How to build a wet room
Wet Room: How to Build a Wet Room
When it comes to bathroom upgrades, options abound. Now more than ever, it seems people are turning to the sort of renovations that make their shower and bath areas feel as spacious and spa-like as possible. And one increasingly popular option for achieving these spa vibes is by transitioning your traditional bathroom space into a wet room.
This May Also Interest You: What’s a Wet Room?
Read on to learn more about this burgeoning trend and to find out if it might be the right fit for you and your next bathroom renovation.
What Is a Wet Room, Anyway?
A wet room is a completely waterproof bathroom space with no separation between the shower area and the rest of the bathroom. Wet rooms are single level in that there are no steps, trays or raised portions at all. Because they utilize space more effectively, adding a wet room can make your bathroom appear larger. If tranquility and spaciousness are what you’re after, transforming an outdated bathroom into a wet room is the perfect way to maximize your space.
Wet Room Bathrooms: The Benefits
Once you start scrolling through images of wet rooms online, it might start to feel like adding one to your home is more fantasy than reality. After all, their super sleek, elegant appearance looks like something out of your favorite magazine.
But what if adding a wet room wasn’t nearly as difficult as you thought? What if installing a wet room was a smart and sensible upgrade that can be as useful as it is luxurious? The fact is that adding a wet room bathroom to your home offers a number of advantages:
Space Maximization
One of the most enticing reasons to install a wet room is its inherent space efficiency. Because everything in a wet room is waterproof, the need for a shower screen or enclosure becomes obsolete. Without the need for a separate shower area, the entire bathroom becomes an open area that appears larger than it actually is. Do you have a small bathroom with an awkward layout that makes mobility difficult? An open-plan wet room might just be your best bet.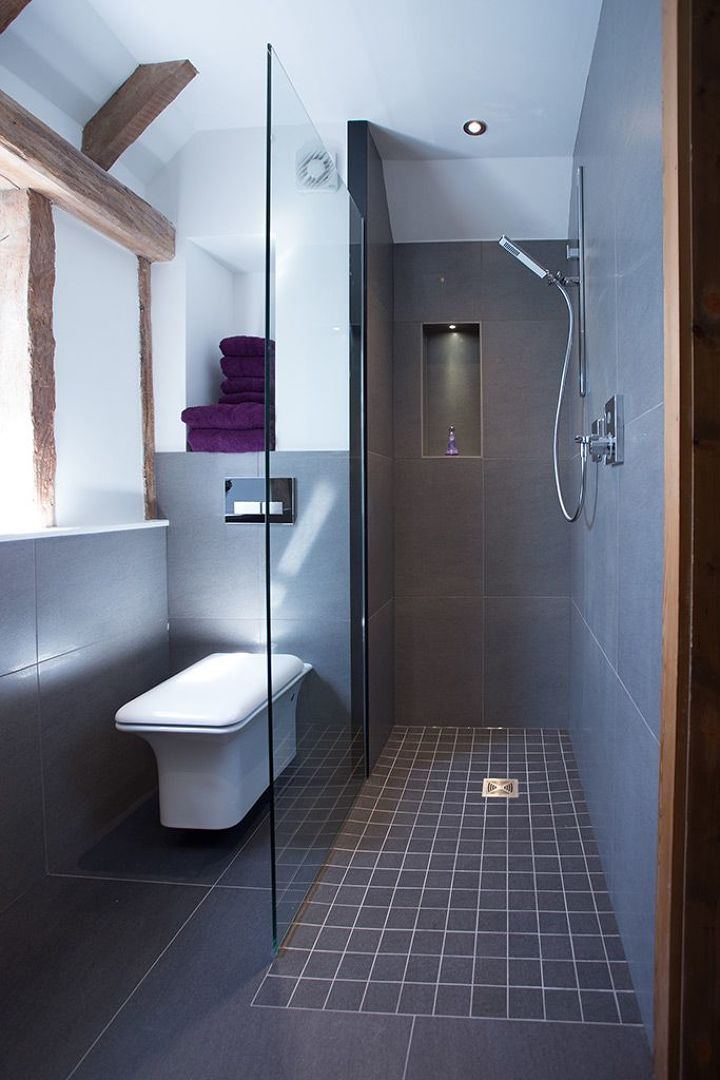
As you lay out your new bathroom, be sure to remember that these rooms are designed in such a way that everything can get wet. So you'll want to be sure to site your toilet and sink in such a way that they don't get sprayed by your shower. If there's not enough room to do so, a simple partition between the shower and toilet/sink space can do the job nicely — and using one made from glass will still keep the open feel of the room.
Easier to Clean
As an added bonus, wet rooms are easier to clean than conventional bathrooms. Think about it: There are no shower trays or screens to contend with and, with fully tiled walls and floors, a wet room cleaning routine is super simple. If you opt to install a wall-mounted toilet or sink to further open your floor space, cleaning gets even easier.
What’s more, when installed properly, your wet room floor will protect your subfloor better than standard bathroom flooring. Because the floor of a wet room is as waterproofed, or “tanked,” as a conventional shower pan, wet room floors prevent water from infiltrating your subfloors and are actually more protected against mold and mildew than a normal bathroom would be.
Safer and More Accessible
One of the best reasons for installing a wet room bathroom is its functional, accessible design. Whether or not you have any handicapped or elderly members of your family, a doorless, curbless shower area is just safer in general. If you’re concerned that a fully tiled floor might be a slip hazard, you can easily avoid installing polished tile and opt for a non-slip option like natural stone or porcelain.
Speaking of safety, be sure to plan your drain correctly. A popular option in wet room bathrooms is drains that run from one wall to another and funnel water to a central point. Such a drain system can act as something of a gutter that can ensure that water stays on one side while the other side stays dry.
Adds to the Value of Your Home
Open floor plans are in, and they’re here to stay. Sleek design and open spaces are timeless qualities that are both stylish and functional. Secondly, a bathroom without a shower alcove or a bathroom stall feels and looks larger, so increasing the functional space in a room is always a plus when it comes to adding value to your home.
More Related Articles:
- How Much Does a Shower Remodel Cost?
- How to Tile a Shower in 7 Steps
- Making It Rain: How Much Does It Cost to Install a Shower?
- How Do You Install a Shower? Follow This Guide
- How to Remove a Bathtub in 4 Simple Steps
Installing a Wet Room
If you can’t already tell, adding a wet room shower area to your house is a gift that keeps on giving. That said, the idea of ripping apart your bathroom can feel like a pretty daunting and even scary task. And let’s be clear: Unless you’re an advanced DIYer or all-around remodeling expert, installing a wet room is a job that’s best left to the professionals. Ensuring that everything is graded and waterproofed properly is a necessary aspect of a wet room installation, and a pro will be able to make sure there aren’t any water leaks in your new space.
But still, how do you begin designing your new wet room? Whether you’re in the process of a new build or remodeling your existing bathroom, there are crucial aspects to a wet room bathroom design that it pays to stay aware of. Here are some considerations to keep in mind while you’re in the design phase:
1. Examine Your Bathroom Floor
Before you dive into designing a wet room, you first need to examine your bathroom floor to determine how complex the install will be. In fact, it’s generally accepted that the floor type dictates every aspect of the installation process.
Consider the two most popular floor types: timber and concrete. Timber flooring is perhaps the most popular type of flooring and, if you are planning on installing a wet room upstairs, you are most certainly working with timber flooring. In timber floors, joists run parallel to support plywood subflooring. To install a wet room onto a timber floor, you’ll first need to have a floor former installed onto your subfloor. Floor formers have built-in gradients that work to channel water into the drain. On the other hand, if you are installing a wet room onto a concrete subfloor, you’ll need to first install a drain screed to enable the water to channel away from the shower area and safely exit into a wastewater pipe.
2. ‘Tank’ the Wet Room
One of the key benefits of a wet room bathroom is that the entire floor area, as well as the lower section of each wall, is properly waterproofed — “tanked”— to prevent water from damaging the structural elements of your home. The waterproofing process can be time-consuming and can account for a hefty portion of your project’s budget.
To properly waterproof your wet room area, the entire floor section (including the lower section of the walls) will need to be primed and then have a membrane applied that will need to be set or cured. You can choose to use a liquid membrane like Jackoboard Wet Room Waterproofing Tanking Kit that’s painted on with a roller, or a physical membrane such as Impey TileSafe, which is laid onto the floor before tiling.
3. Choose Flooring and Wall Coverings
Once the room has been properly waterproofed, the surface areas are ready to be applied. Tile is by far the most popular choice for surface areas in a wet room, and for good reason. Tile is a sturdy, aesthetically pleasing option that is both easy to maintain and can stand the test of time. However, when choosing tile, it’s important to go for a material that’s not inherently slippery, like ceramic tile. Although they need to be sealed after installation to prevent damage and staining, natural stone tiles are one of the most popular choices for surface areas in a wet room due to their rustic, hard-wearing finish, but also because they’re less slippery than other types of tile.
In addition to tile flooring, vinyl and rubber flooring are other popular choices for a wet room bathroom area. Because of their durability, cost-effectiveness and the wide variety of available patterns, colors and textures, vinyl and rubber flooring remain good waterproof options for your new wet room, particularly if tile is out of your budget.
In terms of wall tile, you can really let creativity be your guide. Keep in mind that porcelain is less porous than ceramic, so it might be a good choice for keeping moisture away from the back of the tiles. Glass tiles are also a popular and waterproof option.
4. Vent It
One other thing to keep in mind when planning your wet room: Be sure to have good ventilation. This can be as simple as a standard vent fan, but it's critical that you include one in your planning because wet rooms tend to get moisture over a larger surface area. If that moisture doesn't have a place to vent, mold and mildew growth can occur.
Wet Rooms: Worth the Work
Whether you want to add value to your home, increase accessibility or simply update your space, adding a wet room may be the way to go. And doing so might be less complicated than you think.
Wet Room Construction Details | Building a Wet Room
» Wet Room Construction Details
How to Build a Wet Room
Building a wet room can be more complex than renovating or building a standard bathroom. Wet rooms have a number of crucial elements that need to be factored into their construction to ensure they not only look good, but function efficiently and most importantly, do not leak.
Read on to find out the aspects of wet room construction that should be considered when planning an installation.
Wet Room Construction: 4 Things to Consider
From deciding on where to build the wet room, to understanding the implications of flooring type, there are many aspects to consider when constructing a wet room.
1) Wet Room Location
Where to place a wet room in a new build is an important consideration of planning and design. Wet rooms are no longer constrained to a solid floor. They can be constructed anywhere – including onto timber floors – thanks to the advances in the design of wet room drainage and waterproofing methods. With effective waterproofing systems, a wet room can be installed throughout residential properties, including family bathrooms, bedroom en-suites and even loft conversions.
2) Build Up Process
Another factor to be considered when constructing a wet room is the floor build up. Wet rooms can be constructed on both timber and solid floors, but the method of installing the wet floor, and the elements used to create the gradients (falls) on each substrate, will vary.
3) Creating Gradients
Creating a gradient in a wet room is one of the three most important components of wet room construction, and is vital in order to guide water down the drain efficiently. The minimum recommended fall is 12mm, and the slope needs to be formed into the floor itself.
There are several ways of doing this depending on the flooring type you are working with.
4) The Differences Between Wooden and Solid Floors
The type of flooring beneath it will have a significant impact on how to build a wet room. Read on to discover the differences between wet room construction on a wooden floor, compared to a solid floor.
How To Build A Wet Room On A Wooden Floor
Wet room wooden floor build up
Timber floor wet room installation will require the removal of the floorboards before anything else is installed. Following its removal, a floor former or ‘dec’ can be fitted, and the drainage systems and waterproofing membranes can be installed.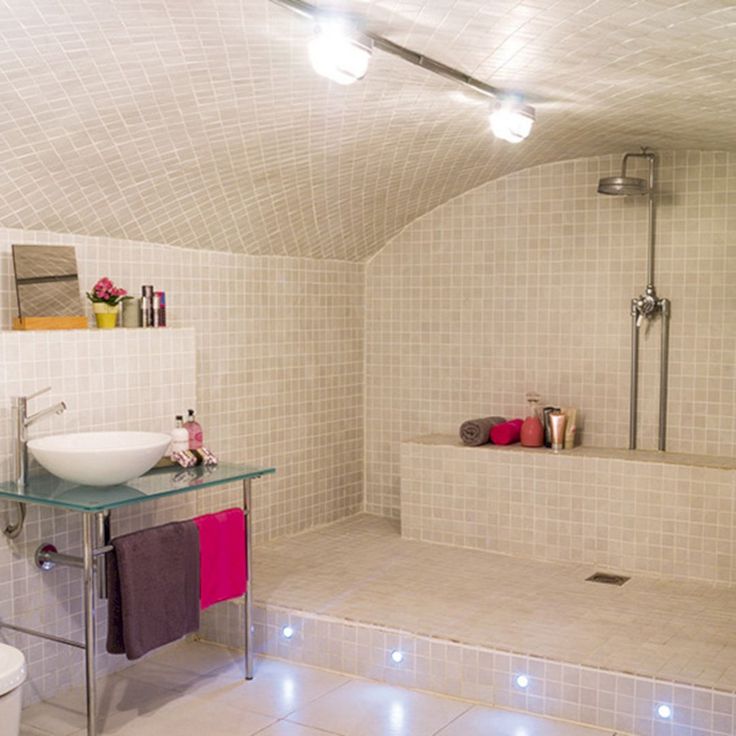
Wet room wooden floor structural rigidity
Installing a wet room on an upper timber floor, or converting an upstairs bathroom into a wet room, may involve minor structural modifications. This is to ensure it is properly supported, and it is a relatively simple and straight forward process. Whilst planning permission is not necessary, wet rooms need to comply to Building Regulations for bathrooms in general.
To ensure that a wet room built on a timber floor using a floor former or ‘dec’ is structurally secure, the following should be consider:
- a subfloor within the wooden joist spaces will need to be constructed using plywood
- A minimum of 18mm ply should be installed between the joists, finishing flush with the top of the joists
- the 22mm floor former should then be installed above the ply lining
- the whole area must be waterproofed
By following these steps, you will ensure that the wet room is structurally sound.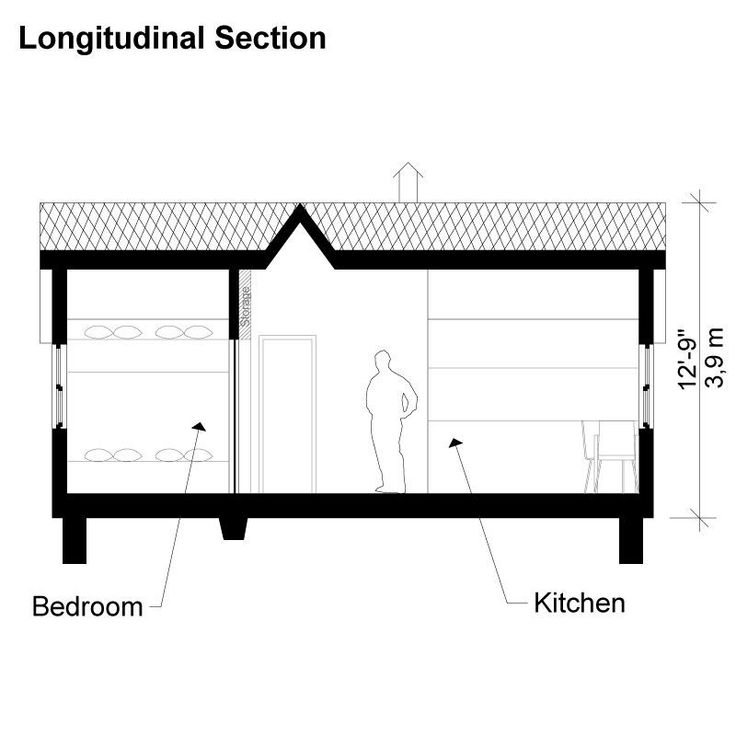
Wet room wooden floor gradients
The floorboards will need to be taken up, supported with ply lining and a floor former with built-in gradients installed. The floor formers are lightweight but they are efficiently designed to carry the weight of the tiles. They have one or two way falls built in, which slope to a linear drain positioned in the floor, or next to the wall. A four-way fall can be achieved with the use of a square drain, offset or in the centre of the former.
See Our Wet Room Drainage Systems for Timber Floors
Installing A Wet Room On A Solid Floor
Wet room solid floor build up
In a new wet room
In a new build, the wet room drainage systems are installed into the floor prior to the screed being laid. This is to create the required gradient needed for the wet room floor.
In a renovated wet room
A retro-fit wet room will require the old screed to be removed in the designated shower area to allow the new drainage system and screed to be installed with the required drainage falls. It is also possible to remove the screed within the shower area to allow the drainage outlet to be fitted, self-levelling latex to be poured, and a floor former installed on top. This will form the wet room gradient.
Wet room solid floor gradients
A new concrete floor can be laid to fall, which allows for the height of the drain. If the wet room is being installed retrospectively, the existing floor will need to be broken into, in order to install the drainage systems.
See Our Wet room Drainage Systems for Solid & Concrete Floors
Drainage & Waterproofing – All Flooring Types
Drainage grill aesthetics in a wet room
It’s advisable to establish the style of wet room drain required at the beginning of the project. This will help determine which system should be installed. Taking into account the desired position of the grill within the shower area will also narrow down the options that are available.
The two main styles of drainage grills are:
Linear grill
This is a contemporary rectangular grill that can be positioned anywhere within the shower area, including up against the wall. The grill comes in different styles:
- stainless steel (available in a variety of finishes)
- Stone-Infill Grill – which is inlaid with your chosen tile to co-ordinate with the wet room
The linear grill can be used on timber or solid floors and is ideally suited to contemporary large format tiles.
Square grill
This is a traditional square drain that is best suited to wet rooms on a timber floor construction. The drain is ideal for use with mosaic tiles.
- Linear Floor Grill against the wall
- Stainless steel Linear Floor Grill
- Stone-Infill Grill against the wall
- Slotted stainless steel square grill
- Solid stainless steel square grill
- Stone-infill grill
Explore Our Wetroom Drainage Products
Discover CCL Wetrooms' range of wetroom drains for solid and timber floors, from our Linear Screed Drain to our Solo 4 Drain.
Wet Room Drainage
Drainage is a key element in the construction of a wet room and the style of drainage used will depend on the following:
- Floor build up
- Flow rate of the shower* (litres per minute, l/m)
- Style of drainage grill
- Type of tiles required
All wet room drains contain a trap and a vertical or horizontal waste pipe attachment. It’s important to choose one that will cope with your water pressure and the desired flow rate for the shower. Once the drain is installed and the waste pipe has been connected to the soil pipe, the floor former is fitted on top before being sealed and waterproofed.
* The l/m is determined by the type/style of shower head chosen and your water pressure. It is vital to ensure that the correct number of traps have been installed at this stage to cope with the flow rate (l/m), as additional traps cannot be added later.
Please remember that other sanitary-ware products in the bathroom do not share the wet room waste pipe. Always ensure that the wet room waste pipe runs independently into the soil pipe.
At CCL Wetrooms we’re experts in wet room drainage. We offer a range of innovative drainage systems, such as our market leading shallow linear screed drain. Take a look at our products page for more information.
CCL Wetrooms Products
Waterproofing
Waterproofing, also known as ‘tanking’ is a vital part of wet room construction and mustn’t be overlooked. It can be effectively carried out through the application of an impermeable waterproof membrane that is designed for use across the whole shower floor area prior to the application of tiles. It is recommended that the membrane is installed across the whole bathroom floor (where appropriate) or at a minimum of 1 metre beyond the shower area.
The membrane is ideal for fast track construction and can be walked on and tiled on immediately – unlike liquid membranes that have to be left for 24 hours to dry. The floor membrane should be used in conjunction with a flexible wall membrane on the walls to ensure water cannot penetrate through any gaps.
A correctly installed waterproof membrane will last for the lifetime of the tiles. Tiles should then be laid using a high quality, rapid set flexible tile adhesive on a solid bed.
Explore Our Wetroom Waterproofing Products
Find out more about the types of waterproofing solutions that can be used in wetrooms. All of our products are expertly manufactured to ensure highly effective waterproofing.
Wet Room Tiling (to British Standard BS5385)
Tiles are one of the most popular options for wet room flooring. They look good, are easy to keep clean, and offer plenty of scope for design in a wet room.
Textured tiles can help to ensure maximum safety while using a wet room. Natural stone tiles, mosaics, sandblasted or flame finishes are good options because they provide more friction and a secure feeling underfoot.
At CCL Wetrooms, we offer a comprehensive wet room design service (and an optional installation service through our sister company Wetrooms UK) that can be tailored to your project and encompasses all stages of the build. If you’d like to find out more about how we can help you design a beautifully functional wet room, contact us today.
Transfer of the wet zone in the apartment. All norms!
Changing the area and / or moving the wet areas of bathtubs and toilets is one of the most common measures during renovation work in an apartment. Redevelopment allows you to make the apartment more comfortable and give it individual features.
Contents of the article
Wet zone in the apartment - what is it?
There is no strict definition of which places in an apartment should be classified as wet areas. According to established practice, we are talking about rooms in which, according to SNiP, there should be floor waterproofing that protects the lower floors from possible leaks.
In a residential building apartment, waterproofing is required in the bathroom, bathroom, shower room and toilet.
Wet areas often include the kitchen and laundry. These rooms are not as “wet” as a bathroom, and when laying floors in them, laying a waterproofing layer is not necessary, although it is highly recommended.
Wet point relocation
When remodeling an apartment, a combined bathroom, toilet, bath or shower is often moved to a new location or arranged in addition to existing sanitary facilities.
It is not uncommon for a wet zone to be moved when redevelopment of new buildings with free planning and in studios, where the boundaries of these premises are marked only on paper or laid out from blocks in one row.
In these cases, special attention must be paid to the laying of utilities, as there are a number of restrictions on the installation of pipelines and installation of ventilation.
The transfer of the wet zone, if there is a residential area below, can only be carried out to a non-residential area. This rule equally applies not only to the bathroom, but also to the kitchen.
Expansion of the wet zone due to the corridor
Most often, during repair work, a bathroom or bathroom is enlarged due to an adjacent non-residential (auxiliary) room - a corridor, a pantry, a dressing room or a dark room.
Expansion of the combined bathroom in the photo:
Current regulations (SP 54.13330.2016) do not allow the placement of sanitary facilities above the living rooms and kitchens of neighbors. An exception is two-level apartments, where, according to the law, it is possible to place a bathroom above your own kitchen.
It is also forbidden to enlarge the kitchen by placing it above the living rooms. And it is possible to expand the kitchen space due to the area of the bathroom only on the top floor.
The exit from the bathroom should not be into the living room or kitchen. There is also an exception to this rule - it is allowed to leave the combined bathroom in the bedroom if it is not the only one in the apartment.
Waterproofing of wet areas
The current regulations provide for the mandatory presence of hydro-sound insulation of the bathroom premises, as well as the installation of an overflow dam.
To protect the apartment from the spread of water, the floor level in the bathroom is either made below the level of the corridor, or separated by a threshold more than 1.5 cm high (according to clause 4.8 of SP 29.13330.2011, updated version of SNiP 2.03.13-88)
Technical requirements for waterproofing are set out in SP 71.13330.2017 "Insulating and finishing coatings" (updated version of SNiP 3.04.01-87). Modern combined materials provide both waterproofing and soundproofing floors.
Examples of waterproofing of wet points:
Increase in the size of the bathroom, displacement and installation of additional plumbing equipment requires compulsory agreement (PP-50, 25 ZhK RF).
Coordination of repair work is carried out by the supervisory authorities exercising control in the field of redevelopment, on the basis of documentation, including a project and a technical report.
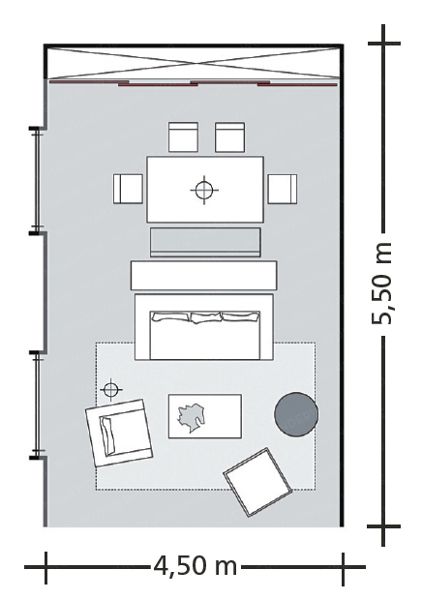
An example of a redevelopment project with an increase and combination of a bathroom:
This project includes combining a bathroom (5) and a toilet (6) into a combined bathroom with its increase over the entire width of the corridor (7). The entrance to the kitchen (4) is moved.
It is possible to legalize the work performed on the basis of a technical opinion on their admissibility and safety.
In Moscow, the approval of the planned and completed repairs with the displacement of the wet zone, as well as other redevelopment works, is carried out by the Moscow Housing Inspectorate, and in the Moscow Region by local administrative authorities.
If the whole house is one large non-residential building, and in them wet areas can be moved anywhere.
The specifics of coordinating the redevelopment of wet areas is that measures for their waterproofing and soundproofing must be formalized by an act of hidden work from a contractor with SRO approval.
Consequences of moving a wet spot in an apartment
Unauthorized enlargement or relocation of rooms belonging to the wet zones of baths and lavatories, most often does not go unnoticed by neighbors or employees of the management company. If an uncoordinated redevelopment or transfer of a wet point is found, in addition to a fine, it leads to the need to fulfill the order of the supervisory authority to restore the original state of the apartment or legalize the work performed in the prescribed manner. In case of failure to comply with the order, the law provides for legal proceedings against the owner of the apartment.
In case of preliminary approval of repair work, the stage of development of project documentation allows you to avoid activities that cannot be agreed upon later.
Waterproofing of wet areas
Waterproofing of wet areas, which include bathrooms and toilets, serves to prevent water from a sudden leak from penetrating to the lower floors within a specified time.
For example, when expanding these premises, the floors on the attached area do not protect against water in any way. Another option is the dismantling of bathrooms or partitions between the bathroom and the toilet: water seeps into poorly sealed grooves in place of the former partitions.
That is, if an unauthorized redevelopment of a bathroom or toilet was carried out in your apartment, then with a high probability it can be said that the installation of waterproofing of wet areas in the bathrooms was carried out incorrectly, or even completely absent.
Suppose you have combined a bathroom and a bathroom, and in addition you want to attach a part of the corridor to it and move the plumbing. According to all the rules, the first thing you had to do was prepare the relevant documents, order a redevelopment project from a specialized organization, and only then proceed with waterproofing wet rooms. But this is not always the case. And if you decide to do the work at your own peril and risk, inviting a team to redevelop the bathroom according to an ad in the newspaper, then the consequences of such work can be the most unpleasant for both you and your neighbors.
When redevelopment is legally agreed upon, laying waterproofing of floors in bathrooms refers to the so-called hidden works, and the correctness of its implementation is controlled by drawing up a certificate of examination of hidden works and field supervision. To be more precise, paragraph 4 of Appendix 7 of PPM 508 refers to works requiring activation, waterproofing of toilets, bathrooms, balconies and showers.
Checking the waterproofing of wet areas and its quality is carried out as follows: a layer of water about 5 cm thick is poured into the bathroom and left for 2 hours. If during this time no leaks were found on the floor below, then the waterproofing of the bathroom was done correctly.
However, in self-planned renovations, hired builders usually don't bother laying, much less checking waterproofing layers. And, as a rule, they do not have the right to draw up acts (for this you need to have an SRO permit). Therefore, even with a small accident, the water does not remain in your bathroom on the floor, but immediately “leaves” to the neighbors on the lower floor. For those who are planning to carry out redevelopment on their own, it will be useful to know that in most cases it is the occurrence of an emergency that causes the housing inspectorate to find out about your redevelopment.
Subsequently, you will not only pay a fine, but you will also have to repair the consequences of leaks in your neighbors' apartment. And, of course, if the work was carried out in violation of building codes, then there can be no question of coordinating redevelopment “backdating”, and all expensive repairs will have to be redone.
Therefore, in order to avoid possible troubles, especially if the work is related to the laying of waterproofing of wet areas, it is best to take care of obtaining permits in advance and coordinate the redevelopment in advance with the Housing Inspectorate.
5 redevelopment mistakes for which they can lose an apartment improve their living conditions. However, we should not forget that often the security of an apartment building depends on this. Even a minor intervention in the structure of a building can lead to quite serious consequences for the owner, both financial and legal.
Situations when, starting a redevelopment, you run the risk of losing your home - in the RBC-Nedvizhimost cards.
adv.rbc.ru
According to the Housing Code of the Russian Federation, redevelopment of an apartment is carried out only in agreement with local governments and on the basis of their decision. Any changes to the configuration of the dwelling must be made to its technical passport. “If the authorities of state housing supervision or municipal housing control reveal the fact of redevelopment, this violation will simply not be ignored and a wide range of coercive measures will be applied to the violator - from issuing an order and holding accountable for its failure to forcibly seizing the redesigned premises in court and selling it at auction,” says Tatyana Trofimenko, representative of the European Legal Service. The advice of all lawyers is to develop a redevelopment project with an architect and coordinate it with the housing inspectorate.
If the redevelopment of the apartment was carried out, albeit illegally, but within reasonable limits, such changes can be legalized if there is a positive conclusion from the construction expertise. To do this, you should apply with a statement of claim to the administration of the municipality with a requirement to preserve the residential premises in a re-planned state.
In Moscow, the authorities have made some indulgence in terms of coordinating minor redevelopments. They can be agreed upon by submitting a technical opinion from a design organization that has SRO approval, together with an application for approval and a technical passport for the re-planned living quarters. However, the approval of the redevelopment through the provision of a technical opinion does not relieve the owner of the apartment from administrative responsibility for illegal redevelopment, reminds Dmitry Tomko, head of the practice of housing law and social relations at the National Legal Service "Amulex".
The most common example of redevelopment is the transfer of the so-called "wet" area (kitchen, bathroom and toilet) to the premises of the apartment, not intended for equipping them with water supply and sanitation systems. So, for example, in the Altai Territory, one of the residents of an apartment building combined a kitchen, a bathroom, a bathroom and a corridor into one room. “A shower was installed in the newly formed room, which is located above the kitchen of the apartment, the bedroom of the apartment was re-planned into a kitchen with a sink, sewerage, water supply pipeline. The regional court ordered the owner to bring the apartment to its original design state, and the counterclaim of the owner of the apartment to keep the premises in a redesigned state was rejected,” Dmitry Tomko gives an example. No alternative solutions are provided here - according to the Housing Code, it is impossible to place a bathroom (shower), toilet and kitchen above the rooms.
Russian housing legislation prohibits the redevelopment of residential buildings and apartments, which can lead to the destruction of the supporting structures of the building, disruption of engineering systems, as well as deterioration in the safety and appearance of facades. Separately, it should be noted the redevelopment in apartment buildings that have the conservation status of monuments. This requires additional approvals from the authority for the protection of monuments.
So, for example, in St. Petersburg, the owner equipped additional balconies in a house - an object of cultural heritage, changing the design of the roof of the attic floor, and made additional doorways in one of the rooms, says Dmitry Tomko. As a result, the building has lost its original appearance and original layout. By a court decision, the apartment was seized from the owner and put up for auction.
Another common option for redevelopment of an apartment is to combine a balcony / loggia with a room or kitchen. Moreover, the transfer of the above kitchen to the balcony can be regarded by the court not only as a redevelopment, but also as a reconstruction of the object. By law, such a change in the configuration of an apartment requires mandatory approval from the housing inspection, since it can lead to damage to neighboring apartments and the entire building.
Dmitry Tomko cites as an example one of the residents of an apartment building in Primorye, who dismantled a window sill in a living room in order to organize access to an unauthorized balcony. “The dismantling by the owner of the partition, part of which was located under the ceiling beam, damaged the building and rendered the neighboring apartment uninhabitable, and, consequently, forced the repossession of the redesigned premises,” says the lawyer.
Often apartment owners decide to improve their living conditions by illegally attaching technical premises to it, which are the common property of all residents of an apartment building. As a rule, we are talking about attics, pantries, less often - about utility rooms.
The Housing Code establishes a clear procedure for the redevelopment and reconstruction of residential premises in an apartment building, including the coordination of such changes. In addition, the Rules for the use of residential premises apply.