Furniture refinishing ideas
The Ultimate Guide for Stunning Painted Furniture Ideas
When it comes to searching for painted furniture ideas you can easily get overwhelmed. I mean there are so many different styles and techniques out there. It is so easy to slip down that rabbit hole of chalk paint furniture ideas. Hopefully, I can help and make your search for painted furniture ideas and inspiration just a little bit easier. Whether you are looking for painted table ideas, painted dresser ideas or painted desk ideas I am gathering some of the best painted furniture makeovers to inspire you. You also get to see all of the different options when it comes to choosing furniture paint colors because those can also seem endless.
Disclosure: This painted furniture ideas post contains affiliate links for your convenience. I may be compensated if you make a purchase after clicking on my links. Click here for my full disclosure policy.
All of these hand painted furniture ideas will come with links to the tutorial to also aid and help you in learning how to paint each particular painted furniture finish. I’ll separate these painted furniture ideas by the technique and/or color in hopes of keeping all the eye candy organized. I am listing these painted furniture ideas in semi categorical order as follows:
- Painted Furniture Ideas Using Furniture Transfers
- Fabric Decoupage on Painted Furniture
- Napkin & Tissue Decoupaged Furniture Makeovers
- Wallpaper Decoupage on Painted Furniture
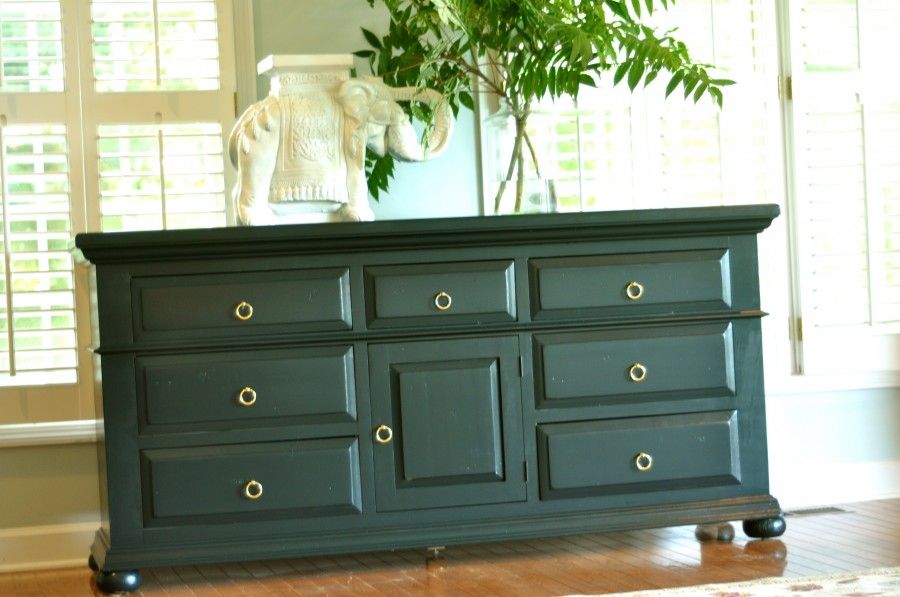
- Painted Dresser Ideas
- Painted Table Ideas
- White Painted Furniture Ideas
- Painted Desk Ideas
- Painted Chairs
- Furniture Painted Using a Layering Paint Technique
- Metallic Painted Furniture
- Other Tutorials Including:
- How to Whitewash Wood Furniture
- How to Paint a Boho Style Drip Effect
- Repainting Already Painted or Stained Furniture
- How to Update Furniture with Wood Burning
Click here to Pin this post for later.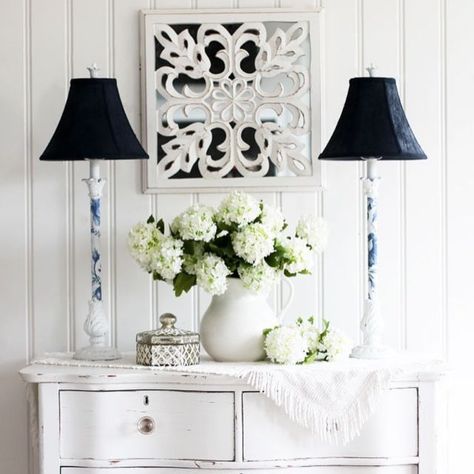
Ready to tackle your next painted furniture project now that you have so many ideas running through your head? Make sure to use quality furniture paint. These are a couple of the paint brands that I use, love and trust. You will see them throughout many of my painted furniture tutorials:
Dixie Belle Paint products and more online here: Dixie Belle Paint
Wise Owl products and more online here: Wise Owl.
Click here to Pin this post for later.
More Painted Furniture Tutorials
I hope these painted furniture ideas before and after projects have helped. Make sure to also check out these helpful posts:
- The Best Tips & Secrets You Need to Know for Painting Furniture
Don’t Forget – Follow Just the Woods and Share this post to Inspire others:
FACEBOOK * INSTAGRAM * PINTEREST
Click HERE to Pin this post for later.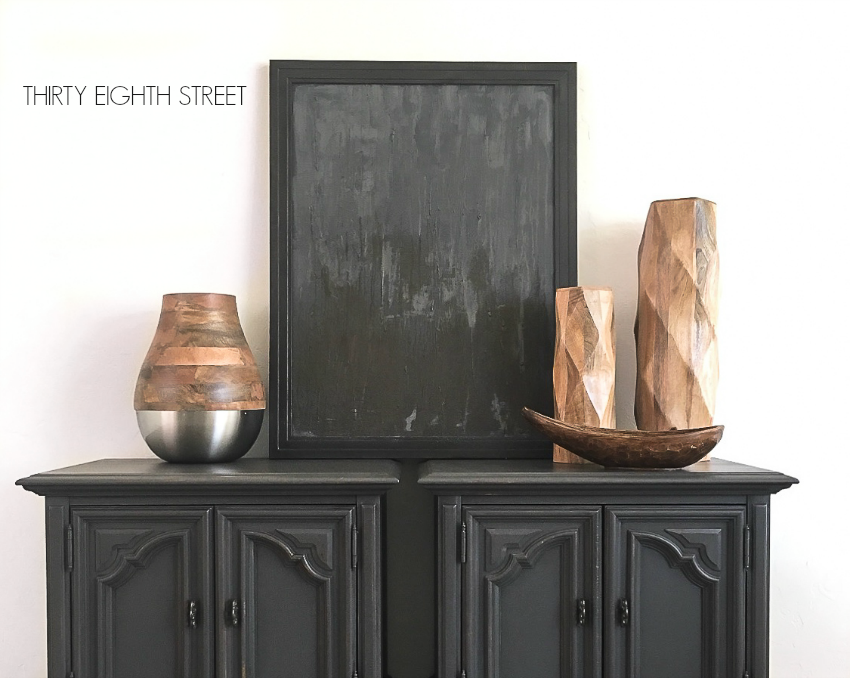
15 Stunning Painted Furniture (Before and After) Makeovers
DIY Vintage Painted Furniture TransformationsIf you need some inspiration for your next furniture makeover, check out these painted furniture before and after reveals which also include step-by-step tutorials and a video!
With all the different ideas online for furniture makeovers, it’s hard to know what style to choose or which products won’t cost an arm and a leg. In this post, I’m sharing my best tips for not only the right color and look but also the right process for a beautiful and long-lasting finish. (Don’t forget to download my free furniture painting cheat sheet here!)
Furniture transformations mean so much more to me than just slapping a coat of paint on an antique. Not only do I love sharing instructions on how to prep and paint furniture to provide a flawless and durable finish, but the process itself is so relaxing and enjoyable for me.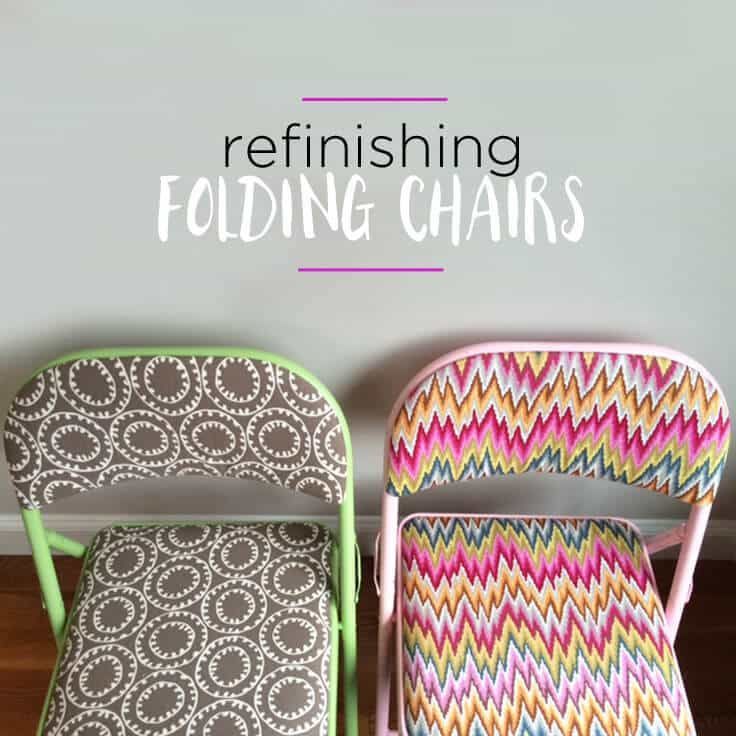 Sometimes I joke that furniture painting is just as effective as therapy (but cheaper!) and I’d love to show you why!
These curbside rejects often remind me of how far I’ve come in my own restoration process and my true source of transformation. Here are my best ideas for giving antique furniture a modern makeover while sharing my absolute favorite aspect of DIY furniture makeovers.
LET ME SHOW YOU:
- Stunning furniture reveals to inspire your own unique transformations!
- How to get a beautiful and durable finish easily without the high cost of chalk paint
- Tips for picking the best paint color for furniture
- The benefits of using paint as a faux stain on painted or previously-stained furniture
WANT TO SAVE THIS FOR LATER? CLICK HERE TO SAVE THIS PIN TO YOUR FAVORITE PINTEREST BOARD
(As an Amazon affiliate I earn from qualifying purchases.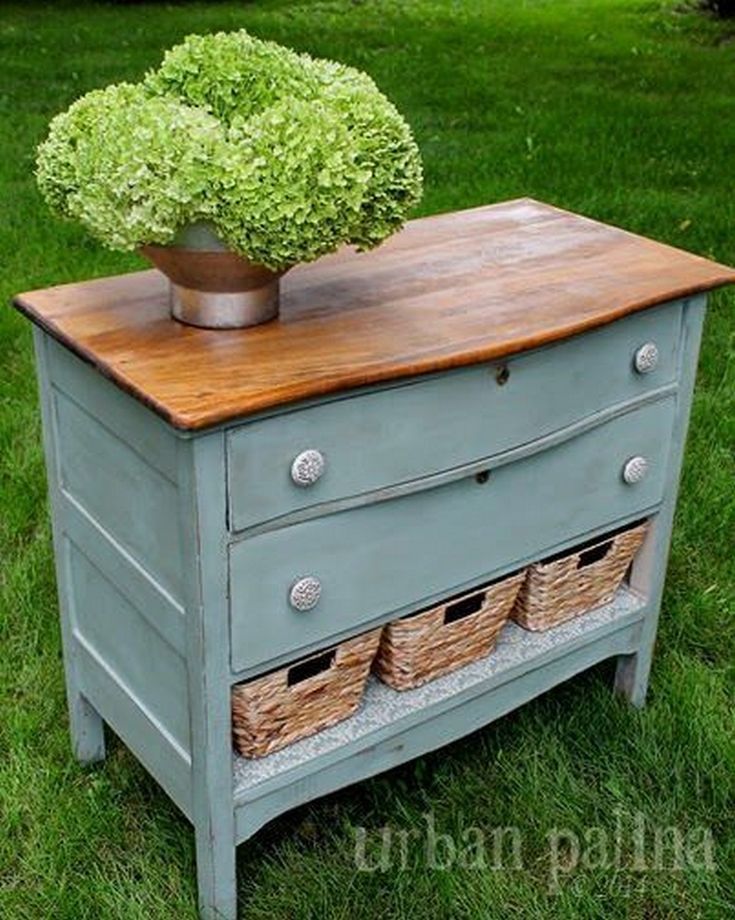 Please see my full disclosure HERE).
More than a couple of years ago, I returned to college a little early after Christmas break during my sophomore year at Texas A&M. I was the only one at our little rental house that weekend out of my 6 roommates. At the time, I was pretty down about something – probably a boy, a roommate issue, or one of a myriad of possible problems that college girls deal with on a day-to-day basis.
An elderly couple owned the house and all of its outdated furniture. I looked around the living room that day and saw the coffee table which looked as awful as I felt. I found some creamy white latex in one of the closets, put an old sheet on the floor, and decided to start painting.
I remember being amazed at how something so simple could be so enjoyable. Before I knew it my bad mood was melting away with every brushstroke of paint on the old coffee table.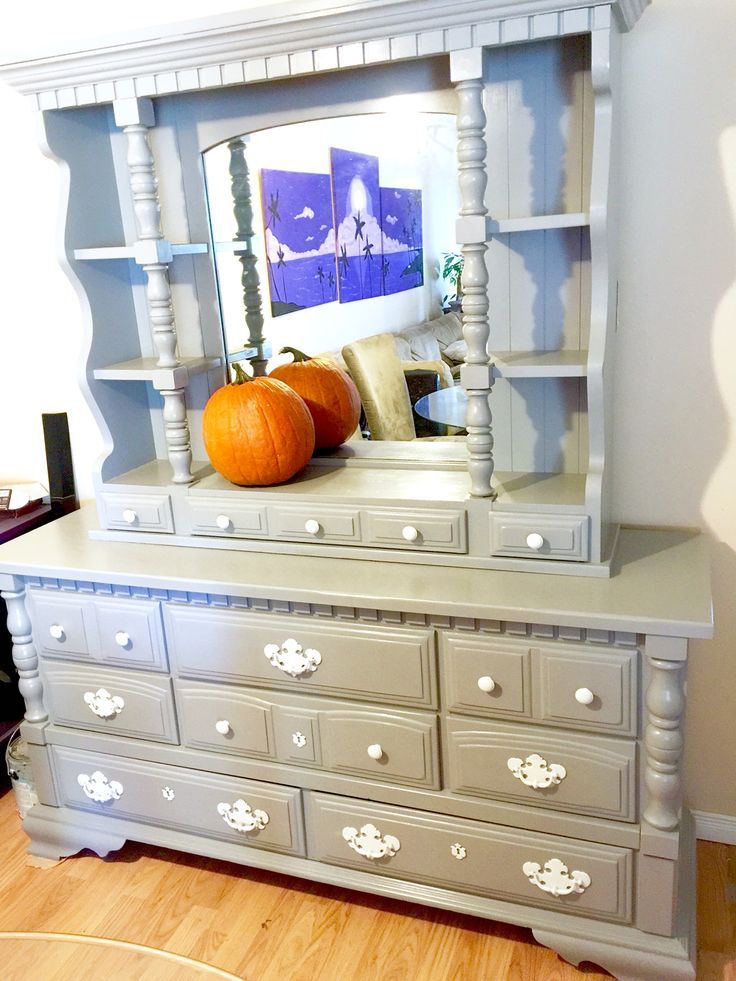
What was previously a surface of chippy brown laminate was now a beautiful clean slate. Suddenly, I felt the same way about the new semester.
I didn’t realize how therapeutic and peaceful painting furniture could be or the joy I could experience by giving a piece of furniture new life. Little did I know, that the coffee table was one of many furniture pieces I would paint and this blog is an attempt to document those makeovers as well as the transformation the Lord is doing in my own life daily.
Renovated Faith: What’s in a Name?God never leaves a project half-done…He continually works on each one of us, as a lavish expression of His amazing love and grace. So many of my DIY projects remind me of how God renovates our hearts. If you are a work-in-progress, just like I am, check out the Renovate Your Faith Devotional at the bottom of this post. Click here to get a weekly reminder of new posts by email.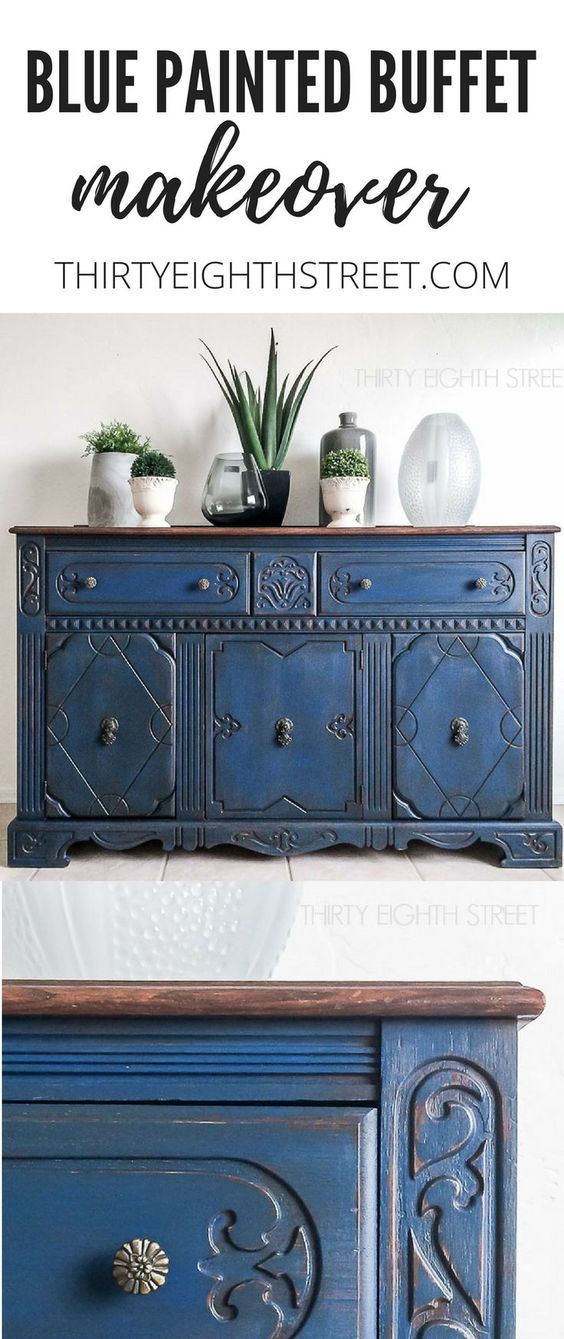
Painted Furniture: Before and After Transformations:
I’ve had the opportunity to refinish lots of furniture pieces through the years but with this post, I’ve tried to narrow them down to my absolute favorite reveals and I can’t wait for you to see them! (To see ALL of my furniture makeovers, you can click here: Project Gallery)
Related: The Ultimate Guide to Refinishing Furniture (The ONLY Tutorial You’ll Ever Need!)
Tips for Painting Bedroom Furniture: Before and After TransformationsI often get questions about ideas for painting bedroom furniture which includes dressers, headboards, side tables, and vanities. A couple of the pieces below have lots of sentimental value because they were my grandparents’. I was happy to get them from my uncle who drove them in a U-Haul from New Mexico to College Station, Tx. (Don’t forget to download my free furniture painting cheat sheet at the end of this post!)
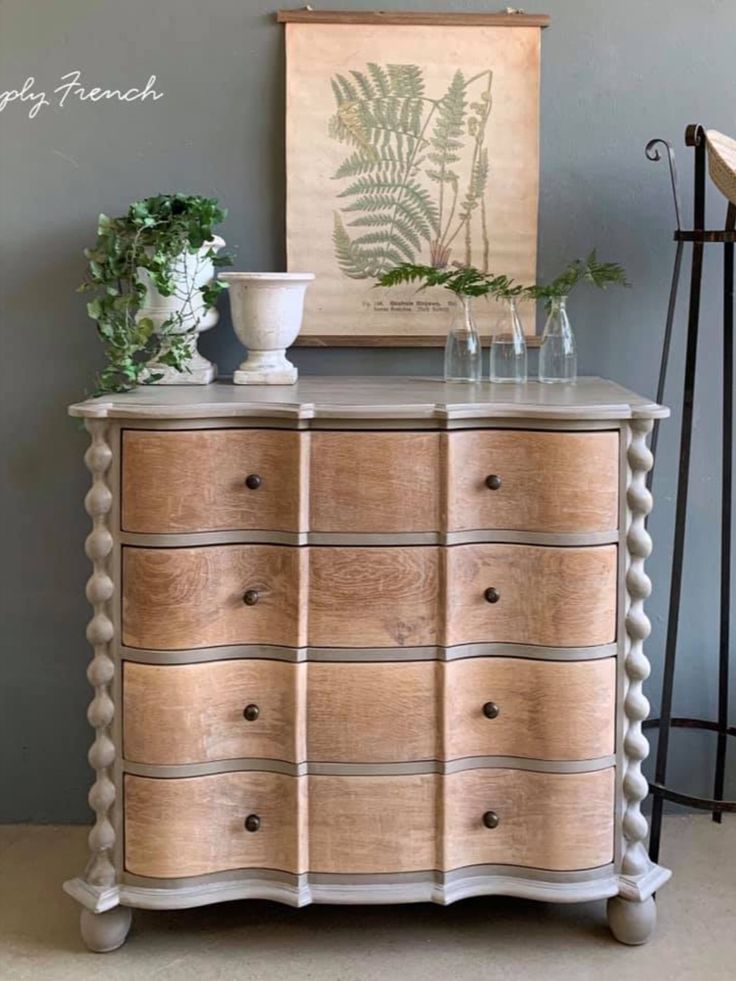
Painted Dressers: Before and AfterAntique dressers are so easy to come by! You can find them anywhere like Facebook Marketplace, Craigslist, or your local resale shop.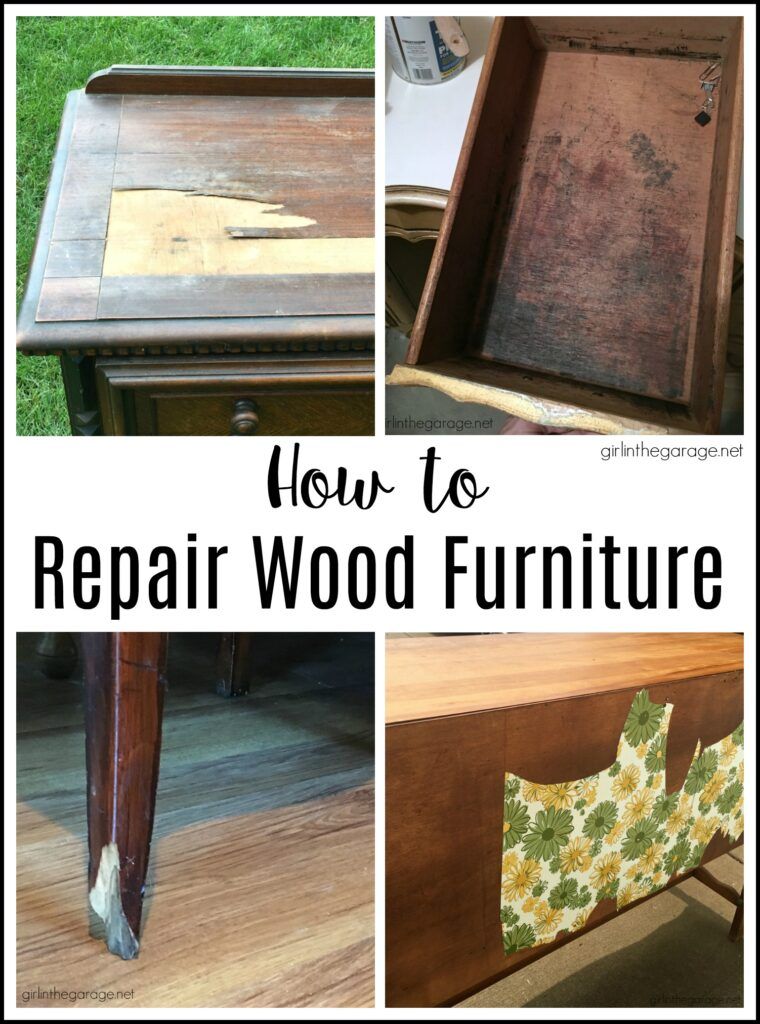 Just make sure to check all the drawers on the dresser before you bring it home to make sure they are in good working order.
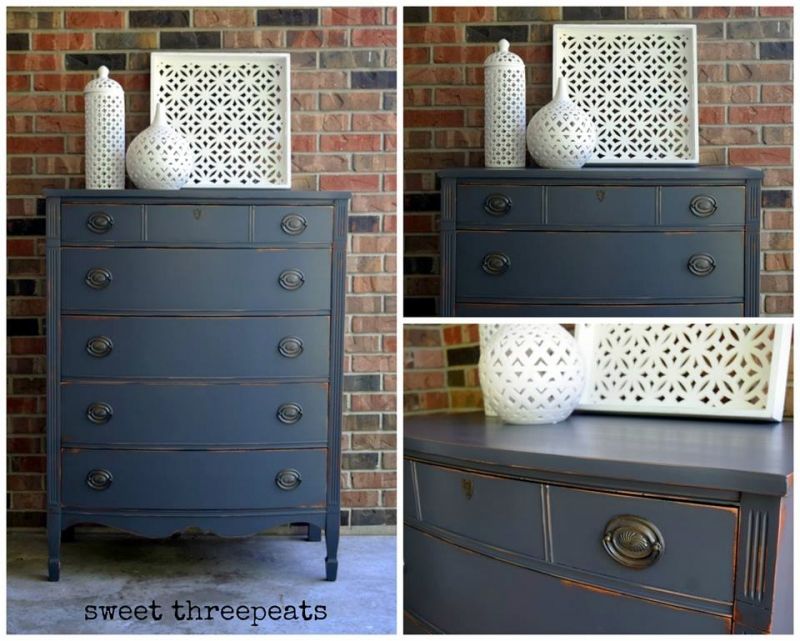
This painted dresser is one of my favorite furniture pieces in our home because it belonged to my grandmother, Cornelia Moseley. She used it every morning to put her makeup on. I wanted it to be a sophisticated dark blue without being too flashy so I picked Benjamin Moore’s Hale Navy. I love that it is such a pretty navy and has a gray undertone while still being a true blue. Needless to say, Hale Navy did not disappoint!
Navy Antique Dresser Makeover – See the full tutorial here.What I love most about this dresser are the intricate designs on each drawer. My mom told me she would run her fingers through the scrollwork when she was a little girl. I also love the long turned legs with wooden wheels. They definitely add lots of style to such a beautiful piece.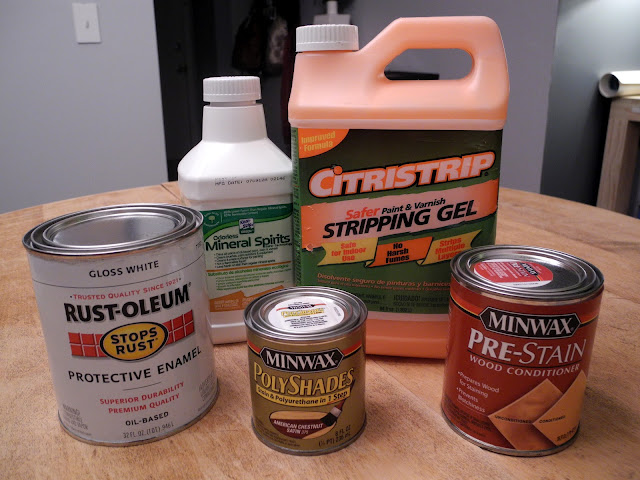
My grandmother was a seamstress and I remember she had a big box of rolls and rolls of intricate lace. She would often make dresses and hem lace on the bottom edge.
For that reason, I added a lace detail to the inside of each drawer so that I can remember her every time I open this navy painted dresser. Because the wood drawers weren’t very smooth, I did a lot of experimenting and was able to find a way to stencil on any wood surface without bleedthrough: The Easy Way to Stencil on Wood
How to Stencil on Wood Perfectly Every TimePainted Furniture Ideas: Dresser Painted with Chalk Paint AlternativeOne of the first furniture makeovers I included on the blog was this antique dresser where I showed how to get the look of chalk paint and wax with a much cheaper and more durable alternative. The results were great and the process is easier than chalk paint! (A Better Alternative to Chalk Paint)
This dresser doesn’t require the maintenance that is needed with waxed furniture pieces and the finish is more durable. To hear more about why I stopped using chalk paint and this transformation, click here: Why I Stopped Using Chalk Paint on Furniture
I included this coastal blue dresser makeover because of the backstory. In the post, you can hear about how a frog in my shoe caused me to be late to meet my husband and the owner of the piece here: Coastal Dresser Makeover with Driftwood Top
BEFORE of Coastal Dresser Makeover – See the full tutorial here.So why is having a frog in my shoe relevant? I was running late to meet Jeremy at the storage facility where the dresser was located. Therefore, he had loaded it before I saw it and I didn’t get to do my usual 4-point inspection.
Coastal Blue Dresser Makeover with Driftwood Top – See the full tutorial here.When we unloaded the dresser, I realized that it reeked of cigarette smoke, old lady air freshener, and some other …organic smell.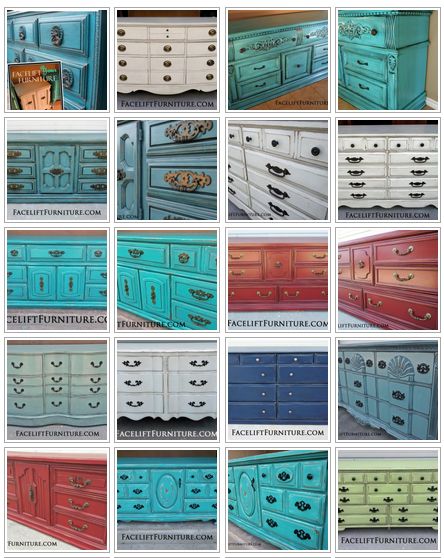 It REEKED! Also, there was a massive chip in one of the drawers that I had no idea how to fix.
I would have never bought the dresser if I’d known about the damage and smell, but there it was, stinking up my garage. Fortunately, I learned some new skills in refinishing this piece and wrote blog posts on them here: How to Get Musty, Moldy Smells Out of Old Furniture and here How to Fix Damaged Furniture for Refinishing
Easy Driftwood Finish for Furniture – See the full tutorial here.This is the first furniture piece where I used a faux finish to get the look of wood. You can read more about my driftwood finish here and more faux stain shades here: How to Faux Stain Wood With Paint
Furniture Redo Ideas: Side TablesAfter painting numerous furniture pieces, I have found some time-saving tricks and also learned from mistakes along the way. I have included all of these tips in my Must-Have Furniture Painting Cheat Sheet.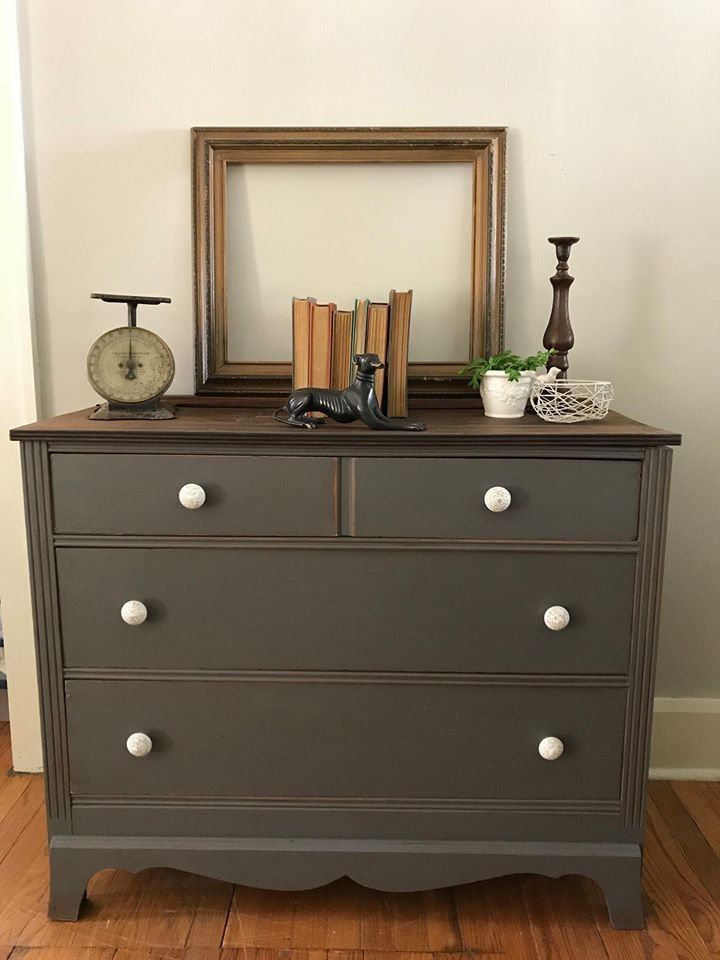 You can get it for free by filling out the form at the bottom of this post. Now, on to side tables!
This is one of my simplest transformations that still had the biggest impact. Sometimes all you need for a dramatic transformation is the right color of paint. This beautiful shade of Dovetail Gray accented the marble tops of these beautiful side tables.
BEFORE of Marble Side Table Makeover – See the full tutorial here.Most of my posts have a Renovate Your Faith section where I share a little about how God is transforming me. In this post, I share not only the full end table restoration but also share some encouragement if you find yourself stuck in the comparison trap: How to Stop Comparing Yourself to Others (Marble Side Table Makeover)
Marble Side Table Reveal – See the full tutorial here.Two-Tone End Tables (Painted Wooden Furniture Makeover)My mother-in-law had the idea to restore the stain on the drawers of Jeremy’s grandma’s old side tables while painting the rest navy. I’m so pleased with the results and am thankful she had such a great idea!
You can see the full transformation and also how to fix damaged furniture here: A Beginner’s Guide to Fixing Furniture Damage
If you need help on installing new hardware or filling old hardware holes, click here: How to Install Handles and Knobs on Furniture and Cabinets
How to Fix Damaged Wood Furniture – See the full tutorial here.Painted Antique Furniture: Vintage Vanity MakeoverProbably my favorite furniture restoration to date is this vintage vanity makeover. It was initially intended for my grandmother to use but my grandfather actually used it more. He would put his wallet and keys in the top right drawer. I sit at this vanity every morning to put my makeup on but I use the top right drawer only to store some things that belonged to him.
BEFORE of Vintage Vanity – See the full post on how to refinish furniture here.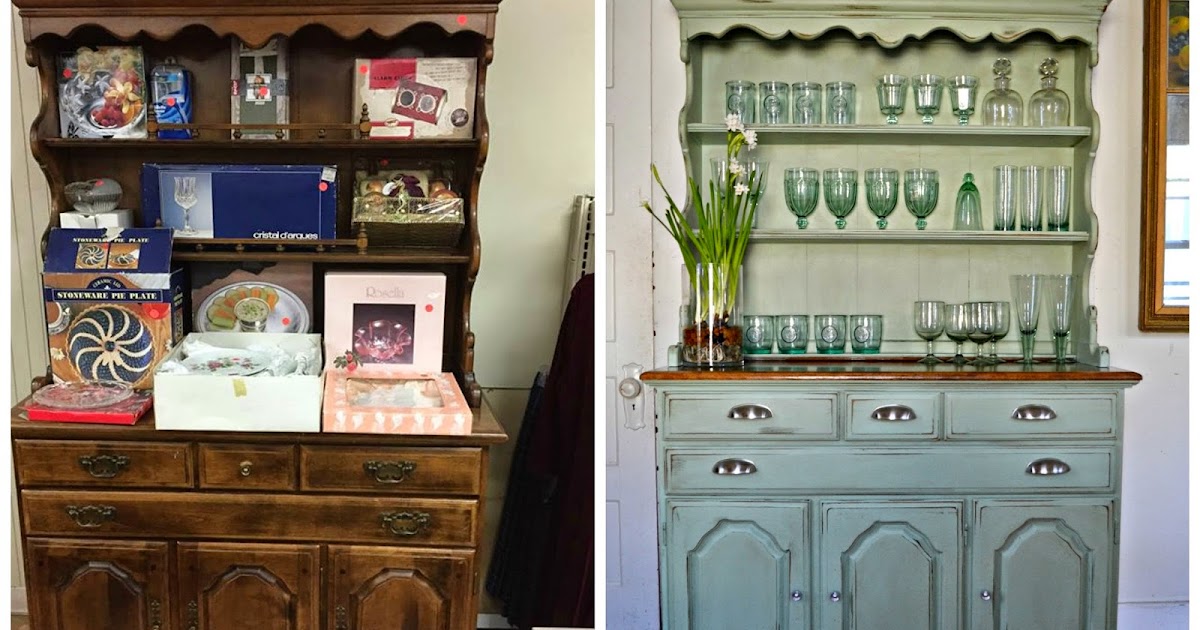
You can see the entire process from start to finish in this post: A Beginner’s Guide to Painting Furniture It is one of my favorite transformations not only because of the dramatic transformation but the sentimental memories behind this piece.
A Beginner’s Guide to Furniture Painting – See the full tutorial here.More Painted Bedroom Furniture IdeasFor more pictures of painted bedroom furniture, you can check out my project gallery here: Painted Furniture by Renovated Faith
Painted Dining Room Furniture (Before and After)
I recently refinished the top of my breakfast table as it had a lot of water damage from cold glasses, because, well…we live here. I used my Dark Walnut faux stain to match the chairs and I love how it turned out. You can see this shade and 5 others here: How to Faux Stain Furniture with Paint
How to Faux Stain Furniture With Paint (6 Shades to Choose From)Easy Faux Raw Wood Finish For Any Surface
One of the biggest trends in furniture today is a bleached raw wood finish.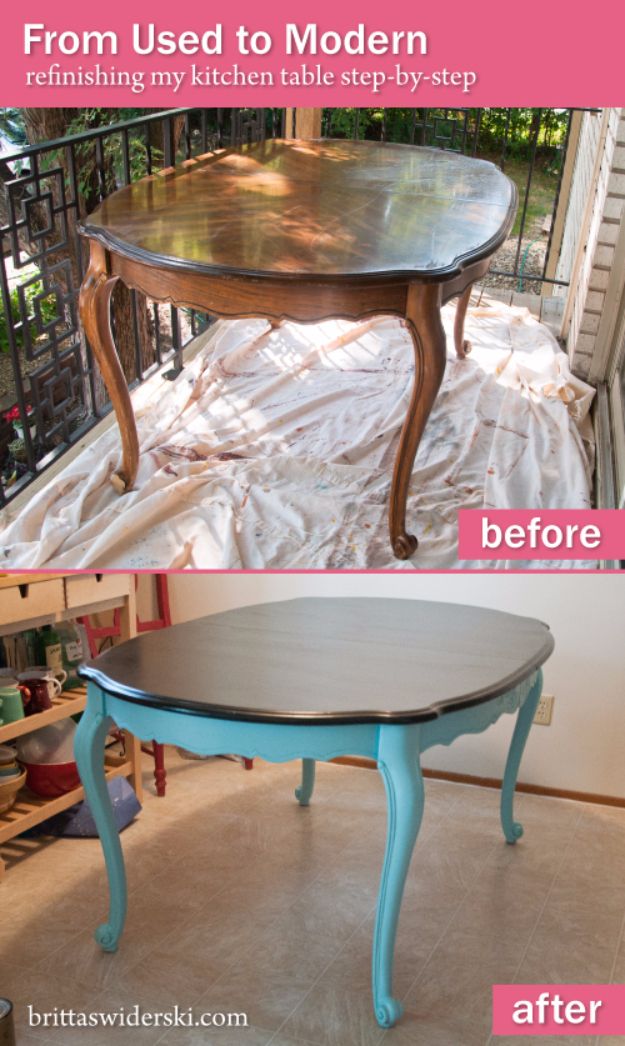 These furniture pieces are stunning but the look is hard to come by without the use of furniture stripper and bleach. But this tutorial will show you how to get the same look on any surface (the console is white laminate) with just paint!
After a long, hard day, I was driving home one night and was nearly home when I saw a dark, eerie figure on the road-side. I slowed down to see what it was and could see in my rearview mirror it was an old hutch or china cabinet. Even though it was dark and I was overtired, turned around to see what shape it was actually in.
To my dismay, it was a huge antique china cabinet. It was old and dirty but the glass panes and shelves were nicely wrapped in newspaper and laid inside.
On it was a sign that said, “FREE, Please Take!” So, I did! I loved refinishing it and decided to paint the inside Behr’s Sonata Blue so that my china would stand out more.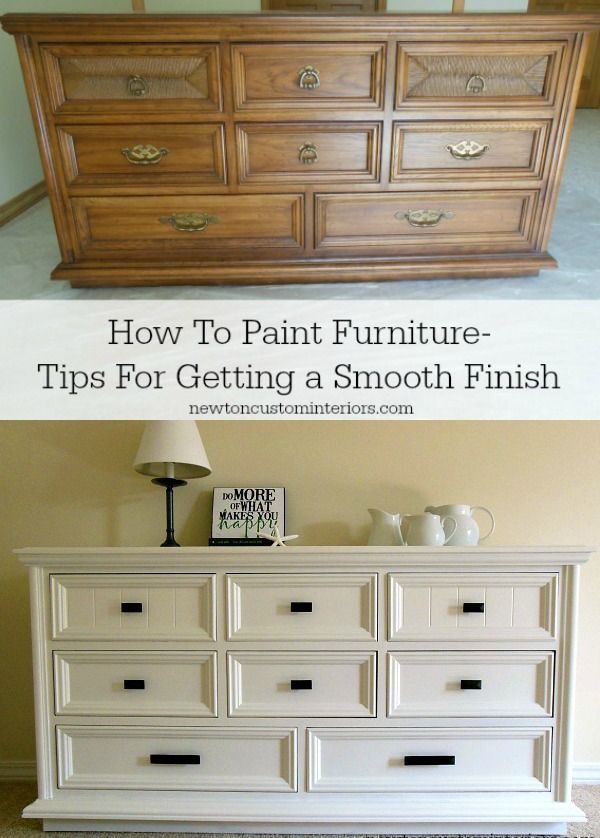
This china cabinet is such a special piece of furniture. The reason I had such a rough day when I first saw it was because my mom had just started chemo for breast cancer. She just recently hit her 5-year mark and is now a breast cancer survivor!
This piece is such a reminder of how God can transform any situation for His glory – no matter how bad it looks at the time. You can see the complete makeover here: White China Cabinet Transformation
White and Sonata Blue China Cabinet – See the full tutorial here.Dining Table Before And After: Raw Wood Finish (coming soon)Painted Chairs Before and After (coming soon)Before and After Pictures of Painted Furniture: Rolltop Desk Restoration
I always shied away from roll-top desks because I wasn’t sure if I could refinish the tambour (the rolly part). Fortunately, after some trial and error, I found a way to refinish it with white latex and gel stain. I even added some tiny drawers on the inside. You can see the full transformation here: Rolltop Desk Makeover
As I write this post, I’m sitting at my upcycled desk that I made from two Ikea cabinets and an old door. I added a thick piece of glass to the top and it has been the best desk, giving me plenty of room to sprawl out and lots of storage drawers. You can see the full transformation here: How to Make a Desk Out of A Door You can also see my best tips for painting IKEA furniture in this post: What To Know Before Painting IKEA Furniture
☑️ MY ALL-TIME BEST FURNITURE PAINTING TIPS (FREE PRINTABLE)
Want to transform a furniture piece but don’t know where to begin? Download the FREE step-by-step printable checklist that shows you the exact process I’ve used on dozens of furniture pieces while saving you time and money! And it costs you nothing.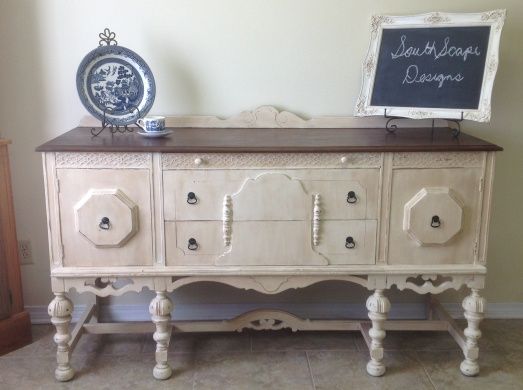 #confetti toss Click here to access your checklist now: FREE Must-Have Painting Checklist
Painting Laminate Furniture
Have you ever walked into a used furniture store and saw a great piece to refinish only to realize that it was laminate? Painting laminate furniture can be tricky if you don’t include one simple step. In this post, I show you all you need to know on how to paint and stain laminate easily: How to Paint and Stain Laminate Furniture (with Video Tutorial)
How To Update A Wire Shelf Unit to Look Like DIY Industrial Pipe Shelves
We all these chrome wire shelf units somewhere in our home or garage. They hold a lot of weight and come in lots of versatile sizes but they aren’t much to look at. With a few easy updates, you can transform your own wire shelf rack into a low-cost industrial style shelf you can be proud of: DIY Industrial Shelves (Wire Shelving Hack) You can also see how I transformed it into a DIY grow light stand: DIY Grow Light Shelves
Here is the before photo.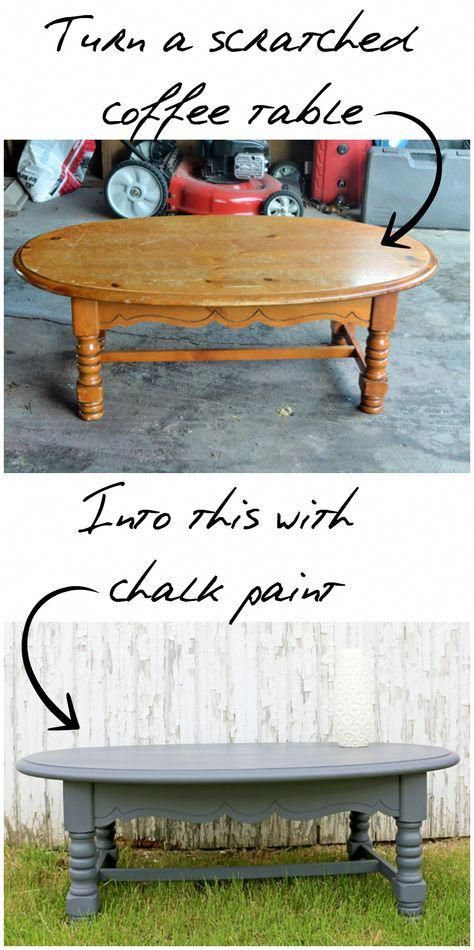 How to Make Painted Furniture Pinterest-WorthyHow Do You Paint Furniture?
There’s more than one way to paint furniture but I’ve had the BEST results with latex paint as long as you keep a few specific tips in mind. Several other options today are chalk paint, milk paint, and General Finishes furniture paint. I have tried them all and have found the easiest and most flexible option is a process involving latex paint. Because the same paint is often used for cabinets, it ensures a beautiful but durable finish every time in almost any color imaginable: A Beginner’s Guide to Painting Furniture
What About Chalk Painted Furniture?What is chalk painted furniture? Whether you use Annie Sloan Chalk Paint, Rustoleum chalk paint or any similar products, chalk paint is known for it’s matte, chalky finish. The additives that give it this chalky finish help it to stick to furniture in some cases but the finish isn’t durable long-term and other options will give you fewer brush strokes.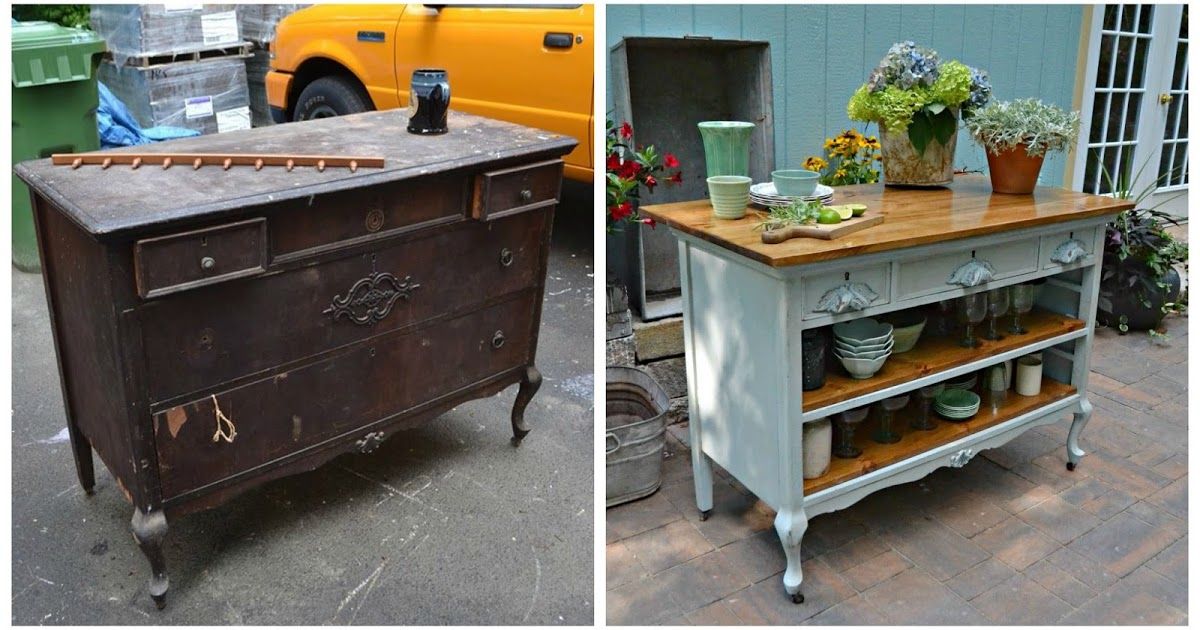 For a side by side comparison of some of the most popular paint options for furniture today, click here: Chalk Paint vs. Milk Paint vs. Latex
If you want a cheap, easy, and lasting way to paint furniture while achieving the same farmhouse look of chalk paint, be sure to check out the link below. I feel like there are a few misconceptions about chalk paint and when family antiques are at stake, I think it’s worth explaining why it’s not always the best or easiest way to refinish furniture. Here are the reasons I stopped using chalk paint: 7 Reasons I No Longer Use Chalk Paint on Furniture: A Better Alternative.
Can Painted Furniture Be Stained?To stain painted furniture with a traditional stain, you usually have to completely strip off the old stain with a chemical stripper which is pretty messy. Another option is to sand off the existing paint. HOWEVER, I know of a process that allows you to faux stain using latex paint.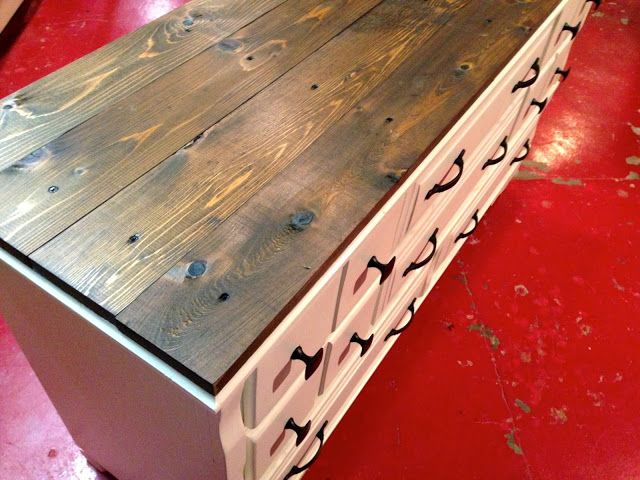 You can simply paint over the existing surface without stripping or sanding off the old finish. See the full tutorial here: How to Faux Stain with Latex Paint (6 Shades to Choose From)
After I blind-tested and reviewed 24 furniture paints, I recommend Benjamin Moore Advance. You can see the full results for each paint brand here: The Absolute Best Paint for Furniture
Can Wall Paint Be Used On Furniture?Wall paint can be used on furniture but not all wall paint is created equally. The term “latex paint” can cover lots of different grades of water-based paints. My favorite paints for furniture that also can be used for walls are Sherwin Williams ProClasssic and Behr Marquee (at Home Depot). Lowe’s also has a line of Sherwin Williams paints that I’ve had good results with.
How Do You Paint Over Painted Wood Furniture?Before you repaint painted furniture, you want to very lightly sand the surface.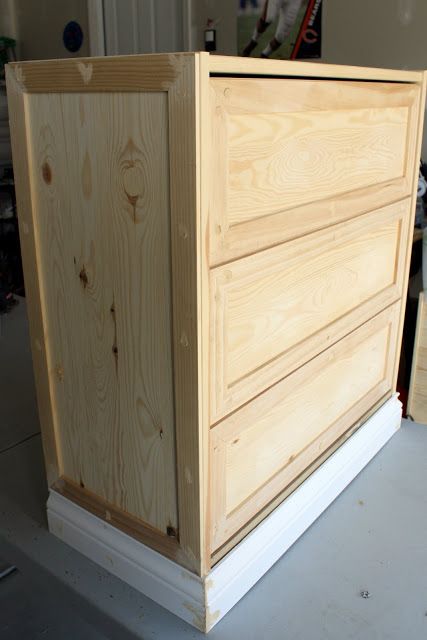 I know that I probably just lost your interest when I said the “s” word. But remember, you don’t need to sand off the old paint layer. Instead, you are just going over the surface with sandpaper or a mouse sander to slightly rough it up so it accepts a new layer of paint. You can see how I do that in this post: How To Sand Furniture in Less Than 5 Minutes
After painting furniture, you want to add some kind of protective finish. I wasn’t sure what to seal painted furniture with as there are so many options of topcoats. But on high-use pieces like dining tables or coffee tables, it’s important to know what to put on painted furniture to protect it. So, I did a little experimenting and placed cold drinking glasses of water on top of samples of different clear coats overnight. In terms of durability and also the finish, Varathane’s Waterbased Polyurethane came out on top in every test (Best Clear Coat for Furniture).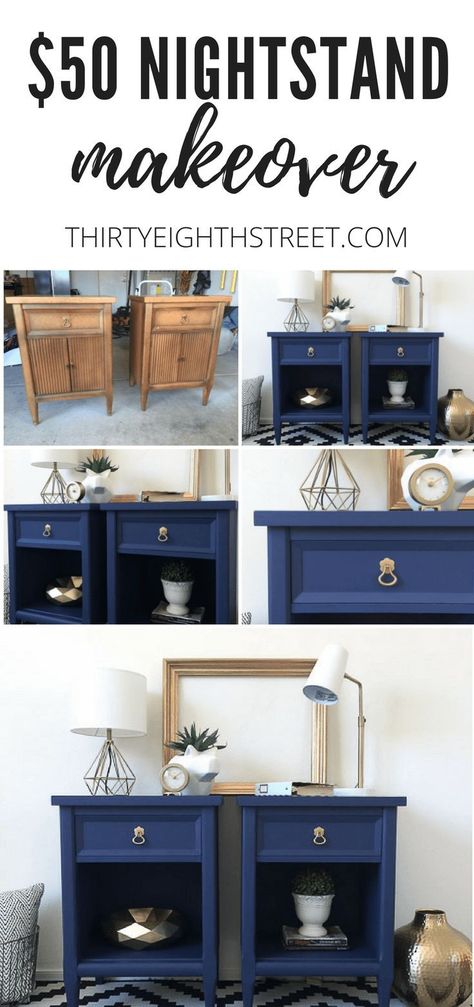
Even if you chalk paint furniture, I recommend using a clear coat like the one I mentioned above instead of wax. Applying wax is time-consuming and there is also a special technique that requires a specific brush. But a clear coat is easy to brush on in the direction of the grain to seal your furniture piece. If you use latex paint, you don’t need any kind of protective coating unless it is a well-used furniture piece that needs added protection. Chalk paint however always needs some sort of sealant.
When to Wax Painted FurnitureFurniture wax needs to be maintained. In other words, it will have to be repeated every 6 months to retain the durability of the wax.
When To Seal Painted Furniture with a Clear CoatPieces painted with latex don’t need an additional topcoat unless they will be used quite a bit like a kitchen table or coffee table. A clear coat can be brushed on in several layers whenever the piece is painted.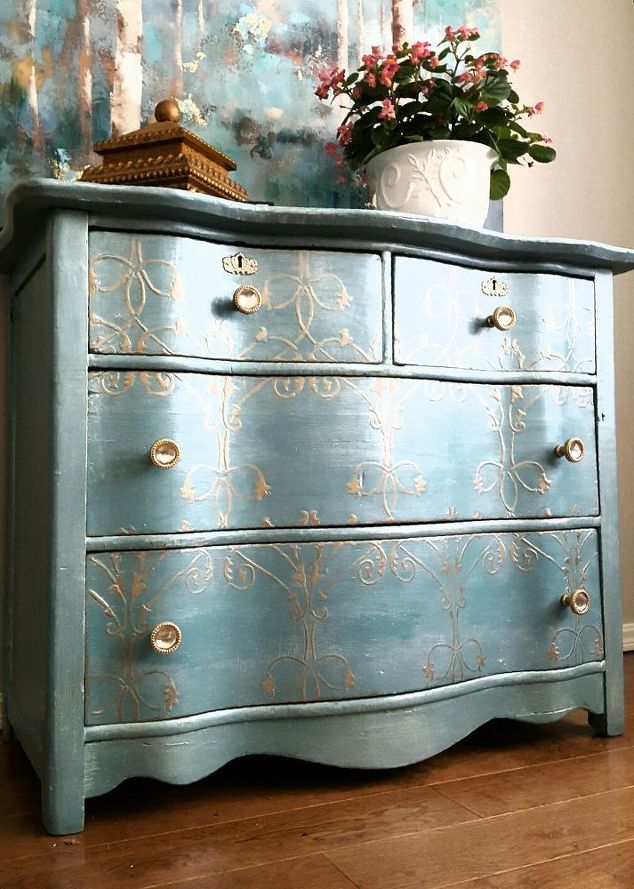 There is not long-term maintenance with a top coat – brush it on and you’re done! See a video on how to add a top coat here: Best Clear Coats for Furniture
Painted furniture is classic and while color trends stage, painted furniture is a staple in home decor. One of the biggest trends in furniture right now is a raw wood or Restoration Hardware-style finish. Right now I’m working on a faux stain that will give you a raw wood finish with paint – no stripping or bleaching required! That post will be out in a couple of weeks.
How to Paint Furniture White – See the Full Tutorial HERECan You Mix Painted Furniture With Wood Furniture?When it comes to mixing styles of furniture, feel free to mix wood furniture and painted furniture as long as the painted furniture works with the colors of the room.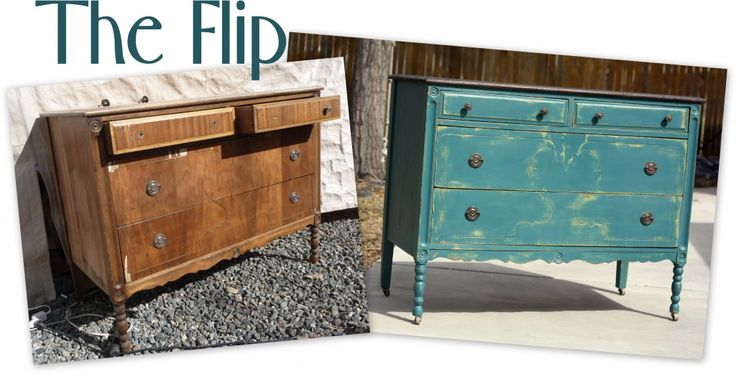 The one thing you don’t want is for every piece of furniture in your room to exactly match. You do want furniture pieces to coordinate but matching bedroom sets are a thing of the past.
Updating your existing painted furniture to have a modern look can be as simple as changing the hardware or adding more modern legs. You can check different options for knobs and handles here to give you some ideas. Also, a different shade of paint can do wonders to modernize your furniture.
RENOVATE YOUR FAITH: The Author of Transformation
Whether a vanity, rolltop desk, or even marble side tables, there are a couple of things they all have in common. Yes, they are all inexpensive furniture makeovers but, I also see a lot of my own journey in these DIY furniture transformations.
Whenever I rescue a piece of furniture from the side of a road or old storage facility, I can’t help but think about how God also rescued and saved me.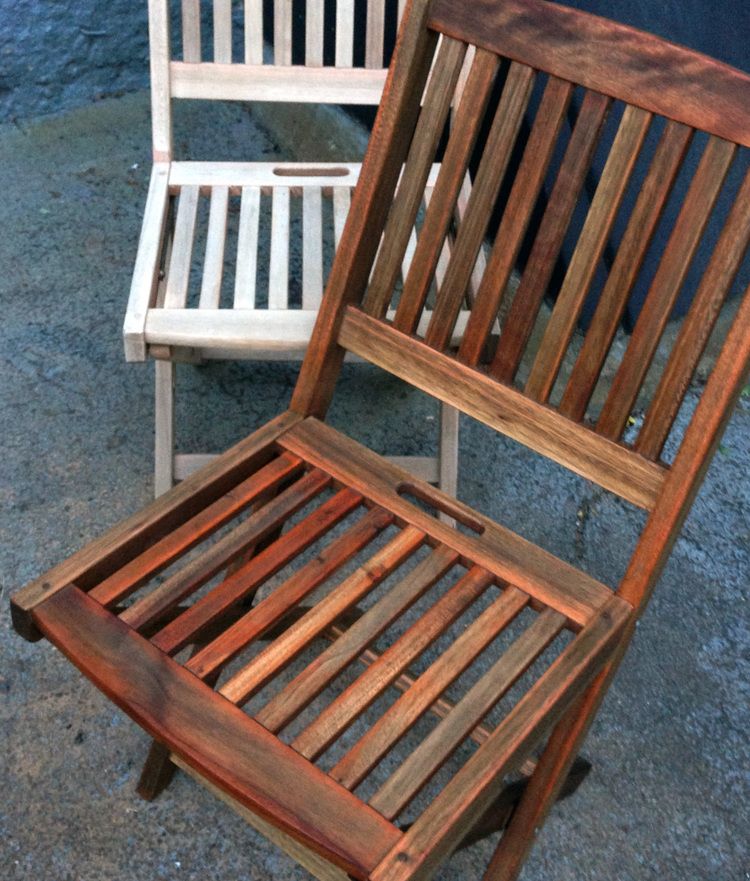 Often these pieces are broken down, painted an odd color, or are just plain outdated. Often, they smell and are covered in spider webs. But no matter how dingy or damaged a piece is, I like to wonder about its history and imagine what it could one day become…
In John 4, we see Jesus making his way from Judea to Galilee. The shortest route was through Samaria but many Jews would take an alternate, much longer route to avoid being around Samaritans.
The Jews saw Samaritans as perpetually unclean and religious compromisers. Many Jews had such disdain and hatred for them that when Jesus’ enemies wanted to insult Him, they called Him a “Samaritan”. On that same day, a Samaritan woman went to a well in Samaria to get water.
Jesus approached her. It was rare for Samaritan women to come to the well that time of day and culturally unacceptable for a woman to be alone in public.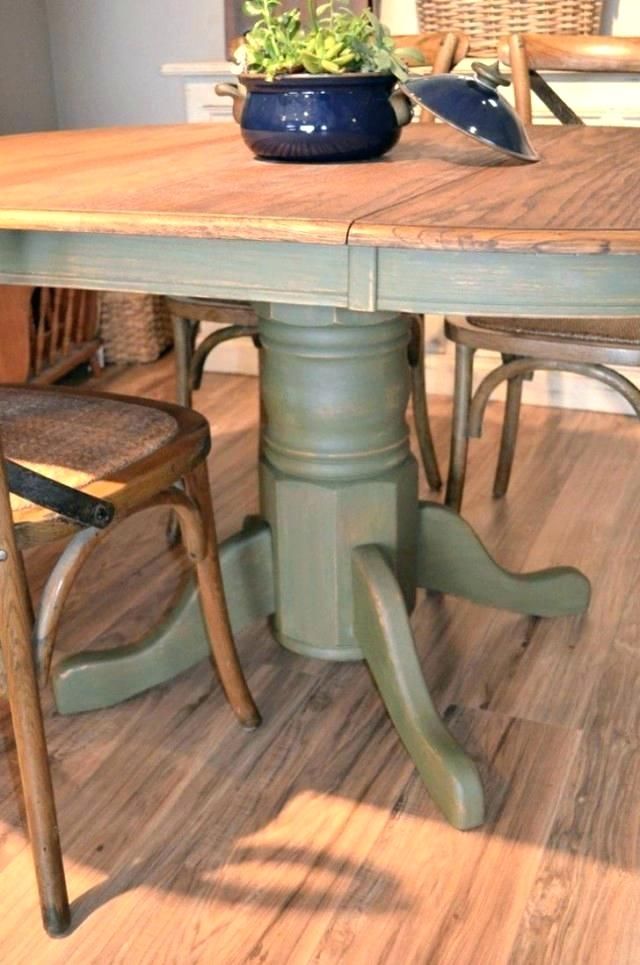 Scholars believe that perhaps she was seen as rejected in her community and knew others wanted to avoid her.
But Jesus does just the opposite. In those days, Jews were prohibited from speaking to strangers, to women, and always to Samaritans. She already had three strikes against her.
Also, she had a very questionable past…
But despite the cultural requirements that surrounded Him, Jesus sought her out. He purposely came through Samaria and went to the well, not to get water but to give this one woman the only thing that could satisfy her thirst.
As they began to talk, Jesus described to her the living water that can only come through knowing the Father. At the time, the women thought he meant physical water but the Lord doesn’t seek to only heal us physically but also spiritually.
Our greatest need is not just on the surface.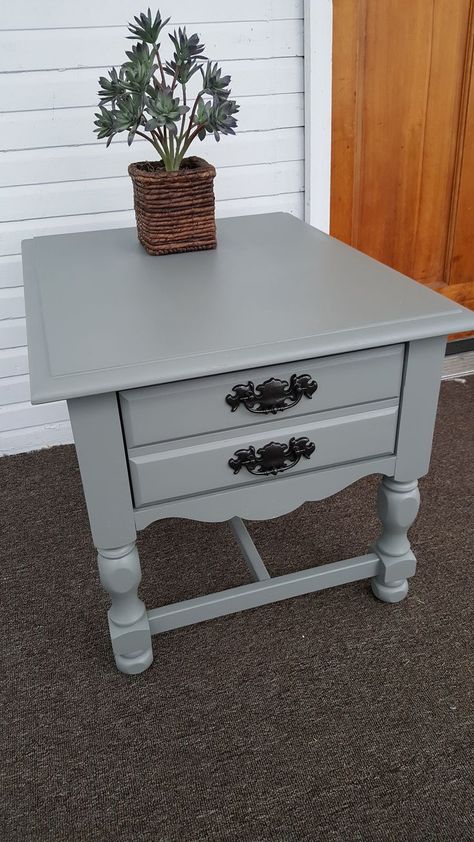 When God reaches out to pull us from our brokenness and despair, He doesn’t just bandage our wounds, but he makes us fully whole.
Jesus knew her story…every ugly detail. He knew she had lived a life of impropriety with several men but He still sought her out as one of His own.
Like recovering a broken piece of furniture from a trash heap, Jesus sought her out. In the same way, Jesus pulls us from our state of despair. He fixes our hurts, sands our rough spots, and makes us whole again.
But he doesn’t just make us a new version of our old selves. Instead, he makes over our hearts, giving us the opportunity and capability to be who we were always created to be.
“Therefore, if anyone is in Christ, he is a new creation. The old has passed away; behold, the new has come.” 2 Corinthians 5:17
Our Savior seeks us out. He chases us down. And despite our failures and shame, He will never ever leave one of His sheep behind.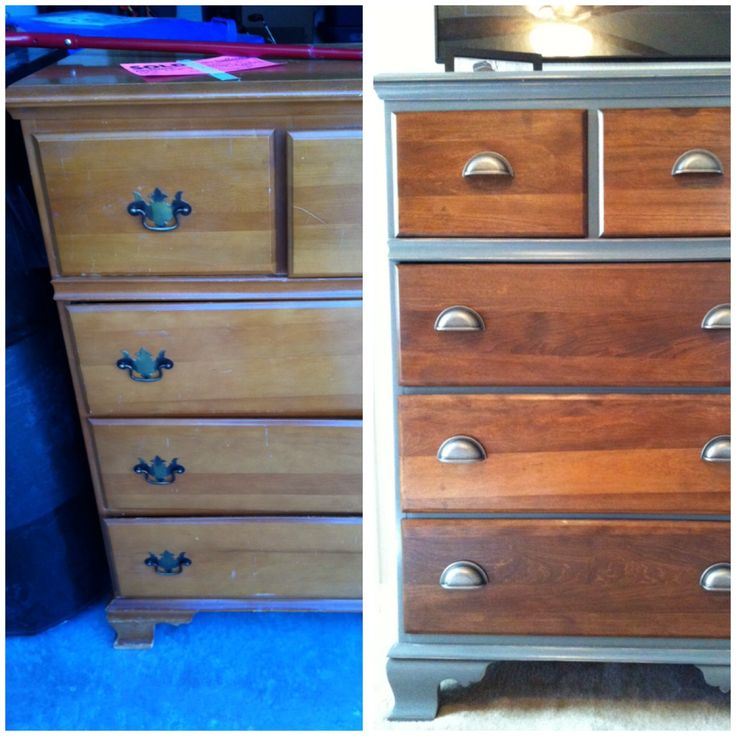 He actively seeks us out to give us new life in Him.
If you are struggling with feelings of rejection and shame, know that your heavenly Father loves you more than you can possibly comprehend. He wants you to take His hand and trust in Him, the only one that can give us what we truly need.
As someone who has struggled with feelings of rejection, know that there is one person who will never reject you. No matter your failures, no matter your struggles or your past, He will never let go of your hand.
So many of the furniture pieces I’ve refinished should have been thrown in the trash a long time ago. They weren’t worth my time, my effort and they cost me more than I could ever get in return.
Thankfully, regardless of what we may deserve or who has rejected us in the past, the only one who should have rejected us didn’t. In Him, we can have new life and purpose, if we trust in Him.
If you are wanting more information about a relationship with Jesus Christ, please don’t hesitate to contact me at Karin@renovatedfaith.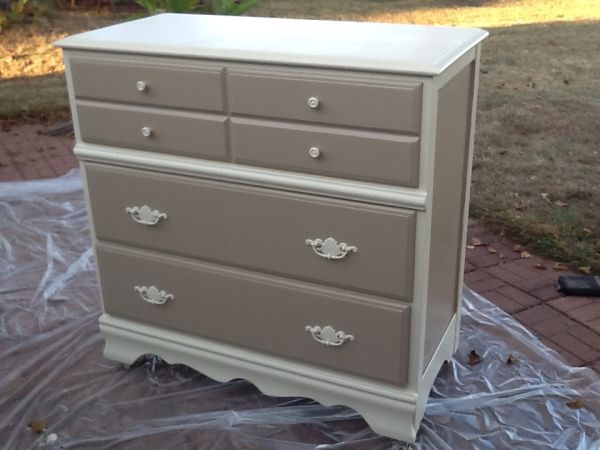 com.
com.
If you want a fabulous resource on rejection and shame, you have to listen to podcast number 12 from Journeywomen. She is one of the podcasters I listed in my post-Best Christian Podcasts for Women and the information in this episode was life-changing for me!
For more spiritual encouragement, click here for the rest of my project posts that also include Renovate Your Faith devotionals.
☑️ My All-Time Best Furniture Painting Tips & Tricks (FREE PRINTABLE)
Don’t forget to download the FREE step-by-step printable checklist that shows you the entire process I’ve used on dozens of furniture pieces while saving you time and money!
FAQ’s: Painted Furniture Ideas (Before and After Makeovers)Can You Whitewash Painted Furniture?To whitewash furniture, simply add water to white latex paint in a 1:1 mixture. Brush some of the paint mixture on one surface of your furniture piece.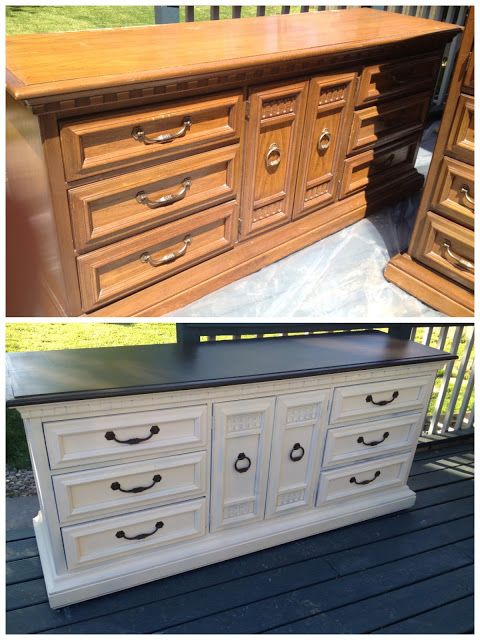 Then, wipe off the paint mixture in long strokes with a moist rag in the direction of the grain. Keep wiping off until you get the look you want.
If you aren’t interested in painting your furniture piece, there are lots of talented furniture painters around the country that can help you out. The best way to find them is by doing a Facebook search based on location. If you have a gift shop that sells painted furniture, they are bound to know of someone to assist you.
What Painted Wood Furniture Sheet Looks Best?Stain or matte (flat) sheens are most popular now. Satin is slightly shinier than matte but also satin paints tend to be a little more durable.
Can Chalk Painted Furniture Be Used Outside?Chalk painted furniture can be used outside as long as it is protected with an exterior clear coat. I suggest Spar Urethane. Be sure to add several coats to give your furniture piece maximum protection.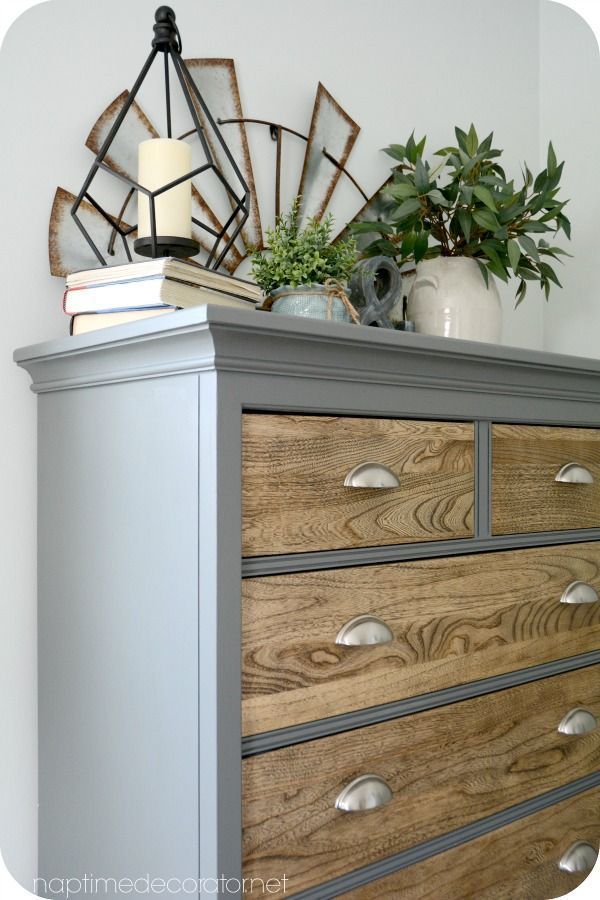 Do not wax the furniture piece before applying the clear coat.
You can always sell painted furniture on Facebook Marketplace or Craigslist for a quick sale. However, if you want to maximize your profit for painted furniture, check into local craft malls where you could set up a booth. You can also check with local gift stores. Often, they will allow you to put your painted furniture pieces in their shop with a for sale tag. They can use your furniture piece to display their merchandise while also getting your furniture in front of potential buyers.
Whimsical Painted Furniture (Decorating Furniture with Paint)
For ideas on how you can add whimsical details to furniture, my favorite source of ideas is Miss Mustard Seed. She has an incredible knack for adding intricate details on furniture without it looking too busy. She is truly an artist and her tutorials can be found here: Miss Mustard Seed
More Posts Related to Painted Furniture Pictures and TutorialsA Beginner’s Guide to Furniture Painting (Vintage Vanity Reveal)The Absolute Best Furniture Paint (24 Brands Blind Tested and Reviewed)
Why I Stopped Using Chalk Paint on FurnitureThe Best Clear Coat for FurnitureHow to Faux Stain with Paint (6 Shades to Choose From)7 Tips for Painting Furniture WhiteHow To Build a Farmhouse Table with Pocket Holes (A Beginner’s Guide!)
41 of the Best Gifts for Christian Women
Easy Curb Appeal on A Budget
RELATED LINKS: Before and After Pictures of Painted Furniture- Renovated Faith on Pinterest: Painted Furniture Inspiration
- Chalk Painted Furniture: Before and After
- Upcycled Furniture Ideas: Before and After
- Before and After Shabby Chic Furniture
- Spray Painted Furniture: Before and After
- Milk Paint Furniture: Before and After
- Painted Furniture Ideas: Modern Farmhouse
- Funky Hand Painted Furniture Ideas (Crazy Painted Furniture Trends)
Don’t forget to download my Free Furniture Painting Cheat Sheet.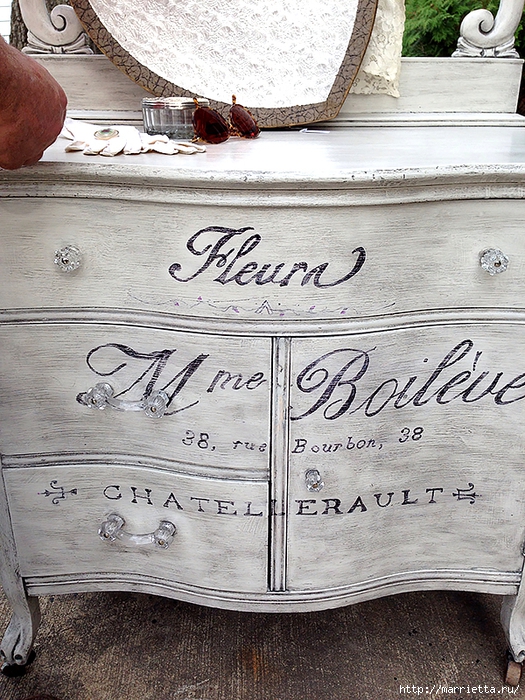 To get your printable, sign up for my weekly newsletter which also grants you free access to my resource library full of wall art printables, checklists, and project plans!
There are so many ways to paint furniture but hopefully, this post explained what has worked well for me to get stunning and long-lasting results every single time! With these tips and tricks, you can have a beautifully painted piece of furniture in no time. You might even find yourself enjoying the therapeutic benefits of furniture painting like I do.
WANT TO SAVE THIS FOR LATER? CLICK HERE TO SAVE THIS PIN TO YOUR FAVORITE PINTEREST BOARD
I love to hear your thoughts and questions! Scroll down to leave a comment and I WILL reply! ❤️
Blessings,
Be sure to follow the fun here!
Email Subscription | Instagram | Pinterest | Facebook | Twitter
Best Tips for Painted Furniture: YouTube VideoKarin Peters
Welcome to Renovated Faith, where I share about DIY projects, my faith and everything in between! When I’m not spending time with my family, you will find me redoing furniture in the garage or watering plants in my greenhouse. This blog is about transformation. Anyone can renovate a house but only God can transform our hearts!
Furniture restoration - 120 photos of interesting ideas for restoration
Furniture surrounds us every day and everywhere: at home, in the office, in restaurants, etc. However, like everything in this world, it ages over time and gradually becomes unusable, partially or completely. It is quite possible to repair or restore old furniture, and this can be done at home without special equipment and a special kind of tool.
If you pay attention to the photo of the restored furniture, you can see that outwardly it does not differ in any way from the new one.
In principle, it is impossible to reveal all the secrets of restoration and repair in one article, and therefore in this review we will reveal only the most basic points, we will try to outline the most general work plan, starting from which you can already start working.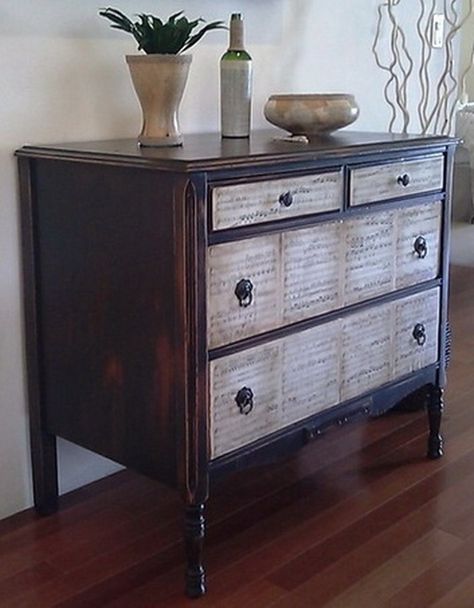
Brief content of the article:
- General work plan
- Upholstered furniture restoration features
- Tools
- Conclusion
- Photo of the furniture restoration process
General work plan
Like any other work, do-it-yourself furniture restoration requires a thoughtful and balanced approach. You must be clear about what you want to do and how to achieve it.
Before you even start work, conduct a thorough inspection, analyze the value of the furniture. If antiques fell into your hands, it is better not to undertake repairs on your own - entrust this matter to professionals, they will be able not only to restore, but also to preserve historical authenticity and the final cost.
After you have inspected the item, clean it of dirt. Use sponges, brushes. It is better to wash with a simple soapy solution, this will avoid additional damage from aggressive solvents.
All fittings must be dismantled, processed, cleaned and restored to their appearance separately. In cases where it is required to remove indelible plaque with soapy water and a brush, fine sandpaper can be used.
After you have carried out the general cleaning of the furniture, it is dismantled, all removable parts and parts are removed. The glued frame is not touched.
The next stage is the removal of the old paintwork, the so-called sanding. You can use special chemical washes. The main thing is not to damage the surface, everything is done very carefully.
If the furniture lacks any elements or details, they must first be reconstructed, for which, if possible, the external data and dimensions of the desired element are determined. In this work, the correct selection of material is of particular importance, for example, if the part is wooden, it is necessary to select wood of the same type for the rest of the structure.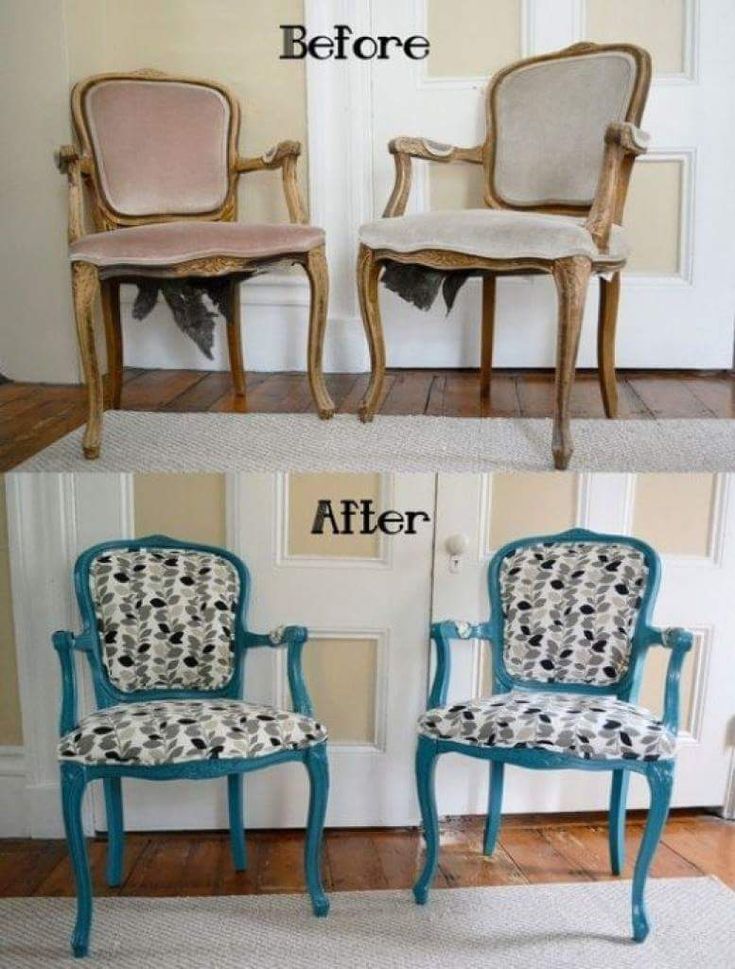
After the elements are restored, they are pre-assembled, they are installed in place, but not glued, the main thing is to determine how the parts fit together, whether all the mounting dimensions match. Found deficiencies are eliminated and proceed to assembly. Parts are connected and fastened together.
After assembly and external inspection, they begin toning - applying varnish and other coatings. If the furniture being restored is very old, then it is better to apply varnish with a brush, this will ensure historical accuracy.
After coating, the furniture is dried and inspected again, the defects are eliminated.
Remember that restoring old furniture is an exciting and interesting activity. There is no need to hurry in this work, everything is done thoughtfully. If something is not clear to you, or you cannot make any detail yourself, seek advice or help from specialists.
Peculiarities of restoration of upholstered furniture
In principle, the restoration of upholstered furniture is not particularly different, except for the presence of upholstery, which is preliminarily dismantled or, if it has completely fallen into disrepair, is removed. Then proceed to the restoration according to the plan outlined above. After applying varnishes, proceed to work on the upholstery.
The choice of material is of particular importance, it must be similar to that used originally.
Upholstery begins with the restoration of the seat, for which they install and fasten springs, jute ribbons, if necessary - stuffed with horsehair and only after that they start upholstery with fabric or leather.
Instruments
Restoration work is a rather specific type of activity, and therefore requires the use of ordinary and special types of instruments. In the most general form, you will need:
- Spatula set;
- Scrapers and steel sponges;
- Screwdriver set;
- Hammers in various sizes and weights. mallets;
- Set of clamps and clips;
- Squares, rulers, pencils and chalk;
- Brush set;
- Drill, drill set;
- Pliers, wire cutters;
- Respirator; gloves.
In addition to the tool, you need a range of different consumables: sandpaper, varnishes, paints, thinners and special chemical washes.
It is impossible to specify everything that may be required, a lot depends on what you are going to restore and what specific operations you have to perform.
Conclusion
In this review, we have outlined the most general points. You can find more detailed information on the Internet or read special books on restoration. I would like to note - there is no limit to perfection! Each master throughout his life learns and improves his skills. Maybe not right away, but everything will work out.
Take a photo of furniture before and after restoration, compare the result - we are sure that you will experience the pleasure of your work, and if something did not work right away - do not despair, skills develop over time, already tomorrow, maybe you can do it which today seemed impossible.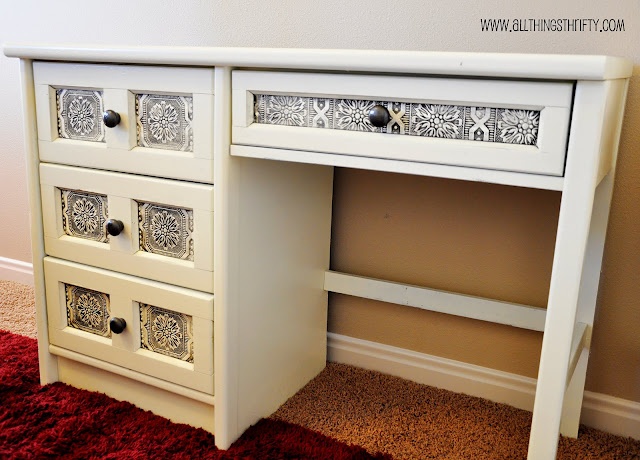
Photo of furniture restoration process
- DIY stool
- DIY door trim
- DIY cornice
- DIY folding chair
- DIY pouffe
- DIY folding table
- DIY gate
- Phone shelf
- Furniture decoupage
- Furniture eccentric
- Chaise lounge with own hands
- DIY armchair
- Upholstery of chairs
- DIY housekeeper
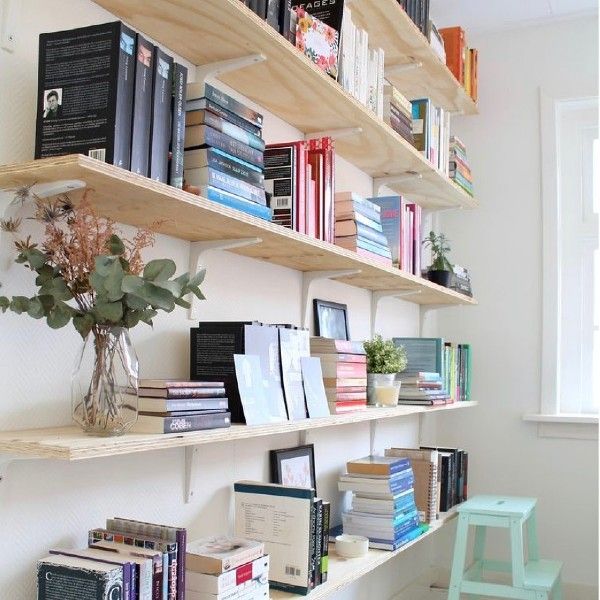
- Garage shelving
- DIY shelves
- Telescopic rails
- Table-bench
- DIY chair
- DIY hanger
- Folding bed
- Do-it-yourself wardrobe
- Furniture assembly
- DIY children's table
- Oak furniture
- DIY extension table
- Furniture hinges
- Table made of cut wood
- Folding table
- DIY wall panels
- Laptop table
- DIY folding table
- How to make a bed
- DIY shop
- DIY hallway
- Summer cottage furniture
- How to update furniture
- DIY computer desk
- Bench with backrest
- Picnic table
- Bath furniture
- DIY garden swing
- DIY flower stand
- Pallet furniture
- Furniture Decor
Repair of old furniture at home.
 Do-it-yourself furniture restoration: an overview of the best furniture restoration ideas and options for beginners (150 photos and videos)
 Contents
- Repairing old furniture at home Do-it-yourself furniture restoration: an overview of the best furniture restoration ideas and options for beginners (150 photos and videos)
- Advantages and disadvantages of do-it-yourself furniture restoration
- Renovation of wooden objects
- Stages of restoration
- How to paint old furniture without removing the old layer. Stages of painting old furniture with your own hands
- Do-it-yourself old furniture repair at home. Pros and cons
- DIY furniture restoration video. Wooden Studio OIL MINI SET HD
Repair of old furniture at home. Do-it-yourself furniture restoration: an overview of the best furniture restoration ideas and options for beginners (150 photos and videos)
Do-it-yourself restoration of old furniture may arise if the owner does not want to say goodbye to a valuable thing, sympathy for vintage interior items, and simply for the sake of economy.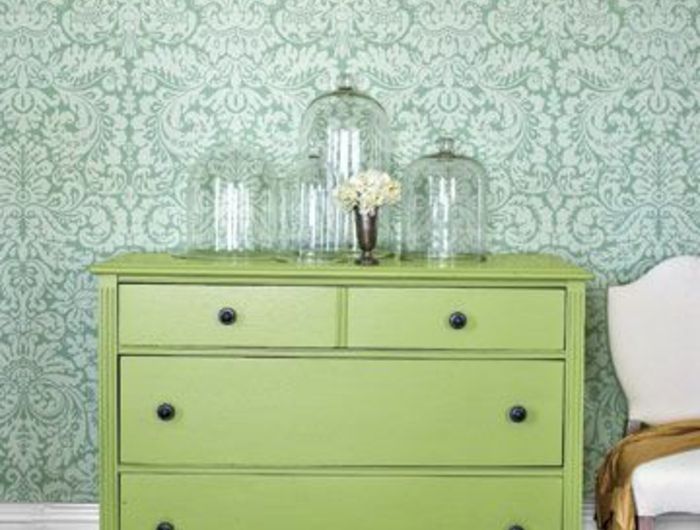 In fact, updating old furniture is not a problem, the Internet is full of ready-made instructions.
Advantages and disadvantages of do-it-yourself furniture restoration
If you have the opportunity to restore aged interior items with your own hands, you should take advantage of this.
The advantages of restoring old furniture with your own hands include:
- Cost savings;
- Furniture does not need to be transported;
- An opportunity to bring your idea to life.
Disadvantages of independent work:
- It may take a long time;
- Dust, chemical odours.
Given the pros and cons of this method of furniture restoration, you can decide for yourself how it is more convenient to carry out your plan - on your own or with the help of professionals.
Renovation of wooden objects
Restoration of wooden furniture is the most common question in the field of working with aged interior items.
Before you start restoring furniture, you need to pay attention to the presence of any signs of antiques - stamps, stamps, fixtures, fittings.
If these elements are found, it is better not to touch the furniture yourself, but to entrust this matter to professionals so as not to spoil anything and not lose value.
If no signs of antiques are found, you can start processing yourself.
Studying the photos of the restoration of old furniture, you can find many non-standard solutions and unusual ways.
Restoration steps
Acclimatization. So that after restoration the elements of wooden furniture do not deform, you need to let it “get used” to its environment. Air temperature and humidity are important for wood.
The optimum temperature for the room in which furniture restoration work will take place should vary from 18 to 25 degrees, air humidity should not exceed 75%. You should also pay attention to the harmful effects of direct sunlight and the heat of radiators.
Dismantling elements. For better processing, it is better to disconnect all furniture parts from each other and work with them separately. You need to use the tools as carefully as possible, without damaging the tree. If it is important to keep the elements and the fastener system in its original form, it is better to disassemble them and lay them out in order.
Cleaning. You need to clean each element in the most gentle way - with a soft brush wrapped in a cloth, a vacuum cleaner and non-aggressive chemicals.
First, the parts are washed from dirt with a cloth and dishwashing detergent. Dust is carefully removed with a vacuum cleaner. All parts are dried in a horizontal position.
Removal of dents, scratches. To do this, use special wax pencils, "liquid wood" or steam from an ordinary kettle. These options are suitable for small, shallow damage, otherwise the entire module may need to be replaced.
Fastening repair.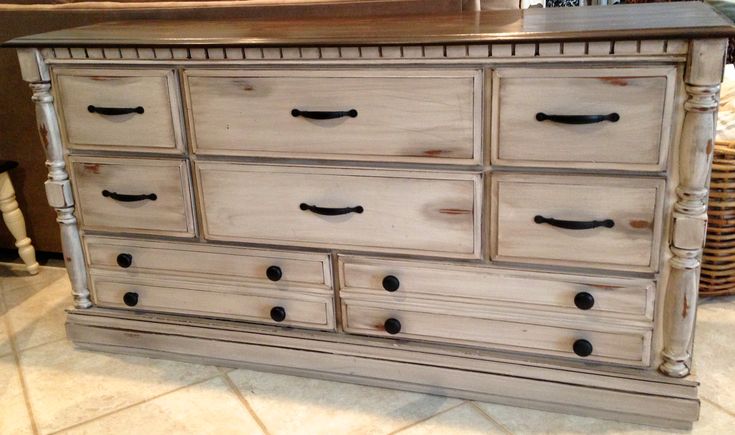 It implies a complete or partial replacement of fasteners. Restoration of the top layer of the tree. To do this, you may need to glue a sheet of plywood onto the old surface.
How to paint old furniture without removing the old layer. Stages of painting old furniture with your own hands
Let us analyze in detail the general technique for painting furnishings from any material at home. It is suitable for old and new products, if, for example, you want to change the design of a standard dresser or wardrobe from IKEA.
All recommendations on how to paint lacquered or any other furniture begin with a description of the preparatory work. They are necessary so that the painted surface is even, uniform and lasts a long time. It is important that the paint is chosen correctly, otherwise you will not be able to get a good result. Be sure to study the painting instructions, which indicate how to prepare the preparation for work and other important points.
Stages of preparation
- Completely disassemble the product.
 Carefully unscrew the fasteners, remove the doors, take out the shelves. We remove the accessories. Everything that cannot be removed, for example, stained glass or glass inserts, is completely sealed with masking tape.
Do-it-yourself old furniture repair at home. Pros and cons
Restoration of old furniture is a creative process that allows you to restore beauty and functionality to interior items. A finished sofa, table or wardrobe can be used independently, left as decoration or sold. Antique furniture is in great demand among collectors and lovers of retro styles, so there is always a demand for it.
Benefits of do-it-yourself furniture restoration at home:
- Savings on the purchase of a new item and the services of a restoration workshop. Many of the work can be done independently, using improvised tools.
- After the work done, the furniture will last longer.
- You can discover your creative potential, embody complex ideas.
 You will not be rushed, which allows you to spend a lot of time on restoration.
 - You don't have to get rid of an antique item inherited from your ancestors. Perhaps the chest of drawers is expensive as a memory of a grandmother or evokes nostalgia for childhood. It is difficult for many to part with old items left over from childhood.
- Old furniture will not spoil the new interior. This concerns items that were bought to complement the interior, but then the design of the room changed. In this case, you need to create new furniture that will blend perfectly with the overall style.
You'll get the wardrobe or sofa you need without the hassle of searching. At home, you will create an item that meets your requirements. And for this you do not need to look for it in stores, order it on foreign sites or make it from specialists.
But there are also drawbacks to self-restoration of furniture:
- Having no experience in working with furniture, you may encounter difficulties already at the stage of selecting materials.