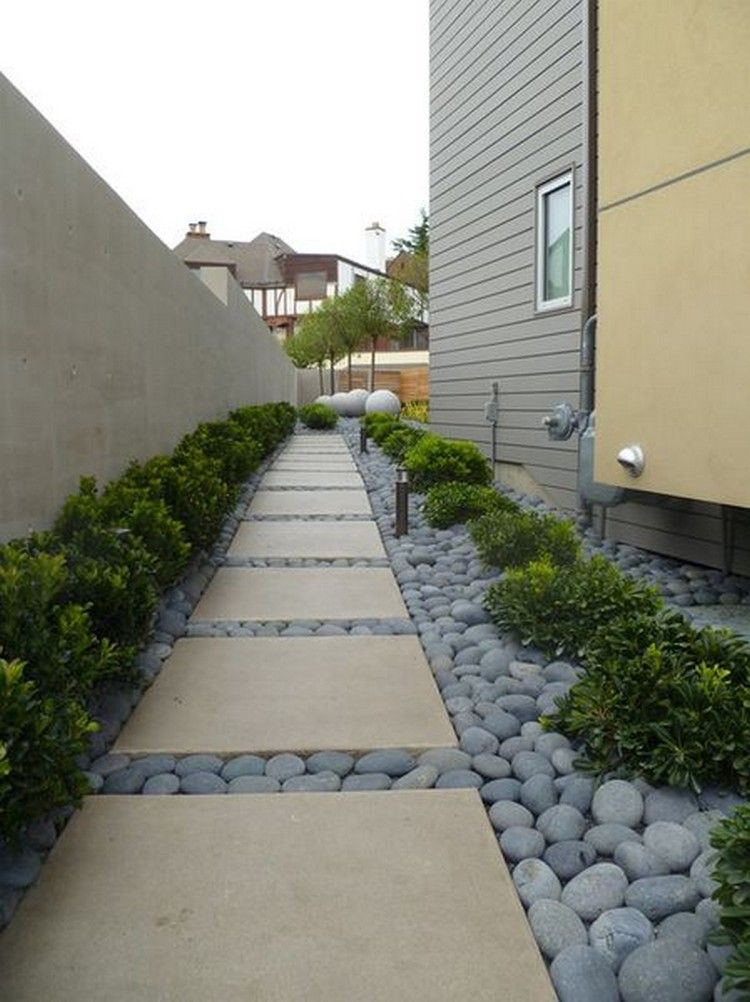
Hanging plates on wall to decorate
How To Hang Plates on the Wall (The Best Plate Hangers & More!)
Updated: by Kris Jarrett
Want to know how to hang plates on the wall? I’m sharing my tips & tricks and the plate hangers that I used to get the job done right!
For months I kept my beautiful new plates sitting in a cabinet where they weren’t used or seen. And the big bare wall in my dining room? It stayed bare. Because honestly the whole idea of designing and hanging a decorative plate wall intimidated me. But last month I finally did it – I hauled my plates out of the cabinet and hung them up on our dining room wall:
The trickiest part was figuring out the how-tos of hanging the plates so I thought I’d share what worked best for me, what’s worked for others, and why you may want to choose one method of hanging plates over the other (post includes affiliate links – see my full disclosure statement {here}):
Step 1: Figure Out How You Want to Arrange Your Plates
Take all the plates that you’re thinking about using in your plate wall and lay them out on the floor. If you space constraints for the wall that they’ll be hanging on, it helps to put some painter’s tape on the floor to mark the max width and height that you have to work with. Arrange and rearrange until you figure out a design that you love!
All of my plates are from Juliska – the ones with the printed scenes are from their Country Estate collection in Flint color that you can find {here}. I also have two of {these dinner plates} from their Berry & Thread collection, and multiple different sized plates from their Jardins du Monde collection {here}. The center platter is the Jardins du Monde grande charger that is no longer available but can sometimes be found on eBay {here}.
Step 2: Trace Each Plate on Paper
I wanted to see the arrangement up on the wall before nailing in 20+ hangers and realizing that I should have shifted it up or down or changed some plates around so I traced the plates on kraft paper and cut each of them out. Once each plate was cut out, I drew both a horizontal and vertical line through the center of each paper plate, which helped me line them up evenly on the wall using a level (I wish I was a girl who could just wing it and not worry if things don’t line up quite right but I know myself enough to know that it would bug me if the arrangement was visibly “off”…).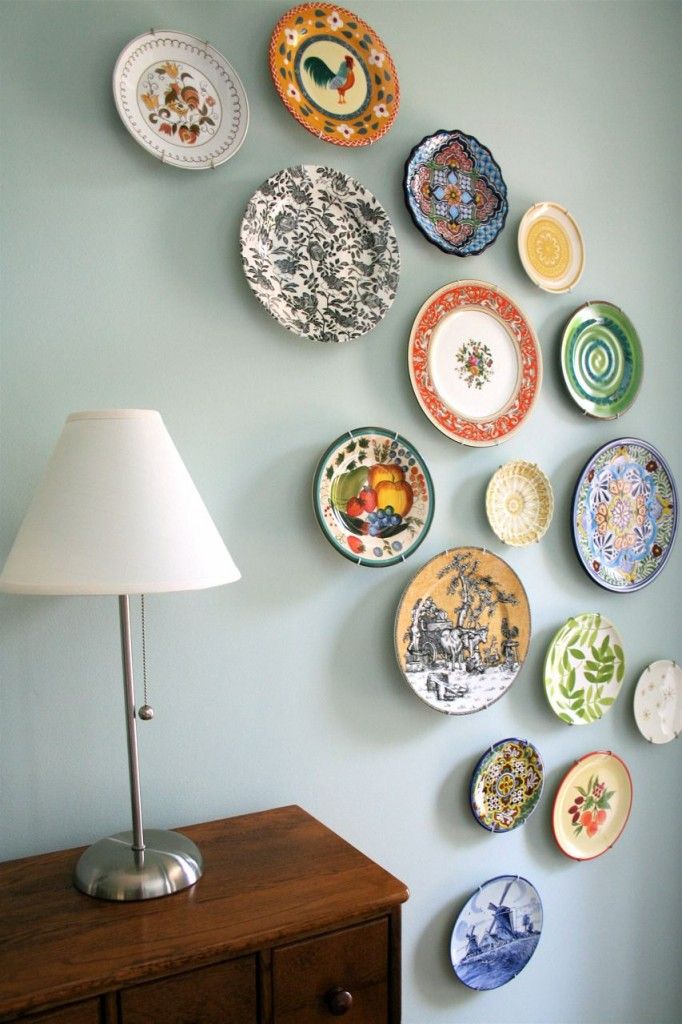
Step 3: Tape Your Templates to the Wall
Once I had my plate templates arranged and level on the wall, I taped them to the wall with LOTS of tape to make sure they wouldn’t fall down overnight (I was doing my hanging the next day). And then when I was getting my girls their breakfast the next morning, I heard a rustling in the dining room and found them in a heap on the floor. Nooo! I had used Delicate Surfaces painter’s tape and it didn’t hold. Ugh. Lesson learned. I redid the arrangement but this time used regular painter’s tape and put a tiny nail through the center of each plate just to be extra sure we didn’t have a repeat incident.
Step 4: Figure Out the Best Plate Hangers for You and Hang Them Up!
My original plan was to hang my plates using {these} Disc Hangers, which are adhesive discs that you adhere to the back of your plates. The advantages of the Disc Hangers are that they allow your plates to hang flat against the wall and they are invisible once you hang them.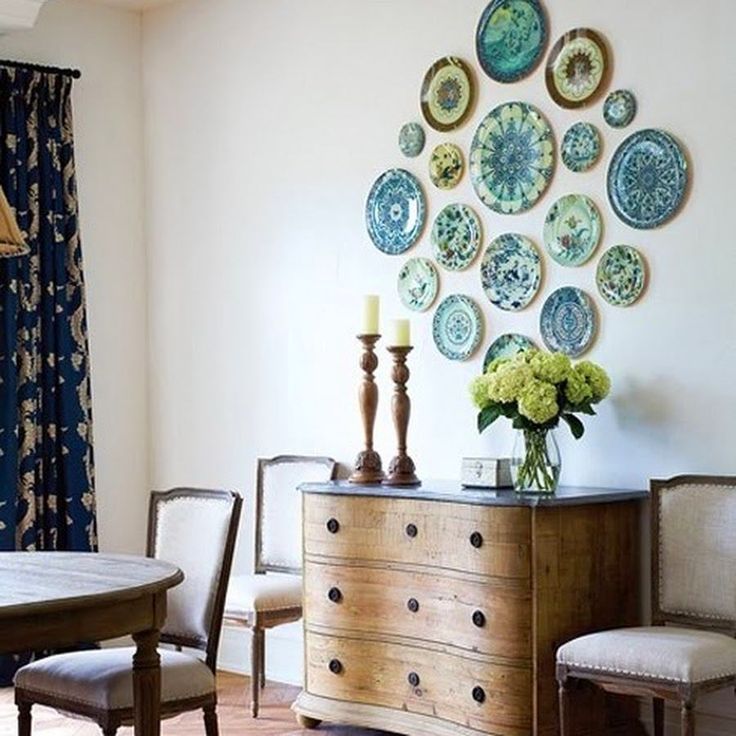 Unfortunately, I realized that most of my plates have a raised pattern on the back – definitely not a good surface for adhering a flat Disc Hanger.
The other disadvantages of the Disc Hangers are that you can’t easily remove them to use the plates – I wanted to be able to take some of the platters off of my wall if needed to use them for serving food at parties every now and then and the Disc Hangers wouldn’t allow me to do them. Also, according to the reviews some people have had issues with their plates fall off the wall when using them. But there are others who have used them with beautiful results (and no broken plates!) such as Emily of Timeless Paper who used them to hang this gorgeous plate wall over her bed (don’t you love it?!):
Since the Disc Hangers weren’t going to work for me, I ended up hanging my plates using Tripar’s white vinyl coated plate hangers found {here}. Beware that they do “run small” – my 9″ plates did not fit the 7″-9″ hanger size – I had to use the 10″-14″ size.
Since they are vinyl coated, they won’t scratch the plates like plain wire hangers can and I love that when you use this type of plate hanger, you can easily remove the plates from the wall and use them. The key to working with these hangers is to bend the top of the hanger so that your plate will lay flat on the wall once hung. The best way to do this is to first attach the plate hanger to the plate and lie the plate on a flat surface. The top of the hanger should (barely) touch the flat surface that your plate is lying on. If it doesn’t, take the hanger off the plate, bend it, and place it back on to see if it’s where you need it to be.
Once all of your plates have hangers, it’s time to get them up on the wall! I used {these OOK picture hooks} – hook your OOK hook onto the wire hanger that is attached to your plate and measure the distance from the top of the plate down to where the nail will go into the OOK hook. Transfer this measurement to your plate template and gently tap the OOK hook nail in just a bit.
Then remove the template from the wall, put the nail through the OOK hook, and hammer it in at the same spot that you tapped it into moments ago. Now hang your plate!
Repeat.
It’s definitely my favorite thing about our dining room – you can take a tour to check the entire space out including a bunch of fun “before” and “after” pics (it wasn’t too pretty when we moved in!) {here}!
- Pin
- Share
Categories: Decorating Tips Tags: wall art
✉️FREE EMAIL SERIES ✉️
5 Secrets to Reinventing Your Home on a Budget
Simple tips to instantly transform five rooms in your home!
Reader Interactions
How to hang plates on a wall – an expert guide
(Image credit: Emma Sims-Hilditch)
Hanging plates on a wall is a little trickier than hanging pictures. First, there's their fragility, their varying shapes and sizes, and, of course, weights. However, a plate wall can be extraordinarily beautiful, individual and can make for a wonderful accent feature in a room.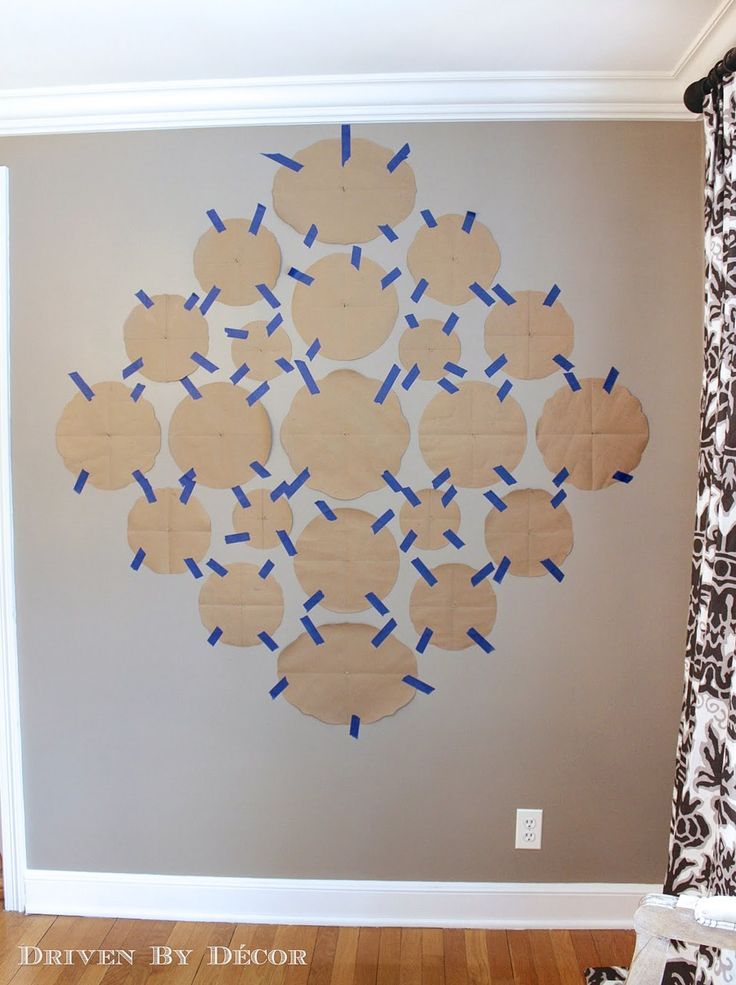
See: Home makeover ideas – simple ways to transform your home
'The selection of art is an intensely personal and often costly process,' says Emma Sims Hilditch, founder and creative director of Sims Hilditch, who is something of a plate wall expert. 'For those looking for a more economical and slightly different way to fill a blank space in a room, then a plate wall is a great solution and is easier to do than you might think.'
Below, Emma demonstrates the simple process in easy steps – including her tips for getting the process just right.
How to hang plates on a wall
(Image credit: Emma Sims-Hilditch)
'When choosing the plates, try to select a range of sizes and a variety of origins,' says Emma. 'Plates which carry meaning or a message are great additions to the design as they help it to become a meaningful part of the home.'
Follow her instructions below – and see Emma's video on hanging plates for more tips.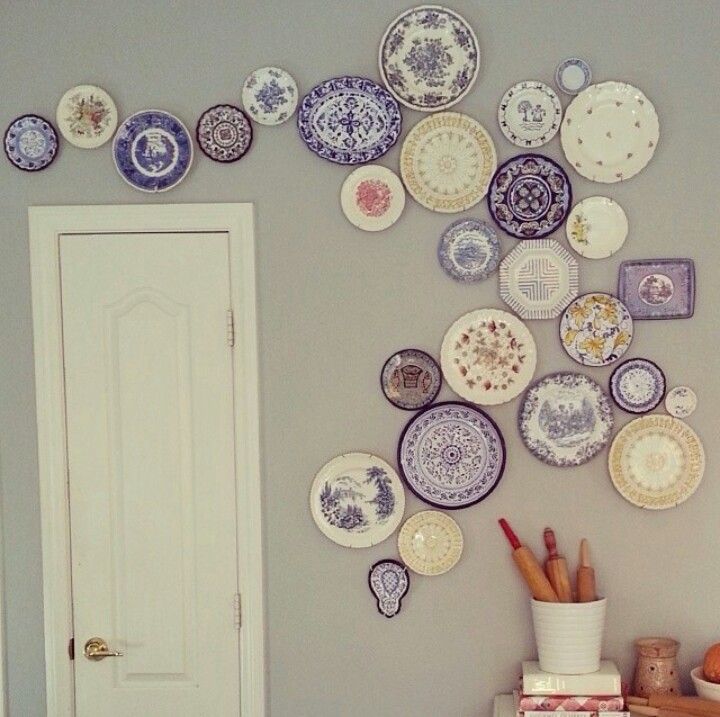
See: 5 tips for displaying china – plate wall inspiration, plus more ways to create a beautiful arrangement
1. Measure the wall
'Use a tape measure to work out the dimensions of the plate wall first and arrange the plates accordingly on the floor,' says Emma.
It's useful to mark with pencil or tape the central point of the plate wall. This is where you will hang your first plate. It can also be helpful to use low-tack masking tape to mark out the boundaries of the plate display on the wall – and to repeat the exercise on a table or the floor to ensure the plate display you are planning will fit comfortably into it.
2. Measure your plate arrangement
'Draw a rough sketch of where the plates will be positioned and record the measurements on paper,' says Emma.
Use this as a guide to arrange the plates on the table or floor within your taped boundaries – and adjust it until you are happy with it.
'Once the plates are arranged, measure the distance to the top of each plate starting from the highest point down, with the topmost plate being ‘0’. Then mark these measurements on the wall,' says Emma.
3. Create templates of the plates
Draw around each plate on to separate pieces of paper and cut them out to create templates. Stick each template to the wall in the arrangement you have planned on the floor. Now stand back and adjust the arrangement until you are happy with it.
'Try to stick to the measurements as a guide at this stage, but remember that this is an artistic process which may be deviated from slightly to add creative flair!' says Emma.
See: Cottage decorating ideas – charming ways to get a characterful look
4. Clean the plates
'Before hanging, clean the back of each plate where an adhesive disk with a hook will be applied.'
Ensure you clean the front of the plates, too, so that your display isn't marred by fingerprints.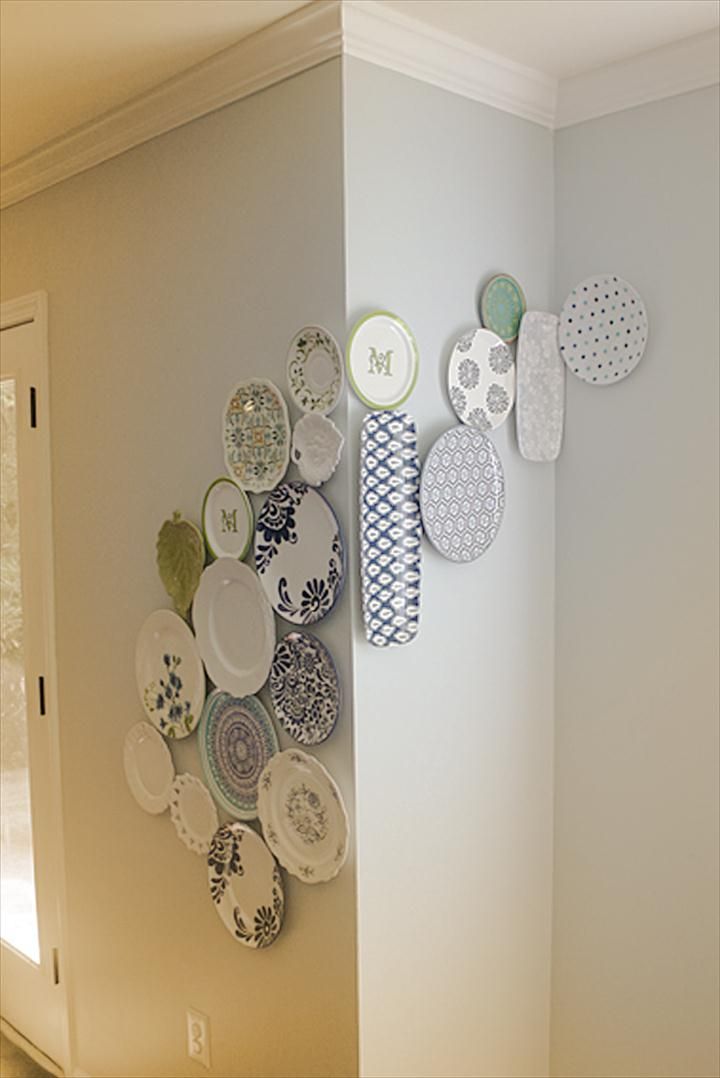
5. Prepare the plates for hanging
'Prepare the disk (‘The Original Invisible Plate Hanger ’) by applying water to the back and rubbing it with your finger for five to 10 minutes. Stick it on the underside of the plate and leave it for 24 hours to bond.
'Once the plates are ready, find the center point on the wall and use the measurements/templates previously recorded to place a hook point where each plate will be positioned, before finally hanging them according to the design.'
6. Hang plates with Command Strips
Hanging plates with Command Strips means that you don't need nails or screws and you can remove or rearrange the plate display without damaging the wall. However, it does mean that the bottom of the plates needs to be flat to the wall – and plates with a lip underneath won't be able to be displayed with Command Strips – although Command Hooks should work if the plate has a hole for you to be able to attach to the hook with string threaded through it.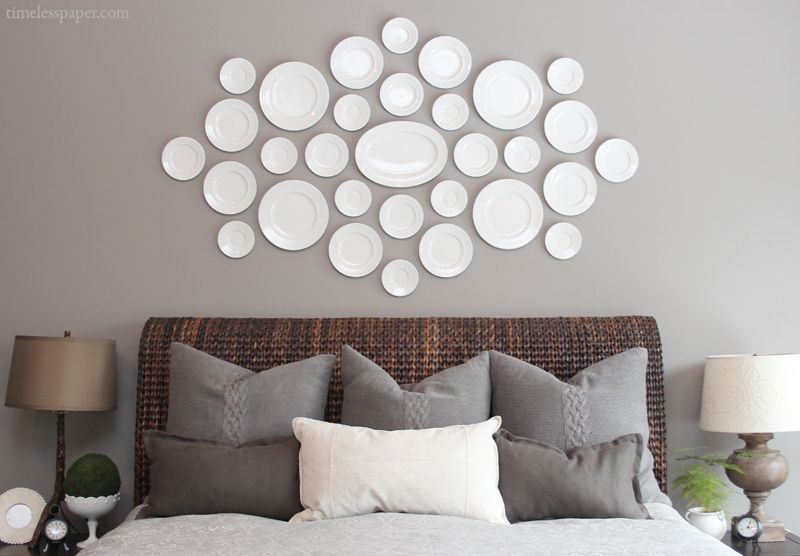
Assuming you can use them, clean the back of the plates thoroughly, stick the adhesive strip to the wall and another to the plate then press together until you are happy they are attached.
7. How to hang plates with plate hangers
Plate hangers grip the rim of the plates in three or four places and have a clasp at the back of the plate that you can hook over a nail. The important part of this process – other than getting the nail firmly into the wall – is to ensure the plate hangers you choose are the right size: too small and the plates are in danger of falling.
See: Interior design tips – decorating secrets for the world's top experts
The downside to plate hangers? You can see the grips from the front of the plate, so be ready to touch them up with paint – or even nail varnish – that matches the color of your plates so that they blend away.
Founded in 2009, the Sims Hilditch design practice has become one of the most trusted and respected in the industry.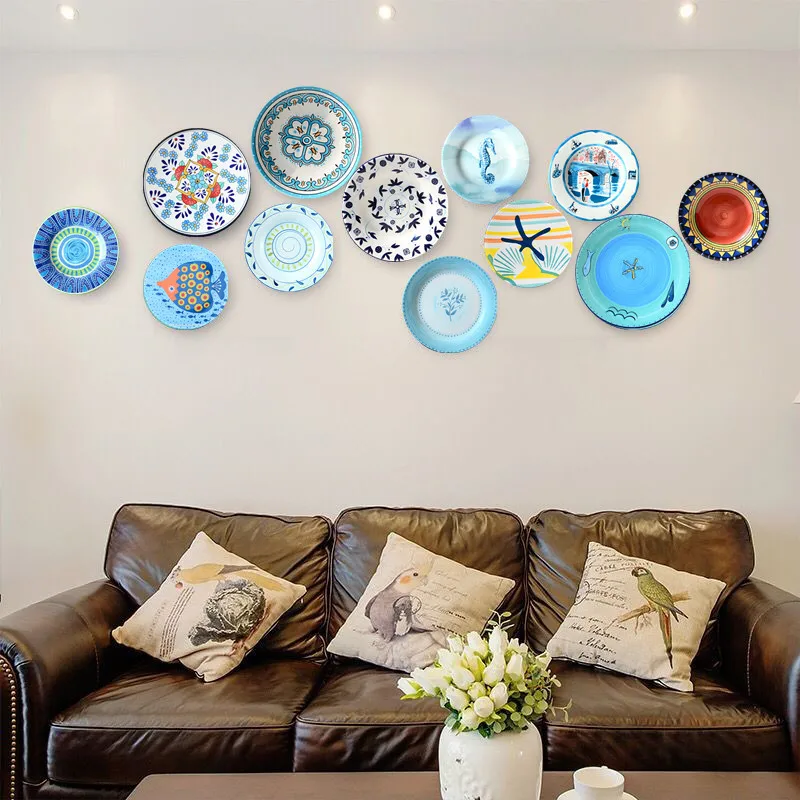 Its couture approach combines interior architecture, interior design and procurement management within one concept-to-completion, fully bespoke service. Creative Founder, Emma Sims-Hilditch is passionate about her belief that good design can transform not only how people live but also how they feel.
71 photos of creating an attractive appearance
Most people find that the best wall decorations are paintings, picture frames, mirrors, vinyl stickers. Today it can still be plates. They can instantly breathe life into the environment. With their help, you can emphasize the strengths of the interior.
Cymbals can also be used as accents. With the right choice of colors, ornament or pattern, they will organically fit into the design of the room. But deciding on a palette can sometimes not be enough. It is equally important to hang them correctly. nine0003
When creating a composition of plates, remember that they will look advantageous on ordinary walls decorated in the same tone.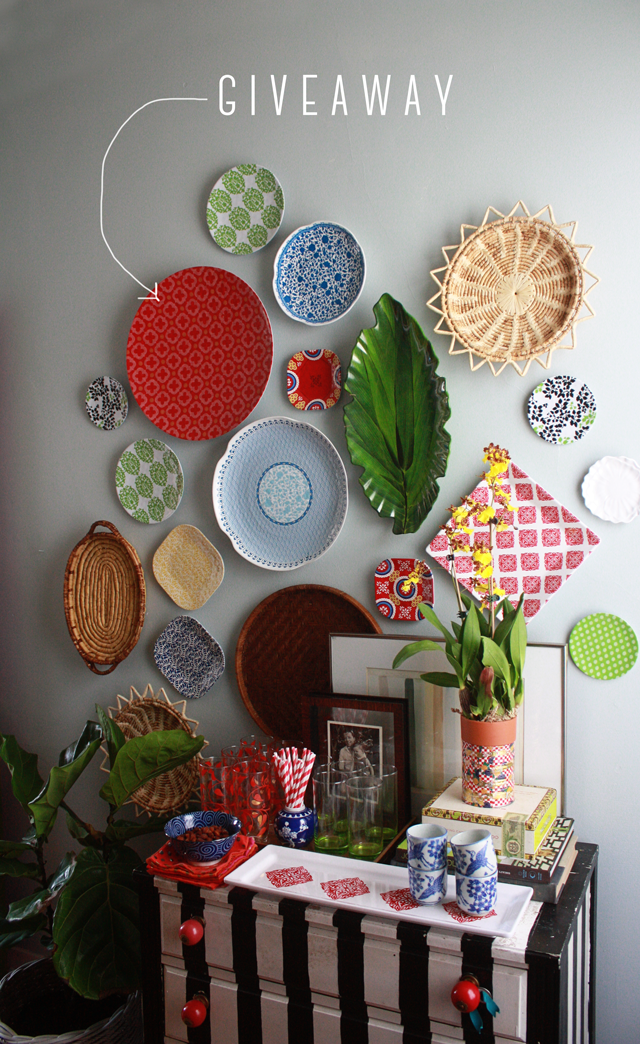 For multi-colored and dark plates, a light background is suitable, and light porcelain decor will be better perceived on dark walls.
When it comes to creating a cymbal composition, harmony plays an important role. Overall symmetry is also important. You can experiment with the shape and size of the plates - the main thing is that the whole group looks symmetrical. nine0003
Plates on the wall can be arranged in the form of a cross, circle, oval, square, star, rectangle or wave.
Place to hang plates
The first thing that comes to mind is the kitchen. Also, plates can successfully complement the interior of a bedroom, hallway, living room, dining room.
Speaking of design styles, the composition of plates can be used in different interior styles. The main thing is to choose the pattern on the product that matches the direction. nine0003
Decorative plates on the walls will look optimal in country, fusion, shabby chic environments.
Scandinavian, Provencal style and classic also accept such decorations.
Mounting types for plates
Below we will answer the frequently asked question: "How to hang a plate on the wall?".
This decoration can be attached to the wall using:
Double-sided tape. You can easily buy it at any store that sells stationery. On the one hand, such Velcro is attached to a plate, and on the other - to the wall. nine0003
Paper clips. From dense material you need to cut a circle or square. Then attach a paper clip to the back of the plate and pour everything with hot glue. Next, until the glue has hardened, put the cut piece of material on top and press it.
Pins. This is the simplest type of attachment. On the back side of the decorative product, you need to drip hot glue and immediately put a safety pin with the opening side.
Ribbons with ring. To do this, you need to take a piece of tape, fold it in half, thread a ring into it and glue it to the plate.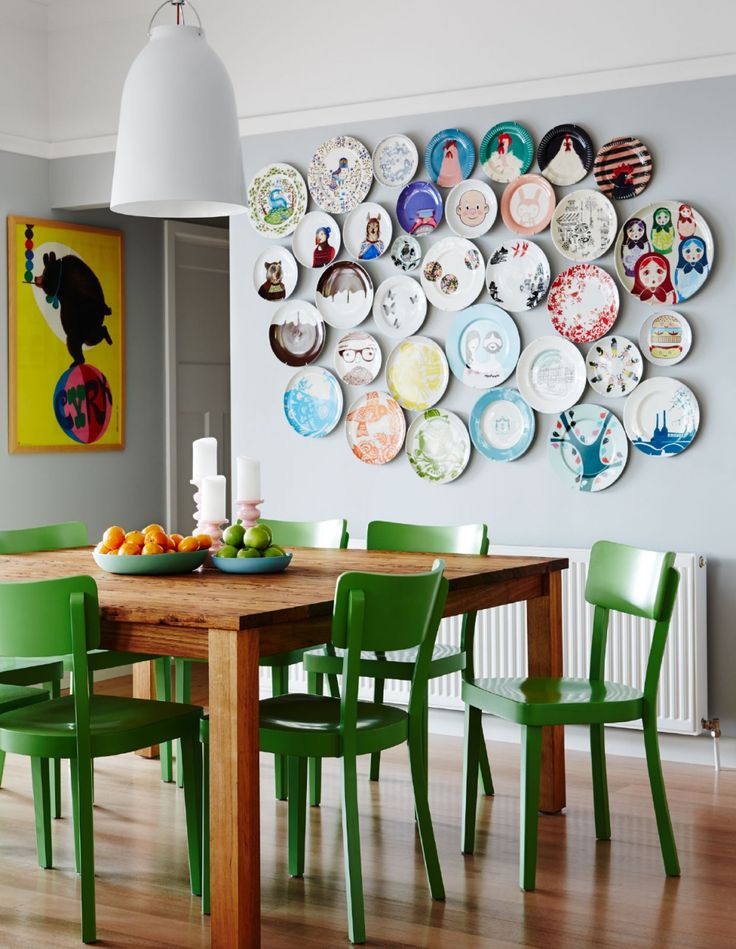 For reliability, a piece of fabric in the shape of a circle can be glued to the ends of the tape. nine0003
Cold welded tapes. It is necessary to fix the tape to the back side of the plate by cold welding.
There are also ready-made types of mounting plates on the wall:
- metal stand;
- metal wall holder;
- transparent material holder;
- special shelf with rails.
Where you can buy plates
A classic place to buy plates are shops and shops selling souvenirs. Most often, such porcelain products are brought from vacations. nine0003
But, if you can't go on vacation soon, but you still want to buy a plate, then Internet stores and retail outlets selling various decor for the apartment come to the rescue.
How to turn an ordinary plate into a decorative item
You will need:
- a simple plate;
- acrylic paints;
- brushes;
- carbon paper;
- printed image;
- a ribbon with a ring or a piece of rope;
- pencil and hot glue.
Place the copy paper on the plate and the selected design on it. Circle it with a pencil.
Outline the resulting image with black or brown paint, wait until the paint dries.
Fill in the drawing completely. Set the plate aside to dry for a few days.
Attach to the product.
Wall decoration with plates is becoming popular these days. After all, it is very interesting to consider them from time to time and remember the history of the acquisition of each copy.
photos of plates on the wall
9000 9000,000000 9000,000000 9000,000000 9000,000000 9000,0000000003
Product to order
Production time: 3-4 weeks
Online payment
By bank card on the website with a money back guarantee
Guaranteed delivery
Shipping within 2 weeks.
Contactless delivery
Dear customers! My store has discounts on Boxberry products and shipping. nine0003
Go to the store
Other products (53)
Product categories
Charms from Favorite Vine Category and brand
All products from Favorite Vine Brand
Pendants Category
Description
A set of hanging wicker wall plates my author's work. I combined two techniques, crocheting and weaving. This is a brand new home decor item. Wicker plates can decorate a wall in any room. nine0003
This set can be made in any color. And the number of items can be made according to your desire.
Care instructions
Wipe clean with a soft, dry cloth or slightly damp sponge. Do not rub with abrasive products! If the wicker plate gets completely wet, let it dry at room temperature without distorting its shape. After drying, it will again become the same strong.