Fix kitchen faucet drip
How To Fix a Leaky Single-handle Disk Faucet
Prevent Mold, Water Damage, and Increased Water Costs With a Simple Repair
By
Bob Formisano
Bob Formisano
Bob Formisano is a licensed architect and builder with nearly 40 years of experience building new homes and restoring older homes. One of his specialties is repairing old systems dating back to the 1920s, including galvanized water pipes, knob-and-tube wiring, and more. His home repair articles for The Spruce span more than 10 years.
Learn more about The Spruce's Editorial Process
Updated on 12/07/22
Reviewed by
Richard Epstein
Reviewed by Richard Epstein
Richard Epstein is a licensed master plumber with over 40 years experience in residential and commercial plumbing. He specializes in estimating as well as design and engineering for plumbing systems, and he works for one of New York's largest union plumbing construction companies.
Learn more about The Spruce's Review Board
Fact checked by
Jessica Wrubel
Fact checked by Jessica Wrubel
Jessica Wrubel has an accomplished background as a writer and copy editor, working for various publications, newspapers and in public libraries assisting with reference, research and special projects. In addition to her journalism experience, she has been educating on health and wellness topics for over 15 years in and outside of the classroom.
Learn more about The Spruce's Editorial Process
The Spruce / Kevin Norris
In This Article
-
Identifying a Disk Faucet
-
Before You Begin
-
Instructions
-
FAQ
Project Overview
Repairing a leaky bathroom or kitchen faucet is generally not a hard job, but it is sometimes complicated by the fact that there are so many different faucet designs, each with different types of parts and requiring different repair methods. Many single-handle faucets use some form of interior ball or cartridge. Most of the time, fixing a leaky single-handle faucet is a fairly simple matter of replacing the faucet cartridge or replacing the ball or its parts.
A single-handle disk faucet, however, uses a different design that requires a different repair procedure.
Identifying a Disk Faucet
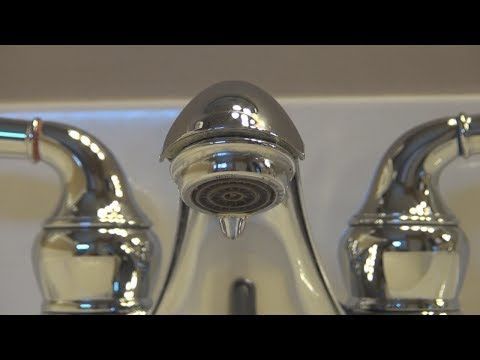
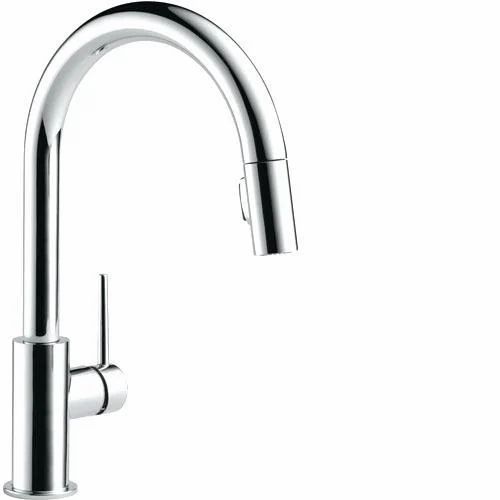
From the outside, the disk, cartridge, and ball faucets look similar. Like most cartridge or ball faucets, a disk faucet usually has one handle (though there are some double-handle models). However, if you are facing fixing a leaky old-fashioned faucet, for example, it is not a disc faucet but rather it has compression valves, which is a much different and easier fix. But while ball faucets have a handle that rotates freely in all directions, a ceramic disk faucet has a distinctive operating motion that includes a smooth forward-back action, along with a left-right rotation. This is similar to the way standard cartridge faucets move, but you'll notice that a ceramic disk faucet has a shorter, wider body, not the upright cylindrical shape common to cartridge faucets.
Inside the faucet body, a disk faucet uses a special type of sealed cartridge with two closely fitting ceramic disks, one fixed, the other moveable. Moving the handle slides the disks around within their cartridge, aligning the holes in various ways to change the ratio of hot and cold water getting through the disks to the faucet's mixing chamber. It is a very dependable design that requires less attention than standard ball-type or cartridge faucets.
Before You Begin
In this project, we describe how to disassemble and clean the parts of a typical single-handle ceramic disk faucet. It is the same repair process if you have a single-handle kitchen faucet with a spray hose. In many cases, a simple cleaning of the seals and water ports will fix a faucet that is leaking. Sometimes, though, a simple cleaning will fail to fix the leaky faucet. In this case, the problem causing a single-handle faucet to leak may be damaged seals that have lost their resiliency.
Unlike other faucets, where seals, springs, and other parts are often offered in repair kits specified for particular faucet models, the seals for most ceramic disk faucets are not sold this way. Nor will you find suitable seals in the universal kits that offer a wide selection of washers, seals, and O-rings. If you find that the seals on your ceramic disk cartridge are cracked or badly worn, the fix is generally to just buy a new cartridge and install it.
Equipment / Tools
- Allen (hex) wrench
- Channel-type pliers or pipe wrench
- Screwdriver
- Utility knife
- Old toothbrush or small nylon brush
Materials
- Replacement disk cartridge (if needed)
- New O-ring for faucet body
- Heatproof silicone plumber's grease
How To Fix a Leaky Single-handle Disk Faucet
The Spruce / Kevin Norris
-
Turn off the Water
The first step in faucet repair is to locate the hot and cold fixture shutoff valves and turn them off. The shutoffs are usually found directly under the sink, at the point where the water supply pipes are connected to the flexible water supply tubes leading up to the faucet tailpieces.
 Some valves have knurled knobs that are rotated clockwise to shut off the water, while others are lever-type valves with handles that rotate one-quarter turn to shut them off.
 You do not need to turn off the home's main water supply to fix this problem. However, if your faucet does not have dedicated fixture shutoff valves, then you'll need to shut off the water supply to the entire house at a branch valve or at the main shutoff valve.
Once the water is shut off, open the faucet to release pressure and let the water drain out.
The Spruce / Kevin Norris
-
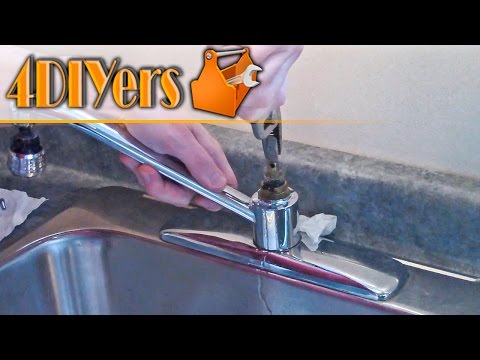
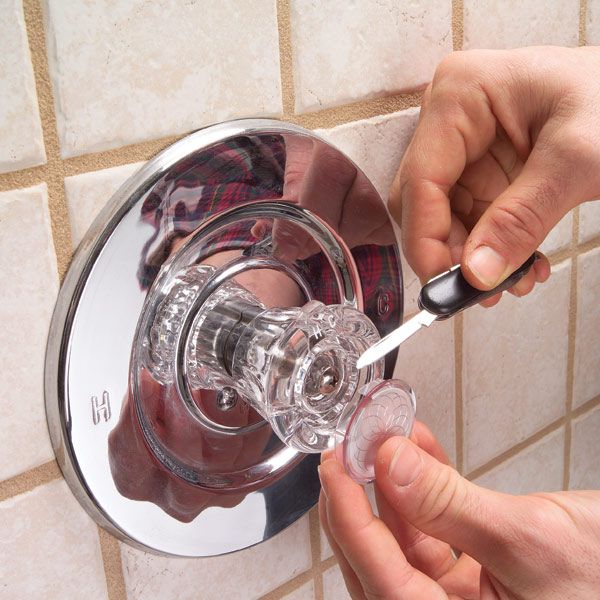
Remove the Faucet Handle
Detach the faucet handle from the faucet body and cartridge. The mounting screw is often concealed under a plastic or metal cap that covers the top of the faucet body, as shown here. If your faucet does not have a plastic cap, the handle may be attached by a hex screw on the side, front, or rear of the handle. Use a Phillips screwdriver or Allen wrench to remove the mounting screw, then gently pull or pry the handle off.

The Spruce / Kevin Norris
-
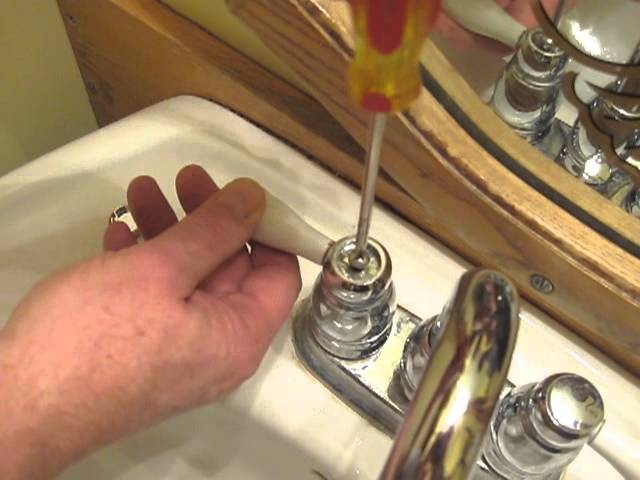
Remove the Disc Cartridge
With the handle removed the disk cartridge is now exposed and can be removed. Some styles have screws or a mounting ring that hold the disk cartridge in place. If you have this style, remove the screw or ring that secures the cartridge before lifting the cartridge out. If the cartridge is sticky, hold the stem with pliers to gently tug it out.
With the cartridge removed, check it for damage. If it is cracked or otherwise damaged, it will need to be replaced. If you have to replace a cartridge, it’s a good idea to bring the old one along to the hardware store, as it makes finding a replacement much easier.
The Spruce / Kevin Norris
-
Remove the Seals and Clean the Ports
The next steps may vary slightly, depending on the faucet's model and manufacturer. In most cases, disk faucets leak because rubber seals in the bottom of the ceramic disk get damaged or layered with grit or mineral deposits.
Inspect the bottom of the cartridge, and remove the rubber seals from the water inlet ports using a small screwdriver. Be careful not to damage the seals. Use a soft nylon brush (an old toothbrush works well) to gently clean the rubber seals.
Also, clean the ports at the bottom of the cartridge. If the ports have a substantial build-up of calcium, a product such as Lime-A-Way may help dissolve the deposits.
Tip
Some faucets have sealed disk cartridges that don't allow you to remove the seals. With these, simply buy an entirely new cartridge and install it. Or, if the seals are cracked or badly damaged, it's usually best to just buy and install an entirely new cartridge, which generally costs no more than $10 to $20. Replacement seals can be hard to find, and it's usually not worth the effort, considering that the entire cartridge is quite affordable.
The Spruce / Kevin Norris
-
Replace the Spout O-Ring
Remove the O-ring from the faucet body neck.
 Coat a new O-ring with a light layer of silicone plumber's grease and install it by setting it into the groove on the faucet body.
 The Spruce / Kevin Norris
-
Reassemble the Faucet
Insert the cleaned rubber seals back into their seal seats. Place the disk cartridge back into the faucet body, aligning the tabs on the cartridge with the notches in the faucet body. If there is a mounting screw or cap, reinstall it.
Attach the handle, then replace the decorative cap (if present). Tighten up the mounting screw of the single-handle faucet just enough until you feel resistance, but don't strip the screw.
The Spruce / Kevin Norris
-
Restore the Water Supply
Set the faucet handle to the center open position, then turn the water supply back on gradually. When air stops sputtering out of the faucet, move the handle to the closed position. Check to make sure the faucet is not leaking. If it's still leaking you may need to slightly tighten or adjust the inner parts.
The Spruce / Kevin Norris
How do I stop my kitchen faucet from leaking?
Having a leaky kitchen faucet can be a real headache. Not only is it annoying to hear the constant dripping, but it can add up to a lot of wasted water (and money) over time.
However, if your kitchen faucet is leaking, don't worry; you may not need to call in a plumber to fix it - there are some simple steps you can take to stop the dripping and get your faucet back in working order. In this blog, we'll cover some common issues that cause leaky faucets and what you can do to fix them.
Loose Connections Can Make Your Kitchen Faucet Leak
If any of the connections between the faucet and the sink are loose, it can leak. This problem is fixed by tightening the connections.
Areas to check include:
-
The faucet and the sink connection.
-
The connection between the faucet and the water supply line.
-
The connection between the hot and cold water lines.
-
The connection between the handle and the faucet body.
-
The connection between the aerator and the faucet body.
-
The connection between the faucet body and the mounting nut.
After determining the source of the leak, you can tighten the connections with a wrench or replace worn parts.
Worn Out O-Ring Can Cause a Faucet To Leak
The O-ring in a kitchen faucet creates a watertight seal between the faucet and the sink. It prevents water from leaking out of the faucet and helps to ensure the water pressure is maintained.
With use, the O-ring can become damaged over time and cause a leak. The best move is to replace this faucet component immediately to prevent further damage or leaks.
Corroded Valve Seat
Mineral deposits can build up inside the valve seat and cause a leak.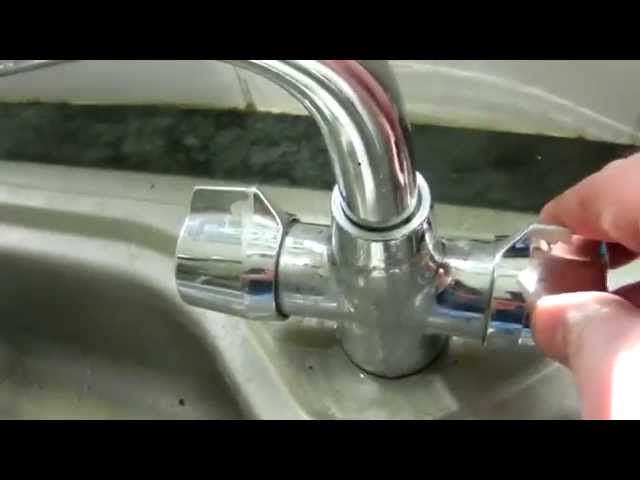 To repair a corroded valve seat, you will need to clean the valve seat and remove any corrosion or mineral deposits that have built up. You can use a wire brush or another abrasive cleaning tool to remove buildup and residue.
If the component is badly clogged with deposits, replacing the valve seat is always an option. This part is widely available at most big box and home improvement retailers.
If Your Faucet Is Leaking Look For A Broken Or Worn-Out Washer
Over time, wear and tear to the washer can cause a leak. If this is the case, replacing the washer should resolve your issue. To do this, turn off the faucet water supply and use a wrench to unscrew the nut that holds the washer in place. Once removed, you can replace the worn-out washer with a new one. Make sure to use the same type and size of the washer as the one you're replacing. Once the new washer is in place, reattach the nut and turn the water supply back on.
A Clogged Aerator Can Cause a Leaky Kitchen Faucet
A faucet aerator is a small but significant component that screws onto the end of a faucet. It mixes air into the water stream, creating a gentler flow that reduces splashing and conserves water. However, debris can collect in the aerator and cause a leak.
If a faucet aerator becomes clogged, it may reduce water flow and pressure. To fix this:
-
Turn off the water supply and remove the aerator.
-
Next, use a small brush or cloth to clean it and any debris from the faucet.
-
Once it is clean, reattach the aerator and turn the water supply back on.
Faulty Faucet Hardware
Faulty faucet hardware can cause a leaky kitchen faucet if the parts become worn or damaged over time. Common reasons include a defective o-ring, worn valve seat, or cracked gaskets. Other causes of a leaky kitchen faucet include worn-out washers, loose nuts, bolts, or a clogged aerator.
Therefore, it is essential to inspect the faucet hardware regularly to ensure it is in good condition and replace any worn or damaged parts.
Homes with hard or untreated water are more likely to experience issues with their plumbing when compared to houses that use soft, treated water.
Hard water is mineral-rich, containing calcium and magnesium. As it applies to the water supply, these minerals can build up in the plumbing system, resulting in clogged pipes. In addition, they can reduce efficiency, causing the water heater to work harder. Installing a water treatment system helps avert these issues.
Overall, it's essential to be aware of the signs of a leaking kitchen faucet and to take steps to resolve the problem quickly and correctly. If the leak persists, it is best to consult a licensed plumber to diagnose the issue and provide reliable solutions.
The faucet is leaking in the kitchen, how to fix and eliminate the leak
Perhaps everyone who uses plumbing with a faucet has at least once come across the question of why the faucet is flowing? In the vast majority of cases, leakage occurs at the joints of the mixer parts. Below we will dwell on the options for solving this problem and the causes of the leak.
The joint between the faucet and the body is leaking
0009, the rubber seal is thinned, connecting the faucet spout to the body.
Leakage can be eliminated by replacing the worn rubber band with a new one . To do this, you need:
- Unscrew the fastening and mounting nuts.
- Remove the worn seal (at the same time you can make sure that the cause is wear).
- Replace the old seal with a new one.
- Reassemble the valve in reverse order.
Faucet mixer leak
Leaking valve
If water drips from one or two wash valves, then, with a high probability, the leak can be removed by replacing the faucet box . This is a block part located directly under the valve handwheel. Crane boxes of two-valve mixers are of two types: ceramic and worm.
How to disassemble the faucet mixer and remove the faucet box is shown in the photo below.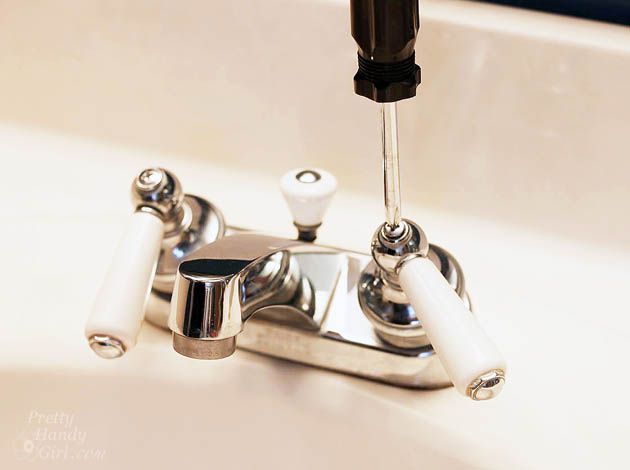
Ceramic bushing repair
In order not to drip from the ceramic faucet box, , a complete replacement of element is needed. To remove the old axle box, you need to:
- remove the valve plug and unscrew the screw;
- after - remove the valve and unscrew the crane box;
- then you need to buy exactly the same item;
- screw it in the same place
- and assemble the crane back.
Of course, the water must first be turned off.
Repair of a worm-drive crane box
Repair of a crane with a worm-drive crane box is easier: not the entire element needs to be changed, but only the seal under it .
The procedure is the same as for the ceramic bushing, the only difference is that you need to replace the gasket under the bushing with a new one and screw it back.
Leak under the nut
0010 .
- It is necessary to unscrew the bushing in the same way and remove the rod from it.
- There should be an elastic band in the groove, which is the gland.
- To repair a kitchen faucet, you need to install a new seal and reassemble the faucet.
The repair of a two-valve mixer is described above. How to fix a leak in a single-lever model is described in the next subsection.
Single lever faucet leaking
0009 change cartridge . As in the case of crane boxes, the cartridge must be bought new , completely similar to the old one.
To repair such a faucet, follow this procedure:
- Shut off the water supply.
- Remove the plug on the tap (you can pry it off with something sharp).
- Remove the screw located under this plug.
- Remove the tap handle and unscrew the trim.
- Pull out the cartridge by removing the fixing nut.
- Replace cartridge.
- Reassemble mixer in reverse order.
Detailed instructions for replacing the cartridge in the mixer with your own hands at the link.
The joint with the water pipe is leaking
In this case, the problem is solved by replacing the gaskets.
Required:
- unscrew the fastening nut;
- remove mixer;
- replace gaskets;
- then - put everything back together.
About the company
We have been producing faucets since 2006. We are pleased to offer you all models of Russian kitchen faucets. For any wholesale buyer, the range of equipment sold is important, so it would be the right decision to expand it with various types of equipment.
We supply equipment to the regions. Delivery in Moscow within the Moscow Ring Road is free. For other cities, check with managers. We realize mixers only wholesale.
The faucet in the kitchen is leaking and dripping
The situation when the faucet in the kitchen is leaking happens quite often in everyday life, and it is not always convenient and profitable to call a repairman. Almost all malfunctions in plumbing can be eliminated by yourself if you correctly establish the reason why the faucet is dripping, leaking, or generally faulty. And to solve this issue, let's figure out how you can fix it yourself.
Contents:
- The main reasons why the tap in the kitchen is leaking and dripping
- How to determine the cause of leaks?
- Construction of kitchen faucets and their types
- Do-it-yourself repair of a faucet in a kitchen sink
- Replacement of a rubber seal
- Repair and replacement of a gooseneck
- Replacement and repair of an axle box
- Tips for prevention 7 90 water supply, sometimes the siphon leaks under the sink at the points of attachment to the sink and the connection of its parts, less often the pipes of the plumbing system leak.
- A low-quality device is purchased. Such situations occur quite often with a large number of cheap Chinese goods on the market, and it is not guaranteed that the goods from a well-known brand are not fake. When buying, you should choose a product in the average price range and pay attention to the material of its manufacture.
- If the faucet drips in the kitchen, the cause of the malfunction may be poor-quality installation of the device by an unqualified specialist, most often the mixing parts are poorly connected or incorrectly selected and gaskets installed.
- The faucet leaks even if it was not used correctly - the handle turned at the wrong angle or excessive force was applied when moving it.
- The main cause of leaks in the kitchen sink is the wear of the main parts of the faucet - gaskets, locking mechanisms (faucet boxes) and other moving parts.
- Sometimes there is a situation in which water from the taps flows in a thin stream or drips when the handle is turned - the cause may be clogging of the aerator filter with sand or dirt at the outlet of the spout.
- Water starts to drip or flows in a thin stream from the gander when the valve is closed.
- Moisture seeps in at the junction of the body and spout.
- Water does not flow or has little pressure when the valve handles are open.
- A leaking kitchen sink faucet is visibly damaged and leaking liquid.
- The leak is at the bottom at the connection point with the supply hoses or pipes.

Before starting the repair of the mixer, it is useful to study the design features of their various types and methods of restoration.
Modern high-tech sensor faucets
The main reasons why the faucet in the kitchen is leaking and dripping
Any repair of a kitchen faucet begins with troubleshooting and the causes of their occurrence, while the following cases most often occur:
Single Lever Kitchen Mixer Taps
How to identify the cause of leaks?
To find out what kind of problem has already occurred and why the faucet is dripping, consider the sources of the leak in the following places:
A leaky or dripping faucet doesn't need to be replaced to fix, most problems can be fixed by hand.
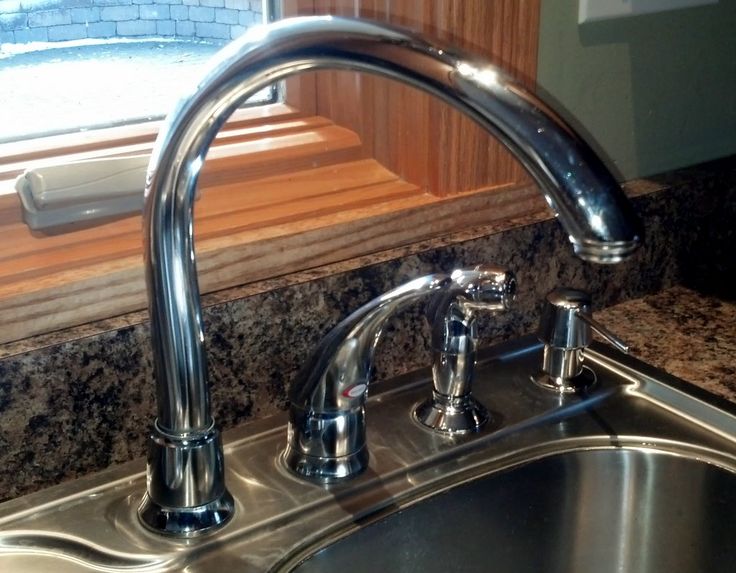
Standard Twin Valve Kitchen Faucets
If the water flow is too low
The main causes of poor flow when the faucet is working properly are clogged filter aerator, broken cartridge or stop valve, abraded gaskets. In the first case, the aerator filter is unscrewed from the spout, cleaned with a brush and washed; replacement of parts is necessary to eliminate other malfunctions.
Leaking under the sink
If the kitchen faucet under the sink is leaking, the water supply hose is probably leaking due to damage or the gasket is worn where it connects to the body.
In this case, you can run to the store for a new hose or seals. The repair consists in replacing the entire hose or the sealing rubber rings on its outlet at the connection point.
Spout connection leak
When a kitchen faucet leaks at the spout connection to the body, the seals at the leaking base have been damaged or worn out.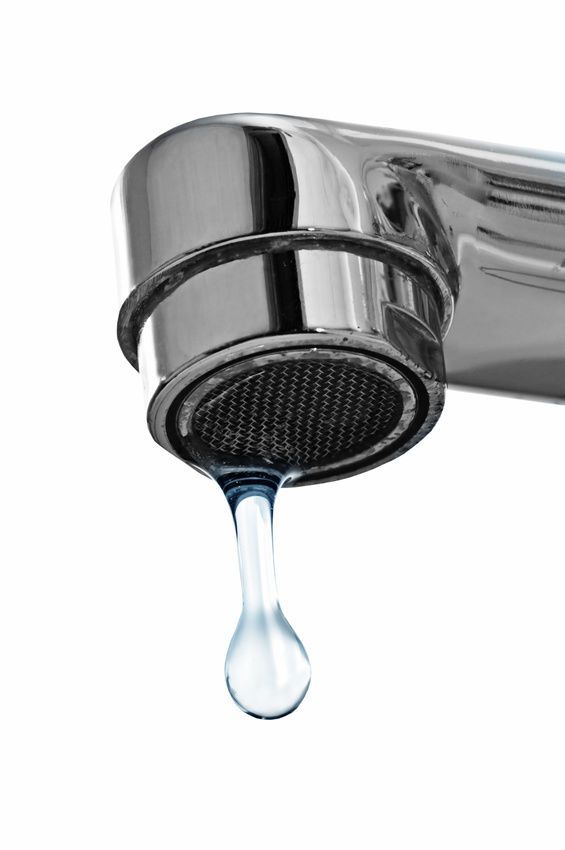 To fix the problem, you should purchase new rubber gaskets and replace the old worn rubber rings with a new seal.
Gander is leaking
The faucet spout can leak if its body is damaged, the main reason for such a defect is clogging of the filter at its outlet, as a result of which the water pressure leads to cracks in the metal tube. If a malfunction is found in single-lever models with a non-separable outflow built into the body, you will have to completely change the mixer, with the exception of the cartridge. In a two-valve design, the gooseneck can be easily removed and replaced with a new one.
Other causes of water leaks
Sometimes the faucet starts to work badly after some time for no particular reason, and it is not immediately clear what to do if the faucet drips. The main reason for such a malfunction is the formation of a precipitate of lime salts on plumbing parts.
In this case, it is necessary to dismantle and clean the faucet, using special household chemicals for cleaning sanitary ware from limescale.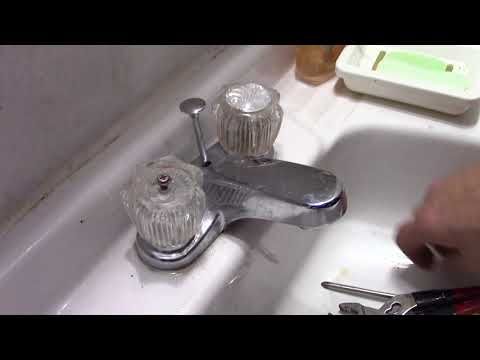
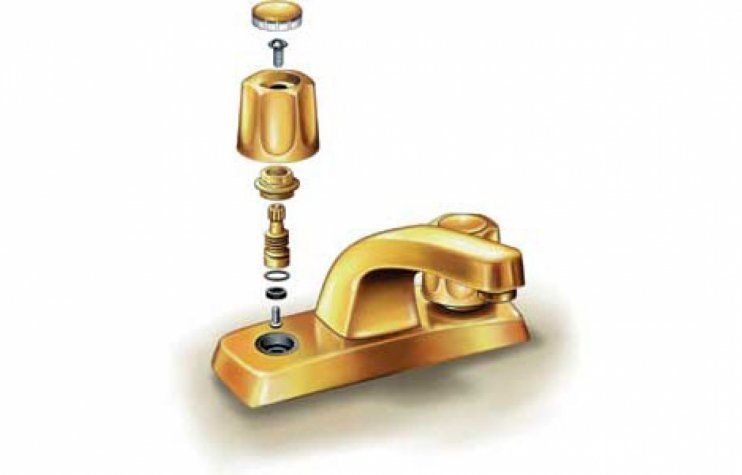
Single-lever faucet components
Kitchen faucets and their types
Although there is a large selection of kitchen faucets on the market, they can all be divided into three groups depending on their design features: two-valve, single lever and touch.
The last type is a product of modern innovative technologies, provides water supply without direct contact when hands and any objects enter the infrared or ultrasonic sensor area. Typically, sensor views are set to a certain temperature and flow, and therefore are inconvenient for use in a kitchen where constant changes in the parameters of the water jet are required.
Single-lever
The ball-type faucet allows you to control the temperature and flow of water with a single lever. The main elements that control the water supply are internal cartridges in the form of a hollow ball with pilot holes or cylindrical cartridges with built-in ceramic plates.
The single-lever type is designed so that the replacement of the most frequently failing cartridge does not present any particular difficulties for any owner, the disadvantages of ceramic cartridges include high sensitivity to water pollution.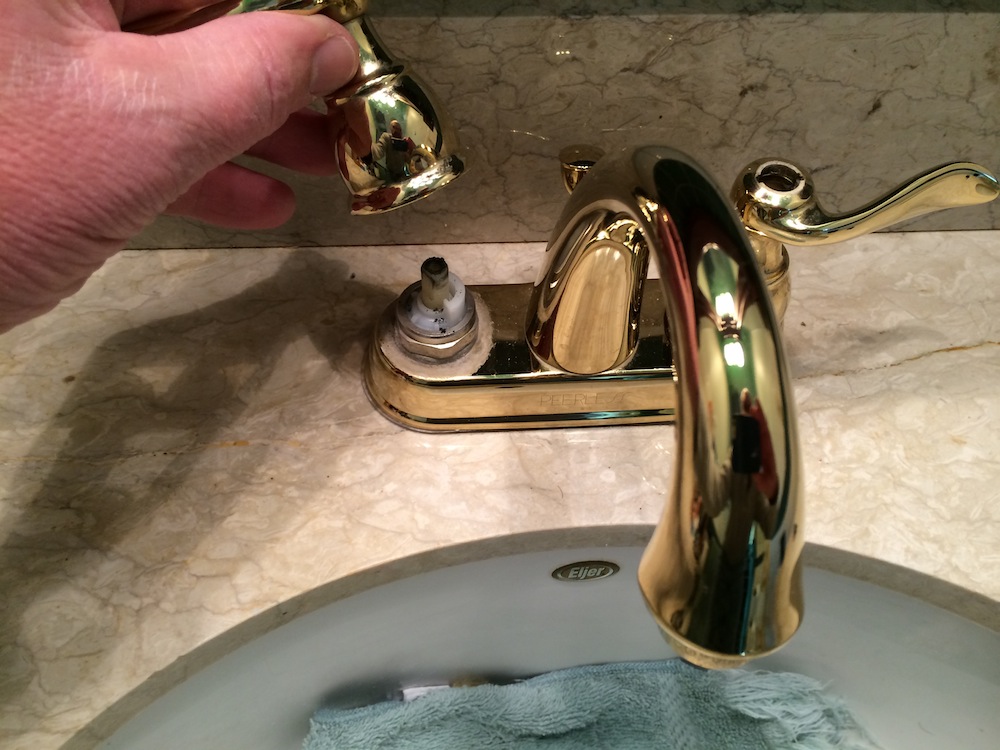
Two-valve faucet - constructive device
Two-valve
Faucet mixers are a classic version of devices for regulating water supply, the temperature setting is carried out by turning separately located hot and cold water valves. The scheme of the valve mechanism can include two types of locking devices: worm with a rubber shut-off valve and ceramic with a ceramic sealing cylinder.
The design of the ceramic kitchen faucet differs from the worm type in that it only takes half or a quarter of a turn to lock and open.
The disadvantage of the rubber gasket is a short service life and poor performance at very high temperatures, ceramics are more wear and temperature resistant, but can be damaged if solid particles of sand enter the plumbing.
Appearance of plumbing valves and cartridges
Do-it-yourself kitchen sink faucet repair
Do-it-yourself kitchen faucet repair is a fairly simple task with the right tools and minimal knowledge of plumbing equipment. The task is greatly simplified when single-lever devices break down - a simple replacement of a damaged cartridge is required to restore performance.
Tools Required
To disassemble a double handle faucet or change the cartridge in a single lever model, tools are required:
- Adjustable plumbing wrench. With it, you can dismantle the two-valve mixer by unscrewing the decorative trim and the nut that secures the cartridge, the key is the main tool of any plumber.
- Allen key or screwdriver. A tool is needed when disassembling the valve to remove the handles and mixer heads, which can be screwed to the shut-off bushings with hexagonal or Phillips screws.
- Sharp knife. It may be necessary for work on removing plugs, fitting rubber seals, cutting linen tow or synthetic sealing tape.
Plumbing Repair Tools and Accessories
Before repairing a faucet in the kitchen, you need to purchase the necessary parts (cartridge, rubber seal) and auxiliary sealing materials in the form of silicone grease, linen rags.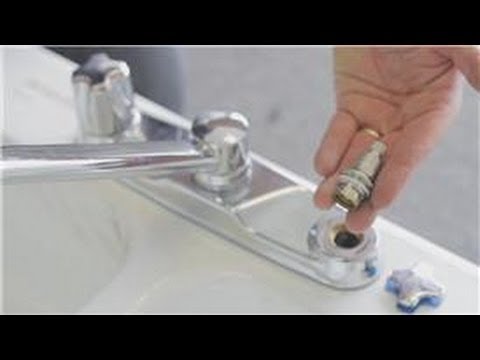 It is useful to have modern highly effective household chemicals on hand to combat limescale, which makes it difficult to dismantle plumbing parts.
Preparatory work
Solving the problem, if the faucet in the kitchen is leaking - how to fix it yourself, before doing the work, you should make the necessary preparation. When a complex repair is ahead or you doubt your ability to cope with the task, you can make a small water reserve.
Repair of a faucet involves shutting off the common water line in the apartment, so before carrying out work, you should make sure that closing the common water supply valves completely eliminates leaks.
Replacing the rubber gasket
Replacing the gaskets in the two-valve model is the most common do-it-yourself kitchen faucet repair. In this case, the sealing rings can be changed at the place where the spout is fixed to the body or on the lock box.
Most often, the seal is worn out or missing on the lock box, the main tool and accessories for the job are a wrench and a set of gaskets.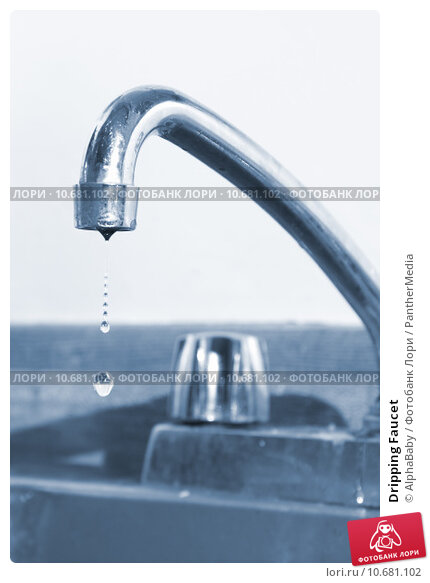
Replacing the seals in the two-valve shut-off box
Before changing the gasket in the faucet, perform the following operations:
- Remove the plastic plug and use a Phillips screwdriver to unscrew the screw securing the rotary handwheel.
- After removing the flywheel with an adjustable wrench, the locking box is unscrewed from the mixer body; in some models, the decorative nut is removed before that.
- Replace the worn seal on the body and the check valve of the axlebox, having previously coated it with silicone grease.
Before changing the gasket in the tide, it is necessary to isolate the metal adjustable wrench from direct contact with the fixing head in order to avoid damaging it. For this, insulating material (duct tape, paper) is placed on a turnkey basis, and after the ebb is removed, the old ring gaskets are replaced with new ones.
When changing the gasket in a mixer with a ceramic bushing, you usually get all the rubber and ceramic seals in a standard replacement kit. The device is disassembled similarly to the example above, the replacement of the gasket in the tap occurs without much difficulty.
The wear of the sealing gum located between the plates of the cartridge case in most cases cannot be repaired, since it is produced in a non-separable design.
Do-it-yourself kitchen plumbing repair - cartridge replacement
Repair and replacement of the gooseneck
Replacement of the gooseneck in a two-valve faucet occurs in the standard way; the old element is unscrewed and a new element is installed. In the single-lever version, the gander is installed in the body, so it is impossible to remove it - you need to completely replace the mixer or repair the current ebb.
Cold welding, epoxy resin and other building materials are used to seal gaps and cracks in the body of a damaged tide.
Since the castings are made of metal (copper alloys, brass) that lends itself well to soldering, soldering is the best and most effective way to restore them.