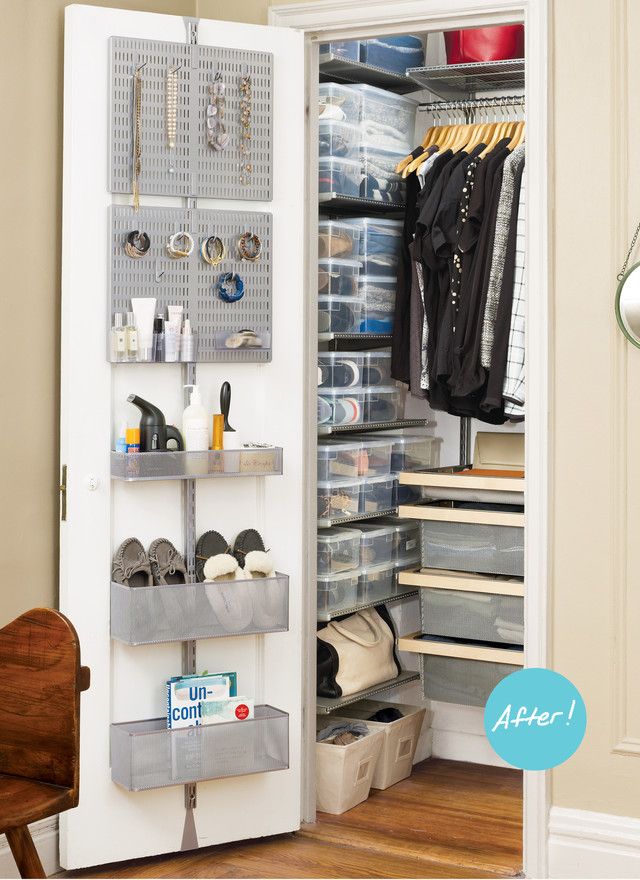
Deck edge finishing
8 Ways to Finish the Composite Decking Ends – Decks By E3
The finish of composite decking is amazing, from imitating natural wood decking to an entirely different look. But the ends. The cut ends of composite decking are less than beautiful, requiring a finishing detail.
There are many ways to finish composite decking ends. Each with its strengths and weaknesses.
Composite decking ends can be finished by picture framing, raised fascia board, painting the ends, attaching decking veneer, composite nosing strips, vinyl stair nosing cove, composite corner trim or plastic end caps. In short composite decking, ends must be hidden or blended into the look of the decking boards.
Lots of ways, but which one is right for your deck? Let me give a short description of each to help you better understand your options to finish a composite deck.
- Picture Frame
The says it all. Install the main decking boards, then finish the ends off with a decking board running perpendicular to the decking. When you are in the yard, look back on the deck, the cut ends are all hidden behind the decking board.
2. Raised composite fascia board
A straightforward way to cover the end of the composite decking boards. Install the decking on the deck, cut flush with the edge joist. Install the composite fascia board flush with the top of the decking
The fascia extending higher than the joist by the thickness of the decking. The decking ends hidden behind the fascia board. With nothing but the beautiful fascia board to see from the yard.
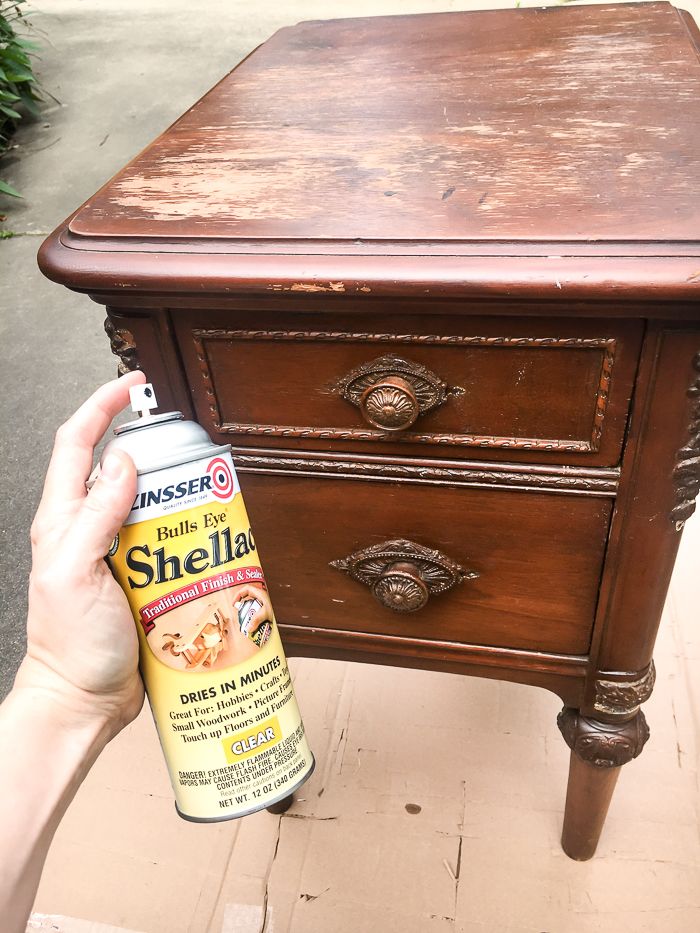
3. Paint the Composite Decking Ends
The problem with composite decking ends is they are a different colour than the decking. The composite is wrapped with its beautiful colour that you love, but the ends are the colour of whatever ground up milk cartons, plastic bags and sawdust are. Which can vary from board to board. The solution, colour match the polymer cap and paint all the ends to match the decking colour.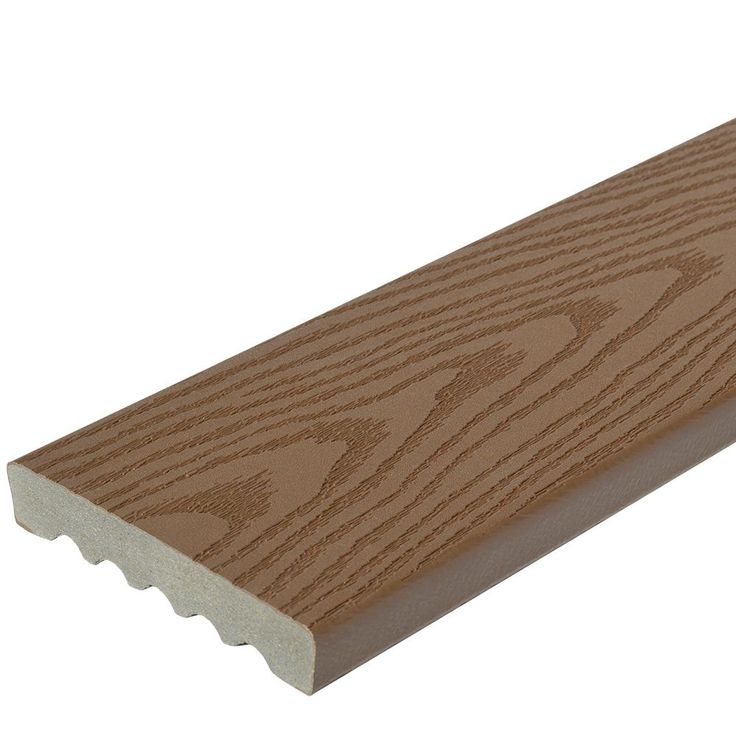 Making the composite decking ends consistent with the deck.
4. Glued on veneer cap
Similar to painting, the decking boards ends but taking it to a whole new level. Attach a thin veneer from the decking unto the cut end. Not only is the decking the same colour as the top of the decking but with the same texture and colour pattern.
Here is a short video of Dr. Decks doing precisely that.
5. Screw end strip to ends
A combination of veneer and picture framing. Rip a composite deck board an inch or so thick and screw to the ends of the composite decking. Giving the decking boards end the nice clean finish of rounded decking edge.
Without all the extra substructure work involved with picture framing the deck or the challenge of attaching veneer to the end of each deck board.
6. Vinyl Stair nosing
An older solution to finishing composite decking ends taken from the interior of the house. The composite decking ends are finished off by attaching vinyl stair nosing to the ends.![]() Finishing the edge of the deck with similar to vinyl stairs inside the house.
Finishing the edge of the deck with similar to vinyl stairs inside the house.
Requiring no extra framing, at a fraction of the cost picture framing a composite deck.
7. Composite Corner Trim
A decking edge cover made of the same material as the decking. The look and feel of a stair nosing cap but in a composite.
8. Plastic Board Decking Ends
A finishing option only for decking boards with hollow cylinders in the decking board. The plastic end caps are attached to the end of the deck board with small taps that are tapped into the cylinders with a rubber mallet. Hiding the holes on the ends of the decking boards with a similar colour plastic.
Of these eight options for finishing composite deck ends, picture framing is my favourite. The decking finish I most often finish composite decking with. There are several reasons, appearance, maintenance and life of the deck of why I favour picture framing composite decking.
Let me explain better my criteria in evaluating the best way to finish composite decking ends.
Contents
- 1 Criteria for Evaluating Composite Decking Ends Finishes
- 2 Advantages and Disadvantages of Composite Decking Ends Finishes
- 2.1 PICTURE FRAME
- 2.2 RAISED FASCIA BOARD
- 2.3 PAINTED ENDS
- 2.4 Glued on cap veneer
- 2.5 Screw end strip to ends
- 2.6 Vinyl Stair Nosing
- 2.7 Composite Corner Trims
- 2.8 Plastic Decking Boards End Caps
- 3 Conclusion of Finishing Composite Decking Ends
Criteria for Evaluating Composite Decking Ends Finishes
The number one driving factor in finishing the ends of composite decking is appearance. However, you choose to complete the decking; it must look good. If it doesn’t improve the look of the ends. You may as well trim the decking and leave it at that.
Finish the ends needs to elevate the look of the decking and the deck.
The end finishing of the decking boards should not increase maintenance required for the deck. We choose composite decking for its low maintenance.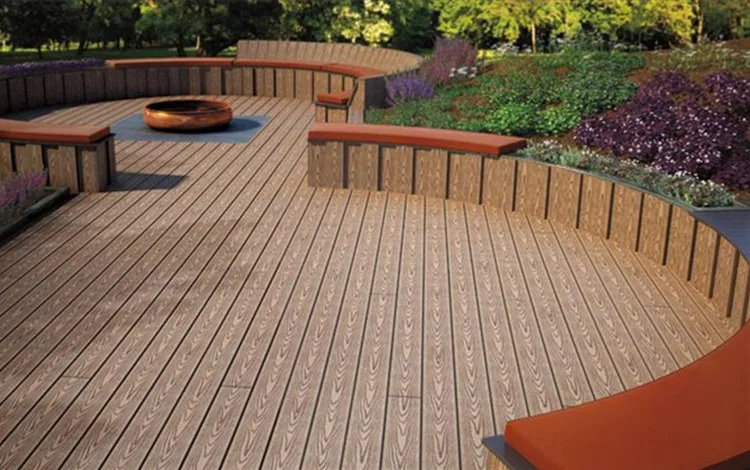
Finishing the deck boards with a finishing detail that requires regular and extensive maintenance destroys the low maintenance advantage of the composite deck. The level and type of care needed for the end detail must match the decking maintenance.
Decking finishing should complete the deck, not create problems. The finish of the deck boards ends should not develop complications for the life of the deck. In particular, trapping water and grime. The single biggest thing that will shorten the lifespan of a deck is trapped water.
End boards finishes should not trap water on the deck, decking or joists.
That being said, let’s evaluate possible decking finishes using these criteria.
Advantages and Disadvantages of Composite Decking Ends FinishesPICTURE FRAMEAdvantages
Picture framing is excellent in maintaining consistency with the appearance of the deck. With a consistent look on all the sides of the deck having the same look front and sides.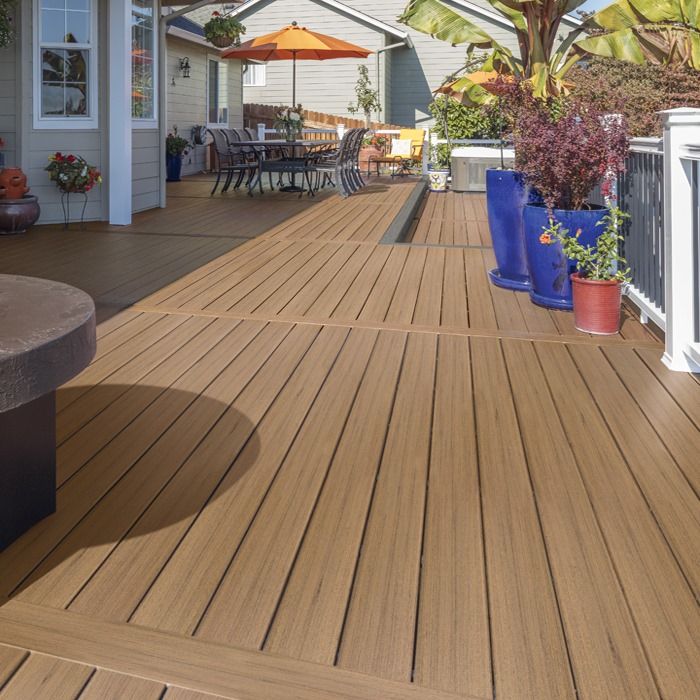
Along with the decking being consistent for the stairs, the treads mimicking the picture frame nosing and end look.
Using the same material, the decking for picture framing maintenance is consistent for the entire deck. The end finish and decking being cleaned in the exact same way.
The deck board resting on top of the end joist adds to the protection of the joist, shielding it from the rain, increasing the life of the deck.
On top of that. The gap between the decking and the picture frame draining water while not trapping gunk. Winning!
This gap also provides room for expansion and contraction of the decking, which is so critical with composite decking.
Not being attached like some other finishing options, there is no conflict between material and movement.
Disadvantages
The most significant disadvantage of picture frame finishing is cost. An additional joist with blocking will need to be added to the edges of the deck. On top of the extra deck board to run perpendicular to the decking to hide the ends.
Picture framing a simple 12′ by 12′ (3.6×3.6m) can add $500 to the cost of the deck once the extra material and labour are accounted for. Often increasing as square composite decking boards without the groove often are only sold in 20′ (6m) lengths, which increases the costs with large offcuts.
The mitre cuts are also problematic with picture framing. As the boards expand and contract during the day and seasons, the mitre joints will open and close. What once was a beautiful mitre joint joints becomes an ugly gap between boards.
RAISED FASCIA BOARDAdvantages
Probablythe easiest way to finish decking ends with no additional costs. Simple trim the decking and install the fascia flush to the top of the decking. All steps and materials that every composite deck requires.
Still being composite decking, it adds no additional maintenance.
Disadvantages
There are two distinct disadvantages of raising the fascia board. First is grime and water, the other the stairs.
With the decking cut flush with end joist and then capped with the fascia board. The potential for water to become trapped between the fascia board and the joist is great. Water is fine. Trapped water rots decks.
Joist membrane can minimize this risk, but it is still a disadvantage of the design.
The stairs are a different issue with inconsistency between treads and the deck. The treads nosing being decking but the deck edge fascia board.
Along with the inconsistency is wear. Decking is designed to be walked on. Fascia is not. Fascia material is thinner and does not have the structural strength to support regular foot traffic. Resulting in the edge of the fascia to wear down prematurely or break off.
PAINTED ENDSAdvantages
Again, a very cost-conscious finishing solution. TimberTech sells matching paint for their decking for under $20. Or you can buy a small “sample” paint from your local building supply store colour matched to the decking colour for as little as five bucks. Either way, the inconsistent colour of the end decking is removed.
The decking ends can still overhang the end joist helping to protect the joist by directing the rain off the deck and away from the joist.
Disadvantages
A traditional look of wood decking but doesn’t always work with composite decking. More and more composite decking is scalloped to reduce cost and weight. Creating ugly decking ends with voids that paint cannot hide.
Even when painted, cut ends look unfinished. The colour may help them blend in, but it’s still a cut end.
Glued on cap veneerAdvantages
Consistency of both the decking edge and ends in colour and texture is the most significant advantage here. Regardless of what angle you look at the deck, it all looks the same.
Disadvantages
Veneer cap is not readily available. Requiring a high level of skill and tools to create your own. The veneer can be cut from offcuts put the additional labour for each piece is high.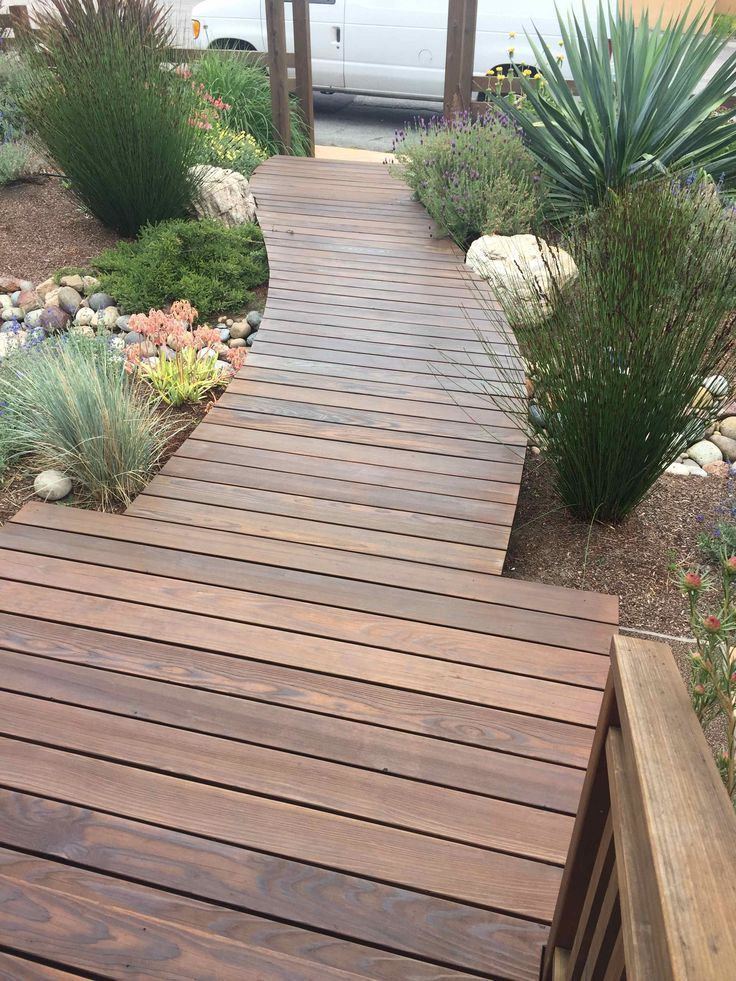
I have never done this but watching Dr. Decks do it for a fascia board makes me think it would add hours in construction to finish the decking. Costing more in time then picture framing the deck does in material and labour.
Also, it is only as strong as the connection. If the glue fails, so does the finish. And for this to work, you must use contact glue, which gives you only one shot to get it right.
Perfectly attaching veneer to 30 deck boards with zero errors. I hope you’re a brain surgeon because the same focus and accuracy will be required. And that’s for a small deck.
The thin veneer has no structural strength. You can glue it in front of the scallop holes, covering them over but one poke. It is game over.
Screw end strip to endsThe same edge deck looks as picture framing without the extra joist and block framing. More for the yard view, not on the deck looking down.
More durable then veneer but not as much as a complete deck board as in picture framing.
Advantages
The simplicity of construction is the most significant advantage of screws decking edge to the ends of decking boards.
Without all the extra framing to support the decking as picture framing, reducing the task in half. Additional material required is slashed to only a third of a deck board for each side of the deck. Bringing costs to only slightly over a $100 to finish the composite deck board ends.
Consistency is also maintained at the stairs with the matching nosing appearance at the deck leading to the stairs.
Disadvantages
Composite decking is not a structural material. That is why it requires so much blocking supporting it. Becoming even more apparent with smaller strips of decking.
The strength is only as good as they are fasteners to the ends of the decking.
Requiring either a high number of screws into the decking. Attaching the strips securely to the decking ends.
Or glue them similar as veneer but longer pieces along with screws holding in place.
This won’t matter on a deck with railing.
But at the stairs, it could potentially break off with high foot traffic. As the nosing is the most stepped on part, of a deck.
Vinyl Stair Nosing
They are a few different nosing materials available that can be used on composite decks. Three of the more common are vinyl, aluminum or plastic. Resting on top of the deck and then hanging over the edge covering the cut ends of the deck.
Advantages
Installation of vinyl stair nosing is easy. Roll it out. Trim to size. Fasten with pan head screws or glue down to the decking.
As stair nosing is not the same material or colour of the decking, it can create a border around the deck with colour contrast. Highlighting the edge of the deck. Which is good both aesthetically and for safety. As it minimizes accidental steps off the deck.
The added material on the edge of the decking and treads increases grip, minimizing slipping. A common complaint with some composite decking.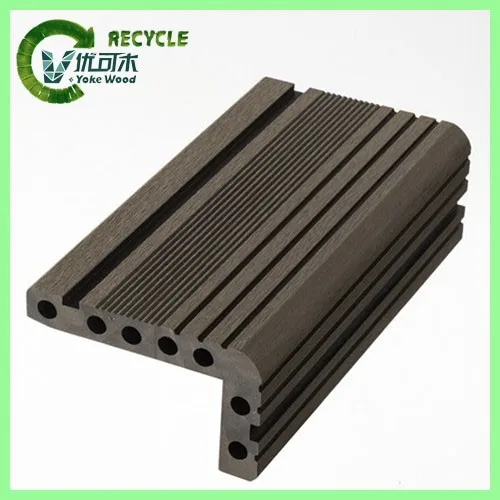
Disadvantages
The different materials may create contrast around the deck, but the change in material can be detrimental. Most composite decking has a life expectancy of 25 years or more. Not stair nosing, often wearing out sooner. Needing to be replaced long before the decking. Increasing maintenance. Not annually but before the decking.
That traction grip around the edge of the deck is also a dam. The small lip trapping water and dirt on the decking. For composite, it won’t increase rot, but it does make it harder to clean the deck as not all the water and dirt will run off the deck.
Composite Corner TrimsSimilar to vinyl stair nosing except the same material as the decking, composite. However, limited availability as few manufactures offer composite corners.
Advantages
One of the most significant advantages of composite corners is it is composite. The same as the decking. Requiring the same maintenance with all the same benefits of composite.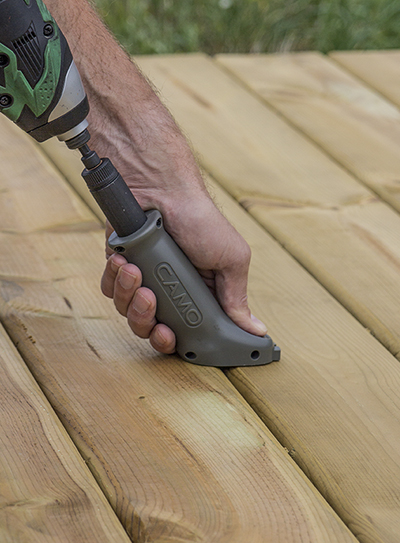 Good decking, good trim.
The cost is also very reasonable. Composite trim is less than $40 for a 12’x12′ deck. Costing less than one piece of decking and not requiring all the extra framing details to support it.
Disadvantages
But just like stair nosing, the small lip around the perimeter of the deck will trap water and dirt. Making cleaning the deck harder.
Plastic Decking Boards End CapsOnly available for hollow cylinder composite decking. With small plugs that are tapped into the holes holding the cap into place. Finishing of the decking but covering those unsightly holes on the ends.
Advantages
Does not require additional framing, while still allowing the decking to overhang the framing. Providing a clean look to the deck while leading the water off the substructure.
All while keeping installation simple.
Again, at a reasonable price. Around $60 for a 12’x12′ deck. Hard to compete with that price.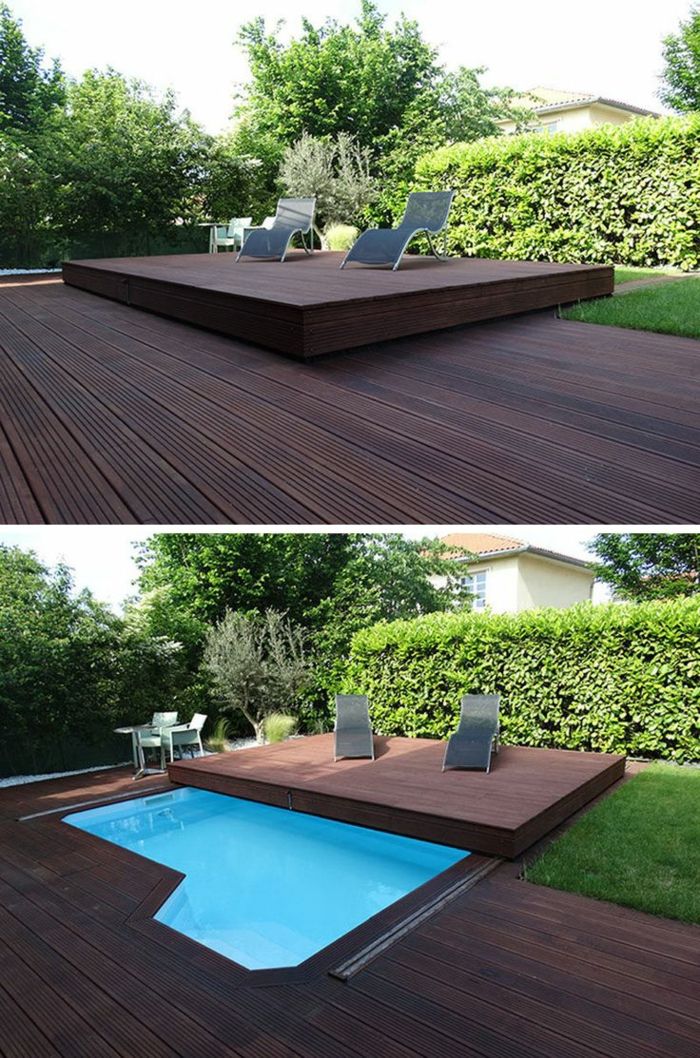
Disadvantages
This is not a one size fits all solution for decking ends. Only available for composite with cylinder cavities to receive the plugs.
The single largest drawback is it does not live up to the promise. There are many complaints that even though it sounds simple to install. Line up to the holes and tap in. It’s not! Frustrating precision is required to tap the ends in equally. Not overdriving one side, binding the plugs.
Then once you get them installed, they break way easier than they should. Requiring the damaged ends to be pulled out and replaced. Often in only a few years’ time. Way too soon for a composite deck.
Conclusion of Finishing Composite Decking Ends
However, you decided to finish your composite board ends. Choose a way that will not increase the maintenance of the deck. That will genuinely hide the unsightly ends.
This includes not complicating cleaning the deck by creating water dams. That traps water and dirt on your deck.
If your deck has stairs, finish in a way that is consistent with the stair nosing.
I think most often, picture framing checks all these boxes. Followed by raised fascia if the budget is tight. Two of the best options for finishing composite decking ends.
If you haven’t yet decided on which composite decking to buy. You should check out my list of the best composite decking brands. Composite decking is great but it is not all created equal. Some brands excel better in certain applications, others have better warranties and others just look better. But you should just click the link to find out.
3 Ways to Finish the Ends of Composite Decking
🡐 Back to Blog
Friday, January 7, 2022
Decking
Composite decking has the power to transform any outdoor space and the durability to withstand even the harshest climates. It is stronger, lighter- and more resistant to moisture and pests than wood, making it easy to install and maintain.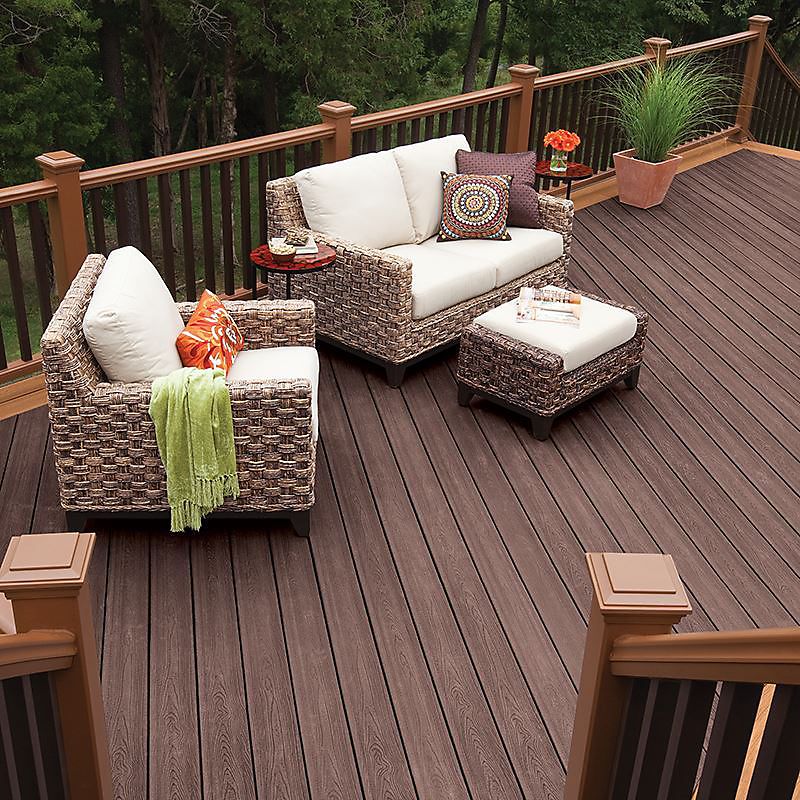 Perhaps, this is why Qualified Remodeler notes more and more homeowners all over the country are choosing composite decking, which “has surpassed wood’s popularity in some regions.”
With its increased popularity, many homeowners want to know how to finish the edges of composite decking. Despite the added benefits of composite decking, if homeowners skip the finishing touches, their decking project may feel incomplete. There are several options to finish a composite deck that complement the home and complete the outdoor living spaces. Here are three trending solutions.
1. Raised fascia boards
2. Picture frame
3. Edging perimeter with alternative material
1. Raised fascia boards
Perhaps the easiest way to finish a composite decking project is to install fascia boards. These boards are thin and attached directly to the deck substructure, finished-looking materials that create a smooth line across the deck’s side. They need no additional structures, so fascia can be cut and installed onto any deck.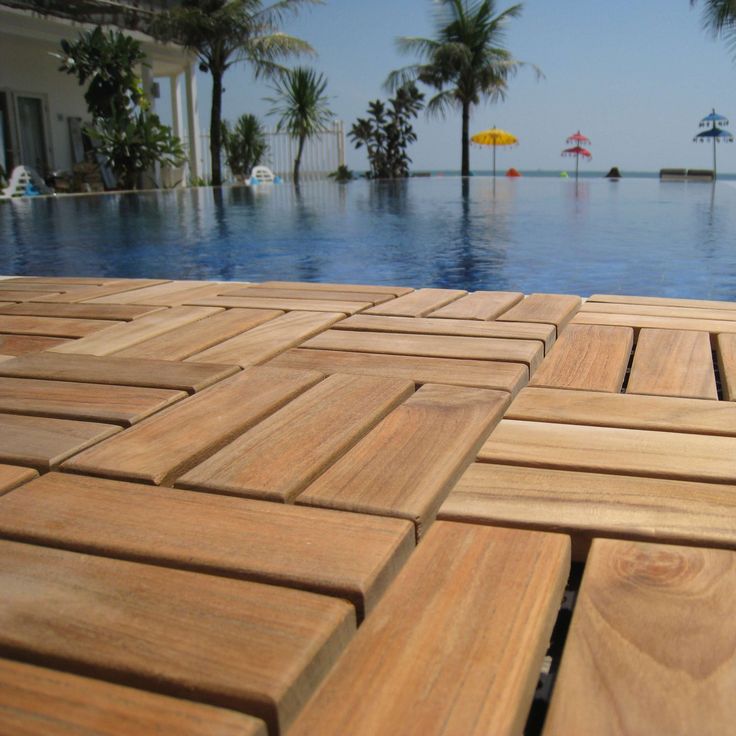 To hide the fascia’s edges, simply cut the corner edges at 45 degrees to ensure a clean fit all the way around.
Pro Tip: Consider matching or contrasting fascia boards with deck boards and cladding. Matching boards supports a more traditional look, while contrasted boards gives a subtle nod to picture-framed decks.
2. Picture frame
Homeowners can install a picture-frame finish by running boards perpendicular to the main decking boards. Slightly more labor intensive than raised fascia, picture framing hides the ends of composite decking while allowing homeowners further opportunities to express their unique design visions. Additionally, this process protects joists, increasing the structural stability and durability of the deck. That said, this way of finishing a composite deck will require additional joists and boards. The experts at the Journal of Light Construction have written a guide to help first-time DIYers and seasoned framers alike navigate the process.
Pro Tip: Contrast a light deck with a dark picture frame for a modern look. Because the picture-frame border uses a small portion of the deck’s area, this look can even be used in warmer climates.
3. Edging perimeter with alternative material
For floating or platform decks, edging the perimeter with bricks or stones can be the perfect answer to hiding the edges of composite decking. These materials add a touch of contrasting color and texture to any composite deck while softening the transition from deck to lawn. They can also act as a way for those with brick or stone houses to add a visual connection to their decks.
Pro Tip: Edging the perimeter of a composite deck with bricks or stones is labor intensive and can require specialized tools, so consult with an expert before choosing this method.
Hiding the ends for a beautiful finish
As said above, there are several ways to complete a composite deck. These three options are just the tip of the iceberg. How homeowners finish their composite decks depends entirely on their specific needs and design aesthetics. Maybe the simple elegance of raised fascia is the right choice, or maybe a boldly contrasting picture frame makes the perfect statement. Alternatively, edging with stone or combining some of these finishes can create a one-of-a-kind look. Whatever the decision may be, Fortress® decking can fit a variety of finishes for an outdoor space as unique as the people who enjoy it. And with composite materials that can withstand some of the harshest climates around the world, homeowners can be sure their decks will be the outdoor extension of their homes for years to come.
You May Also Like:
What are Deck Post Caps and Why do You Need Them?
3 Tips to Turn Your Deck Into a Modern Farmhouse Inspired Outdoor Retreat
Screws, Nails or Hidden Fasteners – Which should You Use on Deck Boards
×
Fortress Building Products uses cookies to improve your user experience. By using this site, you accept our use of cookies.
Finishing the area around the pool
Photo 1 of 2
The luxuriously finished space surrounding your pool, your deck, can be the focal point of your entire backyard or backyard. Whether it surrounds only your pool or even your home, whether it is a surface for your entire yard or just a modest walkway around the edge, the deck will always be the place where you want to gather for outdoor recreation, family entertainment, a wild reception or relaxed loneliness.
There are different types of decks and choosing the one that works best for your needs will depend on many factors. But the first thing to consider is how you want to use this finish. To provide more usable outdoor space for any activity, to complete the look of the pool - or both.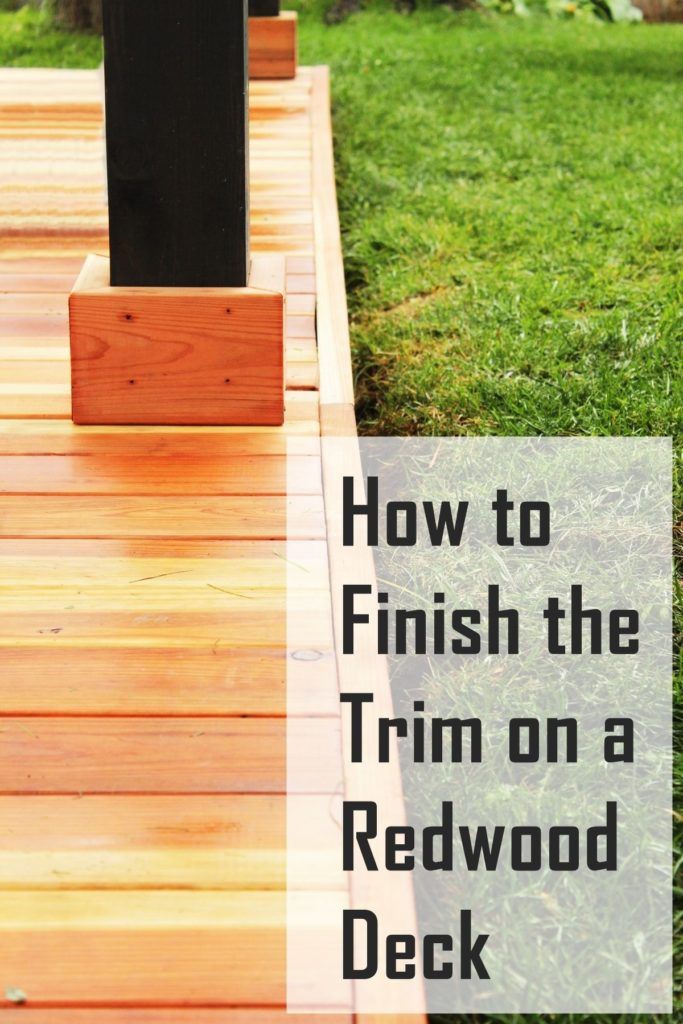
Many pool owners do not use their reservoirs to the maximum solely because they did not provide for a well-equipped surrounding area in due time. A minimal percentage of people believe that they have wasted space on their site by equipping a special deck around the pool.
There are many projects and options to consider for potential construction. To best determine what you want for your deck, it may be convenient to follow the following guidelines.
Discuss with someone who already owns a pool and its surrounding finishes how to install a deck. Find out their claims or positive experience, take into account complaints or regrets about what was missed in the process. Personal meetings are optional - now such issues are resolved with ease in specialized forums, for example.
Discuss what you are looking for in building such a deck with several contractors. Ask for samples of their work, and if possible, talk to one of their clients. Read the reviews, make sure that all instructions and norms are followed.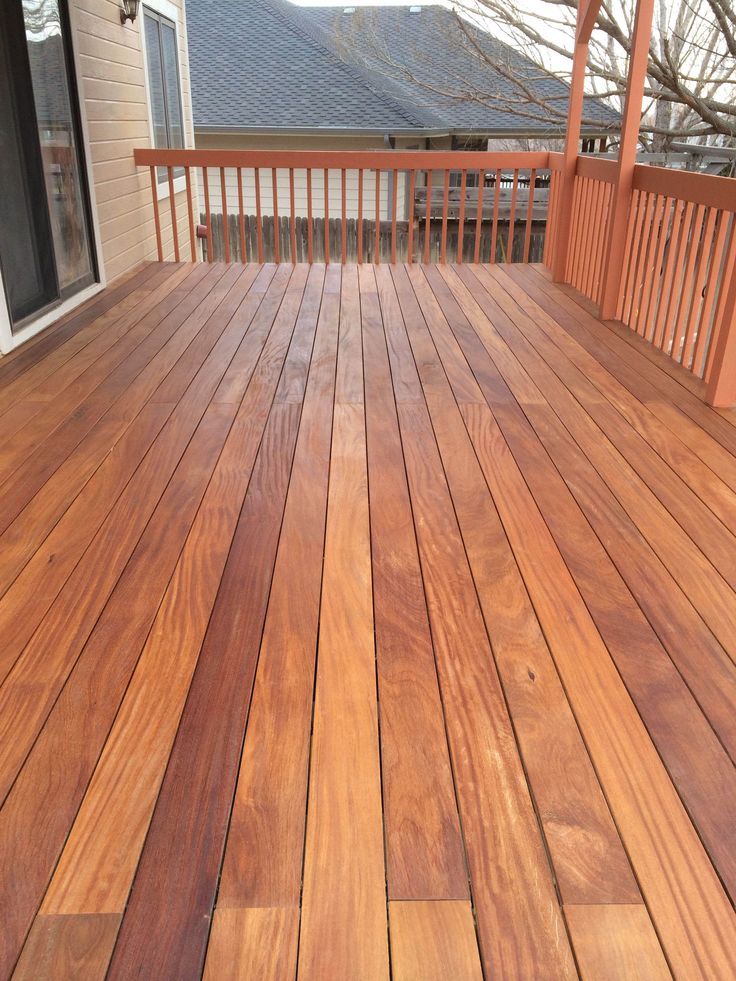
Use reference materials. Get acquainted not only with profile information like the one below, but also promotional materials for construction companies, design projects, landscape design magazines, etc.
Take your time when deciding. Carefully research the main purpose of the construction and move on only when you feel confident in all parameters and decisions. Regardless of the type and size of deck or patio you choose, this build is an investment for years to come. And it is important not only to get a result, but also to enjoy the fruits of your labor.
Finishing the adjacent territory
For many homeowners, such a deck is a full-fledged extension of the territory and an extension of the house. With the right planning and design, any patio can be transformed into an outdoor space that's perfect for meetings, family dinners, or just relaxing and unwinding. Backyard decks can be made from a variety of materials in this case, but hardwoods (e.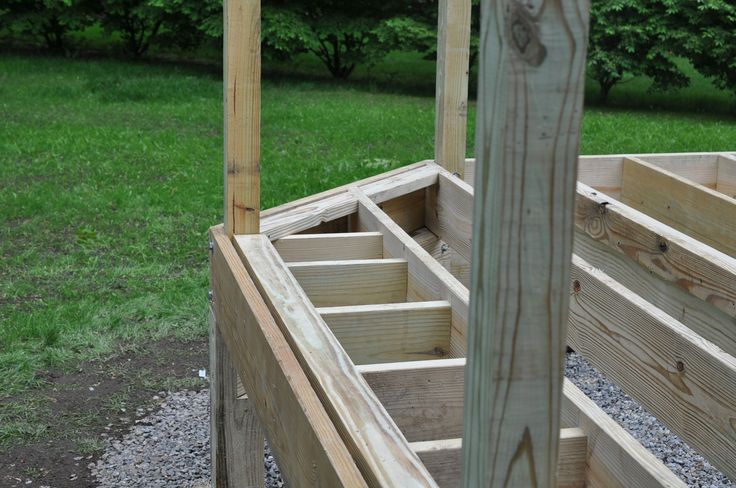 g. eucalyptus, oak, maple, etc.) as well as pressure treated and composites are considered the most. All of them are versatile and durable.
Teak, ipe, brazil walnut and mahogany are woods that are naturally strong. These tree species evolve by surviving the daily rigors of harsh, wet, insect-infested rainforests. After harvesting processes, they also acquire their elastic properties, becoming excellent building materials. I must say that when working with such materials, specialists most often take special precautions in advance (for example, such as pre-drilling holes with special equipment) to avoid delamination and preserve the natural beauty of the pattern of these exotic materials.
Other options are mahogany, cedar and cypress. In the past, mahogany was very popular for decks due to its hardy constitution. In some regions (worldwide, not because of sanctions in our country) limited supplies are now visible, and therefore cedar is increasingly found as an alternative.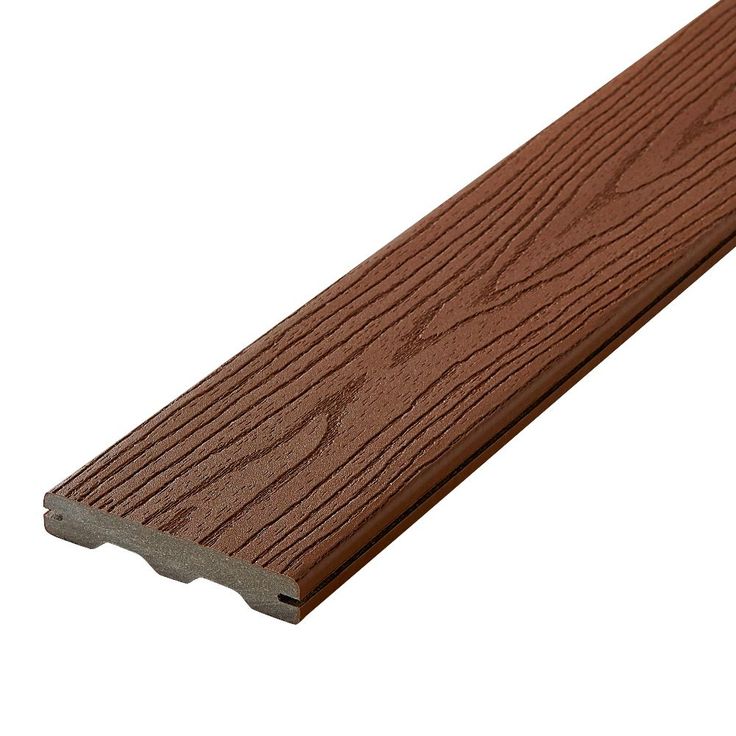 It is easy to work with and its thermophysical properties keep it cool when the weather gets hot. Plus cedar forests are more abundant, so the environmental impact is not as significant. Cypress has advantages similar to its cousins: it is rot resistant plus strong and hardy. Regardless of which wood you choose, it's important to approach the source carefully.
Pressure treated trees have received negative reviews for some time. But despite this, they are the most popular choice for decks - almost 70 percent of all pool environments are made from this economical material. Chemically treated, it is resistant to termites and rot. Most often it is made from red and yellow pine and several types of spruce. This is a plentiful and renewable resource.
Composite and vinyl decks are preferred by those who want to create an environment outside of traditional styles. Although initially more expensive than wooden decks, artificial materials are low maintenance and can be a more economical choice for the exit.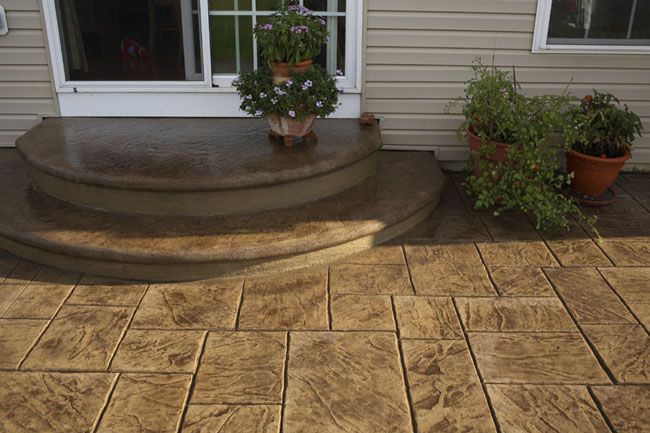
Pool environment
For pool owners, the deck just surrounding the pool is important for both looks and feel. Grip, tactile sensations, visibility for swimmers are important, as well as a full-fledged area for sunbathing. Thus, such a pool environment is an integral part of the overall design of the basin landscape. It should complement the design of the pool and be easy to move around.
There are many options for decks and walkways, including wood, concrete, stone, tile and composite. Each of them has his own set of pros and cons. For example, cobblestones tend to absorb heat and get too hot, while travertine stays relatively cool in the summer sun. The final choice should be based on many factors such as budget, environment, style you prefer, how much you are willing to spend on maintenance, etc.
Materials such as ype and mahogany are also popular choices for pool decks. Mostly because of their rich and luxurious texture. Concrete is a fairly flexible choice, also because it can be stained, additionally decorated with stones and decorative rocks, stenciled, rock salt finished and stamped. All this allows your deck to have a more natural look. Natural stone such as granite, bluish sandstone and travertine are beautiful, landscape-forming materials that enhance the pool's appeal.
Composite decks are low maintenance alternatives. Although this type of finish may cost more initially, after some time it becomes cost-effective. Decks around above ground pools are not just places where you drop things before you enter the water. They can carry not only a decorative role, but are also quite "combat assets" with utilitarian benefits: for example, they can become sunbeds, provide lighting, place plants. They can surround both underground and above-ground pools. It is enough to make gentle slopes, slopes, “introduce” any options or even attractions into the surface, etc.
Composite lumber has become quite popular.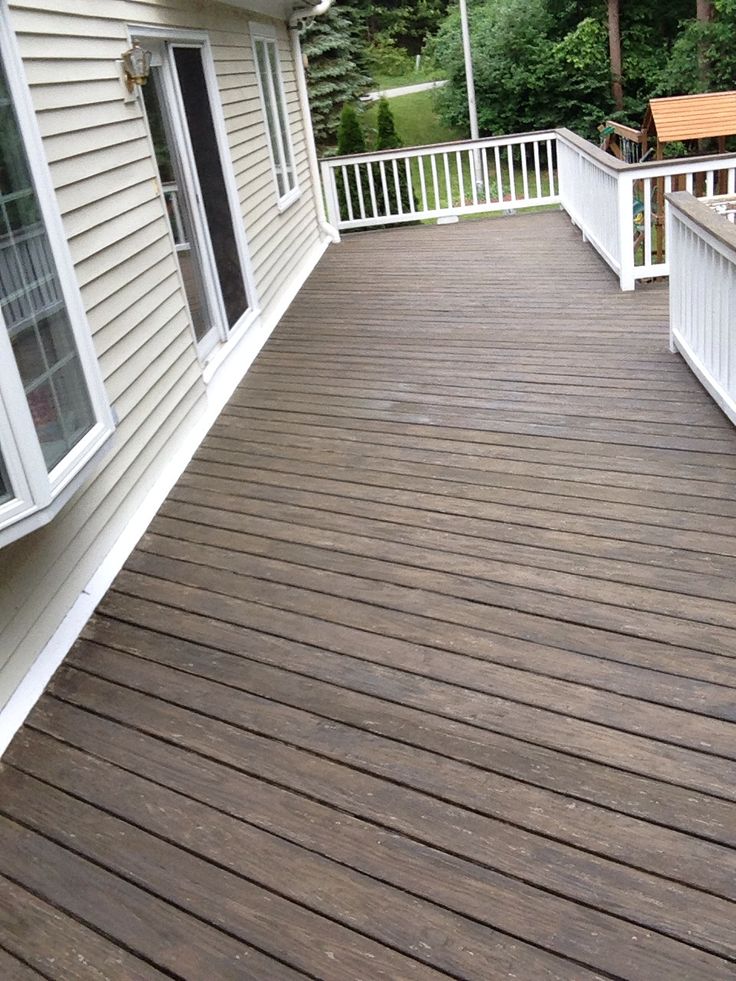 They cost less and are extremely durable, environmentally friendly and maintenance free. Such compounds do not contain chemicals, adhesives or additives. In fact, these lumber is made from a combination of sawdust mixed with plastic. Many of these new composite materials offer up to 20 years of warranty against warping, rotting or insect attack.
Another option is aluminum and PVC. They are quite popular for building large deck areas in temperate climates. The good thing about aluminum and PVC trim products is that they are available in a wide variety of colors and can, for the most part, "mask" the plastic look. In addition, aluminum is commonly used for boat decks. In boat finishing, it shows itself as a strong waterproof option no worse than timber. It won't burn your feet, it's fairly light and sells for reasonable money. The aluminum finish is especially interesting with white, light gray and wood tones in the design. The limitations of aluminum as a finishing material include difficulty creating curved edges, but corner edges can be accommodated.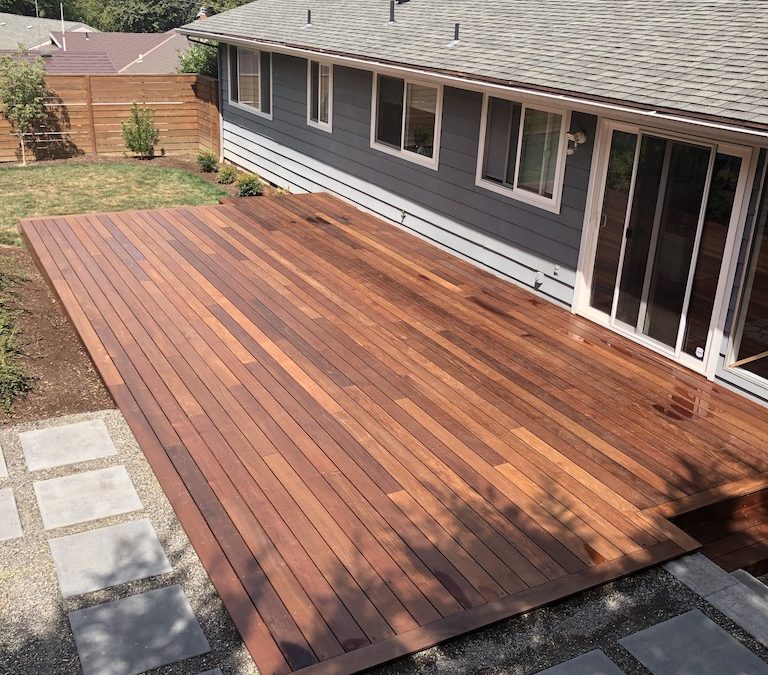
New deck for your yacht
One day you fall through deck of your favorite boat.
Maybe it's time to repair ?
Wood deck fabrication detail described in the book "Building Yachts" by Reinke et al. Using this technology, we changed the deck and roof of the cabin in Tallinn quarter-ton.
We pasted with Kleiberit glue larch slats 35mmx15mm with a groove 4x6mm for 6mm plywood, the slats from below were attracted with small brass screws, the grooves filled with polyurethane sealant, then sanded the deck disk, clamped in a large electric drill.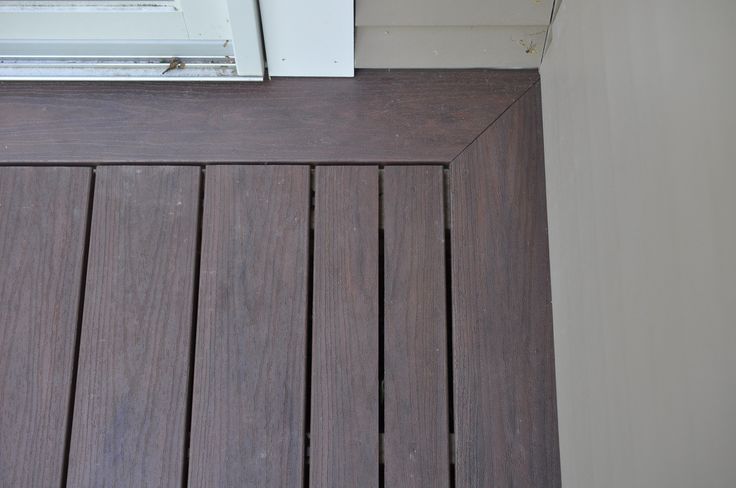 It turned out very strong and beautiful, but long - I later estimated the costs time in 500 hours. This includes the dismantling of all efficient things, lifeline racks, etc., removal of the old deck, replacement parts of beams, gluing plywood and laths, sealing and coating with polyurethane varnish, installation of practical things. Kleiberite (rather than epoxy) was used for a reason much better adhesive properties in conditions of increased humidity - our climate is damp, and repairs were carried out under open sky. By the way - a reliable tent is required in any case. Wood must be dried in a dryer to standard (12%) humidity.
Later, on the WEST SYSTEM website (now this the link is already dead), I found another cover option which is allows, in my opinion, to reduce the time spent on 15-20%. However, modern equipment is desirable here. for the manufacture of thin wooden plates. If I had to cover the deck now, I would use this technology.
The essence of the method is to stick thin planks of teak or larch on a plywood base or prepared surface of the repaired deck. Pressure at gluing is provided by screws with wide washers, which are screwed into the grooves between the strips with a step of 200 mm, at the same time determining the width of the grooves. After curing adhesive screws are unscrewed, the grooves are filled with epoxy resin with filler. The entire deck surface is sanded and protected by paintwork.
SELECTION AND PREPARATION WOOD
First of all, you need to get the required amount of quality wood. Tick, of course the best choice, but we did not even dream of it. Larch - closest substitute for teak wood, especially good "Ayan".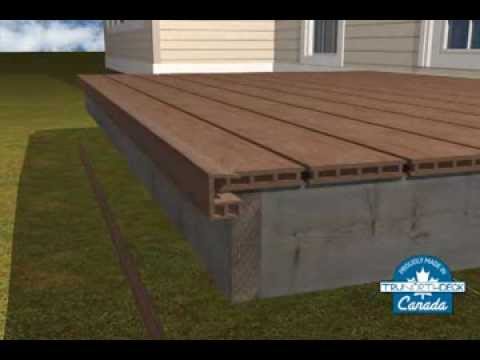 (Everything that follows is written about the choice wood and gluing, applies equally to teak). You need to buy boards - 4 or 5 cm thick, depending on selectable rail width. We used 4 cm boards and received 35 mm rails at the output. The width of the rail depends on the need to bend it. If the boat is large, or the slats will be stacked parallel, it is advisable to choose the width more.
Boards must be dried in an industrial dryer to standard humidity (12%). It takes usually a month and a half. Use of raw wood in deck - a waste of time - it is drying up, and very much.
Process boards to net size (then it will not be possible to do this) and cut the slats, Be sure to take into account the direction of the growth rings!
Annual layers of wood must be perpendicular to the plane of the rail, or at an angle, but as much as possible closer to perpendicular. All must be completely cut out. wood defects. The rejection of the forest in this case is very great, unless you were able to select boards when purchase. However, this reduces the likelihood of cracks. due to drying of wood and improves the appearance of the deck. The high-speed circular saw gives a surface that does not require additional processing before gluing.
GLUING PREPARATION
We completely ripped off the old deck and deckhouse roof, part of the deck set also had to be replaced. Before that, you need to carefully remove all practical things, fixed on deck, cockpit coamings, hatches, winches, railings, etc. After the repair of the deck set on it glued plywood with a thickness of ~12 mm on the deck, on the roof felling - 2 layers of 6 mm. It's good if there is a real marine plywood, however we used waterproof construction, considering that it will be adequately protected from water.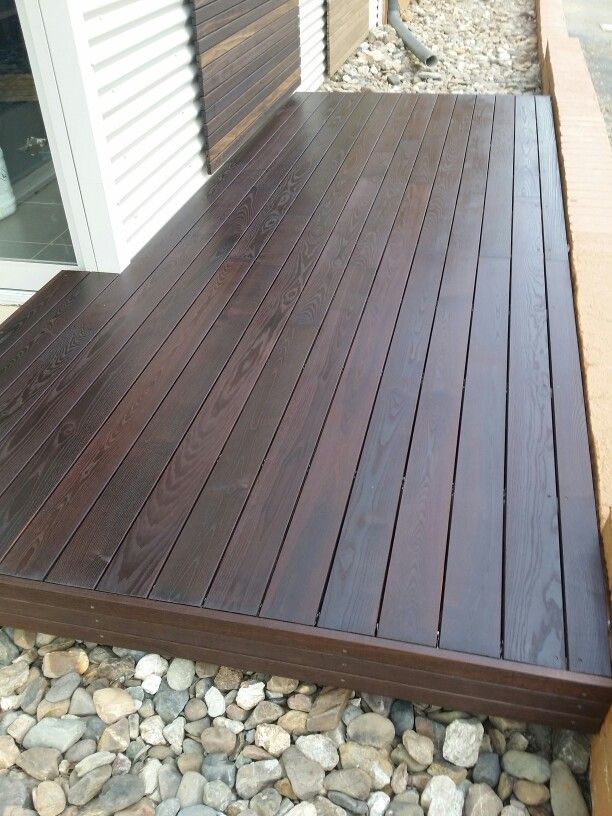 Of course, its open ends must be closed with overlays from larch. (From 1990g we are actively exploiting two Drescombe Logger (5.7 m seaworthy sailing dinghies with heavy centerboard and gaff rigging, cm photo) made from construction plywood. Since the construction, they did not know the premises - and still in good condition. And the plywood is just painted).
Joints can usually be placed along beams, or strips of the same plywood. For reliable pressing when gluing, you need use small brass screws. After marking, trimming and fitting plywood is stacked on a set, bottom with a pencil you need to outline the elements of the set. turn over sheet, drill holes for screws and apply according to the marking glue. Lubricate the set with glue, put the plywood in place, and tighten with screws. Needed to drive screws drill with adjustable speed.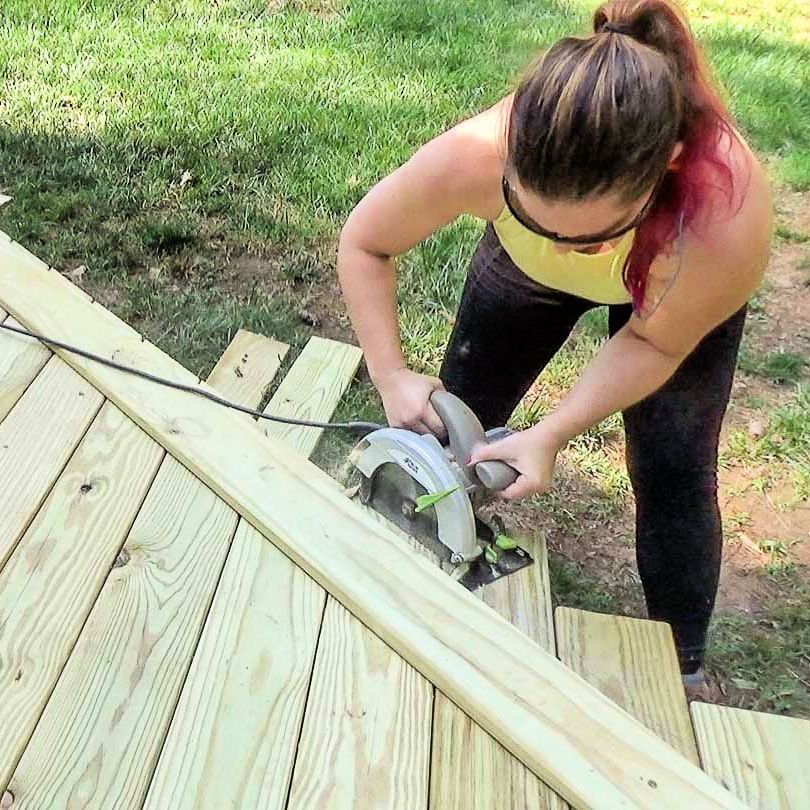
If you are going to glue slats on your old deck, it needs to be processed with a rough emery wheel, clamped in a large drill to remove all traces of the old paint, silicone, rotten top layer of wood, and in generally level the surface. Then the wood dust needs remove carefully.
Deck surfaces prepared for gluing, it must be covered with a film to protect it from contamination - from dirty feet, sweaty hands, etc.
Lathing usually starts with the gunwale. For pressing the outer rails for the period of gluing with screws, in holes are made in them, which will subsequently be closed bulwark bars. The deck is marked for applying glue.
Laths prepared for bonding, need wipe with acetone or thinner 646 and then dry paper napkins. This will help improve penetration. epoxy, as it removes the resin from the surface of the rail.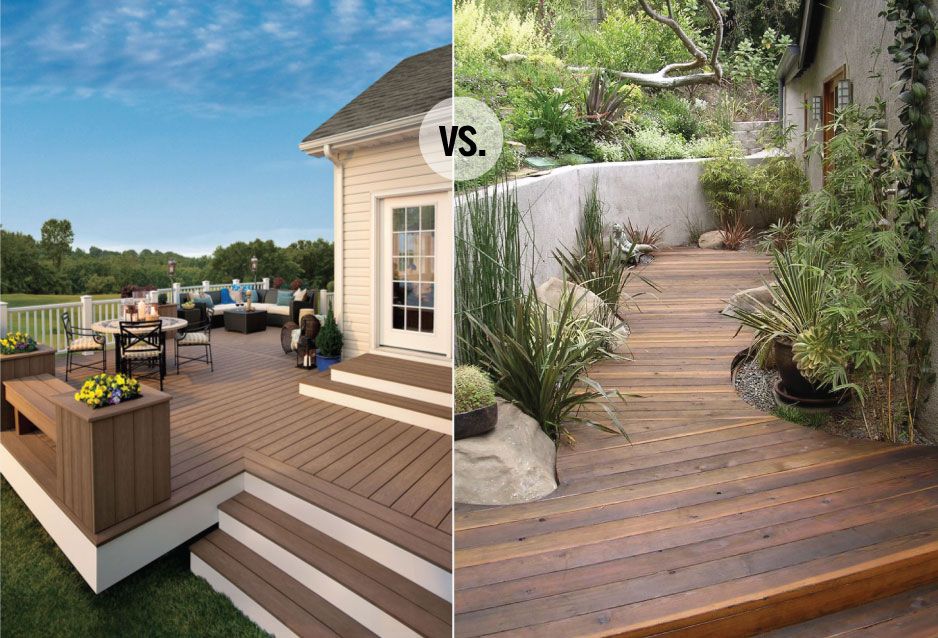 Be sure to pause for at least 30 minutes in order to solvent residues have evaporated.
RESIN, HARDENER, FILLER
Epoxy resin based adhesives polyurethane - what to choose? It all depends on the conditions in which you have to work. In dry climates and stable temperature (20°C or more), the best results will be epoxy resins. As a filler, we are always we use wood dust, which is obtained after grinding machine, naturally after grinding dried wood. It is very hygroscopic, so it should be keep in a tightly closed jar. The filler is added to resin after hardener to the consistency of mayonnaise. Be sure to make a simple pan scale in order to dilute epoxy correctly - save a lot of money. And further - check each new batch of epoxy and hardener. There is such an unpleasant feature - sometimes the resin is not becomes or the adhesive line does not match requirements.
Since we had to work on the shore sea, and our climate in summer is cool and humid, for gluing rails to plywood, we used polyurethane glue "Kleiberit" 501 with good results.
GLUING
The adhesive is applied to both surfaces. On deck - a thicker layer, with the expectation that when you put the rail in place and press it with screws, excess resin should begin to squeeze out between slats. Ideally, before applying the surface of the rails, you need to heat up to 40-50°C to improve the penetration of the adhesive - but this is more of a theoretical wish.
The strips are put in place and fastened with screws with large washers. Screws with washers must be placed between the strips with a step of 200 mm. Each row screws will press the edges of two adjacent rails and simultaneously determine the distance between the rails.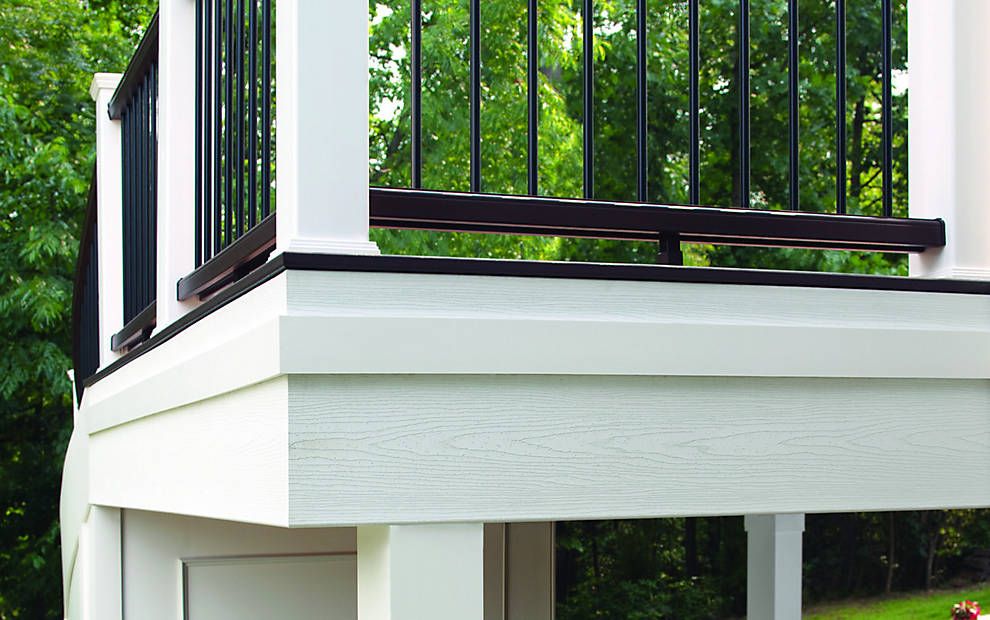 Instead of washers, you can use pieces of fiberglass. Screws and washers need to be covered with a thin layer of wax, paraffin or something something similar to prevent sticking to the planks. Some use baking powder.
- Technology with using thin rails 3-6 mm.
The slots are filled with filled resin.
- Technology with using thick rails 6-18 mm.
The grooves are filled with polyurethane sealant.
Before final screwdriving the slats are pressed tightly against their side surface. Straightaway fill in any voids and smooth out excess resin that has come out between rails. It is necessary to clean the outer edges of the rails from resin before it sets.
Screws and washers must be removed after 24 hours. First, slightly tighten the screw, then unscrew it. If a the screw does not turn away, it needs to be heated soldering iron.
Screw holes to be filled resin. For these purposes, it is convenient to use a syringe. Where the screws went through, glue the strip in advance from below adhesive tape.
Belt sander or drill with an emery wheel will be needed for final finishing. For a large deck, a sanding machine can be used parquet. We completely sanded the deck all around, although this failed to avoid minor irregularities and risks. The deck is almost ready, it remains to choose and apply paint and varnish and put everything in place, what was taken.
| 30 KB | 32 KB |