Cover outdoor faucets winter
How to Cover Outdoor Faucets for Winter?
How to Cover Outdoor Faucets for Winter?In colder climates, frost and freezing temperatures can badly destroy your water pipes and outdoor faucets. While these faucets are available in stylish designs, they look great in summer and spring. But when you don’t follow proper precautions, these outdoor faucets cannot offer seamless performance and hence cause a lot of problems.
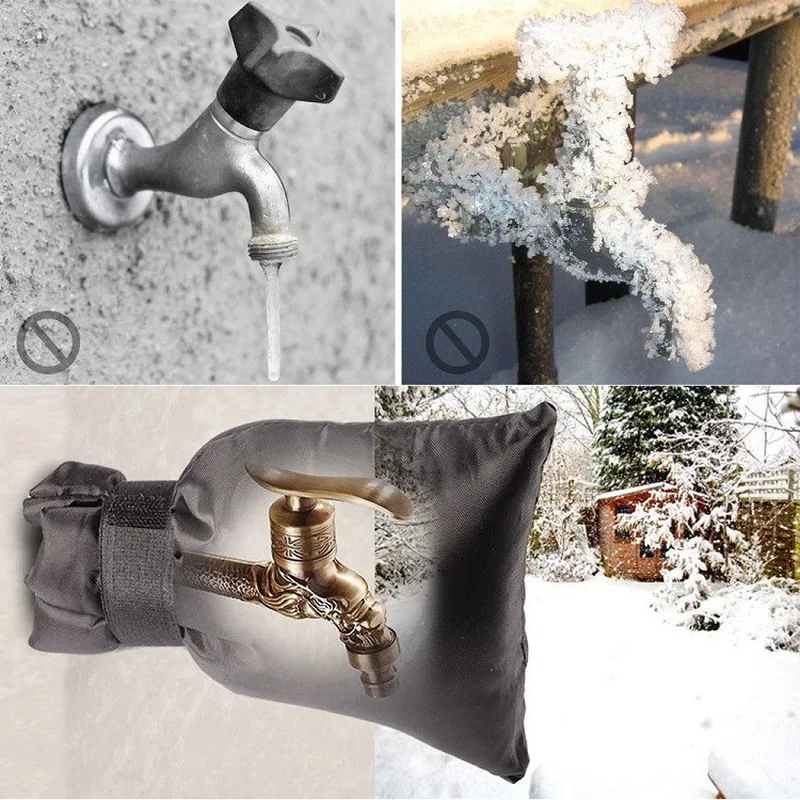
If you want to minimize the damage, the best way is to cover your outdoor kitchen faucets so you can protect them from frosty temperatures because when the season is cold, water can expand and pipes can rupture badly. And when pipes are burst, you have to spend tons of money fixing the damage done to walls, ceilings, and floors.
Therefore, it makes great sense to cover the outdoor faucets and consider every preventive measure. Covering the outdoor faucet is relatively easy, as you can purchase insulated covers that fit over the spigots.
When you use outdoor faucet covers, they will simply help prevent them from damage and rupturing. Let’s find out how this outdoor faucet covers work and what are the risks of exposing them to cold freezing temperatures.
When it comes to winterizing your home, you often forget outdoor faucets. As a result, it leads to serious damages and expensive repairs.
Here are some risks of leaving these faucets exposed in cold:
Invest in Outdoor Faucet Covers:If you want to protect yourself and your property, it’s recommended to invest in outdoor faucet covers. You can choose from soft covers as well as hardcovers.
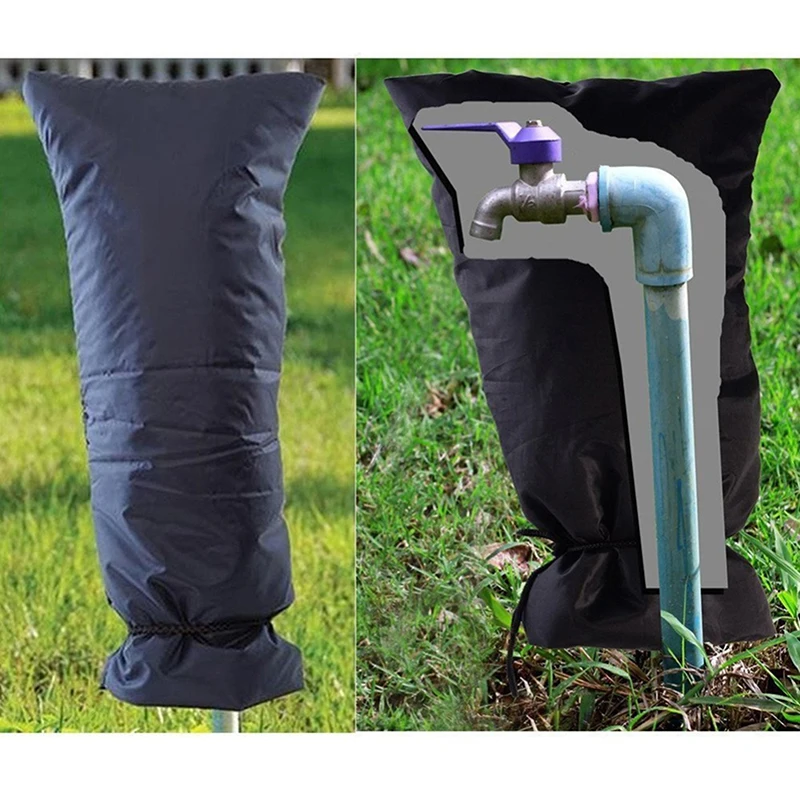
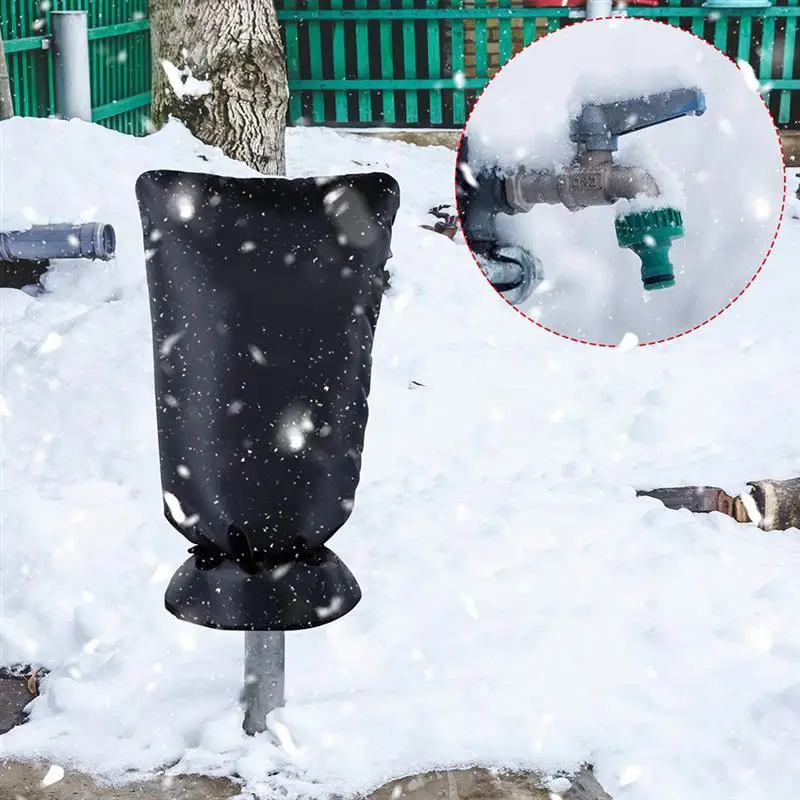
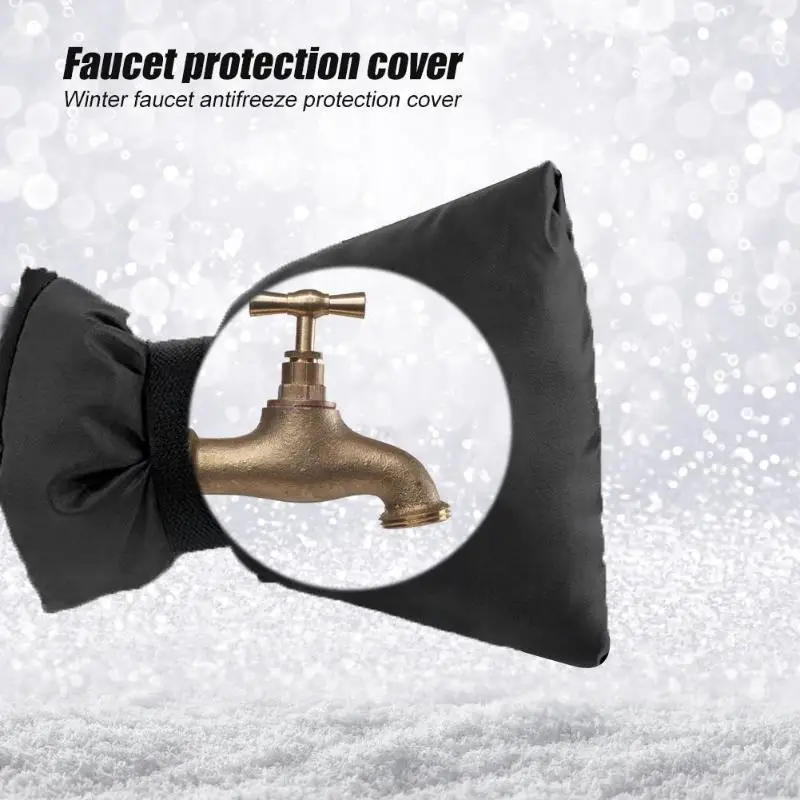
How Do These Faucet Covers Work?Faucet covers are usually available in two different shapes. You can either find them square or dome-shaped shells that are made of solid thermal foam as well as feature flexible gaskets that can easily fit into your outdoor faucets. Some covers are just like flexible bags, and they are created with soft fabric which is properly insulated.
It’s important to install them properly so that they can stick tightly to the base of your faucet. You can choose from any style, as the covers offer reliable insurance against spigots damaged because of freezing.
Faucet covers can trap heat that radiates naturally through the internal pipes of the external spigot. This insulated cover is responsible to prevent the radiated heat from escaping. Hence it prevents the entry of water into your faucet and protects it from freezing and expanding.
Some brands and retailers market these outdoor faucet covers with different names. For example, some of them are known as “garden faucet insulation cover” and some of them are called “insulated faucet socks.”
All these covers do an excellent job. However, if you want to get excellent results, it’s important to seal them tightly to offer great thermal protection.
At What Temperature Should You Cover the Faucets?Cover the outdoor faucets before the temperature dips below freezing.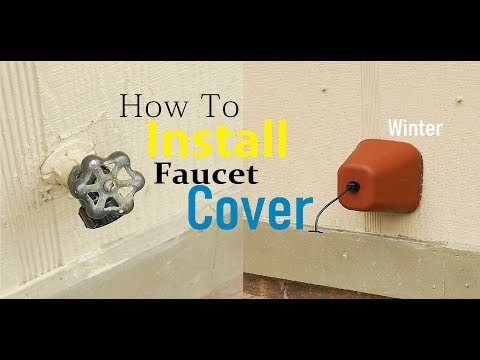
Especially when the temperature dips below 28 degrees and you think that your outdoor faucet will not be able to survive such freezing temperature, then it’s best to cover them fully with recommended faucet covers. So, when you make your to-do list for your garden or yard, do not forget to include “covering the outdoor faucet” in the list before the cold weather kicks in.
Protect Your Faucets: Extra TipsWhen the temperature dips below freezing, it’s crucial to protect your faucets with covers and follow other preventive measures.
To protect it from harsh weather conditions, it’s important to disconnect everything from your outdoor faucet especially if there is any threat of freezing.
It’s recommended to remove the “y splitter”, its hose, pool filler, as well as irrigation timer. By doing this, you can simply prevent your faucet from being frozen and damaged.
It’s also important to follow preventive measures when you turn on the faucets in Springtime for the first time and are not sure whether they will be working fine or there will be any kind of leakage.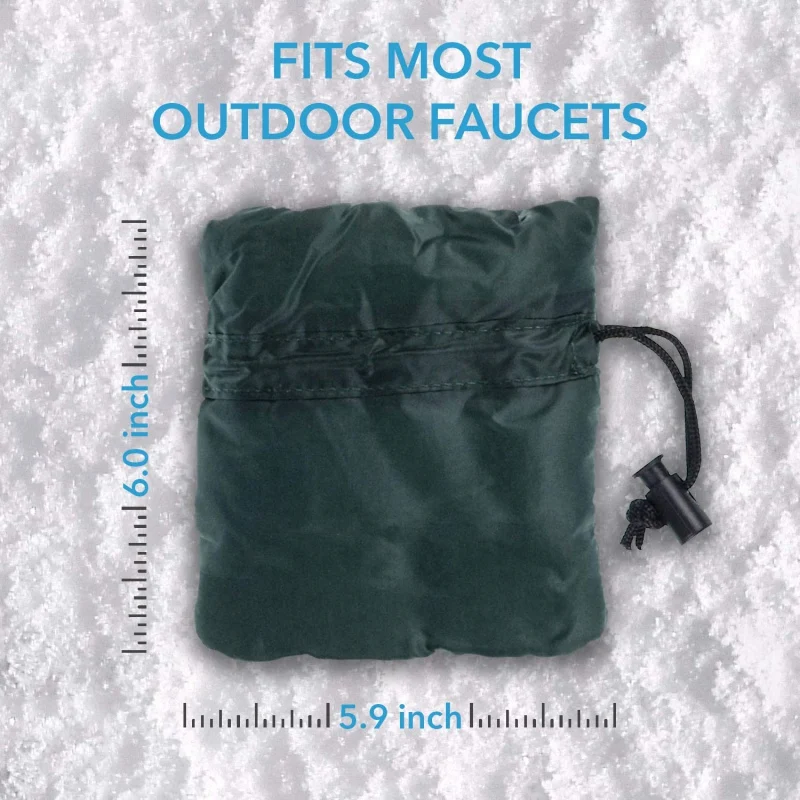
We know that there are tons of jobs to do inside and outside the home when the weather changes. However, covering your outdoor faucets should be your #1 priority.
It’s always a good step to take care of things before the temperature drops to zero. You can save yourself from a lot of hassle if you follow the preventive measures beforehand.
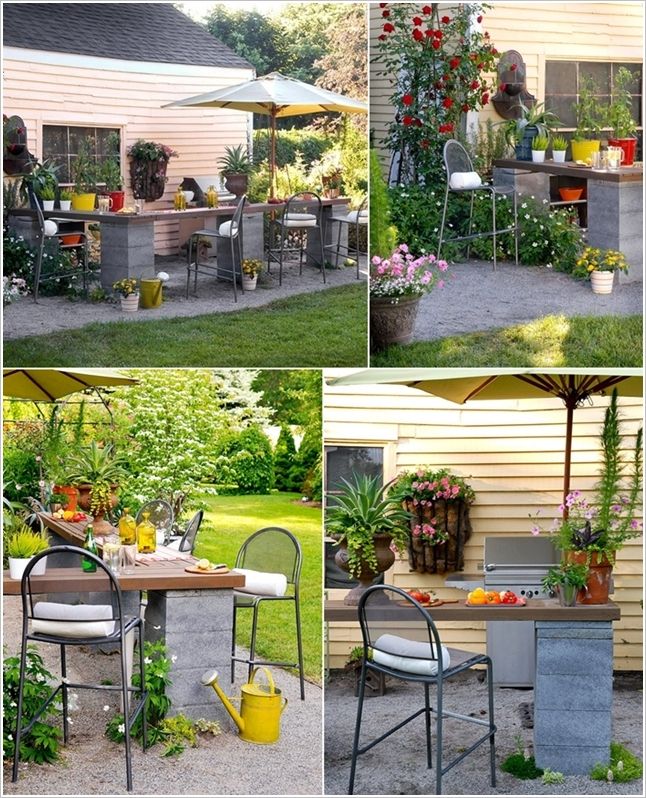
At KibiUSA, you can find a couple of kitchen faucets in different styles, colors, and designs. You can choose from brushed gold, brushed nickel, chrome, and matte black. So, if you are looking to buy a faucet for your outdoor kitchen, make sure you visit the website first so you can buy the right faucet cover based on its design.
How to Winterize Outdoor Spigots Using Insulated Faucet Covers
By
Aaron Stickley
Aaron Stickley
Aaron Stickley is a licensed plumber with 15 years of experience in commercial, new residential plumbing, and residential service and repair.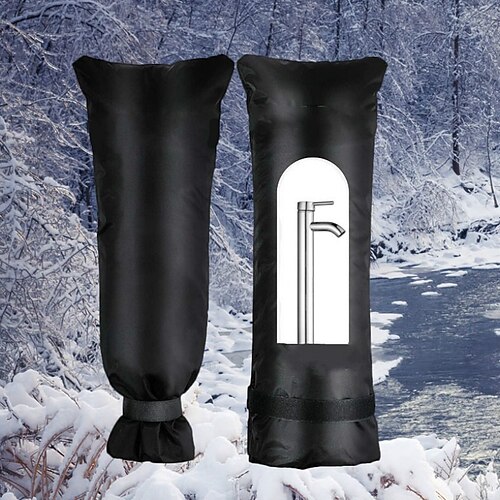 He started his own residential service and repair plumbing business. Aaron's articles about plumbing on The Spruce span four years.
Learn more about The Spruce's Editorial Process
Updated on 05/30/22
Reviewed by
Richard Epstein
Reviewed by Richard Epstein
Richard Epstein is a licensed master plumber with over 40 years experience in residential and commercial plumbing. He specializes in estimating as well as design and engineering for plumbing systems, and he works for one of New York's largest union plumbing construction companies.
Learn more about The Spruce's Review Board
The Spruce / Meg MacDonald
Project Overview
In colder climates, winter comes along each year and does its best to destroy our water pipes. The best way to minimize the damage from cold weather on household plumbing is to do a little winterizing pre-season, which essentially means protecting them against any freezing that can expand the water and rupture the pipes.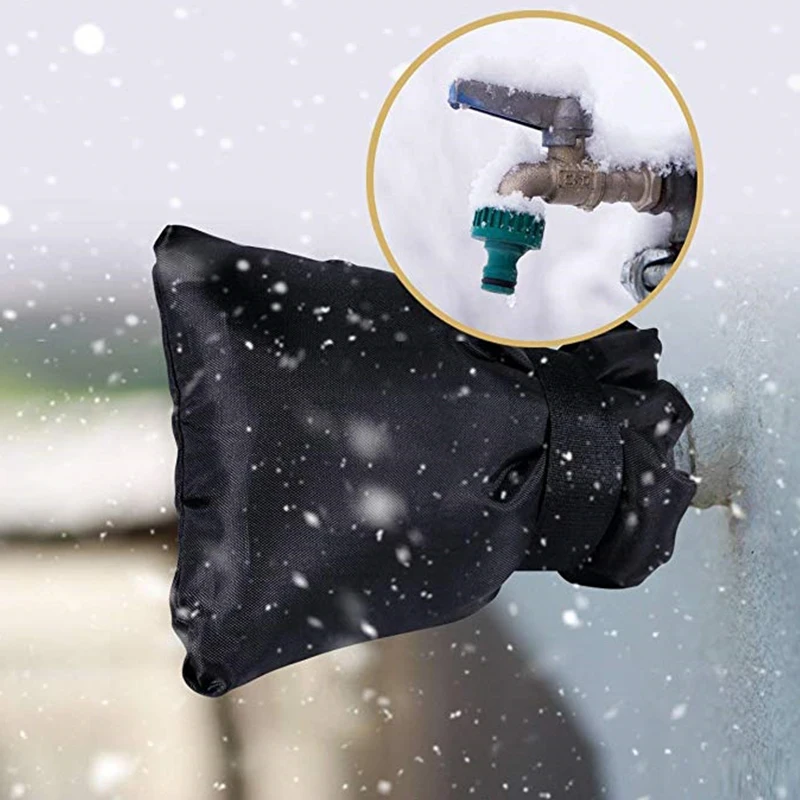 Burst water pipes can cause thousands of dollars of damage when the water soaks walls, ceilings, and floors, so it just makes sense to take preventive measures when and where you can.
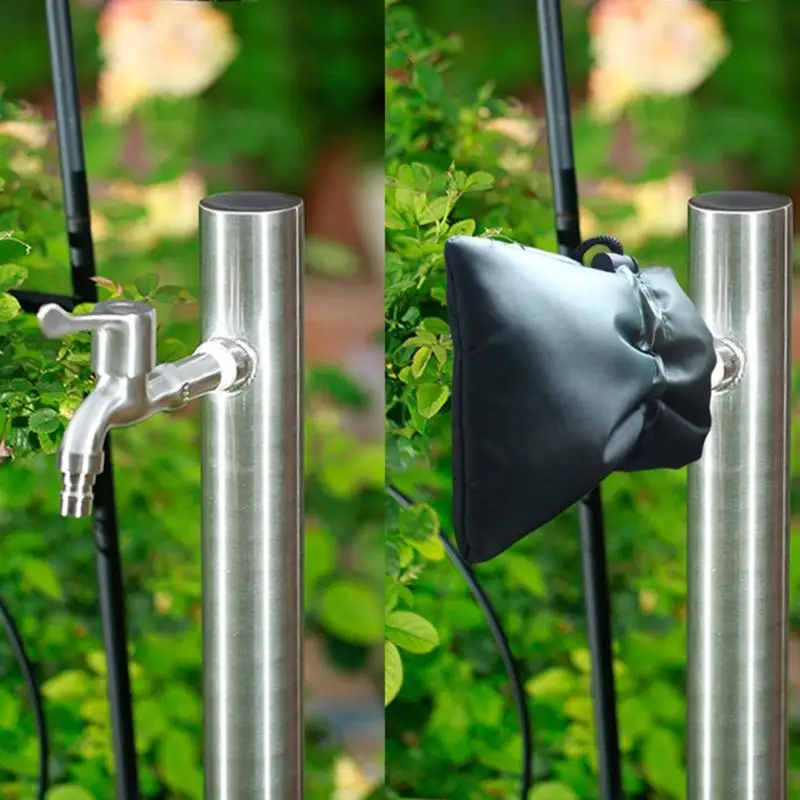
A good starting point is to winterize your outdoor faucets (hose spigots). Doing so is relatively easy, thanks to insulated covers you can purchase to fit over the spigots. Installing these covers, along with performing a few simple winterizing procedures, can prevent outdoor faucets from rupturing due to freezing temperatures.
Equipment / Tools
- Bucket (for draining excess water)
- Wrench (for any necessary removals or repairs))
Materials
- Insulated outdoor faucet covers (one for each outdoor spigot)
- Faucet repair materials (as needed)
The Spruce / Meg MacDonald
Installing outdoor faucet covers should be done in conjunction with some basic winterizing procedures aimed at removing as much water as you can so there is little-to-no trapped water that can freeze inside the spigot.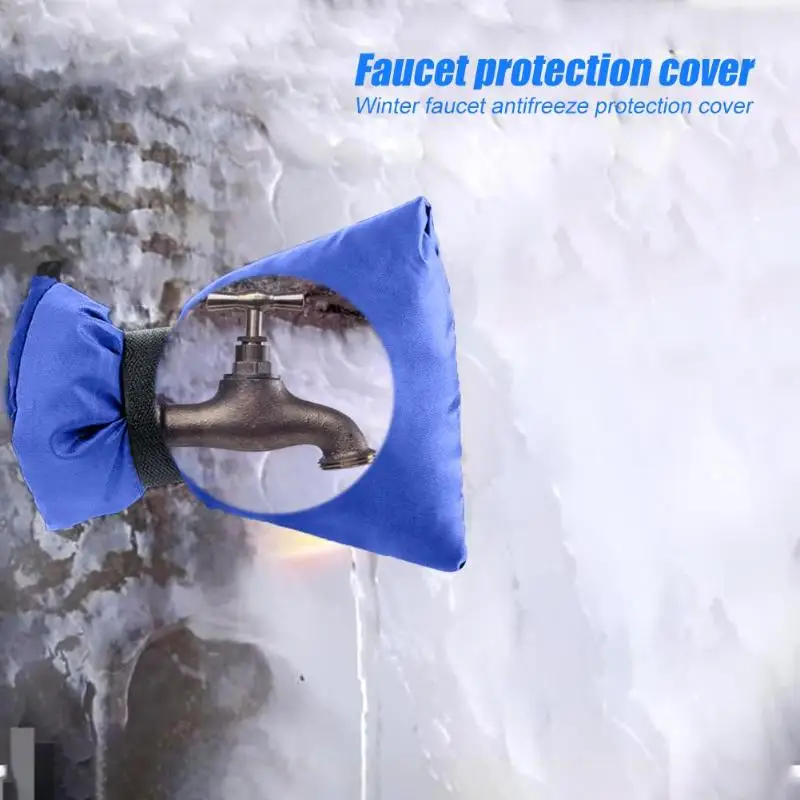
-
Disconnect Any Hoses
No matter what kind of outdoor spigots you have (freeze-proof or not), it's important to remove any hoses, splitters, or other fittings screwed onto the spigot before winter sets in. Not removing hoses can trap water and make it much more likely a faucet will freeze.
This is always a difficult step because most people will want to use the outside water until the point when freezing weather begins. However, it’s best to stay ahead of the cold weather by disconnecting hoses early—even one night of freezing weather can cause a break in the pipes.
The Spruce / Meg MacDonald
-
Inspect the Spigots
The next step to winterizing outdoor faucets is leak detection and repair. Check all spigots, yard hydrants, and other fixtures for leaks and drips. If you do find any problems, repair or replace the fixture before the temperature drops to freezing. Dripping water indicates a spigot with a leaky washer or cartridge, which can block up and freeze in the spigot or in the pipe feeding it.
The Spruce / Meg MacDonald
Tip
While there are specialty outdoor spigots marketed as "freeze-proof," there is no guarantee that these faucets will not freeze in the coldest weather, so even these faucets can benefit from outdoor faucet covers. Long term, though, installing freeze-proof spigots is a good step toward avoiding potential problems.
-
Drain the Spigot and Pipes
Getting as much water out of the pipes as possible is the next step. If you have an outdoor faucet that is not freeze-proof, the best way to do this is to shut off that line, if possible, and drain the water from it into a bucket while temperatures are still above freezing.
Do this by shutting off an interior shut-off valve to the water line leading to the spigot. Then open the spigot and leave it open for a few hours until the water inside the pipe drains out. After the water drains out, close the spigot again.
Tip
If there's no indoor shut-off valve present, it becomes even more important to carefully insulate the spigot from the outdoors.
With a frost-free spigot or a yard hydrant, this step isn’t necessary, since the fixture is designed to keep the water away from the end of the spigot. However—just as with regular outdoor spigots—hoses and other attachments should be removed from frost-free spigots and yard hydrants before the winter, or they may not drain properly.
The Spruce / Meg MacDonald
-
Install Outdoor Faucet Covers
The last step to winterizing outdoor faucets is to protect them with insulation. An easy way to do this is to install an outdoor faucet cover on each outdoor fixture, including frost-free spigots.
When covering regular spigots that are not freeze-proof, extra loose insulation can be packed inside the faucet cover to keep it warm and dry throughout the winter. In most situations, however, the faucet cover will provide enough insulation.
Frost-free spigots should still be covered as well—although they are resistant to freezing, they are not completely frost-proof in the coldest weather.
 There are rubber gaskets and washers inside the frost-free spigots that will benefit from the extra protection from the cold.
 The Spruce / Meg MacDonald
How Frost-Proof Wall Hydrants or Hose Bibs Work
Frost-proof wall hydrants or hose bibs are designed to shut off the water inside the foundation wall. This is accomplished because the mechanism is longer than the washer seats at the end of the hydrant or hose bib. They come in different lengths, depending on the width of your foundation wall or point of connection inside. When off, the water drains out.
They do not need additional outside insulation if installed correctly. However, you should always disconnect garden hoses prior to the winter months.
In very harsh environments or during particularly cold winters, if the room where the piping connects inside is not heated, pipes can freeze and burst when they thaw.
How Outdoor Faucet Covers Work
Most faucet covers use one of two styles.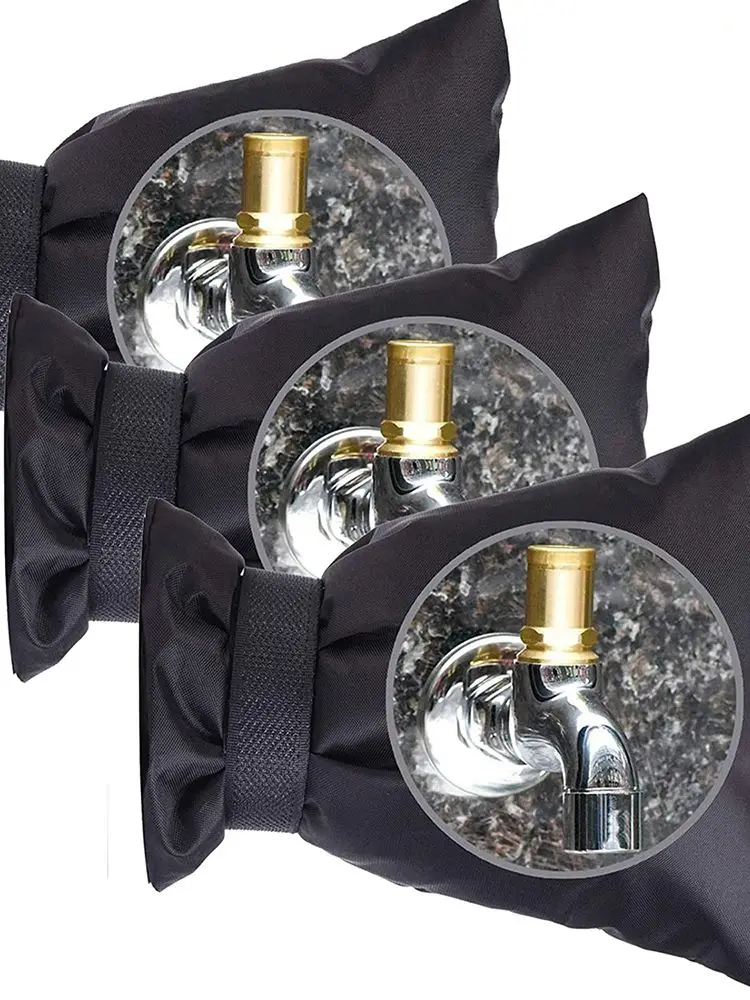 Faucet covers are either square or dome-shaped shells made of rigid thermal foam with flexible gaskets that fit right over outdoor faucets, or they are flexible bags made of thick fabric stuffed with insulation. When properly installed so that they seal tightly around the base of the faucet, either style provides good insurance against spigots rupturing due to freezing.
Faucet covers work by trapping heat that naturally radiates through the interior pipes to the outdoor spigot. The insulated cover prevents this radiated heat from escaping and therefore prevents water in the faucet from freezing, expanding, and rupturing the spigot.
Manufacturers may market these faucet covers under several different names, including "garden faucet insulation cover" or "insulated faucet socks." All of them will do the job, but for the best results, they need to seal tightly so they can provide the most thermal protection.
Types of faucet finishes
- Chrome nickel finish (chrome plated)
- Satin (satin chrome)
- Chrome-coloured (bronze, gold)
- PVD coating
- Painted finish
- Polished steel
In short, all coatings are applied in layers on products and depend on the quality of the base (good processing of the body of the product) and the materials of the coating itself.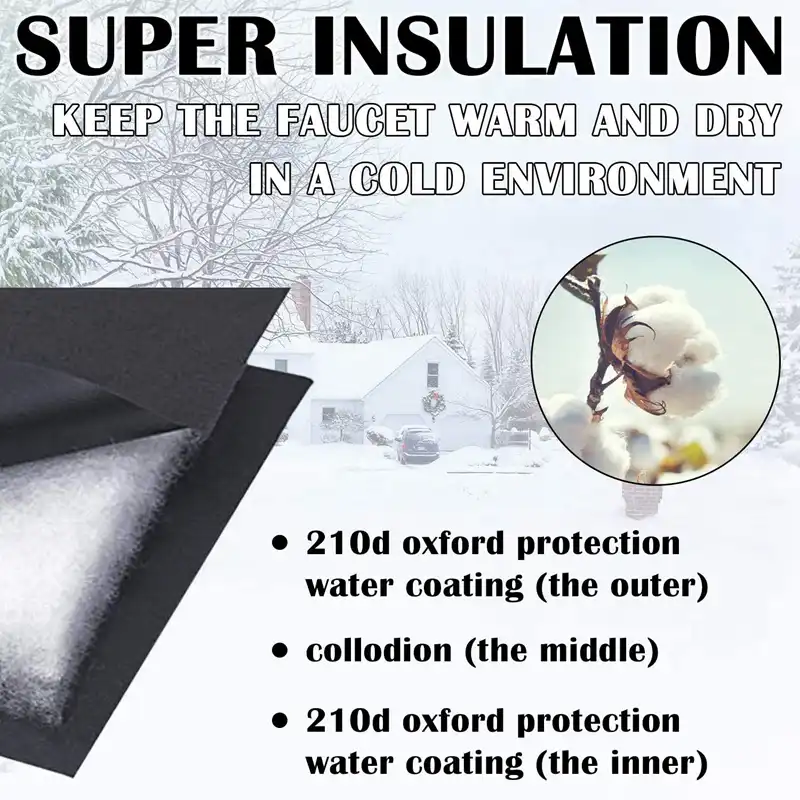 Any coating applied to products without a prepared substrate will have an uneven surface. In addition, due to the poor quality of the coating materials themselves, the coating does not hold well and may “peel off” after some time.
Coating of quality materials on well-finished products has a uniform and smooth surface.
Chrome Nickel
The most common faucet finish is, of course, Chrome Nickel, which has a shiny silver finish.
The process of chrome plating of the surface of the mixer occurs by electrolysis (the product is dipped into a plurality of baths with a chemical solution, to which an electric charge is applied) with multilayer deposition of nickel and chromium. Many factors (such as current strength, solution temperature, and others) are responsible for the quality of the coating, and any, even slightly violation or deviation from the norms, leads to the destruction of the surface.
How do you know if the chrome is applied well?
Please note that:
- there are no bumps or abrasions on the mixer body;
- the surface has an almost mirror-like appearance, and not matte (except for satin) or a light shade;
- has no microcracks on the surface.
We also note that many well-known manufacturers use their own technologies in applying chromium to the surface. Such technologies, as a rule, preserve the appearance from fading, facilitate the care of products and better resist mechanical damage.
Chrome faucets in the online shop
Satin finish (matt chrome)
Satin is also called satin chrome, which is a matt silver surface. This is a more practical surface, unlike chrome, on which stains and smudges from water are poorly visible.
The process of applying a satin chrome surface is no different from the usual one - the same sequential multi-layer deposition of nickel and chromium using an electrolysis process. However, after the coating hardens, it is treated with special diamond-coated brushes, which turn the mirror surface into a matte one.
The result of high-quality application and polishing of satin is a uniform surface without scuffs, scratches and cracks.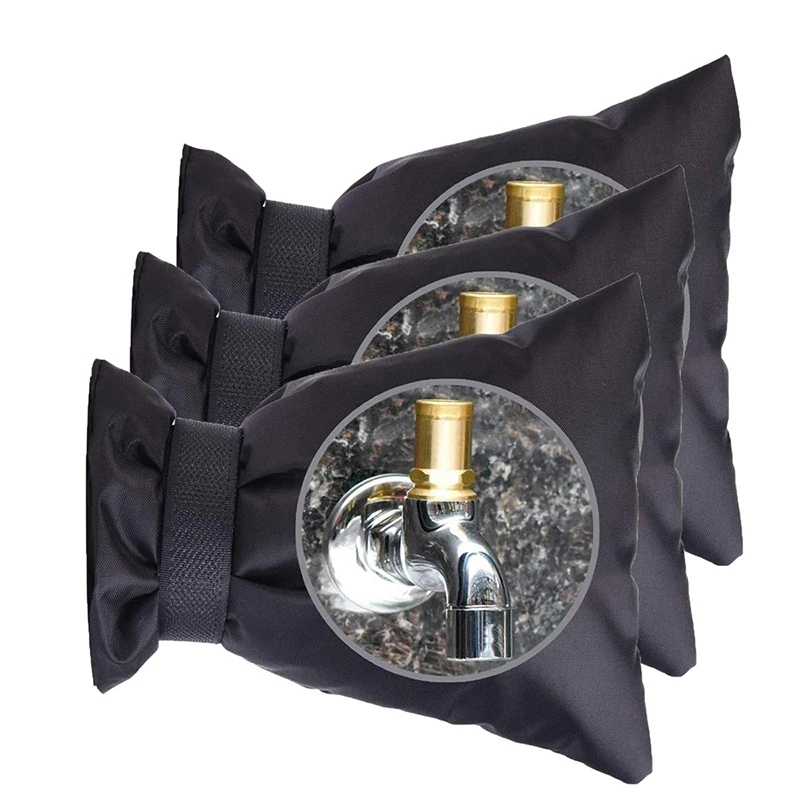
Chrome-coloured
The two main types of this coating are bronze and gold. Naturally, manufacturers do not make faucets from bronze or gold, due to the complexity of processing these materials and their high cost. Instead, the faucets are specially treated and given a bronze or gold plating. This process is called bronzing or gilding.
The process itself is similar to the method of applying chromium - all the same immersion of the product in special baths and exposure to current. The color of the coating (it can be light, dark) is controlled by the amount of metal alloy that is added to the solution. Bronzing and gilding can be both glossy and matte.
Despite the fact that the coating may be uneven and mimic wear, the texture of the faucet must be perfectly smooth, without cracks or scratches. Imitation of scuffs and antiquity does not mean that the product should be treated roughly.
PVD coating
PVD (Physical Vapor Deposition) is a process of vacuum pressing particles of various metals (gold, copper, chromium, titanium, etc.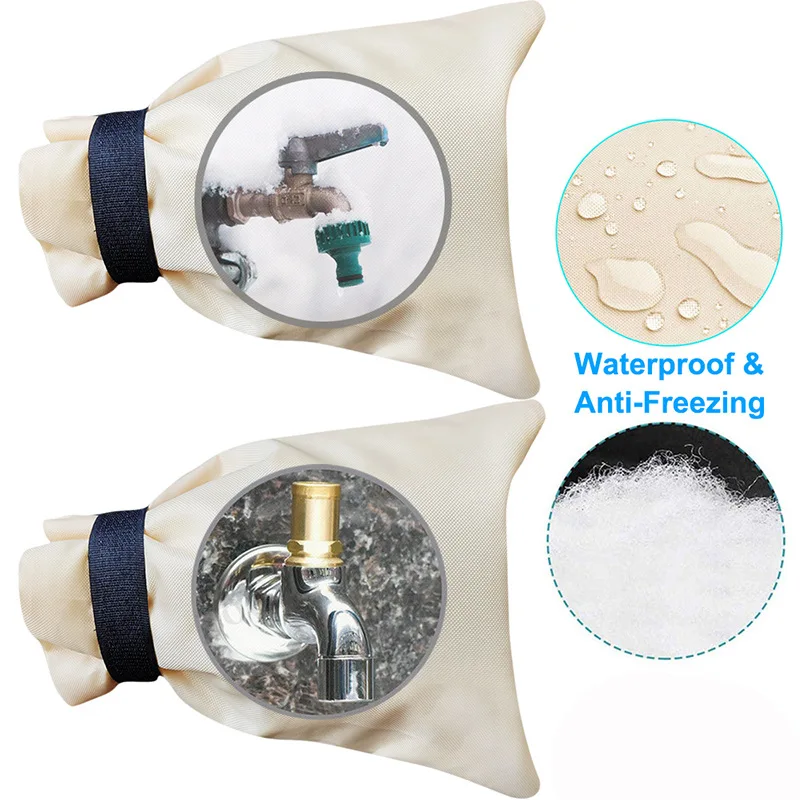 ) onto the surface. This is an anti-friction, wear and erosion resistant coating that does not lose its original appearance after many years. The only disadvantage of such a coating can only be called a high cost, due to the production complexity in its application.
This coating is applied only to premium segment faucets, and if you saw a PVD-coated faucet at a low price, then most likely you are counterfeit or fake branded products.
The quality of such PVD depends on:
- the material on which it is applied;
- coating thickness;
- and the absence of violations in the application technology.
How long the coating will last depends on the operating conditions and how aggressive the chemical treatment will be on the product.
Painted finish
Painted surface of the faucet allows you to create sanitaryware models with an unusual design for the interior of almost any bathroom.
Each manufacturer paints models using their own techniques, so we will only describe the two most popular painting methods:
- Painting and firing.
 The body material is treated in a special way and prepared for painting. Acrylic paint is applied to the body in several layers, and after it dries, the body is fired for 30 to 40 minutes.
 - Pressurized. Powdered paint is applied to the mixer body in a pressure chamber. This method is somewhat similar to the PVD coating process.
The finish can be either matt or glossy. It depends on the type of paint used.
Painted faucets in the online store
Polished steel
As already described in the article about faucet materials, stainless steel models, as a rule, are not covered with decorative layers.
This is due to the fact that such products are designed for increased mechanical stress and processing with aggressive cleaning agents. None of the above coatings is able to fully survive after years of work in such conditions.
For this reason, stainless steel faucets are not coated with additional additional layers, but only polished with special diamond-coated brushes.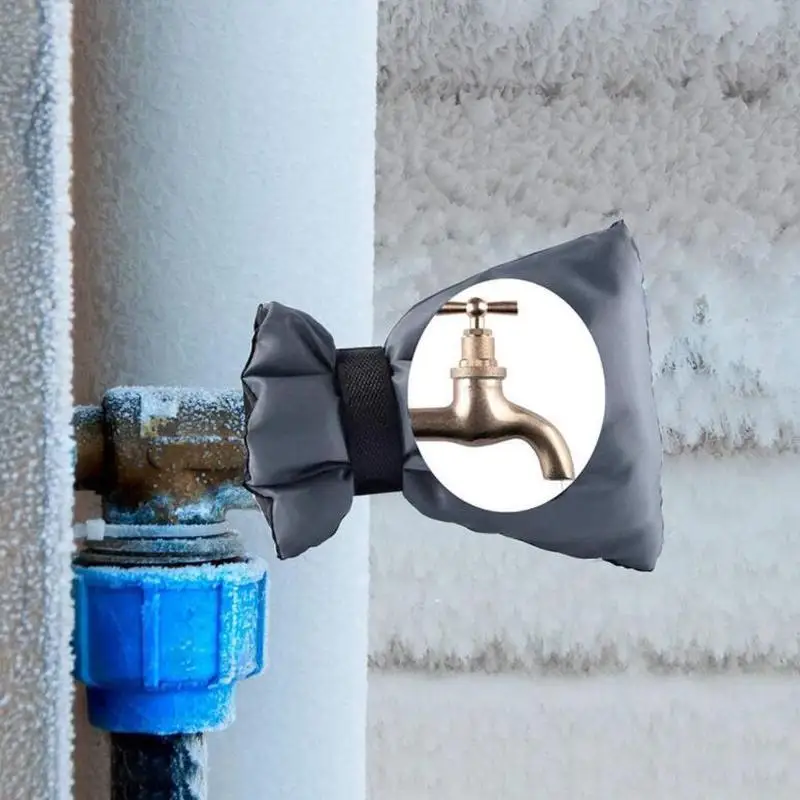
Steel-coloured faucets in the online shop
Installation with exposed faucet
This section presents the options for completing a bathroom or toilet room with a hygienic shower.
- Photo example
- Item from example
In this example, we see that an exposed tap is used (1). It is mounted on the wall, under the already pre-exposed pipes. The connection is standard 15 cm. Allows you to mix water and regulate pressure. After installing the faucet, you need to screw the hose from the hygienic shower (2). After that, you can supply water to the hygienic watering can.
On all hygienic watering cans there is a button (shut-off valve). When pressed, water will flow. Without installing a mixer that will increase the pressure, the installation of a hygiene kit is not recommended. The shut-off valve in the watering can will not withstand constant pressure.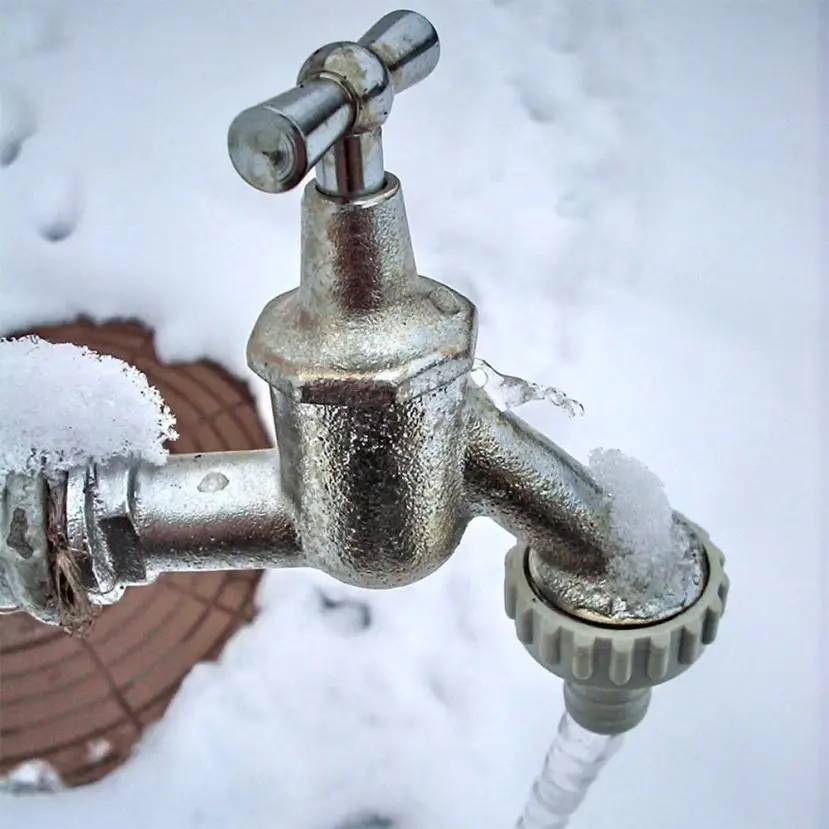
Product used in the example:
| | Shower mixer Hansgrohe Logis 71600000 It was chosen due to the fact that it is a new model and is very popular.
|
Similar products, suggest to use:
| Article: 32846000Gr |
| 106518 RUB | More |
| Article: 32740000Gr |
| 9659 rub | More |
| Article: 31960000 |
| 14052 rub | More |
| Article: 32640000 |
| 24321 rub | More |
| | Hansgrohe hygienic shower 32128000 The most popular hygienic shower available today. 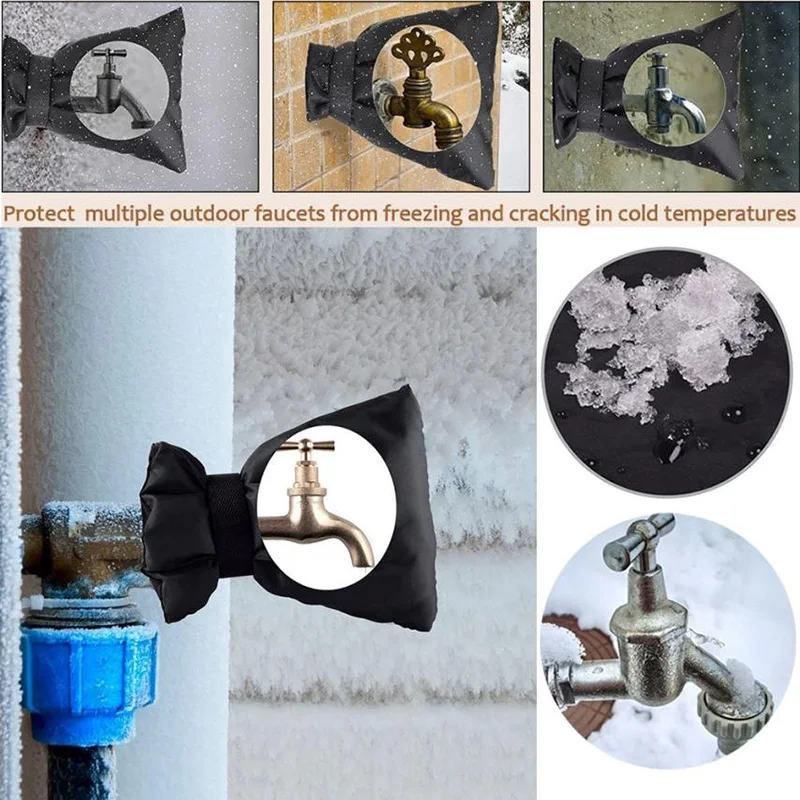 
| ||