Best way to put grass seed down
How to grow grass from grass seed the easy way
Planting grass seed is a way to expand your lawn into new areas and maximize the green space around your home. You can also plant new grass seed to improve your current lawn if it’s looking a little dingy. You can even use grass seed to restart your lawn completely.
Before you seed, start with some quick and easy prep work.
As an easy rule, if you’re experiencing (or are about to experience) harsh temperatures you’ll want to wait until the extreme weather passes to plant your grass seed for best results.
Either spring or fall is the best time to plant, based on your region and grass type. To keep this simple, if you’re in the northern part of the country, you’re likely in the ‘cool season’ area, meaning the best time to plant grass seeds is the fall, or typically September through November. If you’re in the southern or middle regions, you’ll likely want to plant in spring or early summer, typically March – June.
Trying to plant seed out of season may still be possible, but it can make for slower growing and hurt the chances of the new grass’s survival. Just something to keep in mind.
Using the same regions shown above, you’ll want to buy a grass seed type that grows best in your climate.
- Cool season grasses (northern states) include: Kentucky bluegrass, Perennial ryegrass and fescue.
- Transition zone grasses include: Zoysia, Fescue / Bluegrass blends, and Bluegrass / Perennial Ryegrass blends
- Warm season grasses include: Bermudagrass, Bahiagrass, Zoysia, and Centipede grass.
Pennington’s article on grass types based on more specific regions may be helpful if you’re still trying to decide.
Assuming that the timing is right, here’s what you’ll need to buy.
Grass seedWe recommend shopping on Amazon, Home Depot, or Lowes for fast and convenient selections.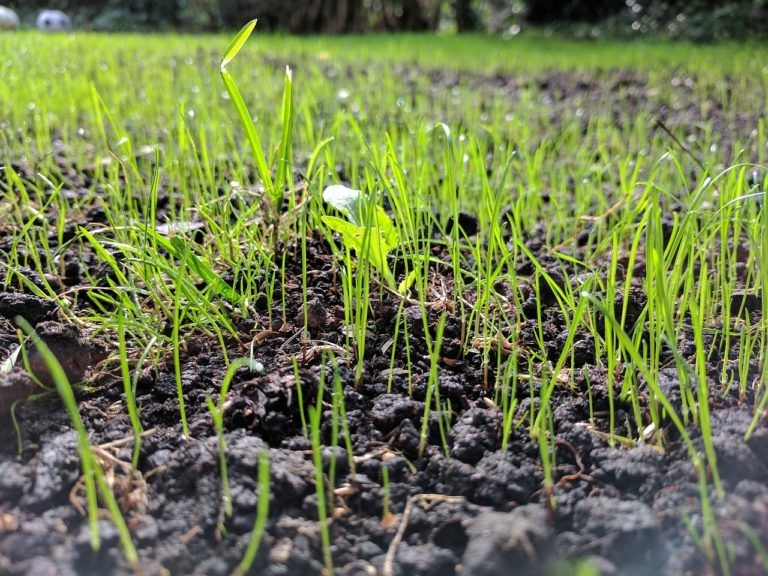 Home Depot will probably be able to provide more insight if you feel you’re still questioning what grass type or how much to buy.
Check out this article on the Spruce for the best grass seed picks in 2020.A pH Tester
This will be used to test your soil before adding the seed. You can find these on Amazon for around $10.
Grass feeder (aka fertilizer)Once planted, the seed will need to start growing quickly, before surrounding weeds out-grow and kill it. Grass feeder should be applied right after the seeds are planted, so be sure to add this to your cart as well.
Here are the top 10 lawn fertilizers of 2020 based on BestReviews.Guide
To protect the seeds from blowing away, being burned by the sun, eaten by birds, etc. you’ll want to bury the seeds under a layer of nutrient-dense soil, like Scotts turf builder. Local nurseries and Home Depot or Lowes will have soil available, just make sure to explain your use before buying, to avoid any soil with weed seed.
Step 1:
Prepare the surface of the lawnWhether you are seeding for the very first time or just overseeding your existing thinned out lawn, you need to make sure you have a good, solid foundation. Make sure to remove weeds, rocks, sticks, and other debris from the lawn.
Check any uneven areas so you can try to level the ground before laying down any seed. This will help prevent water from collecting and pooling in low areas, which will cause the seed to rot.
Loosen the soilIf your soil is compacted, you will need to loosen at least the top four inches of soil. You can use a tiller or rake. This will allow air flow and will provide the best chance for vigorous growth.
You can also scatter out a thin layer of topsoil over the lawn at this stage. Since it is freshly laid, it will not be compacted, allowing good airflow. Make sure to keep enough left for coverage at the end.
Applying topsoil will also level out the lawn for a nice and even look, which will also help you avoid puddles when you are watering. If you encounter divots or holes, this is a good time to fill them in to prevent problem areas once the grass starts growing.
Step 2: Enrich your soil with nutrients to help grass seeds growIf you’re planting new grass seed because your lawn is dead or struggling to grow, there may be deeper issues to address with your soil.
This is where you’ll need to get out your pH tester. Ideally, the pH for most grass types is between 6.0 and 7.0.
If your soil’s pH is under 6.0, it is too acidic, meaning it needs nutrients such as nitrogen, phosphorus, potassium, and calcium. Lime (aka limestone) can be applied to the soil to help increase the soil pH and make those nutrients more available.
If your soil’s pH is above a 7, add compost, peat, sulfur, or fertilizer to lower the pH.
Step 3: Lay and feed the grass seedWhen laying down seeds, you must do a pretty heavy application for a brand new lawn. Try to maintain an even application over the entire area so that everything gets covered.
Alternatively, you need lighter coverage when overseeding an existing lawn. Put more grass seed in sparse areas to promote growth.
To lay the seed, you can just use your bare hands or a spreader for larger areas.
Cover up the seeds or work the seeds into the soilWhen seed is only applied to the surface level of the ground, it will dry out quickly and will not germinate. It might also get washed away by water or wind.
Add another thin layer of the soil that you purchased onto your lawn to bury the seeds.
If you do not have soil to put on top of the seeds, the seed must be worked into the soil; about ⅓ to ½ inch deep. After sowing the seed, use a rake to work the seed into the soil and smooth the surface.
This will keep the water from evaporating immediately, thus keeping the ground moist. It also protects the seeds from wildlife.
Add your feederOnce the seed is applied to the soil, treat the yard with fertilizer to accelerate growth.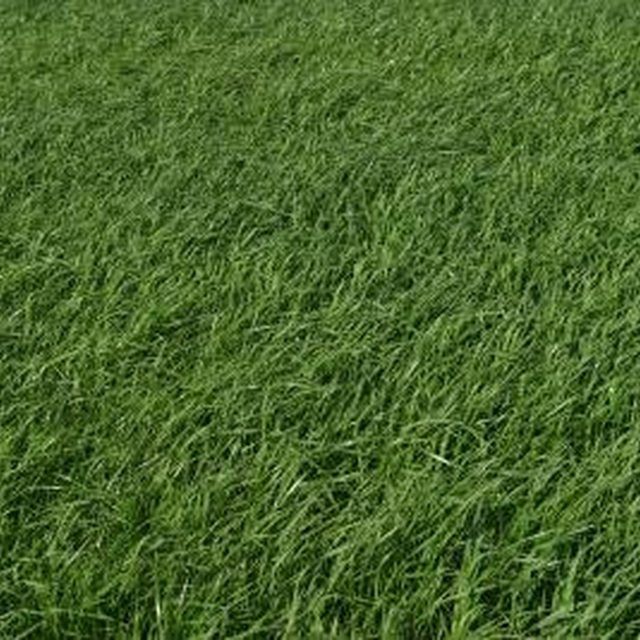
The final step in successfully planting grass seed is to keep the lawn adequately moisturized all the time. This is very crucial in the process.
If the seed dries out, it will die. After sowing grass seed, they will need constant and frequent watering unlike the “water deeply and less frequently” watering for mature grass. This is to help the seed germinate and develop its root system for a healthy lawn.
On the other hand, overwatering will hinder the germination process as well, so you need to use just enough water to keep the soil moist at seed depth. It should be moist, never soggy.
You must commit to water the new or overseeded lawn at least two to three times every single day to keep the top inch of the soil moist at all times. The germination time for grass seed ranges from 5 to 30 days depending on the variety or longer in cooler temperatures.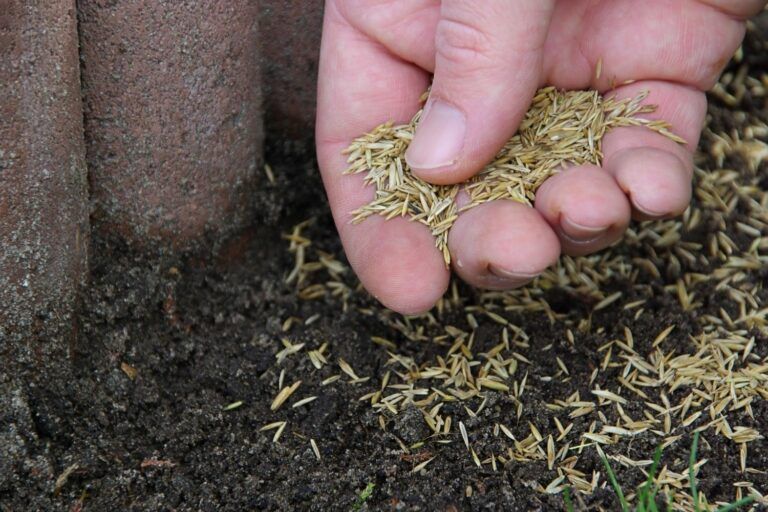
Once the seedbed has started to establish itself and sprouts have begun to pop out, continue to check the ground’s moisture regularly. If you notice it getting dry, add some water.
Remember, these new grass seedlings have very short roots and they will still require very frequent watering so the roots can spread out. Steps one and two will just go to waste if the watering part will not be done appropriately, so your commitment is a must!
For after-care, whether you have seeded a new lawn or just filled in a bare spot, start mowing your grass after 8 weeks or until the grass has reached a mowing height. Do not cut it too short and do not cut more than one-third of its height as it will stress out the grass.
FAQsHow long does new grass seed take to grow?
Generally speaking, it takes between 7 and 30 days for grass seed germination to begin.
While it’s possible to simply sow the new grass seed over your existing lawn, taking the time to prepare your lawn beforehand will increase the likelihood of seed germination and improve your end result.
Probably not. Some seeds on the soil’s surface will sprout, but the germination rate will diminish, and you will not be left with ideal results.
It depends how loose your soil is. Grass seeds are not strong enough to grow through soil. They’re meant to be placed on top of loose, prepared soil. Germination can quickly suffer from too much soil on top of them.
Total
46
Shares
A Simple Guide to Success
Lawns are everywhere. Some are highly tended; others, not so much. My own lawn is a mixed planting of three types of turf grass (Kentucky blue, fescue, and perennial rye grass), clover, violets, ground ivy, and various other “weeds”, which is exactly how I like it (and so do the resident honey bees and bumble bees!). Regardless of how perfectionistic you are about your lawn, at one point or another, you’ll find yourself needing to plant grass seed. Whether it’s to fill in a bare spot left behind by Fido or a wayward snowplow, or to install a brand-new lawn after a construction project, learning how to plant grass seed is a necessity for most homeowners. This article offers a simple guide to success, no matter the reason for your reseeding efforts.
Start with the best type of grass for your climate
As a professional horticulturist and a former landscaper, I’ve seeded dozens of brand-new lawns over the years, and I’ve over-seeded bare spots in hundreds more. No matter how large or how small your job is, success always starts with selecting the best grass seed for your region. Different grass species thrive in different climates. There are cool-season grasses and warm-season grasses. The label of the package will tell you which grass varieties are included. It will also tell you whether or not there is a starter fertilizer included. Do not choose a blend that includes weed control products. They could harm young seedlings.
Which grass seed is best for your yard also depends on the amount of sunlight it receives. I suggest contacting a local garden center or feed store and speaking with them about the best options for your region. There are also some useful online maps with all the information you’ll need to choose the appropriate grass species for your growing conditions if you live in the US.
Some brands of grass seed come blended with a “filler” product intended to help you distribute the seed evenly and to act as a protective covering. I personally avoid these products because they are more costly than purchasing a bag of high-quality plain seed and they don’t cover as large of an area.
Preparing the ground for planting
After selecting and purchasing the seed, it’s time to prepare the soil for the planting process. This is a very important step in knowing how to plant grass seed successfully. The tender roots of young grass plants will not grow well in compacted soils so it’s essential that this step be done properly. Here are instructions for prepping the ground to overseed bare spots in an established lawn and instructions on how to prepare for planting grass seed in a large bare area.
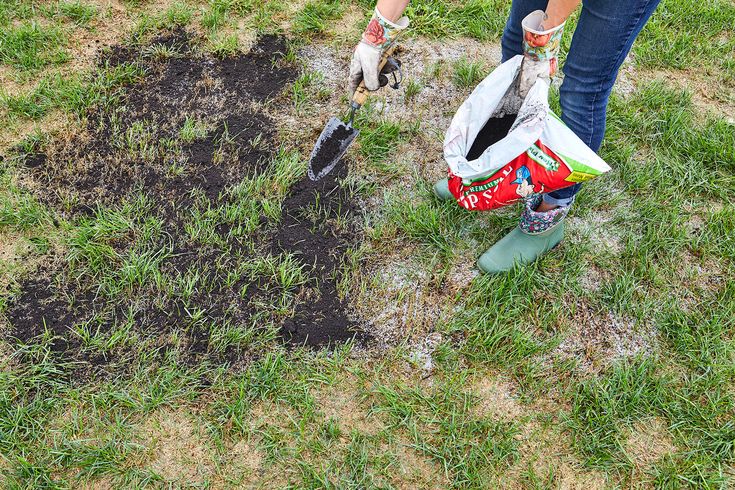
Preparation for seeding a bare spot in the lawn: Begin by using a cultivator to remove the dead grass. If it’s a small spot, use a hand cultivator. If it’s a larger spot, use a diamond hoe or warren hoe. Then, dig up the area down to a depth of two or three inches with a shovel or trowel. Loosen the soil and break up any clumps.
To repair a “doggie spot” in your lawn, start by removing the dead grass.Preparation for planting grass seed in a large bare area: If you want to know how to plant grass seed in larger areas successfully, begin by loosening the top three to five inches of soil. Use a rototiller for the job if it’s a very large lawn area.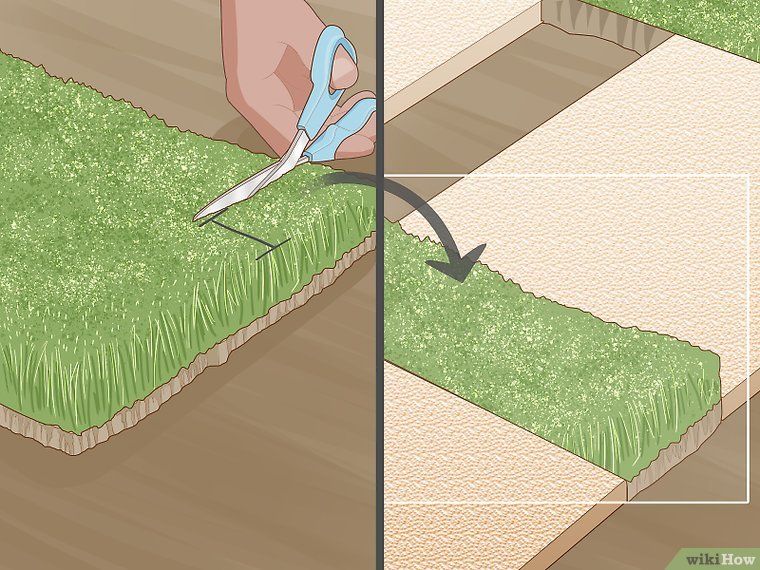 Use a shovel or hoe if it’s an area that’s just a few square feet.
Whether the area is small or large, after loosening the soil, it’s time to rake it smooth. Use a bow rake or a seeding rake to further break up any soil clods and rake the soil out into fine particles and a smooth finish. Use the tines of the rake to smash any large clumps of dirt if necessary.
After loosening the soil, rake it out smoothly and break up any clumps.The final step of site preparation for planting grass seed is to water the area well. Putting seed down on damp soil encourages speedy germination and provides immediate moisture to emerging roots.
Wetting the area before planting is an important step in the process.How to plant grass seed
For small areas, use your hand to distribute the seed, flinging it out over the area. For large areas, use a walk-behind broadcast spreader or a hand-held hopper spreader to disperse the seed. It’s all too easy to put down too much seed, or conversely, not enough seed. When you’re finished, the grass seeds should be evenly spread over the soil surface. They should be about one-quarter to one-half inch apart (obviously no one expects you to actually measure – just eyeball it). If you sow grass seed too thickly, the plants will outcompete each other and their growth will suffer. If you don’t sow them thickly enough, weeds may move in.
How to ensure good coverage
Sometimes it’s challenging to ensure ample coverage of grass seedlings. If you are using a drop spreader, I suggest distributing the seeds in one direction and then making a second pass in the perpendicular direction. This two-directional overseeding promotes more even grass seed germination and distribution. If you are spreading the seed by hand, it’s a bit easier to eye, but dropping the seeds from different angles helps.
What to put on top of newly planted grass seed
After the seeds are sown, cover them immediately to protect them from birds, keep them moist, and prevent them from washing away in a heavy rain. There are several different mulches you can use for the job. In my experience, straw (not hay, which can be filled with weed seeds), screened compost, or mushroom soil are prime choices. These products also act as soil amendments when they break down and can improve your soil’s fertility and structure. All three of these options are available from your local garden store or landscape supply center. Erosion mats are another option. They can easily be unrolled over the area with little mess and are biodegradable, though they’re also a good bit more expensive than the previous choices. Peat moss is not a good idea because it can repel water once it has dried out.
No matter what you choose to use to cover grass seed, more is definitely not better. One-quarter of an inch is about as thick as you should go. Compost and mushroom soil are great for covering fall-seeded lawns. Their dark color absorbs the sun’s heat and keeps the soil warm all night long. This speeds germination and encourages rapid lawn establishment prior to winter’s arrival.
How long does it take for grass seed to germinate
Some varieties of turfgrass take longer to germinate than others. For example, perennial rye grass germinates in as little as 3 to 5 days, fescues take more like 10 days, Kentucky bluegrass takes 2 to 3 weeks, and warm-season grasses like centipede, Bermuda, and zoysia grasses can take over a month. If your grass seed is a mixture of varieties, know that not all of them will germinate at the same time. To encourage good germination and a healthy start no matter which type of grass seed you planted, it’s critical that you keep the seeded area and the young plants well-watered until they are established. See the section below on watering for more info on how and when to water new grass.
Planting grass seed in fall
In many climates, the best time to plant grass seed is in the autumn. The still-warm soil of late August, September, October, or November encourages optimum root growth, while the cooling air temperatures discourage excessive top growth. This is perfect for establishing lawn grasses and promoting extensive root growth. It also makes the turf more resistant to drought and better able to access nutrients in the soil. In addition, in most regions, fall also brings increased amounts of rainfall. This means you won’t have to lug out the hose and sprinkler as often.
It’s time to plant grass seed in the fall when nighttime temperatures drop down to about 60 degrees F. Keep an eye on the forecast. Opt for sowing grass seed when there’s a day or two of rain predicted.
Planting grass seed in spring
Spring is another great time to seed the lawn. It’s particularly good if you live where springs are long and cool. For spring planting, it’s absolutely essential that you continue to regularly water the seed and the sprouted grass through the remainder of the spring, summer, and well into the fall. Establishment failures are often connected to improper watering. Early summer is another possible time, but you’ll need to water more often.
How often to water grass seed after planting
Water newly planted grass seed daily if the weather is over 80 degrees F. Every other day is a good watering schedule if temperatures are cooler. Prior to germination, wet the top inch or so of soil. But, once the grass seed germinates and begins to grow, reduce the frequency of irrigation but water more deeply. Once your new grass is about two inches tall, reduce your watering schedule to once or twice a week, but water until the ground is wet down to a depth of about three inches.
Once grass is fully established, stop irrigation all together, unless there’s a prolonged period of drought. When it comes to watering established lawns, it’s always better to water less frequently but very deeply. Always water lawn in the morning, if possible, to reduce the chance of fungal disease issues.
When is it safe to mow new grass?
Mow new grass when it reaches a height of about 3 inches. Mow high through the first growing season (3 to 4 inches). Make sure your mower blades are sharp (here’s my favorite sharpening tool) so they cut the grass cleanly, rather than tearing it which can create an entryway for disease.
When to fertilize new grass
When learning how to plant grass seed, many people think you should add fertilizer at planting time. This is not a good practice however, because fertilizers (especially salt-based synthetic lawn fertilizers) can burn tender young grass roots. Instead, top-dress the lawn with compost (here’s how) or use an organic granular lawn fertilizer instead of a synthetic brand.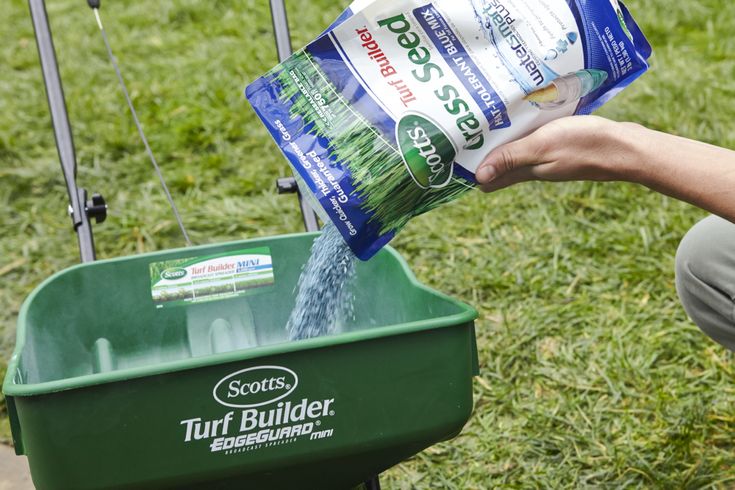 You can start to fertilize new lawns after you’ve mowed the grass 6 times.
Now that you know how to plant grass seed, it’s easy to see how doing it right can make all the difference. Follow the steps outlined above and you’ll have a healthy, thriving lawn instead of one that’s struggling.
For more on growing a beautiful landscape, please visit the following articles:
- Why you should top dress your lawn with compost
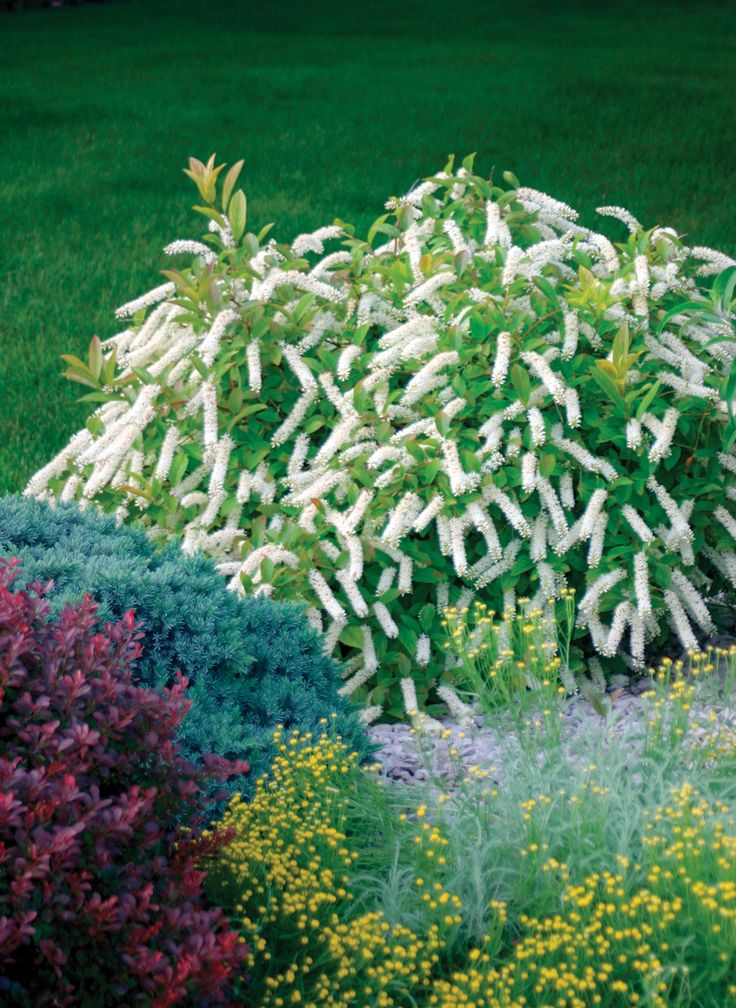
- The best blooming shrubs for shade
- Evergreen groundcovers
- Dwarf evergreen trees for small yards
- 18 top performing low-maintenance shrubs
How to plant lawn grass - do-it-yourself lawn preparation
So! You have decided to get a lawn in your area. A reasonable question arises - when and how to plant lawn grass?
Let's start in order.
Content:
How to choose lawn grass
When to sow lawn
Preparing the soil for lawn grass
How to plant lawn grass yourself
How to care for lawn grass
Seasonal lawn care
How to choose lawn grass
The decisive issue for the choice of lawn grass mixture is its intended purpose.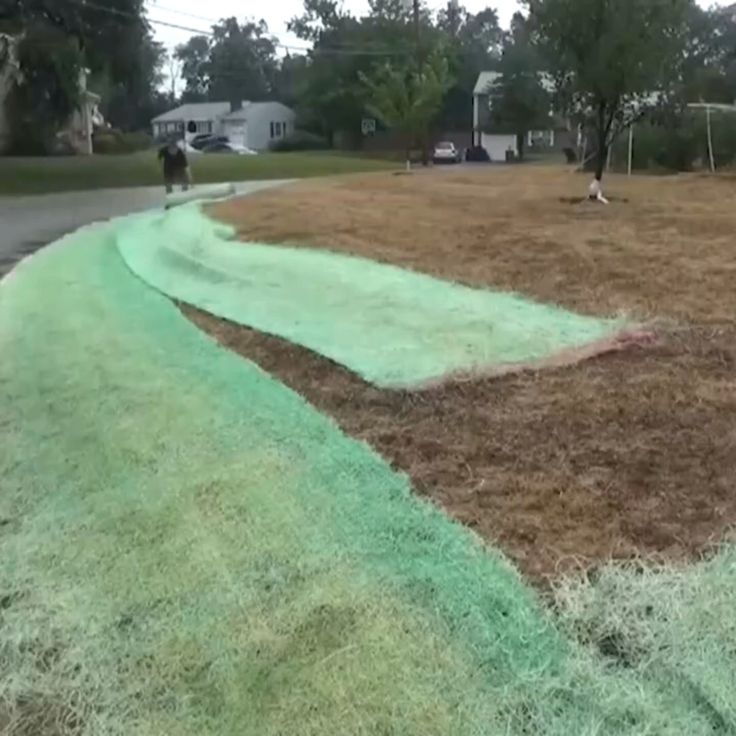 Usually the name of the lawn grass that you see on the packaging speaks for itself. For example:
Sports turf is a turf for high traffic areas. It can be sports and playgrounds, playgrounds for active games of dogs. Such a lawn is resistant to trampling, but grows quickly, which requires frequent mowing.
Parterre lawn - a lawn with a decorative function, serves as a backdrop for solitary plants and flower beds. It has a bright color and a beautiful sheen. Requires regular watering and space open to sunlight.
Dwarf Lawn is a lawn that contains low growing, slow growing grass species, making it easy to care for and minimizing the need for mowing. It is more often used as decorative, because it is subject to trampling.
Slope Turf - In this lawn, the grasses are selected to form a strong root layer (turf) that is able to hold the soil on the slope and prevent erosion.
When to sow lawn grass
In central Russia, lawn grass seeds can be planted immediately after the snow melts (late April - early May) and until the very end of the confidently warm season (usually October). In a later period, it is not recommended to sow the lawn, since the plants will not have time to fully get stronger before wintering, and as a result, in the spring it will be necessary to oversow, or even re-sow the lawn.
The most favorable period for sowing lawn grass is the end of April - May and September - the beginning of October.
If fresh fertile soil is brought in, it is worth waiting 1-2 weeks before sowing. After spilling the soil, wait 3-4 hours, then sow the lawn.
If sowing lawn grass is carried out in the summer, it is worth waiting for rainy cloudy days.
Do not overdo it with watering. Before germination - watering every day, then no more than 1 time per week.
The first lawn mowing is done when the grass is about 15 cm high.
Before planting the lawn, a drainage system must be established, and, if provided, an electrical supply system and an underground irrigation system.
In order for the lawn to look perfect, it is necessary to level the soil. The slope can be 1-3% to facilitate surface water runoff. A large lawn area can be given a greater slope, but not more than 30%.
Soil preparation for lawn grass
Weed removal
Removing weeds will ensure friendly seedlings, improve the appearance of the lawn and make it easier to further care for it.
Weed control methods:
Freezing is the death of underground parts of weeds in winter. To do this, in the fall it is necessary to carry out deep digging of the soil.
Suffocation - a long-term method based on repeated cutting of weeds at a shallow depth (harrowing for 2-3 years), the effect is achieved by exhausting the rhizome.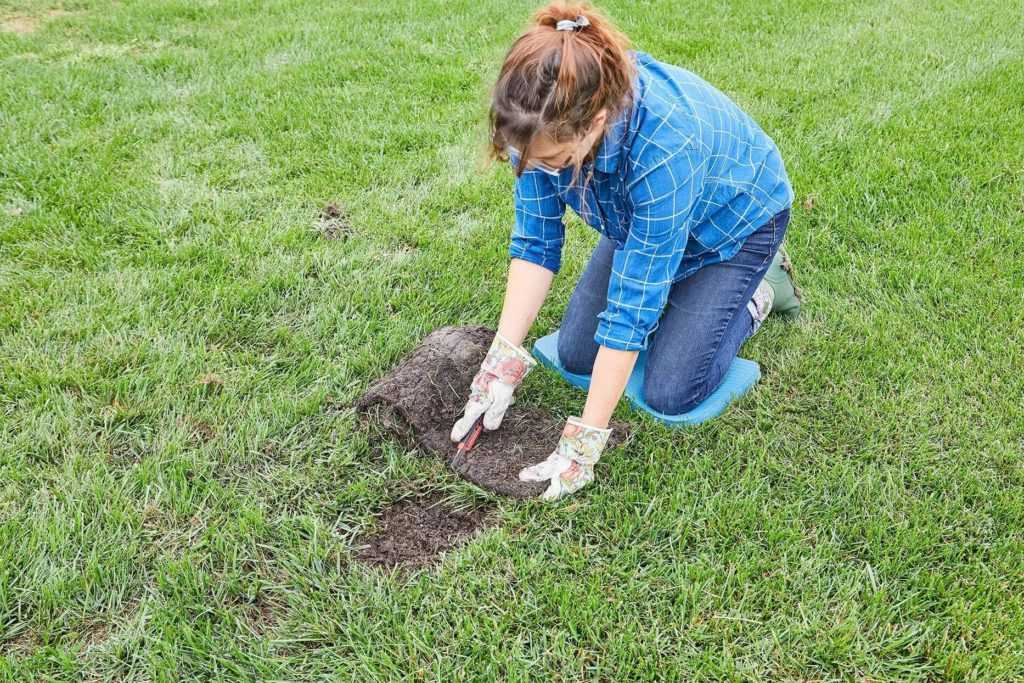
Provocation - a couple of weeks before sowing, it is necessary to prepare the soil, and when a lot of weed sprouts appear, they are loosened on the surface, thereby destroying them.
Mulching - covering the soil, depriving weeds of light. For this purpose, ripened compost is well suited, and crushed bark under trees and shrubs.
New primer is the most effective, but laborious and more expensive method. Removing the old soil and laying out the new soil with a drainage system - the soil is removed to a depth of 30 cm and laid out in layers: crushed stone, sand and black earth, and a rolled lawn is laid on top or seeds of lawn grass mixture are sown.
Herbicides - Weeds must be treated when they are actively growing, but must not be mechanically damaged. Within 5-10 days, the herbicide spreads over the entire area of the plant and after 20-30 days the plant dies entirely. Approximately 15 days after the action of the preparation, the land can be cultivated. Herbicides are best applied in the fall if lawn grass is planned to be planted in the spring.
Plots on which weeds have already been removed, it would be good to protect from those that have not yet been processed.
The surface of the soil under the lawn must be leveled - there should be no mounds or holes. As a result, water will accumulate in the pits, which will lead to wetting of the grass, and the bumps will make it difficult for the lawn mower to work.
Soil fertility
The thickness of the fertile layer for the proper development of lawn grass should be at least 10 - 15 cm.
The soil should be improved, depending on its characteristics.
The soil mixture and all its components should be mixed well and embedded in detail into the soil, loosened to a depth of about 40 cm, so that the lower layers do not subsequently move upward.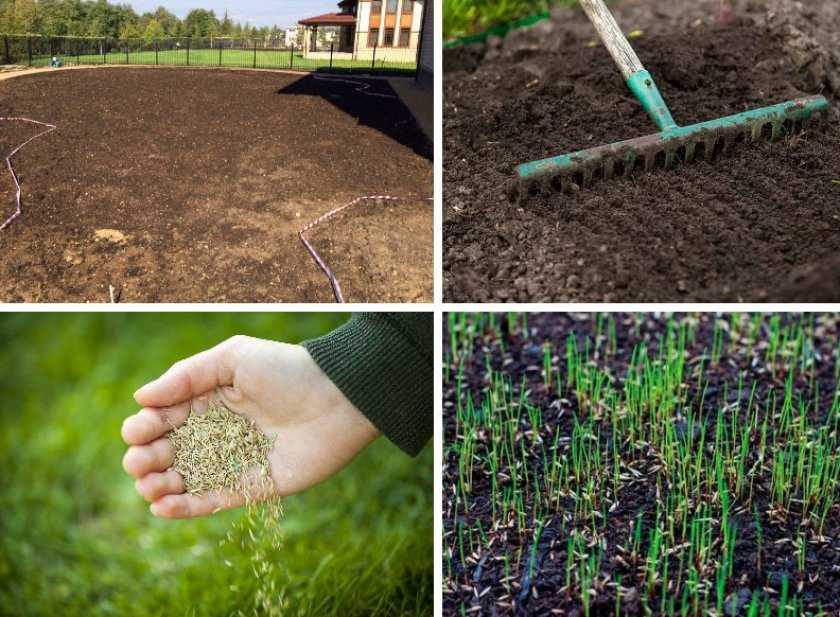 When carrying out these works, it is necessary to remove from the ground all parts of plants that have previously been treated with chemicals, and their roots must also be carefully removed.
In order to make it convenient to care for the edges of the lawn, it is better to fix them. Borders are usually decorated with materials such as gravel, crushed stone or pebbles. You can also use a stone border or tile - this will also look advantageous in a decorative way, and will give you access to mow the edges of the lawn, which will make mowing much easier.
How to sow lawn grass with your own hands
- Level the soil with a rake. There should be no bumps or depressions.
- Seeding rate for lawn grass is usually indicated by the manufacturer on the packaging. Sowing is done by hand or with a special manual seeder, the site should be passed several times: in different directions (left to right, right to left and diagonally).
 This is done to evenly distribute the seeds over the entire area.
For convenience, seeds can be mixed with sand before sowing, then the seeds will not stick together, and sowing will be convenient and even. - Then roll the seeds with a special roller or close them with a rake.
- Be sure to shed the soil well with a nozzle that sprays a fine jet of water.
How to care for lawn grass
During the period of growth of a young lawn, it needs to be provided with:
- sufficient watering
- removal of weeds that will attack a weak lawn
- lawn mowing 5-10 cm
A lawn is considered mature and mature after 2-3 seasons after sowing.
Seasonal lawn care
How to sow seeds | Useful articles on the blog Becker
Planting seeds is one of the most important steps in growing any plant. Each gardener understands that this period must be approached with the utmost responsibility - after all, the further growth, fertility and quality of the plant depends on how correctly the seeds are planted.
As the proverb says, "like the seed, like the tribe."
Some gardeners get carried away and enjoy this process, presenting the results of their labors, some consider it a routine and tedious work, but it is clear to everyone that one cannot do without it.
The first piece of advice is to treat planting seeds as a creative process. Draw and create in your imagination unprecedented results, they will help you work with interest and enthusiasm, and this will be more than rewarded when the time comes to harvest a magnificent harvest to the envy of your neighbors.
The main thing to remember is that everyone can grow strong, healthy and beautiful plants, for this you do not need to be an agronomist or have any special abilities or skills. You just need to have a strong desire and a small amount of knowledge that will allow you to avoid common and fatal mistakes.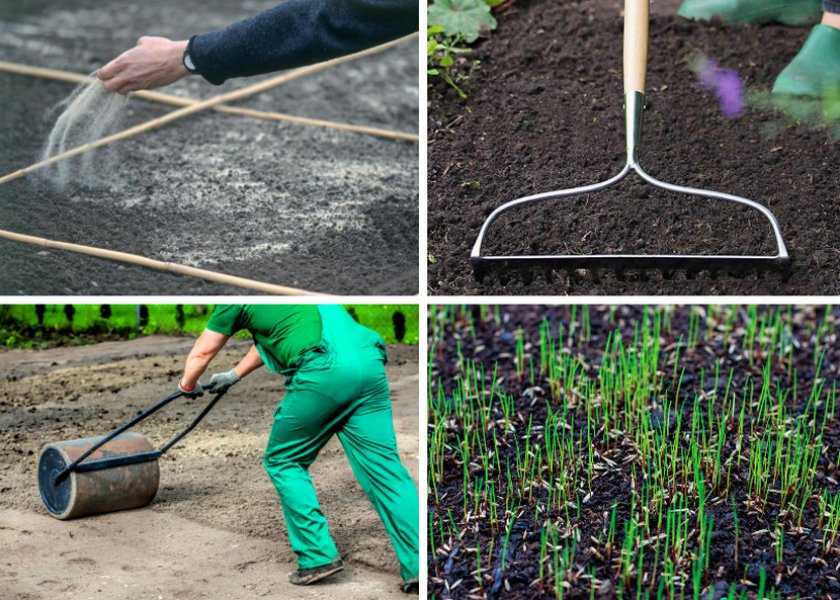 You just need to clearly know the minimum information on how to sow the seeds correctly.
If you ignore the rules for planting seeds that you will learn in this article, then all efforts may well be in vain - plants can simply stretch out, fall ill and die. In this case, you will simply lose money, and most importantly, you will kill a lot of time for sowing. And lose the enthusiasm you need. Therefore, let's better learn from the mistakes of others and turn exhausting work into an exciting creative process!
For simplicity and readability of the article, let's break down its structures into main key points, which will highlight the main problems and mistakes when sowing seeds. So...
Question 1. Selection of seeds
One of the simplest and at the same time fatal mistakes of all gardeners and gardeners is an understandable but fatal desire to save money. Of course, no one wants to spend more, but in this case, believe me, you will lose much more than you save.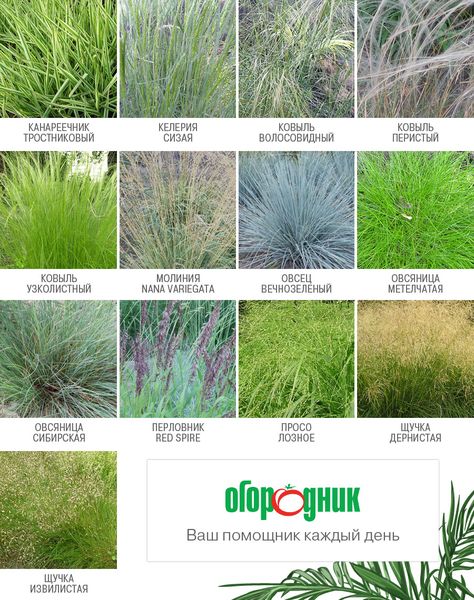 Having bought seeds from an unknown company, it is not clear from where, at best, in the end, you will have weak, stunted plants. And most likely - they will not rise at all. Do you need it?
By the way, Becker offers seeds of the highest quality - order and see for yourself like tens of thousands of other gardeners.
Well, since we started this topic, let's list some fundamental points when choosing and buying seeds:
Take seeds in bags
Now on the market you can see many offers to buy seeds from open containers. They measure them with spoons or glasses, and people take them - relying on their low cost, but forgetting about the dubious quality.
Absolutely not allowed. It is necessary to take only packaged seeds, since it is impossible to store seeds in an open container with high quality - they could freeze in winter, absorb a huge amount of moisture and various toxic substances from the air.
Consider yield parameters
This needs to be clarified. No matter how strange it may sound, but still the choice of the most productive varieties is not always the best option. And it's not about the quality of the seeds. It's just that high-yielding varieties are always more demanding on all growing parameters - soil, fertilizers, temperature, and so on. It is not always possible to provide such ideal conditions.
And low-yielding varieties are usually completely unpretentious in all these parameters and will yield a crop with a greater guarantee. Perhaps not as plentiful as the previous ones, but stable. As a result, it is still unknown which variety will give a larger yield. So keep this in mind and focus on how much you can idealize the conditions for the growth of your plants.
Keepability
Keep in mind that keeping quality is an important parameter, especially for vegetables that are meant to be stored for a long time. The same crops can be stored for a long time, but those with greater keeping quality will not lose their taste.
Therefore, think about which variety is right for you. For example, you need to choose between the delicious Riviera potatoes, which cannot be stored for a long time, and Slavyanka , , which may not be so tasty, but will last much longer.
Endurance
This property of the variety is resistant to various diseases, pests and other adverse effects. The weather at the present time behaves unpredictably (July heat in April, April cold in June, and so on), so plants must be able to withstand all this, so to speak, have a margin of safety.
So what, then, would seem to be the question? We take the most hardy?
But there is a small caveat here - the more useful properties a plant has, the less hardy it is. Therefore, look for your individual "golden mean". As actually and always in this difficult, but fascinating business.
When - ordinary varieties, when - hybrids
Decide what you need seeds for - whether you will harvest them for the future, or grow plants right away.
If you take it for future use, give preference to ordinary varieties, and for cultivation, take hybrids - seeds marked F1.
Why is that?
Here is a small digression, how they generally differ.
The peculiarity of the varieties is that they can pass on their acquired qualities in the offspring - both negative and positive. That is, from the seeds of plants of ordinary varieties, we will get something similar to it in all respects. Therefore, if you want to display your views, then this is your choice.
Hybrids can be considered better planting material, as they grow more beautiful and uniform. Also, as a rule, they are distinguished by abundant and early flowering, and as a result, the most massive fruiting.
However, all their advantages are relevant only for "one-time" cultivation - hybrids have no practical use in seed production. It makes no sense at all to collect seeds from them - none of them will really grow.
A few more tips for seed selection:
-
Select plants appropriate for the growing area.
-
Use specially treated seeds
-
Choose your seed producer carefully.
Question 2. Seedbed Treatment
It doesn't matter if you use your own seed or purchased untreated seeds, they need preplant treatment.
True, it is worth noting that it would be better and more correct to buy already processed seeds. But what if these are your seeds? Then read about pre-sowing treatment further.
Many gardeners often ignore this step, and for good reason. Seeds that are not properly treated can lead to partial or even complete loss of the crop. Why is this happening? This is mainly due to infectious diseases that are transmitted not only through the soil, but also through untreated seeds. So, the stages of seed preparation:
Etching, or disinfection
Carried out to destroy pathogenic microorganisms and prevent various diseases. At home, this can be done using a 1% solution of potassium permanganate (better known as potassium permanganate) or baking soda. Processing should last 20 minutes. Another option is hydrogen peroxide heated to 40 degrees - exposure for about 7-10 minutes.
If you do not want to use "chemistry", you can give your seeds a kind of contrast shower. In other words, use the hydrothermal method. To do this, alternately treat them with hot (about 50 degrees), and then with cold water, keeping it hot for at least 20 minutes.
Calibration
Of course, not all seeds will be of sufficient quality, some will have to be selected and discarded. Calibration is the process of separating the "wheat from the chaff".
The first way. Make a 5% soda solution, throw the seeds in there, and mix well. Let them stand for about 5 minutes. After that, some seeds will remain on the surface of the water, and most will settle. Drain the floating seeds, and those that remain at the bottom, rinse well with plain water and dry, but not in the sun.
The second way, unusual. It can be used for very small seeds. Take a plastic stick and electrify. Scatter the seeds in an even layer on a sheet of paper and run a stick over them. At the same time, high-quality seeds will remain lying, and bad, empty ones will stick to the stick.
Stratification
>This is a kind of imitation of winter conditions. It is carried out so that the seeds germinate more amicably. The whole process consists in cooling the wetted seeds. For this task at home, a refrigerator with a temperature regime of about 0 to +5 degrees is perfect.
In the case of small seeds, use wet cotton pads instead of vermiculite - this will also work fine.
But, of course, the best option is not to imitate environmental conditions, but to use them directly. If it is possible to stratify the seeds in your garden - excellent. Sow the seeds in foam food trays, cover with the same tray on top, and bury in the snow. Thus, the closest to natural conditions will be obtained.
Hardening
This procedure is necessary for all heat-loving crops (mainly cucurbitaceae and nightshade families), it increases their tolerance to temperature fluctuations and other adverse environmental conditions.
The essence of the method is the alternating effect of high and low temperatures on swollen, ready-to-sprout seeds.
Approximately every 12 hours for several days, it is necessary to expose the seeds to either positive (18-20 degrees) or negative (about -2 degrees) temperatures.
The seeds can then be kept at room temperature until sowing.
Heating (for seeds of plants from the gourd family)
This should increase the number of female flowers and the mass of seedlings.
Very easy to make. Dry seeds are wrapped in gauze and placed near the heating battery. An alternative is an oven. There it is necessary to observe the temperature of about 50 degrees, gradually increasing to 60.
It remains to wait 2-4 hours, periodically stirring the seeds, and the warming procedure for them is completed.
Enrichment with microelements
After the seeds have been dressed and warmed up, it is recommended to carry out this procedure.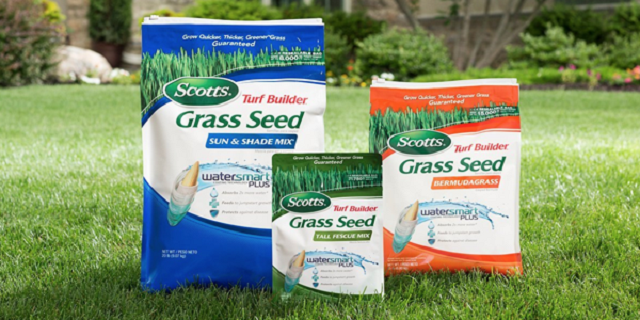 Thanks to it, the energy of germination and the metabolism of seedlings are stimulated. This process is especially important for those seeds that have a small supply of nutrients (carrots, tomatoes, onions, and so on).
It is necessary to carry out the procedure a few days before the start of sowing. To do this, it is necessary to make a solution of fertilizers containing micro and macro elements, such as zinc, magnesium, copper, nickel, boron, molybdenum, chromium, cobalt and others.
Water temperature should be 40-45 degrees. After that, the seeds are kept in the solution for a day and dried.
Seed soaking
What is it for? Everything is simple - in order to rise faster and give more friendly shoots. So, let's begin.
It should be noted right away that using tap water for this purpose is a bad idea. The ideal option would be thawed or rain, in extreme cases, non-carbonated purchased will do.
Pour the seeds into a fairly large cloth in a thin, even layer. Place a cloth with seeds on a plate or saucer. Now fill it all with water at room temperature, but not much, the seeds should not float - it is better to underfill than overfill. Now fold the edges of the cloth, thus covering the seeds, and put in a dark place.
Check them periodically, and when the seeds begin to dry out, water them again - in other words, keep the moisture constant. The room temperature should be around 20 degrees.
Each seed requires an individual soaking time. Pumpkin, legumes and cabbage will last only 12-20 hours; swans, asters and nightshades need 25-40 hours already. Onions and buckwheat generally require 50-75 hours of soaking.
The seeds are then ready for sowing.
By the way, gardeners often have difficulty sowing small seeds - they stick to their hands and do not allow to sow evenly. This problem can be solved by mixing the seeds with dry sand. That's all, now you can safely surrender to the process without wasting your nerves.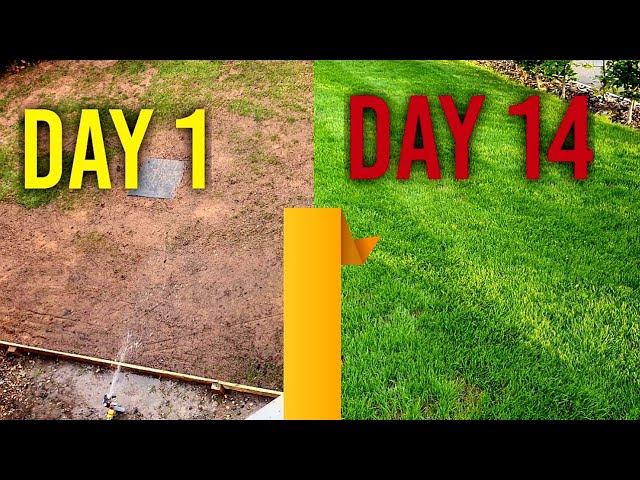
Question 3. When to sow
Every experienced gardener probably knows the answer to this difficult question. Knows through years of practice, mistakes and disappointments. However, what about newbies? There are an insane number of varieties of different plants, and each of them must be sown in a strictly defined period of time. You can't remember everything. Beginners usually rush to read endless articles, gardening magazines, and with sin in half still accumulate the right amount of knowledge. However, this partially solves the problem - because now, during the miracles of selection, almost every day new varieties appear, which, in turn, require additional knowledge.
Again, growing plants is not a science, but, as we said at the beginning of this article, rather a creative process. Therefore, you should not completely trust the information, which accurately indicates the timing of sowing a particular crop.
Too many individual factors and conditions affect plant growth to allow universal planting dates to be published.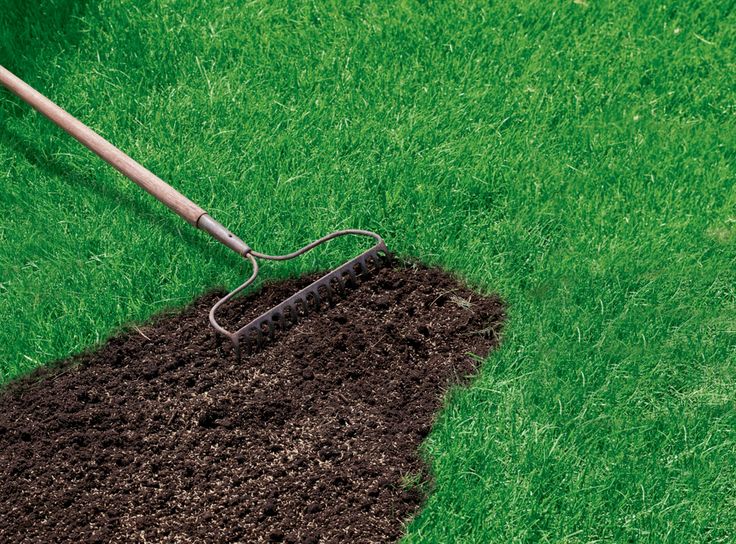 Therefore, you need to know how to calculate the planting time for each plant specifically in your conditions. It's not that hard to calculate them. Let's see what you need to know to calculate:
Duration of the growing season
The growing season is, to put it simply, the time from planting to full maturity and harvest. Of course, for each culture this duration is individual, and in some it is so long that a mandatory condition for seedlings arises. Otherwise, the plant may simply not have time to grow. By the way, even for a plant of the same species, the growing season can be different - after all, early, mid-season and late-ripening varieties are distinguished. Of course, all this must be taken into account when calculating the timing of planting - the plant must simply have time to grow.
Where can I find this duration? The answer is very clear and simple - on the packaging of seeds.
The range of these durations is quite large. Let's give an example - tomatoes of early varieties are planted in March, and late-ripening varieties are sown in February.
Temperature requirements of plants
Most vegetable crops are very heat-loving (well, with the exception, perhaps, of cabbage). It is necessary to know these features, because the period of planting seedlings in the ground directly depends on this. It is also worth considering the inconstancy of the weather - therefore, if you want to plant, say, an eggplant (and it is extremely thermophilic), then play it safe and plant it only when you are sure that frosts are definitely not expected.
Seedling age
Each plant has a moment when it most painlessly endures the process of transplanting into the ground, takes root more easily and will not get sick. Since this process is quite dangerous and traumatic for the plant, it is necessary to know when this optimal moment comes and compare it with the optimal time for planting in the ground.
This moment directly depends on the length of the growing season. For example, for sweet peppers, this “best” age falls on 40-50 days, and for eggplant - 45-60.
Growing conditions
This is a very important point in calculating the planting date. After all, if you want to plant seedlings of tomatoes in a greenhouse, you can start approximately at the beginning of May, and in the case of open ground, you will have to wait until June. Accordingly, it will be possible to start sowing in the case of a greenhouse in February, and if in open ground, not earlier than the end of March.
Again, you must soberly assess the situation and think about how your greenhouse is protected from the cold, what is it covered with, does it have heating, and so on. These are already individual factors, and here only you yourself, based on these observations, can accurately determine the timing.
Terms of seed germination
An important factor, which is often forgotten when calculating inexperienced gardeners. Meanwhile, in some crops, the duration of seed germination can be 12-15 days. If you forget about them, then you will not catch up!
What affects the germination time of seeds? First of all, of course, the variety of a particular crop, but even the same varieties often germinate at different times. This is due to individual germination factors - temperature, soil composition, pre-sowing treatment - in general, the conditions that we have created for the seeds.
We have already discussed such "accelerators" of the germination period as soaking, however, there are also special preparations for these purposes (Immunocytofit, Zircon). The run-up in terms between different cultures is quite large, and this must also be taken into account. So, for example, cabbage sprouts in 4-5 days, and sweet peppers can delay the case for 12-15 days.
Estimated harvest time
It all depends on what and when you want to get. Within reasonable limits, of course. The meaning of this parameter is that by changing the timing of sowing seedlings, you affect the date of harvest.
What does this give us? You can do several stages of crops, and this will give us the opportunity to increase the fruiting period.
Let's take an example. Let's say you decide to get an extra early harvest. It is necessary to choose the most early-ripening variety and sow the seeds for seedlings as early as possible (taking into account, of course, other conditions). After some time, we sow another seedling. As a result, the age of these seedlings will be different, and they will bear fruit in turn. True, it is worth considering that it will also be necessary to land them in turn. But a more abundant harvest is worth it, isn't it?
Number of frost-free days
The last thing to mention from the planting date calculation parameters is the number of warm days per year in your area. Why is it necessary to know it? Just knowing exactly these data and the duration of the growing season, some plants can be planted immediately in the ground, bypassing the seedling stage. In other words, the plant may simply have time to grow and so.
The most important thing in the process of calculating the landing date is not in a hurry. Many gardeners like to compete with their neighbors, showing off super-early abundant harvests. However, do not rush - sown seedlings too early will not give an early harvest. Overgrown - will not give high. Trust me, it's not worth it.
Question 4. Burying
All experienced gardeners should remember not to overdo it with planting the seed in the soil. If you bury more than necessary, the seeds will germinate longer, or they may not sprout at all. Well, or only a few will germinate. Do you need it? No, we need the perfect harvest.
So remember one simple rule:
For most varieties, the seed placement depth is 2 seed diameters.
There are also seeds that do not need to be buried in the soil at all - they are called light-similar. They need direct sunlight to thrive.
Fortunately, you can always find information about the insertion depth on the packaging. Here is another argument for you in favor of buying packaged seeds, which we discussed at the beginning of the article.
Question 5. Not thickening crops
Do not save space. The land is big enough for everyone. One of the most common mistakes novice gardeners make is overcrowding. As a result, you will get weak, elongated seedlings with fragile shoots.
Seedlings will not have enough space to develop, they will not be able to get enough nutrients and minerals. This, in turn, will lead to the fact that the seedlings will be more prone to various diseases.
So don't give them a reason to compete with each other for water, space and food. Each seedling should have all of this equally. Each crop has a different allowable degree of thickening, so consider their planting practices.
Question 6. Watering after sowing
So you put the seed in the ground, covered it with earth... No, don't water now! This will cause the seeds to sink even deeper with the water, and we have already talked about the importance of the correct depth. Not the fact that they will then ascend.
Yes, the soil must be moist. But this must be done before sowing. If you still need to moisten the soil a little after sowing, do it with a spray gun.
Question 7. Top dressing is an important aspect of plant development
Do not neglect top dressing - they are stimulators of healthy plant growth. If you are growing seedlings in small containers, then this advice becomes especially relevant. How to feed seedlings?
You will need to make a weak solution of fertilizers such as ammonium nitrate, superphosphate and potassium sulfate. However, before watering the seedlings with this solution, do not forget to sprinkle the plants with plain water first. This will prevent caustic fertilizers from damaging the delicate root system. You can find out the number and frequency of top dressing on the seed packaging.
Take care of the health of seedlings
If you yourself get sick, say, with the flu, you will immediately begin to actively drink medicines and conduct various methods of therapy. At this moment, you are well aware that "it" will not pass. The same thing with seedlings - a black leg, rotting of the root system - all plant diseases will not go away by themselves, they must be treated. Otherwise, the disease will progress, and as a result, the plant will simply die.
We are not going to talk about all the possible plant diseases in detail now - there are too many of them. The main thing is, if you notice that the seedlings take on a strange unhealthy look - sound the alarm, diagnose and treat the disease.
In general, this should not be allowed at all - as they say, the future of medicine belongs to preventive medicine. It is the same in gardening - the best therapy is prevention.
Treat seeds before planting, strictly observe growing conditions, and water seedlings periodically with disease prevention agents such as Trichodermin.
General points in planting conditions
When growing seedlings, there are many conditions that must be observed exactly. These are temperature conditions, lighting, watering, etc. Therefore, it is now necessary to highlight the main points of these conditions:
Lighting
Every gardener understands that his seedlings will not do well without proper lighting. Therefore, this point should be given close attention.
Think about how it is possible to give plants sufficient lighting in your situation, based on the following data - the length of daylight hours necessary for the stable development and growth of seedlings is 12-14 hours.
If for some reason natural lighting is not enough, you will have to use artificial - fluorescent lamps. This is especially true when planting seedlings early. If your seedlings are on the windowsill, it is desirable that this window sill be on the south side.
By the way, a very effective solution is to place reflective foil screens around the seedling trays.
Watering
If the plant is not provided with the proper level of humidity, of course, it will die. It is clear. Those seeds that are swollen simply cannot sprout, and if they do, they will die.
To prevent moisture loss, we recommend covering the seedling trays with polyethylene. This will slow down the drying process of the topsoil. After all the seeds have sprouted, the film can be removed by continuing periodic watering.
However, excessive watering is also not good. This will cause the root system to rot, which will damage the plant with various diseases.
Watering with too cold water will lead to the same result. Water temperature for irrigation should be between 20 and 24 degrees.
Temperature
Temperature too low will slow the growth and germination of seedlings. That is, if she comes up at all.
If you simply put the tray with seedlings on the windowsill, especially immediately after sowing, keep in mind that the temperature inside the tray will be lower than in the room. Therefore, make some kind of stand to raise the tray a couple of centimeters from the windowsill.
During the period when the seeds are just sprouting, the temperature in the room should be 5-7 degrees higher than after germination.