Best way to clean a kitchen
How to Seriously Deep Clean Your Kitchen
sparkling clean kitchen in blue and white
Credit: RYAN RAY/CC + EM INTERIORS
Our kitchens have been working overtime. After months of creating more home-cooked meals than you've likely ever whipped up before, which was followed by the marathon of food preparation for the holidays, it's likely time to wipe the slate clean. Give your family's hub this expert detailing twice a year to get it looking, smelling, and running like new.
Make Your Sink Sparkle
Your hand- and dish-washing HQ is—brace yourself—one of your home's dirtiest spots. To sanitize it, spritz on a mix of one ounce bleach, one-half quart water, and one teaspoon dish soap. Wait five minutes, then scrub with a large brush. Detail the faucet and drain seam with a toothbrush, and flush with hot water.
refrigerator filled with food containers illustration
Credit: Illustration by Stephanie Singleton
Tackle the Refrigerator
Sure, you wipe up spills, but if you haven't done more than that in six months or so, it's time to roll up your sleeves. Per a 2019 American Cleaning Institute survey, 41 percent of us don't even remember the last time we really sanitized this space. And while it's satisfying, the goal isn't just Instagram-worthy organization—this is for your health. The standard temp inside a fridge (about 40 degrees) makes it hospitable to germs and fungal mold, says New York University microbiologist Philip Tierno, PhD.
What's more, pet hair, dust tumbleweeds, and stray green beans can accumulate underneath and behind this appliance, covering the condenser coils that cool its motor and help it run efficiently. So unplug it, or hit the switch for its outlet on your home's electrical panel, and vacuum them with the brush attachment. They may be located on the front or back, or underneath, depending on your model; you may need to shimmy it away from the wall for access. (It's not such an ordeal, we promise, and the efficiency and lifespan payoffs for your fridge are major.) Then turn it back on and take everything out—from your freezer, too.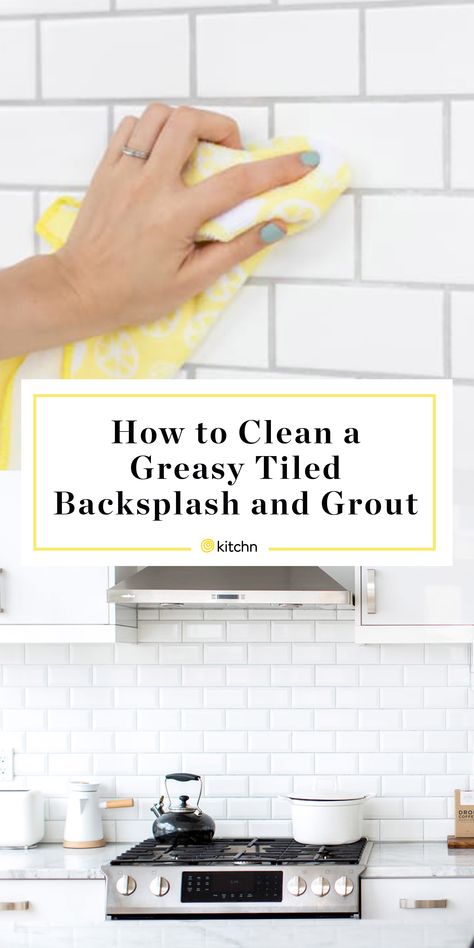 Stash keepers in coolers; toss anything expired, and recycle the containers. Slide out any removable shelves and drawers, and soak them in hot, soapy water in the sink (or a tub, if they're big). Meanwhile, spray the interior and top with a mix of one cup each water and distilled white vinegar, plus one teaspoon of dish soap. If you see any stuck-on food bits or discoloration, sprinkle on baking soda. Then scrub the whole shebang. Clean My Space founder Melissa Maker uses Scotch-Brite Advanced Scrub Dots Non-Scratch Scrubbers ($4 for two, amazon.com); their unique pointy shape wiggles into tight corners. Run a damp cloth over all surfaces, then dry and replace the shelves and food, wiping bottles as you go. To sequester spills prevent items like meat or berries from leaking onto clean surfaces in your fridge, place a shelf liner or enamel butcher tray underneath, and wash them as needed, suggests Sansoni.
gray stove illustration
Credit: Illustration by Stephanie Singleton
Scour the Stove
Sauce and grease splatters don't just look messy; they can harbor germs and draw bugs if allowed to set.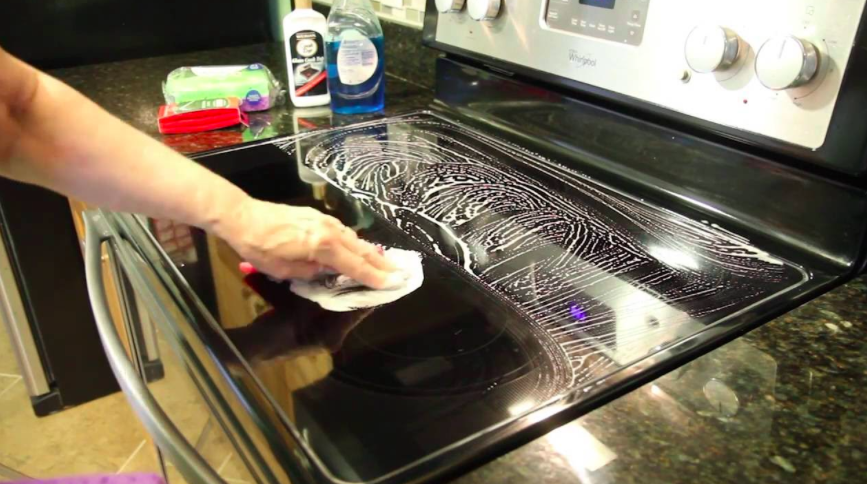 So, use the right method for your model. Glass stove tops can get scratched, so grab a special sponge, like the pad in Affresh's Cooktop Cleaning Kit ($7, amazon.com); it has a textured surface that works vigorously but gently. For gas stove tops and burner grates, borrow Chicago chef and a partner at One Off Hospitality Paul Kahan's recipe: one cup white vinegar, one tablespoon castile soap, and two cups water. "A scouring pad soaked with this stuff makes grates look terrific," he says. Next, pop off the knobs and the vent-hood screen up top, and let them soak in hot, soapy water. "They collect so much grease and dust," says Tennessee chef Mee McCormick of Pinewood Kitchen & Mercantile. "That extra little bit makes a big difference in how clean your kitchen is." If soap doesn't cut it, grab your dedicated cleaning toothbrush (every pro's secret weapon) and get in there with a paste of baking soda and water.
Overhaul the Oven
This hardworking holiday appliance needs your attention when it smokes or smells funny while preheating. Pull out the racks and, depending on their size, either put them in the dishwasher; soak them in the sink in hot water and a few regular dishwasher-detergent tablets for two hours, turning as needed; or stick the racks and tablets in the tub (line it with an old towel first, to avoid scratching the glaze). "The tablets are powerful degreasers, and they'll cut through cooked-on crud so you don't have to use elbow grease," says GoClean Co's Sarah McAllister. Meanwhile, spray the interior with a solution of two cups water and two table-spoons dish soap, let stand for five minutes, then swipe with a wet pumice stone, says Maker, who assures that the combo of abrasion and degreasing is plenty strong—no toxic cleaner or self-cleaning setting necessary. There are big pumice stones for jobs like this; Maker likes the Pumie Scouring Stick ($10 for three, amazon.com). Hit the inside of the door with cleaning pro and the founder of Unclutter.com Donna Smallin Kuper's favorite tool: a damp Brillo pad ($2 for ten, walmart.
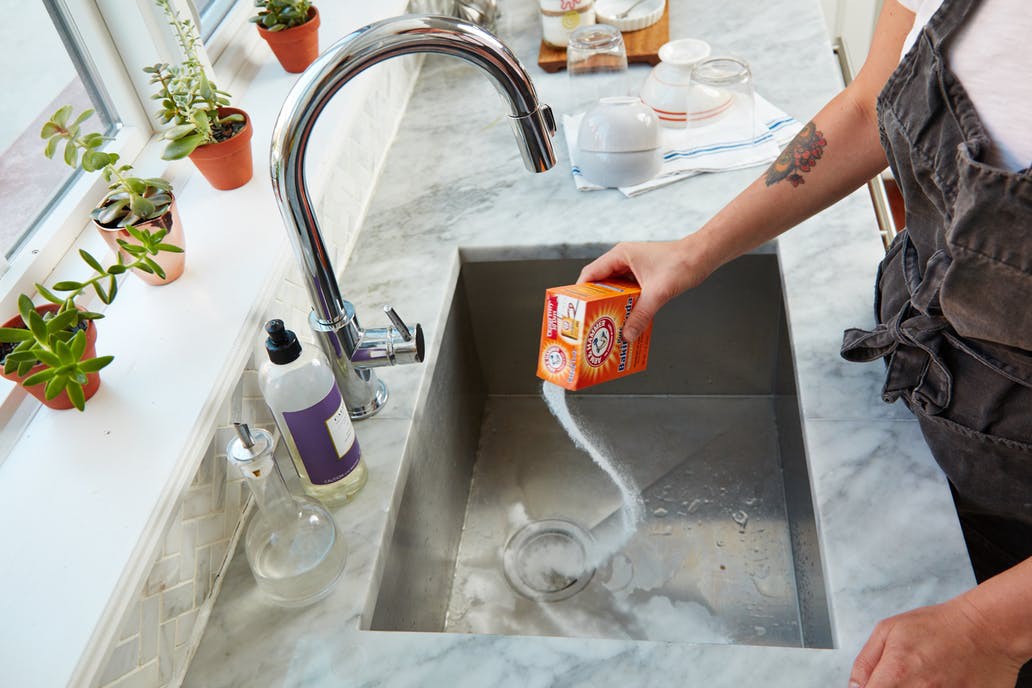 com). Vacuum any crumbs out of the warming drawer, and replace the dry racks and knobs.
These efforts become easier, however, if you maintain your oven year round. To protect the bottom from food drips, stick a baking sheet on the lowest rack before you slide in your next lasagna or pie, suggests Brian Sansoni, the senior vice president of communication, outreach, and membership at the American Cleaning Institute. That way, you can just wash the sheet afterward, versus cleaning the whole oven. (To get that baking sheet spick-and-span, see chef Sharone Hakman's technique.)
cups and bowls in dishwasher illustration
Credit: Illustration by Stephanie Singleton
Degunk the Dishwasher
Food, grease, water minerals, and undissolved detergent can build up on the interior and in the filter at the bottom, knocking its performance. Unscrew the filter, rinse it with hot water, scrub it with a trusty cleaning toothbrush (just rinse this tool between uses), and screw it back on. Then pop off the spray arm—or arms; your machine may have more than one. Rinse them in warm water, pry out any buildup in the holes with a toothpick, and replace. Wipe the door gasket and exterior with a damp cloth, then insert a deep-cleaning pod, like Cascade Dishwasher Cleaner ($17, amazon.com), and let it do its thing. These have powerful surfactants that dissolve grimy or smelly residue effortlessly.
kitchen cabinets illustration
Credit: Illustration by Stephanie Singleton
Conquer the Cabinets
When the light hits a certain way, drips and fingerprints can appear out of nowhere. Dust bunnies adore any exposed tops, and millwork—like the grooved fronts of Shaker cabinets— is an extra-sticky area. Unscrew the pulls and knobs, and wash them in hot, soapy water. While they're off, grab a cleaning toothbrush, suds it up, and tackle the door's nooks and crannies. Then wipe the entire surface with a cloth dampened in hot, soapy water. Follow with a damp cloth, and dry with a microfiber one. If grime persists, spritz on an enzyme cleaner, like Bio-Kleen All-Purpose Spray ($10, biokleenhome.com), and let it sit for five minutes before wiping it off. When the hardware is dry, replace it. Then empty the drawers and use your vacuum's brush attachment or a lint roller to nab crumbs. (To hit corners, roll a lint-roller sheet around a butter knife, says Maker.) Wipe down if needed, and refill.
toaster and jars on counter illustration
Credit: Illustration by Stephanie Singleton
Get Counters Gleaming
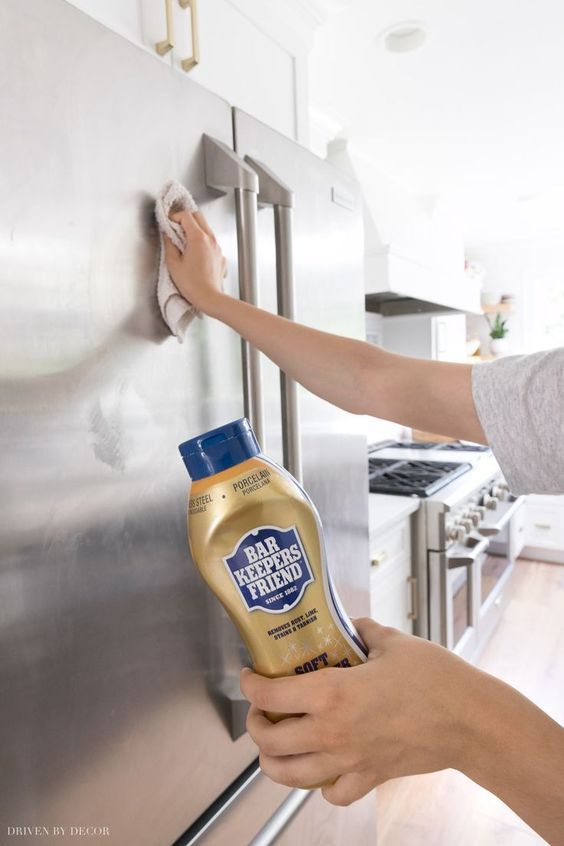
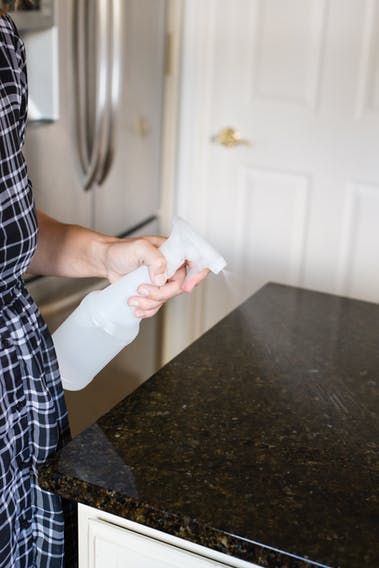
We're guessing you don't detail the caulk line where the countertop and backsplash meet very often—or always excavate under the toaster, mixer, and coffee maker, for that matter. For glorious grout, apply a paste of one-quarter cup hydrogen peroxide and one-half cup baking soda, then scrub gently and wipe well. Countertops require a little recon: Although some of us wield a multi-purpose cleaner with abandon, the wrong formula can damage or discolor some materials. A spray bottle filled with hot water and a squirt of dish soap is a universally safe bet. When you want to disinfect, check a formula's label first to ensure it's okay for your surface. Most multipurpose sprays are fine for laminate, quartz, and soap-stone. Otherwise, a mix of one part isopropyl alcohol to three parts water works great on concrete and granite, and half a lemon and salt work wonders for wood. Marble calls for a specialized product, such as Miracle Sealants Tile and Stone Cleaner ($9, homedepot.com). Martha keeps her counters pristine by wiping them down with white cotton-terry bar towels (like these, from Williams Sonoma ($20 for four, williams-sonoma.com)) in lieu of paper towels—they're bleachable and look neutral in any space. Since they need to be laundered after a few uses, she keeps plenty in rotation.
dutch ovens illustration
Credit: Illustration by Stephanie Singleton
Polish Pots and Pans
Daily washing doesn't nix tarnish or blackened, cooked-on food. That's why you should let the material be your guide. For copper, chef Bill Kim of Chicago's Urbanbelly mixes a paste of equal parts lemon juice and salt; it dissolves tarnish almost instantly. For stainless steel, Planta chef David Lee lets heat do the work: Fill a pot with water and a squirt of dish soap, boil for five to 10 minutes to get rid of scorch marks and hard-water stains, then wash as usual. Phoenix chef Christopher Gross, the owner of Christopher's & Crush Lounge, uses a similar strategy for any burnt pot: "Fill it with water and a teaspoon of baking soda, and simmer for a half hour." It works like magic. When a baking sheet has seen better days, take a cue from chef and Masterchef competitor, Sharone Hakman: Let it sit in equal parts baking soda and hydrogen peroxide for four hours. It'll shine like new.
How to clean a kitchen in less than an hour
Real Homes is supported by its audience. When you purchase through links on our site, we may earn an affiliate commission.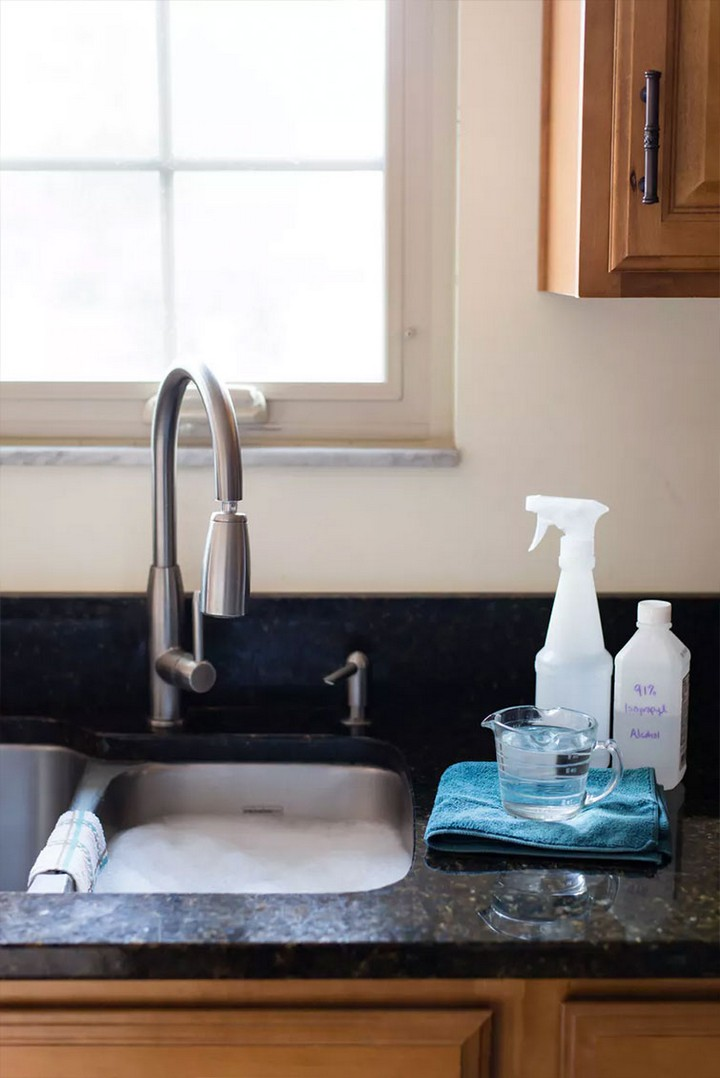 Here’s why you can trust us.
(Image credit: Neptune)
Join our newsletter
Get the best home decor ideas, DIY advice and project inspiration straight to your inbox!
Thank you for signing up to Realhomes. You will receive a verification email shortly.
There was a problem. Please refresh the page and try again.
By submitting your information you agree to the Terms & Conditions and Privacy Policy and are aged 16 or over.Knowing how to clean a kitchen properly is essential. Whether yours is big or tiny, rented or owned, deep cleaning your cooking space every week or so totally pays off. Aside from the key hygiene aspect, a clean kitchen is one that is a pleasure to be and cook in also. Although it might come as a surprise, once you've deep cleaned your kitchen once, keeping on top of it will be a total breeze.
The key, as with many undesirable household chores, is to just get started. Making sure you have the correct technique and tools to hand will help bring up your kitchen space like never before. From decluttering and organizing, to cleaning out appliances and sprucing hard to reach surfaces to perfection, take it one step at a time and the results will be worth it.
(Image credit: Garden Trading)
How often should you clean a kitchen?
Running the dishwasher or doing the dishes by hand and wiping down countertops should be done daily, as and when a build up happens. How often you physically have to do this depends on a multitude of factors, but it will make deep cleaning your kitchen more light work and keep cooking in this space a pleasurable experience rather than a hectic one.
If you have a big family, or even just one toddler running around, if you work from home regularly or love nothing more than cooking up a storm every darn day of the week, then of course you will need to spend more time cleaning your kitchen than not. Using the best kitchen cleaners will help make the job easier. Use these daily tips to stay on top of it.
How to clean a kitchen fast
If you don't want to spend hours scrubbing, we hear you. Especially when you feel you're not that good at cleaning or haven't cleaned much before, 'it can be a little daunting to know where to start', according to Anne Clark, the founder at My Kitchen Serenity . Clark has a fool-proof basic guide to cleaning a kitchen fast:
- Sweep or vacuum the floor to remove any large particles or debris, then
mob with a floor cleaner if necessary. You can make your own floor cleaner
with vinegar and baking soda - Wipe down the countertops and appliances, including the oven, stovetop,
refrigerator, and dishwasher. Then, spray an all-purpose on all of the
surfaces to be cleaned. Let it sit for a few minutes, then wipe it clean
with a cloth, sponge, or paper towel. If you don’t have an all-purpose
cleaner, you can use a vinegar and water solution - Clean the sink and wipe down the faucet and handles. Again, use the
same method as above as with your kitchen surfaces - Dust all of the cabinets and shelves with a clean rag or duster
This is the bare minimum and can be achieved in well under an hour.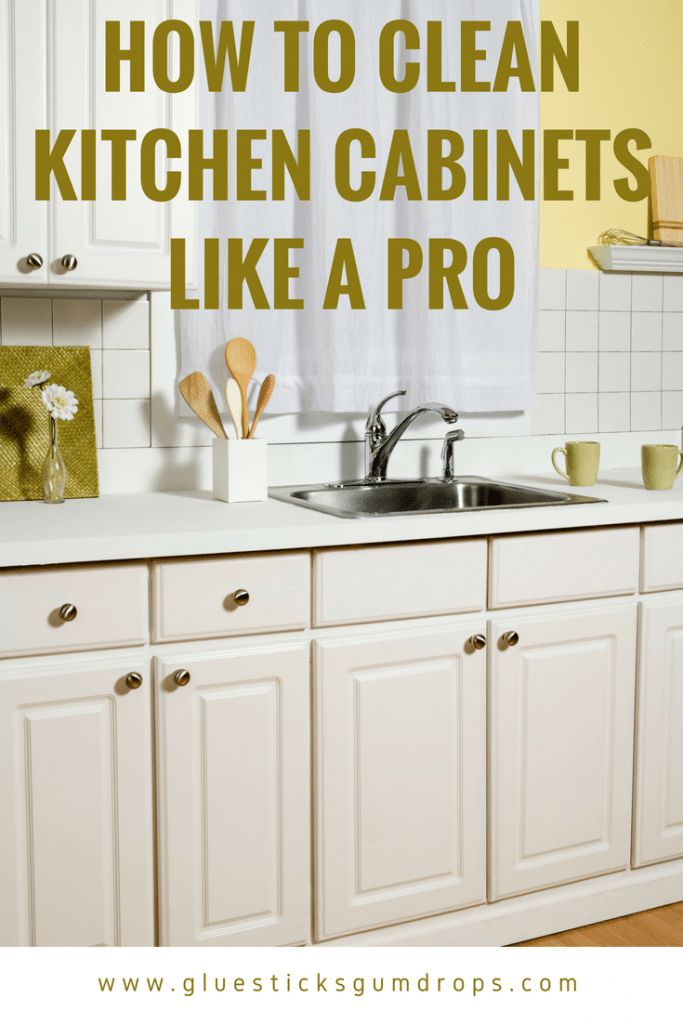 Of course, there's much more to it – if you want to deep clean a kitchen and keep it clean. What better way to show off your favorite kitchen ideas after all?
Daily kitchen cleaning tips
- Clean up after every meal: The rule of thumb, it seems like a faff but it is so worth it.
- Aim for an empty sink: Striving to keep your sink empty at all times will instantly make your kitchen space seem spotless and it will make deep cleaning a doddle too.
- Do the eye-level test: Get every last crumb by checking your countertops at eye-level after you’ve cleaned them.
- Be strategic: Always work left to right and top to bottom. Once you've nailed this strategy, cleaning your space will be so breezy and you won't need to think about it.
- Clean over the floor: You’ll clean your floor last so it’s fine if collects crumbs and the like.
- Vacuum daily: It takes five minutes and it will stop staining delicate floors leading to more time when deep cleaning.
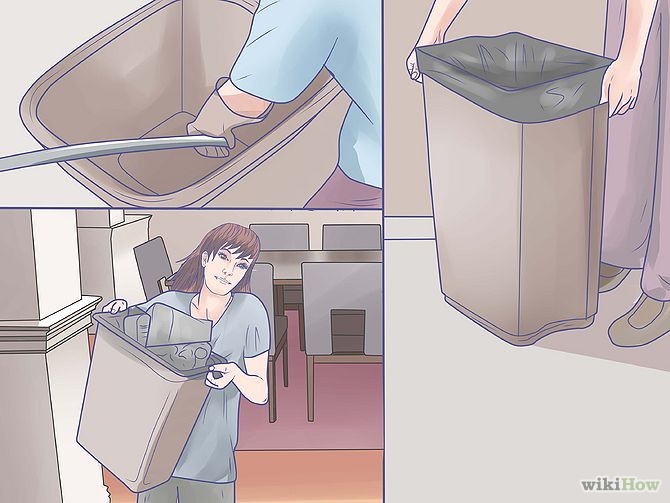
- Empty your trash: Smelly trash is a recipe for disaster and bacteria also. Don't let it get to the point where your bag is overflowing by emptying it regularly.
- Never overfill your dishwasher: This is a star appliance but if you overfill it, it won't clean properly. And, who wants to do the dishes twice?
- Clear out the refrigerator frequently: Cleaning a fridge regularly will stop smells and and unsightly food display every time you go to open those doors. Aim for at least a monthly clean and get rid of old food as and when.
- Clean that under-counter sink: You know the one we mean, and just because it's loaded with cleaning products, it doesn't mean that it's a clean space. Clear it out regularly.
- Be minimal: Limit what you have on your countertops to keep your cooking area uncluttered, easier to clean and more visually pleasing also.
- Label, label, label: To stop the need to organize everything again and again, every day of the week, label your herbs and spices – whether you have a pantry or not – so that creating order is far easier and becomes more routine.
(Image credit: deVOL)
How to deep clean a kitchen in 45 minutes: step-by-step
On top of daily cleaning, you should be deep cleaning your kitchen on a weekly if not bi-weekly basis. Again, it depends how much the space is being used, and remember also that if you have a large family in tow, sharing the load is a wise move...
However, if you keep on top of quick daily chores, you'll soar through the following deep clean checklist in about 45 minutes flat.
1. Clear the decks
You cannot clean a kitchen with clutter everywhere and this first step may actually take you the longest but it's also one of the most important tasks.
This is a good time to employ Melissa Maker's, author and creator of Clean My Space , 12 O'clock method (more on that later). You start by the door, and work your way around moving everything off the counters, putting any dirty dishes in the dishwasher or in the sink to hand wash/soak.
Note that it's pretty tempting when putting the cayenne away to start reorganzing your entire herb collection, but don't. Organizing kitchen cabinets and the entire contents of your pantry for that matter is a separate job. Focus on cleaning the kitchen only.
Empty the trash, your compost and any recycling too.
2. Start the dishwasher and make a start on the sink
With everything in your dishwasher, if you have one, switch it on now. If you're hand washing, do this now then dry everything to stow away.
With a clear sink, you can start deep cleaning process. if you know how to unblock a sink, add your unclogging cleaning agents now so that it can work as you continue to work on the rest.
Then, learn how to wash a stainless steel sink properly to remove any stains and food residue.
3. Clean your stove top
If you have gas burners or a glass-top stove that's looking grubby, start by scrubbing this down so that any burn-on food leftovers and splashes end up on the floor or on your countertops which you'll get to next.
Why? You'll kick yourself if you never realized that cleaning your countertops before you dust and wipe down any upper kitchen cabinets just means that you'll have to clean your counters again.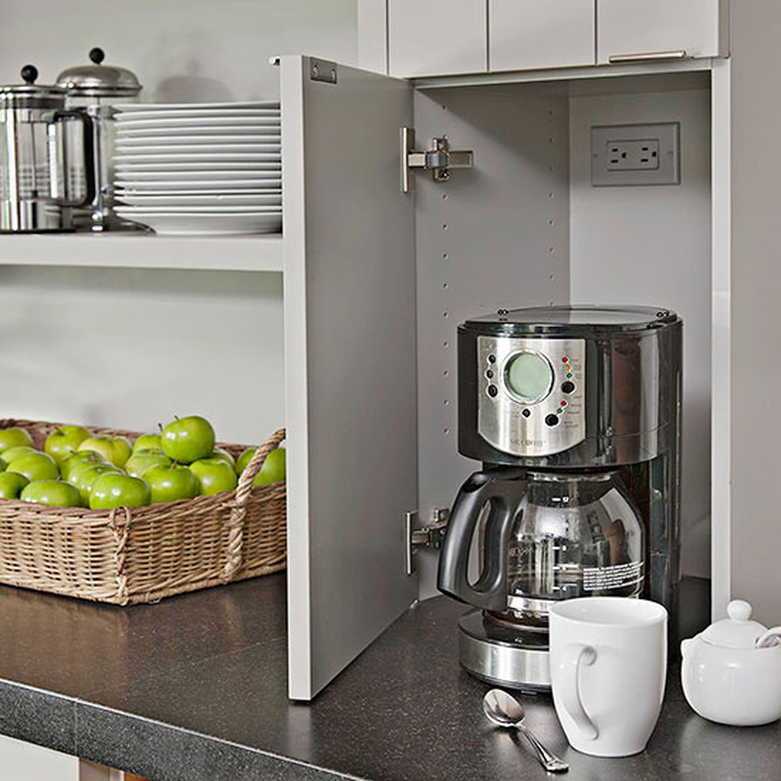 So start from the top with your favorite cleaning product and a damp microfibre cloth and work your way down to your bottom cabinets.
If you are cleaning marble, granite or other natural stone worktops take care with what you use as natural products like vinegar are too acidic and can damage the finish.
If your countertops are wood, then you'll need some extra knowledge on how to clean butcher-block countertops, but it's not that difficult; you just need to be gentle.
5. Clean left to right
And working left to right just makes it easier to ensure that you've got to everything, including big and small appliance doors like microwaves and ovens, in one smooth sweep.
Dust your fridge, and make sure you catch crumbs from your toaster or grounds from your coffee maker. We're surface cleaning here, but if you do want to set more time aside later to say, clean an oven or descale a kettle, you can get your cleaning agents started now so they have time to work their magic.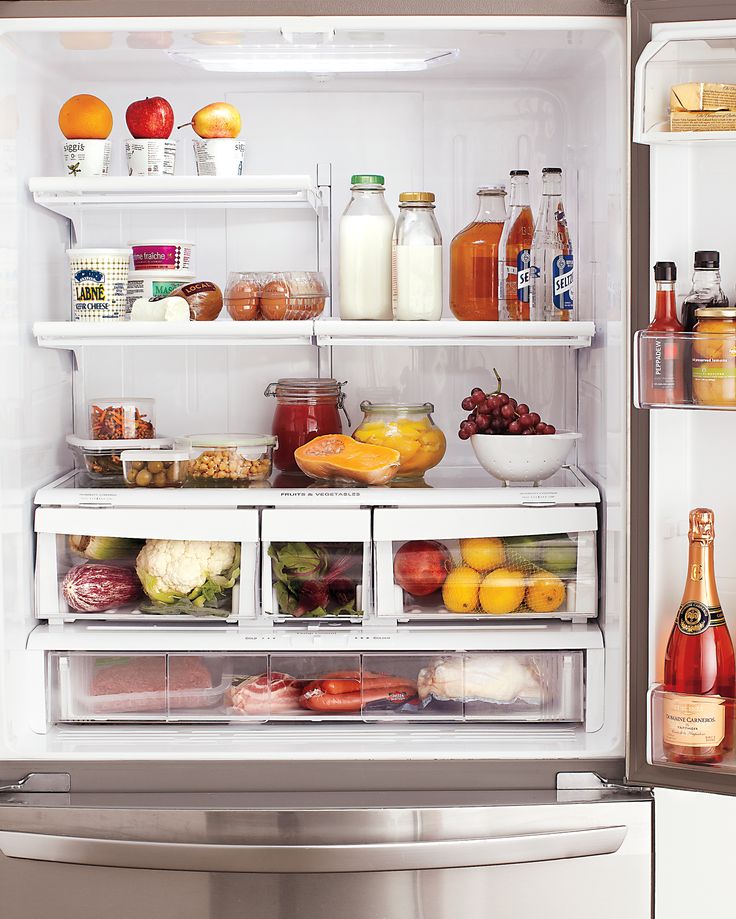
(Image credit: Kasia Fiszer © Future)
6. Clean anything else in the space
If you have a breakfast bar or a dining table in your space, maybe it’s an open plan kitchen that you have – be sure to wipe down the chairs and table top also.
7. Reassess everything remaining on your counter
With your counters clean, now you can take a good, hard look at what you're left with. If it's spick and span but still a little busy, think about what you actually use and what you actually need on display. Be ruthless here, and if the waffle iron that made an appearance 3 Christmases ago is still there collecting dust, find it a new home in your cupboards.
8. Finish cleaning the sink
Whether it's baking soda and vinegar, or your favorite cleaning product you used to clean and unblock your sink, now it's time to scrub it off. Once done, pour hot water down the plughole to unclog anything remaining. Make sure you give your taps and spout a wipe down too.
(Image credit: Katie Lee)
9. Clean the kitchen floor
All that dust and all those crumbs landed on your kitchen floor so grab your best vacuum cleaner or go old school with a broom and collect it all.
Once it's dust-free, pick up your best mop – we like to use a flat head mop – and wipe the floor down, cleaning yourself out of the kitchen, not into a corner! Make sure you consider your kitchen's floor material, taking care not to clean with acids on engineered wood and the like.
Ceramic tile is the easiest to clean, but you can learn how to clean hardwood floors to keep them in perfect condition, too.
10. Put your kitchen back together again
Whether you need to replace the kitchen sponge that is now in the garbage can or if your need to put a new liner back into the trash can for that matter, now is the time to do it.
Add clean kitchen towels and if decluttering your breakfast bar area now means you can add fresh flowers or your favorite candle to lightly fragrance the room, do that now too, you totally deserve it.
11. Protect your appliances and cookware from spills
It may sound obvious, but protecting your appliances from spills in the first place will drastically reduce the amount of cleaning you have to do. Dennis Capone, a kitchen expert at My Kitchen Toolkit , recommends using cooking liners 'if you use an air fryer, toaster oven or slow cooker. There are plenty of products out there that can be inserted perfectly into your appliance to protect it from food spills - slow cooker liners like these from Amazon are an absolute game-changer.'
Don't want liners? Capone points out that 'you don't have to limit yourself to
pre-made liners – a simple sheet of aluminum foil can also do wonders
for keeping baking trays, broiler pans, and toaster ovens clean.'
Kitchen cleaning tips from celebrity cleaning experts
Melissa Maker explains her kitchen cleaning method a little more on her YouTube channel, ‘The reason I like working in this 12 o’clock starting at the door and working my way around the room way, is that I don’t miss anything. '
'
How do you clean a kitchen if you're a beginner?
If you're moving into your first home and don't have much experience cleaning a kitchen, panic can set in pretty quickly. Sara San Angelo, a professional house cleaner and blogger , appreciates that 'for those who are moving into their first apartment or house, cleaning the kitchen can seem like an overwhelming job.'
However, she has some words of reassurance: 'if you do a few certain things each day, it becomes much more manageable. I recommend doing the dishes every day, clearing and wiping the counters, and spot sweeping or cleaning up spills immediately.'
Do those dishes, and do them every day! According to San Angelo, 'an empty sink at the end of the day can really give you a sense of accomplishment and keep you
motivated to tackle bigger cleaning tasks.'
Additionally, 'keep a nice basket on the counter to throw loose items in for a quick decluttering' and keep your floor clean: 'a clean floor is the easiest and fastest way to make your house look clean.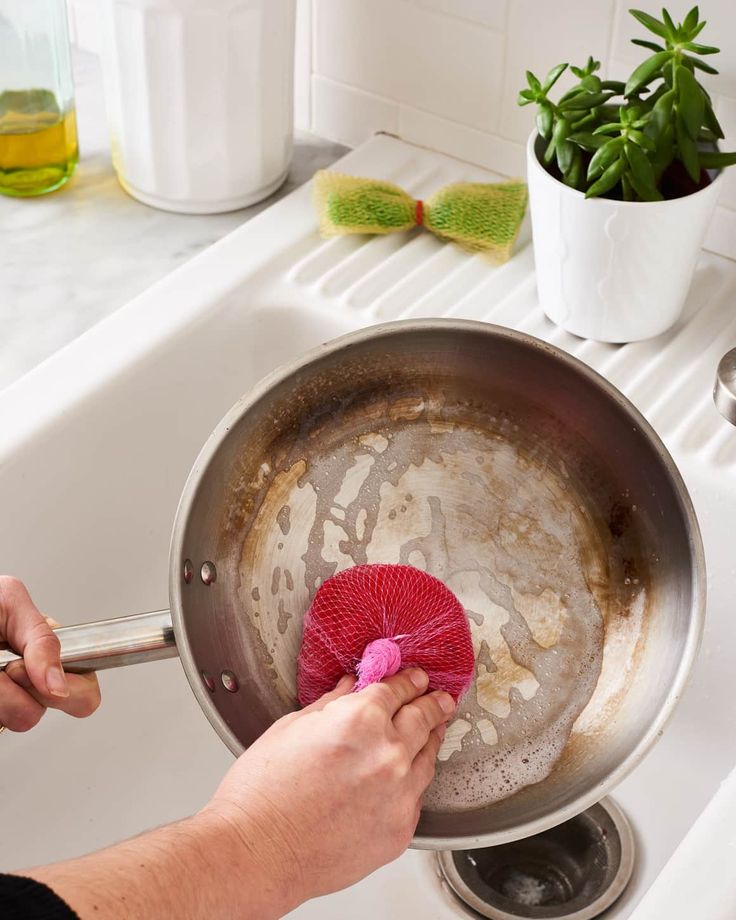 '
'
Your kitchen cleaning essentials
Scotch-Brite 7100223066 Classic Scouring Pad, Green
Duzzit Baking Soda 550g, Non Scratch Multipurpose Powerful Cleaning Action.
A hero product in the world of natural cleaning.
Our favorite liquid soap to use
Dawn Ultra Dishwashing Liquid Dish Soap Original Scent, 19.4 oz, 573ml
Works a treat, every time!
Easy as pie!
Camille is Deputy Editor of Realhomes.com and joined in January 2020. Her love of interior design stemmed from a childhood spent dreaming up weird and wonderful ways to renovate her grandma’s house in France – a greenhouse roof was involved – and it was spending time around very good-looking house plants and in a hardworking kitchen garden that gave her a green thumb. When Camille isn’t sipping coffee and/or writing, she is seeking out cool new Facebook Marketplace finds or tapping into her other creative outlets: painting and clay throwing. She currently rents in North London with her French cat and two others, and hopes to one day renovate the most sustainable house of dreams, somewhere marvellously sunny with a wild, lavish garden and chickens, of course.
Top 11 tips to help you clean your kitchen efficiently and quickly • INMYROOM FOOD
Reviews
We offer you a simple and comprehensive guide to clean up in the heart of the apartment - your favorite kitchen. All the best tips on how to clean quickly, efficiently, without missing anything and creating real comfort.
Spring is a time of wonderful transformations and changes for the better. Surely you, having caught the optimistic notes of freshness and renewal in the warm April air, have already thought about preparing your apartment for the sunny season.
In our today's review we will talk about the kitchen - perhaps the most important room where we like to spend the evenings with the dearest people and delight each other with new dishes. It is not surprising that this particular room requires our special attention, and it is customary to begin any cleaning of the apartment with putting things in order in the kitchen.
Before you start cleaning, we would like to share some general tips with you. Make sure in advance that you have everything you need to start: detergents, sponges, napkins and a pair of rubber gloves. This is a basic kit for any housewife, without which high-quality cleaning is simply impossible.
Free yourself at least an hour of time for quality and meticulous work. Start with the most frustrating tasks and work your way up to the easier ones so the work moves faster and you get less tired. Open the windows, turn on your favorite energetic music and start bringing beauty and comfort.
In this review, we, together with experts from the manufacturer of household appliances Midea , have collected the main criteria and tips that will help you quickly clean up your kitchen.
Midea is a modern diversified corporation that specializes in the production of household appliances. Today it is one of the leading manufacturers in the world.
Get rid of all unnecessary
It is difficult to clean up in a room where chaos reigns, and there are things around that have nothing to do with the kitchen. Take 5-7 minutes to collect and put all the extra items in their places. It can be children's toys, books, magazines, a computer and much more. Freeing up space, you prepare the ground for further action and, without noticing it, make the kitchen more spacious.
The next step is to free the sink from the dirty dishes. This must be done quickly and decisively, not allowing yourself to relax at the very beginning. Happy owners of dishwashers can load their appliances right now.
Time to get rid of the accumulated rubbish and take it out after checking the various cabinets, shelves and dining table for its presence. Feel free to throw away all unnecessary boxes that clutter up the space - instead of them, you can use elegant transparent jars to store various bulk products, which are much nicer and more convenient to use.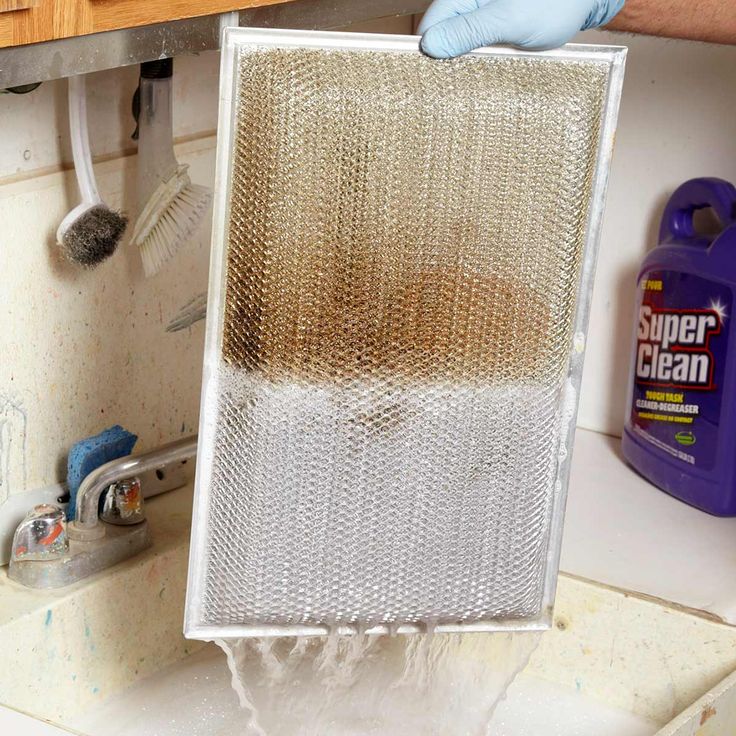
Big wash
In order not to waste time, start loading the washing machine - it will also have something to do during our big cleaning in the kitchen. Pay attention to the curtains and curtains: how long ago were they last washed and what was their original color? It is there that the greatest amount of dust settles, which we do not even notice, and in the spring, when there is more sun and light, the dirt on the curtains becomes more clearly visible.
Be sure to send the tablecloth, all kitchen towels, napkins, potholders and other kitchen textiles to the launderer. Make it a rule to change such items once a week or as they get dirty. Be sure to keep a second set on hand to use while the first one is being washed, dried, and waiting to be ironed.
Crockery
General cleaning in the kitchen is the best time to take care of your dishes and return them to a fresh, shiny look. Soda will help you get rid of tea plaque. It also easily removes stubborn dirt and neutralizes unpleasant odors.
Hardened greasy deposits from almost any surface can be preliminarily "softened" with citric acid, and only then removed by adding a special chemical cleaner from a wide range of professional detergents.
There is an alternative solution for those who don't like to complicate their lives by additional "control" dishwashing. Once you buy a dishwasher, you will forget about compromise and start saving time and energy in the kitchen. Millions of modern housewives rightly prefer dishwashers to hand washing dishes: the technique will cope with this task faster and much better.
If you decide to purchase such a kitchen helper, please note that many manufacturers specially equip their models with functions for washing heavily soiled dishes. So, for example, the company offers its customers a unique Power Wash option, which works as an addition to any program you need, but differs in the function of increasing the water pressure and washing temperature. The new INNO WASH rocker, in turn, will show an excellent result that can impress even the most skeptical critics: 360-degree rotation and spraying streams of water even in the most inaccessible places make this feature a real find for those who do not like to pore over dirty dishes, searching for a long time and often skipping imperceptible, at first glance, pollution.
Refrigerator
Take a look in the refrigerator: how are the products that have been there almost from last year? Should anything be thrown away? clean? Easy to spread out? As a rule, even the most thorough cleaning of the refrigerator does not exceed 20 minutes, so be sure to check its condition both inside and out.
Wash all drawers with a sponge and cleaning agent and remove all dirt. To bring the glass shelves into perfect condition, go over them with a cloth with glass washing liquid: this way they will shine nicely and not spoil the overall picture with muddy spots and streaks.
Arrange your products wisely: send perishable fermented milk products deep in, leave what you use most often on the middle shelves, put products without packaging in special containers, and put a thin paper towel on the shelf with vegetables - with it vegetables will be stored longer avoiding premature decay.
Sink and stove
A shining sink and a perfectly clean stove are the face of the hostess, and therefore special attention should be paid to these areas. The easiest way to do this job quickly and efficiently is to start cleaning both areas at the same time. Apply the cleaner to the stove and sink, being careful not to miss the most inaccessible places. While the appliance cleans itself, you have 10-15 minutes to check the cleanliness under the sink and in the oven.
Be sure to check the cabinet under the sink: we usually keep various household items there that need to be neatly arranged from time to time, and a trash can that wants our attention. Examine the door from the inside: for sure you will find an impressive number of various unpleasant spots there.
When cleaning the stove, do not be too lazy to check the condition of the oven door and handle, as well as the dashboard. It is here that the largest number of greasy stains accumulate, which we recommend getting rid of with strong cleaning products. Take a look inside the oven: it is quite possible that the baking sheet and racks are also insistently demanding your attention.
Lockers and their contents
If you have 15 minutes to spare and want to work hard, check the contents of your kitchen cabinets. Surely you will be surprised how many unnecessary and long-unused boxes and products gather dust for a long time, taking up precious space.
Tidy up all cupboards and drawers by thoroughly dusting them inside and out and at the same time reviewing all contents. Pay special attention to the box with seasonings: very often even the most exemplary housewives have real chaos going on there.
Get convenient transparent jars for storing cereals and pasta, transfer small jars or bags into separate plastic containers and try to zone the space: you will be surprised how much cleaner and tidy your kitchen will become.
Household appliances
If you have already cleaned your stove to a shine, it's not time to stop there: your attention is also waiting for a microwave, dishwasher.
Also pay attention to small household appliances: a kettle, a toaster, a multicooker, a jug of water - all these little things, imperceptible at first glance, get dirty very easily, and we often forget to put them in order. First of all, they need to be cleaned of dust, and only then get rid of plaque with a special cleaning agent or ordinary vinegar mixed with salt. and, of course, the hood.
A simple lemon will do just fine in the microwave: put it in a bowl, pre-cut into pieces, cover with water and send to warm up for 5 minutes. After that, any stains will be much better scrubbed even with a soft sponge.
Surrounding surfaces
Pay attention to the condition of all kitchen surfaces: how long ago did you last clean them and how dirty are they? Countertops will be perfectly washed with a simple soapy solution - just remember that some coatings, especially wood, do not tolerate hard sponges and some aggressive cleaners.
Don't forget about all kinds of doors, the outside of the refrigerator, wall shelves and various drawers. Particular care must be taken to clean the dining table. And if you've decided to get serious about everything flat and wooden, we urge you to check the condition of wooden cutting boards, which, in addition to constant washing, need a good cleaning from stains and odors. The easiest natural way to restore a board to its original appearance is to clean it with a paste of salt and baking soda, taken in equal parts and diluted with water, and then wipe the surface of the board with lemon pulp.
Do not ignore the window with the window sill: a solid layer of dust has probably accumulated there for a long time. Start washing the window from the frame and after that go to the glass, which should first be cleaned with a soft cloth from the main dirt, and only then, for a special shine and removal of streaks, treated with glass washing liquid. By the way, if your kitchen has mirrors, you can do the same with them.
Spend some time on the tiles, especially if there is dirt on the seams and joints. Armed with a toothbrush, you can easily soften even the worst stains with baking soda, vinegar or lemon juice, and then easily get rid of them with any cleaning agent.
Above eye level
Hard-to-reach and inconspicuous, at first glance, places accumulate the largest amount of dust and dirt.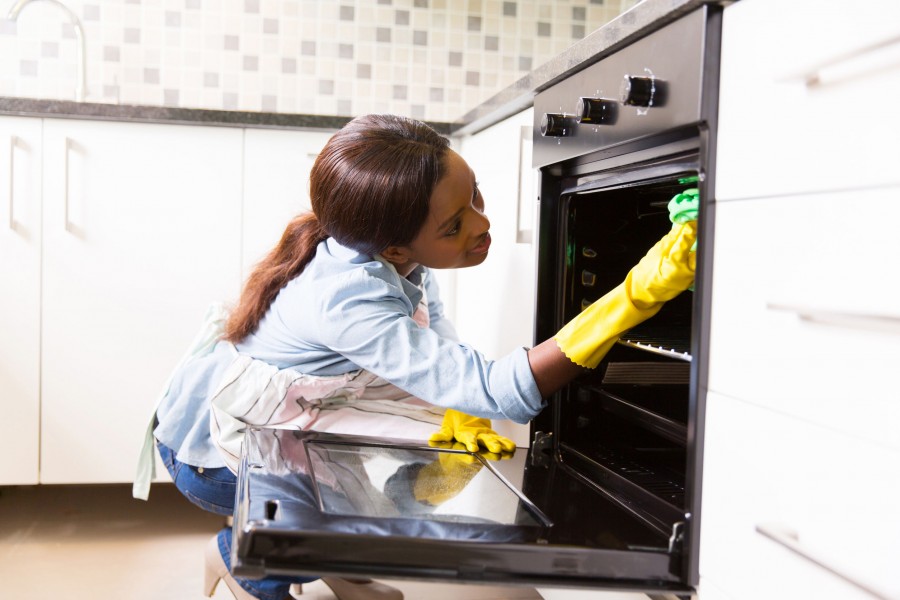 If you have an extractor hood in your kitchen, do not forget to clean it too: the filter in it is usually clogged with a frozen layer of fat. Use a strong greasy grate cleaner and don't forget to dust off the outside of the hood.
For those who have not yet had time to appreciate the benefits of a cooker hood in keeping the kitchen clean, we advise you to pay attention to the wide range of Midea models of various designs, equipped with aluminum grease filters, as well as a carbon filter - an important option that allows you to get rid of not only unwanted grease and grime, but also purify the air.
Be sure to check the top surface of the kitchen cabinets: they are often overlooked. And if the main decoration of your kitchen is a beautiful chandelier, do not be too lazy to wipe it from dust too.
If you are in the mood for general cleaning and are determined to make every millimeter of the kitchen shine with cleanliness, pay attention to the ceiling. Over time, it is there that dust, grease stains, combustion products and many other unpleasant things accumulate.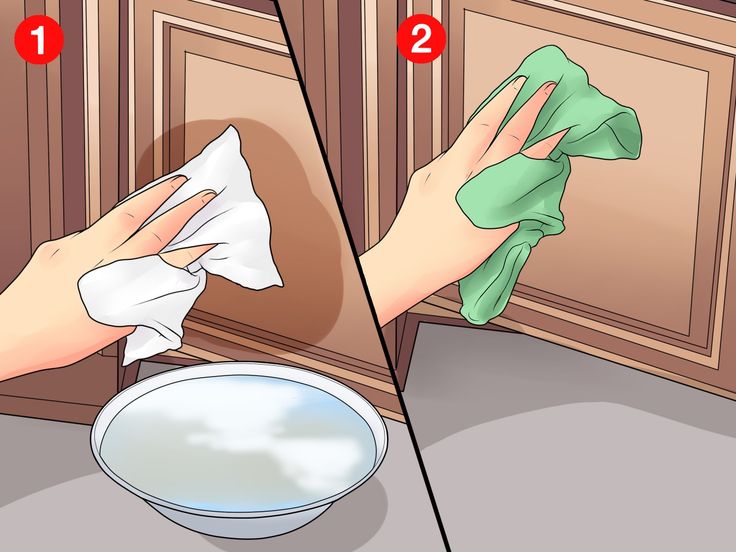 In order to wash this problem area, you will need a product that is suitable for the ceiling finish material. For example, a stretch ceiling can be washed with simple detergents diluted in hot water and a soft flannel cloth, while a painted ceiling is best cleaned with a soft brush.
Floor
If you have moved on to mopping, you are almost done cleaning. Therefore, you need to gather all your strength and throw them on the most problematic kitchen area. Experienced housewives usually clean the floor in two stages: dry cleaning with a vacuum cleaner or brush to get rid of large debris, dust and crumbs, and wet cleaning, which includes a thorough washing using a detergent suitable for your floor.
Tiles and linoleum should be wiped dry after wet cleaning. Otherwise, dirty stains may remain on the first one, and the second one may swell from excess moisture and lose its decent appearance. Parquet and laminate require more reverent care: to care for such flooring, you will need a special soft mop and special detergents.
Start wet cleaning from the nooks and crannies of your kitchen, not missing hard-to-reach places, skirting boards, under the table and headset, under the radiator and refrigerator, moving towards the door.
Cozy atmosphere
After all the tedious chores are over, the floor is cleaned, the sink is shiny, and the clean stove does not give you any other feeling than an irresistible desire to cook something special, you can proceed to the most pleasant part of cleaning - bringing comfort.
It's time to get the second set of tablecloths, towels and napkins and put everything in its place. Clean curtains can now be hung on shining windows. If during cleaning you used disposable rags and sponges, feel free to throw them away and replace them with new ones.
Put new napkins in the napkin holder, decorate the table with a bowl of fruit or place a vase of fresh flowers on it: these simple steps will make your kitchen truly cozy and magical, and the spring atmosphere will literally fill the whole space.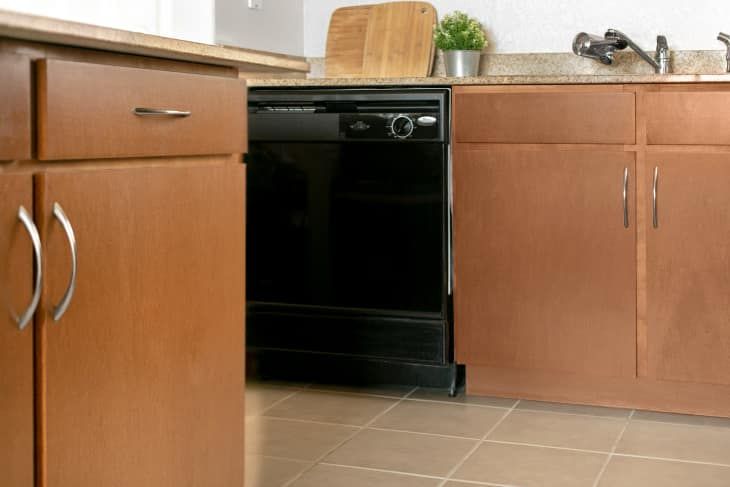
Kitchen cleaning | Effective detergents
Where do you need to clean in the kitchen? Everywhere!
This may seem like a daunting task, but the kitchen is where you prepare food. Therefore, it is essential that work surfaces, utensils and cutlery are perfectly clean.
Millions of microbes live in the kitchen. Most of them are harmless, but there are others, such as E. coli and salmonella, which can become a catalyst for disease, especially in children and older people. Therefore, keeping the kitchen clean is not a whim, but a vital necessity.
But the good news is that there are many ways to make your kitchen almost sterile in no time. Here are just a few tips to keep your kitchen clean, beautiful and extremely hygienic.
Dangerous germs spread at an incredible rate, so it's important to keep not only pots and pans clean, but also other surfaces and objects in your kitchen. Germs can settle in the most unexpected places: on stove switches, buttons on a microwave oven or on a faucet - that is, on any surface that you touch with your hands, soiled with raw meat or eggs.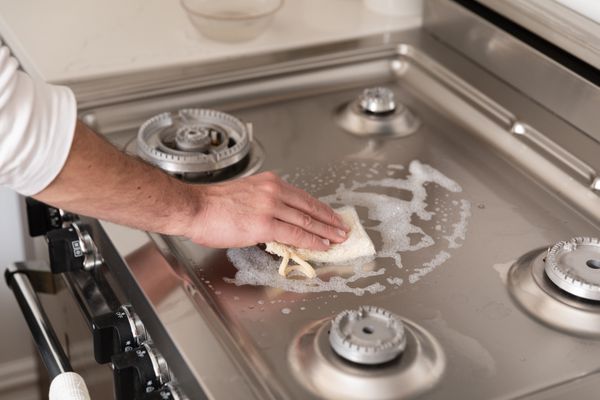
You don't have to spend hours cleaning the kitchen every week! Products from the Cif, Domestos and Glorix brands will help you deal with dirt in minutes. Of course, to keep your kitchen sparkling clean and healthy, you should carefully follow the instructions on the labels of detergents.
If you've ever wondered how to clean your gas stove or worktop, here are some tips. It is best to use kitchen cleaners that are very effective and do a great job of keeping your kitchen clean and safe.
Mini-survey
Has the house cleaning process changed during the lockdown?
No, cleaned as before
0%
Yes, cleaned more often
0%
Yes, used disinfectants more often
0%
Yes, I have started cleaning with a vacuum cleaner, special cloths, sponges, etc. more often.
0%
0 Votes
How to clean a gas or induction hob
Gas stoves are very durable and can be cleaned with an all-purpose cleaner, but it is still better to use those that are specifically designed to deal with oil and grease marks.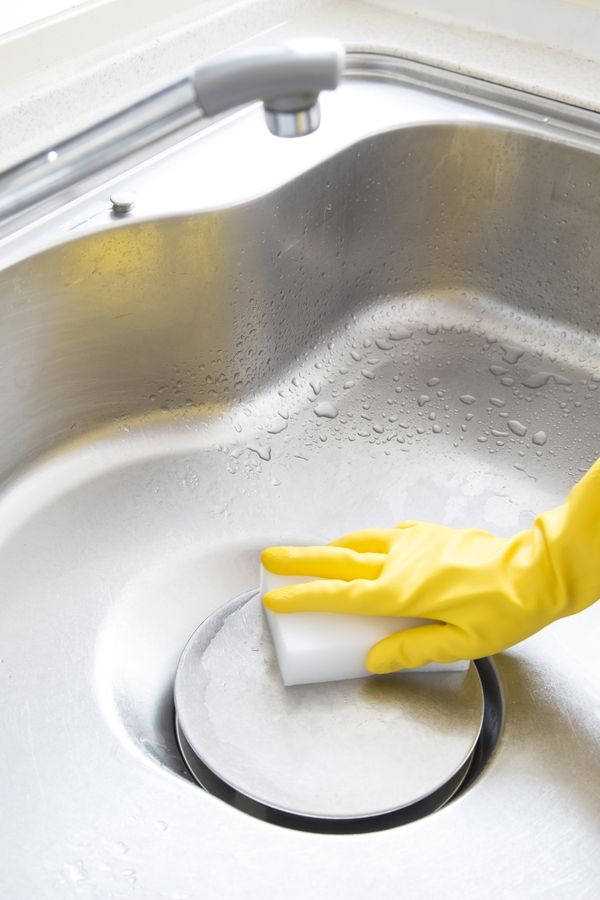 In this case, pay special attention to the gas stove grate and the handle at the stove. Cif brand products are good, for example, Cif Ease of cleanliness for the kitchen comes with a spray that allows you to apply the cleaner into cracks and hard-to-reach corners around the burners.
A glass-ceramic hob can be cleaned with a special scraper and detergents, often produced by the manufacturers of these hob.
Electric stove burners are also unpretentious and a wide range of products are suitable for them.
How to clean kitchen sinks and faucets
There are two main reasons why kitchen faucets and faucets need to be kept clean. Firstly, this is where germs begin to multiply, so you need to thoroughly rinse the sink after cooking. Try modern, simple and effective kitchen cleaners like Domestos Bleach Spray, which is specifically formulated to fight germs. Secondly, no one likes dirty fingerprints on a shiny faucet. Take care of your sink and faucet with Cif Stainless Steel Specialty, which not only removes even the most stubborn stains, but also protects the metal.
How to clean the work surface
The work surface in the kitchen should be cleaned after every meal. It is very easy! If you have cut vegetables or fruits, simply wipe the surface with a damp cloth. If you have cooked meat that may have contained salmonella or E. coli, it is better to use antibacterial cleaners such as Glorix spray. Choose ones that come in spray bottles and don't need to be diluted with water.
How to clean pots and pans
Dishwashers are brilliant, but they can't always clean food stuck to the bottom of the pot. Before putting the pan in the dishwasher or washing it, pour some Cif cream on the burnt bottom and let it sit for a couple of minutes. Then wash as usual and your pan will shine better than new.
Natural Kitchen Cleaners
If you prefer natural kitchen cleaners, there are plenty to choose from. To make your floor and worktop shine, try mixing equal parts water and vinegar and rubbing them down.