Best paint for dresser
5 Best Paint Types for Furniture: Pros and Cons
Give your furniture new life and a new look with a fresh coat of paint. Whether you want to paint a chair, table, nightstand, or specialty piece, this is a great DIY project that can give your furniture a unique look with just a few hours of work and some basic supplies.
You have many options when painting your furniture. The type of paint is the biggest consideration you’ll have to make. There are oil, latex, and acrylic paint options for furniture, along with specialty paints, including chalky and milk. You can paint with a brush and/or roller or even use spray paint. Each of these paints for furniture carries unique advantages, and some are better suited for one type of project versus another.
Here are the pros and cons of the best paint for furniture.
Latex Paint
Latex paint for furniture is a popular option because it’s easily accessible. You can pick up a pint or gallon of latex paint at your local hardware store and choose from a variety of brands. There are also low or no-VOC (volatile organic compound) formulas, which are highly recommended for indoor painting projects.
A downside is that while latex paint dries fast, it takes a long time to cure and retains a relatively soft finish that's prone to chipping and scratching. This isn’t ideal for furniture that will get heavy use. Instead of soaking into porous surfaces like oil-based paint, latex paint bonds to the surface layer of furniture. As a result, this layer of paint can be damaged relatively easily. For best results, prep the surface with sanding and a primer—and know that you might have touch-ups to do in the future.
On the flip side, one of the big advantages of latex paint for furniture is the wide range of available colors. Choose from the color chips on hand, or have the paint counter mix up a custom shade that will perfectly suit your furniture piece and decor. This level of choice makes it easy to find the paint shade that matches your vision—and your room.
Latex paint is also available in multiple finishes. You can choose from flat (matte), satin, semigloss, or gloss finishes for your project.
- Flat: Without any resins in the formula, this type of latex paint won’t reflect much light and will have a matte—almost velvety—appearance. However, it won’t be a very durable finish that can stand up to a lot of bumping, touching, and washing. So save this finish for a project that isn’t going to be under heavy use daily. For a more durable matte paint, consider using chalky paint.
- Satin: A paint with a satin finish reflects a minimal amount of light. (Eggshell finish is closely related.) If you like the look of matte paint but need a paint for furniture that is more durable, satin paint might be the best choice for you. If you opt for a washable formula, you’ll find it easier to keep clean.
- Semigloss: This might be the best paint finish for furniture, as a semigloss paint reflects light well and stands up to washing and the demands of use.
 The greater concentration of resins in a semigloss formula make this paint more durable for furniture you actually plan to put to work. Many people like the shiny finish, too.
 - Gloss: A glossy paint finish will give your pieces the most drama and durability—but it demands the most prep. High-gloss paints reflect a lot of light, and their increased concentration of resins makes them able to withstand a lot of use and cleaning. But beware: A surface with this much sheen will amplify imperfections. So if you opt for this type of paint for furniture, you’ll need to make sure it’s prepped and that any imperfections have been remedied.
Best for: Pieces of furniture that won’t see a lot of action and when affordability is a top factor
Pros
Readily available with abundant color options
Easy to clean with soap and water
Available in different finishes
Chalky Paint
The Spruce / Jordan Provost Reclaiming vintage furniture or giving newer pieces old-world charm has led to a rise in popularity for chalky paint. This water-based paint typically has latex as its base but delivers a thicker, buildable texture.
Chalky paint is available from specialty retailers, though it’s becoming more widely available. Some people have even found success making their own chalky paint, but the best and most consistent results come from buying a commercial formula. It’s more expensive than conventional latex paint, but people love it for its unique look and silky smooth finish.
Unlike other more conventional paint for furniture, there can be a bit of a learning curve when first using chalky paint. It dries fast, which is a plus, but this also means brush strokes can be seen if you revisit an area for a touch-up once the paint has started to dry. Prepare to practice some, or be flexible in the overall look of the finished product.
Chalky paint can be sanded or distressed to create a weathered look. So the product is popular among people looking for a more vintage or shabby chic look.
Best for: Refinishing antique pieces or achieving a rich, matte look on furniture you use every day
Cons
Brush strokes might be visible
Finish is subject to scratching or marking
Can be expensive with limited color options
The 8 Best Chalk Paints of 2022
Watch Now: How to Use Chalky Finish Paint on Furniture
Milk Paint
If you’re looking for a natural paint for furniture with a slightly thinner texture than chalky paint—but plenty of character—then milk paint might be the right type for you. This nontoxic paint is made from milk protein with an activator, typically lime or borax. Color pigments are added to change the tint of the paint. Plus, it’s easy to age the finish of milk paint with light sanding—or leave it intact for a smooth, matte look.
Milk paint for furniture is popular for its eco-friendly ingredients with no chemicals or added fumes. In fact, this paint has a long history of use for painting furniture, houses, and more before commercial paint was widely available. It can be used on a wide variety of surfaces, but the finish can vary and sometimes is inconsistent in terms of saturation. To ensure more consistent results (and less chipping, as this is a water-based paint), use a bonder with milk paint. This is also important on smooth surfaces, such as glass or plastic.
A unique feature of milk paint is that it’s typically sold in powder form. Add water to mix up the amount of paint you need, and store the rest for later use or touch-ups. It’s typically less expensive than chalky paint but yields similar results. A top coat of wax or oil might be necessary to preserve the finish.
Best for: Furniture you want to appear antiqued, weathered, or distressed
Cons
Tough to achieve consistent saturation
Might chip or scratch without sealer
Bonder is sometimes required
Acrylic Paint
Acrylic paint is another water-based type of paint for furniture that is closely related to latex paint. Color particles are suspended in an acrylic polymer and offer rich pigment with a smooth finish. It can be applied to a variety of surfaces, making it a versatile type of paint for furniture. However, it’s often sold in small containers—making it a better choice for small-scale projects, such as console tables, picture frames, and other accent pieces.
Acrylic paint goes on evenly and is self-leveling, making it easy to work with. However, a primer is a good idea if you want the paint to adhere better to the surface. Drying times are short for acrylic paint, so you can apply several coats in a relatively short period of time. But you will need to give it plenty of time to fully cure once the project is complete. Clean-up is also easy with just soap and water, as it’s a water-based paint.
It should be noted that acrylic paint does have more elasticity to resist chipping or cracking than some other types of water-based paint. But it is still best suited for pieces with light to moderate use.
Best for: Small furniture or accent pieces that need a quick, affordable coat of paint
Oil Paint
Oil-based paint, also sometimes called alkyd paint, is one of the most durable paints to use on furniture. However, this durability comes at a cost. Oil-based paints are usually expensive, take a long time to dry, and have high levels of VOCs that require abundant ventilation. In fact, oil-based paint isn't available everywhere and is even banned in some areas due to its components.
Still, painting furniture with oil-based paint is something to consider if you want a resilient finish that won’t chip or scratch easily. You’ll need to have a natural bristle brush and mineral spirits or turpentine on hand as paint thinner and for clean-up. The advantage to oil paint for furniture is that it can be applied over most surfaces and adheres well. It saturates any porous surface and is self-leveling for easy application. Drying time between coats is long—up to 24 hours—but it does cure more quickly than water-based paints.
You might also consider oil-based paint if you don’t know what type of finish is currently on a piece of furniture. Water-based paints will have a tough time adhering to a surface previously painted with oil-based paint. But oil-based paint can be applied successfully over either water- or oil-based paint.
Best for: Any type of furniture that is heavily used and needs a durable finish
Application Tips
- Aside from choosing the right type of paint for your furniture project, make sure you choose the right application method.
 You can select from natural bristle brushes (for oil-based paint) or synthetic bristle brushes (for water-based paint). There also are cloths, paint rollers, or sponges for specialty applications and effects. Or you can use a paint sprayer, especially for larger projects and projects where you want to avoid brush strokes.
 - The stroke and finish you achieve will vary based on what type of applicator you use. A brush will give you broad coverage but might show strokes more easily (especially with water-based paint). A roller offers less control but even coverage. Application with a cloth or sponge is best for a unique textured finish.
How to Achieve Smooth Results When Painting Wood
By
Lee Wallender
Lee Wallender
Lee has over two decades of hands-on experience remodeling, fixing, and improving homes, and has been providing home improvement advice for over 13 years.
Learn more about The Spruce's Editorial Process
Updated on 05/29/22
Reviewed by
Johnathan Brewer
Reviewed by Johnathan Brewer
Johnathan Brewer is a home improvement expert with over two decades of professional experience as a licensed general contractor specializing in kitchen and bath. He has been featured on HGTV’s “Super Scapes,” “Curb Appeal the Block,” “Elbow Room,” DIY Network's “House Crashers,” "This Old House," and OWN Network's Emmy award winning show, “Home Made Simple.” Jonathan is also a member of The Spruce Home Improvement Review Board.
Learn more about The Spruce's Review Board
Fact checked by
Alexandra Kay
Fact checked by Alexandra Kay
Alexandra Kay is a writer, fact-checker, researcher, and editor who checks The Spruce articles for accuracy and adds source citations. Alex frequently writes for b2b and b2c publications. When she isn't writing or fact-checking for print or online articles, Alex is an associate professor of English at a community college.
Learn more about The Spruce's Editorial Process
The Spruce / Claire Cohen
Project Overview
Painting wood appears to be such an elemental, foolproof project that many people rush the job along or attempt shortcuts that produce poor results. Plus, with the advent of paint-ready surfaces like drywall or primed trim and casing, wood painting is slowly becoming a lost art.
Mastering the techniques of high-quality painting of wood surfaces is not difficult, but it does take some practice. Within just a few hours, you can transform yourself from an amateur weekend painter to one with professional skills.
Watch Now: How to Paint Wood Smoothly
Warning
Always use a dust mask when sanding. If you believe that the surface was painted with lead-based paint, take precautions to avoid breathing or ingesting the paint dust. Hearing protection is essential when operating the oscillating sander.
The Spruce / Claire Cohen
Need more help? Talk to a painter near you
Our partners can help you compare quotes from top-rated professionals near you
Get a Quote
Advertiser Disclosure
The offers that appear in this table are from partnerships from which The Spruce receives compensation.
Equipment / Tools
- Plastic sheeting
- Canvas drop cloth
- Eye and hearing protection
- Rubber gloves
- Bucket
- Clean cloths
- Random orbital sander
- Shop vacuum
- 2 1/2-inch paintbrush
- Roller assembly with a high-density foam cover
- Paint tray and liner
Materials
- TSP (tri-sodium phosphate)
- 180-grit and 220-grit sandpaper
- Tack cloth
- Primer
- Interior acrylic-latex paint
- Paint additive such as Penetrol or Floetrol (optional)
-
Cover Your Work Surface
Drape plastic sheeting over the floor or other work surface to protect it from paint spills. Lay a canvas drop cloth or contractor's paper over the plastic sheeting. The plastic keeps the paint from soaking through to the floor, while the canvas provides a non-slip surface and helps to contain paint spills.
The Spruce / Claire Cohen
-
Clean the Wood Surfaces
Put on eye protection and rubber gloves.
 Mix a solution of TSP with warm water to the proportions recommended by the manufacturer. Dip a cloth in the water, firmly squeeze it dry, then wipe down the wood to remove all oils, dirt, and grime. Rinse the surface with clean, warm water and a clean cloth. Let the wood dry completely.
 After the wood is dry, check the piece for large nicks, gouges, and scratches. If necessary, fill them with a wood filler using a flexible putty knife.
About TSP
TSP is a strong cleaner, degreaser, and deglosser that has long been used for cleaning surfaces in preparation for painting. If you would like to avoid using phosphates (which are banned in many communities), use a TSP substitute instead.
The Spruce / Claire Cohen
-
Sand the Flat Areas
Put on a dust mask or respirator, as well as hearing protection. Sand the flat, smooth areas of wood with a random orbital sander and 180-grit sandpaper. The intent is not to strip the wood of all of the coatings and stains but simply to smooth out the surface and provide some "tooth," or slight scratches, to help the paint bond.
The Spruce / Claire Cohen
-
Sand the Corners and Details
If you are sanding furniture that has uneven surfaces, switch to hand-sanding so that the sandpaper can better conform to the shape of the piece.
The Spruce / Claire Cohen
-
Clean Off the Dust
Thoroughly remove the sanding dust from all surfaces. Begin with a shop vacuum outfitted with a brush attachment. Do not use a blower, as this will only redistribute the dust back on the surface. Make sure that the shop vacuum is fitted with a bag and a filter to minimize airborne dust.
After you have removed a majority of the dust with the shop vacuum, use a tack cloth or a cotton rag that has been dipped in water and thoroughly squeezed out to remove the remainder of the dust.
The Spruce / Claire Cohen
-
Prime the Wood
Mix the primer well and apply it with a brush or roller. After drying, if the primer looks transparent or streaky on the wood, prime a second time.
The Spruce / Claire Cohen
-
Apply Primer With a Roller (optional)
For flat surfaces, switch to the roller to speed up the process and provide a smoother finish.
The Spruce / Claire Cohen
-
Sand the Primer
Let the primer dry completely, then sand it down before painting. Use very fine 220-grit sandpaper, and apply light pressure to prevent gouging the primer. Remove the primer dust with a quick brush from the shop vacuum, followed by a light swipe of the tack cloth.
The Spruce / Claire Cohen
-
Paint the Wood With a Brush or Roller
For highly irregular surfaces, such as furniture, crown molding, and trim, it is best to use a paintbrush only. For surfaces that have large, flat areas, incorporating a high-density foam roller will help you get the job done more quickly.
Dab the end of the paintbrush bristles only about 1/3 the length of the brush into the paint each time you load the brush.
 Transfer the paint to the wood, dragging the brush in short strokes that run parallel to the wood grain. Keep a wet edge at all times to prevent lap marks. Do not add a second coat of paint during this step, as this can cause the paint to tear.
 For painting with the roller, insert the paint tray liner in the paint tray, then fill the tray less than halfway. Gently dab the roller into the paint. Roll the paint up and down the slope of the tray a few times to distribute the paint on the roller pad.
Transfer the roller to the wood. Roll the paint onto the wood, beginning with light pressure only. High-density foam roller covers work better with thinner latex paint than with oil-based paints.
For a more professional finish, looking into spraying the object rather than using a brush.
The Spruce / Claire Cohen
-
Sand the First Coat
You can usually achieve an even smoother coat if you opt to sand and paint one final time. Sanding the first paint coat brings down bumps and inconsistencies introduced by the roller or brush.
 Using 220-grit sandpaper, sand gently by hand, or attach the paper to the orbital sander and run it extremely lightly across the surface. Do not apply pressure to the sander other than the weight of the sander itself.
 After sanding, open up the tack cloth, bunch it up but keep it loose, then lightly run it across the surface. Too much pressure on the tack cloth will be counter-productive, as this will press the tack cloth's embedded wax onto the surface.
The Spruce / Claire Cohen
-
Apply a Second Coat of Paint
Apply a final coat of paint, using a brush and/or roller, as desired. Let the paint dry as directed. If possible, let the piece dry overnight or longer before using it. Paint becomes more durable after it fully cures.
The Spruce / Claire Cohen
High-quality results are easy to achieve if you follow a few professional tips:
- Use a brush and a roller: Paintbrushes and rollers have complementary roles.
 Rollers cover large areas quickly but cannot reach into corners. For smooth surfaces, use a high-density foam roller. Paintbrushes are good at painting corners and edges, but they take a long time when painting large areas. Brushing after rolling to eliminate lines and drips is a professional technique known as back-brushing.
 - Primers are important: Primers are formulated to bond to problem surfaces and to give the paint a consistent surface for a smoother finish. Primer also helps prevent flashing, a condition where areas of the final paint job look as if they were painted with different paint glosses. Use a high-quality primer brand, such as Kilz or Zinsser.
- Consider paint additives: Paint can get tacky and create brush-drag if you take too long while painting. You can either pick up the pace or buy an additive that extends your working time. Penetrol and Floetrol are popular additives that help you create smooth brush strokes.
 Avoid painting underneath a fan or heating vent or in direct sunlight, as all of these will accelerate drying time and lead to tacky paint.
Watch Now: How to Make Painted Driftwood
Article Sources
The Spruce uses only high-quality sources, including peer-reviewed studies, to support the facts within our articles. Read our editorial process to learn more about how we fact-check and keep our content accurate, reliable, and trustworthy.
Renovation, Repair and Painting Program: Do-It-Yourselfers. United States Environmental Protection Agency.
Executive Summary of EPA747-R-97-002. United States Environmental Protection Agency.
Best Furniture Paint 2020: How to Paint Old Furniture
New paint adds value to old furnishings and gives them new life. Use different compositions. Some emphasize the natural beauty of the material, others create a bright glossy finish. Vyacheslav Bulakhtin, head of the "Paints - Lighting" category at Leroy Merlin, talks about the best paints for furniture made of wood, composite materials based on it, plastic and metal parts.
Understanding different types of coloring products
For wood and wood-based materials
— Penetrating
— Coatings
For plastic elements
For metal fittings
Wood is used in the manufacture of furniture in various forms. Premium positions are made from an array. In more budget segments, the body is made of laminated chipboard or MDF, while facades and decor can be made of solid wood. Items in the economy category can be assembled entirely from composite materials. At the same time, in any form, wood retains its characteristics.
The main property of natural wood is "liveness". Even after processing, it retains porosity. Due to this property, the wood can swell or crack when the humidity changes.
The wood does not lose its "liveness" even in the composition of chipboard, MDF and plywood. These materials can also swell or shrink. For this reason, products with the same properties are used for natural and composite elements. Two types of compositions can be distinguished: penetrating and covering.
Penetrating compounds
They protect the wood from moisture and bacteria and can give it a new shade. The coating emphasizes the natural beauty of the pattern. Glazing compositions are made on the basis of natural oils and synthetic compounds.
Oil impregnations
One of the types of glazing agents is impregnations made from natural oils. The advantage is that the oil penetrates into the pores of the wood, but does not clog them, does not form a film on the surface and does not hide the texture. The treated wood acquires a soft sheen.
For example, tung oil can be used to protect outdoor furnishings. Just like linseed oil, it is known for its waterproofing properties. Glazing compositions are also produced using other types of natural and synthetic oils.
Colorants can be added to the oil. Such impregnations are great for those who are looking for what paint is better to paint old furniture made of precious wood.
Alkyd-based impregnations
An alternative to oil-based ones is decorative-protective alkyd-based impregnations.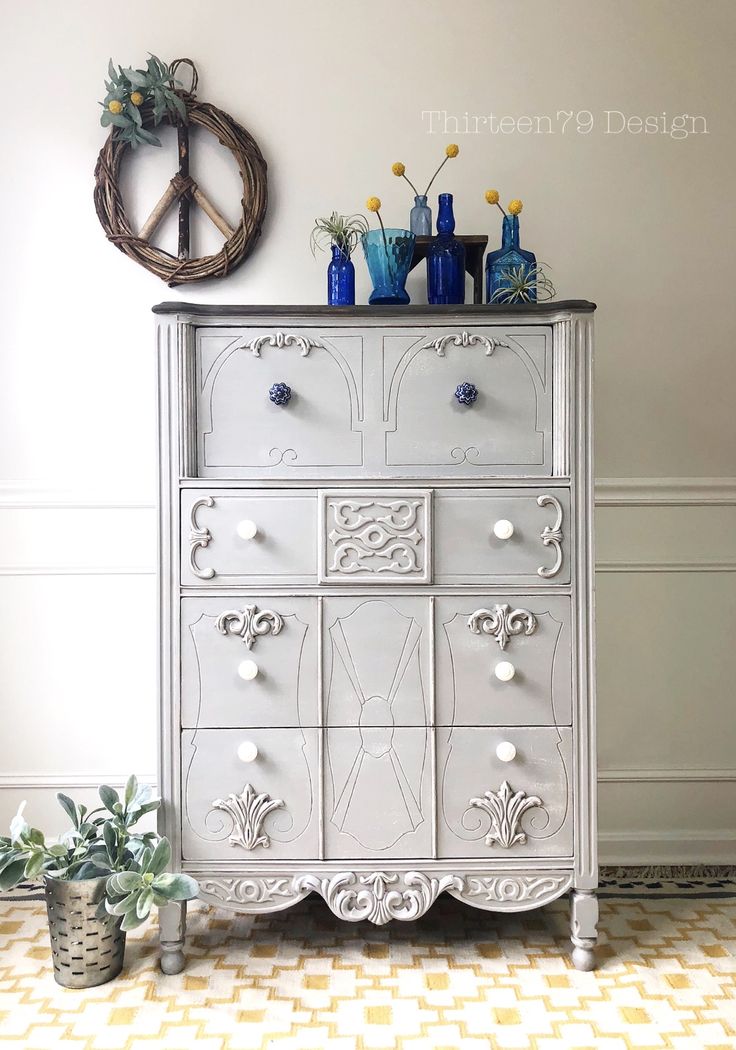 Often, manufacturers call them decorative and protective azure. Like oil, alkyd impregnations allow tinting, they are used to tint wood objects. Alkyd impregnations can be considered in the question of which paint is best for garden furniture. But for the one that is used indoors, they are also suitable.
ShutterStock
Covering compounds
Covering agents do not penetrate into the thickness of the material, form a transparent or opaque film. Among them, there are two types - varnishes and enamels. The former do not hide the natural beauty of wood, the latter create an opaque matte or glossy layer on the surface. There are ready-made products on sale, in which tinting substances are already involved. They are also produced in the form of a base, which can be tinted in the store using a choice of colors from the manufacturer's palette.
When choosing which paint is better to paint furniture made of composite materials, it is worth using a composition that forms a colored opaque coating. Tinting allows you to give such furniture almost any color. Sometimes it is advisable to choose an opaque coating for solid wood. For example, full staining will be required if the thing has turned yellow over time.
Wood wall paints labeled “interior” are suitable for furniture. The scope for interior work means safety and no smell.
Leroy Merlin
Varnishes
If necessary, create a transparent or translucent protective film on the surface, furniture is covered with polyurethane varnish. The film protects the wood from mechanical damage. Lack of varnishes in a long drying time. But more modern acrylic and alkyd varnishes, which dry in a few hours, are deprived of it. They are odorless, wear-resistant, and do not have to wait long between coats.
Lacquer stains
They are produced on the basis of varnishes and are used not only for color renewal, but also for full coloration. Among the tinting stains, there are those that can imitate valuable wood species.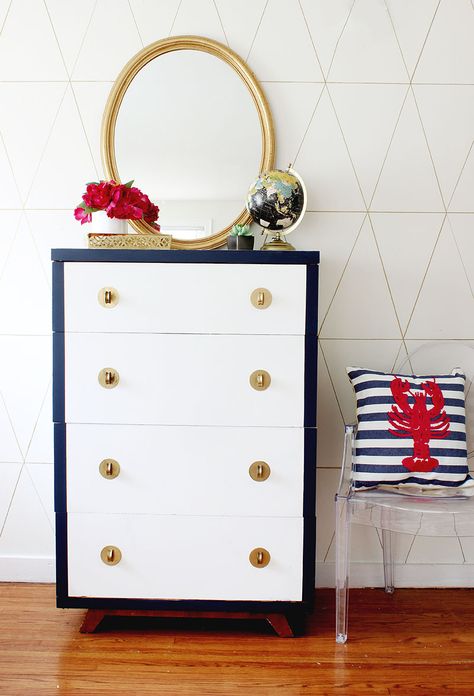
Alkyd enamels
One of the options for opaque top coats are universal enamels based on alkyd resins. The versatility is that they are used in working with different materials: wood, MDF, chipboard and others. In the question of what paint to paint furniture facades, you can turn to alkyd enamels. They also update the melamine coating of the facades of kitchen sets. It is permissible to apply enamel on surfaces previously painted with varnish or enamel.
Although alkyd enamel is classified as a covering agent, it can still penetrate the surface to a small depth. Therefore, porous rocks must be carefully primed before painting. These include pine and spruce.
Water Based Acrylic Enamels
Water based products are virtually odourless, dry quickly and are best suited for renovating children's natural wood or composite furniture. They can be given any shade by tinting. Acrylic paint is practically not absorbed into the material. It forms a durable and wear-resistant protective film on the surface.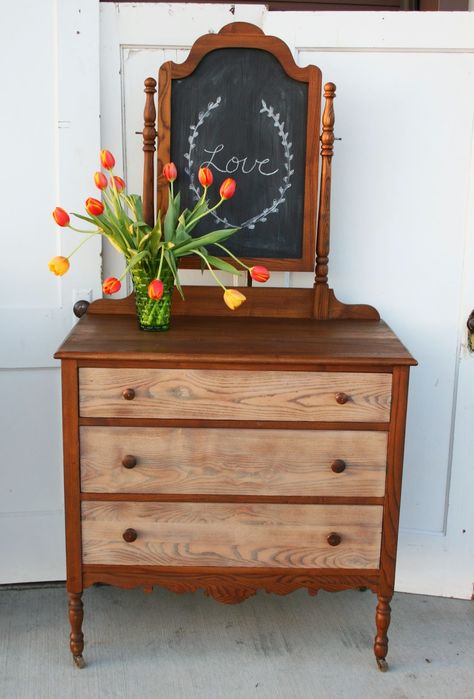
Leroy Merlin
Leroy Merlin
If plastic parts are to be painted, water-based acrylic paint will do. Due to its high adhesion, this type forms a durable coating on a wide variety of materials, including PVC, ABS, polycarbonate, polystyrene and polypropylene surfaces. Before painting, it is necessary to prepare the plastic using a specialized primer.
If you want to paint cabinet or chest of drawer handles, you can also choose acrylic enamel with metal marking. Acrylic will give a strong film on almost any surface, including steel.
Durable film does not lose its properties and well tolerates regular mechanical impact. This is especially important for painting cabinet handles, chair legs and other metal elements. The product adheres well to the surface, provided that a specialized primer is used, it is easy to apply with a spray gun and dries quickly.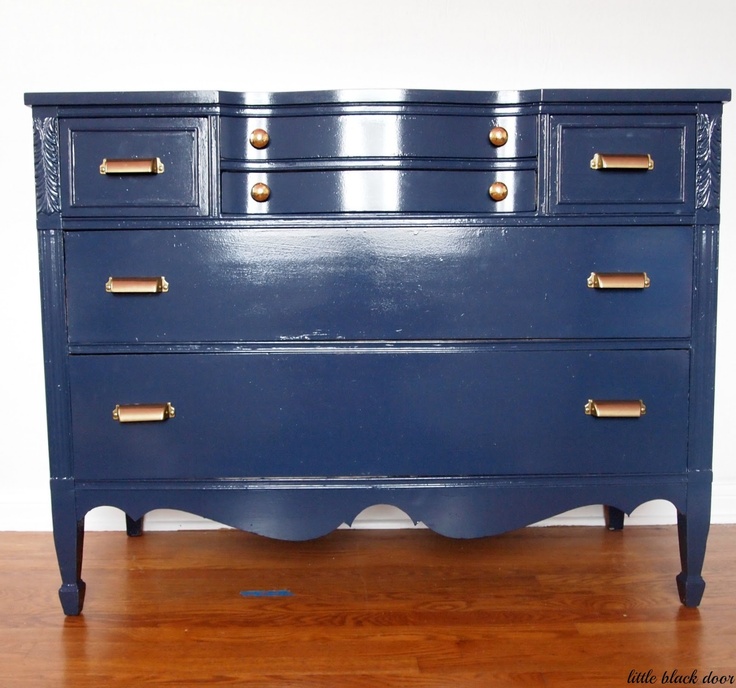 Acrylic enamel is UV resistant and retains its original color for a long time.
Furniture restoration and repainting paint
With proper care, quality furniture will last for many years and generations. It is up to you to extend its life and restore its original appearance or upgrade it beyond recognition. In this article, we will talk about materials that will help implement the solution: how to choose the right paint for furniture restoration and where to buy it, how to hide defects.
Furniture needs updating
In what situations do interior items need restoration, and when furniture at home can no longer be saved?
Solid wood products can live forever, but furniture made of chipboard, fiberboard, laminated chipboard and other wood derivatives has a limited lifespan. In addition, such surfaces are practically not amenable to painting. However, it is too early to say goodbye to your favorite old chest of drawers or furniture front if it is still holding tight and needs only cosmetic repairs.
It is possible to hide chips, scratches of various depths, cracks and even restore lost decorative elements, renew the coating and completely change the style with your own hands.
What you need
Just as furniture restoration is not limited to repainting, useful materials are not limited to paint alone. It will be discussed below.
- Putty and putty. Irreplaceable assistants for decorators and restorers in preparation for painting and removing defects. Allows you to repair bumps and dents, remove unnecessary cracks and scratches. Whatever the original condition of the product, the paint for furniture restoration lays down on such a coating in the best possible way. If desired, with the help of textured mastics, you can create a variety of textured surfaces.
- Lacquer and wax. You can use varnishes and waxes as a top coat for paint or separately. They protect the wood and create a water-repellent finish. With the help of wax in different shades, you can give furniture the effect of antiquity or emphasize the structure of the tree with a classic satin transparent.
Can furniture be painted with any paint?
Overview of materials for refinishing furniture
Paints for interiors differ from each other in composition, degree of gloss and transparency, as well as the field of application. Not all of them are equally suitable and sometimes it is difficult to choose paint for furniture, some are simply created for other tasks.
What ingredients should I pay attention to when choosing paint for repainting furniture? First of all, it is worth abandoning the use of oil paints and solvent-based materials. The first ones are simply outdated, while the rest are toxic and flammable.
Opt for water-based products. Such dyes are environmentally friendly, emit a minimum amount of volatile organic substances or do not emit them at all. Thanks to this, they do not have a sharp unpleasant odor, are not flammable and do not cause serious harm to health and the environment. This is a weighty argument, since we are talking about paint for repainting furniture in a living room.
Acrylic and other furniture paints
The most common and readily available water-based materials are acrylics. However, acrylic is not always effective for repainting. A significant drawback is that it does not fit on varnished surfaces, meaningless for repainting products made of chipboard or previously painted with adhesive-based materials. Unfortunately, it cannot be considered as a paint for glossy furniture facades.
An alternative to acrylic are a variety of eco-colors: milky, mineral and chalk. They are made entirely from natural materials, so they are absolutely safe for health and the environment, do not cause allergies and do not smell. The special composition allows you to lie evenly and firmly on difficult surfaces:
- tree
- wood derivatives: chipboard, MDF, chipboard and others
- concrete
- glass
- metal
- various types of plastic
Is it possible to paint lacquered furniture? Yes, but it's easy. To make it fit well, you just need to slightly bring down the shine and walk along the surface with sandpaper. Most often, it does not require a primer or other special preparation of the product.
Furniture painting instructions
A few questions that affect the course of the restoration:
- To remove or not to remove the old coating? It is not necessary to remove a strong and even coating at all, but you can paint over it. It is necessary to remove the old layer of varnish or paint if it is already peeling, blistering or completely unsuitable in texture. Do this with a spatula, solvent or building hair dryer.
- Is there any serious damage to the furniture that needs to be repaired? Treat deep scratches on the paint of furniture facades, chips and other defects with mastic and a spatula. The mastic is applied to clean solid bases, dries to the touch within 1-2 hours, completely hardens in a day.
- Should I create an original texture or just paint over it? Annie Sloan's professional line of furniture paints, for example, makes it possible to artistically age furniture, imitate scuffs and create multi-layered textural compositions.
Learn more