Bathroom painting schemes
38 Best Bathroom Paint Colors
Type keyword(s) to searchToday's Top Stories
1
45 Cheap Valentine's Day Gifts That They'll Love
2
9 Best Space Heaters of 2023
3
38 Cute Winter Quotes Perfect for Cozy Season
4
What to Do When Your Beloved Pet Dies
5
22 Super Bowl Drinks to Please a Crowd
We’ve been independently researching and testing products for over 120 years. If you buy through our links, we may earn a commission. Learn more about our review process.
These popular shades will transform your space in no time.
By Monique Valeris and Mariah Thomas
New! You can now save articles. It's free!
Benjamin Moore
It's true: A fresh coat of paint can transform a bathroom in an instant. The only trick is picking a color! You could go for a timeless neutral to make a small bathroom feel bigger. Or take your pick of classic hues, like black, burgundy and navy, which are brilliant for creating a moody feel. If you want an of-the-moment vibe, go for trendy paint colors that bring on the drama like "Very Peri," "Raccoon Fur," or Benjamin Moore's 2023 Color of the Year, Raspberry Blush.
Our list of best bathroom paint colors features a mix of popular and unexpected paint colors, designed to create the ultimate oasis to start and end your day right. We found energetic yellow and flirty pink to brighten guest bathrooms and powder rooms. Plus, we've sprinkled in a mix of elegant greens and stunning blues as well as subtle options such as Redend Point — Sherwin-Williams' 2023 Color of the Year.
Wherever your design sensibilities lie, you're guaranteed to find an attractive paint color below to complete your dream bathroom once and for all.
Farrow & Ball
1 of 38
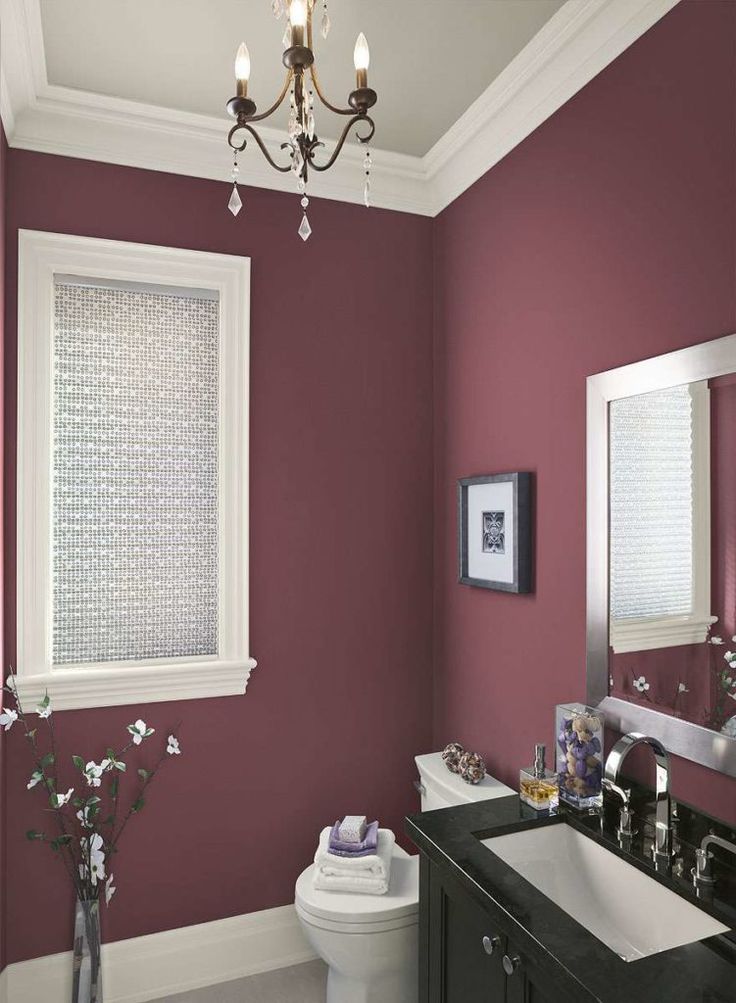
Rich Red
For a cozy vibe, deck out your powder room in this deep red shade from Farrow & Ball. The warm hue, called Preference Red, is particularly striking when paired with white accents and antique pieces.
GET THE LOOK
Courtesy of Danslelakehouse.com
2 of 38
Electric Blue
This vibrant color works well in small bathrooms (vanities are perfect!), especially if your goal is to create a retro-inspired look. Pair the refreshing shade with wallpaper in a complementary pattern and cherry wood accents for a picture-perfect setup.
GET THE LOOK
Benjamin Moore
3 of 38
Coral
The warm undertones of this coral pigment steal the show in this bathroom layout. Using the same color for the trim and moldings — a designer-approved trick — bring even more style to the space.
GET THE LOOK
Farrow & Ball
4 of 38
Paean Black
Here's a pick for those who love charcoal colors but want an option that can make even more of an impact. This red-based black from Farrow & Ball is a no-fail choice for achieving a contemporary or bohemian vibe in a bathroom. Temper the hue with white for visual contrast.
GET THE LOOK
A Beautiful Mess
5 of 38
Peachy Pink
If you want to decorate your bathroom in a pretty shade of pink that doesn't feel overwhelming, go for a pale tone. Scatter the color throughout to add flair to a white space, such as your vanity or tub, and bask in how peaceful the room feels.
GET THE LOOK
See more at A Beautiful Mess »
Benjamin Moore
6 of 38
Banana Yellow
A bright shade of yellow creates the illusion of light in any windowless bathroom. Pairing the color with white makes the overall room an uplifting oasis.
GET THE LOOK
Amy Bartlam; Design: Kate Lester
7 of 38
Cool Blue
Muted blue paneling allows this California bathroom's upper wallpapered walls to shine. Layer the look with a mirror for added brightness.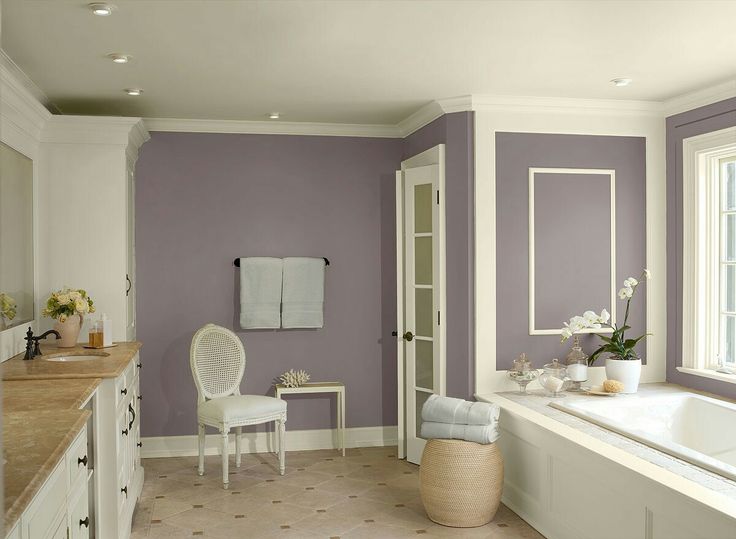
GET THE LOOK
Lark Photography for Country Living
8 of 38
Playful Pink
Take inspiration from The Makerista and deck out your walls in a cheery pink shade, perfect for pairing with floral and checkered patterns.
GET THE LOOK
RELATED: Elegant Pink Bathrooms to Transform Your Space
Jared Kuzia Photography
9 of 38
Indigo Blue
Cover your bathroom's upper walls in an indigo blue color, which can act as the perfect match for white subway and penny tiles. Don't forget to hang art!
GET THE LOOK
Raquel Langworthy
10 of 38
Gray
It doesn't get more versatile than soft gray walls to ensure that your bathroom's decorative pieces, like a wooden ladder for towels, steal the show.
GET THE LOOK
Cody Ulrich
11 of 38
Clean White
Short on space? Mirrors on top of white-washed siding does the trick. The reflections create a "window" on any wall, nipping that cramped feeling in the bud.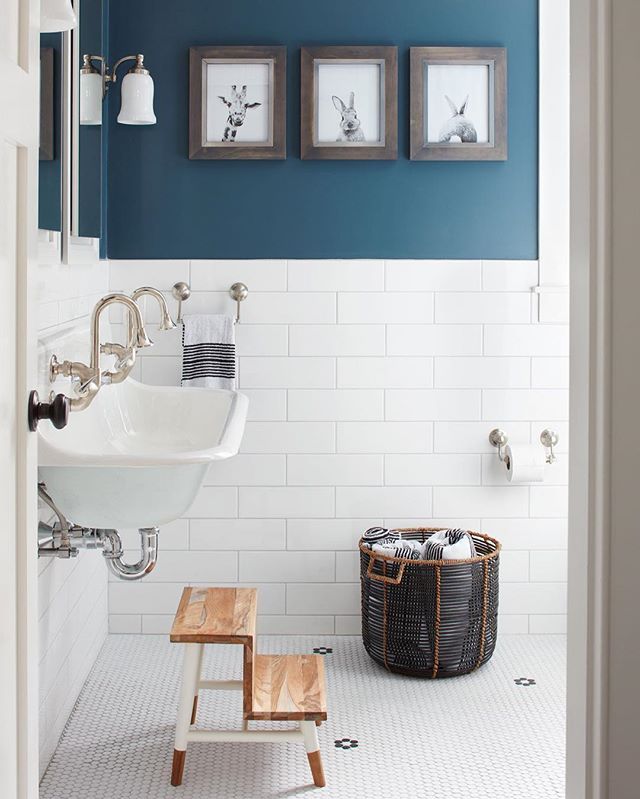
GET THE LOOK
Haris Kenjar
12 of 38
Mauve
Wood panels boasting an attractive mauve shade give this petite bathroom a sophisticated flair.
GET THE LOOK
Milo Brown
13 of 38
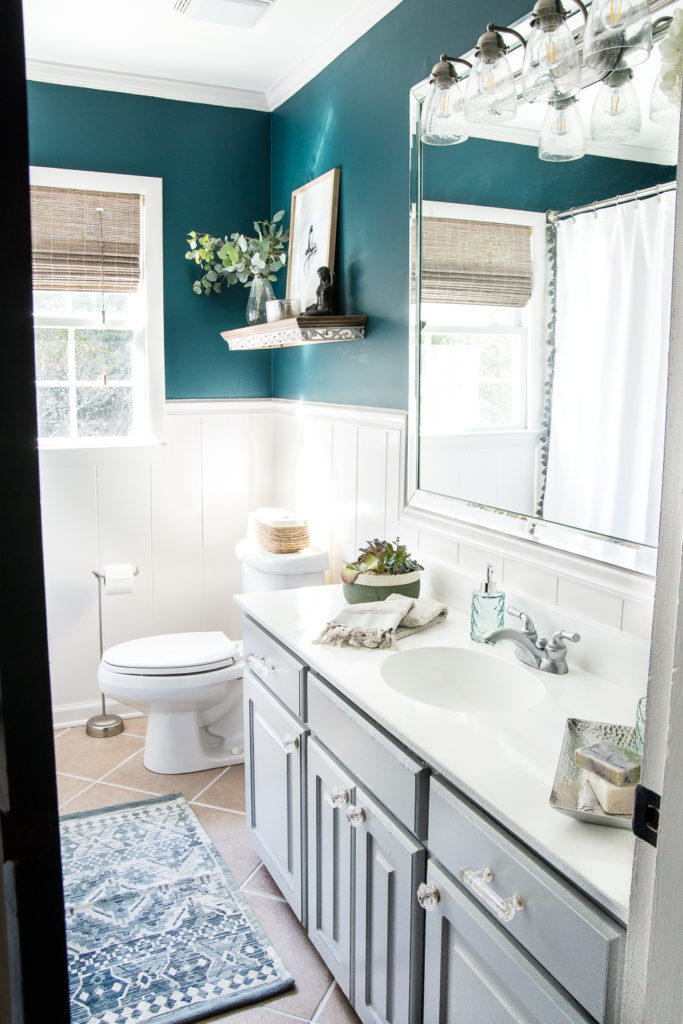
Teal
For an unexpected yet attractive design scheme, pair teal walls with a claw-foot tub in a brick red hue.
GET THE LOOK
Paul Dyer
14 of 38
Rose Pink
Rose never looked so good! Take a cue from this design scheme and add pops of white to balance the eye-catching paint color.
GET THE LOOK
Annie Schlechter
15 of 38
Griege
Consider this beige and gray combo your paint color superhero. It can do it all, from adding some depth to an all-white bathroom or acting as a neutral backdrop for an entire home.
GET THE LOOK
Mark Lund
16 of 38
Powder Blue
Embrace a nautical vibe with powder blue walls that can easily bring a sense of calm to any bathroom.
GET THE LOOK
DAVID TSAY
17 of 38
Dusty Blue
A cool gray-blue can liven up a stark white bathroom without going overboard on color.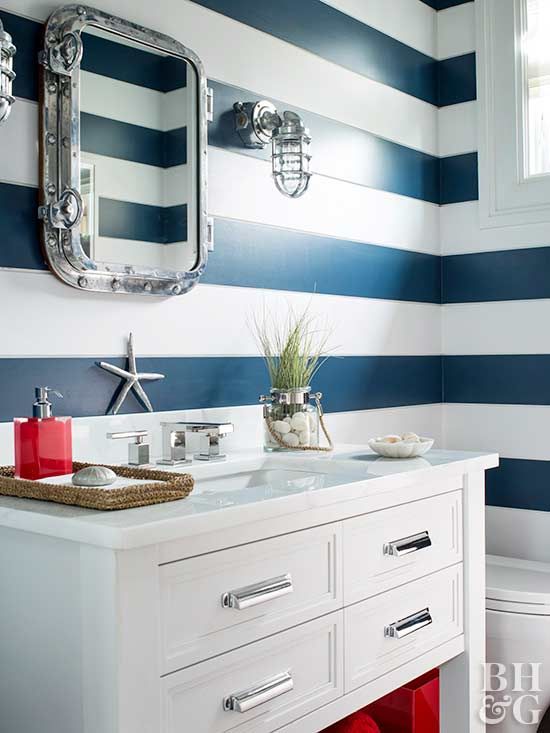 With the herringbone placement of the subway tile, this space is anything but ordinary.
GET THE LOOK
Jean Allsopp
18 of 38
Powder Blue
Your walls aren't the only place ready for color. Blue cabinetry (with a hint of violet!) refreshes a traditional cream backdrop.
GET THE LOOK
19 of 38
Pistachio
Annie Schlechter
20 of 38
Ink
Wallpapered rooms deserve an upgrade too. Coat the ceiling with a shade too bold for a larger space — it's a risk that'll pay off, big time.
GET THE LOOK
Michael Graydon
21 of 38
Lavender
Thanks to beautiful lavender walls, this bathroom is nothing short of luxurious. The white tub, windows and ceiling complement the soothing shade and create a welcoming atmosphere.
GET THE LOOK
22 of 38
Tan
A blend of neutrals, including tan and white, contributes to this bathroom's timeless appeal.
GET THE LOOK
Michael Graydon
23 of 38
Mustard
If you want to stick to an earthy color scheme that's visually appealing and works well with wood accents, consider a mustard-yellow shade.
GET THE LOOK
Mandi Gubler
24 of 38
Hunter Green
Designer Mandi Gubler transformed a cookie-cutter bathroom into a boho haven with a gorgeous emerald statement wall, new tiling, fixtures and more for only $939! See more of the incredible transformation on her blog, Vintage Revivals.
GET THE LOOK
One Kings Lane
25 of 38
Deep Navy
Sometimes bolder is better. This dark navy shiplap brings serious drama to a powder room using just a can of paint.
GET THE LOOK
ELSIE LARSON/A BEAUTIFUL MESS
26 of 38
Peachy Pink
This bathroom may be pink, but it's all grown-up. The peachy hue brings a little playfulness and a touch of glam to a truly pretty vanity. See more of this space at A Beautiful Mess.
GET THE LOOK
LIZZIE ORME
27 of 38
Stormy Blue
This true navy contrasts perfectly with the copper tub. Can't imagine painting your entire bathroom this dark? Stick to a statement wall instead.
GET THE LOOK
Lincoln Barbour
28 of 38
Off White
A true eggshell is a no-fail paint color time and time again. The color brings warmth to the room without overpowering it.
GET THE LOOK
David A. Land
29 of 38
Periwinkle
A little bit blue, a little bit purple, periwinkle is the perfect choice for a soothing space. For a more grown-up take, find a shade that has just a touch of gray like this bathroom.
GET THE LOOK
Nathan Kirkman
30 of 38
Black and White
Intense hues don't typically read "relaxing," but a trip to the dark side might be in order. Ebony adds an edge to traditional white subway tile, especially if you paint the trim too.
GET THE LOOK
70 Stunning Bathroom Decorating Ideas
Monique Valeris Senior Home Editor Monique Valeris is the senior home editor for Good Housekeeping, where she oversees the brand's home decorating coverage across print and digital.
Mariah Thomas Assistant Editor Mariah Thomas (she/her) is an assistant editor for Good Housekeeping, where she covers home and lifestyle content.
Want to save this article?
Create an account and you’ll be able to save and revisit articles. It’s free!
Sign up
Sign in
Join GH+
You've hit your max! To read and save unlimited articles, sign up to become a GH+ member.
JOIN NOW
Want to save this article?
Only GH+ members can save this article. Become a GH+ member to read and save unlimited articles.
Subscribe
Sign in
40 Fresh White Bathroom Design Ideas
7 Best Toilets of 2023
9 Best Bathroom Cleaners of 2023
11 Best Air Fresheners of 2023
9 Best Showerheads of 2023
7 Best Grout Cleaners of 2023
The Best Tested Toilet Brushes
9 Best Bathroom Scales, Tested & Reviewed
The Best Towels to Upgrade Your Bathroom
The Best Drain Cleaners to Vanquish Serious Clogs
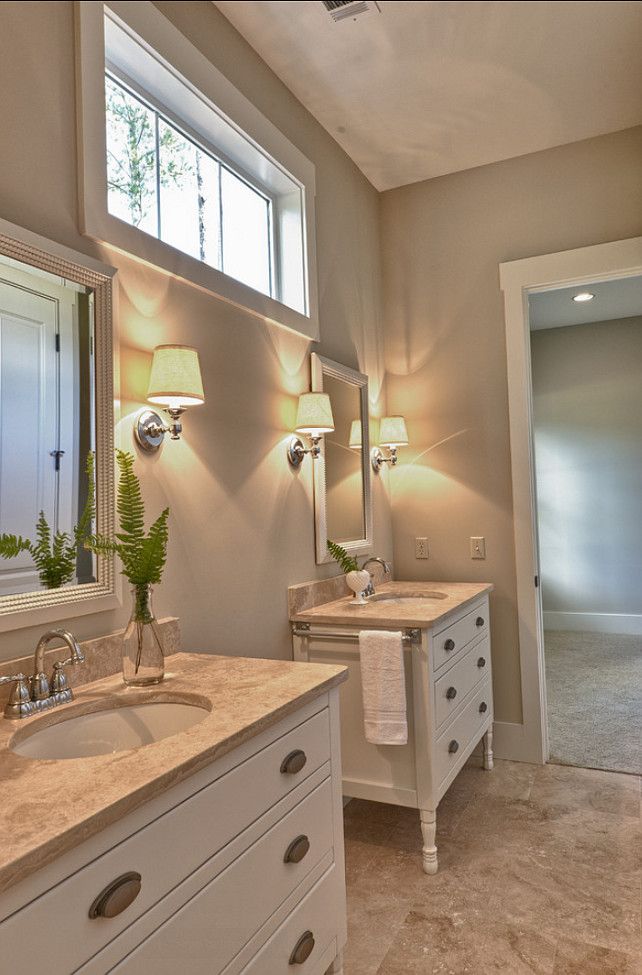
24 Best Bathroom Colors - Top Paint Colors for Bathroom Walls
Emily J Followill
Coming up with a color scheme can be intimidating, especially in smaller or more utilitarian spaces like bathrooms, where the materials have to work extra hard to set the scene. But taking the time to weigh all your options and choose colors you really love will pay off in the end. And paint is probably the easiest, most transformative way to upgrade your bathroom, whether you're remodeling or just feel like embarking on a quick DIY project this week. So, we're bringing you 24 bathrooms from designers, each one with fresh paint color ideas and style inspiration. If you wish to go all-over vibrant, add a subtle accent, or incorporate a pattern, these examples will show you how to create a colorful bathroom you'll love (or just ain't over again when you change your mind!).
Read McKendree
1 of 24
Fresh Cornflower Blue
This New England powder room designed by Katie Rosenfield maintains a sense of place without being overtly theme-y. It's preppy and classic, but also fresh. With a sweet cornflower blue wallpaper, chrome accents, and silvery floor tiles, the powder blue paint turned out to be the perfect color for the wall-spanning vanity.
BUY NOW Benjamin Moore Harbor Fog, $80
Heidi Caillier
2 of 24
Mysterious Deep Plum
A deep shade of plum emboldens the beadboard paneled walls in this bathroom designed by Heidi Caillier. Opening up to a dusty peach-toned bedroom, the bathroom plays the role of its moodier counterpart and adds just the right amount of complexity.
BUY NOW Backdrop self-Portrait, $49
Osklo Studio
3 of 24
Soothing Pale Gray
A pale shade of gray paint keeps this bathroom designed by Osklo Studio neutral and calm, but polished and formal, too. It's the perfect shade for this environment, as a stark white would be a little too bright. The gold fixtures and accents contrast the cool color family.
BUY NOW Farrow & Ball Cabbage White, $110
Lauren Pressey
4 of 24
Refreshing Spring Green
This adobe home in Santa Fe, New Mexico features tons of rich earth tones. In the powder room, French & French Interiors matched a matte spring green paint color to the floor tiles.
BUY NOW Farrow & Ball Breakfast Room Green, $120
Emily J Followill
5 of 24
Playful Clay Pink
"The was the first thing I planned on ripping out, and now it's one of my favorite rooms," says designer Lathem Gordon. Retro clay-toned tiles are brightened up by Sherwin-Williams's Bella Pink Paint. The bold gallery wall features colorful works so that it doesn't feel too monochromatic.
BUY NOW Sherwin Williams Bella Pink
Heidi Caillier Design
6 of 24
Sophisticated Dark Gray
It's all about layers, textures, color in this warm bathroom designed by Heidi Caillier. She transformed a rustic green dresser into a sink vanity which is polished off with a natural stone countertop for a sleek touch. the most transformative element of the space is definitely the dark gray paint, which strikes a cozy mood.
BUY NOW Portola Paints Quinn, $10 (sample)
House Beautiful
7 of 24
Quirky Turquoise
With an adventurous mix of colors, patterns, and textures, this bathroom designed by Sean Scherer is bursting with character. The inky black clawfoot tub, bronze sconces, and gilt framed artwork add a cool gothic twist to the light tropical turquoise wall and lime green and coral candlesticks. The floral carpets tie everything together.
BUY NOW Farrow & Ball Blue Ground, $110
House Beautiful
8 of 24
Sweet Light Pink
We love the eclectic artwork against the baby pink walls of this powder room. A teeny tiny bathroom is a perfect place for a playful paint color since there's no room for any other decorative statements. In this bathroom, the pink backdrop makes the traditional portrait gallery fun and whimsical.
BUY NOW Benjamin Moore Early Sunrise, $80
Leanne Ford Interiors
9 of 24
Edgy Light Gray
If you like grittier, edgier design, paint the walls gray and then incorporate more industrial elements. Here, Leanne Ford worked with concrete and exposed piping.
BUY NOW Farrow & Ball Plummett, $110
Victoria Pearson
10 of 24
Formal Bright Blue
Contrary to popular belief, stark white walls can make small spaces feel even smaller while dark paint colors will make a powder room or modest bathroom morel luxe and expansive. Plus, smaller rooms are perfect for experimenting, as we've mentioned.We love the classic blue paint Reath Design chose for this space.
BUY NOW Farrow & Ball Scotch Blue, $110
Commune Design
11 of 24
Chilled Out Coral
In this bathroom by Commune Design, this burnt coral paint strikes a nice balance between unique and neutral, sophisticated and edgy, soft and bold. All the gold accents add a contemporary yet timeless feel, especially paired with the warm wood cabinets.
BUY NOW Benjamin Moore Monticello Peach, $80
Heidi Caillier
12 of 24
Timeless Beige
Wood paneling painted in a soft greige shade creates a classic backdrop for this bathroom by Heidi Caillier. The wooden materials and accents like the toilet cover and mirror, along with the geometric tiled floors, complement the paint. The result is a low-key and approachable elegance.
BUY NOW Portola Paints Chateau, $110
Emil Dervish
13 of 24
Attention-Grabbing Red
Emil Dervish kept this industrial space modern and minimal with white graphic square tiles but added some funk with color on the upper half of the walls and ceiling. Opt for a bold red paint color like this if you want to make a strong statement.
BUY NOW Farrow & Ball Blazer, $110
Robert McKinley Studio
14 of 24
Grounded Brown
We're loving the offbeat yet neutral clay color scheme in this grounded bathroom designed by Robert McKinley Studio. The combination of mocha painted walls, a woven lampshade and blinds, and natural stone countertop create an earth-inspired oasis.
BUY NOW Benjamin Moore Cattail, $80
ETC.etera
15 of 24
Sunny Orange
The vibrant tangerine-painted cabinets in this bathroom designed by ETC.etera bring out the orange undertones in the pink stone vanity topper, which also ties in the pink floor tiles and area rug. The lesson? Match your cabinets to your natural stones and tiles.
BUY NOW Farrow & Ball Dutch Orange, $110
Robson Rak
16 of 24
Kelly Green
For a bold, modern impact, cover the entire bathroom in a saturated paint color. Fiona Lynch Studio opted for a rich shade of Kelly green.
BUY NOW Benjamin Moore Celtic Green, $80
Heidi Caillier
17 of 24
Romantic Mauve
Heidi Caillier chose an unexpected shade of mauve paint, brass fixtures and lighting, and smokey marble materials for the shower to achieve a one-of-a-kind yet timeless bathroom.
BUY NOW Benjamin Moore Cupid's Dart, $80
Sylvia Martin
18 of 24
Refreshing Sage Green
Designed to feel like an enclosed porch, this vintage-feeling bathroom was painted sage green. It features lantern-style light fixtures, hidden medicine cabinets, and freestanding, antique oak washstands.
BUY NOW Farrow & Ball Vert de Terre, $110
House Beautiful
19 of 24
Dark Blue
Interior designer Shaun Smith used the retro blue tiles in his bathroom drive the design process. Paired with floral blue wallpaper and porcelain accents, the old-school tiles feel much more fresh and stylish. To polish thing off even more, he painted the ceiling a slightly different shade of blue.
BUY NOW Benjamin Moore Bermuda Blue, $80
THOMAS LOOF
20 of 24
Black
Subway and hex tiles are popular in bathrooms for a good reason. They're durable in wet environments and and style-wise, are classic and reliable. But that doesn't mean you can't use paint! Here, designer Caroline Rafferty painted the ceiling a pitch black hue to make the white and airy environment feel formal and intimate.
BUY NOW Farrow & Ball Railings, $110
Fantastic Frank
21 of 24
Light Yellow
Pale yellow walls on the upper half of the wall complement the geometric mustard and white tiles framing the bathtub. The terra cotta herringbone floor tiles are a nice transition. They feel subtle and "accidental," yet match nicely—perfect for a lived in country chic vibe.
BUY NOW Farrow & Ball Dayroom Yellow, $110
Studio DB
22 of 24
Deep Green
This bathroom designed by Studio DB is undeniably sexy. While the custom metallic mural wallpaper is the focal point, the purple clawfoot tub and deep forest green walls create the framework.
BUY NOW Benjamin Moore Calypso Green, $80
REID ROLLS
23 of 24
Chalky White
Leanne Ford is the queen of all-white interiors. She keeps things interesting by folding in different textures. In this bathroom, she opted for a chalky paint finish, introducing more depth and dimension.
BUY NOW Portola Paints Roman Clay Elizabeth I, $10
Trevor Tondro
24 of 24
Deep Navy
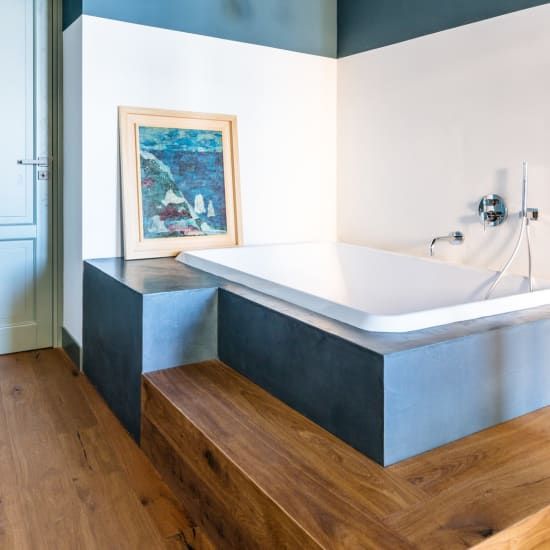
The farmhouse sink in this guest bathroom is a subtle nod to this Charleston home's earlier days as a kitchen house. Polo Blue on the walls adds a modern pop of color to this historic home.
BUY NOW Benjamin Moore Deep Royal, $80
ideas on what and how to paint the walls in the bathroom
When it comes to renovating a bathroom, most people prefer painting. This finish is more resistant and durable than wallpaper. Before painting, you need to choose a paint. Read more about how to paint the bathroom, will be discussed in this article.
Contents
- Which paint can be used in the bathroom
- Oil paint
- Alkyd enamel
- Paint Water-dispersion
- glossy paint
- matte paint
- textured paint
- latex paint
- Silicone paint
- Rules for painting walls in the bathroom
- Staining process What kind of paint can be used in the bathroom
When choosing a paint for the bathroom, give preference to resistant to heat, moisture and light. The paint must not be deformed by impact, friction or steam. The product must not contain hazardous substances.
The composition of the paint should contain antifungal components and algaecides against the development of mold. Read more about what paint to paint the walls in the bathroom, will be discussed below.
Oil paint
This type of paint belongs to the category of budget goods. This paint is insoluble in water. It will not get scratched if it comes into contact with hard objects. She does not lose her attractiveness for a long time. Walls painted with oil paint can be washed using household chemicals.
The oil paint will dry for at least 5 days if the room temperature is around +20°C. It smells unpleasant, and the smell must be weathered within a week.
Alkyd enamel
Alkyd paint features include:
- durability;
- water repellent;
- easy to clean;
- chemical resistance;
- Hue saturation retention;
Apply this type of paint in several layers. The temperature in the bathroom should be between +5°C and +35°C . If this condition is not observed, the paint will not be fixed on the surface. The term of complete drying is 24 hours.
 In this case, the temperature should be + 20 ° C. Drying is faster at higher temperatures. When the enamel dries, a thin film may form, which will accentuate irregularities and defects.
 Painting a bathroom with alkyd paint must be done in a respirator. The unpleasant smell keeps indoors for a long time, it is very difficult to erode.
Water-dispersion paint
The paint contains water dispersion polymers. It does not contain organic solvents, so it is non-toxic. The aroma is almost completely absent. After drying, a film forms on the surface of the paint, which prevents the absorption of water.
Water-dispersion paint is characterized by resistance to fading and abrasion. Wall cleaning can be done with detergents, and they will not spoil the coating. The composition of such paint may contain fungicides, algicides and antiseptic substances. Drying speed - 60 min.
Gloss Paint
If you are decorating your bathroom in a high-tech or minimalist style and don't know how to paint your bathroom walls instead of tiles, it is better to use gloss paint.
 It will visually increase the size of the room, and make it a little lighter. Painted walls in a bathroom with a smooth surface are easy to clean, but you can notice bumps, dust deposits and other contaminants on them.
 Matte Paint
If you have a large bathroom, you can paint it yourself with matt paints. They will allow you to slightly reduce the room, and make it more comfortable. On matte surfaces, defects are barely noticeable. Due to the porous structure, it is more difficult to wash walls with matte paint. Matte surfaces are suitable for styles such as classic, eco-style and Provence.
Textured paint
Using textured paints creates a relief surface. Substances must be applied in a dense layer. To brighten the walls, add color to the classic snow-white version.
Textured paints are applied with a brush, roller or spatula. Drying speed - up to 8 hours. If you cover the walls and ceiling with a thick layer of paint, you can hide the defects.
 Textured paints are characterized by heat resistance and moisture resistance. They do not fade and do not peel off over time.
 Latex paint
This type of paint belongs to the water-based category. Forms a dense film on the surface, and is well applied. Characterized by durability.
The disadvantages of latex paint include high price and the need for pre-preparation of the surface for work.
Silicone paint
This type of paint is water based. They can be used to paint the bathroom. Sold at a low price, resistant to water and steam.
Rules for painting bathroom walls yourself
There are several rules for preparing and painting bathroom walls. If you don't want to hire workers, you can do it yourself. More details on how to paint the walls in the bathroom in stages will be described below.
Preparing the walls
First you need to prepare the surface for work.
 The surface must be dry so that the paint lays down evenly. Otherwise, condensation will form, which will shorten the life of the coating.
 There are several steps to finish the walls:
- Remove the old coating. Old paint can be removed with thinner, spatulas, sandpaper or scrapers.
- Prepare a draft. Cover the walls with plaster or drywall that is resistant to moisture. When the plaster dries, proceed to further work.
- If the walls show irregularities , they must be puttied. For this, acrylic or latex putty is suitable, which penetrates deep into the walls. Apply a primer before using putty.
- Prime walls with primer to finish. Apply it in several layers. Each of them should be applied when the previous layer is dry.
Painting process
When the primer is completely dry, you can start painting. This is easy to do on your own, without the help of specialists.
To properly paint your bathroom, follow these guidelines:
- Use masking tape to cover all objects and surfaces that you will not paint. These are faucets, toilets, shelves, pipes, heated towel rails, etc.
- If there are bumps on the walls, first apply the paint with a brush. It will create a denser layer that will mask the defects.
- Smooth surfaces are painted with roller . It will evenly apply paint to the walls, and reduce the consumption of materials. In hard-to-reach places, use a brush. It is much more compact.
- Get the paint ready. If you add color to it, mix the materials thoroughly so that the color is uniform.
- First coat thinner with thinner .
- Apply the second coat of paint after the previous one is completely dry. You may need 3-4 coats.
- Watch for drips and areas that are not covered.
- The composition must be homogeneous , without additional impurities.
Common wall painting mistakes
Everyone who works with paint can make a mistake. If you are new to such work, then the risk of errors only increases.
Common bathroom painting mistakes include:
- Using the same roller for different paints. If the existing roller is painted with a different paint, then it is better to use new tools for painting the bathroom. Otherwise, streaks or changes in the desired shade may appear.
- Incorrect use of the brush . If you use a brush, apply the paint evenly with it. Do not change the direction and amplitude of the swing. Otherwise, after the paint dries, the appearance of the wall will not be aesthetic.
- Wrong paint dilution. When you dilute the paint, do everything according to the instructions described on the bank. If you have friends who have used such materials, you can ask them for advice.
Now you know how to paint a bathroom, and that this process is accessible to anyone, even a beginner. If you pick up tools and materials, as well as prepare the surface for painting for work, the result will please. Follow the recommendations and the right combination so that the painted surfaces retain their appearance for a long time.
What color to paint the bathtub is up to you — inspect the furniture and appliances in the room, the proposed photo design ideas, and choose a tone that will be in harmony with the items in the bathroom.
How do you like the article?
DIY bathroom wall painting
There are many ways to decorate a bathroom, both expensive and not very expensive. The simplest and most budgetary is painting, and if you apply imagination, then the most decorative.
 With the help of paint alone, you can completely change the style of the interior, make the room bright, exclusive, or vice versa, give a strict but elegant look. No special skills are required for this, the main thing is to choose the right staining technique. The process itself is also simple, but much depends on the quality of surface preparation and the choice of material.
 Staining walls in the bathroom
Material content
- 1 Advantages of staining
- 2 What paint select
- 2.1 Oil paint
- 2.2 Alkyd enamel
- 2.3 Water-dispersion paint 9000 9000 2.4 Glying and matte-which is better?
- 2.5 Textured paints
- 2.6 How to get good quality paint
- 3 The best paint
- 4 Paint consumption and additional materials
- 5 Preparing the bathroom for painting
- 5.1 Video: Removing old paint from the walls.
- 6 I paint a bathroom
- 7 Decorative methods of painting
- 7.
 1 Using stencils
 - 7.2 Video: applying drawings to the walls using stencils
- 7.3 Walls in strip 9000 7.4 rollers for applications
900 9000 9 when painting walls - 7.
- moisture resistance;
- hygiene;
- antibacterial properties;
- breathable;
- the absence of harmful substances in the composition.
- widest range of colors;
- high water repellency;
- fade resistance;
- the ability to tighten small cracks and smooth out irregularities;
- drying within one hour after application;
- good covering power.
Advantages of painting
So why is painting better than other finishes?
Inexpensive. Tiles, decorative plaster, plastic panels are still more expensive than paint. In addition to the basic finish, you will need related materials (tile adhesive, grout, slats for battens under the panels, etc.), as well as an additional tool. To paint a bathroom, you will need paint, primer, leveling putty and painting supplies, which will cost several times less. Of course, the tile lasts longer, but even with re-painting after a few years, such repairs remain the most budget option.
Painted bathroom walls - economical finish
Simple. Tiling requires skill and skill. Without experience, it is difficult to lay it neatly and beautifully, especially in the corners. Paneling is easier, but even there it is necessary to take accurate measurements, install the crate, and know how to properly fasten the lamellas. When painting, the most crucial and difficult moment is the preparation of the surface, its alignment. To align the walls well, you need to try very hard, and not everyone gets it right the first time. But this is only if the surfaces are too uneven, with minor defects, everything turns out perfectly even for beginners. Well, applying paint on smooth smooth walls will no longer be difficult.
Wall painting is the easiest and least time-consuming process
Creative. Modern paints are distinguished not only by improved properties, but also by a huge variety of colors. Designers offer a lot of interesting combinations and methods of applying paint, which are far superior to any cladding in terms of decorativeness. The combination of colors and shades allows you to transform the interior beyond recognition with minimal cost.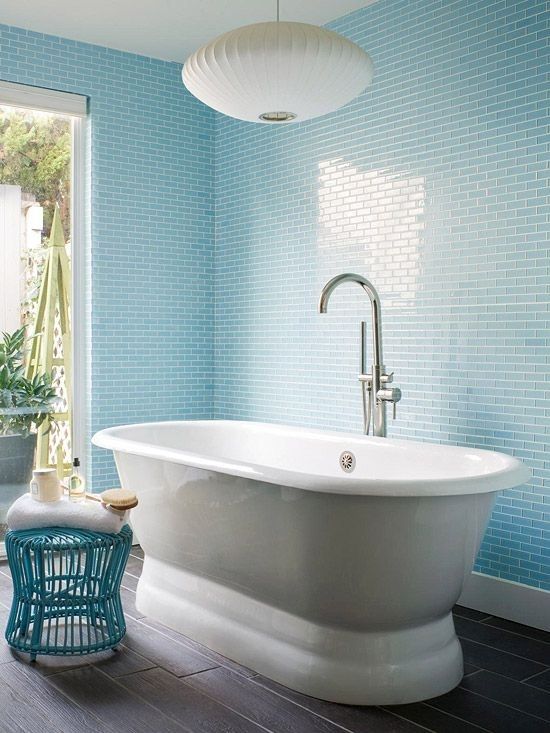 Various stencils and special rollers with a textured pattern further simplify the staining process.
Decor stencils! Creating a unique interior
Textured rollers
Homemade textured roller
Practical. High-quality paints do not fade for a long time, are easily cleaned of dirt, and if the application technology is observed, they do not crack or peel off for years. Of course, such a coating is easily damaged, for example, by catching something sharp or hitting a heavy object against the wall. But these defects are easily eliminated by puttying and tinting the damaged area, the main thing is to choose the paint according to the tone.
Touching up paint is much easier than replacing broken tiles
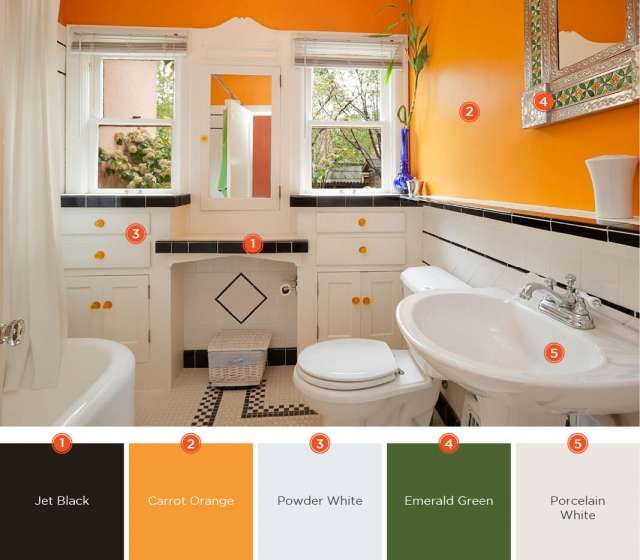
That's interesting! Bathroom in orange tones: design photo, color combination.
Which paint to choose
The bathroom differs from other rooms in the apartment primarily due to its high humidity.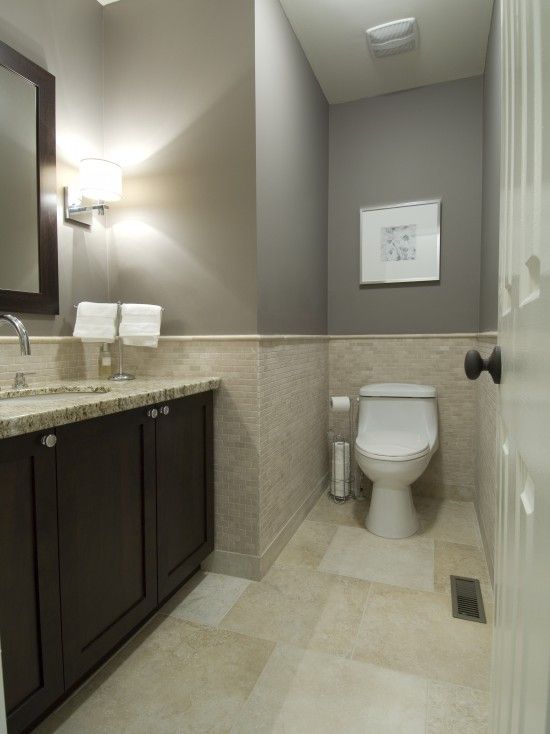 This implies the use of finishing materials, including paint, with certain characteristics:
In addition, such paint must be resistant to abrasion, since the walls in the bathroom have to be washed and wiped very often. These requirements are partially met by oil paint and alkyd enamel, but water-based paint is most suitable. Consider the characteristics of each type separately.
How and with what to paint the walls in the bathroom: 6 important tips
Oil paint
Now oil paints are not at all as popular as they were 10-15 years ago, but they still have a certain demand. Their main advantage is high adhesion and durability combined with a low price. Few contemporary paints can last this long without losing their visual appeal. The painted surface does not get wet, perfectly tolerates repeated washing, and does not react with household chemicals.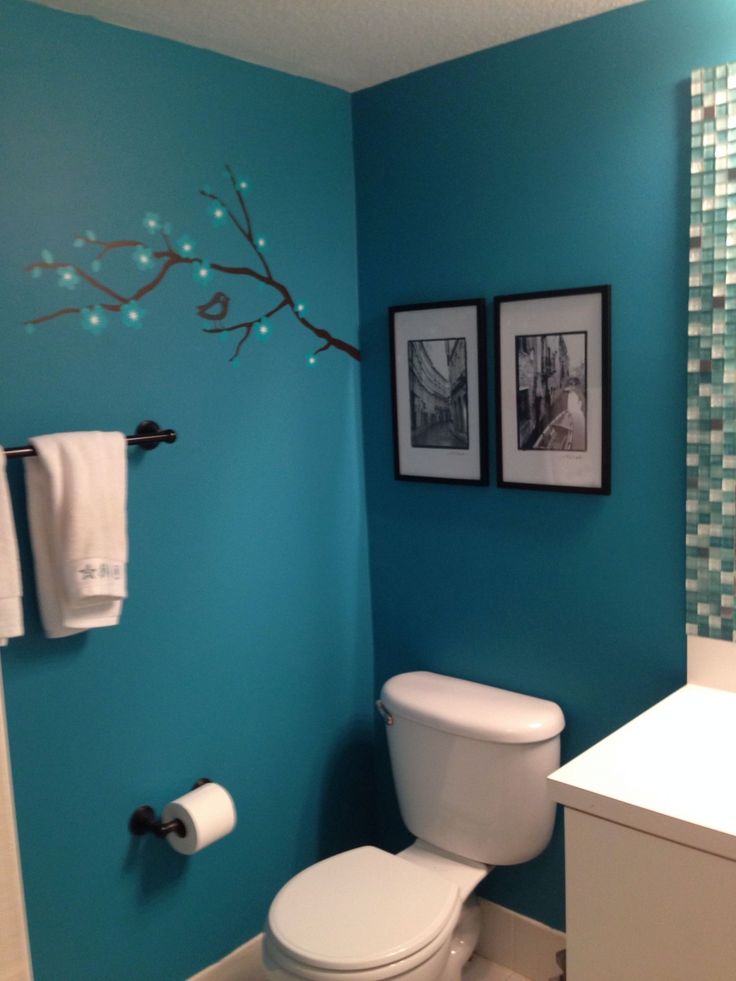
Bath oil paint
The main components of oil paints are drying oil and pigments. Depending on the scope of application, various fillers are added to the composition: manganese and cobalt salts, talc, barite, mica. On sale, the paint is presented in two forms: liquid and pasty (thick grated). The first type is immediately ready for use, and the paint only needs to be thoroughly mixed until smooth. The second type requires dilution of the composition with drying oil to the desired consistency. To dilute the paint, you can also use kerosene, turpentine, white spirit, but in small proportions - no more than 5% of the total mass.
Oil paints have a high density, which increases the consumption of the composition. At the same time, this property contributes to an increase in hiding power, and often one coat of paint is sufficient to obtain an even coating. Additionally, this structure allows you to mask minor flaws on the walls. It is recommended to apply it with a hard brush, rubbing it with force into the surface to be painted. To achieve the highest quality result, you need not only to carefully prepare the walls, but also to choose the right paint for its intended purpose. Each type of surface (metal, wood, concrete, plaster, etc.) has its own composition, so carefully study the information on the package.
Oil paint Ditex MA-15
The disadvantage of oil paints is a long drying time. As a rule, this period is 5-7 days at a temperature of +20 degrees. At lower temperatures, the paint dries even longer. Some manufacturers are now adding special fillers to the composition, which reduce the drying time to 2-3 days. This information is also indicated on the packaging.
Alkyd Enamel
Alkyd Enamel
The water-repellent properties of the enamel allow it to be widely used in bathrooms. Painted surfaces do not dampen, are easy to clean with a variety of cleaning solutions, do not fade for a long time and are not erased. Two coats of paint, applied according to the rules, retain a protective effect for 4 years.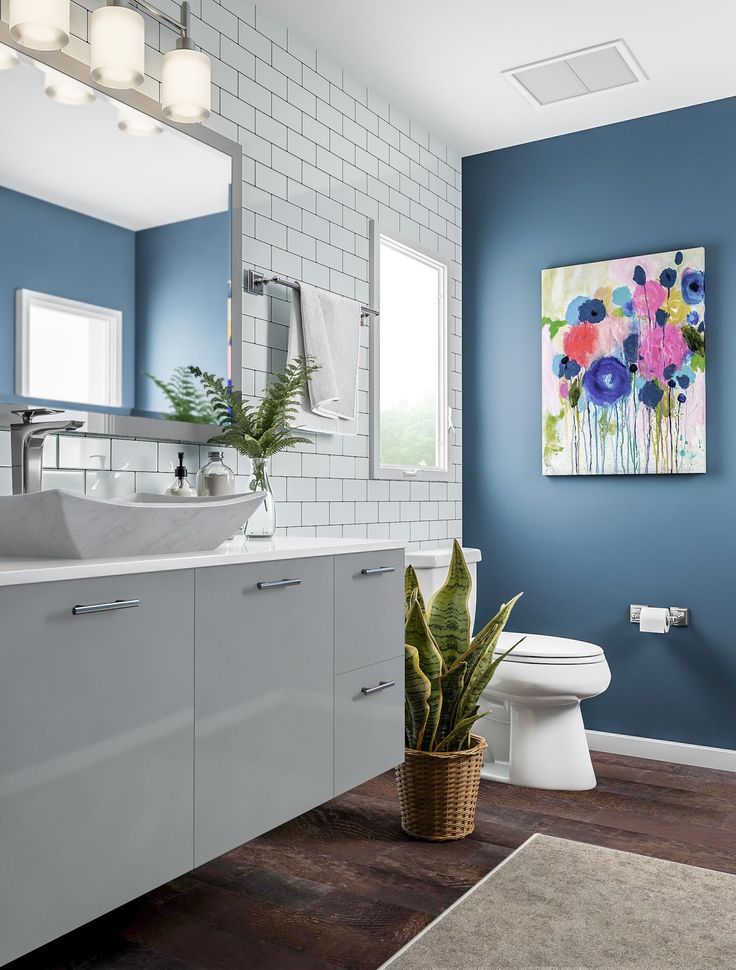 The composition of the enamel includes a solvent, so the paint, if necessary, is diluted with turpentine, solvent, white spirit in a ratio of 1:10 to the mass of the enamel.
For a quality coating, the application temperature range must be between 5 and 35°C, otherwise the adhesive properties are reduced. Each layer dries overnight at 20 ° C, if the room is hot, the drying time is reduced. Usually, 2-3 coats of paint are required for concrete, plaster and brick walls in order for the coating to be as even as possible. Unlike oil paint, enamel is less viscous, and therefore practically does not hide small defects on the painted surface.
Enamel is divided into glossy and matt. The main color spectrum is quite wide, in addition, the paint is perfectly mixed and tinted, and therefore it is not difficult to choose the desired shade. The pigments that make up modern enamels have increased resistance to ultraviolet radiation, and the painted surfaces retain their rich color for a long time. When choosing, be sure to pay attention to the marking - universal enamel PF 115 is best suited for internal use.
Alkyd enamel PF-115
The main disadvantage of alkyd enamel is toxicity. A pungent pungent smell disappears from the room for a long time; a respirator is needed during work. It is worth noting that only fresh paints are toxic; after drying and the smell disappears, there is no danger to human health. Another disadvantage is the flammability of the paint, but many manufacturers add flame retardants to the composition, which reduce the risk of ignition to a minimum.
Main technical characteristics of PF-115
Enamel consumption PF-115 with 1 and 2-layer coating
| Color PF-115 | Amount of enamel, to obtain a coating in 1 micron, in g/m² | Thickness, 1, micron2 | Thickness 2 layers, μm | Approximate consumption, 2 layers, brush/roller, g/m2 | ||||||||||
|---|---|---|---|---|---|---|---|---|---|---|---|---|---|---|
| White | 3. 75-3.17 75-3.17 | 18-23 | 40 | |||||||||||
| 9040 904 40 904 40 | ||||||||||||||
| Black | 3.14,-2.65 |
 Its surface is more porous, and therefore it is more difficult to remove pollution. In all other respects, it is in no way inferior to glossy. Semi-gloss only slightly reflect light, and look great both on ceilings and on walls.
  The relief structure allows you to perfectly hide minor defects, but irregularities larger than 3-4 mm will already be visible. Subject to the painting technology, it lasts for several years, almost does not fade, is not afraid of moisture and temperature changes.
  Small manufacturers often produce paint products that do not comply with GOST, using cheap fillers and carcinogens. Trying to save money will only increase your costs, as everything will have to be repainted.
 | Instrument | Plus | Bessions | |
|---|---|---|---|
| TIMALIC WIDE | SOMPLE ONE RESIRE, A large assortment allows you to choose the most convenient in width and coherent brushes. With a brush it is convenient to paint over corners and all hard-to-reach places With a brush it is convenient to paint over corners and all hard-to-reach places | A lot of paint is consumed, hands get very tired during the work, slow staining speed. Often traces of smears remain on the surface | |
| Rollers | Affordable price, large selection of roller size and density, comfortable ergonomic shape. Paint consumption is much less than when using brushes. When working with a roller, much less time and physical effort is required, the paint lays down in a uniform thin layer over the entire surface. Special telescopic handles that are attached to the roller make it easy to paint walls under the ceiling | For painting, the most even surface is required, the presence of flaws contributes to the poor quality of the coating. Rollers are not suitable for painting in hard-to-reach places | |
| Spray guns | Quickly and very efficiently paints any surface, regardless of configuration. Very economical paint consumption, does not require much physical effort | High cost, the need for thorough rinsing after each application. When using low-quality paint, the nozzle becomes clogged, you have to disassemble and clean everything When using low-quality paint, the nozzle becomes clogged, you have to disassemble and clean everything |
If you only need to paint the bathroom, and it has a modest size, it is not worth spending money on a spray gun. It is better to buy a roller and 1-2 narrow brushes to paint over the corners.
Consumption of paint and additional materials
Before proceeding with the repair, it is necessary to calculate in advance the scope of work and determine how much of which materials will be needed. The main expense item is paint, additionally you will need putty for leveling and a primer. In order not to overpay and run to the store, if something is not enough, calculate in advance the approximate consumption of these materials.
Putty is used to eliminate all irregularities greater than 2 mm. A few minor defects are puttied separately, but if there are too many irregularities, a continuous application of at least 2 layers is required. For calculations, it is necessary to know the rate of putty consumption per square meter, the area of \u200b\u200ball surfaces to be leveled and the layer thickness. The consumption rate is always indicated by the manufacturer on the packaging, and averages 0.9-1.8 kg / m2. By multiplying the original data, you will find out how much material you need to buy.
Wall plastering for painting
Calculation example: the area of one wall is 3×4 m = 12 m2. The thickness of the leveling layer is 3 mm. The consumption rate is 1.2 kg/m2. We multiply 1.2 kg x 12 m2 x 3 mm = 43.2 kg. That is, for one wall you will need about 45 kg of putty (you need to buy with a small margin). In the same way, calculate the amount for the remaining walls, and then summarize.
Surfaces are primed twice - before applying putty and after leveling. This contributes to an increase in water-repellent properties and more uniform paint application. The consumption rate of the primer mixture is on average 0.1-0.15 kg/m2. The amount of primer is calculated in the same way as putties: multiply the area by the consumption rate and by the number of layers.
Consumption also depends on the color
Preparing the bathroom for painting
The preparatory process includes two steps - removing the old finish and leveling the surfaces. In some cases, it is not necessary to remove the coating to the base, for example, if the walls have already been painted and do not have defects. Then the surface is simply cleaned of dust and dirt, primed and dried before applying a new paint. But this happens very rarely, and you can almost always find exfoliated areas, cracks, potholes, places infected with fungus.
Step 1. To begin with, everything unnecessary is taken out of the bathroom, skirting boards and old lining (if any) are removed. Peeled paint can be easily removed with a scraper or spatula, prying off its edges. Where the paint sits tightly, it is best to use a grinder with a flexible disk under the emery.
How to remove paint from a wall
Video: Removing old paint from walls.
Step 2. Small potholes and cracks are rubbed with sandpaper.
Wall sanding
Large cracks are grooved for subsequent grouting.
Filling cracks
Whitewash is simply washed off with water to a firm base.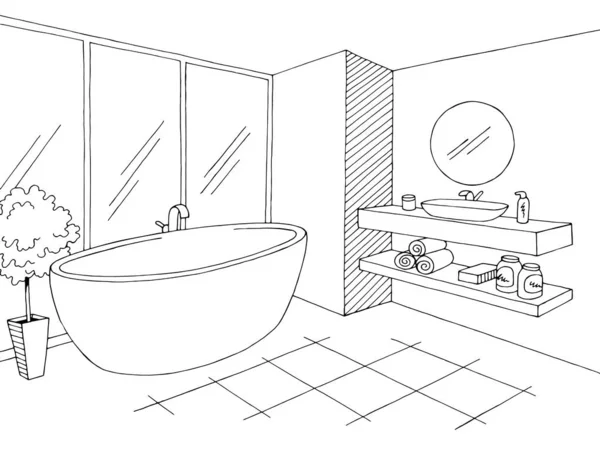
Whitewash can be washed off the walls with a regular sponge and water
Step 3. Areas blackened by mold are treated separately: they are thoroughly cleaned with a scraper, wiped and any antiseptic composition is applied. Especially carefully inspect the places behind the pipes, where dirt most often accumulates and fungus develops.
Mold and fungus killer
Step 4. After the walls are cleaned, remove all debris, dust and dirt. Large cracks in the walls are filled with plaster and allowed to dry.
Sealing cracks and crevices in walls
Step 5. Next, the surfaces are primed, starting from the top. In dry rooms it is possible to prime and once, directly under painting, but more reliable protection is necessary for a bathroom. Be sure to use a primer that is deep-penetrating and waterproof. To apply the primer, take a roller with a fine nap. Foam rubber for these purposes is not quite a suitable option.
Deep Penetrating Primer
Pour the primer into the paint bath, dip the roller and roll it evenly over the surface. Where the roller does not reach, primed with a brush. Make sure that there are no dry areas and no drips. Depending on the composition, the primer dries from 4 to 12 hours. If the base of the walls is sufficiently porous, it is advisable to prime again after the first layer has completely dried. For a strong concrete surface, once is enough.
Wall primer
Step 6. According to the instructions on the packaging, dilute the putty mixture with water and fill in all irregularities. The mixture is applied with a spatula and excess putty is removed with it. If you need to level the surface with a continuous layer, take a wide spatula, apply a solution along the entire length of the blade and, holding the spatula at an angle to the wall, apply putty with an even movement. It is not necessary to press hard on the spatula, the main thing is that the blade fits snugly against the surface. Movements are performed from the bottom up, making sure that there are no sagging and voids.
Puttying the wall - photo
Step 7. When the putty dries, sand the walls well with fine-grained sandpaper. This will help give the surface the desired smoothness. Since a lot of dust is generated during the grinding process, upon completion of the work, everything is wiped with a damp, clean cloth.
Step 8. The prepared surface is primed a second time, again starting from the top. After that, it remains only to wait for the composition to dry.
Painting the bathroom
The easiest way is to paint the bathroom in one color. In order not to accidentally stain the ceiling and other areas that cannot be painted, masking tape is glued along the boundaries of these zones. This must be done carefully, checking the evenness of the lines, otherwise you will have to eliminate errors later.
Step 1. Mix the paint thoroughly until smooth. If a film has formed on the surface of the paint, it must be removed very carefully, otherwise small pieces of the film will fall on the walls and the whole look will be spoiled.
Mixing paint with tint
Step 2. As a rule, colored compositions are used for walls, not white ones, so it is necessary to tint the paint correctly. This applies mainly to water-dispersion paints, since enamels and oil paints are sold already tinted. A little color from the bottle is poured into a bucket of paint in a thin stream and mixed with a mixer at the lowest speed. When the composition acquires a uniform color, pour in a little more color and stir. So you can more accurately select the desired shade. If you immediately pour out all the color from the bottle, the color of the paint may turn out to be darker than required.
Paint color
So that the walls do not differ in tone, such a volume of paint is tinted, which is enough for the entire area.
If you dilute the composition for each wall separately, it is unlikely that you will be able to pick up exactly the same color.
Step 3. First, paint the joints in the corners, at the doorway and hard-to-reach areas with a narrow brush. The paint is carefully rubbed, removing streaks and sagging. Brush movements should be in the same direction.
Step 4. Take a wide brush or roller and start painting the walls themselves. Do not dip the tool into the paint very hard, this leads to the formation of streaks and splashes. If a roller is used, it is well rolled out on the relief surface of the tray so that the paint evenly saturates the material. They paint the walls in parallel stripes, from top to bottom, rolling the roller until the base stops showing through. Thus, they paint over the entire area and leave the walls to dry.
How to paint walls correctly
Tip. While the walls are drying, the roller should be placed in a plastic bag and wrapped tightly.
This will keep it from drying out and you can use it to apply a second coat. Do the same with a paint brush.
Step 5. After drying, the whole procedure is repeated again in the same sequence. When the walls are completely painted, very carefully remove the masking tape. You can do this after some time, but preferably until the second layer of paint has completely dried.
Usually two coats are sufficient, but sometimes one more is required. This can be determined visually: if the walls have a non-uniform tone, certain sections are translucent, traces of strokes are visible, which means that the third layer is necessary. If the color of the walls is deep and even, there are no visible flaws, there is no need to paint anymore.
Applying the first and second coat of paint
Decorative painting methods
Unfortunately, not everyone knows how to draw, so only a few can decorate the bathroom walls with hand-painted paintings.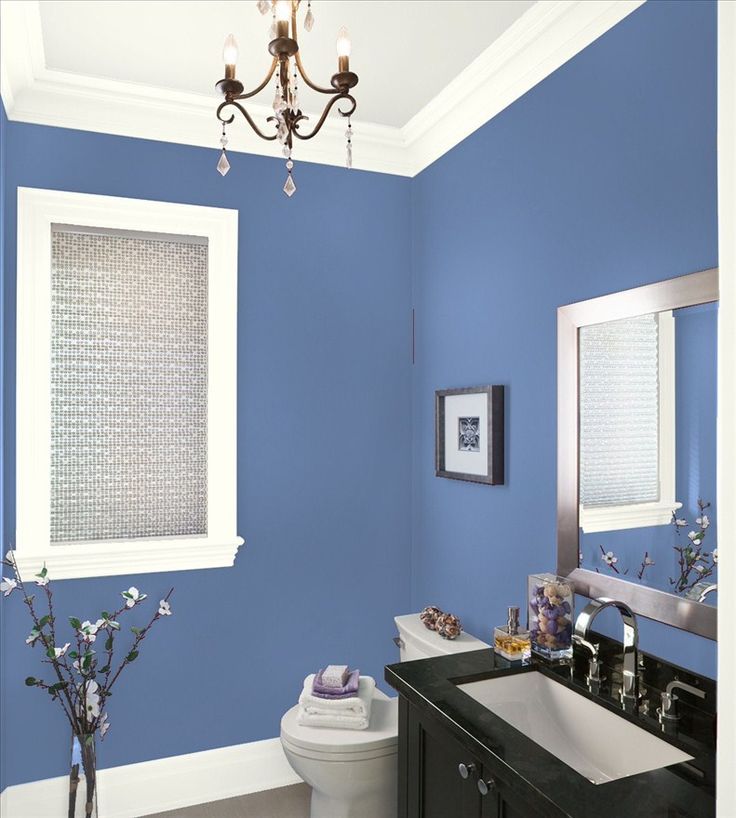 Hiring a specialist for this is too expensive, which means you need to look for simpler ways. A wide palette of modern colors gives a wonderful opportunity to decorate the interior without much effort.
Using stencils
This is one of the most popular ways. Now on sale there are many ready-made stencils for painting, inexpensive and easy to use. Disposable stencils are made of adhesive vinyl film, acrylic and durable plastic are used to make reusable templates. Such stencils are tightly fixed on the wall, which makes drawing the drawing as easy as possible.
Step 1. The walls are painted in the manner described above, waiting for complete drying. Choose a suitable pattern and determine its location.
Step 2 . Remove the protective film from the stencil and carefully attach it to the wall surface. If there is no self-adhesive layer, the stencil is fixed with masking tape from all sides.
Fix the stencil on the wall
Step 3.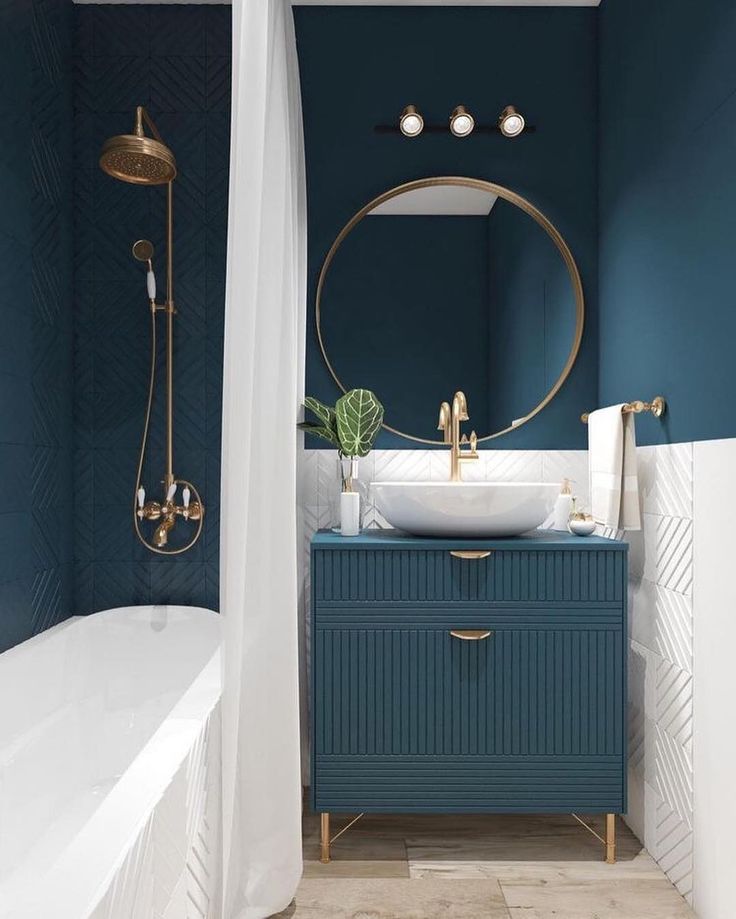 Dip the roller in the paint, roll it first on the tray to remove the excess, then on the surface of the stencil. All cutouts must be evenly covered with paint, otherwise the pattern will be fuzzy.
Paint over the stencil. Use roller or brush
Move the stencil and continue painting on the walls
Step 4. Carefully peel the template off the wall and allow the design to dry.
Stenciling
The color of the pattern should go well with the base color and stand out against the background of the walls. Incorrectly selected shades can ruin everything, and the original idea will lose all its charm.
Video: Painting walls with stencils
Striped walls
With a simple multicolored strip on the walls, you can give your bathroom a special charm, visually expand the boundaries of the interior. There are a huge number of options, so it all depends on your imagination. You can experiment with the width and arrangement of the stripes, the number of colors and shades.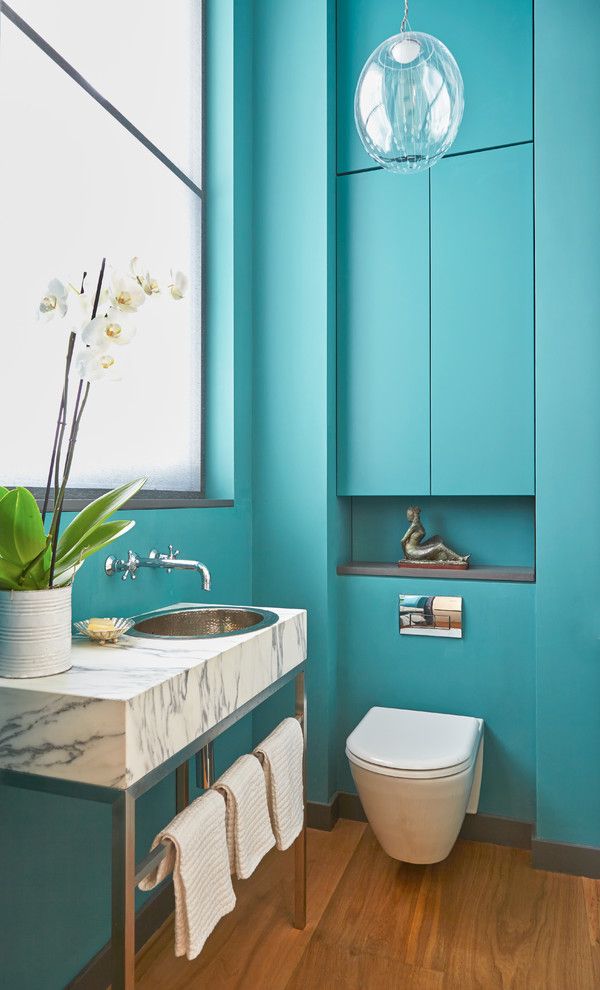 Stripes of the same color look interesting, but with a different surface - matte and glossy.
Painting the walls with stripes
Bathroom interior with striped walls
Bathroom design project with striped walls
To find the best option, it is best to draw a diagram of the stripes on paper and color them to your liking.
All that's left is to buy paint of the desired color and a few rolls of masking tape. The walls should already be painted in the base color.
Step 1. Work starts from one of the corners of the bathroom. Using a building level, draw a vertical line along the wall with a simple pencil from ceiling to floor. The selected strip width is measured and a second line is drawn. In the same way, mark the remaining strips to the corner.
Step 2. Apply masking tape strictly along the lines. In this case, the adhesive tape should be inside those stripes that will remain in the base color. Lines drawn with a pencil cannot be sealed, because this way they will be visible on the painted surface.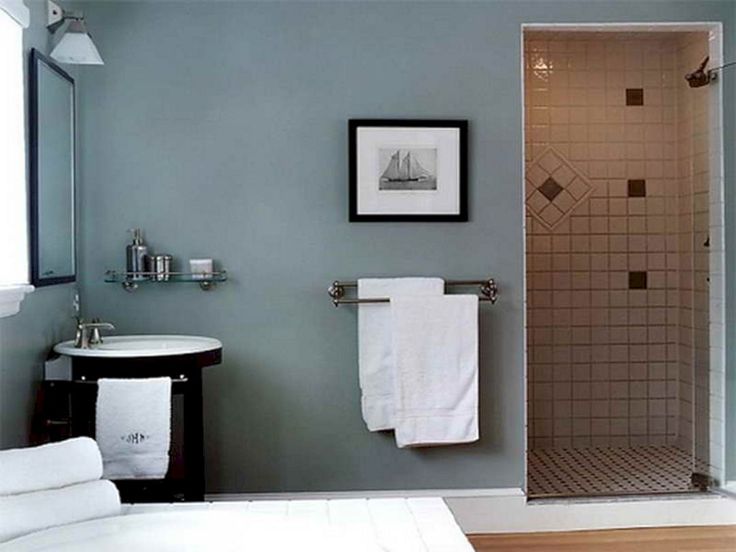
The adhesive tape is well smoothed so that there is no air under it, otherwise the paint will get inside and the stripes will be sloppy. Additionally, glue the joints between the ceiling and walls.
Step 3. Pour paint into the bath, dip the roller into it and start rolling it along the first strip. The layer should lie down evenly, without smudges. Having painted one strip, move on to the next, observing the alternation of stripes in color. If necessary, apply a second coat of paint, waiting for the first to dry.
Apply masking tape
Striped wall painting scheme
Roller painting the wall
Step 4 . After painting is complete, carefully remove the tape from the wall. This should be done slowly, with smooth movements, since a sharp separation can lead to peeling of the paint.
Peel off the tape
You can do the same with horizontal stripes, diagonal stripes, and more complex patterns. If you stick masking tape in perpendicular lines, and then paint over individual areas, you will get colored squares.
Creative on the walls
The most important thing in such painting is the utmost accuracy at every stage. The paint easily penetrates under poorly fixed adhesive tape, lubricates the lines, leaves smudges. All this will have to wipe and re-tint.
Appliqué Rolls
This is probably the fastest and most convenient way to decorate. A special patterned roller has two nozzles - foam rubber, which absorbs paint, and rubber, with an embossed ornament for imprinting.
Animal design roller
First, the walls are prepared in the standard way, painted in the base color. To apply the pattern, choose a paint that is contrasting in color, in harmony with the main one. Next, paint is poured, the roller is dipped so that the foam rubber nozzle is well saturated, both nozzles are rolled together in the bath.
How to paint a wall with a pattern roller
The most crucial moment here is the application of the pattern. The roller must be driven evenly, from top to bottom, strictly vertically. The next strip should run parallel to the first, exactly along the border of the pattern. If the edges of the stripes overlap each other, it will turn out sloppy, and to fix this, you need to completely repaint the wall.
Common mistakes when painting walls
Even after studying the instructions for painting walls, many make annoying mistakes, which is why the walls need to be repaired the next year, or even earlier. The main reason for such errors is the haste with which most people make repairs. Some do not meet the drying deadlines, others skip individual steps in order to manage faster, and as a result, quality suffers. Therefore, read the most common mistakes and try to never repeat them.
Major mistakes when painting walls
Painting unprepared walls. Even if the surface appears smooth and clean, there may still be lint, grease spots, dust, small bumps on it. All this will immediately appear under the new paint, especially if it is glossy. In addition, dust and grease stains reduce the adhesion of the paint, and peeling will appear in these places very soon. Surface grinding, cleaning with soapy solutions, wiping from dust will help to avoid this.
No primer coat. Many consider priming to be redundant, since the paint adheres well to the walls anyway. As a result, paint consumption increases, coloring occurs unevenly, and subsequently a fungus develops. The only way out in such a situation is to re-repair.
Improperly prepared paint. Too thick paint does not apply well, forms sags that are difficult to remove after drying, lays unevenly. Too liquid spreads, poorly covers the surface, requires more layers. Even worse, if the solvent is incorrectly selected. For example, if white spirit is added to water-based paint, the polymers will stick together and form clumps. You won't be able to use this paint. Carefully read the instructions on each package, follow the indicated proportions when diluting, mix the paint thoroughly before applying.
Chaotic brush strokes. The appearance of the wall after drying depends on the method of applying the paint. Movements should be all the time either horizontal or vertical, and with chaotic smearing, clearly visible traces remain on the surface. In this case, it is recommended to apply the second layer perpendicular to the first, then the quality of the coating will be as high as possible.
Patterns of movement of painting tools during painting
Non-compliance with the drying time. It is not in vain that manufacturers indicate the time of complete drying of the layers on the cans of paint. Even if the walls do not stick when touched, this does not mean that the coating has gained sufficient strength. If you start painting earlier than you should, the bottom layer will start to come off and stick in pieces to the roller. Or, after a couple of days, bubbles form on the wall, which also does not add aesthetics. It is better to wait a bit and do everything according to the rules, then the result will fully meet your expectations.