Wood furniture painted white
5 Things You Need to Do When Painting Furniture White
Curious about how to paint furniture white? Is there a secret to painting white furniture? This cabinet is given a white painted furniture makeover. Follow these 5 tips to painting furniture white for a result you will love.
Do you ever wonder how to paint furniture white? Is there a secret to painting white furniture? Maybe there is a secret white furniture paint that is like the holy grail to furniture painting? Nope, there isn’t. I wish there were. The truth is- I don’t think there is one best paint for painting furniture whether white or any other color. Of course, there is furniture paint and then there is wall paint. There is quality paint for furniture and lower quality paint. At the end of the day, most people find what they are comfortable with using and stick with it. But let’s stay focused on the end game here, which is painting furniture white. So, when you plan to paint wood furniture white you really need to make sure that you take a few necessary steps to ensure a quality end result that you will be happy with.
Disclosure: This post contains affiliate links for your convenience. I may be compensated if you make a purchase after clicking on my links. Click here for my full disclosure policy.
Materials Needed / Source List
- Orbital Sander
- Primer
- Yellow Detailer Sponge
- Dense Foam Roller
- Cling On Paint Brushes
- Painters Tape
- Shop-Vac (clean up your mess)
- Find all of my favorite tools and products on my Amazon Page here
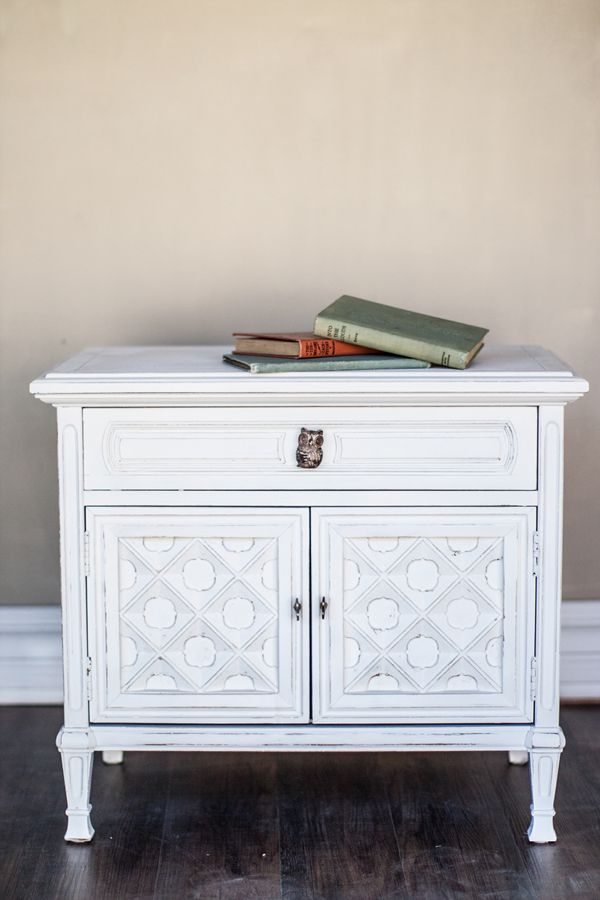
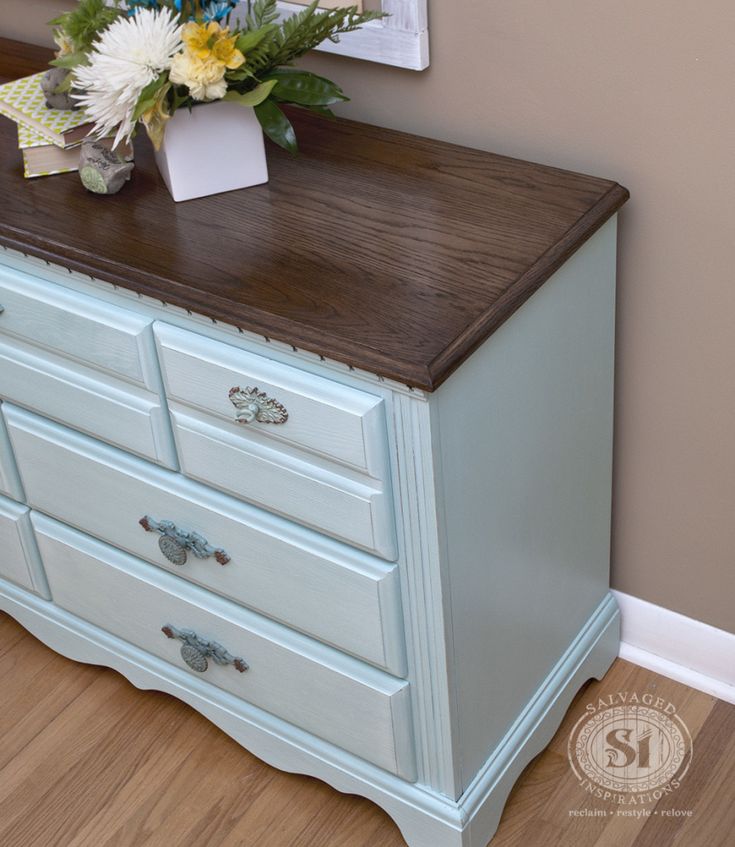
Unfinished Wooden Cabinet
This plain wooden cabinet is up for a makeover. The owner scooped it up for only $20! She asked that it be given a makeover just like the one I did for her over 3 years ago. She loves color but likes to keep her painted furniture neutral so it will remain timeless as her decor may change. Smart lady! This is the piece that was made over 3 years ago: Timeless White Painted buffet This is the piece that we are about to give a furniture makeover.
Make sure to stick around all the way to the end, its Furniture Fixer Upper time where my fellow furniture painting friends join in and share their projects as well.
First Step to Painting Furniture White
The first step when painting furniture white, or painting furniture any color for that matter is the prep. Prep is probably the most important step in furniture painting. This is my go-to process for How to Prep Painted Furniture. In addition to the standard prep process this cabinet is getting a new stain top, so the wood must be sanded down using my favorite orbital sander.
Now that your piece of furniture is cleaned, sanded and prepped I always like to use a primer before painting furniture white. You can find other painted furniture projects that required primer here: primer. I admit that I didn’t use to use primer at all since most chalk paints claim that it isn’t necessary. But over time, I’ve realized that I prefer to err on the side of caution, especially when using white furniture paint. I prefer to seal in any possible bleed through as well as create a nice foundation before painting wood furniture white. The primer that I use and trust is a shellac based primer and you can find it HERE.
When applying primer to furniture I tend to find that a simple foam roller works best for the flat areas, and a chip brush works great for getting into the details, or crevices.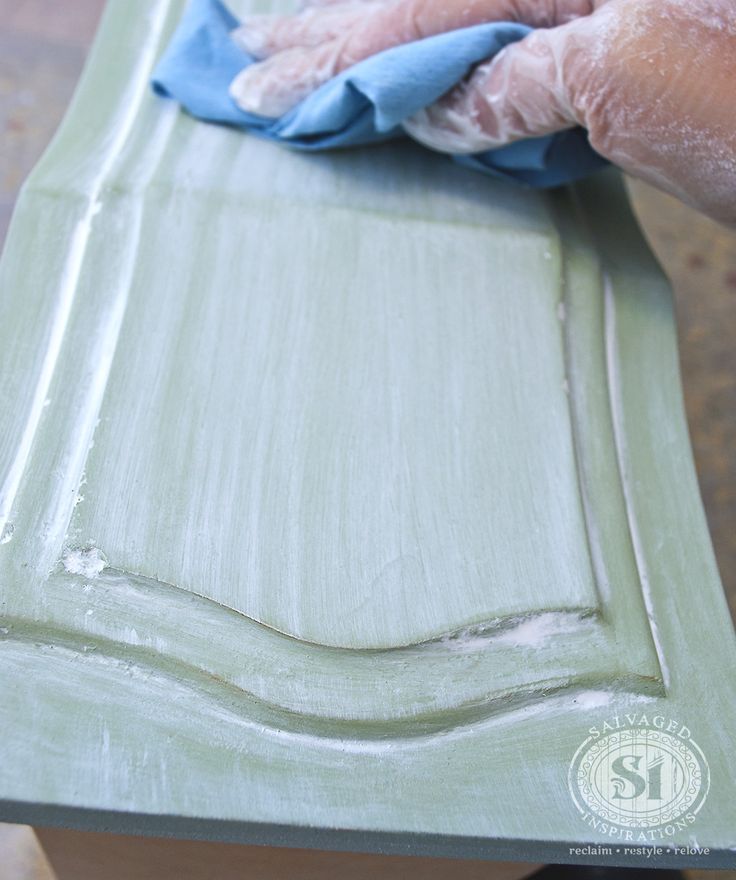 Here is the cabinet with two coats of white primer.
Painting Wood Furniture White & Step Three
You may be unsure as to which white furniture paint to use for your painted furniture project. There are so many different types and brands of paint out there. For this project, I’m creating a custom mixed white paint using both an off-white, and a stark pure white. You can get great furniture paint online HERE.
When you paint furniture white, even with a primer you will still need a minimum of two coats of white paint. There is less pigment in white furniture paint making it sometimes seem as if it’s see through. Don’t get discouraged, with primer and two coats of paint your piece will start to look beautiful. This is with two coats of the custom mixed white furniture paint on the cabinet.
Step Four in Creating a White Painted Finish
Step four is actually a step that you should do throughout the entire process.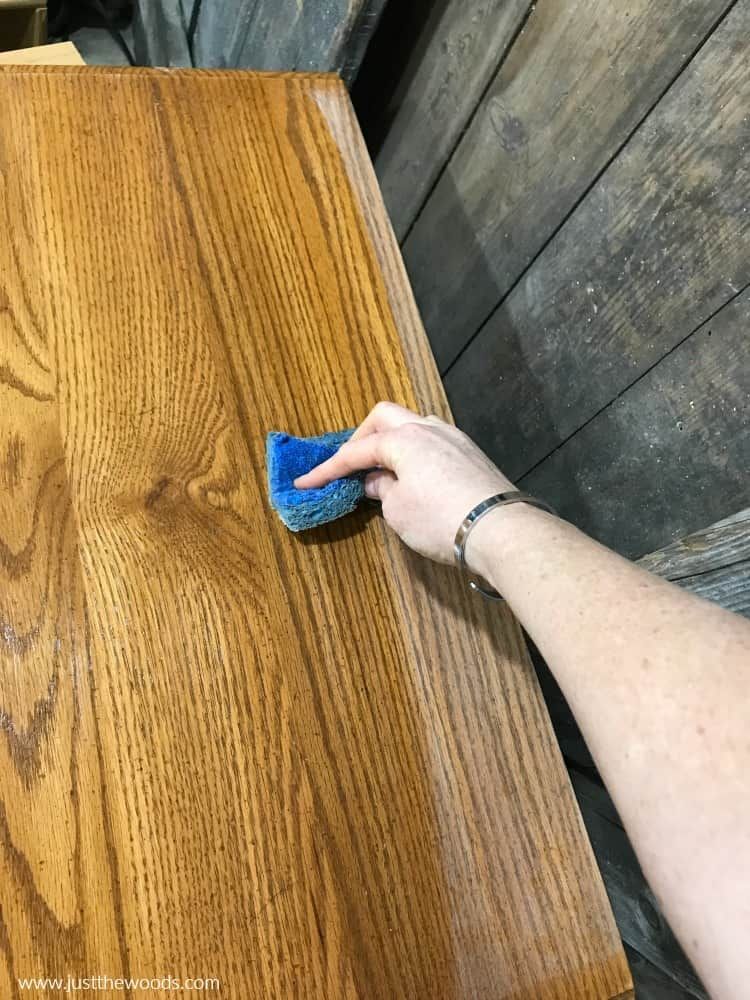 In between each coat of primer, and paint you should lightly sand your piece of furniture. By sanding between coats, you are maintaining a smooth soft finish and you also get the opportunity to see if you missed a spot anywhere along the way. You don’t have to go crazy, a quick once over with a 320 grit is fine.
After you give a quick sanding, always make sure to go back and remove the dust that you just created. A clean lint-free cloth to wipe away the dust works perfectly. You can find them online HERE. This applies to every time you sand your piece of furniture, both sanding between coats and distressing.
Lastly, before sealing your piece go ahead and use an old hairdryer to blow away any sanding dust that may fall into the corners or crevices. You don’t want to seal your dust onto the piece.
Sealing your Furniture and Step Five
Now you should have your piece of painted furniture all cleaned, prepped, primed, painted, sanded and ready for sealer. One major issue that many furniture painters seem to have is that when they are painting furniture white is that they worry about their clear sealer turning yellow. No one wants a yellow tinge over their white painted furniture. This is my little secret that I like to do when sealing a white painted piece of furniture.
Click here to Pin this post for later.
Sealing White Furniture Tip
First, I grab my clear sealer. Then squirt your clear sealer onto a plate and then I dab a little bit of my white furniture paint in with my clear sealer. Just enough to give the sealer a white tint. You don’t want to add a lot of the white paint, just a little.
Apply your white tinted sealer to your white painted furniture using your favorite sponge applicator. I absolutely love my yellow sponges, but as I went to find my last one I realized that it was missing. Apparently, my husband used it and destroyed it by accident! To right his wrong, he ordered my three new ones to replace my one damaged one. Yay me! You can find my favorite yellow sponges HERE. Today I have to resort to using a blue sponge until my new yellow sponges arrive. 🙂
To make sure that your sealer doesn’t pool up in the corners or crevices, go back with a chip brush and remove any excess sealer.
Recap
Don’t forget these basic tips when painting furniture white:
- Clean / Sand / Prep
- Prime
- Minimum 2 coats of white paint
- Sand between Coats
- Add white paint to tint your sealer
Here is a full tutorial with VIDEO showing how I seal my painted furniture projects: Sealing Painted Furniture
Click here to Pin this post for later
White Painted Cabinet Makeover
When you are finished you should have a white painted makeover that you love!
Click here to Pin this post for later
The top of this cabinet is finished using a dark protective wood stain. Click here for a detailed tutorial on How to Apply Wood Stain. The hardware is finished using metallic bronze. You can find more painted hardware projects here:
Wait! Don’t Go! It’s that time of the month again for:
Furniture Fixer-Uppers
A few of my creative and talented blogger friends and I have joined together in our monthly Furniture Fixer Uppers share. Let’s see what my friends are up to! Make sure to click the links below the image to check out all the amazing projects that my bloggy girls are working on this month.
- Confessions of a Serial DIYer
- Prodigal Pieces
- Girl in the Garage
- Petticoat Junktion
- Just the Woods (you are here)
- Interior Frugalista (couldn’t make it this month, she’s on a beach in Mexico sipping drinks with fancy umbrellas)
Don’t Forget – Follow Just the Woods and Share this post to Inspire others:
FACEBOOK * INSTAGRAM * PINTEREST
Painting Wood Furniture White | Get A Pure White Finish
**Heads up: This post contains affiliate links.
As an Amazon Associate, I earn from qualifying purchases. Meaning I may receive a small commission– at no cost to you, of course– were you to make a purchase through any of the links. If I link to a product, I use it, I love it, and I think you would too! Please see my Privacy Policy for more details.**
What’s the first word that pops into your head when you think of the color white? For me, it’s “clean”. Maybe you thought of purity, happiness, brightness, goodness, or simplicity? Any of those work.
And yet, unfortunately, painting wood furniture white and keeping it “pure and clean” looking is not the most simple task. But don’t worry, it’s still doable. I’ll be teaching you how I keep that “clean white” look today as we walk through the steps I recently took for my latest commissioned furniture piece.
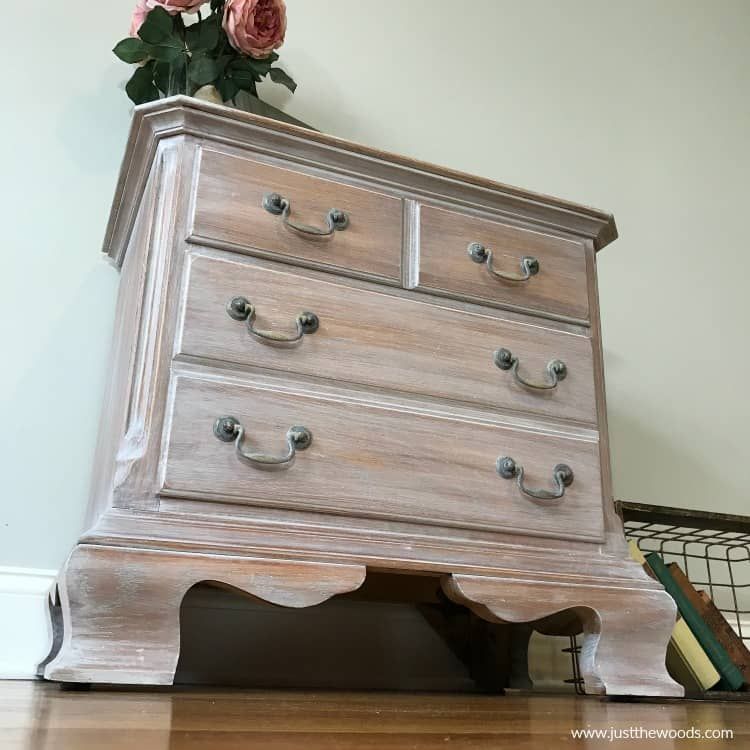
The customer wanted her TV stand painted all white using Linen White Chalk Paint. This is the original piece:
A beautiful piece! But she’s not a fan of the orange-ish coloring of the wood. (I wasn’t a big fan either.) So white it is!
This orange color is an added challenge for me as well, as I will need to take extra precautions not to let the orange dust get anywhere near my white paint or we will not end up with a “pure white” finish at all!
As we walk through painting wood furniture white, we’ll discuss the right prep, the right primer and paint, application, topcoats, and more.
By the end of this post, I hope to have a pure white finished product and I’m confident you’ll never have a problem getting a “pure white” furniture finish again!
Is Your Piece Currently Painted, Stained/Sealed, or Bare Wood?
The info that follows will work no matter the current finish your piece has. But if you’re working with a piece that is already down to bare wood bear in mind a few things:
- Scuff sanding isn’t necessary if the piece is already bare wood. If you got it down to bare wood yourself you most likely sanded it already, but if not, make sure that you’ve sanded it smooth.
 If you need help sanding your wood furniture properly, check out my post How To Sand Wood Furniture with 5 Game-Changing Tips.
 - When using cleansers on bare wood make sure you rinse the surface with water multiple times to be sure no residue remains on the wood. But don’t apply water directly to the wood or you’ll soak it too much! Lightly dampen a clean cloth and wipe the wood that way, just to be safe.
- Water will raise the grain of the wood. To make sure you get a smooth finish, lightly sand the raised grain with 320-grit sandpaper after washing once it has completely dried.
Prepping Your Wood Furniture For White Paint
I can’t stress enough the importance of the first stage of prepping your piece for painting: Clean, clean, clean!
This is actually the first step, the third step, and a couple more steps as well. If you want a “clean” white finish then guess what? You’ll need to keep the surface extremely clean throughout the process!
Before stripping or sanding, use a cleaning solvent to remove dirt and grime from the surface.
There are numerous options here, so I will go over a few of my personal favorites for furniture prep before sanding and painting. A couple of these are deglossers as well, meaning you can skip sanding if you use them. I use them for their cleaning strength alone and usually sand either way just to be safe but that’s your call.
Do NOT sand the piece before cleaning it. If there are any oils, waxes, or built-up residues on the surface and you skip straight to sanding, you’ll end up pushing them deeper into the pores of the wood. This will only make them more difficult– if not impossible– to properly remove.
LA’s Totally Awesome All-Purpose Cleaner
LA’s Totally Awesome All-Purpose Cleaner is a great, cheap product that works awesome! (Hence the name.) It is a non-toxic degreaser, all-purpose cleaner, and spot remover that doesn’t contain bleach, ammonia, or acids.
You can use it on pretty much anything (except leather) but you should dilute it as directed on the back of the bottle. Dilution amounts depend on your surface.
When working with wood it is recommended to dilute 10:1 (water:cleaner). It is a degreaser so it will dull shiny finishes on wood, but this is actually a good thing for us.
That’s why I usually only dilute the cleaner 5:1 when using it for wood prep before painting. If you’re using it as just a cleaner for a wood piece, definitely stick with the 10:1 recommendation.
You can buy it in a spray bottle or in a gallon jug. I find it easier with the jug so you can buy an empty spray bottle to mix the diluted solution in and then use it for application.
Spray the diluted solution directly onto the surface of the wood, and wipe it off immediately. Be sure to get all the nooks and crannies, and scrub any stuck-on spots. Then use a rag dampened with water only to wipe the surface again and remove any residue that’s leftover.
Jasco TSP Subsitute Prepaint Surface Preparation Cleaner/Deglosser
Jasco TSP Substitute is a bit more heavy-duty than the all-purpose cleaner above. Before using this please be sure to put on chemical-resistant gloves and goggles.
It cleans and deglosses surfaces in preparation for painting, meaning you don’t have to sand the surface after you use this product! It saves time compared to other non-toxic cleaners like LA’s Totally Awesome, but it is heavy-duty, and definitely not non-toxic.
Jasco TSP Substitute also needs to be diluted before use. Mix 1 quart of Jasco TSP Substitute with 4 quarts of warm water. Soak a soft sponge in the mixture and apply it to the surface of the piece. Work in a small area starting from the bottom up. Let it sit on the surface for a few minutes.
Then use another sponge soaked in warm water to wipe the surface. Try to do this one swipe at a time. Don’t wipe back and forth or you’ll only spread the solution around never actually removing any of it. You may need to use multiple sponges to remove everything completely.
You don’t have to rinse before painting but I normally do, just in case. Especially when working with white paint! Take a rag dampened with water, wipe the entire surface one last time, and then let it dry.
As I said earlier, I usually still lightly sand the surface of the piece with 220-grit sandpaper just to be safe, but with this product, it probably isn’t necessary at all.
If you do sand the surface, be sure to do another round with this cleaner and remove any residue of it prior to applying paint.
Krud Kutter Prepaint Cleaner/TSP Substitute
(Above link is for 6 bottles of the cleaner.)
Similar to the Jasco TSP Substitute except Krud Kutter’s cleaner is non-toxic, and not concentrated so you can skip diluting it. Plus, it’s already in a spray bottle. So you can just spray it onto your surface, let it sit for a few minutes, and wipe it off with a clean, dry rag.
It is a deglosser as well and the bottle states that you can paint your surface after only a 10-minute dry time. I’ve found that Krud Kutter’s TSP substitute may not be quite as strong as the Jasco version.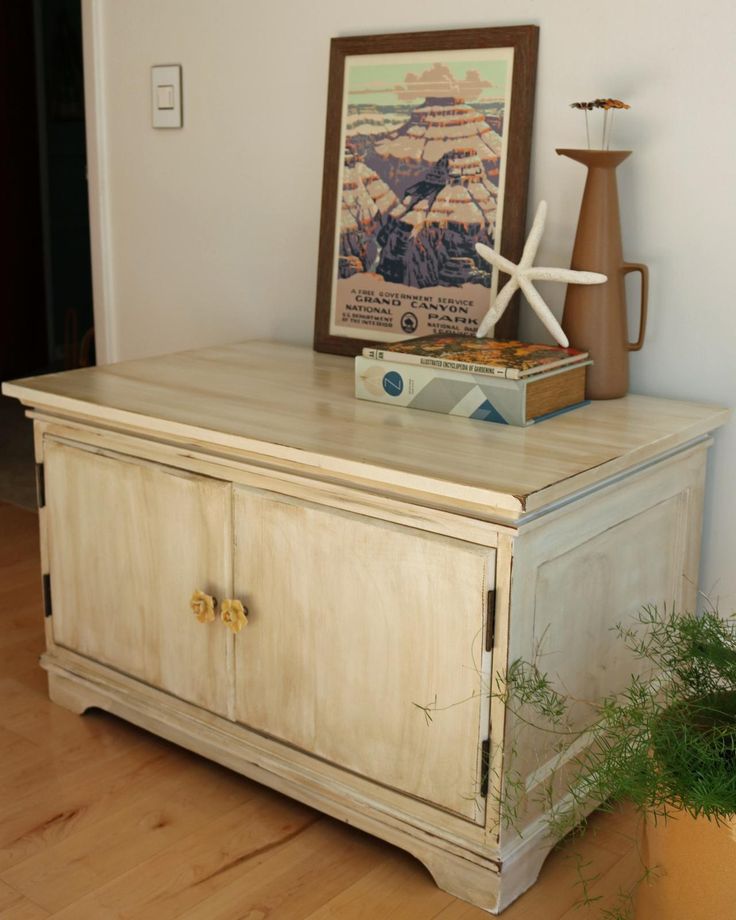 This isn’t that surprising considering the difference in chemicals, but it does make me a bit more cautious on skipping sanding completely.
Again, I always lightly sand the surface after the 10-minute dry time just to be safe. A quick scuff sanding with 220-grit should suffice. I follow that with another round of Krud Kutter and wipe off again with a clean, damp rag.
This way there’s less of a possibility that the paint doesn’t adhere due to any remaining gloss. Plus, cleaning the surface twice definitely doesn’t hurt when we’re trying to get our “pure white” finish.
Scuff Sand Any Glossy Surfaces Left After Degreaser/Deglosser
Use your best judgment on whether or not you need to sand the surface after you’ve used the degreaser or deglosser. Degreaser cleansers do dull glossy finishes slightly, but you’ll probably want to scuff sand it still for better paint adhesion.
Unless you’re working on a super large piece, you should be able to scuff sand by hand with just a sanding block using 180-220 grit sandpaper. You don’t need to remove too much of the existing finish, just enough to dull any shiny areas.
Related: How To Sand Wood Furniture – 5 Game-Changing Tips
If you do decide to use a power sander, I’d recommend no lower than 120-grit to prevent too much finish from being removed. Quickly sand without applying pressure to the sander at all and only a thin layer will be scuffed off the top.
Clean, Clean, and Clean Again – Removing The Sanding Dust Before Applying Paint
Once again wipe down the entire surface with a cleanser to remove all of the dust you just created while buff sanding. This is where I love to use the Totally Awesome All-Purpose Cleanser because it’s not too harsh, but it’s better than plain water.
Something as strong as the TSP Substitute Cleaner isn’t really as necessary here but also wouldn’t hinder your finished product either. The heavy-duty cleansers are really only needed for the first cleaning to be sure you remove any grease or grime from everyday furniture use.
I LOVE using these:
Spray some Totally Awesome on one and wipe down the surface quickly and easily without blowing dust all over the place. Then rinse the duster out with water and wipe down your surface again to remove any residue left from the cleaner.
Repeat this until the duster is as close to clean as possible after wiping down the surface. I usually rinse and repeat at least twice with water only.
Once your surface has dried, you’re ready to apply your primer.
Apply 2 Coats of a Stain-Blocking Primer
I’m not usually a big fan of primer unless I’m painting something that paint doesn’t adhere to well like rusty metal, regular metal, or plastic. Check out my post on Metal Furniture Refinishing for a Which Primer Works Best Cheat Sheet.
When it comes to painting anything white, it’s definitely necessary. Stay away from water-based primers if you plan to paint your piece white. Your best bet is an oil-based primer. But don’t worry, you can use water-based or oil-based paints over the oil-based primer with no problem.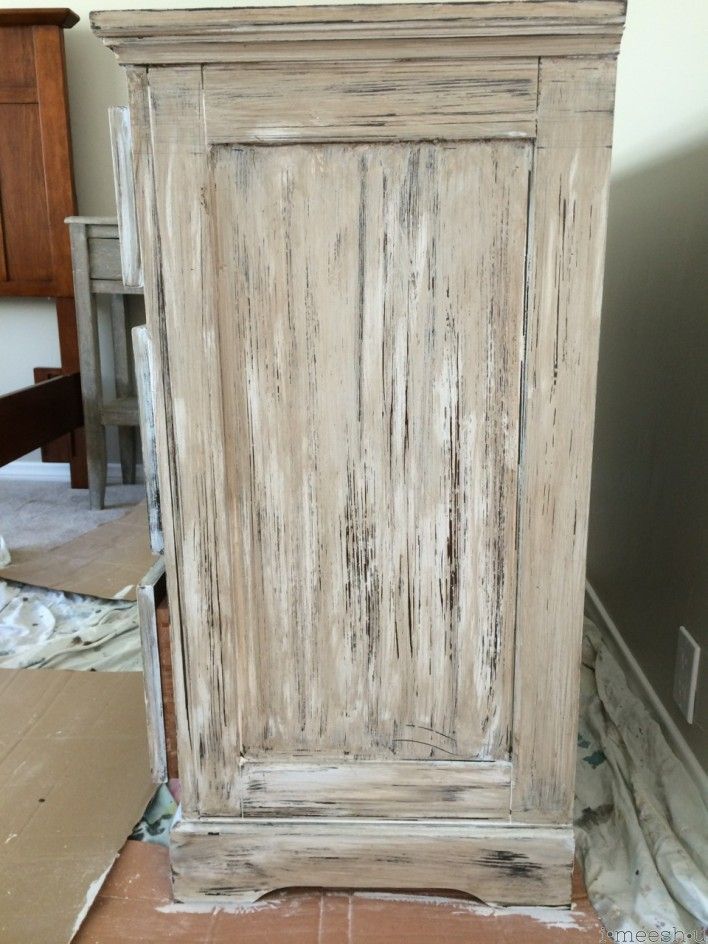
This is my usual choice when priming before white paint:
It’s on the cheaper side, it dries quickly, and perfectly blocks stains and tannins from bleeding through your white paint.
You can also use a shellac-based primer, but they are much more expensive. Unless your piece has some extreme stains or wood knots to cover up, an oil-based primer should work just fine.
It’s also not always necessary to use 2 coats of primer, but again, when painting something white, you’re better off applying a second coat.
Most of the removable parts from the TV Stand coated with 2 coats of primerYou’ll save on paint, and make it twice as hard for any stains to bleed through your finish. All it will do is ensure you a beautiful “pure white” finish in the end, so why not, right?
The Best White Paint For Furniture
There are so many amazing furniture paint companies these days it’s honestly hard to go wrong when choosing a paint. I personally am a fan of matte finishes when it comes to white furniture.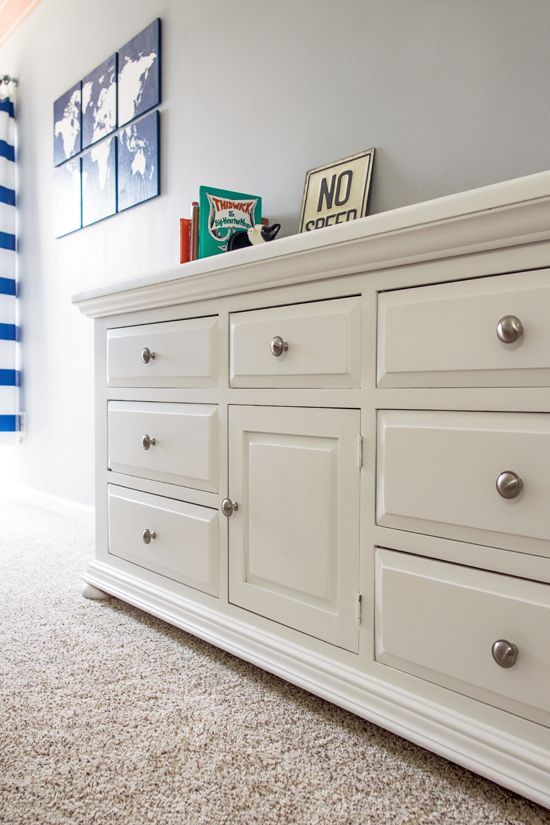
Enamels and glossy paints just stand to make imperfections stand out and are much more difficult to apply. So I’ll recommend 3 of my favorite white paints for furniture. Each is within a reasonable budget and easily acquired.
Rustoleum’s Linen White Chalked Paint
This is the paint my client chose for her TV stand I showed you at the beginning of this post.
It’s cheap, easily purchased at most hardware stores, and goes on easily. It does dry quickly so if you have trouble with brush marks just keep your mister handy to prolong the dry time a bit.
I was able to cover the entire TV stand with only 1 quart of this paint. A little goes a long way!
MudPaint Simply White
MudPaint is another of my favorite furniture paints. It’s actually a clay-based and water-based paint that covers amazingly well. Their Pure Simply White paint color is just that, simple and pure. Exactly what we’re looking for here!
According to their site, it is their purest white with zero additional tinting as with some of their other white paints. So Simply White is definitely the way to go if you’re looking for a pure white finish.
Fusion Mineral Paint – Casement
Fusion Mineral Paint is steadily moving up on my list of favorite furniture paints. It is incredibly easy to apply without brush marks, and as a painter that does not spray furniture, that’s a big bonus for me.
The biggest thing I had to learn when using Fusion was to put way less paint on the brush than I was used to. They actually have an amazing blog post and a youtube video that explains exactly how to apply their paint. It truly helped me a lot when I first began using their product.
Basically, you want to dip your brush into the paint about halfway up the bristles and no more. Then wipe off any excess paint on all sides of the brush. It might not look like a lot, but you’ll be amazed at how much coverage you can get with that one dip.
Fusion does say that there are no primers needed whatsoever before applying it, but I still recommend sticking with this process when painting furniture white. Especially woods that may have tannin bleed through such as oak, cherry, mahogany, cedar, and walnut.
Not sure what wood type you’re dealing with? Check out my Ultimate Guide To Identifying Wood Types in Furniture or better yet…my 169-page eBook “Grain – Investigating Your Furniture’s Wood Identity” and learn your piece’s wood type PLUS finishing tips for each wood type specifically.
Whichever Paint You Choose, Apply at Least 2 Coats Over the Primer
I’d recommend keeping a brush and roller handy depending on the size of your piece.
You can use a roller for larger surfaces to ensure the smoothest finish possible. A small, High-Density Foam Roller with a thin 1/4″ Nap usually works the best for furniture.
A brand new, synthetic nylon bristle paintbrush will give you the smoothest finish if you’re using water-based paint. For oil-based paints, you should use a natural bristle brush.
Related: The Best Cheap Paints For Refinishing Furniture & More
(Paintbrushes, Wood Stains, Waxes, Clear Coats, and Paints)
Unless you see any serious issues after your first coat, you shouldn’t have to sand between coats at all.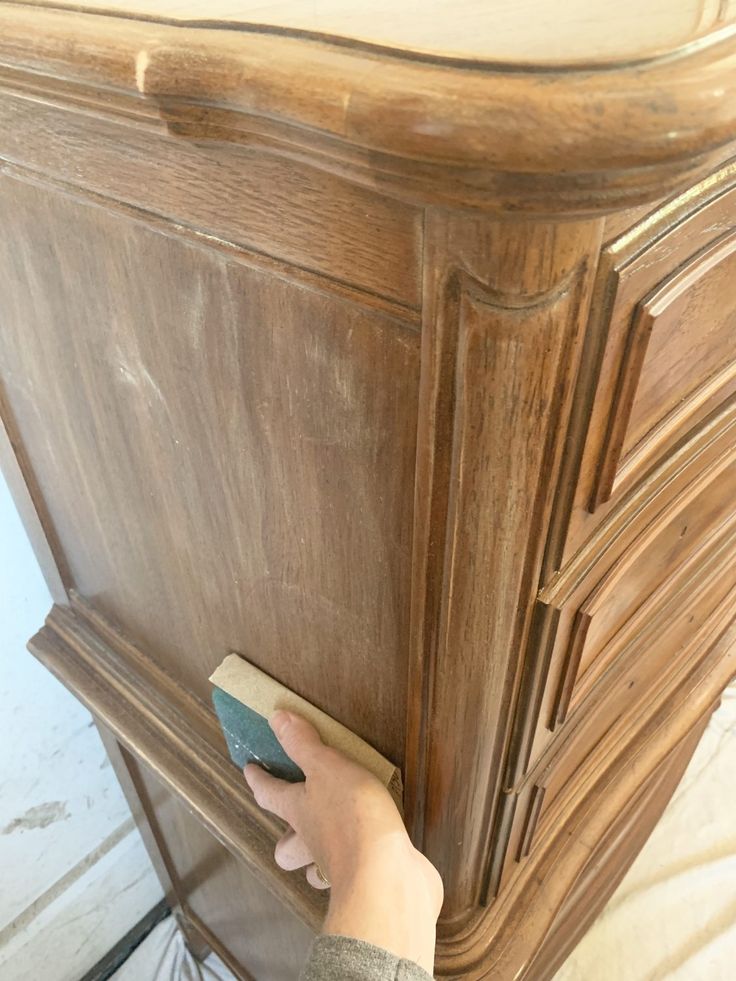 If you find paint drips or puddles, use 220 grit very lightly to even the area out.
If you do sand between coats be sure to clean any dust before applying your next coat!
Related: The Best Tools & Supplies For Refinishing Furniture
(Sandpaper, Power Sanders, Paint Stripping Tools, and more!)
The Best Clear Coats For White Painted Furniture
The final and most difficult step to get right when painting furniture white is the clear coat. I love polyurethane for most things. I’ve got an extensive blog post on Applying Oil-based and Water-based Polyurethane Perfectly, but I do not recommend it here.
Polyurethanes, lacquers, and shellacs all have an amber tone to them that deepens wood grain and works great for sealing natural wood and other paint colors. But white paint will turn yellow when coated with these products.
For the 3 white paints I listed earlier, these are the clear coats most compatible and will not turn your finish yellow:
Rustoleum Matte Clear Top Coat
MudPaint Matte Protective Clear Coat
Fusion Mineral Paint Tough Coat Wipe On Poly
These 3 products are quite similar to one another.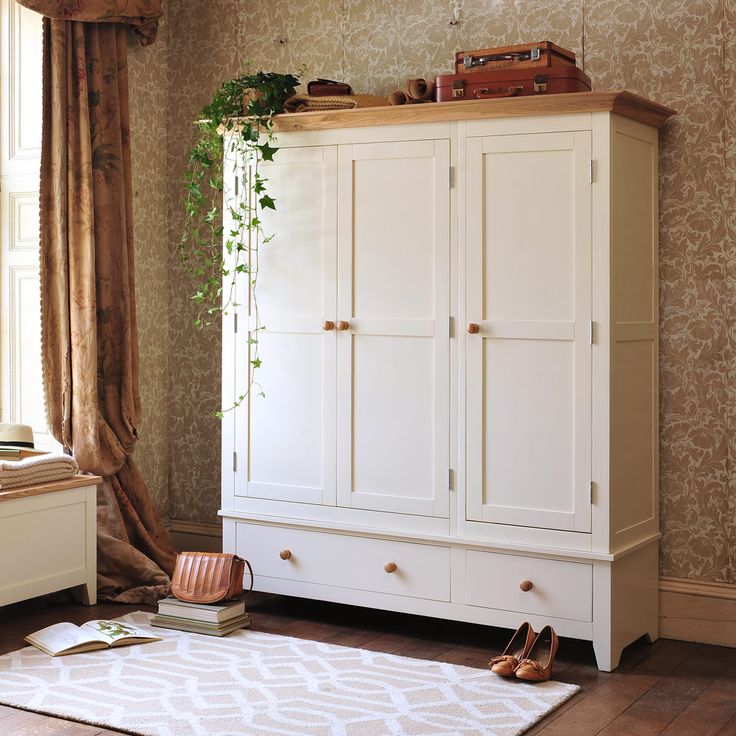 All work great on light-colored pieces, especially white. They are non-yellowing, water-based polyurethanes meant for use over water-based paints like chalk paint, mineral paint, and Mudpaint.
You can use any of the 3 on any of the water-based paints, I really doubt that the brands have to be used together. It’s recommended but really I wouldn’t worry too much about that.
I personally have found the Rustoleum brand to work best on past projects, but the fact that the price is also the lowest explains mainly why I’ve had more experience with it.
Clear Finishing Waxes For White Painted Furniture
Besides Water-Based Polyurethanes, another option for the best clear coat for white painted furniture is a clear wax. Wax leaves a very unique finished look that some may call “velvety”.
The only thing with wax is that it isn’t permanent like polyurethanes. For high-traffic pieces that will get a lot of wear and tear you might want to stick with one of the polyacrylics listed above. Perhaps even only the top of the piece, just to be safe. Otherwise, you will need to reapply the wax every 6 months or so for continued protection.
These are my 3 favorites for clear finishing waxes. There are tons of options out there these days. When working with white-painted furniture you want to use something that is definitely clear and won’t yellow over time. I’ve personally tried all 3 of these on white pieces with great success!
Your number 1 priority when painting wood furniture white should be cleanliness. 100%!
It is very easy to smudge white paint with dirty fingerprints or dirty tools! Make sure you use a clean wax paintbrush to apply your wax topcoat, as well as a clean rag for wiping the excess, and buffing the finish once it has dried.
If you’ve kept your work area, tools, and hands (or anything else within a 1-mile radius of your piece, jk) clean, you should end up with a gorgeous, bright, purely clean white furniture piece!
From the brightest orange to the cleanest white. It can be done!
What do you think? Know any other tricks for getting that “pure white” finish? I’d love to hear them if so.
Check out my DIY Resources page for more tips, free downloads, and fresh new product finds to help you on your next furniture refinishing project. And be sure to enter your email below to receive updates on my latest products and posts!
Pin it!Until Next Time,
KRay
How to paint white furniture at home
A chest of drawers that you inherited from your grandmother, an old mirror in a wooden frame, a chair whose color has become boring - these things are connected with the past and sometimes we feel sorry to send them to a landfill. Yes, and there is no need to get rid of them. Often an old chest of drawers is very dear to us, and these memories cannot be replaced by any new model from the store.
Therefore, we are faced with the task of updating it. How to paint furniture at home? You will find the answer to this and some other questions in this article. nine0003
Contents
- How to paint old furniture with your own hands?
- How to paint furniture white?
- How to paint antique furniture?
- We paint old furniture with our own hands
- Whitening with bleaching paste
- Express whitening
All it takes is a little patience and diligence, paint and a brush, which are available in every self-respecting hardware store, and you can update your favorite dresser or chair with your own hands. nine0003
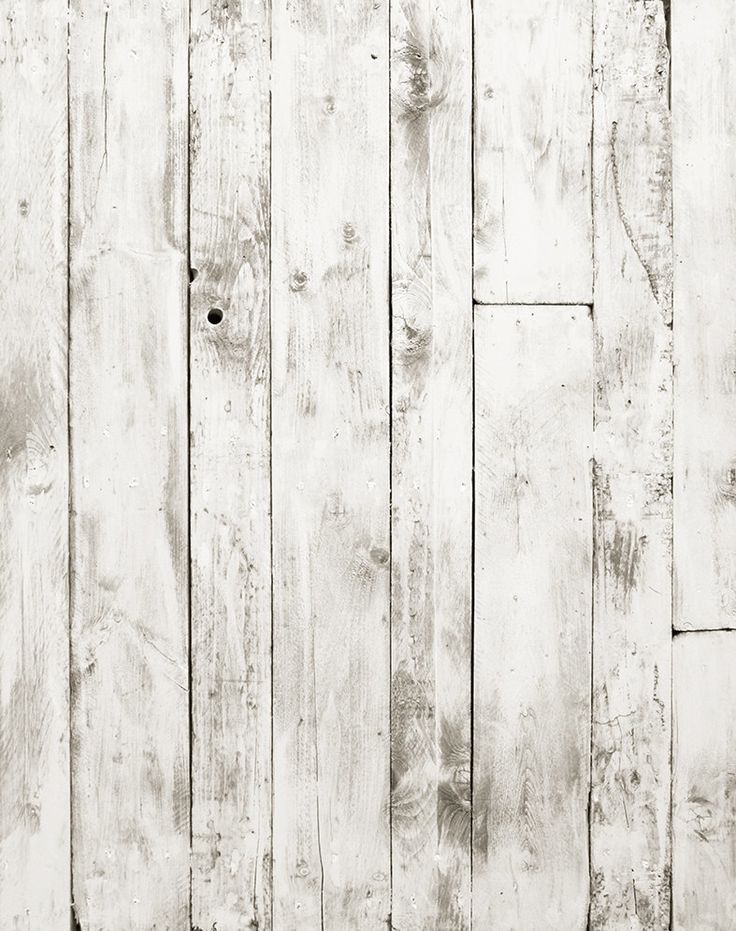
How to paint furniture white?
Metamorphosis in white is a great way to extend the life of old interior items, old equipment and give them new life. Do you dream of wooden doors in the Provence style?
Or maybe you want to transform a table that has served you for many years into a Provence style kitchen interior? Are you attracted by the white wardrobe in the nursery, which will be a great addition to the nautical-style interior? Or maybe you have long dreamed of a white chest of drawers in the bedroom or shelves in the bathroom? All in your hands. nine0003
How to paint antique furniture?
Do-it-yourself antique Provence style white furniture can be finished to look old and very stylish. How to paint furniture in Provence style? You will need to treat the furniture in two steps:
- bleaching,
- light sanding.
The best wood products for this purpose are made of solid wood: oak, pine, birch, beech.
What paint to paint the furniture white and what tools do you need? nine0003
For work, you should prepare:
- dark pigment and white acrylic paint or two colors of acrylic paints,
- white wax candles,
- brushes,
- coarse and fine-grained sandpaper,
- knife, , .
We paint old furniture with our own hands
- Clean the surface of the dresser or chair from dust, wipe it several times with a damp cloth and leave to dry completely. nine0012
- If the surface is painted, remove the varnish layer with sandpaper (first coarse, then fine).
- Places you want to emphasize: carvings, slats, edges, should be covered with a darker paint (brown and blue shades are ideal here). Leave the paint to dry.
- For an uneven and natural effect of worn corners, wax previously painted areas with dark paint. The wax will make sure that the next coat of paint won't stick to those areas. nine0012
- Paint the entire surface with white paint, preferably several times, with drying intervals. Avoid stains.
- Places covered with an additional layer of paint and wax should be rubbed with a knife. Do not press too hard - this way you will get a good effect.
- Rub the entire surface with fine sandpaper to level the surface.
Bleaching with bleaching paste
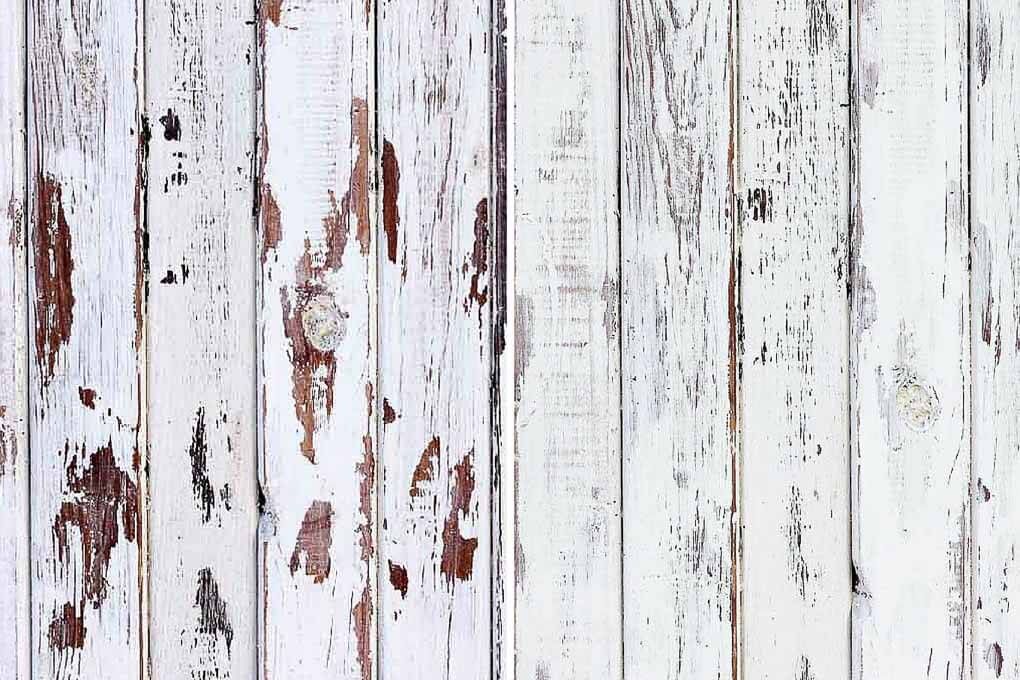
Bleaching with bleaching paste consists of wiping wood with a special paste containing wax and pigment. Characteristic white lines appear on the wooden surface, so it will look older. Porous wood is suitable for such bleaching - trees such as oak, ash. nine0003
You need to buy in the store:
- special paste,
- prepare the paint in the selected color,
- metal brush,
- hard brush,
- cloth,
- piece of rough and fine sanding paper.
Work order:
- Wipe the clean surface of the chair or chest of drawers several times with a damp cloth and leave to dry.
- If the surface is painted, remove the varnish layer with sandpaper. nine0012
- Paint the surface with paint, let it dry.
- Using a wire brush for wood, make tiny grooves according to the grain orientation.
- Apply whitening paste, fill the grooves well and wait for the paste to dry.
- Wipe the surface with a dry cloth.
- Lacquer the surface.
Express whitening
If you want to give new life to a simple wooden stool, you can do it with the effect of washed off white paint. Nothing could be easier. nine0003
You will need:
- sandpaper,
- white paint,
- varnish,
- brush.
How to use:
- Wipe the wood surface with sandpaper.
- Using a brush, apply a coat of paint.
- When the paint is dry, remove excess paint with a tissue.
- Lacquer the wood.
Bleach is a good way to freshen up old furniture. In this way, you can update rattan country furniture, old stools, grandmother's table and chest of drawers with beautiful carvings, an old mirror frame and other wooden interior elements, creating beautiful decorations in the Provence style. nine0003
We paint old furniture white or give life to unnecessary things
COLOR CUBE jewelry designer Olga
Often an old chest of drawers, chair, table or cabinet made of solid wood is very dear to us, like a memory. And it’s a pity to throw it away, and they no longer fit into the new interior. Therefore, the task is to update it. How to paint furniture at home?
I suggest that the most elegant, fresh color is white. Painting furniture is a great way to extend the life of old furnishings, old equipment and give them new life. nine0003
For example, antique white furniture can be finished to look very stylish. You will need to treat the furniture in two steps:
- bleaching;
- light sanding.
The best wood products for this purpose are made of solid wood: oak, pine, birch, beech.
To work, prepare:
- dark dye and white acrylic paint or two colors of acrylic paints; nine0012
- white wax candles;
- brushes;
- coarse and fine sanding paper;
- cloth;
- knife.
- Clean the surface of the dresser or chair from dust, wipe it several times with a damp cloth and leave to dry completely.
- If the surface is painted, remove the varnish layer with sandpaper (first coarse, then fine).
- Places you want to emphasize: carvings, slats, edges, should be covered with a darker paint (brown and blue shades are ideal here). Leave the paint to dry. nine0012
- For an uneven and natural effect of worn corners, wax previously painted areas with dark paint.
 The wax will make sure that the next coat of paint won't stick to those areas.
 - Coat the entire surface with white paint, preferably several times, with drying intervals. Avoid stains.
6. Places covered with an additional layer of paint and wax should be rubbed with a knife. Do not press too hard - this way you will get a good effect. nine0003
7. Rub the entire surface with fine sandpaper to level the surface.
Bleaching with bleaching paste
Bleaching with bleaching paste consists of wiping wood with a special paste containing wax and pigment. Characteristic white lines appear on the wooden surface, so it will look older. Porous wood is suitable for such bleaching - trees such as oak, ash. nine0003
You need to buy in the store:
- special paste,
- prepare the paint in the selected color,
- metal brush,
- hard brush,
- cloth,
- piece of rough and fine sanding paper.
Work order:
- Wipe the clean surface of the chair or chest of drawers several times with a damp cloth and leave to dry.
- If the surface is painted, remove the varnish layer with sandpaper. nine0012
- Paint the surface with paint, let it dry.
- Using a wire brush for wood, make tiny grooves according to the grain orientation.
- Apply whitening paste, fill the grooves well and wait for the paste to dry.
- Wipe the surface with a dry cloth.
- Lacquer the surface.
Express whitening
If you want to give new life to a simple wooden stool, you can do it with the effect of washed off white paint. Nothing could be easier. nine0003
You will need:
- sandpaper,
- white paint,
- varnish,
- brush.
How to use:
- Wipe the wood surface with sandpaper.
- Using a brush, apply a coat of paint.
- When the paint is dry, remove excess paint with a tissue.
- Lacquer the wood.
How to repaint lacquered furniture? Yes, just like repainting polished furniture and any other. The only catch is the old cracked varnish or polish. It can be removed in several ways:
- The mechanical method is the cheapest and most accessible , but also the longest and most laborious. Old polishing or varnishing is removed with sandpaper or scrapers. After choosing it, do not forget to wear safety glasses so that dust and small pieces do not get into your eyes.
- The chemical method is rather expensive , these are special chemicals applied to the old surface and then washed off with water. They come in the form of powder, gel, foam and so on. When removing old varnish in this way, you need to protect the skin and mucous membranes. nine0012
- The thermal method removes the old coating with the building gun . Heating the plane with one hand, scrape off the polish or varnish with the other.