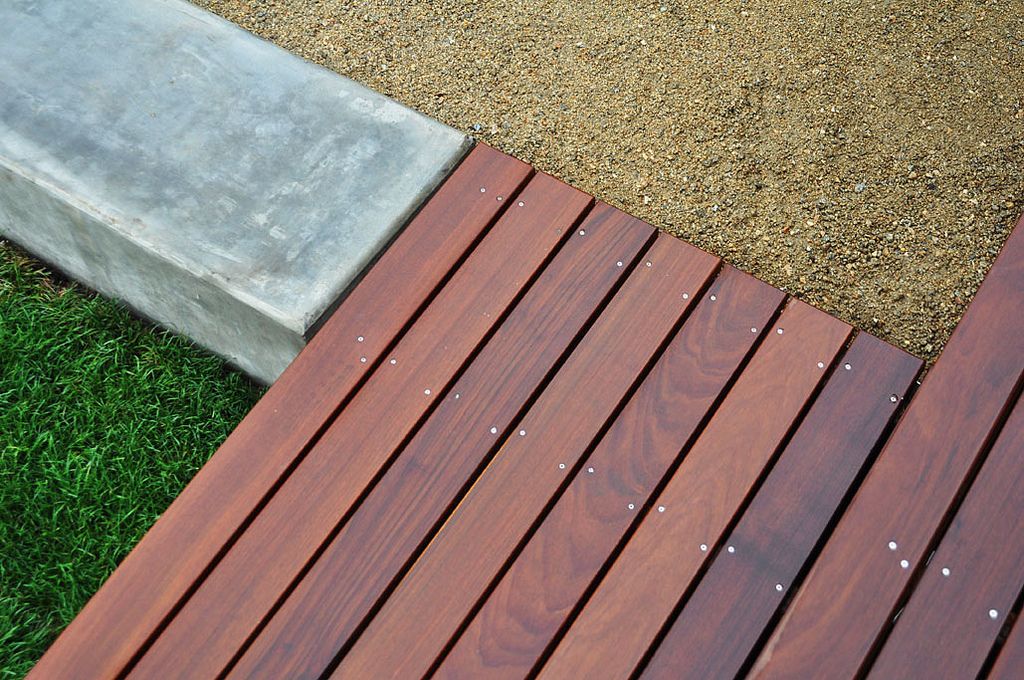
Wood deck edge
10 best ways to edge a deck |
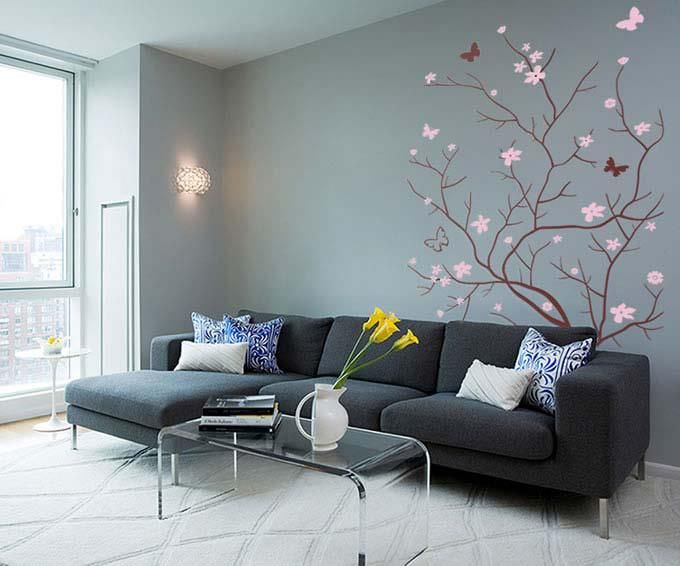
(Image credit: Little Greene)
Deck edging ideas are often overlooked at design stage, but they are just as important as all the other details of a deck, giving it a finished, smart look. Without them, even the most well-designed decking projects can feel a little unfinished, especially if they butt against a wall or fence with no defining feature to sign off with at the edges.
Frame your decking with the right edging, though, and it will create a seamless and professional-looking finish, as well as adding a personal touch that's uniquely yours, so that your deck won't look like every other one on the block.
There are lots of brilliant deck edging ideas to finish off your deck ideas. Try adding a patterned border, lighting panels, low-growing plants in beds to soften edges or built in seating. We've rounded up 10 of our favorite deck edging looks below.
Deck edging ideas
It's worth considering deck edging ideas at design stage, since they can be matched to both deck railing ideas and even deck color ideas. That said, deck edging needn't be in timber – edging can be in contrasting materials, too. Below, we explore the options.
1. Mix up deck materials to add more interest
The Style and Design Garden designed by Ula Maria and built by The `Landscaping Consultants
(Image credit: Alamy)
Using a carefully thought out mix of quality materials to create a decked area will transform a small space. This courtyard garden features a timber deck flanked with beds of herbaceous plants and ornamental grasses to soften the edges.
The dark timber deck has been charred (rather than stained) using a Japanese technique and contrasts beautifully with the hazy planting spilling over the edges. There are steps down to a sunken garden with a tiled mosaic patio that means the deck is raised to show it off better.
This backyard is a great example of how to mix contemporary materials and eclectic planting to create a deck that's full of contrast and character.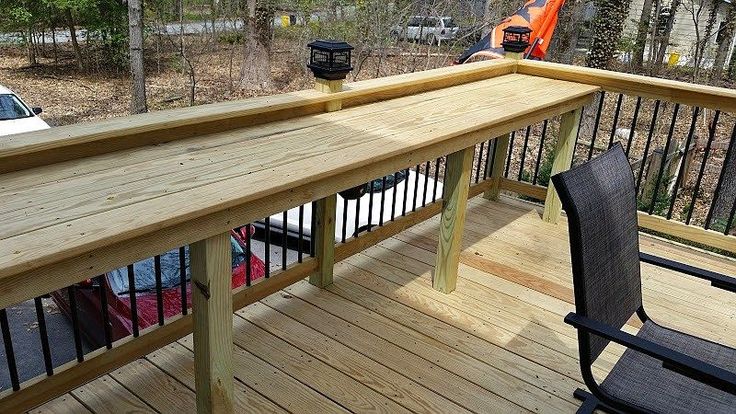
2. Try a modern patterned border
DeckArt boards by Gripsure let you create a decorative edge that can be customised to make a striking border for your deck
(Image credit: Gripsure)
If you are looking for pool landscaping ideas with decking, defined deck edging can look attractive. Both composite and timber deck edging can be a great choice for a pool, offering a laid-back yet smart look. It's the perfect opportunity to add a distinctive border too with a design detail that will transform your deck into something special.
When it comes to poolside it's best to choose deck edging that doesn't become slippery when wet. This distinctive geometric border has integrated non-slip inserts that add a pretty decorative edging to your deck making it practical as well as pretty.
'When cutting timber to use as an edging board, always make sure you have a sharp saw blade to give a nice clean cut,' says Ross Crouch of Gripsure . 'If you can, miter any joints so you have no exposed end grain.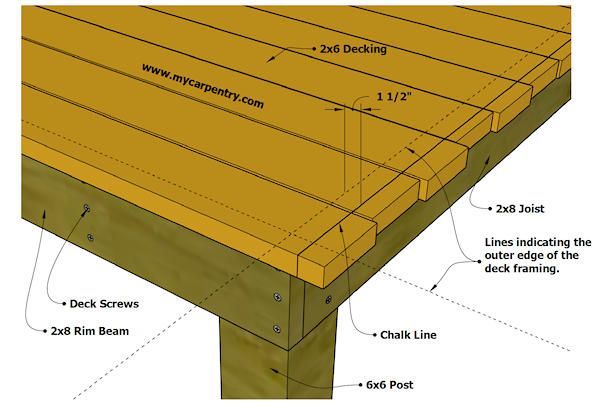 Any timber that's in permanent ground contact should either have an appropriate level of pressure treatment or a protective coating applied.'
Instead of horizontal patterned deck edging, why not consider a vertical border to add an alternative decorative detail to your deck that's both eye catching and unusual?
3. Soften hard deck edges with planting
Courtyard garden design with curved deck fringed with soft planting by Catherine Clancy Garden Design
(Image credit: Catherine Clancey Garden Design)
There is a big trend for curves right now and you can pick up on this by combining decking edging design and deck planting ideas. This style looks more organic than the straight lines of square or rectangular decks, fitting more naturally into an unstructured garden shape. Even better if your curved deck is bordered by swathes of soft planting to blur the edges.
'Shade loving Japanese forest grass and a mixture of evergreen ferns are used in this garden to soften the hard edges of the decking, walls and the areas under the built-in seat,' explains garden designer Catherine Clancy.
'Use mostly evergreen plants, with different shades of green to provide a soft texture around your decking. Grasses provide an extra softness to any planting, and there are plenty of shade loving low-growing grasses to choose from that work well for deck edging ideas like Japanese forest grass Hakonechloa macra 'Aureola', Carex 'Ice Dance' and tall moor grass (sesleria autumnalis).'
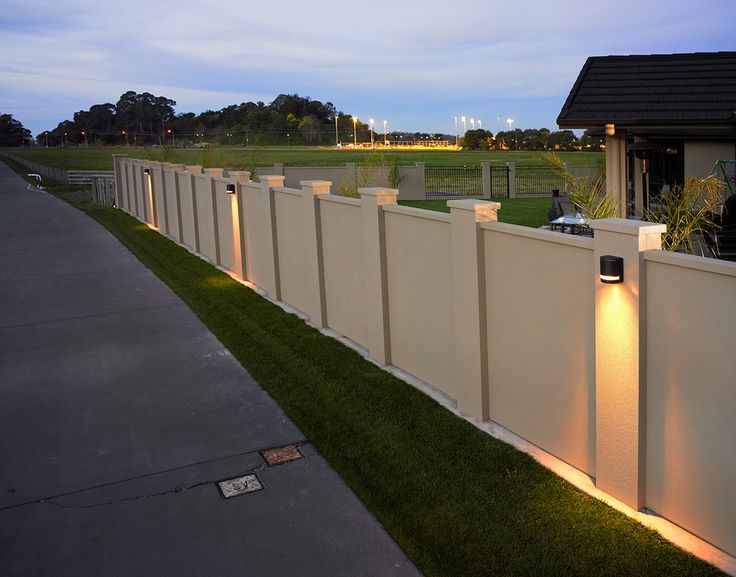
4. Insert light panels for an ambient setting
Light panels on decked roof gardens and terraces add ambient lighting at night as it floods up from below
(Image credit: Future)
If you have a roof terrace with a deck think about adding some glass roof panel lights as a stylish edging idea. They are built to walk on while flooding fantastic levels of natural daylight into the interiors below. This reverses at night if the room below is lit – creating secondary backyard lighting ideas.
Creating a border can turn your deck edging ideas into more of an eye-catching and individual feature.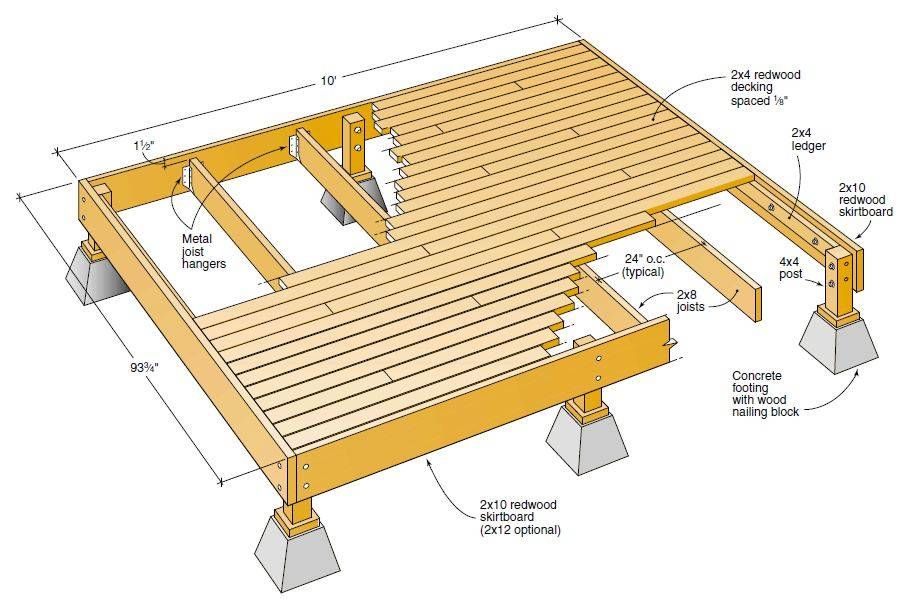 Roof panel lights add a neat edge that introduces a designer feel and enhances your enjoyment of your deck space at night so it's a good investment. As well as being practical they also help to throw diffused light through your planting for a magical touch in the evening.
5. Edge the deck with neat borders
Mix up your decking by interspersing it with smart beds
(Image credit: Annaick Guitteny/Future)
You could play safe and opt for a uniform area of decking. Or you could try adding planting beds into the deck’s structure for a more interesting approach that looks super smart while at the same time maxes up your growing space. After all, you can never have too many plants.
Add a geometric element by using clipped box to create a framework for your border areas then introduce structure and texture with a mix of planting to fill in the detail. A bed of smooth stones is one of our favorite deck edging ideas, adding an interesting element as it works as a backdrop to enhance a display of sculptural foliage such as these pointy leaves.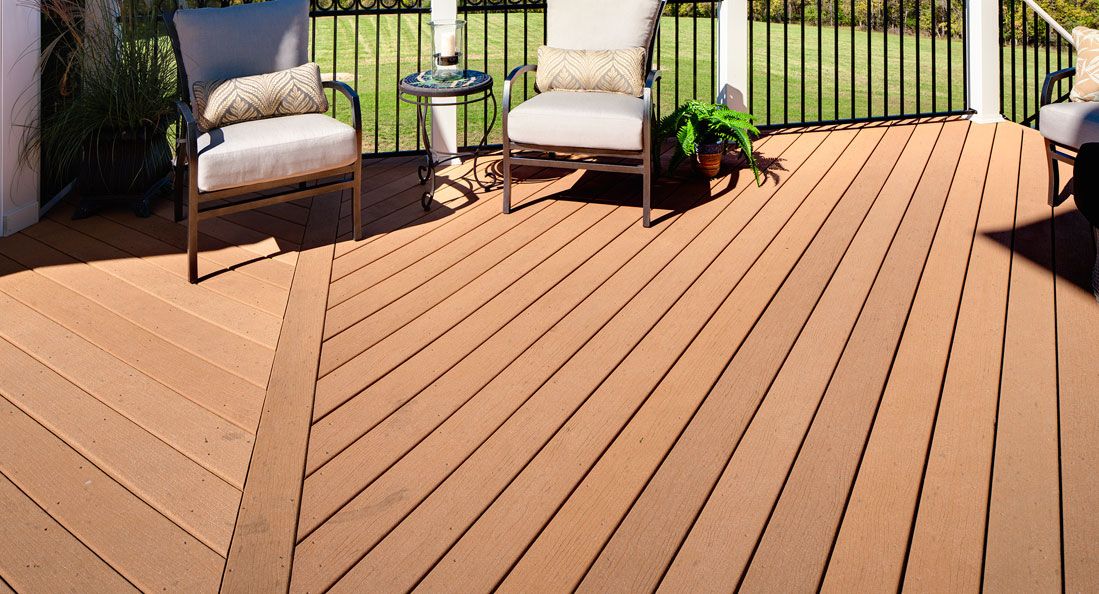
This combination of deck edging ideas creates the perfect spot for your yoga mat.
6. Use pavers to border a deck area
This mix of limestone and Ipe decking is stylish as well as helping to create zoned areas for different uses. Design by Kate Gould Gardens
(Image credit: Kate Gould Gardens)
'All materials in gardens (especially small ones) benefit from definition and this is often easiest with an edging detail,' says garden designer Kate Gould . 'This could be brick, stone or even metal. Whatever you do, make it strong and bold, and be sure that the finish looks crisp and neat as it's such a key highlighting feature.'
In this wonderfully original garden design by Kate a section of ipe decking is inserted into an area of limestone paving, and edged by planters and seating. The wooden decking area becomes the central attraction, in the same way as a rug works in an interior design scheme.
For small garden decking ideas, all spaces are important, and deck edging ideas can be used as a focal point and even as a way of making the area look bigger.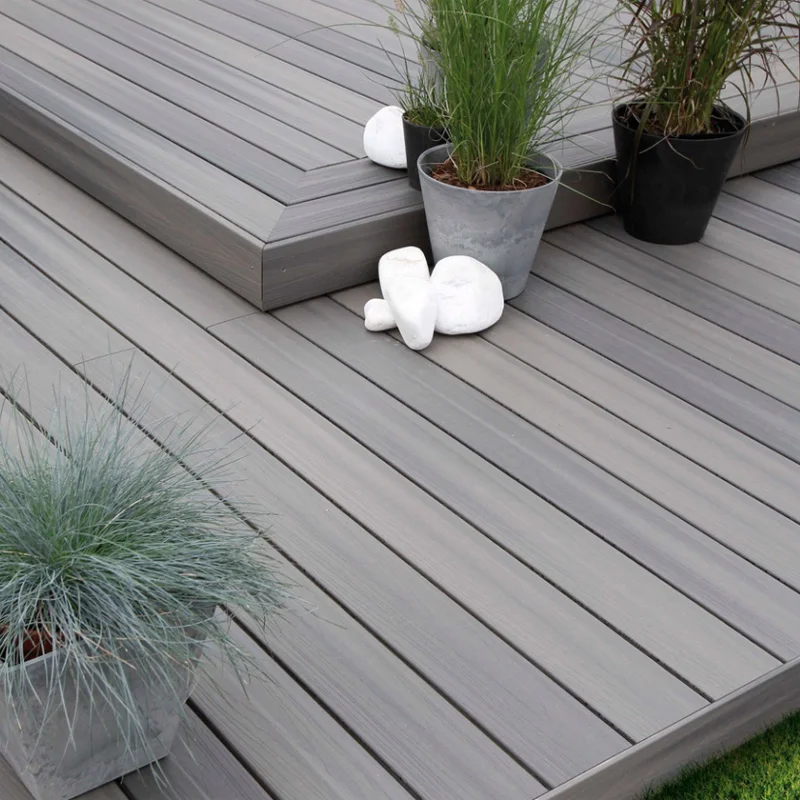 'Here the bench is cantilevered,' explains Kate, 'so the floor continues underneath making the space feel larger and allowing lighting to be incorporated.'
Penthouse deck by LLI Design using different tones of decking wood to create a grid pattern
(Image credit: LLI Design)
'When designing this wraparound sky garden for a penthouse project, we decided to zone separate areas, mixing decking and tiles together,' explains Linda Levene, co-founder and design director of LLI Design .
'For the decking we chose an ipe hardwood, in two tones, one lighter and the other edge piece, darker. We wanted to create something more interesting than just linear planks for the decked area and achieved this by mixing the different tones of decking to form a grid pattern, which added visual interest and visually connected to the architecture of the building, creating a seamless aesthetic.'
Soft but purposeful outdoor lighting adds another dimension to the deck at night, helping to extend the view from the interior.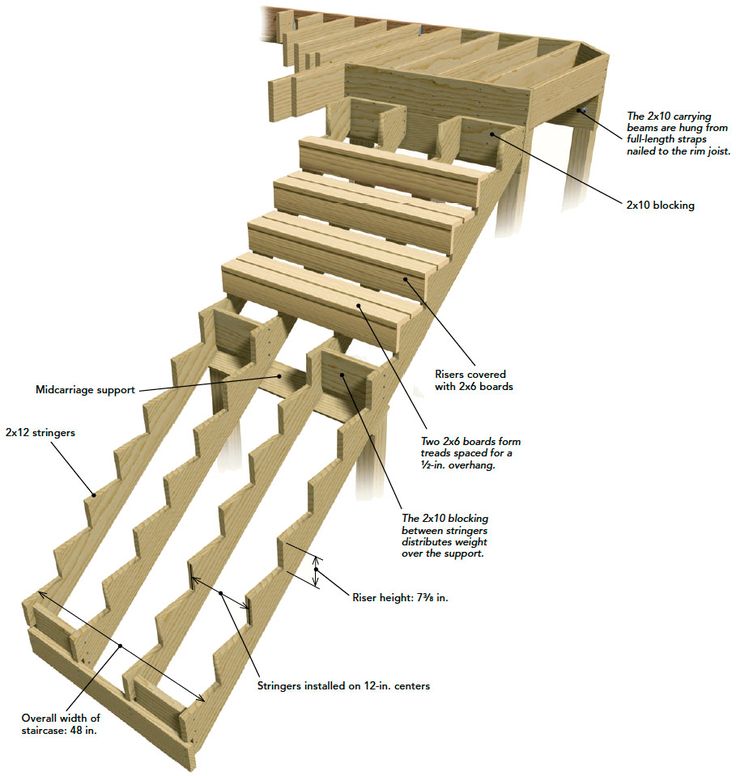 'This was especially important when creating the lighting scheme for the deck as the penthouse had glass on three sides,' says Linda. 'We gently washed the low-growing planting with warm white, spike lights in the planters, and added drama by uplighting specimen plants and trees emphasising their form, structure and texture.'
8. Edge raised decking to add the standout factor
(Image credit: Jane Gilmour/Future)
If you want to create a deck walkway in your backyard it needs to be enhanced by its surroundings as a simple drop down to the grass or planting beds will look unfinished. Stage your raised deck in the right way and it will become the focal point of your garden.
Use a combination of low level planting beds, reflective water pools and sections of smooth stones to create a contemporary look that will really help your deck stand out. You can also use a variety of white, gray and black stones to get a contrasting effect for your deck.
These deck edging ideas are further enhanced if you introduce a contrasting shade of wood to run down each side of the decking walkway.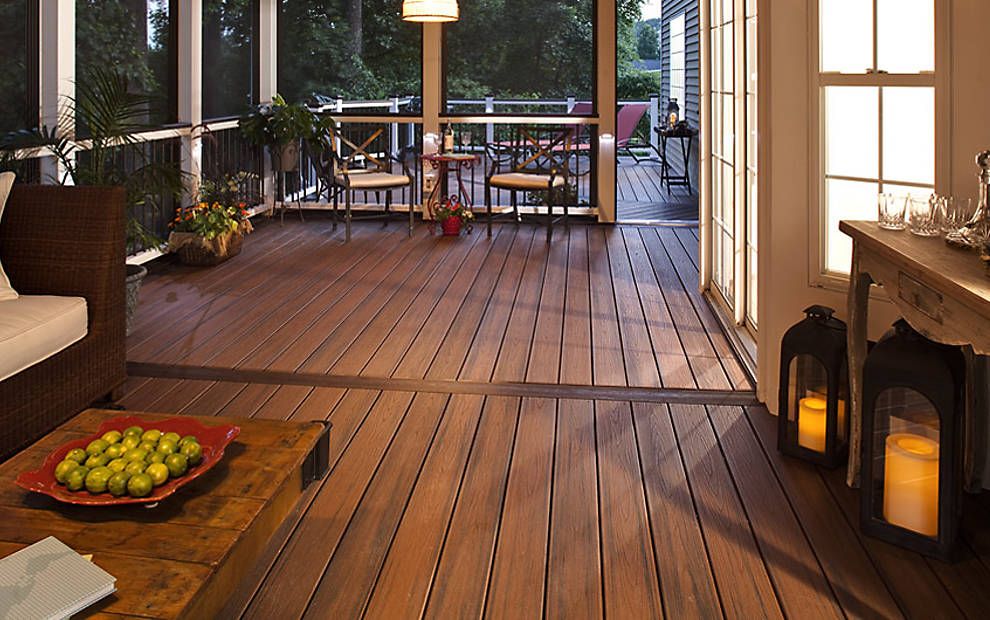
9. Integrate a pergola into your decking
(Image credit: Future)
Pergolas are one of the best deck edging ideas to upgrade your space into more of a destination than just somewhere you walk through. It's a great idea for poolside decks too.
You can buy easy-assembly decking kits that include integral pergolas to transform your deck into a stylish living area. They come complete will everything you need to create a beautifully crafted decking area with integral pergola and require no foundations or advance preparation.
Sounds like a great idea to take your deck edging ideas up a level.
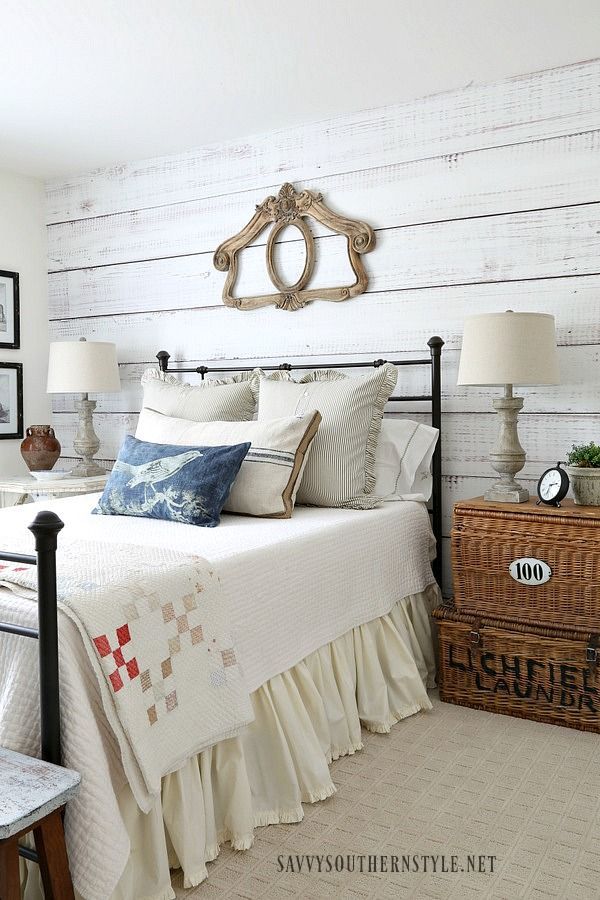
10. Build in matching seating for a co-ordinated look
Wall painted in Little Greene Intelligent Masonry Paint in Tivoli
(Image credit: Little Greene)
A design that combines seating and plants is one of our favorite deck edging ideas that's perfect for the backyard. Using the same wood for the deck, seating and planters creates a coordinated look that's both practical and stylish. Be sure to sand the wood to avoid splinters and treat it to make sure it lasts.
Building in matching seating to your deck looks spectacular. Not only can you create seating easily using your decking boards, it's also an affordable option and you can customize it to include storage space under your seats for cushions and other garden equipment. This is a great idea for small gardens.
Then all you need to do is paint the backdrop in a stunning shade and add some co-ordinating accessories.
How do you edge a deck?
In addition to using deck edging ideas like integral seating, low level planting and lighting panels, you can also create a border around the edge of the deck with fascia boards to give an attractive finish. Corner trims are also available.
Durable edge and corner trims let you cap-off edges, corners and exposed areas of decks or steps, enabling you to seal your new decking area for a smart finish.
Another effective method of finishing a deck surface is to install a trim board around the perimeter.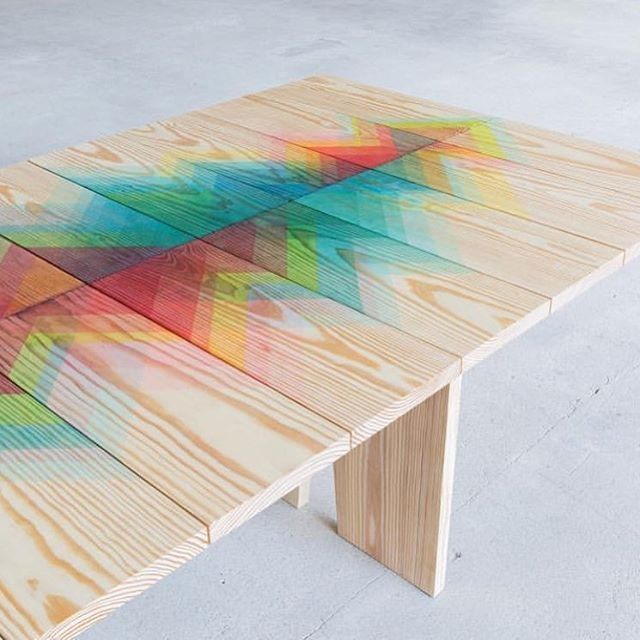 Also known as picture framing or racetrack decking, this is the technique where perimeter boards are laid parallel to the edge of the deck frame, in areas where the ends of the decking boards are exposed.
Perimeter boards cover the butt ends of your deck, which gives a smarter appearance and serves as a contrasting edge trim. Do it well and adding a border to the perimeter of a deck is a great way to up the quality a notch.
The trim known as skirting offers most decking projects a perfect edging solution, allowing you to cover the side of the boards and the exposed subframe, resulting in a well-made deck. For raised projects, it's even possible to stack skirting trims on top of one another to get to the necessary height.
Although your deck is the real star of the show, no deck design is complete without skirting and there are lots of deck edging ideas to choose from. Proper deck skirting allows for ventilation to guard against mold and rot. The deck skirt disguises the area beneath an elevated deck and can also provide cover if you intend to use the space below for storage.
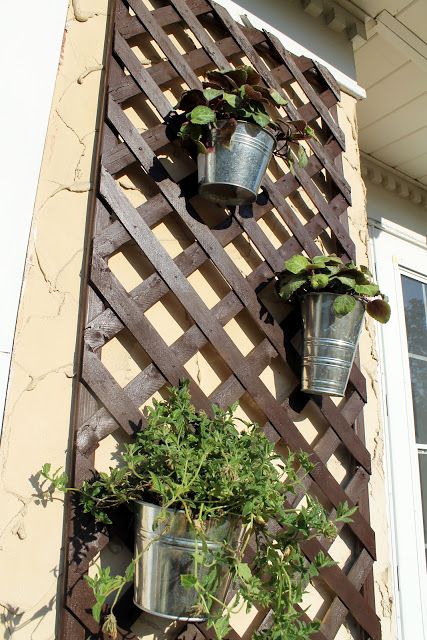
Deck skirting can be made of lattice, wood, stone, or several types of composite materials to add a lovely design element.
Lifestyle journalist Sarah Wilson has been writing about gardens since 2015. She's written for Gardeningetc.com, Livingetc, Homes & Gardens, Easy Gardens and Modern Gardens magazines. Her first job on glossy magazines was at Elle, during which time a visit to the legendary La Colombe d'Or in St-Paul-de-Vence led to an interest in all things gardening. Later as lifestyle editor at Country Homes & Interiors magazine the real pull was the run of captivating country gardens that were featured.
Deck Board Overhang or Flush: What is Better?
5shares
- Share
- Pin
Do you want to boost your home’s living space by adding a deck but don’t want to hire someone for the work? Building a deck isn’t as difficult as you may think. With a few basic guidelines, beginners can learn deck construction. The first step is to plan how the deck will look. Here’s where you’ll run into the question, what is better, deck board overhang or flush?
Building practices say deck board overhang is better than flush. The overhang helps your deck look stunning and last longer. Both the stair nosing and deck boards overhang to protect the substructure. The overhang also protects the decking, especially if it’s wood.
The amount of overhang you need varies. Most boards overhang the substructure between ¼ to 1 ¾”, depending on the material. In this article, I’ll show you why overhanging decking is better and how much overhang is best.
Quick Navigation
- Is It Better to Have Deck Board Overhang or Flush?
- Why is Overhanging Decking Ideal?
- Why Not Flush the Edges?
- How Much Overhang Should a Deck Board Have?
- How Far Can Deck Boards Overhang the Joists?
- Can Composite Decking Overhang?
- Summary
Is It Better to Have Deck Board Overhang or Flush?
Deck board overhang is better than flush edges, according to decking industry professionals. There are several reasons to go for overhang over flush. But you have many options. Ultimately, it’s your choice. The decision depends on your taste, the building codes in your location, and the decking material.
Why is Overhanging Decking Ideal?
Overhanging is good practice in deck building. Deck board overhang protects the materials, and it also looks nice. The construction is easier for beginners to build a deck that’s pleasing to the eye.
The main reason is that the overhanging boards protect the substructure of your deck. It also contributes to safeguarding the joists and the decking material itself, especially if it’s wood. Wood is the most common choice because pressure-treated lumber is excellent for combating persistent moisture damage and decay.
Wood decking may split from the ends due to moisture or dryness and weaken over time. The material’s elasticity becomes shot, and the wood may even start to pull apart around the screws without cracking. However, overhanging wood deck boards add wood between the screws and end grain, keeping the fibers in place after fastening, and prevents splitting later.
An outdoor deck is exposed to rain and snow, so keeping moisture from becoming a problem is critical. Overhang deck boards allow moisture to divert from the wood before causing damage. The water can’t pool or sit and rot the joist rim or framing. Instead, it’s redirected away from the gaps to keep water from building up.
Overhanging deck boards boost the appearance of particular materials as well. Composite fascia and other types of composite material look better with overhanging. Fascia board edges can be unsightly, but the overhang covers this unattractive feature and prevents the material from rotting from rainwater.
An overhang enhances the look of a deck overall. Many people prefer the appearance of overhanging deck boards because it’s aesthetically pleasing. The overhang runs across the top of the band joist, hiding it from view.
If you have stairs leading to your yard, the overhang will also help with a smooth transition between decking and stair nosing. Stair nosing is a requirement. The nosing on your stairs creates more tread. Keeping the overhang on the deck edge consistent with the stair nosing improves the overall look.
Decking overhang has few limitations worth considering. Some people, for example, may not like seeing the end grain along the deck edge. However, composite decking also features ugly ends too, and there are options to solve issues with end grain.
Benefits of Deck Board Overhang
- Protects the joists and substructure
- Wicks moisture away from the deck
- Keeps wood and fascia in better condition
- Blends in with stair nosing
- Appearance is better
- More straightforward for beginners
- Longevity
Disadvantages
- Visible endgrain
- Unsightly decking ends
Why Not Flush the Edges?
Appearance is always a matter of opinion. Some people prefer the edge of the deck to sit flush with the rim board and hide the wood grain behind a fascia board. So why is it better not to flush cut the edges?
It’s difficult to flush cut the edges of certain materials, including wood or composite planks. Composite materials are tougher to cut than wood. Plus, their exposed ripped or crosscut edges are not very appealing. Without sharp equipment and plenty of practice, you’re unlikely to produce a smooth edge.
Making the edge flush is extremely difficult with wood too, even though it is what most people use for their decks. Wood contracts and expands with temperature changes and moisture, so the result often looks sloppy after a year or two. With an overhang, the final deck takes on an intentional appearance.
Flush cut ends don’t project past the rim or band board and can allow moisture to seep or pool under the ends. Use of a fascia board to hide the end grain also collects water and can accelerate rot. However, there are a few options to hide the cut grain without making the edges flush.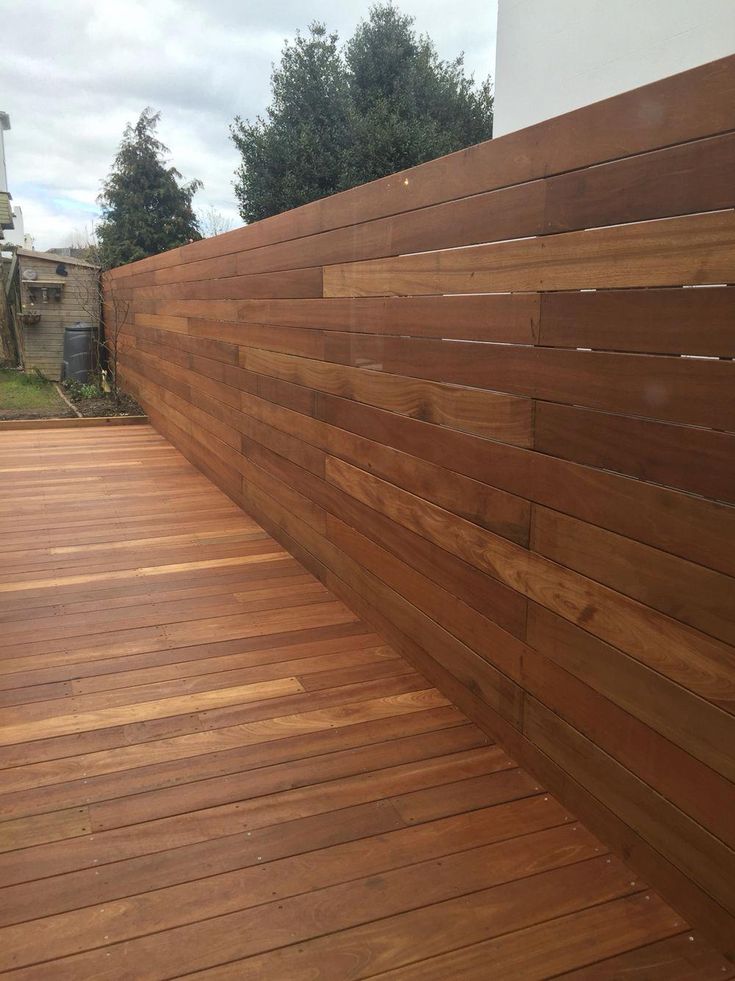 We’ll discuss those more in-depth below.
Another issue is that the joists become more visible from above if you have the edges flush. Each joist should be straight before screwing them into place. If the decking doesn’t overhang, you could stand on the deck and look down to see the joists. An overhang allows the decking to have a beautiful, clean straight edge because the joists stay hidden.
How Much Overhang Should a Deck Board Have?
The decking should overhang the joists between ¼ and 2 inches beyond the end joists and rim board. The amount of overhang you should leave depends on your deck board materials:
- Most wood decks: ¼” to 1 ¾”
- Composite decking: 1½”
- Picture frame deck: 1”
How much overhang you include depends on your materials and if it requires picture framing. Composite decking has unsightly edges and many people want to hide the end grain, so picture frame decks are popular. They hide the rim and finish the deck with clean lines.
Composite decking requires picture framing to clean up the ends. Wood decks could go either way, depending on your preference. Picture frame decking does have limitations, though.
With composite fascia, the overhang must extend at least 1 ½” past the unfinished rim to allow space for the picture frame. Some people leave up to 2 ¾” of overhang before installing the fascia. Otherwise, the deck has a weak spot that bends under your weight when you step down.
The rim joists are responsible for supporting more expensive materials or composite decking without scallop grooves. They help a picture frame stay strong under pressure and have a more distinct visual appearance.
Stair nosing plays a role in the amount of overhang you include as well. Some states or regions limit the stair nosing to 1”, which is the reference you’d use to create consistent decking. If you’re making a picture frame deck with fascia, the initial install of composite decking would cover the rim board and overhang the decking 1 ½” to leave room for the 9/16” fascia board.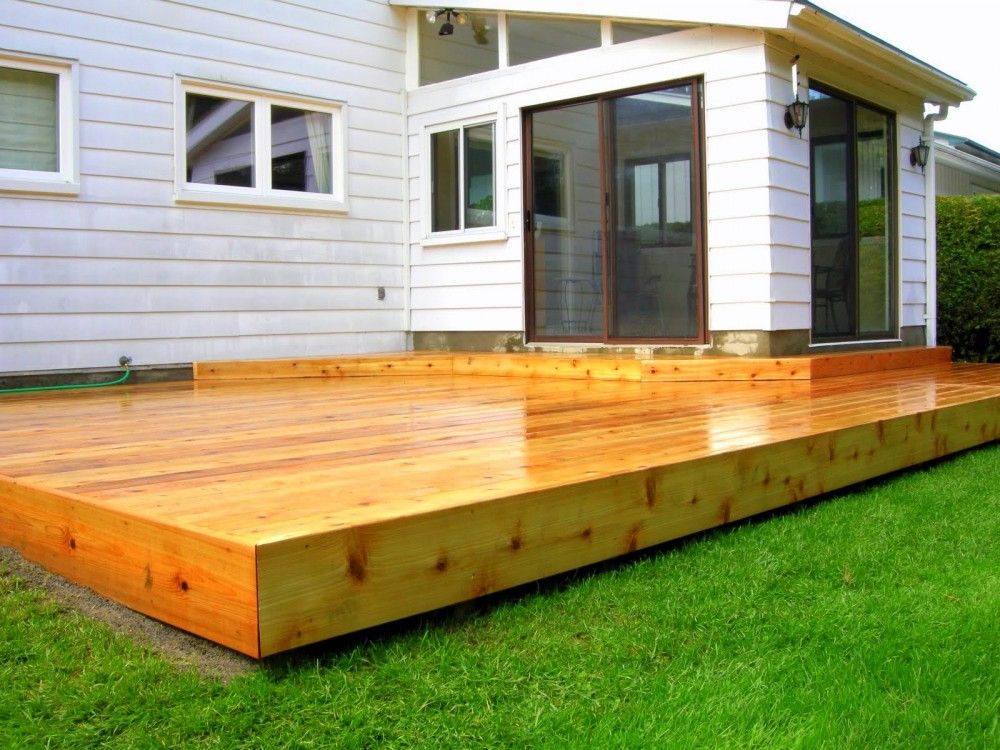 The result is a 1” overhang finish that’s safe and visually appealing, and matches the stair nosing.
Wood deck boards are the easiest to work with for both beginners and pros. You can adjust the overhang to suit your preferences. Make sure the deck board overhang matches the stair nosing.
How Far Can Deck Boards Overhang the Joists?
No matter what material you select for your decking, the overhang should never extend more than the ⅓ the width of the board. The greater the distance from the fasteners and support, the more likely the ends will bend or splay. Additionally, they may not look as appealing with your choice of railing either.
Most deck board overhangs are a minimum of ¼”. Less than that for the overhang, and there really isn’t one, and the structural integrity of the deck will suffer. If you’re unsure how far the deck boards should overhang, check with your local building department for acceptable guidelines.
Limit Joists
You also want to limit joist overhang to a 2-1 ratio, especially with the overhang on stairs. The goal is to have enough material to keep the stairs or the decking edge from pulling up and off when someone steps on the edge. Industry code provisions in America allow cantilevers to extend ¼ of the joist’s backspan, meaning the total space depends on your material. Southern pin 2x10s that are 16” and span 12 feet can cantilever up to three feet, for example.
For the best results, allow a foot of overhand per two feet of support deck. Support the boards by limiting how much decking will overhang. Never overhang the edge of your decking more than a third of the material. That means standard 5.5” decking may have up to 1 ¾” of overhang.
Can Composite Decking Overhang?
Composite decking can overhang, but the material has limitations. The overhang may reduce the amount of kick damage to the boards. However, the material may not be as sturdy as lumber when it comes to the amount of weight it can support along the deck’s edge. For this reason, composite decking tends to have either an inch of overhang, or it sits flush with fascia installed to frame (and cover) the edges and ends.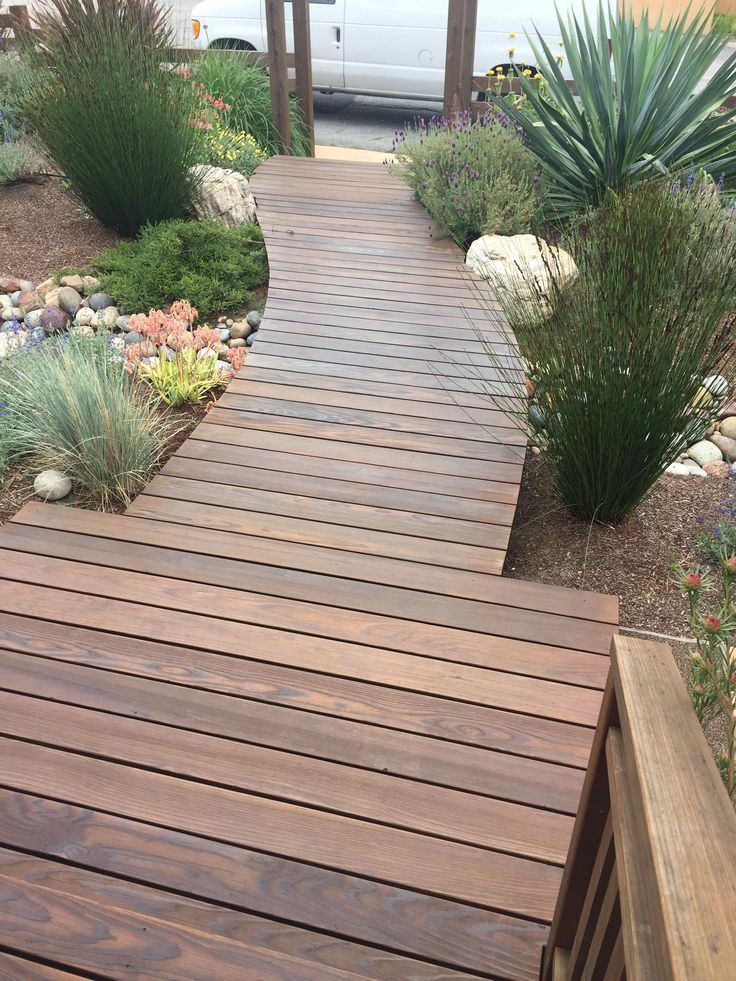
If you choose to go with composite decking, check the material’s allowable overhang. Trex is a popular composite material with a maximum overhang of 102mm or around 4 inches. Between one and two inches of deck board overhang is ideal when you attach an outer fascia board, or at least 1 ¾” to 2 ¾” of overhang before installing the fascia.
Summary
Best practices go with overhang due to the structural benefits. Depending on the type of material you use to make your deck, the overhang is easier, especially for your first time. Beginners can build a great looking wood deck using the overhang.
What are your experiences with deck board overhang? Have you ever made a flush, picture frame deck? Share your experiences with decking in the comments. If you found this article helpful to your deck building project, please share it with your friends and family.
Eugene Sokol
Eugene has been a DIY enthusiast for most of his life and loves being creative while inspiring creativity in others.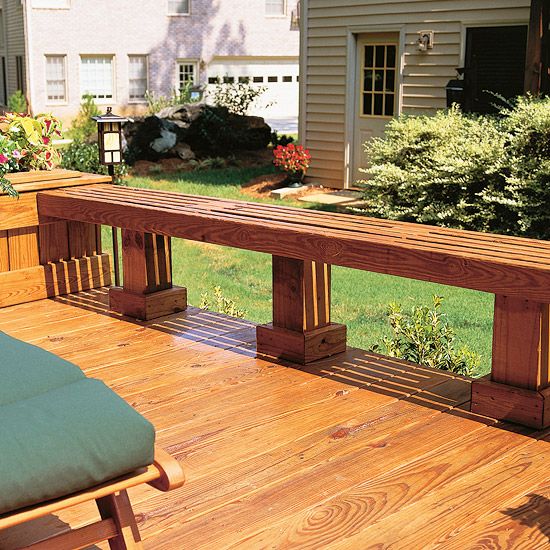 He is passionately interested in home improvement, renovation and woodworking.
Decks on site
Category: Landscaping
In many countries, building a wooden deck (or on-steel) is the most common way to create a recreational area. This is a natural extension of the idea of a veranda located at the back of the house, but remember that a deck can be built somewhere in the garden and not connected to the house.
The deck's main advantage over more traditional hard surface forms lies in its versatility. Decks can be built in areas where it would be difficult to install a patio, on slopes or above water. For example, a deck over a pond could be extended as a jetty to sit on the edge and watch the fish. In addition, wooden decks are built at any height, from the ground to roof level. Rather than just building a low level deck, you could take advantage of a high point in the garden to create an observation platform. Because decks are made of wood, they are soft and pliable, unlike concrete, brick, and stone.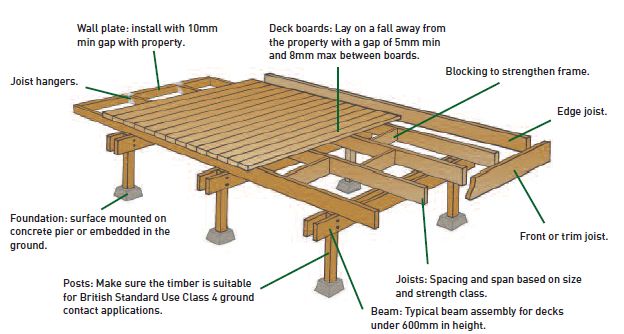 Wood, of course, deteriorates over time, but regularly maintained, it will last you for years to come.
Deck shapes
If you are planning multiple decks, then only square or rectangular ones because these are the easiest shapes to build. However, if another shape such as a triangle or hexagon, for example, would suit your garden design, there is no reason not to build it.
Because wood comes in the form of long planks and strips, one tends to think of a deck made of only straight lines. Most decks have straight edges, but you can trim them to create curves. A series of circles of varying levels, for example, might be extremely attractive, or the edge between the deck and the bush or lawn might form a long winding line.
Deck patterns
Attractive geometric patterns can be formed; more complex intricate designs may require more complex support from below. Some of the options available include "checkerboard" corners, concentric rectangles, and the traditional chevron. In some situations, it is preferable to consider using a simple set of parallel slats, perhaps placed diagonally against the wall of the house, to create momentum.
Deck beams
The number and alignment of the support beams will depend on the project you are laying the deck on. The main beams should run at right angles to the boards joined together to reinforce the base from below. This is effective at ground level where the trees will provide natural shade.
Instead of a simple space of wood, you can create a place or places within the deck - an area for one or more small flower beds, perhaps with deciduous plants or shrubs growing in them. Likewise, trees or bushes growing in the area to be covered by the deck need not be cut down, the deck can simply be fitted around them. This approach can be effective on steeply sloping ground where the deck could protrude beyond tree growth.
Building the deck
Draw a scale plan of your garden on graph paper and note the intended position and size of the deck along with access controls and other features that might influence the design; if the ground slopes, draw the exact elevation of the side of the site.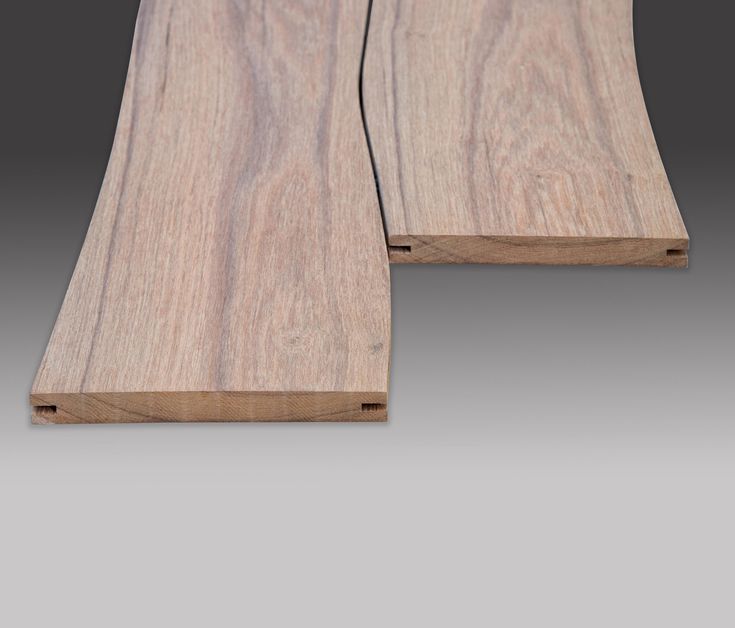
Think about what you will be using the deck for as this will help you determine the overall size; if you intend to dine outside, it should be large enough for a table and chairs to pass behind the chairs when serving diners. On the other hand, if the deck is to be used as a sunbathing area, you need enough space to put sun loungers.
Consider shape and size in relation to nearby objects. For example, a long, rather narrow deck of 6 m x 3 m would look better along the wall of the house than projecting into the garden; a square deck would work better with a set of angles between two walls that meet at right angles.
The amount of wood will depend on your plans. This means that more complex designs will need more wood, and this can be unprofitable. The best wood is hard, does not crack, and is less prone to decay than soft wood, but it will be more expensive,
1. The deck should rest on wooden beams that are kept above ground level to prevent them from rotting.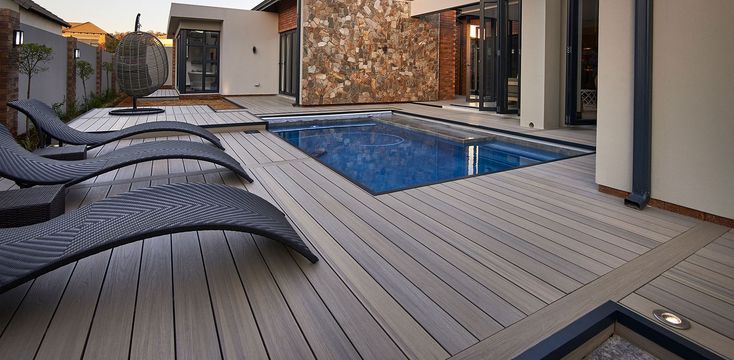
2. Alternatively, wooden beams can be laid on concrete beams or even posts if the ground is sloping.
Softwood, on the other hand, is less expensive but is prone to splitting, especially if poorly prepared. It must be impregnated (protected against water) to prevent rotting, and fasteners such as nails, bolts, screws must be galvanized to prevent them from rusting.
Ground deck
This deck is not only the most popular type, but also the easiest to install. If built correctly, it can be put together in less time than the time it takes to lay a Gravel patio or garden. However, speed shouldn't be the key, it's much more important to ensure that you're building a level, stable platform. If a deck on the ground is built methodically and regularly maintained, it will last for years to come.
Use pegs and string to mark the position of your planned deck, taking care that the corners, if you expect them, are at exactly right angles.
The easiest site to install a deck is an existing patio which, as long as it is flat and stable, should not need any special preparation.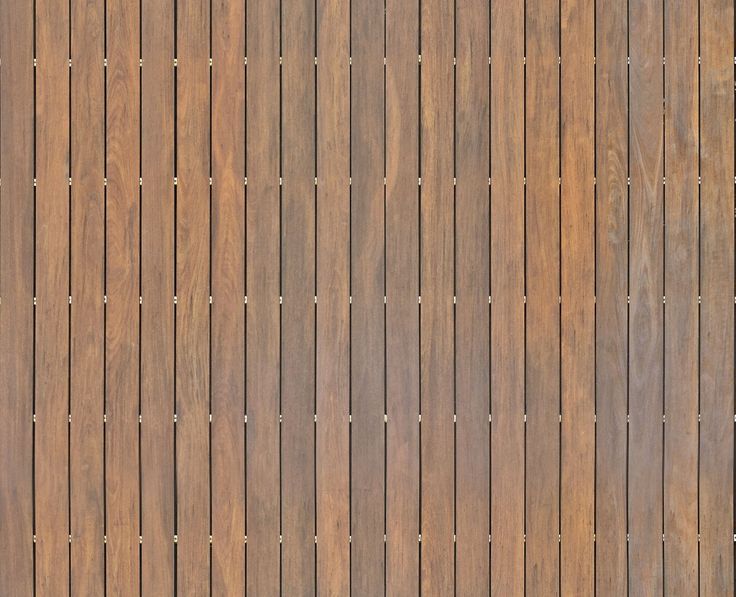 However, if you are installing your deck on an area previously covered by a lawn, you will need to clear all weeds and remove the soil to a depth of about 10 cm, laying an appropriate waterproof membrane on the ground, and then level the area with gravel.
Standard paving tiles or bricks can be used as this is a simple yet effective base for your deck. Place the slabs on the bottom of the wooden blocks of wood, at a distance of 1.5 m.
The direct position of the slabs is determined by the size of your deck. Make sure the slabs or bricks are level by checking it with a level.
Building the Plank Deck
1. FOR the base and planks, use 7.5cm x 2.5cm wood. Place the bases parallel and 75cm apart.
2. Place planks about 1cm apart, using wood pieces as spacers. Make sure the gaps are consistent: they should be at right angles to the base.
3. Arrange the planks so that the joints fit snugly against the ends of the planks and the base. Attach the planks to the base using floorboard nails.
The standard deck structure is to be built on 15cm x 5cm machined timber blocks, parallel to each other and usually spaced 90cm apart, joined at the ends with galvanized brackets. The bases themselves are separated by bars made from the same wood and held together with galvanized brackets. Once the frame is built and placed on the ground, you can start the fun part - laying the deck itself.
Laying the deck
The deck can be laid in a variety of ways ranging from chevrons to straight laid decks - the choice is yours, but the technique is the same: there should be a gap of about 1cm between planks, allowing for expansion of drainage. The easiest way to ensure that the boards are properly positioned across the deck is to use a plank of this thickness as a spacer. Lay the boards as straight as you can, attaching them to each base with a pair of 6.5 cm screws. Trim the edges of the boards with a saw and add panel boards or cornice to the ends of the boards, giving them a neat look.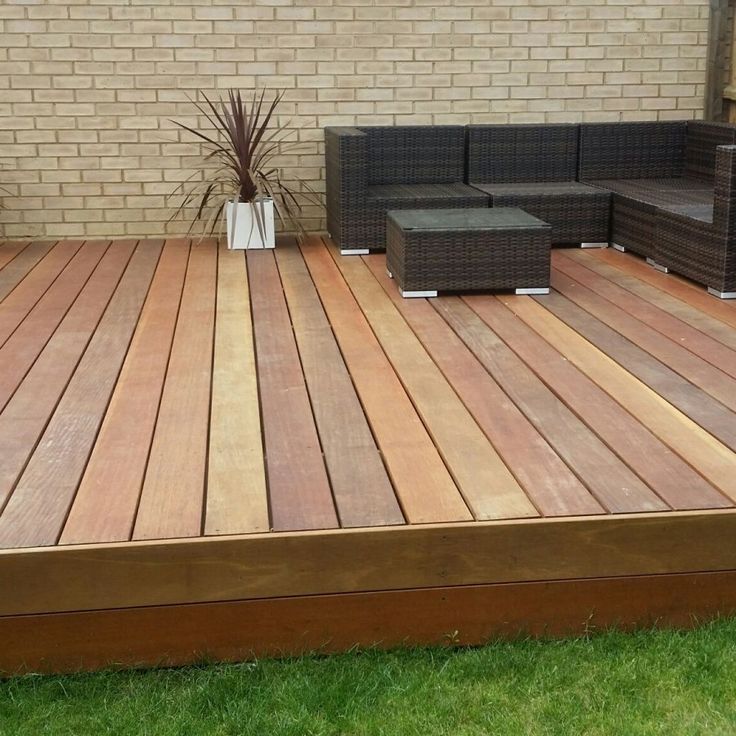
Base timber
Base timber for the boardwalk or platform may be constructed on a concrete surface entirely from flat-sawn hardwood or treated softwood measuring approximately 7.5 x 2.5 cm. Assemble boarding at site. These platforms are extremely easy to build - they are made up of long timber that forms a base filled with planks of timber. To form the base, place a long piece of timber about 75 cm apart, parallel to each other in the direction of the slope of the ground. Planks of the same wood along the width of the platform are placed across the base at the right angles. Lay full length timber across the platforms if it is up to 3m wide; for wider platforms, join the boards lengthwise with joints so that they meet in the middle of the base and can be attached to it. Attach firmly to each side of the platform in additional rows so that there are no breaks across the boardwalk. Fasten the planks to the base with 4 cm flooring nails, two per board, placing them against the outside of the planks to prevent warping.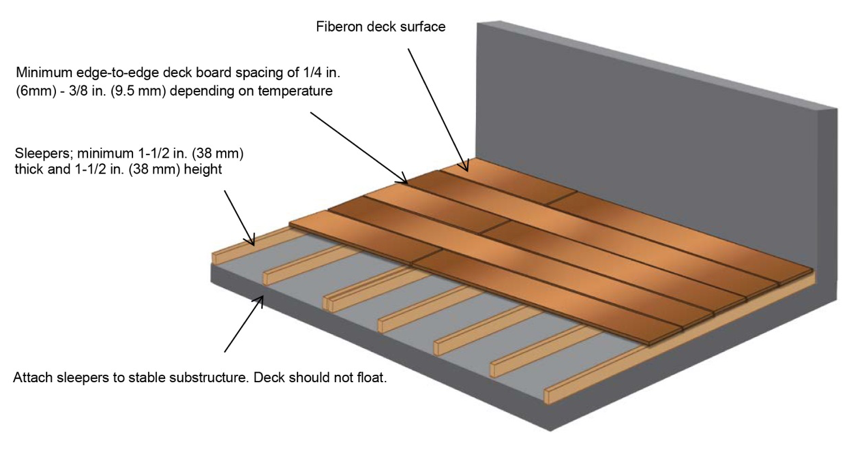
Landscaping - Site Decks
Deck deck
Tags: hull, deck
- Development of tea clippers
- Clipper Hull Construction
- Vessel appearance
- Clipper rigging
- Sails
- Masts and other spars
- Copper plating
- Steering gear
- Anchorage and general forecastle deck arrangement
- Boats
- Coffee bars and bits
- Deck decking
- Steering wheels
- Conclusion
On wooden ships, the decking (Fig. 1) and especially the waterway and the waterway bar to a large extent determined the longitudinal strength and resistance of the hull to deflection. Therefore, these elements of the set had a large cross-section along the entire length of the vessel. A slight gradual decrease in the cross section was allowed only at the extremities.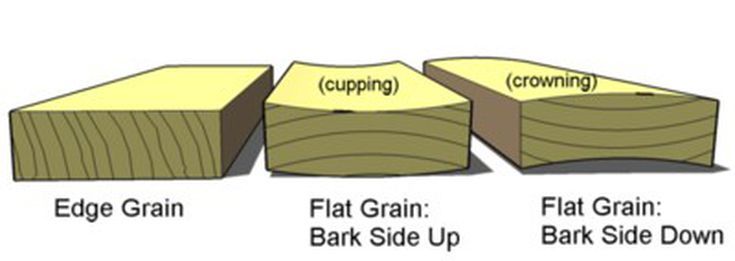
Fig. 1-a. Deck flooring of a wooden vessel:
1, 2, 8 - waterway bars; 3 - hatch; 4 - beam; 5 — hatch coaming; 6 - cutout for cutting; 7 - connecting belt; 9 - wedge; 10 - wooden dowel; 11 - wooden cork; 12 - bolt;
Fig. 1-b. Deck flooring for iron and composite ships:
1— wooden or iron waterway waterway; 2 - teak framing of the deck; 3 - lining under the wheelhouse; 4 - diagonal connection; 5 — side stringer; 6 - iron beams; 7 - iron or wooden manhole cover; 8 - detail of the waterway and deck flooring; 9- 3 or 4 belts between joints; 10 - mast edging; 11— flooring belt around the cabin; 12 — wooden hatch coaming; 13 - iron carlings; 14 - iron coaming.
Along the longitudinal edges of the hatches from bow to stern extended additional belts decking.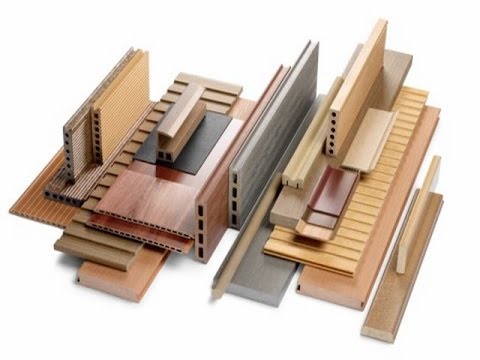 They were not broken by any cutouts. The boards of these belts were either cut into the beams flush with the deck plating, or made slightly protruding. In the latter case, the lining between these belts was raised so that a recess was not formed for the accumulation of water.
Additional belts were slightly curved, as were the contours of the deck itself. The lining between them and the waterway bars was laid parallel to them or with a slight bevel to the ends, so that the outer chords were as long as possible. As a result, due to the continuous belts, the maximum longitudinal strength was given to the flooring.
The inner edge of the waterway bar was a continuous curved plane.
To ensure the high quality of caulking and fastening, the ends of the sheathing boards were made rectangular with a width of about 6 cm, due to which it was convenient to work with a shank. Holes for pins slightly weakened the board. The adjacent board had a notch that met the end of the previous board, and so on, until the ends of the boards met at an angle of about 30°.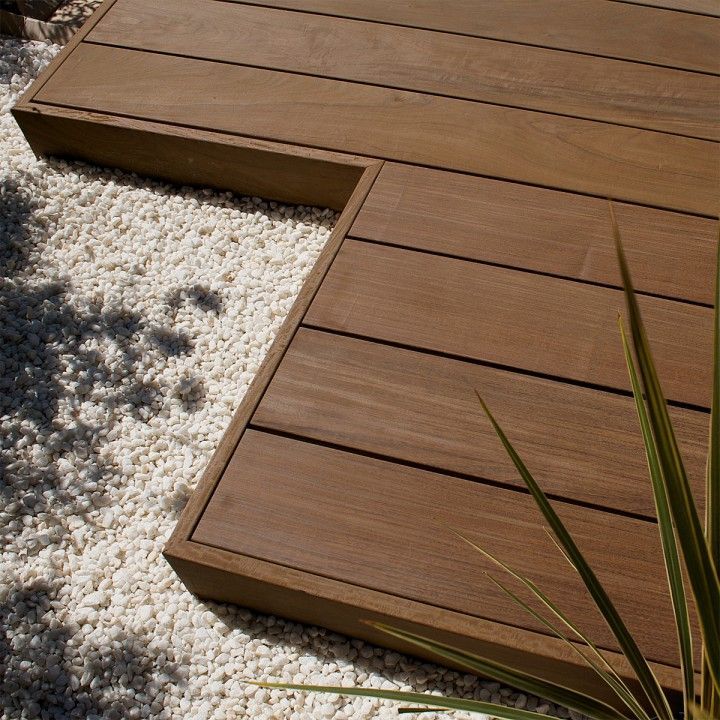 The resulting seam could be well caulked. The flooring of the middle part of the deck had to be made of short boards - it was interrupted by hatches, deck scuppers, partners, etc. These cutouts were enclosed by vertical longitudinal and transverse coamings, the first of which were bolted to the carlings, and the second were included in the beveled cutouts of the ends of the flooring boards, reaching the notch. If the beams along the edges of the hatch had sufficient width, then the transverse coamings were laid directly on them.
Under the deckhouses, the flooring was solid, and around the deckhouses a shallow, beveled groove was made, which made it possible to caulk and tar the gap between the deckhouse and the deck. The mast was surrounded by coamings, since the mast cushion provided sufficient support for both the ends of the planks of the planks and for the coaming beams.
The deck boards were sewn to the beams with dowels, which were wedged with hardwood wedges and then cut flush with the deck. Because the dowels and wedges were cut across the grain, they were more wear-resistant than planks, and on older ships, they would appear as rounded bumps until they were cut down. Sometimes iron nails were used instead of dowels; their hats were sunk into pre-drilled holes, which were clogged with corks.
On iron and composite ships, the decking was made differently. Longitudinal strength was provided mainly by the metal elements of the set. Metal sheerstrake and underdeck stringers replaced wooden waterways and waterway bars, although the latter were sometimes made to complement the metal elements. Instead of wooden additional longitudinal belts of the deck flooring, metal ones appeared, fastened with diagonal underdeck sheets. Therefore, the deck plating itself did not play a large role in providing longitudinal strength and it was not necessary to make the edge boards as long as possible. Their ends were rectangular only for the convenience of caulking, and the ledges were cut out not in them, but in a waterway bar.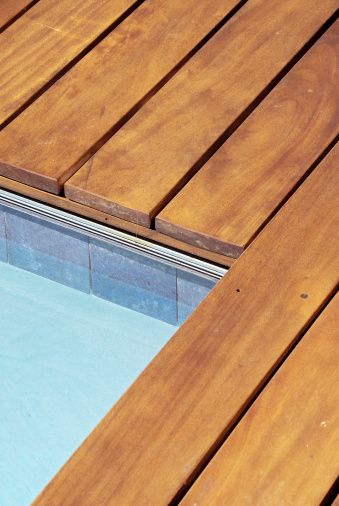 If the contours of the deck had a large curvature, the extreme boards were bevelled. Basically, the floorboards were made straight and parallel to each other.
The designers of wooden boats had different rules for determining the dimensions of the beveled and straight edges of the outer boards of the deck, depending on the width of the boards themselves. Since the width could vary from 10 to 20 cm (the width of typical boards reaches 23 cm), then on composite and iron ships such complex trimming of the edges could lead to an unreasonably large number of cuts in the waterway bar. Therefore, for reasons of convenience of caulking, the minimum edge width was taken equal to 6 cm.
Manholes, hatches were bordered around the perimeter with wide sheets, to which coamings were attached with the help of squares. A teak or pine waterway block was laid around the coaming, which was slightly thicker than the deck flooring and had a bevel to the deck, and the flooring itself was laid end-to-end with the bar. In the same way, coamings were made around gangways, fans, cuttings, etc.
In the case of pine decking, the timbers were made from teak whenever possible, as it would not rust when in contact with the metal. Even if the wooden coamings of hatches or deckhouses were placed directly on iron plates, they were sheathed around them with bevelled teak, because otherwise water accumulated near the coamings and the wood began to rot. In the manufacture of deck decking entirely from teak, the bars served as decoration, and the deckhouse was placed in grooves cut into the decking.
Under the iron bollards, as well as under the spiers and windlasses, teak linings about 5 cm thick were placed; additional boards sheathed the deck around the masts and under the coffee slats.
The edges of the forecastle deck, forecastle cuts and poop were sometimes sewn up with teak boards about 2.5 cm thick with beveled or rounded edges. In this case, the ends of the boards were covered with a bar of semicircular cross section.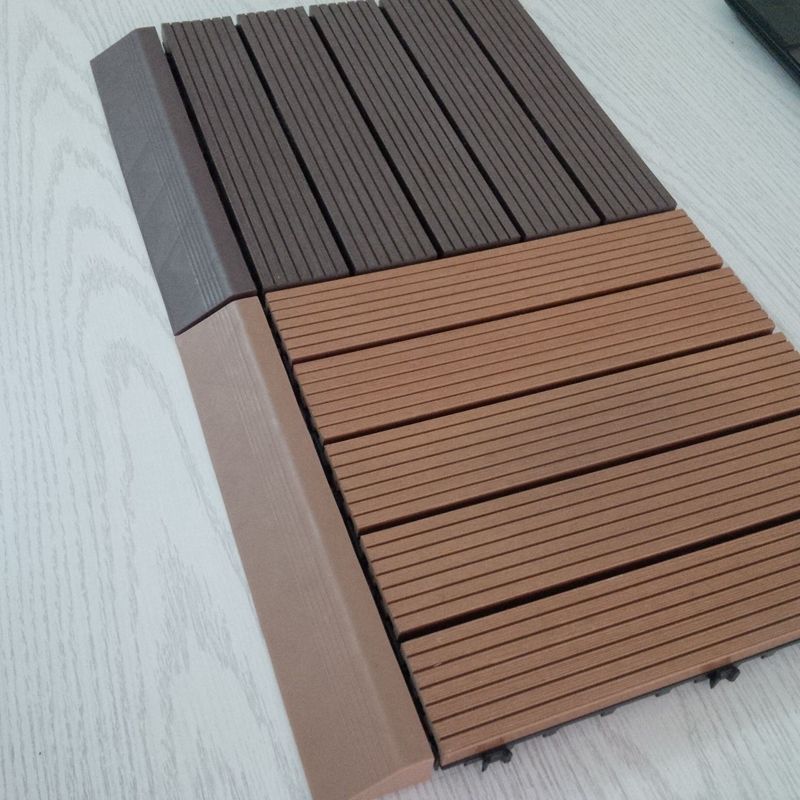
On ships that had pine decking, often the deckhouse was not placed in cutouts in the decking directly on the beams, but teak boards about 5 cm thick were cut into the decking to a depth of about 2.5 cm around the deckhouse perimeter and a deckhouse was already placed on them. The edges of the teak boards protruding above the deck were cut or rounded, and thus the water flowing down from the walls of the cabin did not fall into the seams.
Wooden flooring was fastened to the iron reinforcing deck sheets with metal bolts, onto which nuts were screwed from below. The heads of the bolts were sunk into the floorboards, and the holes were plugged with corks. Corks were cut along the fibers, not across, as on wooden ships. Therefore, they wore out in the same way as the deck boards. The ends of adjacent boards were either joined end-to-end, fastening each of them with bolts, or made beveled or joined into half a tree and fastened with one bolt. In the latter case, the connection, due to the reduced thickness of the ends of the boards, came out weakened.