When to plant potato seeds
How to Plant Seed Potatoes
By
Marie Iannotti
Marie Iannotti
Marie Iannotti is a life-long gardener and a veteran Master Gardener with nearly three decades of experience. She's also an author of three gardening books, a plant photographer, public speaker, and a former Cornell Cooperative Extension Horticulture Educator. Marie's garden writing has been featured in newspapers and magazines nationwide and she has been interviewed for Martha Stewart Radio, National Public Radio, and numerous articles.
Learn more about The Spruce's Editorial Process
Updated on 12/19/22
Reviewed by
Kathleen Miller
Reviewed by Kathleen Miller
Kathleen Miller is a highly-regarded Master Gardener and Horticulturist who shares her knowledge of sustainable living, organic gardening, farming, and landscape design. She founded Gaia's Farm and Gardens, a working sustainable permaculture farm, and writes for Gaia Grows, a local newspaper column. She has over 30 years of experience in gardening and sustainable farming.
Learn more about The Spruce's Review Board
Fact checked by
Sarah Scott
Fact checked by Sarah Scott
Sarah Scott is a fact-checker and researcher who has worked in the custom home building industry in sales, marketing, and design.
Learn more about The Spruce's Editorial Process
The Spruce / Sandhya Moraes
In This Article
-
When to Plant Seed Potatoes
-
Working With Potatoes
-
Instructions
-
Tips
Project Overview
Potatoes are one of the easiest vegetables to grow, but rather than planting them from seeds produced by the flowers of the plant, they are generally grown by planting portions of the root structure, known as seed potatoes. Seed potatoes are tubers that you can use to grow new potatoes that will be genetically identical to the parent potato.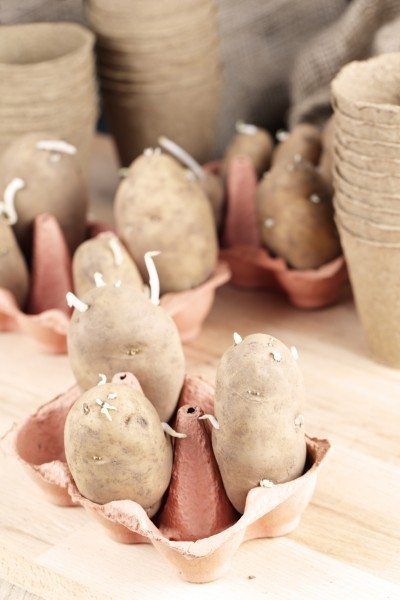 Potatoes grow more expediently by this kind of vegetative propagation, and for most home gardeners the process is easier than growing from seeds. Typically it can take about 60 to 90 days for potatoes to grow after planting. Read more about how to plant seed potatoes in the early spring so you can harvest them by mid-summer.
When to Plant Seed Potatoes
Potatoes do best in full sun. They can be planted in the early spring two to four weeks prior to the expected last frost date in your area. Seed potatoes planted in soil that is too cold or soggy may rot. Generally, potatoes will not grow until the soil temperature has reached at least 45 degrees Fahrenheit. You can plant a second crop as late as June 15th depending on location and harvest the potatoes as late as possible. Potato plants will tolerate a light frost, but protect plants from freezes with row covers, or harvest them before a freeze arrives.
Working With Potatoes
Potatoes are aggressively rooting plants and will produce the best crop when planted in light, loose, well-drained soil. Potatoes prefer slightly acidic soil with a pH of 6.0 to 6.5—acidic to neutral. However, potatoes are prolific growers and usually adapt to poor soil and climate conditions. Make sure to rotate where you plant potatoes in the garden, as soil-borne diseases can linger in the ground and affect future crops.
When selecting seed potatoes, do not use the potatoes you buy at the grocery store. Grocery produce is often treated with a growth inhibitor, which keeps potatoes fresher longer but also prevents sprouting or stunts growth.
Organically grown potatoes may be free of growth inhibitors, but they are prone to any diseases carried over from their growth period (such as ring rot or fusarium wilt). You need disease-free, certified seed potatoes. Before planting, examine the seed potatoes and discard any that have soft spots, cracks, bruises, or signs of rotting.
Before you plant, you may also decide to "chit" (pre-sprout) the potatoes. If you decide to encourage stem growth on your potatoes, this step will add two to four weeks to the planting process. However, many gardeners find that chitting potatoes produces a quicker, slightly larger potato.
Equipment / Tools
Materials
- Seed potatoes
- Powdered sulfur (optional)
- Bag (optional)
- Egg carton, box, tray, or screen (optional)
Learn How to Plant Seed Potatoes Successfully
The Spruce / Sandhya MoraesInstructions
-
Chit the Potatoes (Optional)
Although potatoes will sprout in the dark, you will get long, pale shoots that easily break. Instead, place them in a cool spot with bright light for 2 to 4 weeks. This way, the sprouts will grow stocky, sturdy, and dark green. This process is also called greening. You can place your seed potatoes upright in an egg carton or box, on a tray, or screen with the majority of buds ("eyes") facing up. Do not pile them atop one another. You can start this process one month before your outdoor planting date.
The Spruce / Sandhya Moraes -
Cut the Potatoes (Optional)
You do not need to plant a whole, intact potato.
The Spruce / Sandhya Moraes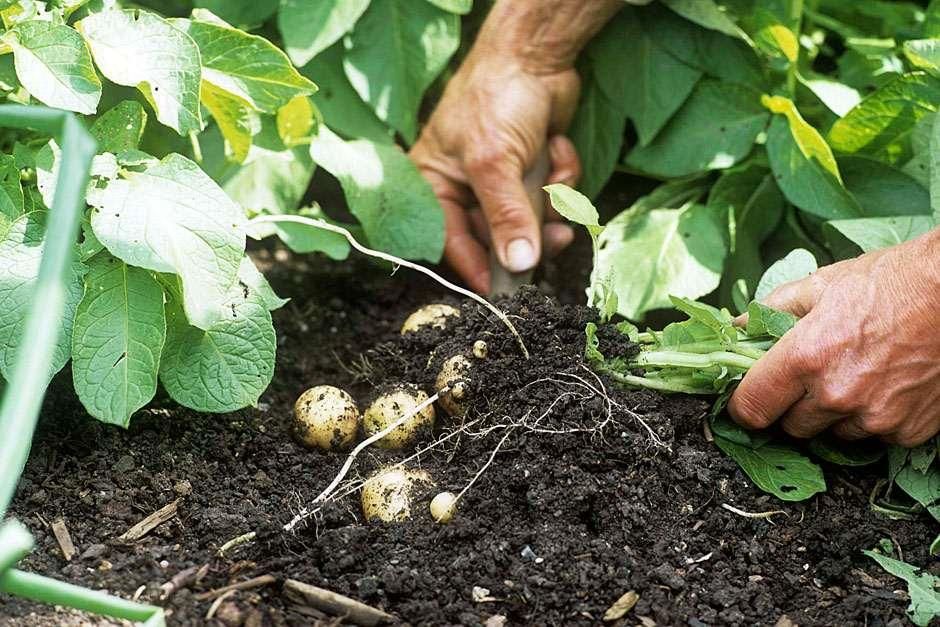 Seed potatoes can be cut into pieces before planting. Each piece should have at least one "eye" each—a bud that will sprout into a new plant. Use a sharp, clean knife to cut the seed potatoes into 2-inch squares. If you are going to cut them, do it about two days before you plan to plant. This allows the pieces to form a callus or seal, which prevents rotting while the pieces sprout and take root. If your seed potato is smaller than a ping pong ball, though, plant it whole.
 -
Plant the Sprouted Potatoes
Plant the potatoes as soon as the sprouts are 1/2 inch to 1 inch long. Handle the seed potatoes carefully, so the sprouts do not break off or become damaged. Plant potatoes with the sprouts facing up and cover lightly with soil. If you've cut the seed potatoes, make sure the cut side is facing down.
The Spruce / Sandhya Moraes -
Plant in Rows
Potatoes grow best planted in rows spaced 3 feet apart.
The Spruce / Sandhya Moraes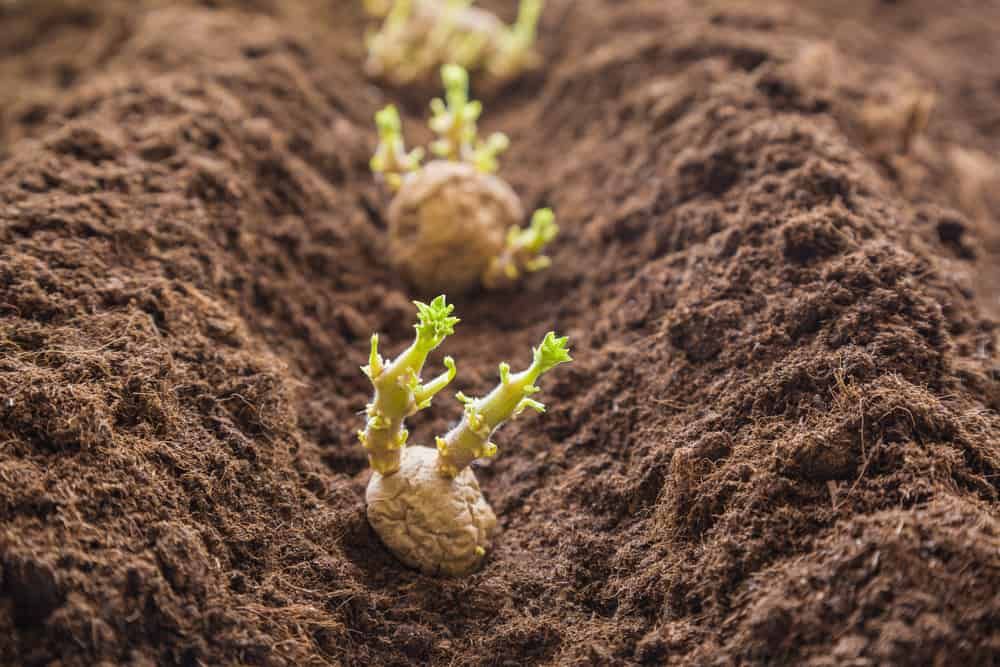 Plant the seed potatoes in a trench that is 6 to 8 inches deep. Place cut side down, with eyes facing up. Space the seed potatoes 12 to 15 inches apart. Fill the trench with 4 inches of soil. As the plants grow, add more soil, mounding it up around the plants.
 -
Water Well
Keep potatoes well-watered throughout summer, especially when flowering. During flowering, the plants begin to create the tubers—the edible potatoes. Potatoes need 1 to 2 inches of water per week to produce well.
The Spruce / Kara Riley
-
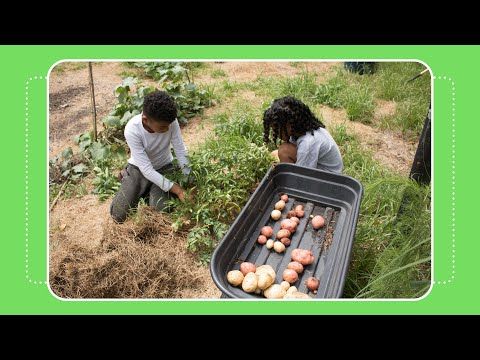
Harvest the Mature Potatoes
When the foliage turns yellow, discontinue watering to begin the curing process for harvesting. You can harvest baby, or "new" potatoes two to three weeks after flowering ceases. Dig around the plants carefully to remove new potatoes for fresh eating, and leave the smaller potatoes to continue growing.
For potatoes that you plan to store, harvest the crop two to three weeks after the foliage dies back.
The Spruce / Sandhya Moraes Carefully loosen the potatoes with a garden fork and remove them from the bed. If the weather is dry, leave the potatoes in the garden, unwashed, for two to three days to cure, or move them to a protected area, such as a garage or shed, to cure.
Seed Potato Tips
- You do not have to chit the potatoes to get a good crop. However, you might want to chit your potatoes if you notice them beginning to sprout or if you want an earlier harvest date. If you plan to eventually cut them before planting them, chit before cutting them.
- When planting whole seed potatoes or pieces of potatoes, in general, more eyes per piece equals more potatoes. Smaller potatoes with one or two eyes per piece mean fewer potatoes, but they will be larger.
- To further protect your seed potatoes, you can dust them with powdered sulfur right after cutting them and before planting them. Place the potatoes in a bag, add the sulfur and shake.
 Then lay the pieces out and let them dry for three to four days.
 - If you have to postpone planting because of weather or some other reason, move the seed potatoes to a cooler spot to slow down their growth. Don't wait too long; the potatoes may start to dehydrate and shrivel.
- On average, one pound of seed potatoes should yield about 10 pounds of edible potatoes. One pound of seed potatoes should fill a 5- to 8-foot row, depending on the variety.
- It's easy to plant seed potatoes in bags and pots, both of which are good alternatives if you have issues with voles in the garden. The planting process is the same for bags and pots. Fill a grow bag halfway with potting mix, plant the seed potatoes, and continue to add more soil to the bag as the potatoes grow. To harvest, spread out a tarp or sheet, and dump the bag. Kids especially enjoy sorting through the bag to find potatoes!
How to Grow Potatoes in Containers
Article Sources
The Spruce uses only high-quality sources, including peer-reviewed studies, to support the facts within our articles.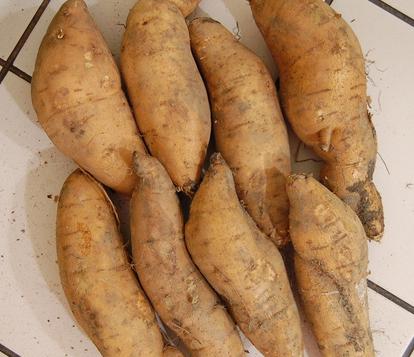 Read our editorial process to learn more about how we fact-check and keep our content accurate, reliable, and trustworthy.
General seed-rots can pose problems in potatoes. Michigan State University.
Crop Rotation, UC IPM Pest Management Guidelines: Potato. University of California Agriculture and Natural Resources.
Organic Production and IPM Guide for Potatoes. Cornell University Cooperative Extension with NY State Department of Agriculture & Markets.
How to Grow Potatoes — Seed Savers Exchange Blog
Here are a few tips from SSE's gardening crew on how to grow potatoes for a healthy and bountiful harvest.
General Advice
Potatoes always do best in full sun. They are aggressively rooting plants, and we find that they will produce the best crop when planted in a light, loose, well-drained soil. Potatoes prefer a slightly acid soil with a PH of 5.0 to 7.0. Fortunately potatoes are very adaptable and will almost always produce a respectable crop, even when the soil conditions and growing seasons are less than perfect.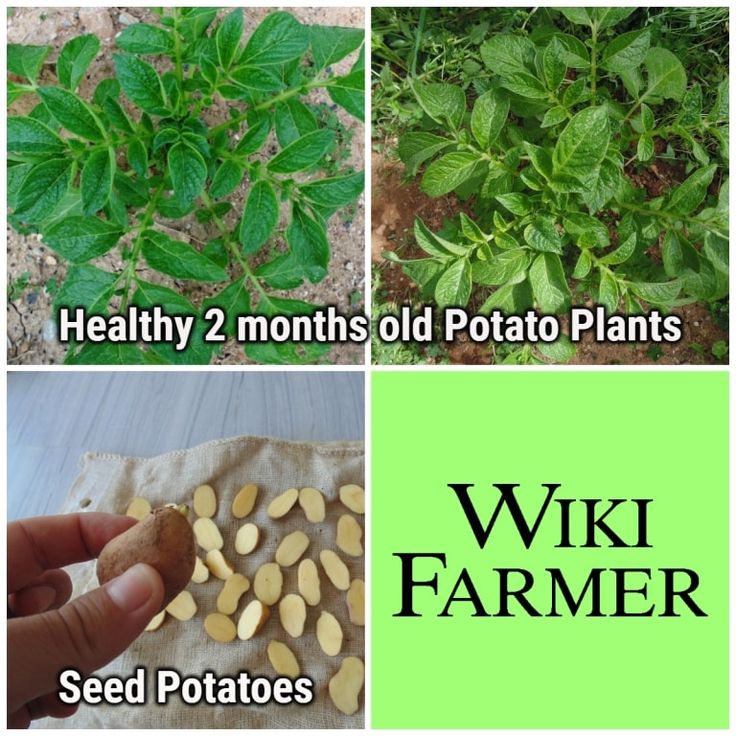
Always keep your potato patch weed-free for best results. Potatoes should be rotated in the garden, never being grown in the same spot until there has been a 3-4 year absence of potatoes.
When to Plant Potatoes
Potatoes may be planted as soon as the ground can be worked in the early spring, but keep soil temperatures in mind. Potato plants will not begin to grow until the soil temperature has reached 45 degrees F. The soil should be moist, but not water-logged.
Potatoes can tolerate a light frost, but you should provide some frost protection for the plants if you know that a hard, late season freeze is coming. If you want to extend storage times, and have a long growing season, you can plant a second crop as late as June 15 and harvest the potatoes as late as possible.
Cutting Potatoes Before Planting
A week or two before your planting date, set your seed potatoes in an area where they will be exposed to light and temperatures between 60-70 degrees F.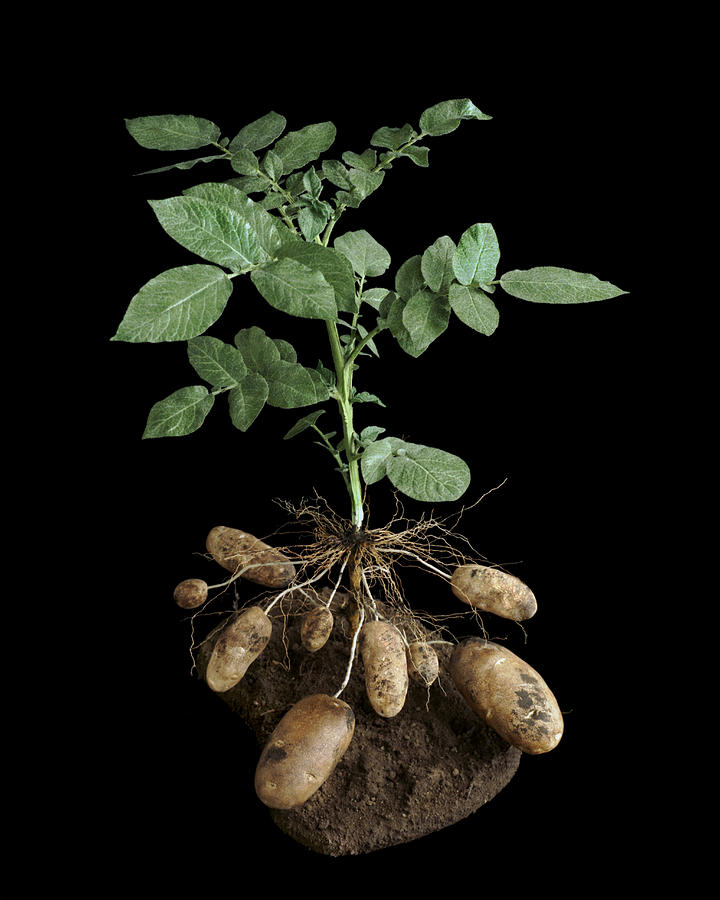 This will begin the sprouting process. A day or two before planting, use a sharp, clean knife to slice the larger seed potatoes into smaller pieces. Each piece should be approximately 2 inches square, and must contain at least 1 or 2 eyes or buds. Plant smaller potatoes whole. A good rule of thumb is to plant potatoes whole if they are smaller in size than a golf ball. In a day or so your seed will form a thick callous over the cuts, which will help prevent rotting.
Planting Potatoes in the Garden
We find that potatoes are best grown in rows. To begin with, dig a trench that is 6-8 inches deep. Plant each piece of potato (cut side down, with the eyes pointing up) every 12-15 inches, with the rows spaced 3 feet apart. If your space is limited or if you would like to grow only baby potatoes, you can decrease the spacing between plants.
To begin with only fill the trench in with 4 inches of soil. Let the plants start to grow and then continue to fill in the trench and even mound the soil around the plants as they continue to grow.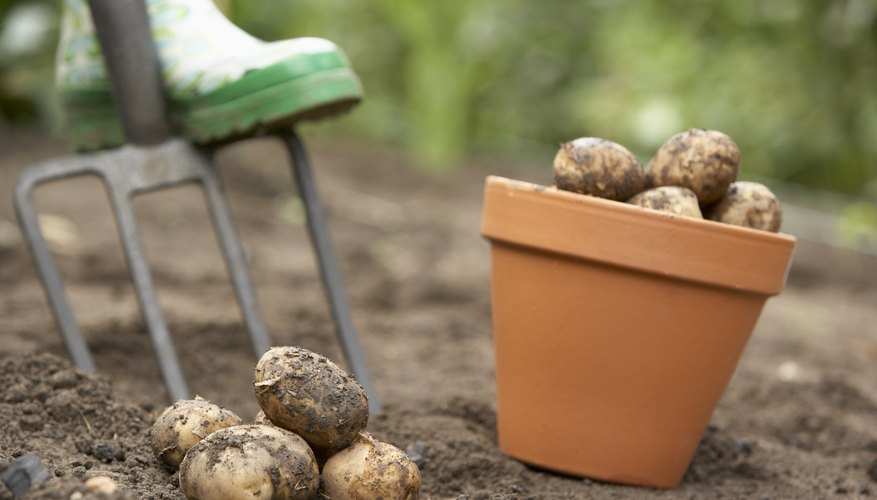 Prior to planting, always make sure to cultivate the soil one last time. This will remove any weeds and will loosen the soil and allow the plants to become established more quickly.
How to Water Potatoes
Keep your potato vines well watered throughout the summer, especially during the period when the plants are flowering and immediately following the flowering stage. During this flowering period the plants are creating their tubers and a steady water supply is crucial to good crop outcome. Potatoes do well with 1-2 inches of water or rain per week. When the foliage turns yellow and begins to die back, discontinue watering. This will help start curing the potatoes for harvest time.
When to Harvesting Potatoes
Baby potatoes typically can be harvested 2-3 weeks after the plants have finished flowering. Gently dig around the plants to remove potatoes for fresh eating, being careful not to be too intrusive. Try to remove the biggest new potatoes and leave the smaller ones in place so they can continue to grow. Only take what you need for immediate eating. Homegrown new potatoes are a luxury and should be used the same day that they are dug.
Potatoes that are going to be kept for storage should not be dug until 2-3 weeks after the foliage dies back. Carefully dig potatoes with a sturdy fork and if the weather is dry, allow the potatoes to lay in the field, unwashed, for 2-3 days. This curing step allows the skins to mature and is essential for good storage. If the weather during harvest is wet and rainy, allow the potatoes to cure in a dry protected area like a garage or covered porch.
Storage Conditions
At Seed Savers Exchange. we are able to store potatoes well into the spring in our underground root cellar. Try to find a storage area that is well ventilated, dark, and cool. The ideal temperature is between 35 and 40 degrees F. Keep in mind that some varieties are better keepers than others. Varieties like Red Gold and Rose Gold are best used in the fall, and others like Carola and Russets are exceptional keepers.
Saving Seed Stock
Home gardeners can save seed for several generations. Save the very best potatoes for planting. You may find that after several years the size begins to decrease; this is typical. Potatoes are very susceptible to viruses. If you are looking for maximum yields it is best to start with fresh, USDA Certified Seed Stock every year.
In collaboration with University of Wisconsin-Madison researchers, SSE is working to eradicate viruses from heritage potatoes in order to safely preserve potato genetic diversity and to offer high quality seed potatoes.
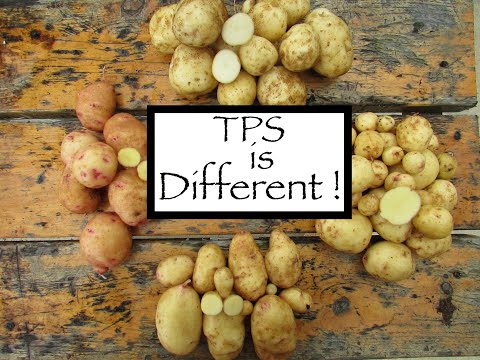
How to Grow Potatoes from Seeds
Having been busy updating potato varieties in their garden, some restless experimental gardeners decide to grow potatoes from seeds. This business is quite troublesome, like growing any seedlings, but for the sake of obtaining healthy seed material, you can sweat and sweat for a year. For the difference in the yield of potatoes from the elite and from the ordinary tuber is huge!
How to grow potatoes from seeds? Why seed propagation is useful and profitable? What difficulties can be encountered when growing potato seedlings? Let's look into all the subtleties and secrets.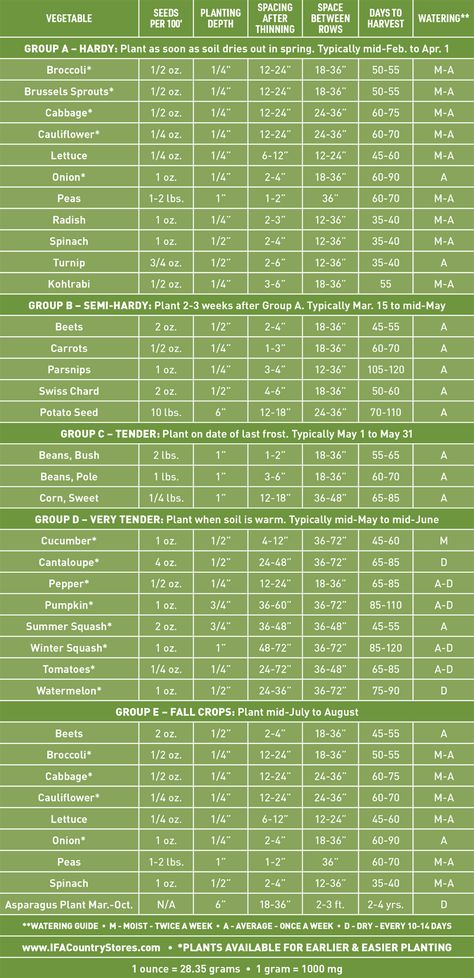
What is the propagation of potatoes from seeds?
Does a simple gardener really need all these experiments with reproduction? We are not breeders, not Michurins, we need a good harvest from potatoes every year and nothing more. And you can buy planting tubers in every market.
What are the benefits of growing potatoes from seeds?
Firstly, potato seeds are many times cheaper than mini-tubers or elite tubers. High-quality seed potatoes cannot be cheap, because obtaining meristem tubers, from which super-elite and elite planting material then grows, is a costly process. Moreover, in appearance, it will not be possible to distinguish elite tubers from ordinary seed tubers, which gives all sorts of unscrupulous sellers the opportunity to call anything “elite” anything. In the markets, as a rule, seed potatoes are sold in the best case of the third reproduction, and maybe the fifth or tenth.
Secondly, unlike tubers, potato seeds do not require a cold cellar for storage, take up little space and remain viable for a long time (6-10 years).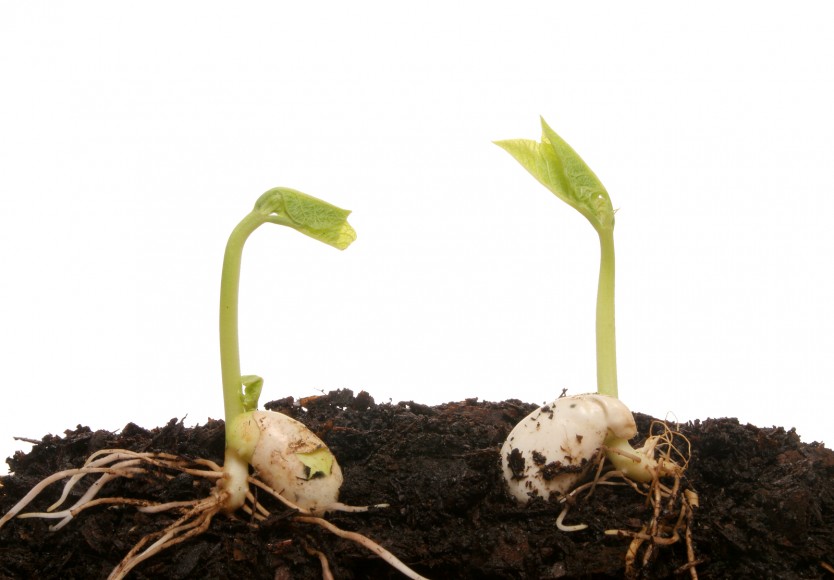
Thirdly, potato bushes and tubers grown from seeds are not susceptible to viral and bacterial diseases and are more resistant to adverse growing conditions.
Fourth, the yield of potatoes from seeds is higher than that of conventionally planted potatoes. Of course, if you want to update the variety as soon as possible, then leave all the potatoes grown from seeds for planting next season. However, this is not at all necessary: even when sown with seeds, a potato bush is able to grow tubers weighing 80-100 grams.
Finally, potatoes grown once from seeds allow you to get good yields for 5-7 years, selecting seed tubers as usual. Because in the first year after planting, mini-tubers are obtained with seeds, in the second year - super superelite, in the third - superelite, in the fourth - elite, in the fifth - the first reproduction, etc.
Growing potatoes from seeds: instructions
Propagation of potatoes from seeds, as a rule, implies a seedling method of growing.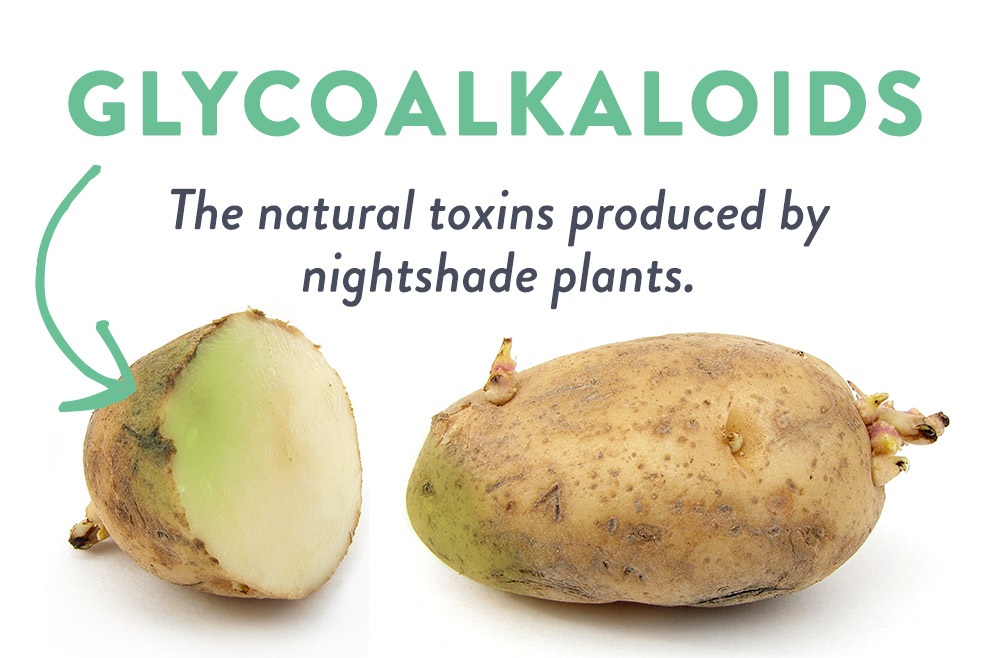 This means that additional containers, soil, space on the windowsill and time will be needed.
Like any other seedling, potatoes are best grown with picks. At the first stage, in small plastic cups (for example, from yogurt), then - in half-liter glasses (for example, from sour cream).
Potato seedling soil should be loose and fertile. It is best to take four parts of peat for one part of the earth and add a biological product for diseases - trichodermin (5 grams per 5 liters of soil mixture). As an option, you can shed the Fitosporin soil a few days before sowing. Unfortunately, potato seedlings are very sensitive and easily affected by the "black leg", so it's better to play it safe.
Some gardeners recommend growing potato seedlings in wet sawdust before picking, so that it grows roots better and faster.
Potato seeds for seedlings are sown in late February - early March. First, the seeds are germinated on a damp cloth in a plastic container with a lid. The rag should always be kept damp, and the lid of the container should be opened from time to time in order to ventilate. On about 5-7 days, the seeds will sprout.
Germinated seeds are carefully laid out on moist, compacted soil and covered with a one-centimeter layer of sand. Then they are carefully sprayed from a spray bottle, covered with a film and sent to a sunny windowsill. The soil (sawdust) is kept moist until germination.
Potato seedlings are much more capricious than tomato and even eggplant ones - they need more light (very quickly stretches when there is a shortage), more nutrients (slowly grows the root system), a very loose substrate (the roots tend to "suffocate" in dense or waterlogged soil), she is more likely to get blackleg. Therefore, potato seedlings are watered very moderately, sprayed with Epin from time to time, fed once a month with complex fertilizer, and, if possible, illuminated with fluorescent lamps.
25 days after planting, potato seedlings dive into large pots, deepening the cotyledon leaves. Toward the end of April, when warm weather sets in, pots with potato seedlings can be moved to the balcony.
Planting potato seedlings in the ground and further care
Ideally, young potato seedlings should be planted in a greenhouse or hotbed, and only in the second year "relocate" tubers to open ground, but not everyone has such an opportunity. Therefore, in mid-May, when the soil is already well warmed up, and frosts are no longer expected, potato seedlings from seeds are usually planted in open ground. As usual, on a cloudy day or in the evening, plants (perhaps already with small nodules) are planted in holes filled with ash and humus and spilled with water, at a distance of 40 centimeters from each other. With this planting scheme, there is a chance to get large tubers in the first year.
Holes for potato seedlings are better to make long, lay the stem horizontally and cover with earth so that only the very tops of the plants remain on the surface.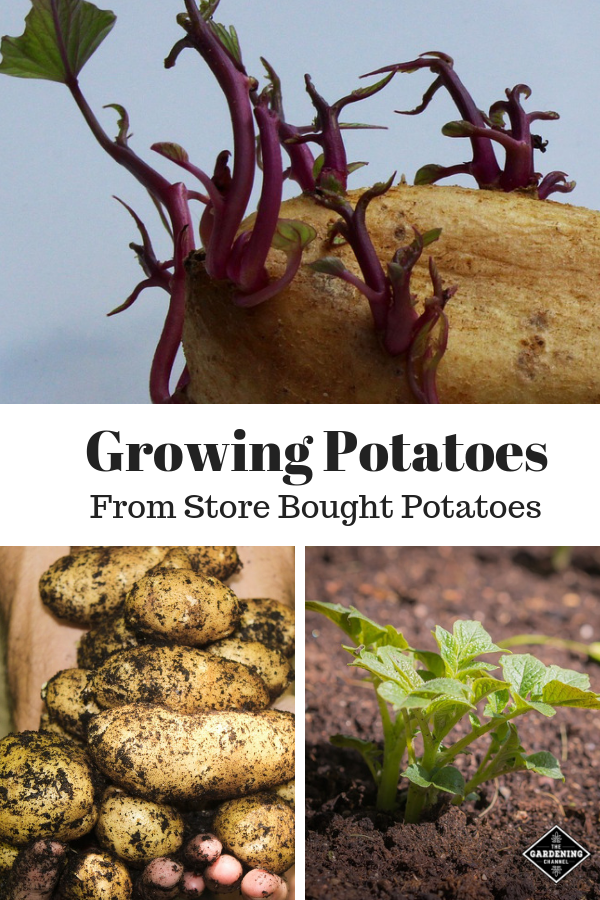 Then the potato bed is mulched with straw or last year's leaves, arcs are arranged and covered with spunbond or other covering material. Potato seedlings are a big sissy, shelter can only be removed in June, when summer weather finally sets in.
In the future, potato care does not differ from the usual: hilling or mulching, watering, top dressing. Potatoes should be fed twice: the first time - a couple of weeks after planting with infusion of mullein (or grass) with ash, the second time - before flowering with potassium sulfate.
How to grow potatoes from seeds without seedlings
If you live in a southern area with long summers, you can not bother with seedlings on the windowsill, but try growing potatoes from seeds in a seedless way. Most likely there will not be large crops, but it is quite possible to get small tubers for seeds. In regions with a short summer, this method, unfortunately, does not work.
In mid-May, germinated potato seeds are planted in a fertilized bed with loose soil (even better - in a warm bed). At a distance of 30-40 centimeters from each other, holes are dug 10-12 centimeters deep. 2-3 seeds are planted in each hole and sprinkled with sand or coconut substrate or loose soil for half a centimeter.
As the plants grow, the soil is poured into the holes, and then hilling is carried out twice, as with ordinary potatoes. All other methods of agricultural technology are common: mulching, watering, top dressing. After yellowing of the tops, the potatoes are dug up and stored until next spring as seed material.
We wish you success and great harvests!
Growing potatoes from seed. Photo — Botanichka
Potato is the most common vegetable in the garden. Recently, the area under its planting has decreased, although early varieties are still grown in almost every summer cottage. In one place, potatoes can be grown for 6-9years, but gradually, if not yields, then the quality of tubers will sharply decrease due to soil fatigue and the accumulation of pathogenic microflora.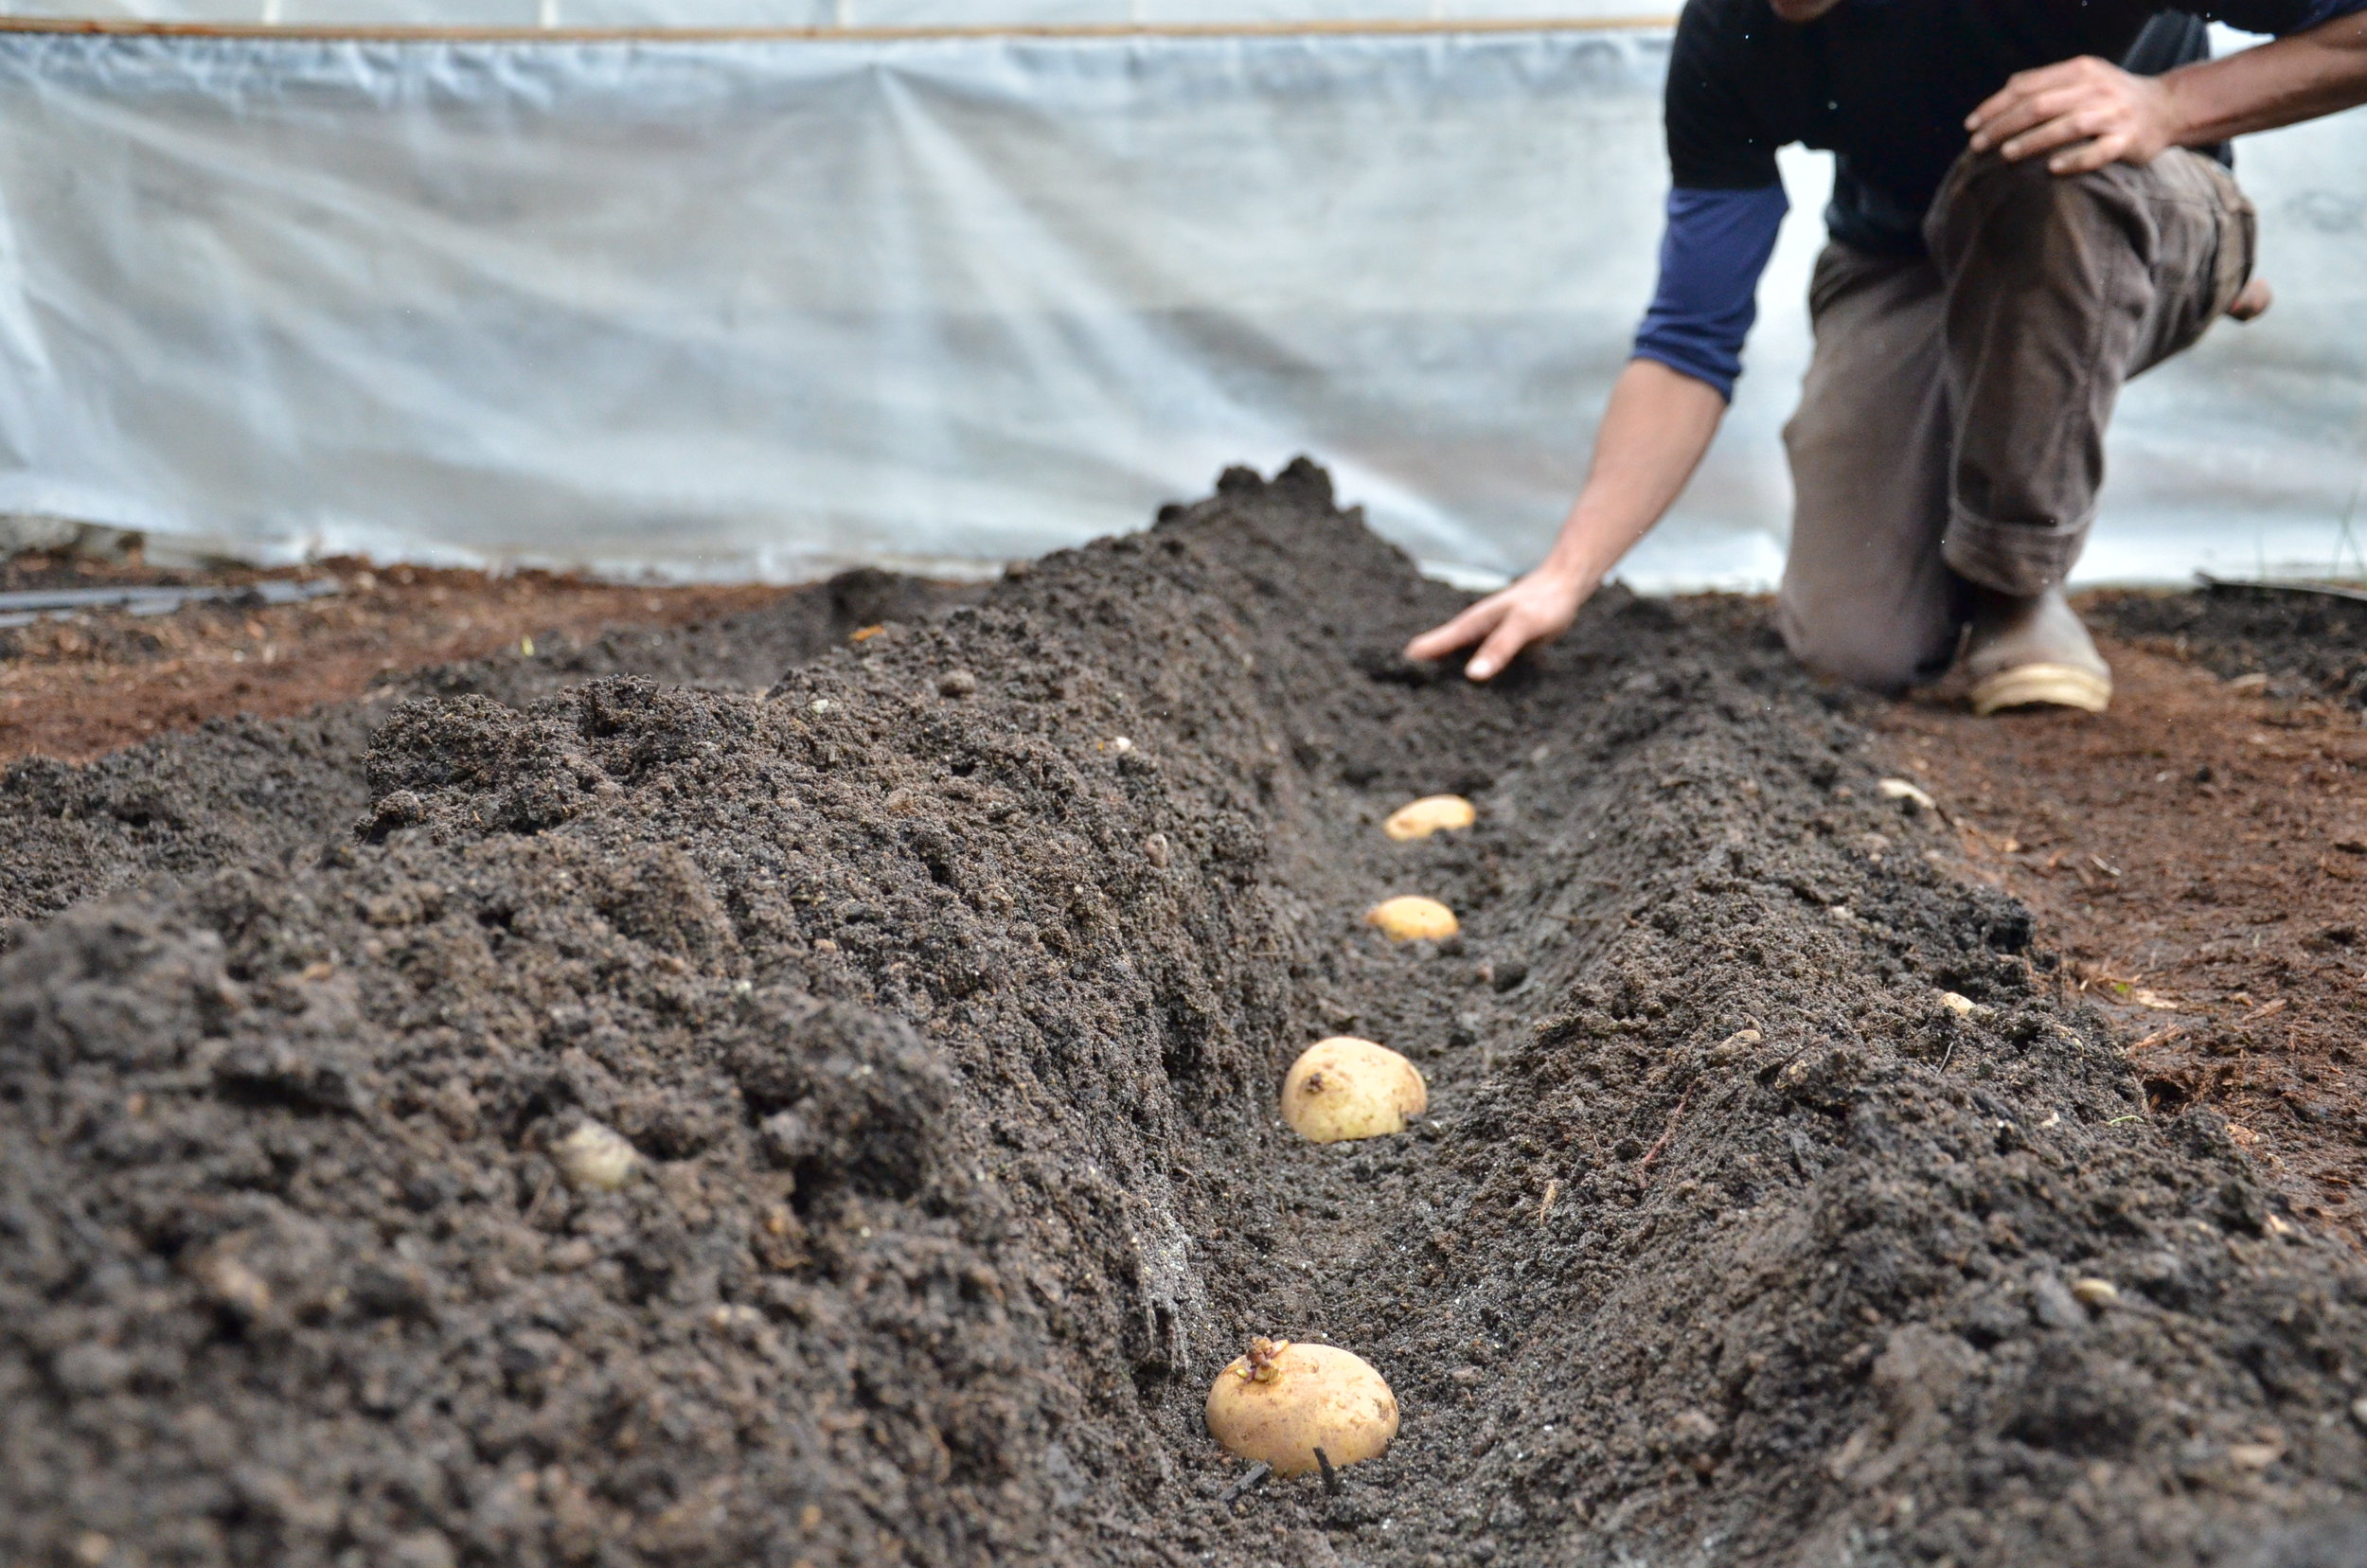 In this case, changing potato varieties does not help much, because they consume the same elements to form the crop and often already carry pathogenic microflora in the planting material (unpleasant putrefactive odor, black circles on the cut of the tuber, etc.). And, buying high-quality planting material, there are no guarantees of its quality.
The way out of this situation may be the technology of growing potatoes from biological seeds. They are formed by an apical loose brush with flowers of white and pink colors. The fruit is a berry, light green at first, dark brown and other colors when fully ripe. Seeds are small brown.
Advantages of potato seed propagation
- Potato seeds purchased from specialized stores do not contain pathogenic viruses and bacteria. They have undergone special selection and processing. They are immune to diseases.
- Resistant to changing environmental conditions. They quickly adapt to the climatic features of the region and form high yields of healthy tubers within 5-7 years.
- The cost of potato seeds is several times cheaper than tubers, since there are no costs for transportation, storage, processing of tubers before planting in the field.
- Potato seeds remain viable for 5-6 years.
- Attention and patience is required, especially when growing potato seedlings and care in the first weeks after planting in the ground (in the field, in the greenhouse, under cover).
- Two year growing period. In the first year we get potato sets (nodules 20-40 g), and the harvest of real tubers for table use is formed only from the second year from potato sets.
Features of growing potatoes from biological seeds
Potatoes are propagated vegetatively (by whole tubers and their parts, cuttings, layering) and by seed. Until recent years, potatoes were propagated by tubers. An alternative to the current situation is the possibility of obtaining high quality yields of potato tubers during seed propagation, which can be carried out by non-seedling and seedling methods.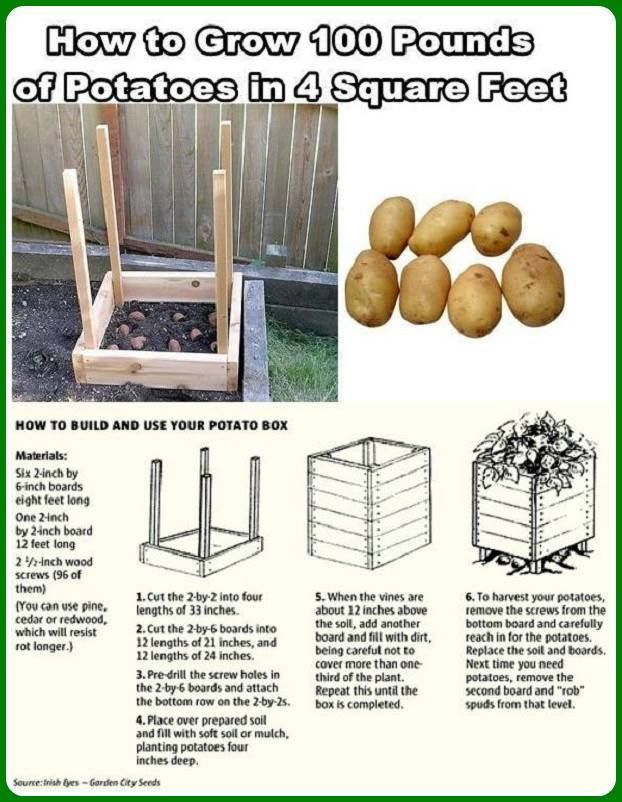
Seedlingless method of growing potatoes from biological seeds
In the southern regions, potatoes from seeds can be grown directly in the open field. Self-growing seeds has certain difficulties, so it's easier to buy ready-made in specialized stores.
Soil preparation
Potato is a photophilous crop and light areas are usually allocated for its placement. In the shade, the bushes are drawn out, and the tubers are formed small.
The best predecessors for potatoes are early harvested legumes (peas), corn, beets, vegetables (not nightshade). In autumn, after harvesting, we free the allotted area from weeds, dig a shovel onto a bayonet. If the soil is prone to acidification, then for digging we add a glass of lime, dolomite flour or 2-3 glasses of wood ash per square meter. m area. We grind the digging and sow green manure, which after 5-8 weeks can be planted in the soil (peas, barley, rye, mustard, rapeseed) and fully prepared for spring sowing.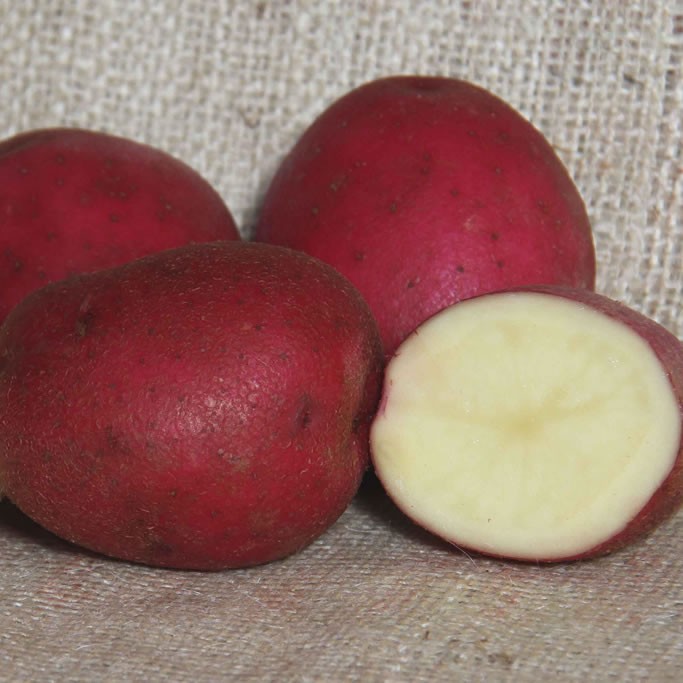
In case of non-sider preparation for autumn digging, we bring in a square. m for 0.5-1.0 bucket of humus, compost. If there is no humus, then in the spring, under 15 cm cultivation, we introduce mineral fertilizers. The easiest way is to use a balanced mineral fertilizer with nitrophoska at the rate of 30-40 g / sq. m area. We level the surface of the soil, freeing it from the soil crust.
Preparation of potato seeds for sowing
To obtain faster germination, potato seeds are awakened from dormancy by pre-sowing heating in a humid chamber at +40..+42 ºС for no more than 15-20 minutes. You can additionally treat the seeds with micronutrients if they have not been treated at the seed preparation center.
Dry the treated potato seeds at room temperature until flowable and sow dry in the soil or put on germination. Scatter the seeds evenly in a saucer on a wet napkin, cover with a damp napkin on top and place in a warm place. You can have a battery or on a warm windowsill. Moisten wipes constantly. After 3-5 days, the boiled potato seeds are ready for sowing.
Sowing potato seeds outdoors
In the first or second decade of May, when the soil in a layer of 10 cm warms up to +14 .. +16 ºС, we loosen the bed allocated for sowing potato seeds again and prepare holes no more than 3-4 cm deep at a distance of 30-40 cm . We spread 2-3 seeds in each hole and mulch with the same soil or 0.5 cm fine mulch.
Furrows can be used instead of holes for sowing. We cut furrows 4-5 cm deep, fill with water. After soaking up water on the soil surface, we sow the seeds and mulch by 0.5-1.0 cm. Potato shoots appear on the 5-10th day. Seedlings can be sparse, so we thicken the sowing.
In the phase of 2 true leaves, when the aerial mass of seedlings begins to close up, thinning is carried out. Moisten the soil before thinning. Gently pulled potato seedlings can be planted as seedlings in separate rows or holes 20-25 cm apart.
Potato seedlings grow very slowly at first and suffer from weeds, compaction and overdrying of the soil. Therefore, they need constant loosening of the soil, weeding and watering with an average rate of water.
After about a month, potato seedlings will form multi-stemmed bushes. Further care for them is the same as when planting tubers. The crop is harvested in late September-early October, depending on the variety. The harvest may be low (tubers 20-40 g).
Potato sets are put into storage as a vegetative seed material free from viruses and other pathologies for planting next year.
Seedling method of growing potatoes from biological seeds
Preparation of soil mixture for sowing potato seeds
The soil for sowing potato seeds must be fertile, loose, water and breathable. The composition of the soil mixture: for 2 parts of garden (garden) soil, add 6 parts of turf or 4 parts of high-moor peat and 1 part of sand. Everything is thoroughly mixed and disinfected.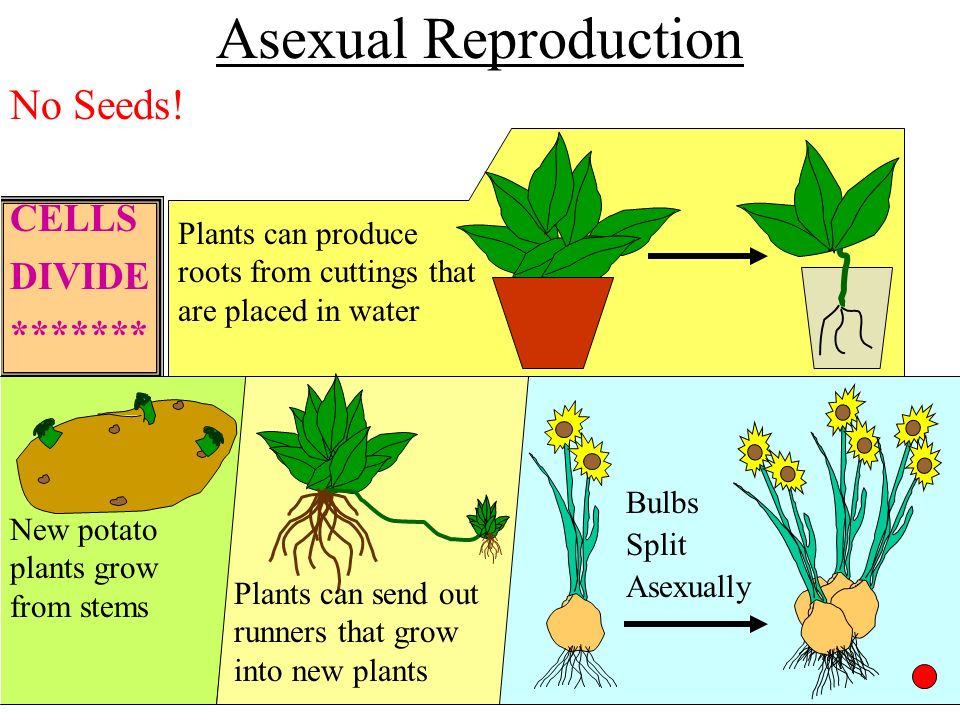 In the prepared soil mixture, we add 10-15 g of nitrophoska and biologics trichodermin or phytosporin (10 g / 10 l of water) for every 10 kg to protect against soil fungal diseases (black leg, root rot).
Stir the mixture and dry at room temperature. Treatment of the soil mixture with biological preparations is especially necessary if the soil mixture has not been disinfected. Biological products have the ability to destroy pathogenic fungi and contribute to increased reproduction of beneficial microflora. We fill the container with the prepared soil mixture.
Preparation of potato seeds
To increase the cold resistance of the crop, we harden the potato seeds by placing them in the refrigerator overnight and in a warm room during the day. Before sowing, we treat potato seeds with a root formation stimulator, a solution of epin or root. We germinate the treated seeds in the same way as for the seedless method of growing. For 3-5 days, the accumulated seeds can be sown in a container prepared for seedlings.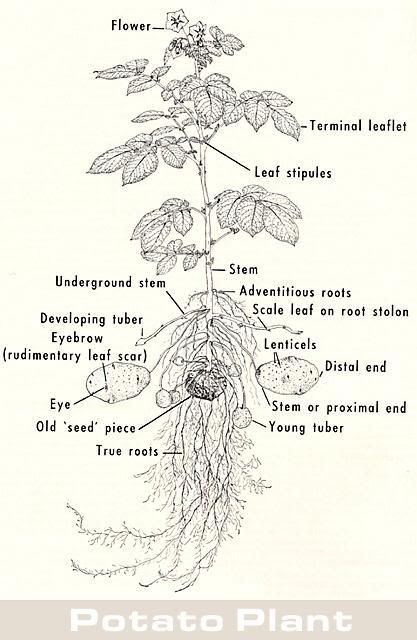
Sowing and caring for seedlings of potatoes
For sowing, we use boxes 10 cm high or other containers (cups, cassettes, peat-humus pots). The container must have holes in the bottom to drain excess water. Potato seedlings get sick with root rot from oversaturation with moisture.
In the prepared container, after 10-12 cm we make furrows 1.0-1.5 cm deep. Lay out the potato seeds in the furrow after 5 cm. Mulch the sown seeds with the same soil mixture or dry sand and moisten with a sprayer. Wet substrate pulls the seed deeper into the soil mixture. Before germination, we moisten the soil through a spray bottle so as not to wash the seeds from the soil with a jet of water and not create an excessively humid environment, since the seedlings are easily affected by root rot.
When sowing potato seeds in separate containers, we place them in boxes to facilitate care.
Put the container with the sown potato seeds on the racks in the heated greenhouse. It can be covered with glass or film in a living room, creating the conditions of a mini-greenhouse, providing an optimal humidity regime and an air temperature of +18..+22 ºС. To increase the supply of oxygen, we systematically loosen the soil.
Potato sprouts appear on the 8-10th day. In phase 2 of true leaves, we carry out a pick (if necessary), deepening the seedling to the cotyledon leaves. Seedlings in separate containers (cups and other containers) are not dived. In order for potato seedlings to be evenly illuminated, we systematically turn the container with seedlings in different directions to the illumination or illuminate it.
For a better formation of the root system, water potato seedlings a week after germination with a solution of ammonium nitrate or urea (1 g/1 liter of water at room temperature). After feeding, be sure to wash the seedlings with clean water.
Subsequent top dressing of potato seedlings before planting in open ground for a permanent basis is carried out every 25-30 days with a complex mineral fertilizer or one of the preparations that are recommended for top dressing seedlings: Kemira Lux, Agricola, Uniflor growth, GUMI Kuznetsova, Baikal EM-1 and other.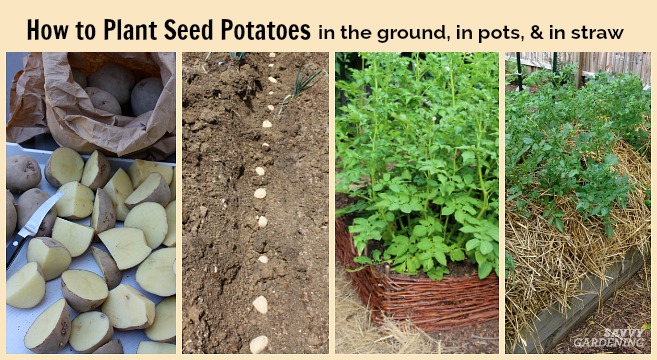 They stimulate the growth of the root system and aboveground mass, have fungicidal properties.
Hardening of potato seedlings
10-12 days before planting in the ground, we harden potato seedlings by placing containers with seedlings at first for 2-6 hours, and a week before planting we keep them around the clock in a cool room (glazed loggia, balcony, unheated corridor ).
Planting potato seedlings in open ground
In the southern region in the second or third decade of May (later in the middle and northern strip of the Russian Federation), 40-55 day old potato seedlings are planted in open ground or in a greenhouse.
On prepared garden beds in open ground we make holes 8-12 cm deep. The distance between the holes depends on the final goal. If we use plantings of the first year to obtain potato sets, then we prepare the holes in 25-30 cm. To get potato tubers (for a taste test), we increase the distance between the holes to 40-60 cm, depending on the variety. You can plant 2 seedlings in one hole.
If available and necessary, add 0.5 cups of mature humus, a couple of tablespoons of ash to the wells, mix with soil, water and, after absorbing water, plant a potato seedling. Potato seedlings usually lie down and break easily. Gently, lying down, lay the seedlings in the hole and cover with soil so that 2-3 upper true leaves remain on the surface.
Planted seedlings of potatoes can be covered with lutrasil or spandbond from a sudden cold snap or overheating by the rays of the spring sun. Over time, when the seedlings begin to form new leaves, we remove the shelter.
In the first month, watering in small doses is carried out first after 2-3 days, and then we increase the water rate and switch to 1 time per week. We constantly loosen beds with plants from the soil crust, remove weeds. Before closing the bushes, we mulch the soil after watering. Monthly seedlings of potatoes form multi-stemmed bushes, and caring for them is no different from caring for a crop planted with tubers.
Feeding potato seedlings
We feed potatoes during the growing season.
- Early varieties of potatoes 1 time in a month after planting in the ground, in the phase of tops formation. We combine top dressing with hilling.
- Medium and late varieties of potatoes are fed twice. The first time in the phase of growth of tops and the second - mass budding.
The need for the first feeding occurs when the height of potato seedlings exceeds 10 cm. A mixture of nitrogen, phosphorus and potassium (chlorine-free forms) fats is prepared in a ratio of 1:2:1 or 1:2:1.5. You can add nitrophoska, nitroammophoska (30-35 g / bush) to the first dressing.
Some gardeners advise applying a solution of organic fertilizers under the root of the potato. If humus was applied for basic soil preparation or when planting directly into the holes, then top dressing with organic infusion is not needed.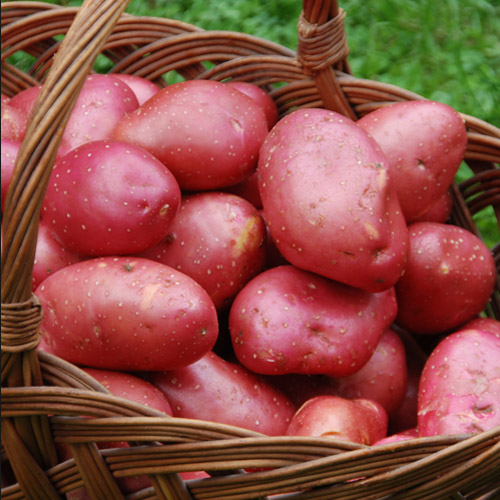 Instead, it is better to use kemira at the rate of 10 g / sq. m. This fertilizer contains trace elements, so necessary for the formation of the quantity and quality of tubers.
In the second top dressing, which coincides with the mass formation of buds, we exclude nitrogen and introduce potassium sulfate and phosphate fertilizers in a ratio of 1:1.5. Potassium enhances tuberization and the delivery of nutrients to the organs of the plant (it is popularly called a cab). During this period, it is good to add ash (1-2 cups per sq. M) or kemira. Top dressing can also be applied in the form of solutions (10 liters of solution for 15-20 bushes).
The amount and ratio of mineral fertilizers, both in the main application and in top dressing, depends on the type of soil, climatic conditions, potato variety and will be different in each individual case. Therefore, when preparing for planting potatoes, read the recommendations of district agronomists.
To stimulate the flow of nutrients from the leaves to the tubers at the end of flowering, the above-ground mass of potatoes can be treated with a solution of superphosphate.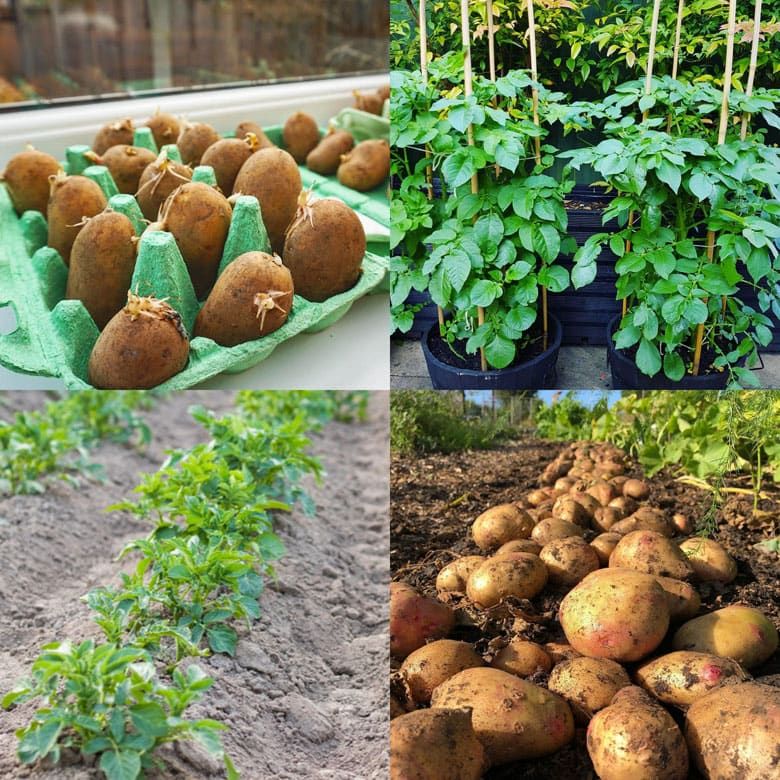 20 g of superphosphate are dissolved in 10 liters of water, insisted for 2 days, filtered and sprayed with tops.
Protection of potato seedlings from diseases and pests
When growing potatoes from seeds, the resulting planting material (potato sets and tubers in subsequent years) is healthy, but the plants themselves, especially young seedlings, are susceptible to diseases and are damaged by pests, which are in abundance. are in the soil. Therefore, it is necessary to protect potato plants both when growing seedlings (especially if the soil for seedlings has not been disinfected) and in the soil when it is planted permanently.
Of the diseases, potatoes are most often affected by fusarium, late blight, scab, tuber cancer, root and tuber rot and other diseases.
Colorado potato beetle, mole cricket, wireworm, aphid, potato scoop, quarantine pests potato cyst nematode, potato moth and others are considered especially dangerous.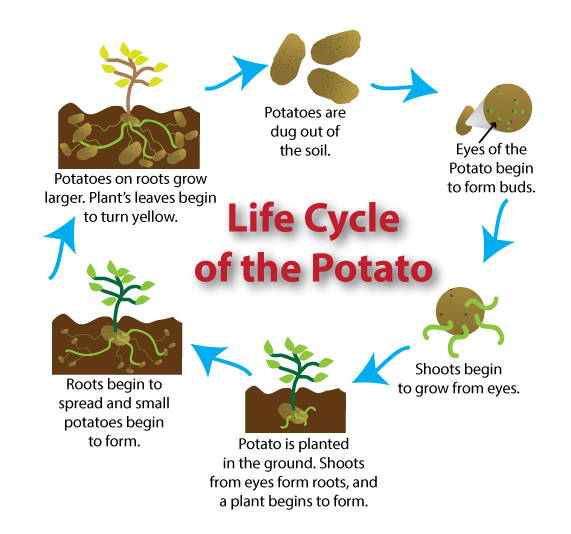 Aphids, in addition to damage to the tops of potatoes, are also a carrier of viruses against which there are no drugs yet.
The chemical industry offers a huge range of products to protect against both diseases and pests. But it is unnecessary to use chemicals in your household if you need environmentally friendly products. Recently, biological preparations have been intensively developed that do not harm humans, animals and beneficial insects (bees).
The following biological products are offered to combat potato diseases: trichodermin, phytolavin, phytosporin, planriz. Plants can be treated last 1-2 days before harvest. Bicol, bitoxibacillin, fitoverin, akarin, boverin and others are recommended for the destruction of pests from biological products. Biological products can be used in tank mixes according to the recommendations, which significantly reduces the load on plants with treatments and the cost of labor and time.
Harvesting and storage of potato nodules
Harvest for long-term storage is harvested after complete drying of the tops.