What paint to use on cast iron
Best Ways to Paint Wrought Iron
What can we help you find?
Search
Search
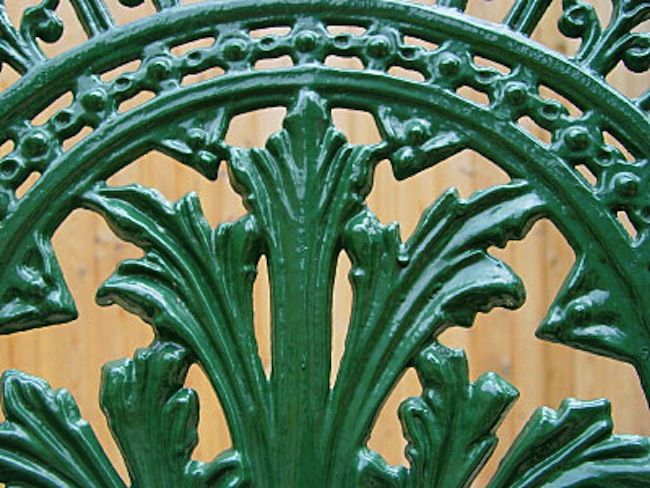
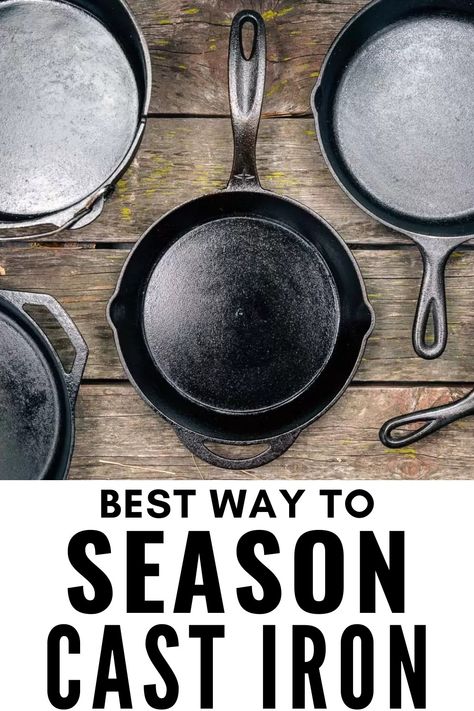
Wrought iron railings, fences and patio furniture have been a classically elegant staple of homes for decades. Over time, exposed to the elements, wrought iron can become pitted and rusty and in need of refinishing.
Even if your wrought iron pieces look good, you can paint them a different color to add a personal touch and contemporary style to what is usually a traditional element of your home.
Step 1: Get Ready to Paint
Pick a warm, dry day to paint your wrought iron pieces. Don’t start painting if surfaces are wet, when the humidity is more than 80 percent, if the temperature is less than 50 degrees or if the piece you're painting is directly in the sun.
If you’re painting movable wrought iron pieces, choose an open area outdoors, covered with drop cloths or tarps for your workspace — you don’t want overspray or splatters and drips to ruin surfaces that you don’t want painted. For fences or railings, make sure that the ground and surrounding surfaces are protected by drop cloths and painter’s tape so they aren't marred by the paint if the overspray is caught by the wind or if the paint drips.
Set up a large piece of cardboard, lightweight wood, or hang a drop cloth or sheet as a shield against overspray that might blow onto other objects. Place the "shield" on the side opposite of the one that you're painting.
Step 2: Remove Old Finish and Rust
Clean the metal with a vinegar and water solution (50/50) or use water with a mild detergent and a scrub brush or rag to remove dirt and grime. Use a bleach and water solution or a commercial mold remover to remove any mold or mildew.
You need to remove both the old paint and rust for new coats of paint to adhere properly. Keep in mind that you don’t have to remove every bit of the old paint. The surface just needs to be free of loose flakes of paint and other debris. Sanding and scraping the surface also “raises” the surface a bit for better paint adhesion.
You can remove both rust and paint using a stiff wire brush or an electric drill equipped with a sanding pad and abrasive discs. Emery cloths (cloth-backed abrasive sheets) can be used when there is minimal rust. Emery cloths work well because they are sturdier and easier to use than sandpaper on items such as railings or fences because of their flexibility. Paint scrapers come in handy as well. Remove sanding dust as you go.
Wear a tight-fitting dust mask, safety goggles, and appropriate clothing that covers your skin while you sand and scrape away paint.
Use a rust dissolver to ease removal of any remnants of rust on the metal. When applying, always follow the manufacturer's instructions on the label. After it has dried, wipe the surface down with a rag to remove any leftover dust or debris. You should see bare metal where the rust has been removed.
Step 3: Apply Primer
Spray wrought iron with a primer made specifically for metals, such as True Value X-O Rust rust-inhibiting primer. Aerosol primer and paint often provide the best, smoothest coverage results on metal, however; it may be necessary in some areas to apply metal primer with a paintbrush. For best results, apply two coats. When spraying, "back-brush" (painting over just-applied paint before it begins to dry) to work the paint into the surface so it will adhere better and smooth out any drips. Allow the primer to dry thoroughly for at least 24 hours. Primer does not always feel wet or tacky before it is completely dry.
After using aerosol primer (or paint), tip the can upside down and depress the nozzle for a few seconds until paint stops coming out. Next, wipe off the nozzle with a cloth. This prevents the nozzle from being clogged the next time you use the can.
Step 4: Apply Paint
Spray on a coat of True Value X-O Rust rust-inhibiting paint or apply it using a small to medium-sized paintbrush. Spray painting gets the job done fast and provides excellent coverage and a smooth finish. Hold the can about 8 to 12 inches from the object you're painting and keep the can moving to avoid excess paint that can drip. Apply several light coats. If you've painted furniture, let the paint dry for at least 24 hours before using.
For best results, apply a second coat of paint within 1 hour of applying the first coat.
In most cases, using True Value X-O Rust spray paint allows you to skip priming because it is formulated to be a paint and primer in one.
Great job! Your wrought iron pieces look good as new.
Project Shopping List
Here’s what you’ll need to complete this project successfully.
General | Best rattle-can paint for cast iron? | Practical Machinist
mm58
Hot Rolled
- #1
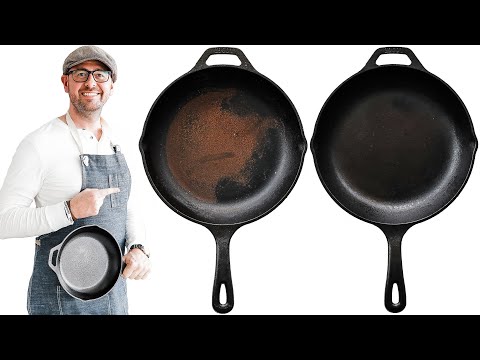
Looking for recommendations for a superior rattle-can paint brand/type for repainting the bed of a lathe I'm restoring. There is no Bondo on this machine, so paint will be applied directly to clean cast iron. Would like it to be a high gloss finish that's easy to wipe down.
Actually, now that I think about it, I would also entertain any suggestions for something that could be brushed on as well. Just gotta be something that would be readily available off the shelf at some place like Ace Hardware, HD, Lowes etc.
Thank you...
Mike
Forrest Addy
Diamond
- #2
You can get a good paint job from a spray can but the underlying prep and finish will take several days and there is no shortening it if you wish the paint to be a tough adherant coating system.
If the cast iron is clean and free of the old paint system you might be well advised to first treat the bare metal with Jasco Metal Prep or an equivalent phosphoric paint prep solution following directions.
A smooth gloss finish on unfilled cast iron may be tough to do in just a few coats. You might consider using a catylized filler here and there to smooth over the as-cast texture.
Follow with a good brush primer suited for industrial metalwork not automobiles. Apply this with a brush, allow to dry for two days, and lightly scuff with a ScotchBrite pad. Patch prime if there is any break-through.
Apply the first color coat starting with thin dicontinuous coats allowing the paint to flash off its solvent and gel slightly. Wisp on additional paint until you get full but thin coverage. Spray inside corners first, then the field, and outside corners last. Allow the paint to fully cure. Look over the work and lightly scuff the dry first coat with ScotchBrite just until it mattes. Apply a second thin coat if you wish paint build.
Apply the finish coat in a thin discontinuous coats as before. As the paint fllm builds up, strive for uniform coverage and film thickness that result in the final gloss. Pick up sags and runs wth a dry brush.
There is no such thing as "rattle and shoot" if you expect a good long lasting paint job. A good painter quality job on a machine tool takes a week or more and 90% of the work comes before the finish coat.
When comes to what spray can paint to use I reccommend the more expensive but not top of the line. The cheaper paints cost less because they are worth less. I suggest "Rustoleum" but most any good quality pray can paint that's not targeted to lazy consumers will do.
I seldom use spray paint. I paint machine tools and industrial equipment with a roller and foam brush and get "spray paint" smooth finishes. By the time everything is masked off for spraying, I could paint the machine two times over with a brush.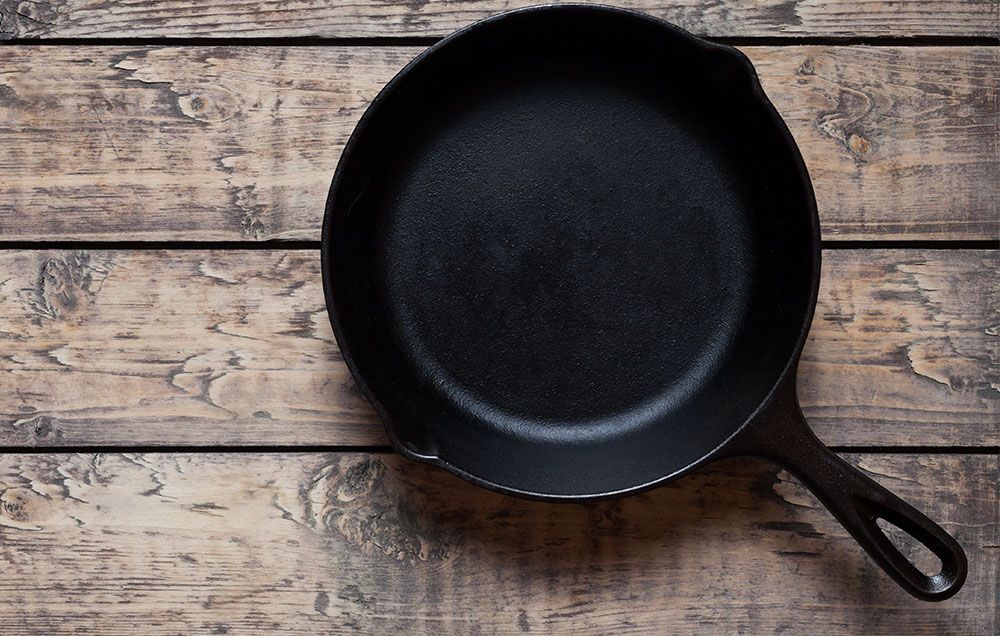
You won't get body shop cycle times unless you are using calylized finishes that cure in a few hours per coat instead of two or more days as with alkyd enamel.
hickstick_10
Stainless
- #3
for the money it would cost you (depending on the size of the machine), to do a good rattle can job, you might as well buy a garage sale compressor and a cheapo spray gun.
Forrest is right, you need primer, or else your paint isnt going to stick around to long (coolant and oil will slough it off in short work)
strokersix
Cast Iron
- #4
My favorite for cast iron engine blocks is to spray with Extend or similar rust converter as a base coat. I like VHT engine enamel for top coat.
Seems to hold up pretty well on engines. Not sure about machine tools. I've always used Rustoleum with a brush on machinery. Carefully applied it flows out nicely.
LowEnergyParticle
Cast Iron
- #5
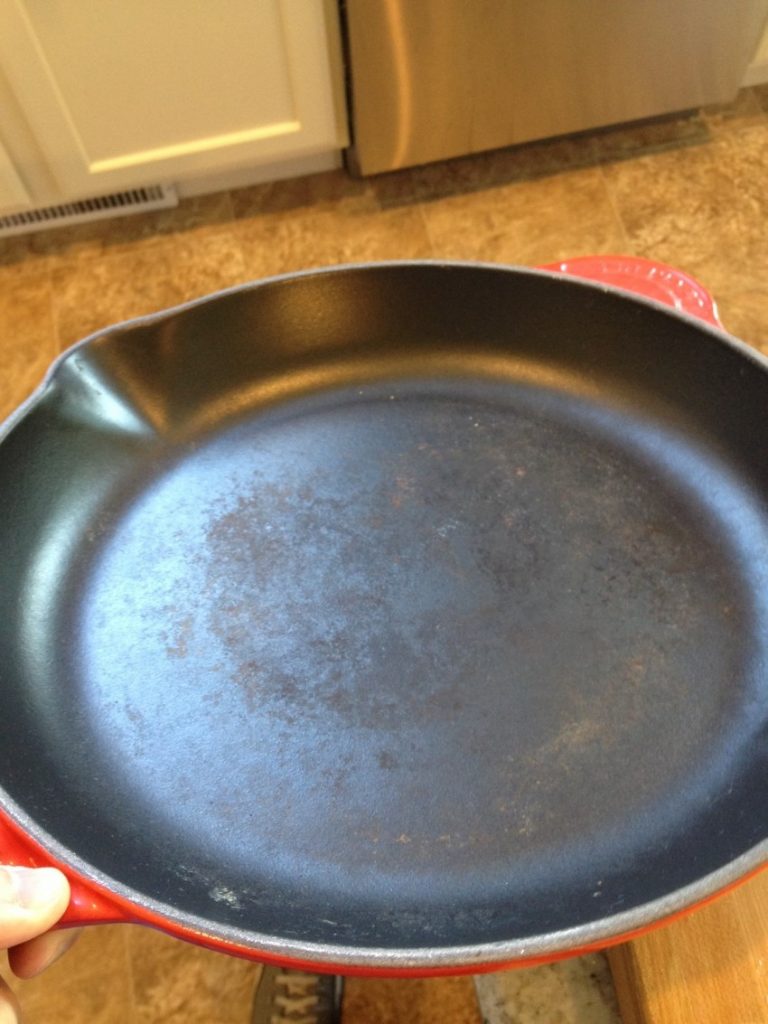
The bed of a lathe has been soaked in oil over and over through the years. The casting now contains oil residue. There are two paths to getting it out that I have read about: one is to gently heat the casting, apparently over a period of several days, and keep wiping off the oil residue that will appear on the surface. The second method I know even less about: supposedly some solvents can flush out the residue oil. Sounds good, but I don't know how the solvents would be applied or recovered.
If someone has actual experience with "de-oiling" castings, I hope they'll chime in.
Good luck,
Dave
BWS
Hot Rolled
- #6
Heck,somebodies gotta say it.............Have you ever had the pleasure of a well set up HVLP gun shooting enamel?This would be the cheap industrial(not auto)paint?If everything is tuned,you can practically shoot it in your living rm whilst carring on a conversation with the Mrs. ..........the transfer rates are that high.Granted,if the gun is out of adj. along with a host of other "issues",HVLP is no better than a sprybomb.Get it right and its downrite jawdropping.
The onliest time a spraybomb gets used around here is for a temporary colour change.A machine painted some horrible shade of puke and dosen't need any "bodywork".In which case we use the cheapest can we can find.
Two spraycans of quality paint will buy a qt. of Sherwin Williams ind. enamel.Granted the hardeners are a touch pricy.BW
mobile_bob
Stainless
- #7
to answer your question directly
there is a paint, i can't remember the manufacture, but it is used
in shops to rattle and shoot over cast iron that is clean, but not necessarily oil free. iirc it is in the engine paint section, and is cast iron color. leaves the surface looking like fresh cast iron, nice stuff
it sticks to any bare cast iron surface without issues, and can be covered with any other color you like.
that is one option
another is to use rustoleum "white" primer and brush it on, it is high in fish oil and will stick to any solid surface that is prepped with a decent wipe down of laquer thinner or the like. it takes a couple days to dry, and over that you can then rattle can on any rustoleum color.
pretty darn tough stuff, and the results are darn good for a hardware store brush on or rattle can paint job.
i don't know if i would go to the expense of a hvlp gun and compressor for a single project, there is no reason that a brushed on job with the final coat done with a rattle can cannot be nicer than most oem machine tool finishes anyway.
a good many exceptional paint jobs have been done on coaches and furniture, as well as classic automobiles using a brush and laquers or enamels that were no better than rustoleum back in the day.
bob g
SAG 180
Titanium
- #8
LowEnergyParticle said:
The bed of a lathe has been soaked in oil over and over through the years. The casting now contains oil residue. There are two paths to getting it out that I have read about: one is to gently heat the casting, apparently over a period of several days, and keep wiping off the oil residue that will appear on the surface.
The second method I know even less about: supposedly some solvents can flush out the residue oil. Sounds good, but I don't know how the solvents would be applied or recovered.
If someone has actual experience with "de-oiling" castings, I hope they'll chime in.
Good luck,
DaveClick to expand...
I use a caustic/water based alkaline degreaser made for degreasing prawn trawler engines and mix it fairly strong. With the casting outside in the sun, I squirt the degreaser on and let it soak for a while before hosing it off with water and do this a few times. After about three soaks and a few hours the cast iron goes a bright yellow golden colour which shows the rust is just beginning and I dry it off with compressed air and let it bake in the sun some more.
Last edited:
Cjay
Aluminum
- #9
Rattle can paint
I like TEMPO aircraft engine enamal, A-219 Lycoming gray.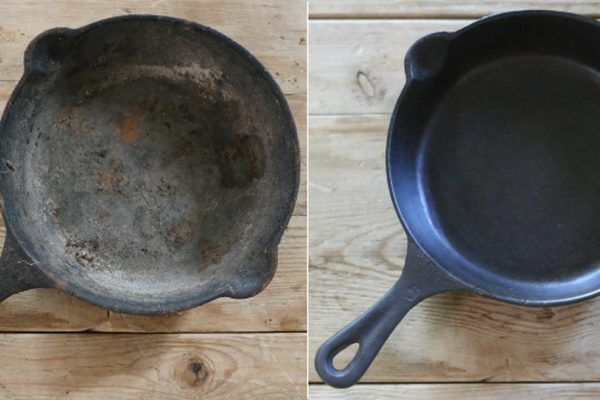 It is not cheap but a can seems to last forever.
awake
Titanium
- #10
With respect, all of you have kinda missed the boat on this one. Allow me to offer the recommendation that the OP really needs (ahem):
Use any paint as long as it is bright blue.
Also, be sure to mask only some of the working surfaces -- otherwise, viewers will not be able to tell that you have just repainted.
No charge, and you're welcome.
MyrtleLake
Stainless
- #11
FWIW, I have been through this:
http://www. practicalmachinist.com/v...n-refinished-iron-casting-182732/#post1135494
It really came down to whether I wanted to buy all sorts of things I'll use once (and have to learn to use) or not. For the former, I decided that if I wanted that level of "professionalism" I would give it to a professional!
Here's what I did. YRMV. Everything I used was available at my local Home Depot except for one.
*Stripped all paint with Citristrip. Washed off with water and dried with an air line to minimize flash rusting.
*Wire wheeled some areas that needed it, but not really much at all.
*In my instance, I had it ground so they returned items in oil
*Used Klean-Strip brand Prep-All Wax & Grease Remover. Available at CarQuest Auto Parts stores
*Masked with blue painter's tape
*Smoothed areas with Bondo that I wanted a real smooth finish; sand, etc
*Blew the surface with compressed air to get rid of residual Bondo dust
*Used Rustoleum Professional Primer (taller silver can than the regular stuff). Two coats.
*Coated with Rustoleum Professional High Performance Enamel (taller silver can than the regular stuff). Two coats.
*Final top coat of Rustoleum Crystal Clear Enamel.
*All done in a driveway in the middle of summer.
The trick with using the hardware store paint is to let it sit for at least two months. Or, reassemble everything but don't use it! The stuff really has no hardener in it, so it takes an extraordinarily long time to reach full strength. I'm sorta a lazy ass, so it works well for me haha. This last step comes from direct observation, though, so I can attest that it is necessary.
Once that is accomplished, I must say that it surpassed my expectations. I have no doubt that a professional would use a hardening paint that would wear longer, but mine is holding up fine. I think the largest detriment to Rustoleum is people do not let it cure for the necessary (very long!) time. After that, I find it to hold up better than usually reported. Very satisfactory.
I gave it great thought and debate, and for an "off the shelf", home-jobber I think I did my best. I'm very happy with it. At the end of the day, though, I sorta agree with darxtar's comment in my thread linked to above Keep things in perspective...
RickWG
Cast Iron
- #12
If I were to use rattlecans ( which i sometimes do) I'd just hose some Rustoleum on it...
If I were to fire up the Devilbis GTi etc it would be PPG DPLF epoxy primer (thats if I had to use the local jobber) or some of the BRIGHT lime green epoxy that came via Boeing if I were to grab what i have laying around.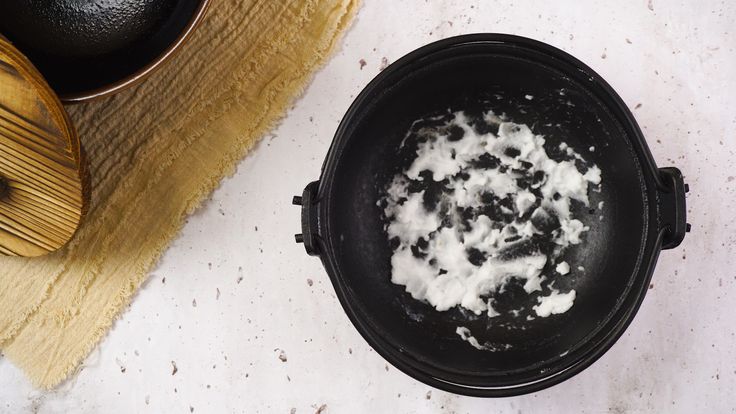
Then Featherfil G2 or the PCL equivalent & sanding to get it smoooooth then one more coat of (reduced) epoxy as a sealer followed by original formula Imron.. but be aware that Imron runs a little over $200/qt...
Mud
Diamond
- #13
I've posted several times that I'm fond of ACE Rust Stop enamel for machines and other heavy duty applications. Adheres well to iron (not counting for oil) without primer, chip and coolant resistant, applies easily, etc. Brushing gives good results too. Takes 2 to 3 days to dry, however.
Van Sickle tractor paint is also good, and also available at my local ACE store.
J_R_Thiele
Stainless
- #14
BWS
I am about to start painting a shaper with Sherwin William industrial enamel- most with foam roller and a bursh when needed. I had throught about using Penetrol to help it flow out. The store I bought the paint at did not saying anything about a hardener. I had mentioned using the Penetrol at some point, so that may have made a difference, if the two are not compatable. ..
..
I have heard about hardeners- I though they went with 2 part paints. Should I be looking at using a hardener?
Not set up for spray.
mm58 Sorry about the post highjack. I started out with Rustolium spraypaint- and one thing lead to another...
Jeff
Alsuchy
Aluminum
- #15
Try this
J_R_Thiele said:
BWS
I am about to start painting a shaper with Sherwin William industrial enamel- most with foam roller and a bursh when needed.
I had throught about using Penetrol to help it flow out. The store I bought the paint at did not saying anything about a hardener. I had mentioned using the Penetrol at some point, so that may have made a difference, if the two are not compatable...
I have heard about hardeners- I though they went with 2 part paints. Should I be looking at using a hardener?
Not set up for spray.mm58 Sorry about the post highjack. I started out with Rustolium spraypaint- and one thing lead to another...
Jeff
Click to expand...
It has been about a 1 1/2 years since I applied 2 coats of KBS rustseal to freashly blasted truck frame and all suspension componints. Some cast some not, all oil soaked at seams, corners ect. This worked very well and spray V/S brush finish are comparable. Only real diffrence is the spray puts more in the air, and the brush puts more on the part. They say you can hit it with a hammer and the metal will bend before it chips. True!!! This is a moisture cured urathane ( stinky, but increadabley tough ) so there are rules, humidity not to high (fast cure) not to low ( no cure ) temp. Ventalitaion, short shelf life once can is opennd.You can get it in bright BLUE (saftey blue) if need be. I am going to use red&grey on my 10 EE. KBS is only one a few companies selling uratanes but is the one I have used. Just say'n!
If something needs to change,
You need to change something.
AL
KBS RustSeal - Rust Paint - Stop Rust - Paint Over Rust
Lakeside53
Stainless
- #16
Marine paints. .. Amazing stuff. Look on the Pettit web site. http://www.pettitpaint.com/catalog_browse.asp
I painted the underside of a lawn mower deck with one of the Pettit rust sealing single part urethenes. Tough as can be. Prep'ed back to bare with phosphoric acid.
Still cleans up like new. http://www.pettitpaint.com/catalog_browse.asp?ictNbr=247
rons
Diamond
- #17
RickWG said:
If I were to use rattlecans ( which i sometimes do) I'd just hose some Rustoleum on it.
..
If I were to fire up the Devilbis GTi etc it would be PPG DPLF epoxy primer (thats if I had to use the local jobber) or some of the BRIGHT lime green epoxy that came via Boeing if I were to grab what i have laying around.
Then Featherfil G2 or the PCL equivalent & sanding to get it smoooooth then one more coat of (reduced) epoxy as a sealer followed by original formula Imron.. but be aware that Imron runs a little over $200/qt...
Click to expand...
No, about $120 for a quart of hardener to use with a gallon (3 quarts) of color which will cost about $60
in the industrial finish line. About $20-$30 for the reducer. So around $200 for a gallon.
BTW, not too long ago the hardener was $75.
Ranchero50
Cast Iron
- #18
My '50's 925 Logan came from a GSA auction, looks like it sat outside for a couple years. ..
..
I disassembled it fully and cleaned / derusted / depainted most of it eith an electrolosys bath. It did well for removing 50 years worth of gunk and metal chips.
Then I primed and painted it with Valspar satin medium blue after polishing all the bright parts on a buffer.
It took about 8 cans of paint and primer to do a 4' cabinet and lathe. I don't have any finished pictures but it's held up well to abuse and mistakes. I chose the satin because I didn't want the glare or 'cheapness' of a high gloss machine but wanted to be able to clean it and have it maintain an oiled look. The lathe gets a lot of compliments from folks who wander into the garage.
Hope this helps.
47nomad
Cast Iron
- #19
If you must use a rattle can and I've tried alot. Here is my recomendation. Ace brand preimum enamal. Very forgiving even in cold weather. Easy to get a shine, fast drying, durable as rattle cans go.Low cost. At my local store machinery grey is their best seller. A lot of guys are on to this around here. Holds up well even outdoors. The key to any paint job is preperation. Primers are a must on bare metal. Likewise many other steps. Rattle cans get a bad rap as most guys that use them take shortcuts. The very best paint jobs never come from a rattle can. I've used spray bombs that cost triple the Ace brand that wern't as good. For small jobs like painting say a steady rest can be a real time saver. Still proper preperation is a must always.
How and how to paint a cast iron radiator at home
Contents
- Is it possible to paint cast iron radiators
- What paint to paint cast iron radiators
- Silver and bronze
- Alkyd and pentaphthalic paints
- Why not try to paint cast iron
- battery
- What color to paint a cast iron battery
- Paint consumption for a cast iron radiator
- Preparing cast iron batteries for painting
- Do I need to prime cast iron radiators before painting
- How to paint old cast iron radiators
- How to paint antique cast iron radiators
- which is supposed to paint a cast-iron radiator, you need to decide for yourself what is more important - to ensure the durability and reliability of a metal radiator or to achieve an aesthetic appearance, which, in general, is important, given the fact that radiators and radiators are made of cast iron, even new, from the store counter, far from the most beautiful.
 nine0003
 It is difficult and time consuming to paint the inner surfaces of a radiator
Is it possible to paint cast iron radiators
It is believed that each additional layer of paint on the surface of a heating radiator reduces its efficiency by 10-15% on average. After four coats of paint, cast-iron battery registers heat up twice as bad as new ones. Therefore, the desire to paint cast-iron batteries in the apartment for the fifth or tenth time before the start of the heating season should be restrained by meaning. Why do useless work, maybe still replace the radiator yourself or entrust the repair to a specialist? nine0003
Trying to paint the cast-iron body of the radiator with your own hands makes sense only in two cases:
- After installing a new radiator. It is imperative to paint this, since, most likely, the store will sell a battery with a primed surface;
- After a major battery repair, including the elimination of leakage, replacement of registers, removal of fistulas or depressurization at the connection.

In any case, there is a chance not only to protect the body from rust, but also to beautifully paint the radiator, especially the cast iron one, which requires care and attention. You will need to choose the appropriate paint, choose the method of applying paint that is most suitable for home conditions. nine0003
It is the last point that always remains the stumbling block. If the registers are in the basement or in the garage, disassembled, then it is better to paint the cast-iron radiators with powder paint. She has a better view, and the quality of the coating is an order of magnitude higher. True, in order to paint, you will have to disassemble the radiator, load it and take it to the nearest paint shop at a car service.
The highest surface quality is powder paint, it lasts for 20 years
Professional painters will definitely tell you the best paint for painting cast iron batteries. Perhaps it will be a primer on polyester resin or a conventional material for painting discs and brake blocks.
 It is clear that painting by the pros will cost a pretty penny, but if done correctly, you can forget for 20-30 years that the cast iron of the body should ever be painted. nine0003
 The fastest way to paint a radiator
But most often it is not possible to solve the problem in the described way, usually for technical reasons, so you have to look for a way to paint the cast-iron radiators in the apartment. At the same time, try not to get poisoned by a toxic solvent and at the same time provide the radiators with a more or less presentable appearance.
What paint to paint cast iron radiators
First of all, you need to decide what kind of paint you can paint the cast iron body. It is quite simple to do this, the range is small, three to four main types of paints and varnishes are usually used for heating radiators:
- Clear alkyd lacquer with silver or titanium white;
- Aerosol automotive touch-up;
- Acrylic and water-dispersion paints.

If possible, you can purchase the so-called hammer paint. If you paint according to the rules, then after drying the layer is obtained with a shine and like a chased surface. The strength of the coating with a hammer mixture is much higher than that of standard alkyd or acrylic materials, but the layer thickness is also noticeably higher. Accordingly, the consumption of paint on cast iron batteries, even if painted with a spray gun, will increase by 50-60%. nine0003
Silicone aluminum paint - expensive but effective
Important! This treatment reliably protects the cast-iron base of the battery from any mechanical damage, scratches, and exposure to detergents and cleaning agents. But it is possible to paint correctly only a new clean battery, without traces of old coatings.
The only significant drawback of this solution is the unattractive gray color of the battery.
Silver and Bronze
One way to properly paint cast iron radiators is to use metal powder filled paints, usually aluminum or bronze.
 The metal filler in the lacquer increases thermal conductivity, while titanium, zinc, and lead oxide often impair heat transfer. nine0003
 Silver is the most durable coating
Before applying paint, the surface is not primed, but cleaned to a metallic sheen and, preferably, treated with a passivating compound. Before painting cast-iron radiators with your own hands, the metal is rubbed with a rag moistened with acetone or solvent No. 646.
Alkyd and pentaphthalic paints
One of the most difficult paints and varnishes, it is possible to paint a cast iron body, but only for 4-5 years of service. The paint is viscous, you have to add a large amount of solvent, otherwise it will be very difficult to paint the cast-iron battery inside the registers. nine0003
Gives a very thick coating, even with a single coat of paint. Therefore, if a decision is made to paint the radiator with alkyd enamel, then it is better to choose specialized compounds and paint in one layer.

Acrylic and water-dispersion paints
Special acrylic water-dispersion paints can be found on sale. They give a fairly beautiful coating, if you want to beautifully paint a cast-iron radiator, then it is better to choose acrylic heat-resistant enamel. nine0003
Water-dispersion are considered good for processing registers, but it is better not to use for a cast-iron battery. The water emulsion does not protect the metal well, and in addition, with intense heating it often turns yellow and becomes covered with gray dust.
What not to try to paint a cast iron battery
In addition to the options listed, there are at least a couple of types of paint that does not make sense to paint cast iron. Do not paint with polyurethane and latex paints, they give a very thick layer, which increases thermal resistance and impairs heat transfer. And besides, the material ages very quickly and becomes covered with cracks. nine0003
Oil paint has approximately the same properties.
 During the first two or three years after painting, the paint layer on the cast-iron radiator will look absolutely perfect, but it will be very bad to heat the radiator.
 What color to paint a cast-iron battery
The most popular colors are white, cream, blue, sometimes the owners deliberately paint the radiators white in order to improve the design of the window opening under which the battery is placed. Dust is clearly visible on a white background, so you have to clean it quite often. nine0003
Blue, gray and beige colors are considered the best solution. You can paint the battery in darker, black and brown colors, especially since the corresponding paints are commercially available, but you can hardly expect any positive effect from such a color scheme.
Paint consumption for a cast iron radiator
On average, painting a cast iron battery of eight sections will take about 110-120 g of alkyd paint, 80-85 g of nitro enamel or acrylic material.
 If you paint with a spray gun, then 65-70 g will be enough to apply one layer.
 If you plan to paint in two or three layers, then the corresponding consumption will need to be increased by 60-70%.
Preparing cast iron batteries for painting
Most of the mistakes people make when trying to paint a cast iron battery relate to improper surface preparation. Painting cast iron and steel surfaces are two big differences, since the paint lays evenly on steel, good adhesion is ensured.
For cast iron, things are much more complicated. It will be necessary not only to remove the old paint and primer, but also to carefully clean the metal, as they say, to a shine, degrease the surface with the available hot water with soda and solvent. nine0003
You will need to clean the metal to a shine
You can remove the old paint with a brush attachment on a drill with bronze bristles, or try using an industrial hair dryer and the same metal brush. It is impossible to use chemical paint removers or firing with a gas burner, since with severe overheating or the use of acid solutions, the seal between the sections burns out first.
Do I need to prime cast iron batteries before painting
If the battery is new and covered with a factory primer, then there is no point in removing the layer. Most often, the quality of priming in the factory is higher than that which can be achieved at home. nine0003
One of the best primers
The only exception is preparation for nitro paint. Usually, the metal is cleaned and rubbed to a shine, after which a primer is applied based on zinc powder and nitro-lacquer, diluted two to three times more than it should be according to the instructions. This preparation ensures good adhesion of the nitro-paint to the cast-iron surface of the battery.
In other cases, a clean new or well-cleaned old battery is recommended to be covered with a thin layer of primer. nine0003
In order to obtain a good adhesion, the primer is diluted one to one with P647 and rubbed into the surface with a damp cloth. The soil layer will turn out to be very thin, almost colorless, but this does not affect its characteristics.
 The paint will stick just as well as on a thick layer, and the thermal resistance will decrease by 30-40%
 How to paint old cast iron radiators
You can paint a cast iron radiator quickly or efficiently. If you need to complete the work as soon as possible, then it is better to use a spray gun or an aerosol can for painting rims. One cast-iron battery will take at least two standard cylinders, which is about 250 g of paint. nine0003
This method has the advantage of a very thin paint layer and high gloss quality. In addition, it is possible to paint even the most inaccessible places, and do the job in a maximum of 10 minutes.
It is much easier to paint a cast-iron battery with a spray gun, but at home or in an apartment, using a spray gun or an air spray creates a lot of problems, so it is better to immediately abandon such technologies.
If there is a choice, it is best to paint the battery with a very hard bristle brush, no rollers or any other similar tools.
 The inconvenience of using such a brush is that the bristles spray the paint heavily, you have to take it in small portions and rub it thoroughly on the cast-iron surface. Working with such a tool is not very comfortable, but in any case, a hard brush allows you to qualitatively paint the oldest cast-iron battery that exists in the house. nine0003
 In addition, a small brush with short, stiff bristles is very handy for painting the inside of the registers. If you try to do this with a regular paint brush, then most of the paint will simply drain onto the floor.
Important! The rigid base of the brush ensures good extrusion of air from under the paint layer, so after drying the paint layer will be thin, without cavities and peeling.
How to paint antique cast iron battery
In order to give the radiator the look of an antique heater, it is necessary to choose the right color and texture of the paint. For example, you can try to design a battery in the form of a product made of non-ferrous metal, brass or copper.
 This will require special fillers that mimic the copper surface. You will have to paint at least four or five layers, with intermediate polishing of each. The result is a cast iron battery, very similar to the copper heat exchanger used for heating 150-200 years ago. nine0003
 Old water heating radiators often had decorative patterns, the manufacturer's inscriptions were made on the surface, stamps and other attributes of individual production were put. You can try to reproduce all this with the help of stickers cut out of foil.
The decoration will have to be glued to the protected cast iron surface using heat-resistant adhesives such as epoxy. After painting, cast iron batteries will look very much like an old radiator. nine0003
Cool DIY Cast Iron Radiator Painting Ideas
Give a boring metal radiator a more personal touch with several colors or paint methods. For example, in a children's room, a cast-iron battery can be painted in several colors that best suit the color scheme of the interior of the room.

For a good mood
For a hall or living room, it is best to paint the battery in the style of wall decoration. This will make the heating system, radiator and pipes almost invisible against the background of window trim. nine0003
On the front surface of the radiators, you can apply a pattern, for example, imitating the technique of painting ceramic wall tiles.
In the simplest case, small inscriptions and photo tracing papers can be made on a white background. With the help of a stencil and blanks printed on a printer, you can easily turn a cast-iron battery into a cabinet covered with newspaper clippings.
Cast iron body, primed with white water-dispersion paint, can be painted with almost any basic paintwork materials, felt-tip pens, markers, PVC painting materials. All that is required is talent, the taste of an artist and a sense of proportion. nine0003
Conclusion
Painting a cast iron radiator is no more difficult than any other metal object in the house.
 The only condition that you must always remember is the use of additional protection for joints and junctions of nuts, plugs, threaded fittings, with which the cast-iron radiator is connected to water heating systems. The less you try to paint in these places, the longer the heating system will last.
 - How to clear a blockage in the toilet nine0006
- We clean the gas column with our own hands
- How to install a toilet with your own hands
- Wall hung toilet with bidet function
What color to paint batteries? - World of Colors
In the era of the global distribution of bimetallic radiators with an impeccable glossy finish, the need for painting, it would seem, has completely disappeared. But even now we are often asked to advise the paint for these purposes. It is not surprising, because any coating is subjected to mechanical stress, which means that scratches and chips are possible.
 And aesthetic preferences are different. Someone wants to remove the “white spot” under the window, and someone wants to fit a heating element into a blue, green or yellow interior. It happened that the mounting foam, when installing PVC double-glazed windows, fell on an uncovered radiator for heating and remained there until complete polymerization. And you should not forget about the cast-iron "grandmother's" old radiators either. So the batteries are still being painted. nine0003
What is the color of batteries
We single out several determining factors when choosing enamel for painting heating radiators:
- high coolant temperature during the heating season (up to 95 C for two-pipe systems and up to 105 C for single-pipe systems in residential premises), which means that the batteries in the apartment can be very hot - surface t in extremely cold winters reaches 75 C;
- painting of a metal surface prone to corrosion processes.
 The presence of corrosion inhibitors in the composition of such enamel is a significant plus. After all, we are dealing with metal, and no one has canceled the processes of its interaction with water and oxygen; nine0006
 - bimetallic radiators have a factory powder coating, the main feature of which is high smoothness, which means low adhesion to enamels. Sanding the surface before painting or using special primers, such as Dulux Trade Super Grip Primer or Tikkurila Otex, will come to the rescue;
- and of course, you should not choose materials for painting, which, when the surface of the batteries is heated, emit harmful substances. nine0015
- VGT VD-AK-1179 tintable acrylic glossy enamel for radiators; nine0006
- Teks white acrylic enamel for radiators heat-resistant;
- heat-resistant acrylic Brite enamel for Teflon-based radiators;
- acrylic paint for furniture and radiators Dulux Master Lux Aqua 40 semi-gloss;
- acrylic paint for furniture and radiators Dulux Master Lux Aqua 70 glossy.
It is worth giving preference to specialized products that have high heat resistance, contain corrosion inhibitors, are characterized by high adhesion to metals and, in part, to complex substrates, such as smooth powder coatings.
The best paint for radiators
We do not choose top products among those offered in our World of Colors stores, because we are sure that you can choose your ideal material for a specific task, financial capabilities and aesthetic preferences.
 So which paint for batteries to choose? nine0003
 There are specialized solvent-based alkyd enamels and water-based acrylic paints. The former have a high concentration of VOCs and smell strongly during work, moreover, there is a strong smell even after painting the radiator. Odorless acrylic paints - they are quite comfortable to make repairs. Over time, such a coating does not turn yellow and retains color for a long time.
A good composition of paints for radiators:
How to properly paint a battery
Let's analyze the technology of working with paints for radiators using the example of Tex acrylic enamel "Universal".
 nine0003
This material is excellent for painting radiators, heating pipes, battery piping. It has a sufficiently high heat resistance and even withstands short-term heating up to 120 ° C. It is noteworthy that enamel can be applied to warm radiators. It is also used indoors for painting pre-primed metal, wood, concrete, brick substrates or on previously painted surfaces with alkyd or acrylic enamels. It can be used in preschool, educational, as well as in medical institutions. During painting work, the smells of paint in the apartment will be insignificant. nine0003
Requirements for the surface to be painted
It must be dry. The temperature of the air and the surface to be painted is above +5ºС, and the relative humidity of the air is less than 80%. Attention! With a decrease in temperature and an increase in the relative humidity of the air, the drying time may increase. The surface must first be cleaned of corrosion products, dust, old peeling paint, oil and other contaminants and dried.
 Degrease metal surfaces with acetone or solvent 646 and prime with anticorrosive primer GF-021 "Universal" TEX, wooden surfaces - with antiseptic Biotex ECO primer "Profi" TEX. nine0003
 Staining
Before painting the battery, mix the enamel thoroughly. Apply to the prepared dry clean surface with a brush, roller or spray in 1-2 coats. If necessary, the enamel can be diluted by 5-10% with water. Drying time at +20ºС and relative humidity of 65% "from dust" - 1 hour, the next layer can be applied after 4-6 hours. The final resistance of the coating to washing is achieved after 2 weeks. If the temperature drops and the relative humidity of the air increases, the drying time may increase. nine0003
Recommendations
If you seriously thought about painting the batteries in the apartment, then the best time is summer, when the batteries are cold and the heating in the apartments is turned off. During the heating season, a warm surface leads to too rapid and uneven drying of the coating.

Learn more