Wall painting guide
How to Paint Walls, a Step-by-Step Guide
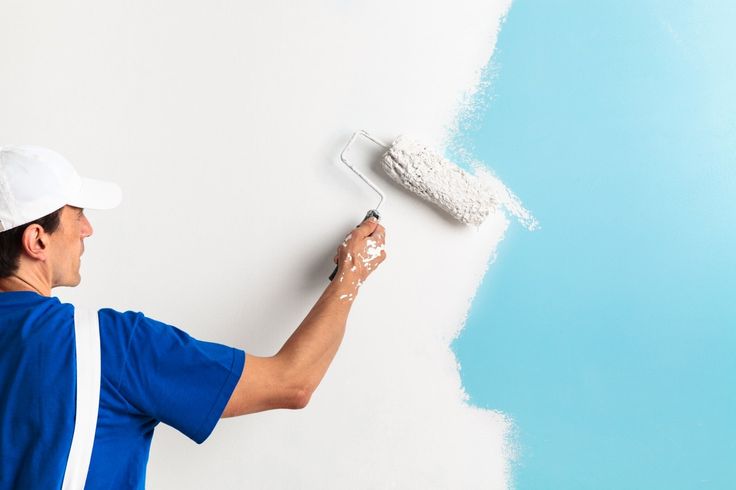
Start by painting the trim with a brush, then move onto the ceiling and walls with a roller.
By Ariel Scotti Updated September 07, 2022
roller brush wall paint
Credit: Janelle Jones
- Materials
- Preparation
- Painting
- Drying
Unlike retiling your kitchen floor, painting a room is a doable task that even renovation novices can tackle in one weekend. But before you grab your brush and dive right in, it's important to learn a few basics—like how to prep the walls and the tools you'll need—so you avoid any painting mishaps.
Necessary Materials
Like any home project, there are a few things you'll need in your arsenal in order to get the job done.
- Spackle (if you need to fill in holes)
- Spackle knife
- Sandpaper
- Tack cloth
- Primer
- Painter's Tape
- Drop cloths
- Paintbrushes
- Shedless Rollers
- Paint tray
- Paint
prepping wall for painting hole
Credit: Janelle Jones
Prepare Walls for Painting
If your walls are in need of a fresh coat of paint, it's likely they haven't been touched up in a while. Fill in holes and clean up stains or marks before adding more paint to these imperfections.
Check for Imperfections
Before you open a paint can, inspect your walls for cracks, holes or stains. "First, look at the wall and see if there are repairs that need to be made," says Chris Richter, senior paint merchant at The Home Depot. "Fill holes from things like pictures and peel away areas of chipping paint."
Sand Patched Areas
If you found any flaws that needed to be repaired prior to painting, you'll need to sand those areas down. If you don't, it's possible ridges from spackling will be left behind and your paint job may look uneven. After sanding, use a tack cloth to clean up any dust from sanding. "You can spot prime those patched or repaired areas, but a primer on its own is generally unnecessary," says Richter. He adds that priming an entire wall is only necessary if it's in bad shape or stained.
Clean Wall Marks
If your wall has a few marks, Richter says to use a rag and a household cleaner to wipe the area. For tough grease stains, he suggests using a trisodium phosphate cleaner—a non-toxic cleaner like Simple Green ($5.28, homedepot.com) is a good choice if you need to lightly wipe down the wall and remove any dirt or oils.
painters tape
Credit: Janelle Jones
How to Paint a Wall
1. Cover Areas You Don't Want Painted
Once your wall is in good shape, use painter's tape to protect baseboards and other areas like moldings, door and window casings, light fixtures, and switch plates. "I'm a big fan of ScotchBlue Painter's Tape ($4.49, amazon.com), it's great for every person to own," says Richter. Also cover nearby valuables. Move furniture out of the room, or place in a centralized location in the room, and cover with plastic or a canvas tarp. Protect the floors with a drop cloth.
2. Pour Your Paint
Now it's time to open up your paint can and pour it into a tray. "The ramp of the tray helps distribute paint evenly on the roller," says Richter. "And trays can also be a good way to work faster if you have more than one person painting." For bigger jobs he recommends using a roller screen combined with the 5-gallon bucket for an even more efficient system.
4. Paint Along the Trim
Known by professionals as "cutting in" Richter recommends using a paint brush—he likes Wooster Pro ($18.06, amazon.com)—to paint the top and bottom areas of your wall along the trim. When painting, move the brush in a smooth, side-to-side motion. According to Richter, you should paint the trim before moving to the ceiling or middle sections of your walls. However, he notes that you should only work in small, 4-foot sections of the trim at a time.
3. Paint the Ceiling
If you're painting an entire room including the ceiling, Richter recommends tackling the ceiling before the walls. "It's really a personal preference but I like to work from top to bottom," he says. "I start with the ceiling and work my way down."
5.
 Paint the Walls
 When you're done with the ceiling, move onto the walls. Dip you roller in paint and move your roller in a vertical motion, going from the top of your walls to the bottom.
6. Leave a Wet Edge
When painting the ceiling and walls, you want to keep a "wet edge." This means that the "cut in" sections of paint need to stay wet and not dry before you go back in vertically with your roller. This is why it's best to work in small sections. "If the cut in paint dries before the rest of the wall is done, you'll see those sections through the rest of the paint," he says.
Drying Time
When you're finished painting, Richter recommends not touching the walls for at least two hours. Instead, focus your energy on preserving your brushes and any remaining paint. "Rinse your brushes and rollers with warm water and maybe a little bit of mild soap," he says. "Most paints are water-based so they clean off easily. Keep rinsing until all the paint is gone and then it's ready to dry and store. " For the cans of paint, just hammer the lid back on and store in a cool, dry place.
How to Paint a Room: 10 Steps to Painting Walls Like a DIY Pro
AD It Yourself
Learn how to paint a room in your home or apartment with these easy DIY steps and brighten up any space in no time
By Lindsey Mather and Elizabeth Stamp
All products featured on Architectural Digest are independently selected by our editors. However, when you buy something through our retail links, we may earn an affiliate commission.
Learning how to paint a room properly is essential for beginning DIY’ers, new homeowners, and veteran home improvement experts alike. After all, it’s pretty painless, relatively inexpensive, and—should something go horribly wrong—easy to fix. But before you grab your roller and get started with your first coat, it’s essential to have a plan of attack. So we asked a handful of experts for their best painting tips and tricks to get you started. Read on to learn how to paint a room and see step-by-step what you’ll need to do to make sure your project is a success.
While San Francisco based designer Nicole Hollis may have turned heads for painting the exterior of her home jet black, we're prone to the moody blue she chose from Farrow & Ball for the bar.Douglas Friedman
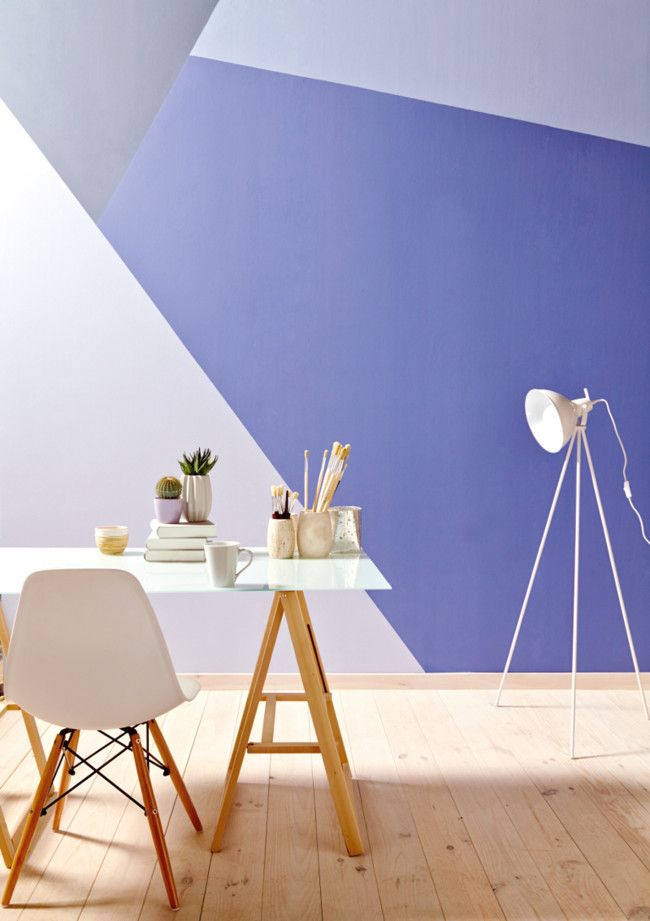
1. Plan your approach
Start by thinking about how you want the finished project to look and remember that you’re not limited to four walls or an entire room in the same color. Consider painting an accent wall in a bold hue or highlighting moldings in a contrasting shade or finish. And don’t forget to look up and see whether the ceiling could use a refresh as well.
Alexander Gorlin used Parma Gray by Farrow & Ball on an accent wall in a New York apartment.
2. Choose your color
Browsing through fan decks and paint chips can be overwhelming.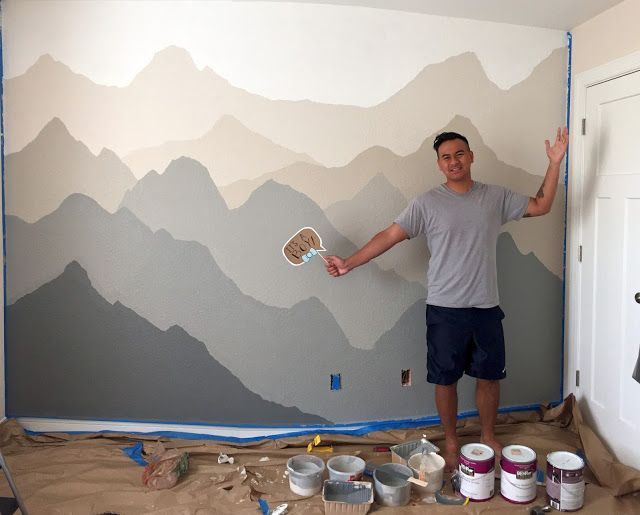 Start by figuring out the general color characteristics: Do you want a warm or cool shade? Neutral or saturated? If you have existing furniture or art, you’ll also want to consider how the shade will complement them. Once you have a sense of what you’re looking for, pick a few shades and get samples—lots of direct-to-consumer brands, like Backdrop and Clare, will send you adhesive swatches you can slap on the wall for a better sense of shade (and it’ll save you a trip to the store). Test the colors to see how they look in the room at different times of day.
Many paint companies also have tools on their websites that will let you upload a photo of your space and preview different colors on the walls. But colors can look different in real-world conditions, so you’ll still need to try it out in the space.
Test samples of your color choices in the room to see how they look in different lighting conditions.
Photo: Richard Drury/Getty Images
3.
 Pick out your tools and materials
Every project is unique and you may need different tools depending on the paint you choose and the condition of your walls, but there are a few must-haves:
- Paint
- Paint roller
- Paint roller extension pole
- Drop cloths
- Paintbrushes
- Paint tray
- Sandpaper
- Painter’s tape
- Rags
- Putty knife
Click here for a shopping list to order all the paint supplies you’ll need to get started—from sanding and priming to your very last touch-ups.
Gather all the essential tools before you start.
Photo: Anika Salsera/Getty Images
4. Determine how much paint you’ll need
Whether you’re painting a powder room or the exterior of your house, the general rule of thumb is one gallon per 400 square feet, says Carl Minchew, vice president of color innovation and design at Benjamin Moore. But that’s just a rough guideline: To get a more precise number, which you’ll definitely want for large projects, use a paint calculator like the ones provided by Benjamin Moore or Pratt & Lambert; they take into account window and door measurements. (And both assume two coats of paint per project.)
Most Popular
Planning on whitewashing a charcoal gray wall? You’ll likely need additional paint when going from dark to light. On the other end of the spectrum, a deep color base tends to require more coats of paint than a lighter color, says Carolyn Noble, color marketing and design manager at Pratt & Lambert. She recommends applying a gray-tinted primer to the surface before you paint your walls a saturated color to help reduce the number of applications. When it comes to finish, you may have heard that the glossier it is, the higher the coverage rate, but it’s not enough of a difference to change the number of gallons you need to buy, Minchew says.
If you’re painting a highly textured surface rather than a smooth one, buy a little extra, says Julianne Simcox, Pratt & Lambert associate brand manager. Cabinets with complicated millwork require more paint, too; Minchew suggests purchasing about 10% more than calculated.
Calculate the correct amount of paint you’ll need to spare yourself trips back to the store and wasted paint.
Photo: Daniel Acker/Bloomberg/Getty Images
5. Prep the walls and the room
You don’t want to damage your favorite sofa or that heirloom Grandma gave you, so empty the room of all the furniture. If you don’t have enough space to relocate everything you own, push it all to the center of the room. Cover the pieces with a drop cloth or lightweight plastic sheeting and do the same with the floor, as well as any cabinetry or countertops that might be in danger of excess splatter. “Don’t skip the drop cloth—paint will splatter, we promise,” say New Jersey contractors—and cousins—John Colaneri and Anthony Carrino, the stars of the HGTV series Cousins Undercover and Kitchen Cousins as well as The Build Up and Grand Design on Ellen DeGeneres’s Ellentube.
Grab a roll of painter’s tape—the cousins recommend FrogTape—and firmly apply it to the edges of the room’s corners, base and crown moldings, and door and window casings, using a putty knife to seal if needed. “Getting a good seal so paint doesn’t get under the tape is everything, plus it will pull away clean after everything is dry,” Colaneri and Carrino say. If you dare (or have an artist’s steady hand), you can skip taping entirely. Remove light switch and outlet covers and apply painter’s tape to protect outlets and switches from paint drips. Before you get started, make sure you know how to repair drywall so you can clean up any nicks in the walls.
Most Popular
Protect floors and furniture with drop cloths.
Photo: Patti McConville/Getty Images
6. Mix your paint
Use a wooden paint stick to stir the paint, and re-stir often throughout the project. Paint that isn’t stirred consistently can lead to the ingredients separating and you’ll risk compromising the true color you’re going for. If you’re using more than one gallon of paint, combine the cans in a large bucket in case there is a slight variation in color.
Mix your paint early and often.
Photo: Tetra Images/Getty Images
7. Pick your painting techniques
Your paint is mixed and your roller is at the ready, but make sure to plan a strategy before you get started. Work from the top of the room down, starting with the ceilings. Planning a bold focal wall? Paint the adjoining light-colored walls first. “Don’t worry if you get paint on what will be your accent wall—the dark paint will cover up whatever lighter paint found its way there. After the lighter wall dries, tape off that edge so the dark color doesn’t bleed onto your new paint,” Colaneri and Carrino advise. If you’re covering up dark walls with a brighter hue, plan on three coats: your primer, plus two coats of the new color to ensure nothing shows through.
Most Popular
Tackle one wall at a time. Take a brush and “cut in”—paint along the molding and the corners from top to bottom—while your painting companion uses a roller to cover the main expanse of the wall, staying away from those more precise spots. When applying paint with the roller, use long strokes in a W pattern for ample coverage (and to avoid those pesky roller marks). Once the wall is dry to the touch, it’s ready for a second coat.
If you are painting the trim, remove the painter’s tape and wait for the walls to dry before applying tape to the walls. Start with the trim closest to the ceiling, move on to door and window frames, and, finally, the baseboards.
Start by cutting in near moldings and corners with a brush.
Photo: Banks Photos/Getty Images
8. Don’t forget ventilation
Watching paint dry is no fun. Make sure your space is well ventilated throughout the project by opening windows and using fans. “Keeping the room warm and a fan blowing definitely helps speed up the drying process,” the cousins say. “If it’s a damp day, it will take much longer for the paint to dry.”
Open a window or use a fan for ventilation.
Photo: Stephen Simpson/Getty Images
9.
 Clean up
You’ve done multiple coats, but it’s not time to relax just yet. Remove all the painter’s tape and gather drop cloths, making sure any spills or splatters are dry before you move them. For latex- and water-based paints, clean brushes with soapy water, though oil-based paints will require mineral spirits. You can use a painter’s brush to clean and reshape bristles. If you want to reuse roller covers, use the curved edge of a 5-in-1 tool to remove the excess paint under running water (they’re also useful for opening a paint can, removing nails, and scraping).
Most Popular
Clean brushes with soap and water if you used latex- or water-based paints.
Photo: Ableimages/David Harrigan/Getty Images
10. Give yourself enough time
The amount of time your project will take depends on the size of your room, how you’re painting, and your skill level. For instance, using a dark shade on the walls and painting the ceiling and trim will take longer than just doing the walls in a neutral color.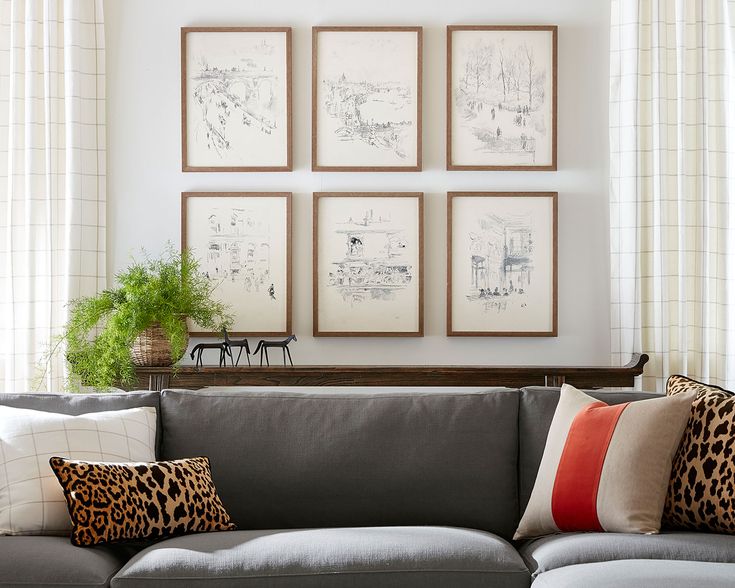 While some spaces can be done in a few hours, others may take several days. Be sure to budget more time than you think the job will need and don’t forget to take prep and cleanup into account.
Shopping guide
ExplorerenovationDecoratingpaintDIYAD It Yourself
Read Moread-it-yourself
How to Dispose of Paint the Responsible Way
You know not to dump old paint in a landfill, but what should you do with it instead? Here, some earth-friendly paint disposal tips
By Jennifer Beck Goldblatt
Wall painting: instructions for those who are not painters at all
27 August Likbez Do it yourself
A simple instruction will help you completely transform the interior in just a few hours.
1. Prepare your tools and materials
Here is a list of what you will need:
- paint;
- wide roller;
- narrow roller;
- roller extension;
- brush;
- wide brush;
- paint tray;
- paddle;
- masking tape;
- film;
- gloves;
- screwdriver.
Reading now 🔥
- 9 easy ways to save money without stress
2. Calculate the amount of paint
In order not to run to the store for the missing can, it is important to immediately estimate the right amount of material. To do this, it is necessary to divide the area of \u200b\u200bthe walls by the paint consumption, multiply by the number of layers and add 10–15% in reserve. As an example, let's calculate how much paint is needed for a room (4.5 x 3 m) with one window (1.4 x 1.6 m) and a door (2.1 x 0.7 m). Ceiling height - 3 m.
First, find the total surface area. To do this, we calculate the perimeter of the room and multiply it by the height of the ceilings:
(4.5 + 4.5 + 3 + 3) × 3 = 45 m²
Now we determine the net painting area. To do this, we calculate the area of window and door openings, and then subtract it from the total area of the walls:
45 - (1.4 × 1.6 + 2.1 × 0.7) = 41.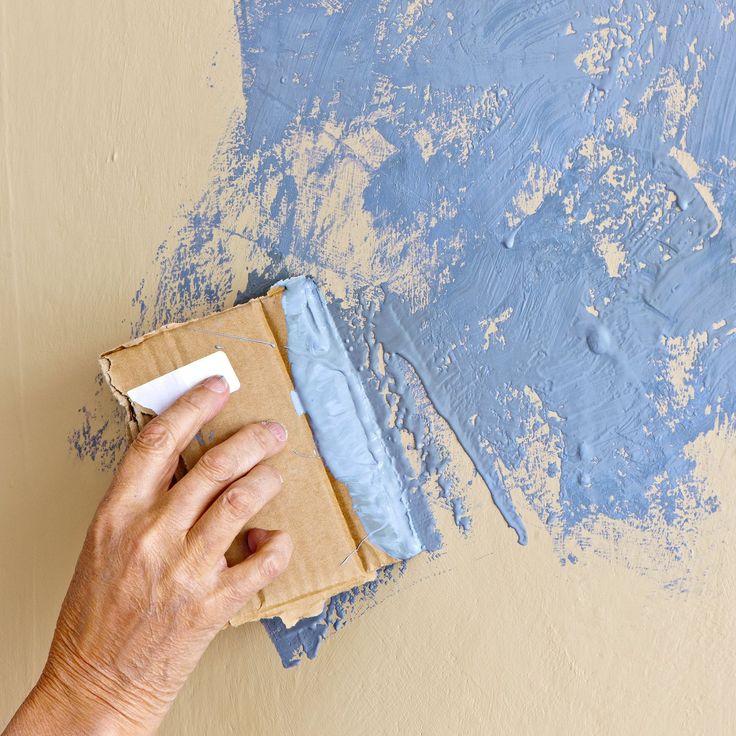 29 m²
29 m²
And, Finally, find out how much total paint is needed. To do this, divide the net painting area by the paint consumption per square meter (indicated on the label), multiply by the number of layers (usually two) and add 15% in reserve:
(41.29 ÷ 10) × 2 + 15% = 9.5 liters
will not be dyed.
Remove furniture and all other items, and what cannot be removed, put in the middle of the room and cover with foil. Wrap the heating radiators with it or remove them. Cover the floors with a thick film or several layers of newspapers.
Illustration: Artyom Kozoriz / LifehackerDe-energize sockets and switches, remove covers from them and cover with masking tape. Also paste over skirting boards, platbands, slope edges and other adjacent surfaces so as not to splatter them.
4. Prepare the walls
Illustration: Artyom Kozoriz / Lifehacker When painting, the surface must be perfectly even. Otherwise, the paint will lie unevenly and all the flaws will then appear even more strongly.
Remove layers of old paint and wallpaper with a spatula and clean the surface well. Putty all the smallest cracks, dents and bumps, and after complete drying, carefully sand with a fine-grained sandpaper.
5. Apply a primer
Illustration: Artyom Kozoriz / LifehackerBefore painting the walls, be sure to prime them: after such treatment, the paint will lie more evenly and will hold better. In addition, by reducing the absorbency of the surface, paint consumption will be significantly reduced.
Using a wide, medium pile roller, prime the walls. Make sure there are no untreated areas. Don't rush and don't let it run. Let the soil dry completely. It usually takes about 2 hours, the exact time is indicated on the label.
6. Prepare the paint
Illustration: Artyom Kozoriz / LifehackerStir the paint thoroughly with a wooden spatula for several minutes. You can use the mixer, but at the lowest speed to prevent the formation of bubbles.
Fill the tray with paint about a third: if you pour more, it will be inconvenient to dip the roller. Close the jar tightly immediately so that the paint does not dry out.
If you wrap the tray with a layer of foil, then after use it will be enough to remove and discard it. The bathroom itself will remain clean.
Do not fully dip the roller. Roll it a few times over the surface of the paint and then over the top of the tray to distribute the material evenly. Pre-moisten the roller in water and wring it out: this way the paint will better saturate the fur coat and will be well applied to the wall from the very beginning.
7. Finish the corners
For better results and faster work, all corners and junction contours are carefully painted over first, and then the main surface. There are two main options for performing layering.
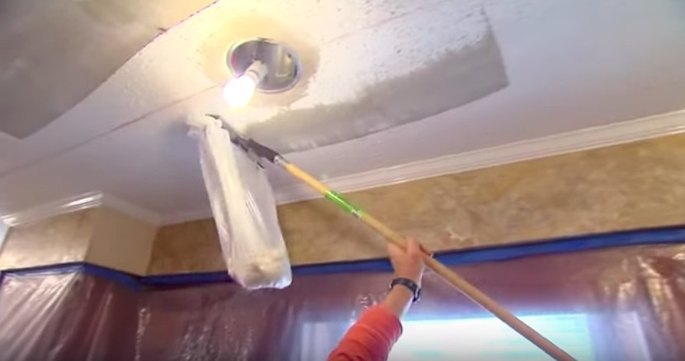
Illustration: Artyom Kozoriz / Lifehacker First: using a small brush, slowly paint 5-7 cm wide strips along ceiling moldings, in corners, at baseboards, and around radiators, sockets and switches. To protect the ceiling, you can seal the blade of the spatula with masking tape and, applying it to a corner, calmly paint with a brush.
Second option: Tape the joints to the ceiling and other surfaces with masking tape, smoothing the joint well with a spatula so that the paint does not flow there. The entire surface of the tape does not need to be smoothed, otherwise the adhesive tape will then be difficult to remove.
Adhesive tape on the ceiling can additionally be painted along the edge with white paint: this way it will immediately fall into the gap and after painting the wall with a different color, the border will be perfect.
8. Apply the first coat of paint
Illustration: Artyom Kozoriz / LifehackerBefore starting work, close doors and windows to prevent drafts and retain moisture - this way the paint will dry more slowly and evenly. Additionally, you can spray water with a spray gun, as well as seal the windows with a film to protect from direct sunlight.
If the paint is thick, then for the first layer it can be thinned according to the instructions on the can - usually 5-10% pure water is added to the total volume. To avoid streaks, do not skimp and get enough paint on the roller.
Cut the pile at the edges of the roller at a 45° angle so that the seams between adjacent strips are less visible.
Start staining from the corner. Use the roller extension to roll continuous strips from ceiling to floor without stopping. Each subsequent strip should overlap the previous one by 3–4 cm.
Spread the paint evenly, being careful not to make the layer too thick. Gradually move from one corner to another. Don't stop until you finish painting the wall, and only then move on to the next one or take a break.
9. Apply the second layer
Illustration: Artyom Kozoriz / LifehackerYou can start painting the next layer only after the previous one has dried, otherwise the roller will tear off the paint and all work will go down the drain. In the warm season, it usually takes about 2 hours, see the instructions for the paint for the exact time.
The second coat should be painted in exactly the same way as the first, the only difference is that the paint does not need to be thinned.
10. Remove masking tape
Illustration: Artyom Kozoriz / LifehackerAfter everything is painted, it is important to remove the adhesive tape that protects the contours and adjoining walls. This should be done 15-20 minutes after applying the second layer. If you hesitate, the paint will dry out and the masking tape will tear it off. Be careful not to damage the paint edges.
It takes about 24 hours to completely dry, depending on the temperature in the room and the type of paint used.
Read also 🧐
- How to glue wallpaper: detailed instructions with photos and videos
- How to choose linoleum
- Which wallpaper to choose for different rooms
- What to do with leftover paint
- How to lay wall tiles
workflow, surface preparation and paint application
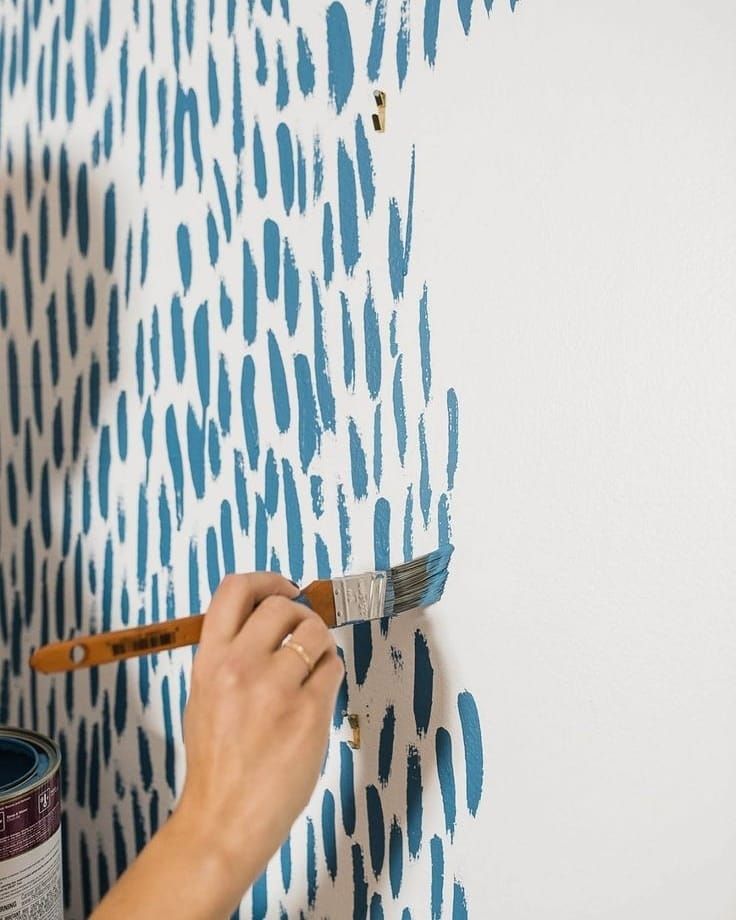
Today, decorative wall painting is as popular as wallpapering. This is due to the fact that everyone chooses a color to their liking, creates a variety of textures, combines shades the way they want. On the painted walls, you can apply a pattern using a relief roller or draw any plot.
Decorative painting is carried out in stages. For those who are doing this for the first time, instructions are offered on how to properly paint the walls.
Content of Article
- Preparation for painting
- Paint Selection
- more about types of colors
- DIY wall painting
- How to paint walls with embossed paint
- photo-Instruction How to paint the walls with your own hands
Before you paint the walls in the apartment, they must be prepared. First, any old coating is removed from the surface: wallpaper, paint, wall panels, whitewash. To remove wallpaper that is glued tightly, use an alkyd primer, diluting it with white spirit in a ratio of 1: 3.
It is also important that the walls are free of grease and fungus. Grease stains are good to remove with acetone. To remove the fungus, use fungicidal preparations.
After cleaning the walls, they must be leveled. If there are volumetric potholes, a plaster mixture is used to level them. Microcracks are easily covered with putty.
If the edges of the crack are crumbling, remove the loose old plaster with a metal spatula. When the edges stop crumbling, you can fill the crack with a plaster mixture or putty.
Sometimes walls are very difficult to level. Then they are “sewn up” with drywall. There are seams between the sheets. They are masked with a sickle - a special masking tape. The smoother the base surface, the better the paint will lay down.
The last stage of preparation is the priming of the walls. After it dries, and it takes about a day, you can paint the walls.
Choosing a paint
Choosing a paint is not only a question of what color is best for the walls. The colors themselves are different. First of all, you need to take care of your own health and choose a safe paint.
The most harmful are those that have a strong odor. These are oil, nitro enamel, PF-115 enamel and others. When working with them, be sure to wear a respirator.
Modern water-based paints are odorless or perfumed, such as apple or citrus. Plus, they dry quickly.
However, they have two disadvantages:
- the painted surface will not be as shiny as with enamel;
- The durability of water-based paints leaves much to be desired.
When buying paint, you need to look at its consumption per 1 square meter of area. As a rule, the lower this indicator, the thicker the paint. But it can be diluted with water or an appropriate solvent specified in the instructions for use. But you need to understand that liquid paint in one layer may not paint over the surface, and you will have to paint it a second time.
As a rule, walls are painted in 2-3 coats. Calculating the amount is simple: look at how much paint goes per 1 sq. m., multiply this amount by the area of \u200b\u200bthe walls and the number of layers, plus 20% of the resulting number. If there is excess paint, it can be hermetically sealed in a jar, and it will last for a long time.
The degree of room humidity also matters when choosing wall paint. For a bathroom or kitchen, it is better to purchase moisture-resistant paint, which also contains antifungal additives.
More about paint types
The following paint types are available:
Emulsion. They have very good reviews from consumers, as they do not smell, dry quickly, and are economical in consumption.
Acrylic. Durable, UV-resistant, diluted with water, but not used in wet areas.
Latex. Used for wallpaper for painting, do not smell, dry quickly, mask small irregularities. Disadvantages: afraid of the light and expensive.
Water based. Used for painting plastered walls and ceilings. The texture is reminiscent of whitewashing with liquid lime. They dry quickly, but smear after drying and are not resistant to abrasion.
Water dispersible. Used for wet areas. afraid of sub-zero temperatures.
Silicone. Due to the increased elasticity, they mask cracks and chips well, but dry for a long time.
Alkyd. These are the usual oil and enamel. They give a shiny surface, are resistant to abrasion, and are not afraid of moisture. They have a very pungent smell, negatively affect the human body, dry up to 2 days.
According to the texture of the paint are smooth, glossy, embossed, imitating the natural texture.
Do-it-yourself wall painting
To do-it-yourself wall painting, you need to prepare a special dish with a sloping embossed bottom, a roller, a roller handle extension, a medium-sized brush, masking tape, thinner if the paint is alkyd. It is better to wear gloves on your hands.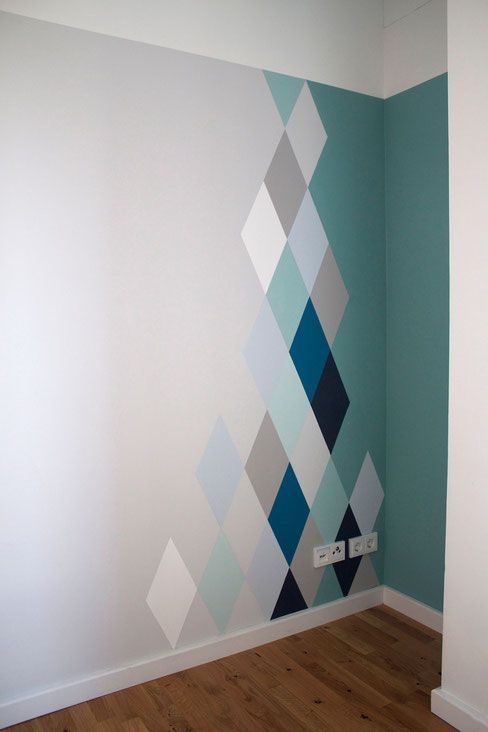
Tape the ceiling around the perimeter along the walls with masking tape. This is necessary in order to paint the walls and not stain the ceiling. Lay polyethylene or newspapers on the floor in several layers. You can use old unused wallpaper.
Large areas can be easily applied with a roller. Paint is poured into the cuvette. The roller is lowered into the ditch and rolled several times along the hill so that the excess paint on the glass. On the wall, the roller must be driven from the bottom up. Make sure the paint goes on evenly.
To paint the upper part of the walls, put an extension on the roller handle - a regular stick or a special nozzle. One wall needs to be painted at a time, otherwise the borders at the junction of the painted on different days will be visible. Paint the corners and joints with the ceiling and floor with a brush.
The first coat must be completely dry, and then it will be seen whether it is necessary to paint a second time. As a rule, the second coat of paint takes a little less. Masking tape from the ceiling must be removed before the paint is completely dry, being careful not to stain it with paint. Wall painting completed.
How to paint the walls with embossed paint
The embossed texture will depend on what fillers are added to the paint and what sizes. You can choose the right one according to the samples that are necessarily displayed in the store.
You can apply relief paint with a wide brush, making strokes not horizontally and vertically, but randomly. You can perform strokes and a spatula to smooth the wallpaper. Also used for this purpose are rollers with a large pile, a relief surface, or with additional elements. For example, fabric ribbons can be tied to a large pile.
It is good to apply textured paint with a sponge, making tangential movements. You will get a chaotic grainy pattern.
The exclusive way of applying the color allows for any variations: with a large comb, a crumpled plastic bag, with the palm of your hand.