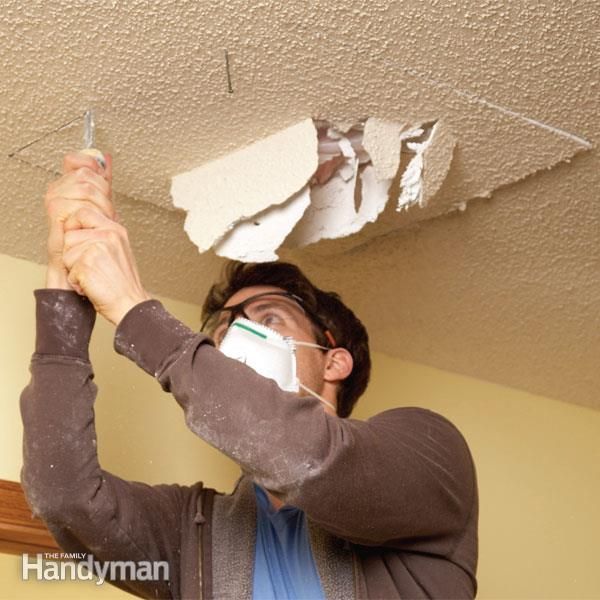
How to texture a ceiling by hand
How to Texture a Ceiling with 4 Techniques
Photo: Zillow Digs home in Sterling, VA
It all too easy to slap a coat of white paint on your ceiling and consider it done. But to really pull a room together, it ought to be stylishly topped off—and putting a textured effect on the ceiling is a great way to add impact to your décor. Another plus? Textured ceilings perfectly camouflage imperfections like cracks or evidence of water damage.
There are a variety of techniques you can employ to create your texture of choice (way beyond the “popcorn” look popular in the 1970s). All it takes is a mixture of paint and drywall mud—and a little ingenuity. Ahead, a simple step-by-step guide for how to texture your ceiling, your way, without sending your budget through the roof.
Tools & Materials- Drop cloths
- Lightweight plastic sheeting
- Painter’s tape
- Ladder
- Paint primer
- Pre-mixed textured paint
- See full list «
- Wall paint
- Drywall mud
- Paintbrush
- Extended paint roller
- Textured paint roller
- Paint roller tray
- Sponge
- Wide compound knife
- Trowel
- Drywall texture sprayer
- Drywall texturing combs
Photo: fotosearch. com
Since you’ll be working against gravity, you’ll want to protect your furniture, floors, and fixtures from splatters. Empty the room as much as possible, which will also give you space to move around. Cover remaining pieces of furniture and the entire floor with drop cloths. Next, take off any faceplates, vent covers, ceiling fans, and/or light fixtures. Finally, apply painter’s tape around the edges of the ceiling, right where it meets the wall, being careful to keep it stick-straight all the way across.
STEP 2: Prime before you texture the ceiling.You might think that because textured paint is part drywall mud it will adhere to any surface, but for a quality job, you still want to prime first. This step will make application easier and give lasting results.
Choose a paint primer close to the color you’ll be using to texture your ceiling—a dark primer for dark paint and a light primer for light paint. Cover the entire surface in a thin, consistent layer and let dry fully (consult the can’s drying time guidelines) before moving on.
Advertisement
STEP 3: Start with pre-mixed textured paint, or combine paint with drywall mud.Prep your product. If you’re looking for a subtle texture, you’ll get good results with pre-mixed textured paint. But if you’re aiming for more depth or special effects, mix your own by combining paint with drywall mud. The standard rule of thumb is one part drywall mud to 10 parts paint. Pour paint into a bucket, add drywall mud, and blend, aiming for the consistency of pancake or biscuit batter. Depending on the look you’re going for, you might want a somewhat thicker consistency. Do a small batch first to practice getting it just right.
Get a pro to do it for you
Receive free, no-commitment estimates from pro painters near you.
Find local pros
+ STEP 4: Apply texture to the ceiling with one of four techniques.
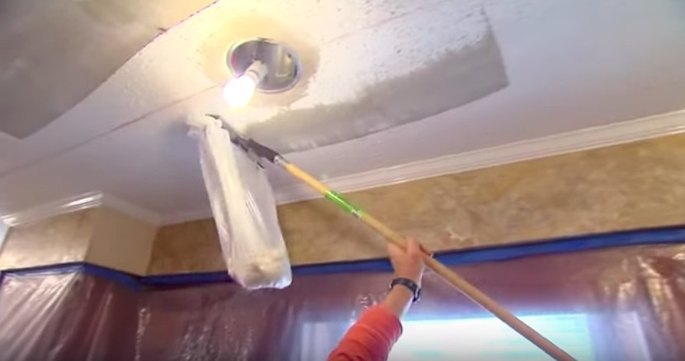
It’s always wise to start in the least noticeable part of the ceiling when applying the texture—perhaps the darkest corner of the room, or the edge of the ceiling closest to the door. Position your ladder there and make sure you can work from a reasonable angle without arching backward. The exact technique (and subsequent tools you’ll need) depends on your desired effect.
- For a subtle finish: Apply pre-mixed textured product as you would typically put on paint. Cut in at the edges first with a paintbrush. Then use an extended roller and paint tray, taking care to bring your roller as close to the edges as possible. To amp the look slightly, use a specialty roller with a texture of its own. Don’t be afraid to experiment; after all, if you don’t like the initial result, you can always switch gears and apply another coat.
- For a stucco finish: To mimic the look of stucco, you’ll need a damp sponge or cloth as well as a wide compound knife or, if you’ve chosen a thicker-than-average consistency for aesthetic reasons, a trowel.
 Working on one small section at a time, apply the mixture to the ceiling, and then dab a damp sponge or cloth into your work in a repetitive motion to create the texture you desire. Repeat this process around the room, one section at a time, being careful not to let the pattern become too uniform.
 - For a popcorn finish: If you like this retro look, you’ll need to buy or rent a drywall texture sprayer. Purchase enough lightweight plastic sheeting to protect your walls from flying particles, securing it to the perimeter of the room with painter’s tape and covering the walls like a floor-length curtain all the way around. Before spraying, choose the nozzle and air pressure setting that matches your desired result, and then follow its instructions as you move the sprayer across the ceiling. Again, allow your application to look as random as possible rather than aiming for a perfect pattern.
- For an artistic finish: Truly advanced DIYers may wish to add extra character by creating a Victorian style rose medallion around a central lighting fixture or ceiling fan.
 This dramatic effect is achieved by using drywall mud and an array of texturing combs (two or three should do the trick, anywhere from 3 to 10 inches in length apiece). Working in concentric circles, you’ll use the combs to apply drywall mud (without paint) in thick, even, decorative stripes to mimic the look of plaster. When completely dry, you’ll paint the entire ceiling. Just keep in mind that this project will require a steady hand and a solid sense of design, so study up on the process before giving it a shot.
Whichever technique you choose, the end result will lend extra punch to your space’s style. The array of colors and effects is endless, so have fun and aim for a look that captures the personality of the room and those who live in it.
Get a pro to do it for you
Receive free, no-commitment estimates from pro painters near you.
Find local pros
+How to texture a ceiling |
(Image credit: Getty Images)
While the past few years has seen a shift away from textured ceilings, there’s no denying the many benefits this unique finish can provide.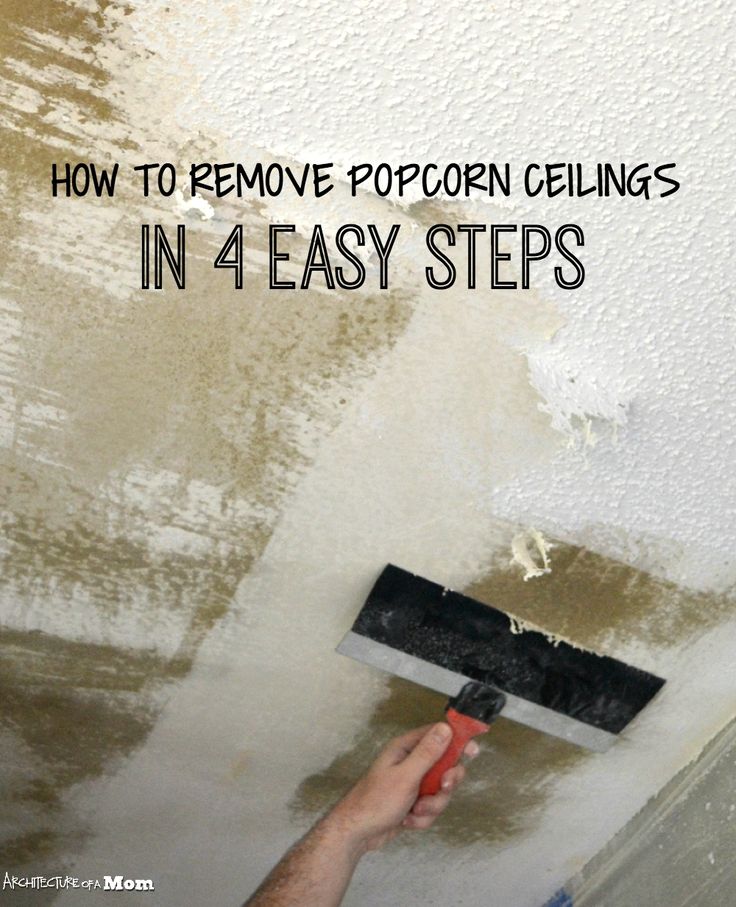 Whether it’s acoustic improvements, disguising imperfections or simply adding interest to an otherwise forgotten surface, texture has been creeping out of obscurity and well and truly into the interiors spotlight.
Of course, it may be the case that you are repairing rather than removing a popcorn ceiling, or matching up an existing textured ceiling to a plain section of drywall or plaster. Whatever the situation, remember that learning how to texture a ceiling is very different from simply painting one, so a certain amount of time and patience is required in order to complete the project effectively.
Below, we offer expert advice about the best way to tackle the task.
How to texture a ceiling by hand
Though not the most fashionable of ceiling ideas, texturing a ceiling does have its place in interior decor, particularly in rentals. Nicholas Smacchia from Westchester-based company, Plastering By Nicholas , recommends starting with an application of easy sand compound directly onto plaster.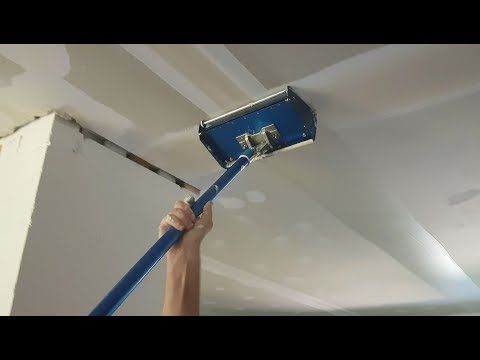
1. Use a sponge or trowel to create a texture in ceiling plaster
‘While the compound is still wet and soft, take your trowel, or slightly wet sea wool sponge and press it flat into the plaster and pull the sponge or trowel away making the compound into a stipple like texture,’ says Nicholas Smacchia.
2. Spray then knock down the texture
‘As the texture starts to set, spray it with a little water and lightly pass the trowel over the stipple to knock it down’, he continues.
As you go, keep spraying ‘water over the stipples to lubricate the compound’ so it does not stick to the trowel and lessen the amount of texture.
Finally, Nicholas suggests brushing with a wet chip brush ‘to soften the texture’ and give it a slightly aged appearance.
This method can be used to produce an orange peel effect too. Be sure to use a softer sponge to create a more dimpled-like texture.
3. Use a wet chip brush to soften the texture
However, in order to master the skip trowel effect, Nicholas suggests using a trowel and applying the easy sand compound ‘in strokes laying one stroke partially over the last in a radius pattern.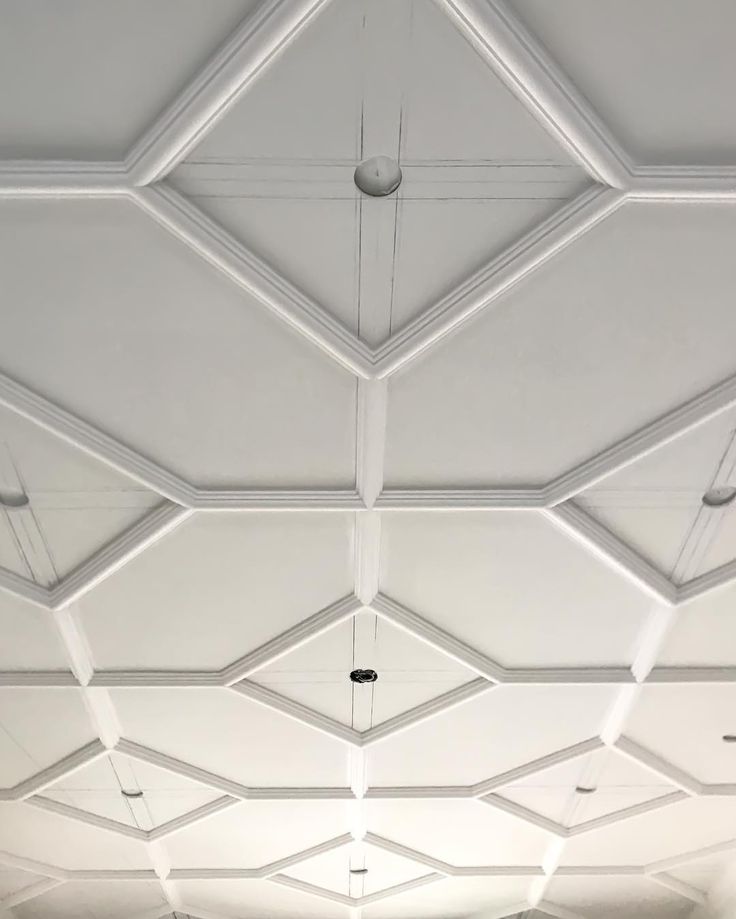 ’
’
‘When this starts to set, use the wet chip brush and sprayer to soften the texture,’ he concludes.
How to spray texture a ceiling
You can, of course, hand-spray the ceiling using an air compressor and hopper gun to achieve the desired textured effect. You’ll need patience and persistence to master this method.
To start, hold the gun about 2ft away from your surface and squeeze the trigger, all the while keeping the gun moving. Work in sections across your ceiling.
If you decide you need to redo, simply scrape it off immediately and place it back in the hopper.
You can also buy spray cans, filled with ready-made product, which work well for small patches and are much easier to manage.
How to apply mixed paint to create a textured effect
Instead of creating the texture on plaster, you can mix a powdered joint compound into regular paint. Since you will be applying the mixed product directly onto the ceiling be sure to apply in a sideways strokes to help achieve the best results.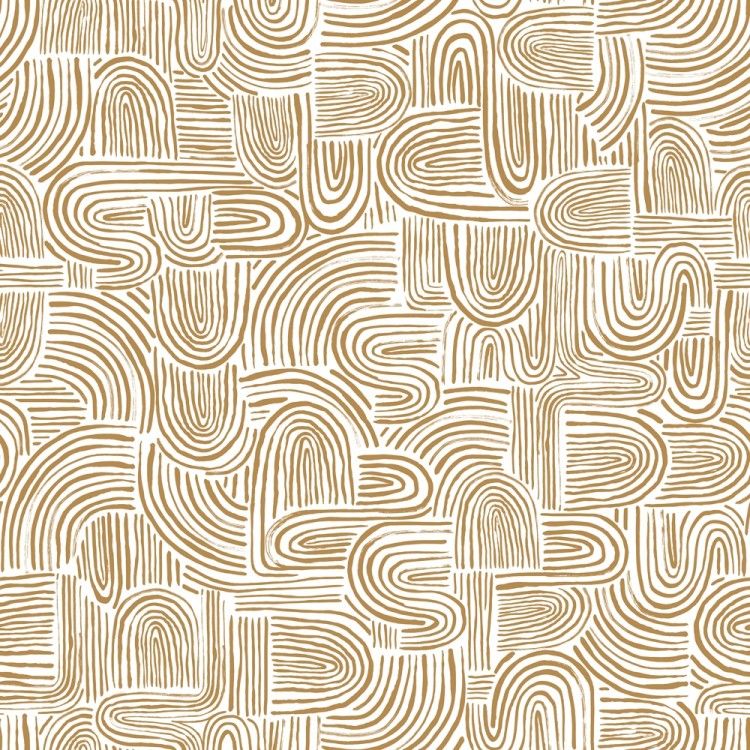 And ensure you are using a long pile roller – it will help the paint get into the low points of the texture and provide a better overall finish.
How to apply textured ceiling paint
The easiest way to create a textured ceiling is with a dedicated product that already contains an additive. The grain in textured paint creates small shadows and depressions, helping you to achieve the desired texture.
Applying these products with a foam roller for maximum texture or a fiber roller for a finer texture will give the best finish. Ensure you load a thick even coat to the surface using short criss-cross strokes, until you have covered about 3sq ft. Finally, finish by rolling lightly in one direction.
What tools will you need to create a textured ceiling?
Before you start, remember that texturing a ceiling will involve wet texture material flying in all directions so you’ll need to cover the floors and surfaces with cloths and protective sheeting.
The traditional method will require:
- An easy sand compound
- A trowel and hawk
- A sea wool sponge (or other types of sponge)
- A spray water bottle
- A soft chip brush
- An air compressor and hopper gun to speed up the process
If you’re looking to make the project as easy as possible, you can mix your own textured paint or, better still, purchase ready-mixed versions that can be applied directly to your ceiling using a roller.
What is a textured ceiling?
A textured ceiling is normally achieved by using a sand compound and spreading in a specific pattern to create a bumpy, uneven finish.
The most popular finishes include a knock-down stipple effect (similar to a popcorn ceiling), an orange peel look or a skip trowel finish.
Knock-down stipple has a rough, bumpy texture and can be created with as much depth as you’d like. Orange peel has a more subtle bumpy look, while skip trowel is applied in large strokes, creating a Mediterranean feel.
Steph Hendries is a freelance journalist who has contributed to many different interiors websites including Homes & Gardens, Ideal Home and Livingetc. She has also worked on a range of social content for property brands such as Zoopla and Boomin. Steph writes for Homes & Gardens Solved section, concentrating on DIY, how to, cleaning and organizing content.
How to Texture a Ceiling with a Sponge - Home Ideas
Things You'll Need
-
Old clothes
-
Safety goggles
-
Staircase
-
Art Plastic
-
Napkin drop
-
Artist's tape
-
Large rag or broom
-
Large sponge
-
Sealant
-
Artist's scraper
-
Paint trays
-
Primer
-
Paint rollers
-
Wall paint
-
Drywall joint compound
-
Bucket
-
Color mixing sticks
-
Small sponge
Prime the ceiling so that the texture adheres well.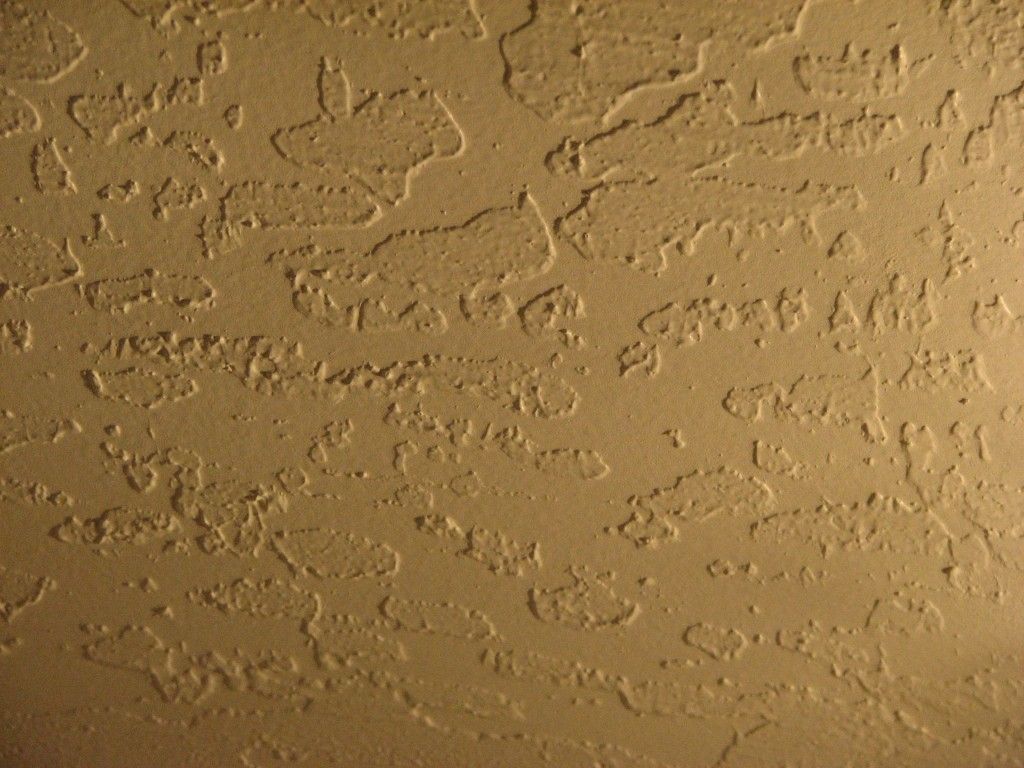
Liven up your ceiling by adding a soft texture with drywall sealant and a sponge. Unlike popcorn ceilings of the past, a sponge textured ceiling adds just enough dimension to make it visually appealing without being overbearing. Ultimately, the amount of texture is up to you. The sponge is a versatile tool due to its many ridges and holes, and you can easily add more or less drywall joint sealer to create a different look.
Step 1
Remove all furniture and accessories from the room.
Step 2
Put on old clothes and goggles.
Step 3
Cover the walls with painter's plastic and the floor with cloth, securing with masking tape.
Step 4
Install the ladder. Get on the stairs and clean the ceiling with a large rag or broom.
Step 5
Dip a large sponge in water and wipe the ceiling with it.
STEP 6
Fill holes or cracks in the ceiling with sealant. Scrape off excess with a paint scraper.
Step 7.
Fill the paint tray with primer. Roll the primer to the ceiling. Let it dry.
Step 8
Place the drywall finishing tray on the floor. For a light textured ceiling, fill the pan with two-part paint to one part drywall grout. For a heavily textured ceiling, use one part paint and another drywall joint mix, or just that mix. Thoroughly mix the mixture in the bucket with paint mixing sticks before filling the tray.
Step 9
Dip a small sponge into the mixture. Practice applying it to the fabric until you feel confident in creating the desired texture.
Step 10
Dip a small sponge into the mixture and apply around the perimeter of the ceiling where the ceiling and walls intersect.
Step 11
Once the perimeter of the ceiling has been textured, dip a larger sponge into the compound mixture. Start texturing a small area about 2 feet by 2 feet in one of the corners, slightly overlapping the textured perimeter.
Step 12
Continue working in small sections at a time, dipping the sponge back into the mixture if necessary. Lightly overlap each section each time you start a new one.
Step 13
After the texture has dried, pour the desired ceiling color into the paint tray. Roll out the paint roller in the paint and paint over the texture. Let the paint dry. Use two coats of paint if you didn't mix the drywall grout first.
Step 14
Remove the rags, clean the room and replace the furniture.
10 DIY wall decor textures
Openwork pattern using a tablecloth
An inexpensive, quick and effective way to decorate a wall is a homemade stencil made from a rubber kitchen tablecloth, tulle or napkin. There are many advantages to this finish. The tablecloth costs a penny, and can be used repeatedly. The algorithm for applying a pattern is within the power of even an amateur finisher.
- The surface of the wall is primed, after drying it is covered with the first layer of putty.
- A stencil is attached to the wet solution.
- Top the tablecloth with a second layer of putty and smooth it tightly with a roller.
- The stencil is removed and the pattern is allowed to dry.
- The surface of the wall is lightly sanded with sandpaper, primed and tinted.
To transfer the image with greater accuracy, the top layer of putty is made thicker or mixed with a small amount of PVA glue. It is important to create a smooth transition between the flat surface of the wall and the relief, the edges of the pattern are blurred with a slightly damp sponge.
If the relief is not needed, the tablecloth can be used as a stencil for painting.
Sponging
Another budget option for self-transformation of walls is a print with a washcloth. Sponge is lightly dipped in paint and pressed with light movements to a solid base. In order for the texture to be seen as clearly as possible, it is important to follow a few simple rules:
- Before painting, the wall is leveled, cleaned and degreased.
- Allow base color to dry completely.
- The sponge is pre-soaked in water or, when working with oil paints, in a solvent.
- After a set of paint on a sponge, the excess is removed by blotting with a napkin.
If a streak or drip is left somewhere during work, after complete drying it can be easily masked with the color of the base.
Roller
Decorative wall paint rollers are available at any hardware store. They are easy to use, durable, functional, and often come with multiple attachments. The trace left by such a roller can imitate an animal skin pattern, a floral ornament, be geometric or abstract.
You can make a decorative roller with your own hands by wrapping the surface of a regular nozzle with thick thread, a piece of cloth or a net. Knitted fabric, pieces of foam or leather, plastic bags are used. The effect of bursting soap bubbles remains after a foam roller with holes, like a fur coat - from a fleecy one.
Screen patterns
Screen-painted interiors are always unique. The pattern can be put on the entire wall or made a little accent. The color is taken 1-2 tones darker or lighter than the base, although sometimes collaborations of two completely different shades look good.
The type of pattern should be in harmony with the surrounding interior. He often finds support in small decorative details: vases, textiles. You can draw a pattern yourself or choose from thousands on the Internet. The drawing is printed on paper, and then transferred to thin plastic or cardboard. Small details are not always painted over neatly, for them it is better to stock up on a thin brush. You can add volume to the ornament using latex putty.
Creating brick texture
Decorative brickwork is appropriate in the bedroom, in the living room, and in the nursery. You can apply a pattern of identical rectangles to the wall using a home-made stencil made of adhesive tape, foam rubber, or by drawing each brick manually.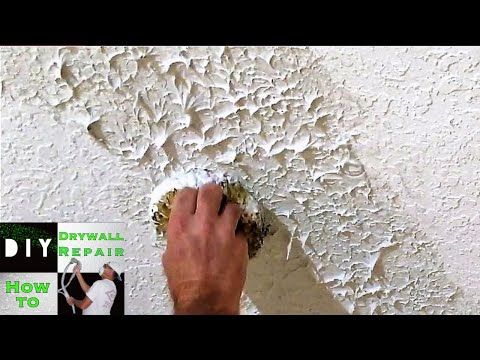
3D is achieved by brightening the top and darkening the bottom. A thin line sums up the masonry seams. The effect of aging is created by adding small scuffs, strokes and shadows.
Decor with spatula and trowel
By experimenting with the size and frequency of strokes, as well as the nature of the movement of the hand when applying putty, you can create dozens of author's textures. The most popular ones are arcs, waves, fish scales, etc.
Using a trowel and a spatula, it is easy to create the most traditional options for applying decorative plaster: grotto, bark beetle, ottocento, etc.
Texture options brush
The original texture can be obtained using a regular paint brush or brush. Simple tricks will help hide uneven terrain, visually stretch or, on the contrary, narrow the space.
Stiff bristles are suitable for applying an abstract pattern or, when dyeing with vertical and then horizontal lines, to create a fabric effect.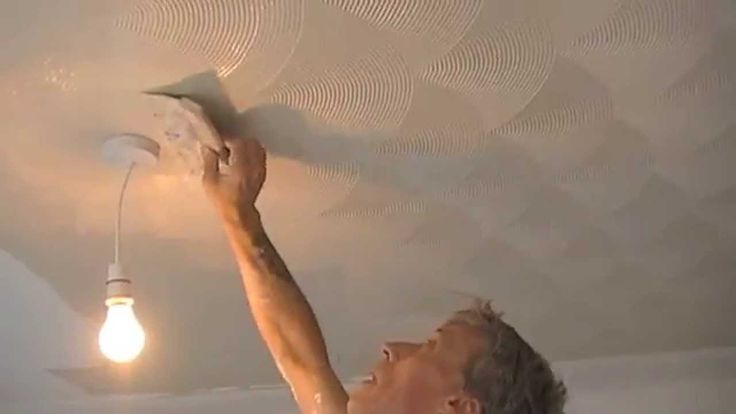 If a brush is not at hand, you can use a homemade broom.
The brush can be used to decorate the entire surface of the wall or create individual patterns. As a rule, patterns are chosen in the form of waves, multidirectional lines or circles. Small irregularities after drying are glossed with a spatula with rounded edges. The surface becomes shiny and is not afraid of moisture.
Sgraffito technique
A labor-intensive, skill-requiring, but incredibly beautiful way of decorating walls is sgraffito. At the preparatory stage, the surface to be decorated is puttied into a couple of layers. The color of the bottom layer should be different from the top. After drying, the top layer is scraped off with a sharp tool according to a pre-selected scheme, obtaining an original pattern.
To create a multi-colored "sgraffito" use several layers of putty and scratch them to different depths.
This finish will require more materials than usual.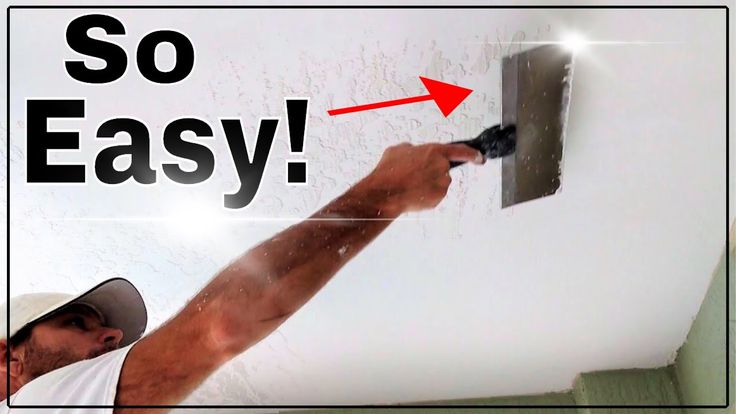 The first layer of putty should be about 8 mm, each subsequent layer should be at least 5 mm.
Dripping
Dripping is a spraying technique that came into design from painting. It is actively used in bold interiors with rich colors.
By experimenting with the size of the droplets, the density of their application and the number of shades used, you can create a bright, picturesque accent throughout the wall.
For inspiration, turn to the work of the Abstract Expressionists, who added sand, crushed glass and other materials to paint to create dense, embossed canvases.
Texturing a wooden wall
Finishing verandas and saunas, as well as interiors in loft, hi-tech, country style, rarely do without wooden surfaces. To decorate the walls, designers use an array of expensive rocks, more budgetary plywood, decorative panels made of slats and bars. If there is not much wood in the interior, you can focus on it by adding relief and texture.