Rejuvenating wood furniture
How to restore wood furniture
(Image credit: Kasia Fiszer)
If you learn how to restore wood furniture the right way, you will not only avoid having to replace it, but will bring out the natural beauty of cherished pieces that will add character to your home.
See: How to refinish hardwood floors to give them a new lease of life
‘Beautiful vintage and antique furniture was made to last, so it is well worth going to the time and trouble of making a few running repairs – you won’t find that wonderful patina of age listed in the contents of a flat-pack,’ says independent restoration expert Helaine Clare.
Do, however, consider the age and quality of the piece before restoring it. Unless you know what you are doing, valuable antiques should be left in the hands of a specialist furniture restorer.
How do you restore old wood furniture?
(Image credit: Jody Stewart)
When deciding how to restore wood furniture, it’s important to first assess the extent of wear and tear. Does it just need cleaning up and refinishing, or are more substantial repairs required?
‘Many of us have at home a beloved piece of wooden furniture. Perhaps it is an antique that has been inherited. However, over time it may have become dirty and grimy, and it’s not always easy to know what to do with it,’ says Mike Morris, supply chain manager at leading wood care expert Liberon .
Product choice is key – so get this right before you start. ‘There's a veritable plethora of wood care products for sale, and choosing the right one for this kind of item can be confusing,’ adds Morris. ‘Bringing back the beautiful good looks of your treasured piece of furniture cannot be left to chance by selecting inferior quality products.
'The key is to choose a top quality wax. The right specialist wax affords a highly glossy and resilient finish, helps to cover marks and scratches, and will also assist in preventing wood drying out in the future.'
Make sure you choose a wax color that is closest to the natural wood. Always test the product on an inconspicuous area for color, compatibility and end result before beginning.
How do you restore wood furniture naturally?
(Image credit: Colin Poole)
For many people it’s important to restore wood furniture naturally. For centuries, beeswax was used to treat furniture, and is still a popular traditional option today.
Helaine Clare advocates the use of beeswax paste to restore old wood furniture; however, there are a number of modern products containing natural ingredients that have been specially formulated to breathe new life into old wood.
‘Choose one with a good content of carnauba wax, which is found on the leaves of the carnauba palm, native to north-eastern Brazil,’ says Morris. ‘It is known as the “Queen of Waxes”, and contributes to the superior durability of the complete wax formulation, making it ideal for nourishing and protecting all types of wood, including lacquers and French polishes.
'Liberon's Wax Polish Black Bison has a good content of carnauba wax and, being highly lustrous, makes wood look simply beautiful. '
'
How to restore wood furniture with vinegar
(Image credit: Kasia Fiszer)
It is not sensible to try to restore wood furniture with vinegar alone, but it is often used as a cleaning solution, mixed with olive oil to nourish the wood.
This solution works better on matte wood than glossy lacquered surfaces, and should not be used on valuable antiques.
Simply mix one part vinegar to one part olive oil and apply a thin layer to furniture before buffing up. However, it’s always a good idea to first try on a small area on the underside before applying over the whole piece.
Restoring wood furniture without stripping
(Image credit: Brent Darby)
If your wood furniture doesn’t require repairs, then cleaning it and restoring it without stripping is the best option.
‘Firstly, remove the old wax using a specialist wax and polish remover, then apply solid wax sparingly, preferably with ultra-fine steel wool,’ says Morris. 'It is possible to apply the wax with a cloth, but it is easy to overload it. ' The wax will help to both restore faded wood furniture and rehydrate the wood if it is dry.
‘It is best if the wax is applied in a circular motion in much the same way as you would polish a pair of shoes, and always work with the grain of the wood.'
Be careful not to apply too much wax, however, as it makes it harder to get a good shine. ‘Many people make the mistake of applying too much, and it is better to build up layers gradually,’ adds Morris. ‘It is harder to overload fine steel wool with the wax, and this application method affords a deeper penetration into the wood.’
Clare uses the same method when applying beeswax paste, allowing the wax to dry for 20 minutes between each coat, and finishing by buffing to a sheen with a soft lint-free cotton cloth.
‘The wood will absorb the wax over a period of time, so to keep it looking good apply at least twice a year,’ says Clare.
'In future, whenever cleaning the treated surfaces, they can be wiped over with a cloth or duster and re-waxed as required when they begin to look dull and tired,' says Morris. 'Certainly, the surfaces should not be washed with water.'
This feature was created by H&G's sister brand, Period Living magazine
Subscribe to Period Living for more inspiration .
Period Living is the UK's best-selling period homes magazine. A subscription provides you with all you need to know about caring for and improving a traditional house and garden.
How to strip wood furniture
(Image credit: Bridget Pierson)
To remove thick layers of varnish or paint, you may need to strip wood furniture. ‘Painted furniture is often stripped by immersion in a vat of caustic soda,’ explains Helaine Clare.
‘Afterwards it should be treated to neutralize the chemicals or the wood becomes dry, and a white salty coating is evident. To remedy, dilute half a pint of white vinegar into half a pint of water. Use a cloth to wipe over the wood. ’
’
If the surface of an item of wood furniture possesses an attractive patina of age, then sanding will strip this. However, in some cases it’s desirable to sand wood furniture to bring it up like new again.
‘Using medium-grade abrasive paper held around a sanding block, rub down the wood until it looks dull,’ says Clare. ‘Wet and dry paper used with water contains the dust, making it less messy and minimizing dust inhalation.
One you have stripped or sanded wood furniture, you’ll need to give it a good clean. ‘Use a solution of sugar soap and warm water to clean dirt and grease off the wood’ says Clare.
‘Mop up surplus water as you work to avoid saturating the wood – this raises the grain and roughens the surface. Use clean water and a cloth to wipe away residues.’
You'll need to give the wood time to dry out properly before applying finishing wax.
How to repair wood furniture
(Image credit: Kasia Fiszer)
You should repair wood furniture if the piece has signs of damage. Where there are splits in the wood, this is easily fixed with wood glue. ‘Clean off dust from the split wood using a paintbrush, then apply wood glue. Position a sash clamp and tighten until the wood is pulled together,’ advises Clare.
‘If the piece is to be left unpainted, protect the surface with off-cuts of wood on the jaws of the clamp. Wipe off surplus glue with a damp sponge and leave overnight.’
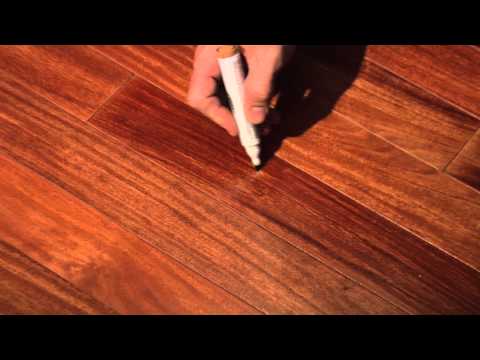
Scratches, dents and small holes in the wood can be filled with a specialist hard wax wood filler, usually sold as colored sticks, which may need to be combined and built up in layers to achieve the right shade.
If the furniture has any hardware, this should be checked for damage, and if necessary removed and cleaned. You may need to use release oil if screws are too tight to remove.
How can you tell if you have woodworm?
Some people are worried about bringing old furniture into the home in case it harbors woodworm. However, Clare says that beetles are unable to thrive in warm, dry, well-ventilated houses.
'To make sure, put sheets of newspaper under suspect furniture,' she says. 'Softwood ply, used on the back of cupboards or base of drawers, is where the beetles head for.
'They tend to emerge in July – tell-tale mounds of sawdust on the paper will indicate current activity.' Treat affected wood with borax wood preserver.
Antique furniture restoration techniques
(Image credit: Polly Eltes)
If your wood furniture has decorative detail such as marquetry or gilding, then it will need more specialist antique furniture restoration. Consult an expert, who will use the appropriate techniques.
Restoring marquetry
‘Marquetry is effectively painting in wood – using colored veneers or decorative graining to construct patterns or pictures,’ says Oliver White, restorer at Plowden & Smith . ‘Restoring it is quite an artistic process. You first need to identify the species of wood that had originally been used. This can be quite difficult to gauge when attempting to copy antique marquetry.
‘You then need to assemble the veneers in a pack, sandwiching layers on top of each other paying particular attention to which direction the wood grain is running on each veneer, as you don’t want them all running the same way.’
White usually draws the design on paper, and applies to to the top of the veneer pack, which is then pinned together to keep everything in place.
‘The design is pierced out with a fine-bladed saw – a careful process,’ says White. ‘It’s important to keep the blade at a 90-degree angle to the veneers, to ensure that all the pieces fit accurately together.’
The wood may then be ‘sand shaded’ to add more depth and tone before the elements are assembled into a pattern and bonded, before the surface is sealed.
It’s an intricate process that requires specialist knowledge and lots of patience.
(Image credit: Kasia Fiszer)
Restoring gilding
Valuable antique furniture, and particularly mirrors and picture frames, often feature gilding.
‘A lot of pieces will have been poorly repaired in the past, so this work needs to be corrected,’ says Ruth Tappin , specialist antiques restorer. ‘Sometimes an item has been covered with gold-colored paint or emulsion. This can be dry stripped or wet stripped with paint stripper, but this will remove any original oil gilding, which will then need replacing.
‘Oil gilding is fairly easy to learn once you know what to feel for as the oil size dries – this is how you know when you apply the gold.’
Oil gilding gives a matte look to the gold and can be used for both internal and external surfaces – it involves applying the size onto a prepared surface, and applying gold leaf once it becomes tacky.
However, Tappin warns that water gilding – used for high points of decoration – is a harder skill to master. ‘For this process a water and glue solution – gilder’s lacquer – is brushed onto the smoothed bole surface.' The bole is clay mixed with rabbit glue, which provides a flexible surface that can be burnished.
'Then the gold leaf is laid on immediately with a glider's tip – a flat brush made from squirrel hair. This is then burnished with an agate stone to achieve a mirror-like finish.'
It is intricate work, best left to professionals. 'Trying to lay down a piece of gold without tearing it takes years of practice,’ says Tappin.
As editor of Period Living, Britain's best-selling period homes magazine, Melanie loves the charm of older properties. I live in a rural village just outside the Cotswolds in England, so am lucky to be surrounded by beautiful homes and countryside, where I enjoy exploring. Having worked in the industry for almost two decades, Melanie is interested in all aspects of homes and gardens. Her previous roles include working on Real Homes and Homebuilding & Renovating, and she has also contributed to Gardening Etc. She has an English degree and has also studied interior design. Melanie frequently writes for Homes & Gardens about property restoration and gardening.
How to restore wood furniture: clean, repair and refinish
When you purchase through links on our site, we may earn an affiliate commission. Here’s how it works.
We show you how to restore old wooden furniture back to its greater glory.
(Image credit: Colin Poole)
Join our newsletter
Thank you for signing up to Realhomes. You will receive a verification email shortly.
There was a problem. Please refresh the page and try again.
By submitting your information you agree to the Terms & Conditions and Privacy Policy and are aged 16 or over.Looking for practical advice on how to restore wood furniture? You've come to the right place. Neglected old wooden furniture often suffers from a build-up of dirt and grime, with the diminished colour and lustre resulting in a dull appearance. With this in mind, owners of antique furniture are often left wondering how to restore old wood furniture (often much treasured pieces) to their former glory.
Thankfully, restoring wood furniture is quite easily done and we've created this easy to follow guide so that when you come to restore furniture, you'll know what to do for ultimate success. What's more, with restoration furniture seemingly always at the forefront of home trends – in both period and contemporary properties – and therefore, more costly to purchase, now you can save on something beautiful by simply creating your own.
- See our guide on caring for, cleaning and polishing wood furniture if you've more modern pieces around the home.
More from Period Living
(Image credit: Period Living)
Period Living is the UK's best-selling period homes magazine. Get inspiration, ideas and advice straight to your door every month with a subscription .
The mahogany writing desk in this project below had ugly watermarks that marred the top that also needed attention. While it’s easy to restore old wooden furniture on a DIY basis, we'd always recommend ensuring you use the correct products. Our guide below talks you through furniture renovation and cleaning done professionally.
Once you're done, see all our cleaning buys, how-tos and hacks to help keep the rest of your home sparkling. Looking for more expert advice on antique furniture restoration perhaps, and all things period properties – both interior and exterior? Head over to our Period Living hub page.
Everything you will need to restore old wooden furniture:
- Work gloves
- Dust mask
- Paintbrushes
- Proprietary chemical stripper and stripping tool
- Wax and polish remover and fine steel wool (0000 gauge)
- Fine glasspaper and sanding block
- Wood dye
- Wood restorer/ finishing oil
- Wax polish
- Tack cloth and lint-free cloth
Eveything you need to restore old wooden furniture...
87 Amazon customer reviews
☆☆☆☆☆
Low Stock
£3
View Deal
Low Stock
£9
View Deal
£12. 61
61
View Deal
How to restore old wooden furniture: step-by-step instructions
1. Prepare for stripping back
Stripping furniture is messy, but key to wood restoration, so work outside if possible. If working indoors, protect the floors and any furniture nearby and ensure good ventilation. To avoid damaging the finish on the body of the table, cover it in a plastic sheet so that only the top is exposed. Apply stripper liberally with an old brush.
2. Allow layers to dissolve
For a good result when refinishing wood, leave the stripper on for between five and 30 minutes until the finish – a mix of old varnish and polish – has dissolved. The length of time will depend on the composition and thickness of the coating. If the stripper hasn’t removed all the layers just re-spread the paste and it will continue to work.
Refinishing wood furniture may seem like an art but is easily done.
- How to lime wood
3. Neutralise the chemical stripper
Neutralise the wood with a pad of steel wool soaked in white spirit or proprietary wax and polish remover, following the grain of the wood. Before using any chemical always read the label carefully as different strippers require different neutralisers. Failure to neutralise stripper can allow it to reactivate and your wood restoration may not go to plan.
- How to paint furniture
4. Clean off the rest of the table:
The next step to refinish furniture is to wipe away residues with cotton rags and leave for 24 hours. Meanwhile clean away dirt and old polish elsewhere by applying wax remover to a steel wool pad or coarse cloth and working in small areas at a time. Leave for a few minutes to soften the wax and wipe away with a clean cloth before it solidifies.
5. Return to the tabletop
24 hours after stripping the tabletop, use a sanding block and very fine glasspaper to smooth over the wood fibres raised during the stripping process – work with the grain. Shake and vacuum the protective sheet to get rid of dust that could spoil the finished piece. Finally wipe the top with a tack cloth.
6. Tackle areas of bleached wood
When you restore furniture, you'll notice that every piece is different to tackle. Here for instance, for many years the table was sited beneath a window and the sun has bleached part of the wood, so applying a mahogany wood dye will make the top a uniform colour. Apply generously with a brush and allow stain to penetrate; wipe away excess with a cloth. Ensure an even finish by working in a good light.
Restoration furniture is a the perfect way to introduce something timeless to both period and modern properties.
7. Improve the sheen and finish when refinishing wood
Once dry, apply a coat of finishing oil using a brush or lint-free cloth. Allow oil to penetrate for 10 minutes and wipe away the surplus before it goes sticky. Wait for at least five hours and gently rub with 0000 gauge steel wool before applying a further coat; repeat again – the more coats the greater the durability and sheen.
8. The final spruce up with wood restorer
Finally, sparingly apply a thin coat of good furniture wax over the whole table. Leave for an hour at least and polish with a lint-free cloth. To avoid warping caused by drying out of the wood, position furniture away from radiators and fires. Sunlight will bleach the wood, so ensure it’s not placed beneath a window
Home remedies for restoring old wooden furniture
There are a couple more tricks you can use to restore furniture at home. You can remove surface dirt and old layers of wax polish with a home-made mix of four parts white spirit to one part of linseed oil. If the finish is still looking a bit lifeless, pour some proprietary wood reviver onto a cotton cloth and buff vigorously.
One such remedy which works when refinishing wood furniture is:
- 1 part linseed oil
- 2 parts meths
- 2 parts turps
- 2 parts distilled vinegar
Finally, refinish furniture with some beeswax polish and that should bring it back to life.
Vulgar rejuvenation of "Europe" › Novaya Gazeta in St. Petersburg
According to the management of the Grand Hotel Europe, filling the Lidvalevo interior with modern design items is a good move, allowing you to earn extra money by attracting a new generation. They do not share concerns about the departing nature here, assuring: we managed to maintain a balance, we did not deviate a single step from the requirements of KGIOP. However, as Novaya Gazeta managed to find out, not all transformations are sanctioned by the security department.
A hi-tech bar counter appeared in the lobby bar of an old hotel without the permission of KGIOP
“An elegant decor in the Art Nouveau style, created by architect Fyodor Ivanovich Lidval, has been the hallmark of a hotel in Russia for decades ”- this is how the lobby bar of the Grand Hotel Europe has been advertised so far. A little over a year ago, Leon Larkin became Managing Director for Russia of Orient-Express (which has owned the hotel since 2005).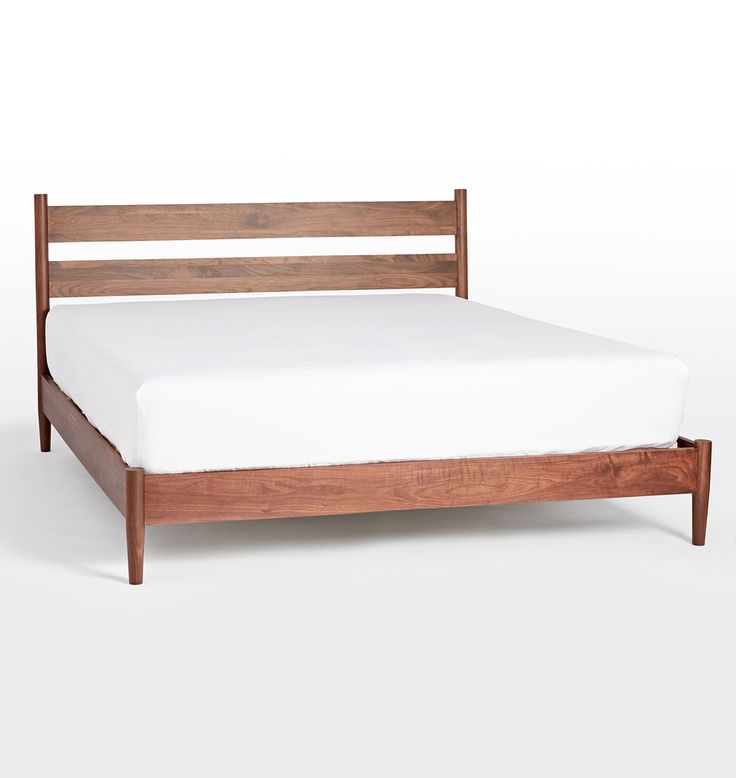 Under him, the lobby bar was renovated, the consequences of which caused a lot of bewildered questions among St. Petersburg residents.
The replacement of the usual furniture, bar counter and antique-styled lamps with modern ones, dissonant with the original interior of the beginning of the century, was harshly criticized (New, No. 18).
When preparing the first material, we turned to the Grand Hotel Europe for clarification, but they were not ready to promptly answer the questions posed. On the day the article was published, Mr. Larkin received a proposal for a personal meeting.
The criticism sounded from the pages of the newspaper seems to him unfounded.
- We just cleaned everything here, made new damask wallpaper, replaced the furniture and the bar counter. It's better than it was! - convinced the initiator of the upgrade.
How can one not recall the historical anecdote about Yuri Luzhkov, who exhorted the defender of antiquity Alexei Komech: “Why are you all unhappy? Well, we demolished the building of the XIX century, so we will build the eighteenth in its place, it will be even better!”
Yes, the now replaced lobby bar was not a collection of genuine arts and crafts. She appeared here after the reconstruction of 191989–1991: “The pieces of furniture so beloved and familiar to the townspeople (wooden sideboards with display cases for wines, a bar counter, armchairs, tables with marble tops, floor lamps, etc.) are modern furniture, stylized antique,” explains Elena Lomakina, Head of the Department for the Protection and Use of Cultural Heritage Sites, KGIOP.
After all, the former user of the building-monument managed to maintain the tradition, to show taste and delicacy. Because those objects were accepted by relatives in the old walls, and the Petersburgers, who honor the spirit of the place, fell in love with them.
Dissatisfied with the current innovations, Mr. Larkin replies:
- This is a matter of taste. We can argue about this for hours. If you come to my house, you will not like my furniture, and I will not like yours if I come to your house.
— But this is a listed building that is not my or your private property, it is a public cultural property and it is a public place. We should not decide his fate, guided by our own predilections.
- I would accept your argument if it was about centennial things. And we have changed modern things, - the manager retorts.
- So you could follow the path of your predecessors, adhering to the style originally set. By acquiring such an asset, your company was aware of its main advantages, which now constitute the key point of your advertising - a genuine architectural monument in the center of St. Petersburg, the preservation of traditions, impeccable taste ... discordant elements?
- It is my duty to strike a balance between historical heritage and providing a financial return to those who have invested money in this hotel. We are faced with the need to attract a younger audience here, otherwise the hotel will simply die. The old generation is leaving. Here comes another, with different needs. And we must answer them,” the interlocutor sums up harshly.
It's scary for this place, if you imagine where such logic can lead. After all, there are many such representatives of the new generation who have the need to break away to the fullest at the beer festival and relieve themselves right there, right next to the Palace.
I would like to present Mr. Larkin with Nikolai Antsiferov's book The Soul of Petersburg. Perhaps reading it will help you realize that business in a city like St. Petersburg does not bode well if it does not take Genius loci into account. The spirit of the place has been given special importance since ancient times. According to the ancient Roman interpretation, the "Spirit" is also the guardian angel of the Place. To understand it, natural sensitivity and professional education are necessary, and it is not worth approaching it without proper respect and delicacy. The concept of "spirit (genius) of the place" in the modern world is endowed not only with a special existential significance, but also acquires a legal status. For example, it can be found in a number of UN documents - the "Quebec Declaration on the Preservation of the Spirit of Place" or the "Valetta Principles" adopted by the ICOMOS General Assembly last fall.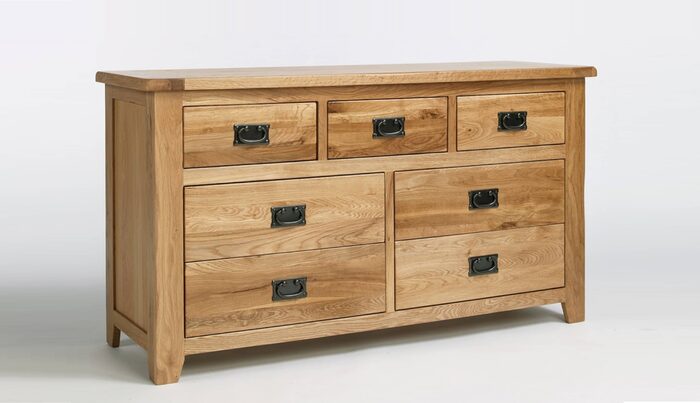 The latter document, in particular, notes the need to "avoid the negative consequences of sharp or excessive contrasts, interference with continuity." It also contains a warning that is relevant to us: the particular dangers that threaten historic cities include "the risk of becoming a consumer product for mass tourism, which can lead to the loss of their authenticity and heritage value."
KGIOP, responding to Novaya's inquiry regarding the legality of the transformations carried out in the lobby bar, reported the following. According to the task of the committee issued in 2011 and with its sanction, Europa Hotel LLC performed “restoration of the plaster surface of walls, ceilings, stucco and architectural decor, floors, wood panels, metal decor and objects of arts and crafts (stained-glass windows, ceiling lamps, fireplaces )".
However, “the arrangement of the KGIOP bar counter has not been agreed upon, so far the relevant documentation has not been received by the committee,” the official response of the security department says. We hope that KGIOP will not stop at stating this fact, but will take appropriate measures. "New" will follow further developments.
Tatiana LIHANOVA
I updated a wooden chest of drawers: a boring piece of furniture turned into a stylish accent of the bedroom interior | Lifestyle
Many today simply adore furniture from well-known manufacturers. It is convenient and inexpensive, so it can be found in almost every home. However, this leads to new problems: using furniture from famous manufacturers in your interior, you risk getting the usual atmosphere - like everyone else. But if you have basic repair skills, you can easily turn a standard item into a unique piece with your own hands.
In this tutorial, we'll take a look at how to turn a standard Tarva chest of drawers into a stunning accent piece for your bedroom. Just use chalk paint paired with gold touches on the chest of drawers legs and you can make a big difference in the design of the piece.
Materials and tools
To transform the dresser you will need the following set of materials and tools:
- chest of drawers;
- wood filler;
- liquid nails;
- spatula;
- paint and paint tray;
- paint roller;
- brush;
- sandpaper;
- water based primer;
- wooden glazing beads;
- ruler or carpenter's square;
- vintage chalk;
- gold-plated paint.
First step
How to start remodeling a chest of drawers? First, you should get rid of the standard handles. Remove them from each drawer. They make your dresser uninteresting and boring, so don't be afraid to remove them.
After you have finished with the handles, fill the holes with wood filler. The resulting irregularities should be smoothed out with a spatula and putty. Continue this procedure until the surface is level. Then wipe it off with a clean cloth.
Design
Lay the chest of drawers on the floor with the drawer side facing up. After that, you will need to mark on each box the exact angled lines at a 45 degree angle. They should be placed at an equal distance from each other. Thus, you can create a design for all drawers at once.
Shaping
Arrange the wooden blocks diagonally according to the slanted lines you drew on the first box. Pre-install wooden spacers. These will act as spacers between the bars and will ensure they are evenly spaced throughout the box.
Use a miter box and ruler to mark where you need to cut excess wood. Place each block at a 45 degree angle to the end box, cut off excess wood. You can use an ordinary hand saw for this purpose, but it is good if you have a powerful miter saw at your disposal. It will allow you to complete your work much faster.
The cut keys must be reinstalled on the first top drawer. In this case, a wooden gasket should be installed again between each key. This will ensure the optimal distance. Glue each wooden block one by one to its rightful place with building glue or liquid nails. When gluing planks, do not forget to remove the adjacent wood spacer.
When the first drawer is ready, repeat all the steps above for the lower drawers. The slats on the first drawer can be used as a guide to align them on the second drawer. Strive to arrange the composition in such a way that you get continuous lines across all the boxes. Cut and glue the pieces for the third drawer. After that, you can move on to the other side of the dresser.
Other side
When you are done with one side of the dresser, you will need to continue the same procedure for the other side. This time, position the overlays at a 45-degree angle so that they form a "V" at the junction with the overlays on the first side of the chest of drawers. Mark, cut and glue them on the second side of the chest of drawers, starting with the top drawer. After that, they can be used as guides for cutting and gluing glazing beads on the remaining two boxes.
Painting
After the glue on the dowels has dried, you can start painting. First, the entire chest of drawers should be lightly sprinkled with sand. This will help prepare the surface for painting. All dust should be wiped off with a clean cloth. Then apply a water-based primer to the surface of the chest of drawers. To do this, it is best to use a roller and brushes. Remove the drawers and use brushes to prime the front of the chest of drawers. Purely theoretically, when using chalk paint, you do not need to wait until the surface of the chest of drawers dries after applying the primer. But if you don't want to risk color uniformity, it's best to let it dry thoroughly.
Once the primer is dry, the first coat of chalk paint can be applied. It is necessary to apply the composition in the direction of the wood fibers. Then let the surface dry again. Then you can cover it with a second layer.
When the paint is dry, coat the chest of drawers with several coats of protective furniture varnish. This compound will help protect your furniture from wear and tear. To preserve the original appearance of the painted surface, it is better to use a matte finish.
Gold-plated elements
To give the chest of drawers a zest, we will decorate the legs with gilded paint. However, special care should be taken when working with this composition. The paint is very caustic, so work with it only in a well-ventilated area.
Final step
After completion of all work, special equipment can be installed inside each box. It is very important that the screws used as fasteners are short enough.
The chest of drawers has acquired a complete look. Now it is definitely completely different from the standard product from popular manufacturers, which is in every second home. This is a unique piece of furniture that is only in your home. Using our simple DIY instructions, today anyone can transform even the simplest furniture.
Finally, I would like to note: do not be afraid to risk your interior. Create maximum conditions for comfortable living at home.