Self build fitted wardrobes
Building a Fitted Wardrobe | ScrewfixWardrobes
How difficult is it to install our wardrobes yourself?
We’ve all been there: we’ve found the perfect wardrobe that complements our room, and all that’s left to do is fit it. But how difficult is this to do yourself? If you’re wondering how to build a wardrobe, this guide will show you just how easy it is to install our products at home.
All of our sliding wardrobes can be customised and designed online, made-to-measure and then delivered to your room of choice. Once delivered, installation is simple. Our sliding wardrobe doors are made to be fitted at home by our customers, and so are constructed with ease in mind. On top of that, we have a wealth of resources, guides and FAQ’s here on our website.
If you find yourself needing the help of an expert when building a fitted wardrobe, we’re always happy to speak on the phone, however we’re confident you’ll find the all the help you need online. Here’s why:
Measuring up for our fitted wardrobes is simple
Preparing and measuring your room should be done before purchasing your wardrobe. By being prepared this way, you’ll be absolutely certain that your wardrobe will fit your space. Measuring up is simple, in fact, we’ve created a measuring guide to help you get it right the first time.
In the guide, you’ll find information on which measurements to take, how much room our products can accommodate and how you can use a height reducer to correct larger spaces.
The main thing to bear in mind when measuring a space is that you’ll be dealing with the aperture size, not the door size. This means you’ll be measuring the space that the doors will fit into, which will be naturally larger than the doors, as you’ll be installing liners as well. The good news is that our software will automatically account for this, giving you the correct measurements for your doors. The only exception to this rule is if you’re planning to install your own liners, or batons to level up the aperture. In this case, measure the space with your installed sections in place.
Building a fitted wardrobe is easy when you know our products
Once you’ve taken delivery of your new wardrobe, you can get started on the installation.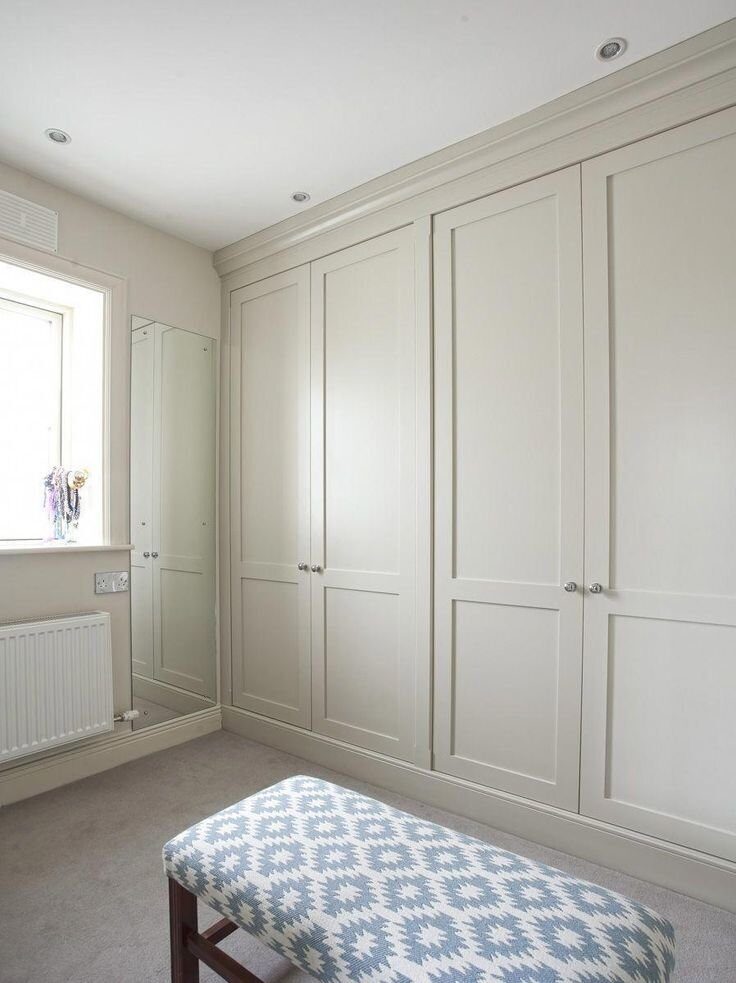 When it comes to wardrobes, there are a lot of different products. From wall-to-end panels, wall-to-wall panels and liners, there are many different types of fitting.
Our FAQ guides answer our most frequently asked questions, and can help you to understand our products, so when looking at our instructional guides, you’ll know exactly what everything means.
We’ll take you through how to build a wardrobe, step-by-step
Our in-depth FAQ articles cover the entire design and creation process of building a fitted wardrobe, and between them, you’ll have the know-how to install your wardrobe without any problems. From designing your own wardrobe, to choosing wardrobe fittings, our guides will take you through each step of the process.
To help get your order just right, we recommend you use our design your own wardrobe tool. If you’d like more information on how to use this tool, we’ve created a walk-through guide for it in our sliding wardrobe designs FAQ.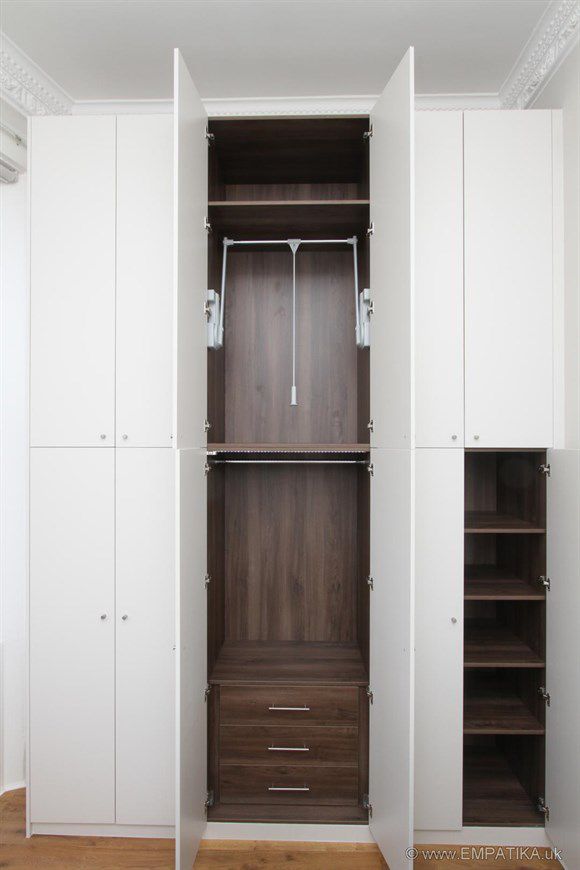
For advice on choosing walk-in wardrobe designs and how to best utilise your space, take a look at our walk-in wardrobe designs guide.
Our extra resources for building a fitted wardrobe
If you’re still left scratching your head, surrounded by sections of wardrobe doors, then don’t worry, we have a range of guides and FAQs that go further in-depth on a variety of topics. From how to fit liners, put up tower unit shelves and aura storage systems, we’ve got a guide for every situation.
As always, if there’s a question that you can’t find the answer to, simply get in touch by giving us a call on 0800 048 2370.
Bespoke DIY Fitted Wardrobes Are A Game Changer
Do you dream of custom fitted wardrobes but have found that installation costs push you way out of budget? Well we have the perfect solution for you – DIY fitted wardrobes!
Whether you’re setting out on your first DIY project or you’re an experienced tradesman, our ranges of self assembly fitted wardrobes are the ideal solution for anyone looking to invest in bespoke fitted furniture.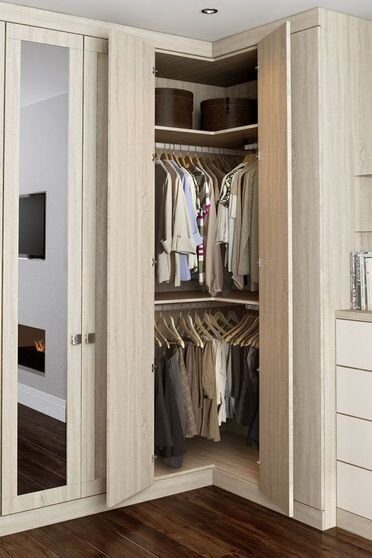
DIY wardrobe sliding doors are a fast and stylish way of transforming the look of your bedroom and utilising every inch of storage space you have available. Bespoke fitted wardrobes are a game changer for storage as they can work with any size room, even if you have alcoves or other features that bulky freestanding wardrobes can’t work with.
Here at Slide Wardrobe Direct, we have a modern range of sliding wardrobes that are easy to install. Custom made in the style that you desire and made to measure for the perfect fit, our built in wardrobe kits deliver the highest quality and the best in style!
Why pay for installation costs if you don’t have toIt’s never been easier to find a fitted furniture supplier online so when it comes to choosing new bedroom wardrobes you are spoilt for choice. But as anyone who’s already started searching for the perfect fitted wardrobe can tell you, there is a big difference in service that you need to look out for.
Does the manufacturer charge you for installation or are their wardrobes designed for easy home installation? This difference in service is significant; as installation costs can drive up the price of your new fitted bedroom furniture significantly!
The great news is that you no longer have to go to expensive leading brands for quality, as companies like Slide Wardrobes Direct are meeting the demand for high quality furniture that is expertly designed for easy ‘do it yourself’ home installation. This flexible self assembly service not only keeps costs down for the customer, but makes it easy for everyone to install high-quality, bespoke bedroom furniture.
Not convinced self assembly fitted wardrobes are for you?Not everyone is convinced by DIY or self assembly projects. This may be due to difficult DIY experiences in the past or as a result of the commonly heard myths that surround ‘do it yourself’ furniture. So here we’re going to bust these myths and show you why self assembly fitted wardrobes are the right choice for you!
❌ Myth: DIY installations are more expensive in the long run
✅ Truth: DIY fitted wardrobes are a financially savvy choice!
Why do people choose DIY? Simply, it’s cheaper.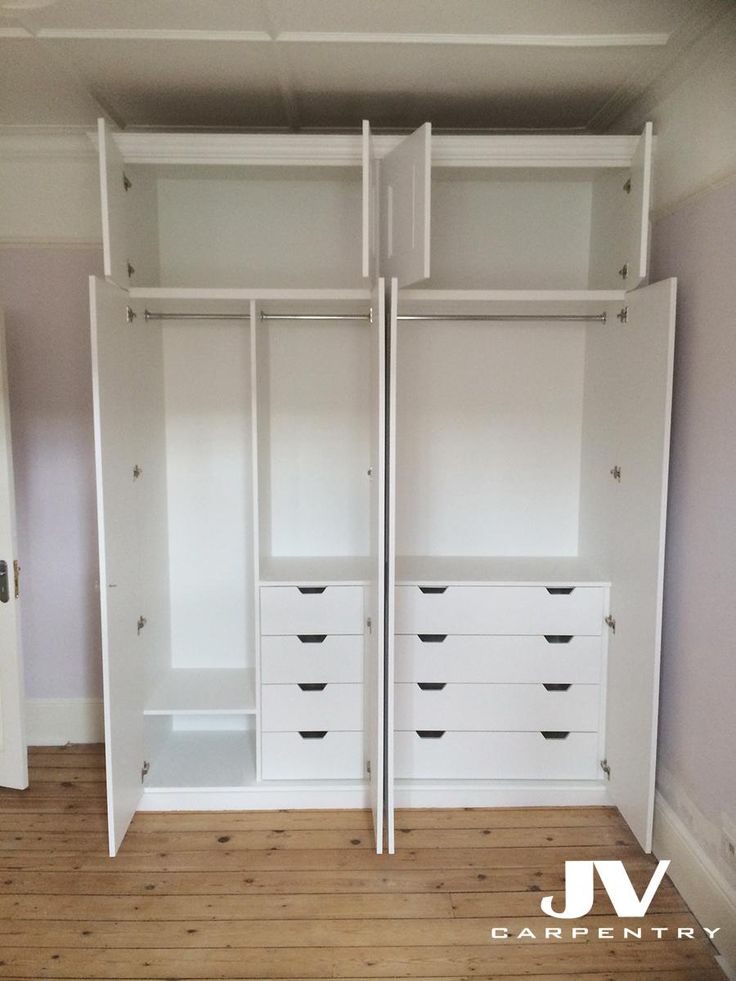 And when it comes to fitted furniture it’s no different. If you don’t have to pay the manufacturer for the labour costs of installing your new wardrobe then the total cost of your new fitted furniture will be significantly cheaper. This is why DIY fitted wardrobes are the perfect solution. They make bespoke wardrobes affordable without compromising on quality.
But if you choose the wrong manufacturer, this might not be the case. Poor quality materials, difficult constructions and a lack of customer support could easily affect the success of your installation and end up costing you more in the long run. So when you’re choosing a wardrobe manufacturer you should look for an experienced company like Slide Wardrobes Direct who provide the following services:
➡ An online designer that visualises your bespoke wardrobe doors with an instant quote
➡ A customer support line to answer any questions you might have during the ordering or installation process
➡ Detailed installation instructions included with every order
➡ On-site manufacturing to ensure quality control is in place.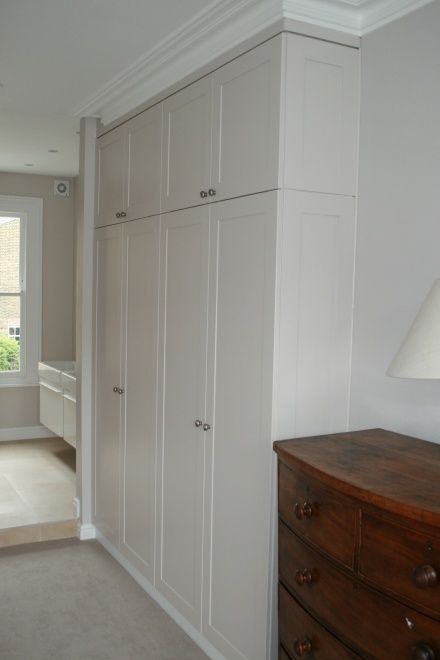
❌ Myth: You need to be an expert to get good results
✅ Truth: Anyone can install fitted wardrobes with the right manufacturer!
We make sure that every customer gets everything they need for an easy home assembly so you don’t need an expert to do it for you! Once you’ve designed your new sliding wardrobe doors using our simple online tool, we will manufacture your doors to your exact specification and deliver them directly to you as part of a complete wardrobe kit. Each fitted wardrobe kit includes your bespoke wardrobe doors with matching tracks and liners, end panels to match your installation type, soft door closures and modular storage systems where selected. Also included are detailed instructions on how to install it all, so the whole process is straight forward and easy to follow! Our experts are always on hand to answer any questions you might have whilst designing your wardrobe, measuring up or installing your new kit, so you have support every step of the way.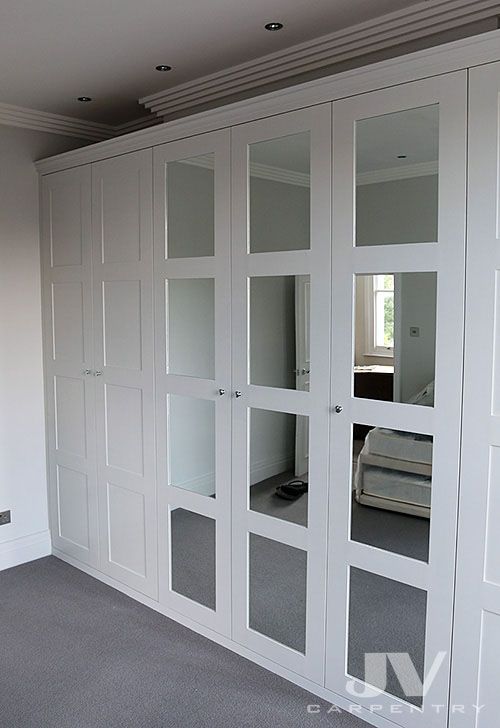
Don’t believe us? Take a look at some of our customer reviews and see what they think about our DIY sliding wardrobe doors!
READ OUR CUSTOMER REVIEWS
❌ Myth: It won’t look as good when you do it yourself
✅ Truth: Made to measure furniture guarantees a perfect fit!
Yes it will look good! Our systems are quick and easy to install by a competent DIYer or a carpenter of your choice by following our comprehensive Fitting instructions. One of the best things about fitted bedroom furniture is that it can use every inch of storage space you have available whilst making a beautiful feature in your room. Sliding wardrobe doors fit floor to ceiling and wall to wall, so they are the perfect fit for the space you have. For professional and quality-looking self assembly wardrobes, all you need to do is give us your exact measurements and our expert team will do the rest!
Here at Slide Wardrobes Direct we use quality materials to build our bespoke wardrobe doors which only ever leave our factory once the quality of each product has been approved against our very high standards.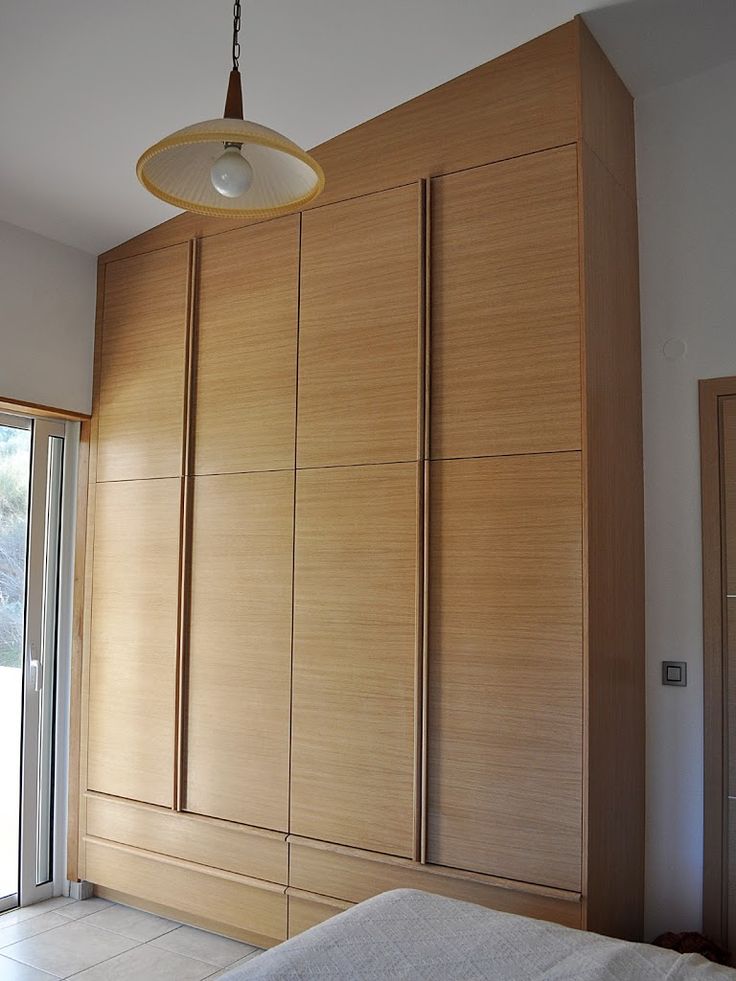 What’s more, a ‘do it yourself’ design doesn’t mean you have to compromise on style. Our ranges are available in a wide choice of modern colours, including wood effects and premium glass, with single and multi-colour options so you can make your wardrobe look exactly how you want it to!
Trust us, there’s nothing unprofessional looking about our products – take a look through our wardrobe galleries and see for yourself!
❌ Myth: DIY fitted furniture won’t last
✅ Truth: A bespoke design is a great investment!
All fitted furniture manufactured by Slide Wardrobes Direct is designed and built on-site by our expert craftsman so we can guarantee excellent quality with every order. We take pride in our service, ensuring that all products are built to last so that every homeowner can enjoy their new wardrobes for many years to come. We follow the latest trends with our design options and provide a wide range of bright hues and natural shades, so there’s a wide choice of styles to work with any home improvement project.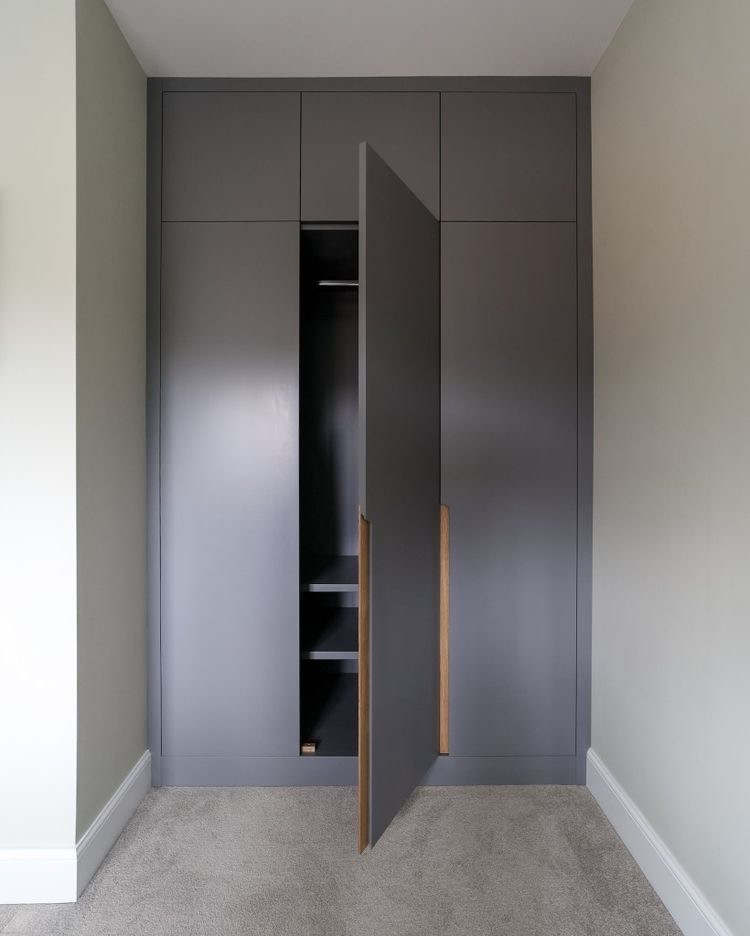 Our flexible wardrobe interiors are highly adaptable so your DIY fitted wardrobe can function perfectly for children or adults, adapting as you go to create the storage that you need. This makes DIY bespoke fitted wardrobes an amazing long-term investment!
photos, videos, diagrams and drawings
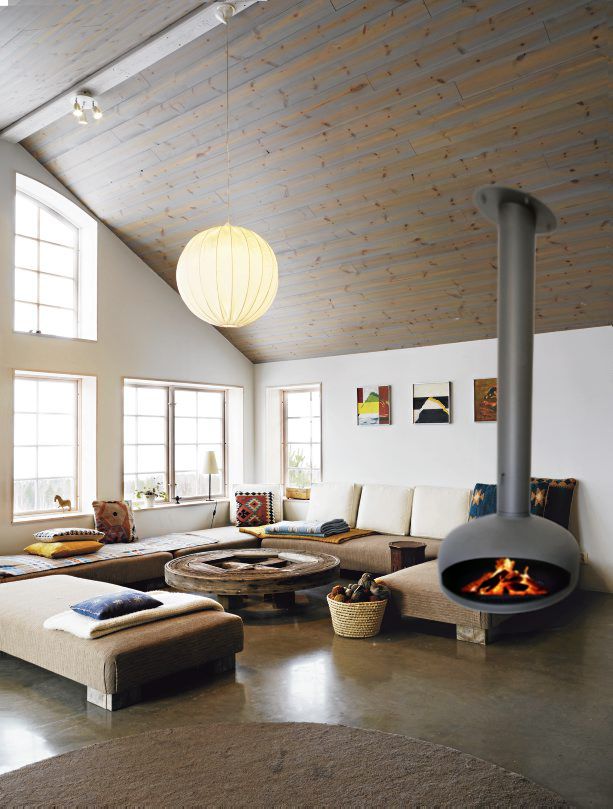
When organizing a living space, it is very important to think about the placement of storage spaces. This is especially true for small-sized rooms, the owners of which cannot afford to force the room with bulky chests of drawers or an unlimited number of shelves. Moreover, modern furniture is not cheap. Today we will talk about how to make a built-in wardrobe with your own hands, thereby solving all of the above problems in one fell swoop!
Advantages of built-in wardrobe
Wardrobes - storage space with sliding door system. This seemingly small feature makes it functional, roomy, comfortable and compact for small spaces.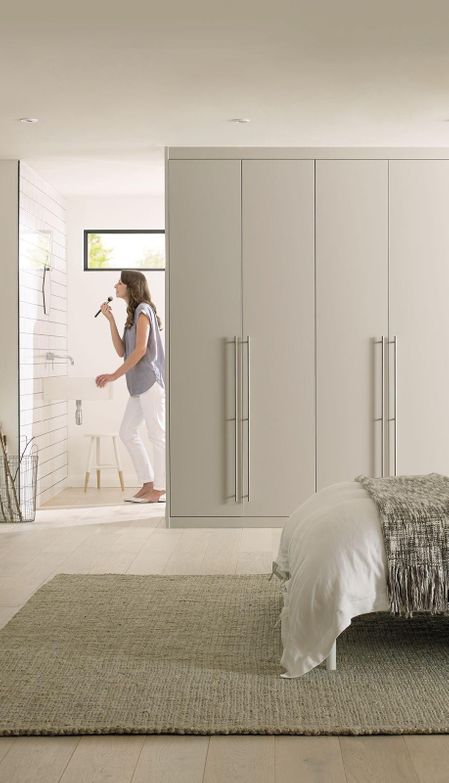
The fact is that sliding doors save precious space, which is usually occupied by open partitions. They also provide convenient access to things, allow you to place shelves, hangers, drawers inside, which are combined in a comfortable sequence, without fear of disturbing the aesthetics.
In addition to practical properties, sliding wardrobes are a stylish element of the interior, which, if desired, can become both a bright accent thanks to design solutions, and “merge” with wall decoration.
There are several types of wardrobes, depending on the location. Among them, built-in ones have a number of advantages. Firstly, due to their location in a niche, they practically do not take up space. Secondly, they allow you to create a complete composition in the interior without violating the principle of practicality. Thirdly, it is quite easy to make them yourself, because the walls act as supporting partitions.
By creating a sliding wardrobe with your own hands, you will not only save money and time, but also design furniture that is ideally suited specifically for your conditions, adjusting to the features of the walls, as well as the size of the niche.
Development of wardrobe layout
No idea can be realized without a carefully thought out plan. Before proceeding with the assembly of the wardrobe, you need to decide what size it will be, what it includes and how it looks.
Measurements
The dimensions of the future design largely depend on the height of the ceilings and the area of the niche itself, in which the cabinet will be located. It should be rectangular, with an opening of about 70 cm - the shelves have approximately this depth, because with a larger indicator it will be difficult to get things. But these details should be 10 cm narrower, taking into account the sliding doors.
Ideal when the sliding wardrobe is mounted to the height of the ceilings. This is convenient, since you do not have to worry about dust accumulation at the top, and also allows you to accommodate the maximum number of things with minimal space.
Taking into account the general measurements of the structure, it is necessary to decide on the doors. The width of each partition should not exceed 600 mm, otherwise the heavy element will press hard on the rollers and skew may occur.
The overlap should be approximately 60 mm, higher values will make it more difficult to access things in the closet.
Filling
When designing the “stuffing” of a closet, be guided by your needs: the number of things and their owners, as well as variety. Modern chests of drawers provide components for various types of items: from bed linen to unnecessary electronics. For convenience, create a drawing by trying several options.
The contents of the closet can be distributed according to a simple principle: outerwear - to the side, important small items - closer, valuables - in drawers, and dry clothes - higher. For example, moisture from a coat can transfer to other things, so it is better to place hangers closer to the edge of the structure.
Bed linen must not be stored below - dirt from the floor rises by about 40 cm, even in closed spaces.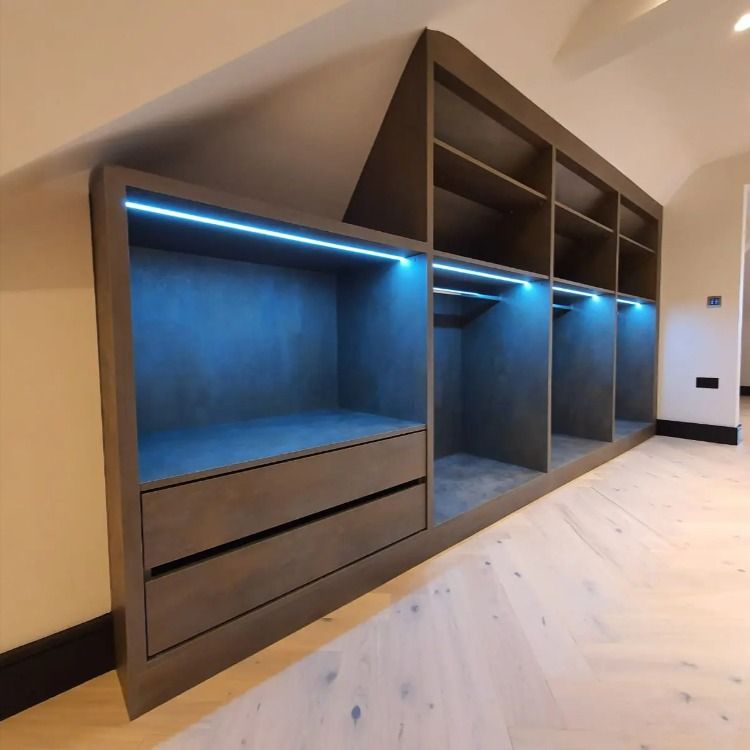 The lower section must be filled with drawers or nets for shoes. Estimate the approximate number of things in the closet in advance to plan the size of the compartments.
Design
Development of the appearance of a sliding wardrobe is the most interesting and creative stage for many. Here it should be borne in mind that we are talking about the design of door facades, since the beauty of the inside is not visible.
Focus on the style of the room. For example, the classic loves noble patterns and carvings, but the modern style prefers laconic lines and non-standard solutions. With minimalism, you can use wall motifs, hiding furniture from view, and with a loft, do not be afraid of experiments.
The beauty of a built-in closet is that it can be an inconspicuous or bright interior element. Facades with whole artistic compositions look original. But if the room does not have a large area, the mirror surface will help to visually expand the space.
Preparation: materials and parts
Materials play an important role in creating a built-in wardrobe with your own hands. Durability, durability and external properties of furniture depend on them.
Wood, although it is considered an excellent basis for a classic interior or provence, is not suitable for the internal filling of a sliding wardrobe. The fact is that in the niche there will be a higher level of humidity, which negatively affects natural materials. But if this option is indispensable for a number of reasons, it is necessary to additionally process the base with special means.
The ideal choice is MDF or fibreboard. These species have all the positive properties of wood, while being more resistant to environmental influences. They are easy to use - they are easy to cut, mount, and save not only money, but also energy. A word of advice: it is recommended to purchase medium or high density fiberboard, as low density is too unstable.
But drywall is better to refuse - it is an impractical, heavy and fragile material that is definitely not suitable for shelves.
Next, determine which parts you will need for assembly.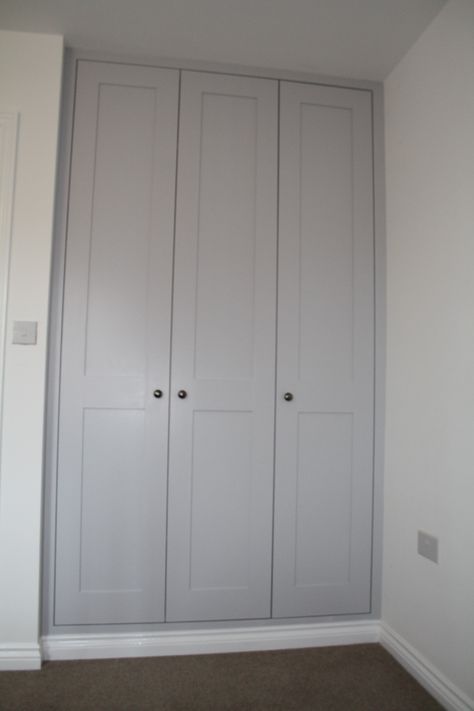 Note that some items can be purchased ready-made: this applies to shelves or sliding doors. You can contact the master, who will make them in accordance with all the rules, and do it yourself only assembling the cabinet. But other components will have to be purchased in any case - they are irreplaceable.
These items include: door rollers and drawer rails, screws, mounting pins, support elements, hanger rods. This list can grow depending on your goals.
Wardrobe assembly
After careful development of the closet scheme and preparation, it's time to move on to the most important moment - the installation of all parts.
Nisha
Undoubtedly, the opening in which the cabinet body is installed must first be prepared for this. To keep the walls from dusting, some people prefer to cover it with a layer of plywood or even paste it with wallpaper. But there is also a more economical option.
To begin with, the old coating is removed with a gel remover.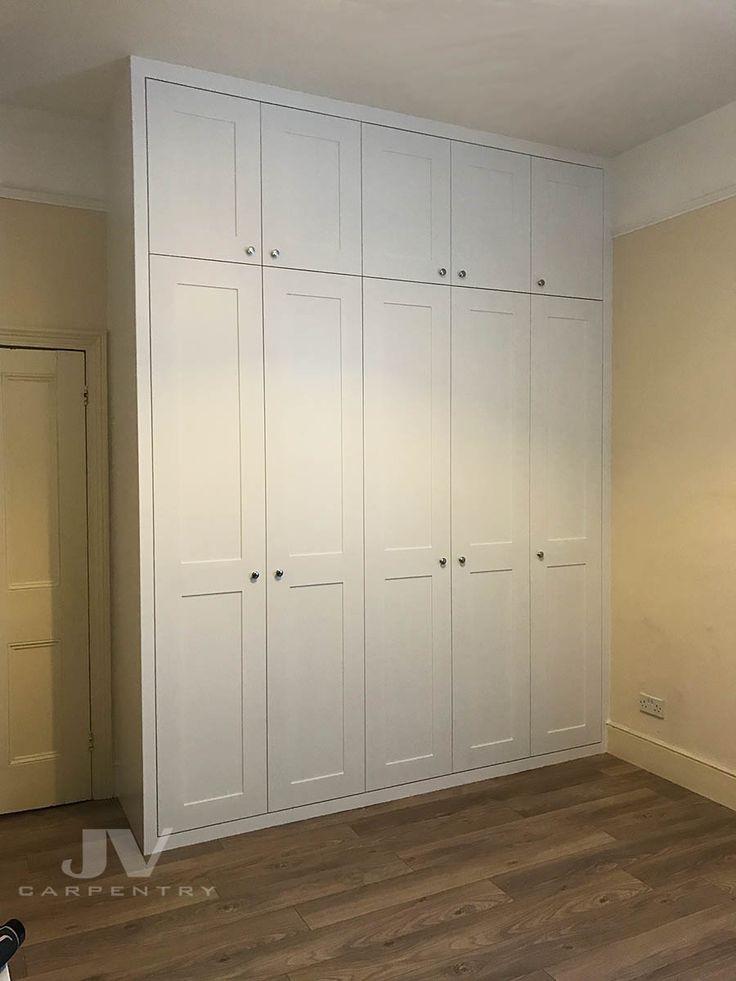 It is completely safe for health. After that, it is necessary to impregnate the surface with a water-polymer solution of PVA. This process will take several days, since it is recommended to repeat the procedure several times, after waiting a day. Then we cover the partitions with acrylic enamel. Done - ten years of protection guaranteed.
Shelves
Time to fill the niche with storage space. Note that for a built-in wardrobe, the options for attaching shelves as in cabinet furniture will be ineffective, since it is impossible to get to the sidewalls from the outside. It is difficult to design a special frame on your own, but the use of adjustable suspension systems can save the situation.
Another convenient solution is to attach the storage units to the plinth pieces that support the shelves from below. In general, having decided on the method, the installation of the internal components of the wardrobe will not cause problems.
Sliding doors
Installing the main feature of wardrobes - sliding doors - is the most difficult stage of work.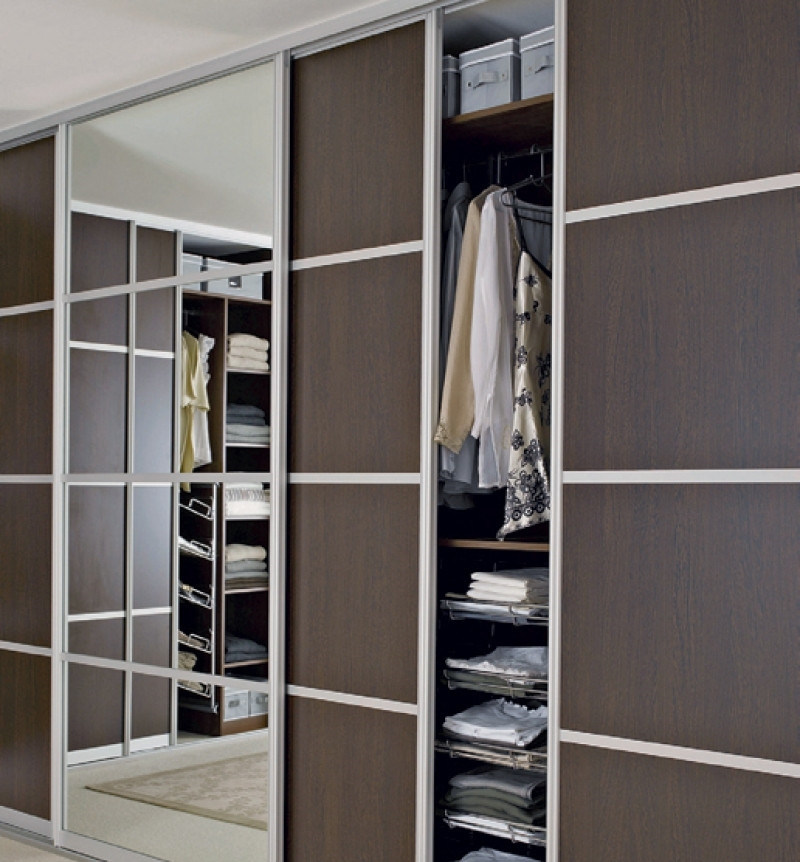 You have to install the role mechanism in such a way that it does its job perfectly, provides easy sliding, clear fixation, and also does not make extraneous sounds.
It is necessary to decide on the choice of suspension. There are three types: bottom rail, top rail and monorail.
In the first case, the lower part of the mechanism serves as a support, while the upper part prevents it from falling out. This is the most common and reliable type. Installation is carried out as follows: the upper and lower rails are installed in a page, raised and adjusted to the stop.
In the second case, the opposite is true - the support goes to the top. Thus, the mechanism is not so dusty, does not emit extraneous sounds. But with careless handling, parts can be easily damaged.
The third option is a carriage with two pairs of rollers. In this case, the suspension of each sash moves to another guide.
Doors are installed in the suspensions, checked for operability - and that's it, the built-in wardrobe is ready!
Video: DIY built-in wardrobe
How to make (assemble) a do-it-yourself wardrobe (photo, video), built-in or cabinet, assembling a wardrobe for a balcony, kitchen and hallway
Step-by-Step Instructions for making and assembling
Most DIYers would love to do a little DIY for their home. But it will be difficult to make a sliding wardrobe with your own hands without knowledge of the subtleties and features of its design. We will go through the cycle of its manufacture step by step. With the help of this tutorial, you can learn how to make a wardrobe yourself.
To get started, prepare the following tools:
Let's look at the step-by-step process of making a three-door wardrobe using these examples:
| Built-in cabinet | Cabinet cabinet |
Description of the production of these models is divided into several stages.
1. Measurement of the room for installation
How to correctly measure the opening of the room. The measurement scheme of our opening will look like this:
| Width measurement | Depth gauge | Height measurement |
As you can see, the room must be measured at several points.
Measuring the width of the room
Take 4 measurements on the back wall:
The first one is above the baseboard.
Second - 800 mm from the floor
Third - 1600 mm from the floor
Fourth - under the ceiling
Next, you need to make another series of measurements, but stepping back from the back wall to the depth of the cabinet. And also, as in the previous example, take 4 measurements at different heights.
Measuring the depth of the room
Make 4 measurements on the side wall:
The first one is above the baseboard.
Second - 800mm from the floor
Third - 1600mm from the floor
Fourth - under the ceiling
Measuring the height of the room
Measure the height along the back wall every 500mm:
First - at the left wall.
Medium - every 500 mm
Last - at the right wall
Next, you need to make another series of measurements, but already stepping back from the back wall to the depth of the cabinet.
Designation of foreign objects
Next, you need to measure the distance to foreign objects - ledges, sockets, switches, doorways.
There are no foreign objects in our example.
2. Calculation of overall dimensions
How the width of a wardrobe is calculated
Calculation of wardrobe dimensions will be carried out on the basis of data obtained during the measurement of the room.
So, according to the results of measuring the room at different points, we have the following widths of the opening: 2100mm, 2097mm, 2094mm, 2090mm.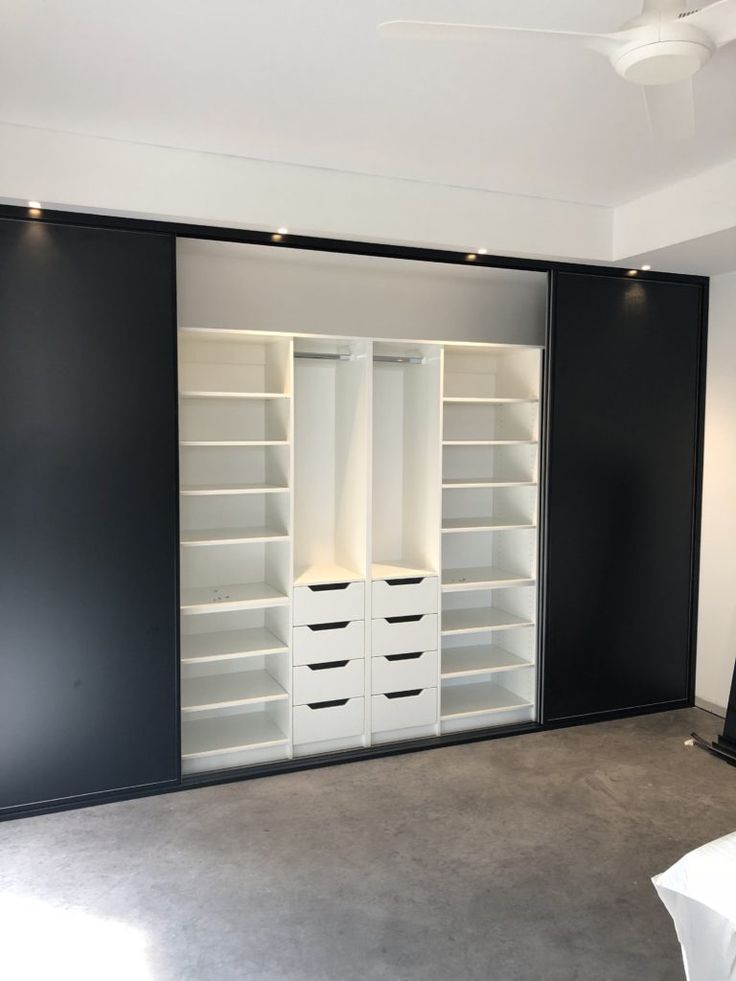 As you can see, all values differ from each other, and the difference between the largest and smallest value is about 10mm.
Consider our examples:
Option #1. The cabinet is built-in, that is, without side panels, in this case we set the width dimension according to the largest size. In our example, 2100mm. A difference in width up to 15 mm is allowed.
Option #2. In the case of a cabinet, i.e. with side panels, floor, roof and rear walls, the width of the cabinet is calculated from the smallest dimension minus 60mm, in our example the smallest dimension is 2090-60=2030mm. As you understand, we subtract 30 mm from each side and thereby ensure the guaranteed entry of our cabinet into the opening along its width.
How the depth is calculated
According to the results of measuring the room at different points, we have the following opening depths: 650 mm, 653 mm, 658 mm, 660 mm.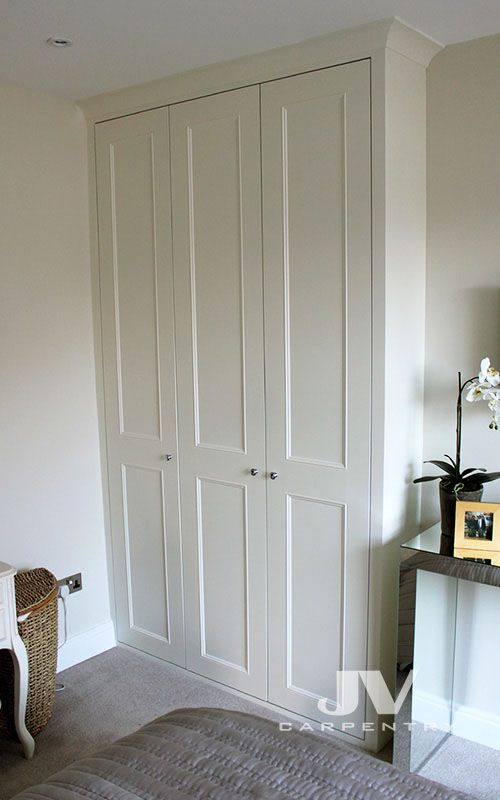 The difference between the largest and smallest value is 10 mm.
The cabinet depth will be calculated from the minimum niche depth.
In wardrobes, 100 mm of the total depth goes to sliding doors. The useful depth of the closet is that part of the closet that is used for storing things in it. In our examples, the dimension is 600 mm in depth, 100 mm is spent on the rails, that is, the useful depth of our cabinet is 600-100 = 500 mm.
How to calculate the height
According to the results of measuring the room at different points, we have the following opening heights: 2642 mm, 2647 mm, 2652 mm. The difference between the largest and smallest value is 10 mm.
If you plan to make a built-in wardrobe with your own hands (option No. 1), then its height will be calculated according to the minimum opening height of the room. A height difference of up to 15 mm is allowed.
If the cabinet is cabinet (option No.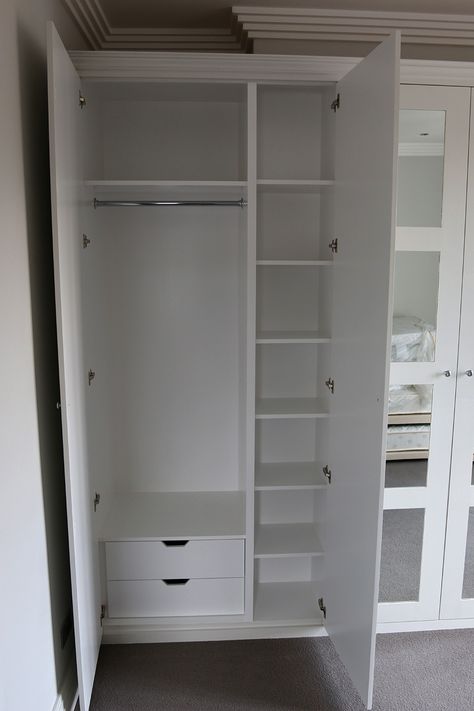 2), then its maximum height will be calculated according to the minimum room opening height minus 40 mm, in our example the maximum height is: 2642-40=2602 mm.
Calculation of the dimensions of parts for the cabinet
After choosing the dimensions, you need to draw up a detailed product, that is, paint the cabinet in detail. To do this, you need to draw a draft of our cabinet, taking into account our wishes (the number of shelves, drawers, rods, etc.), on the resulting drawing, arrange all the dimensions in width, taking into account the thickness of all partitions (see examples)
| Built-in wardrobe (front view) | Sliding wardrobe cabinet (front view) |
| Built-in wardrobe (top view) | Sliding wardrobe cabinet (top view) |
3. Preparation of detailing
For your convenience, on our website you can download the form "Cut chipboard".
The first dimension indicates the length (along the direction of the fibers of the material), the second the width of the part (across the direction of the fibers), then indicate the number of identical parts, then comes the edge, we use PVC edges with a thickness of 2 mm (the designation in the table is X) and 0 .4 mm (the designation in the table is O), we put a 2 mm edge on the front side of the part, and a 0.4 mm edge on the back side of the part. The sides of a part that are joined to another part do not need to be hemmed.
So, let's fill in our table:
This is the set of parts we received.
Note:
Part No. 1 and No. 2 - lower and upper false panel, since the cabinet is built-in and the width of our niche is different, we give the part with a margin of + 50 mm (we cut off the excess, adjusting the part to the width of the opening).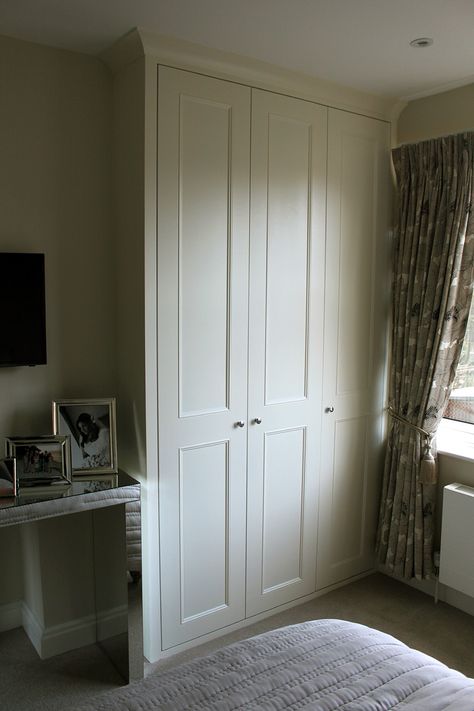
Part No. 3 - Trim side panels, we also give with a notch in height +50 mm, since the ceiling is different in height.
Part No. 4 - Antrisol shelf, also given with a notch + 50mm, adjusting their size in place.
How to calculate the boxes correctly? Let's take this example as a basis:
Opening width 600 opening height 400, from these parameters we will consider 2 boxes, 2mm - gaps in height and width.
- Drawer front 400-2-2-2/2=197mm (drawer front height dimension), 600-2-2=596mm (drawer front width).
- The side panel of the drawer is equal to the length of the rail, the height of the side panel is calculated: front height minus 30 mm.
- The drawer partition is calculated according to the formula, the width of the opening for drawers minus two thicknesses of the guide, minus two thicknesses of the side. drawer panels, that is, 600-13.5 * 2-16 * 2 \u003d 541mm.
- The bottom of the invoice is made according to the size of the box 450x573 mm
Let's make a table with dimensions for our second option (pictured below).
As we see in the photo above, when detailing the cabinet cabinet with our own hands, the parts are sawn without allowance, that is, in size.
I would like to note, as you can see in the first and second tables, we enter the length and width of the parts without taking into account the thickness of the edge, that is, the thickness of the edge must be subtracted from the dimension of the part, this applies to the edge of 2 mm.
I would also like to note the calculation of the rear walls made of hardboard. The rear wall is calculated as follows: cabinet width minus 2 mm, cabinet height minus plinth height minus 2 mm. If the cabinet is wide, then we divide the back walls into several parts, connect them at the back on the partitions, in our case, the height of the back walls is 2602-60-2=2540mm, the width of the first back wall is 638+15+8=661mm, the width of the second back wall is 718+ 8+8=734mm, third rear wall width 600+8+15=623mm.