Replace kitchen drain
in four easy steps |
(Image credit: Alamy)
Every now and then a kitchen sink drain will need changing. Most plumbing components will need replacing at some point, and if your kitchen sink isn’t draining as well as it should, it might be that it’s old and worn out. And if you’re constantly having to repair it or use a plunger, now is the time to think about changing the kitchen sink drain for smooth, easy water drainage every time.
Before you replace a kitchen sink drain, though, do check that it isn't just a case of fixing a clogged sink. ‘The biggest causes of kitchen sink clogs are grease and food,’ says Martha Stewart . ‘That's why it's so important to scrape any crumbs off your plate and into the trash before giving it a good rinse.’
Check your sink area regularly and look for signs of wear and tear. If yours is old and outdated, the drain probably is too.
‘Replacing the kitchen sink drain isn’t too time-consuming,’ says Lucy Searle, Global Editor in Chief for Homes & Gardens. ‘It should take around one or two hours from start to finish and it’s a job that even novice DIY-ers can tackle. The time to change it is if it’s not draining water properly and is tricky to fix or if you are replacing a kitchen sink as part of a kitchen renovation or update.’
How to change a kitchen sink drain
Kitchen sink drain traps can be purchased as kits with parts to match your current configuration. So, think about whether you need a drain trap for a single or double-bowl sink or one with a garbage disposal.
There is also a choice of materials too with PVC plastic (the most common option), chrome and copper. Because the kitchen sink drain is hidden from view inside the kitchen sink cabinet underneath, most people opt for the plastic version.
You’ll also need to check the size. Most kitchen sink drains are 1.5 inches in diameter whereas bathroom sinks will be 1.25 inches. Try to choose a kit with smooth pipes rather than corrugated, as corrugated can catch grease and food as it goes down the drain, causing constant clogs.
You will need:
- Kitchen drain trap kit
- Sink drain and strainer assembly
- Tape measure
- Marker
- PVC tubing cutter or hacksaw
- Channel locks/pliers
1. Check the height of the trap arm
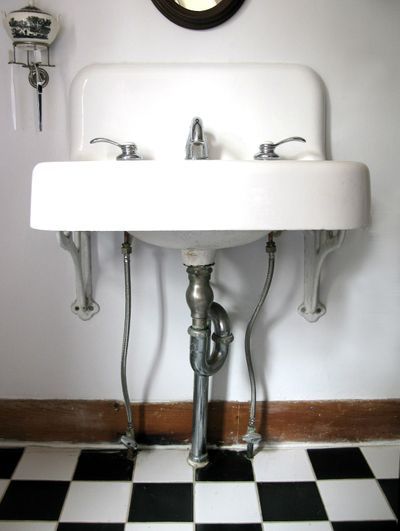
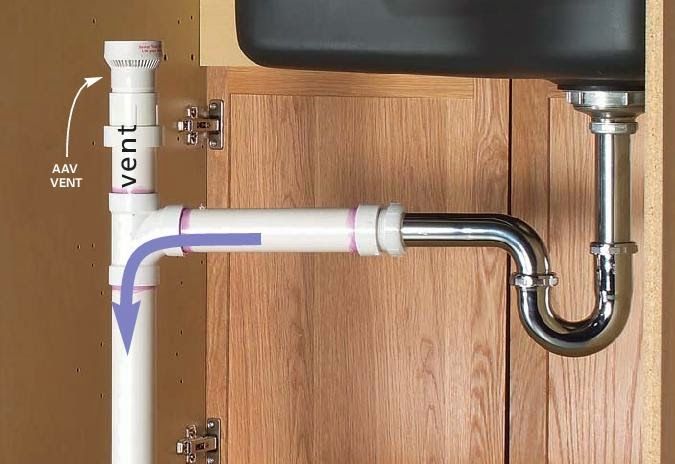
Allow yourself a couple of hours of uninterrupted work time and get all your tools ready. Clear the area under the sink so you have room to work in and place a bucket underneath the pipework. First, look at the height of the trap arm under the current sink. You’ll locate this by looking at the U shaped bend (also known as the P-trap) and the drainpipe that leads into the wall. There’s a trap arm in between, which is a horizontal piece of pipework. Note when we say 'horizontal' that there is a slight slope from the P-trap side to the wall outlet/branch drain to allow for proper draining – ideally, the slope should be around 0.25inches per foot.
Take your tape measure and measure from the floor or the bottom of the cabinet to the middle of the trap arm.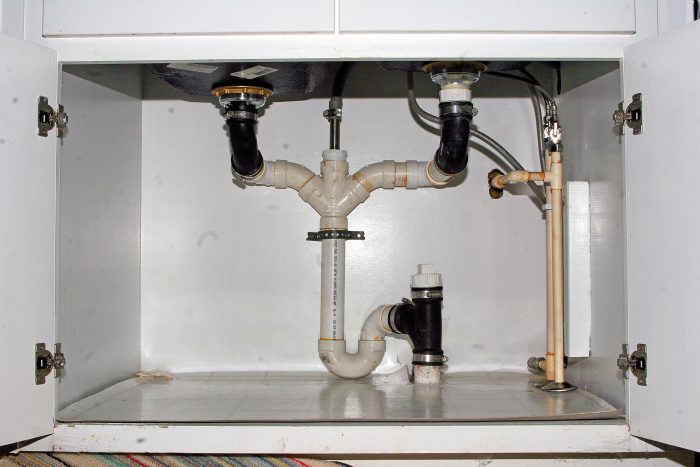 This is the length you need for the new pipe.
The new sink's depth needs to match your current sink's depth so that the trap arm doesn't have to be moved. If the new sink differs from your current one in depth (particularly if it is deeper), that you ensure it can allow for the proper trap arm slope. If it can't, you will need to move the drain outlet in the wall, which makes the job much more complicated (see below).
2. Lower the position of the drain outlet
As we said above, if the new sink is deeper than your current one, you will very likely have to lower the drain outlet. This is not a job for a beginner to DIY – or someone without the proper tools: you will need to both cut away more of the back of the kitchen cabinet and through the brick or masonry of the external house wall.
If you are determined to do this yourself rather than call in a professional, be sure to measure carefully to check whether the lowered P-trap can still be removed for cleaning and unclogging in future.
3. Cut and connect the drain pipes
Whether you’ve bought a pre-cut length of pipe to the measurements needed or you cut a longer length to fit using a small hacksaw or tubing cutter, precision is key. You’re basically replacing like for like here so take photos as you go, as this will help.
You need to remove existing parts and install the drain trap and waste pipe using slip nuts and washers. Tighten by hand for now, making sure the continuous waste arm slopes slightly downwards. Once you’re happy, tighten with Channel locks.
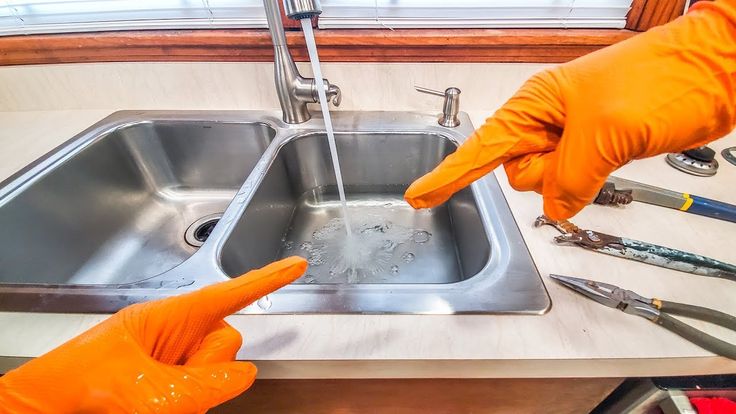
4. Check for any leaks
Turn the faucet on and check for leaks at every pipe joint. Tighten up any connections where needed then finally, fill the sink with the plug in then remove the plug and let the sink drain away – always with a bucket underneath until you’re satisfied.
Do I need plumber's putty to change a kitchen sink drain?
If you do need to stop any leaks, plumber's putty (available at Amazon) is the perfect product.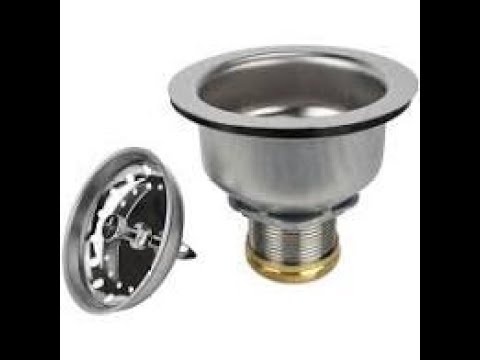 It’s a sealing staple used by professionals, DIY-ers and homeowners alike.
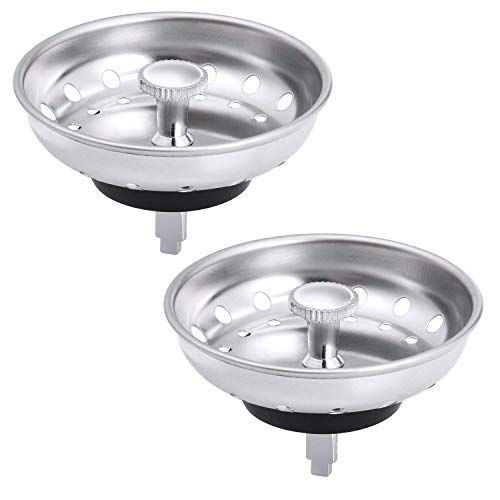
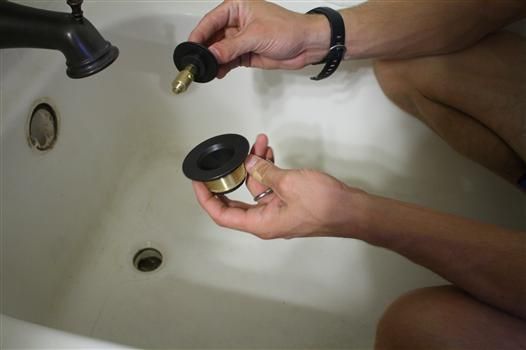
How do I remove a sink strainer?
To remove a sink strainer, use 16 inch slip-joint pliers or a spud wrench to unscrew the existing strainer locknut. If the basket spins, insert the plier handles into the strainer grate from above and stick a screwdriver between the handles to hold it still.
Hayley is an interiors journalist, content provider and copywriter with 26 years experience who has contributed to a wide range of consumer magazines, trade titles, newspapers, blogs and online content. Specialising in kitchens and bathrooms, she has twice won the CEDIA Award for Best Technology feature. Hayley writes for H&G about kitchens, bathrooms, cleaning, DIY and organizing.
How to Install a Kitchen Sink Drain
By
Aaron Stickley
Aaron Stickley
Aaron Stickley is a licensed plumber with 15 years of experience in commercial, new residential plumbing, and residential service and repair.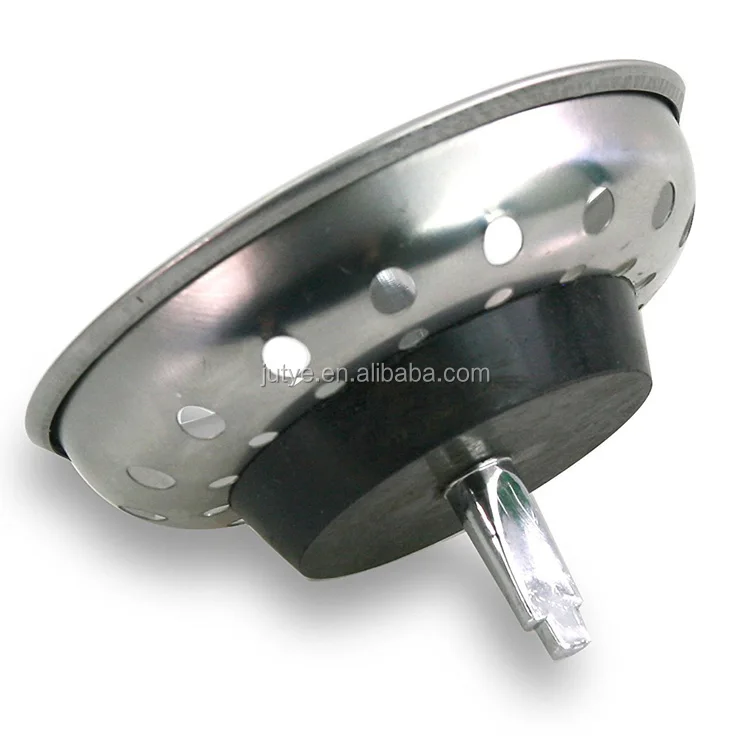 He started his own residential service and repair plumbing business. Aaron's articles about plumbing on The Spruce span four years.
Learn more about The Spruce's Editorial Process
Updated on 06/21/22
Reviewed by
Richard Epstein
Reviewed by Richard Epstein
Richard Epstein is a licensed master plumber with over 40 years experience in residential and commercial plumbing. He specializes in estimating as well as design and engineering for plumbing systems, and he works for one of New York's largest union plumbing construction companies.
Learn more about The Spruce's Review Board
Fact checked by
Jessica Wrubel
Fact checked by Jessica Wrubel
Jessica Wrubel has an accomplished background as a writer and copy editor, working for various publications, newspapers and in public libraries assisting with reference, research and special projects.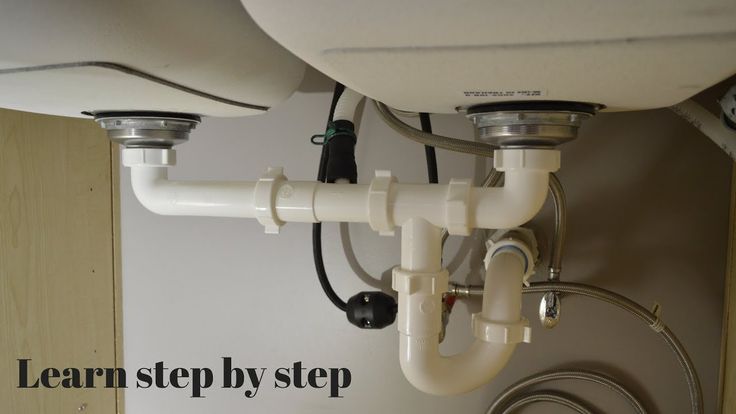 In addition to her journalism experience, she has been educating on health and wellness topics for over 15 years in and outside of the classroom.
Learn more about The Spruce's Editorial Process
The Spruce / Kevin Norris
Project Overview
It's rare for the drain assembly on a kitchen sink to fail and need repair, but if a sink is being replaced during a kitchen renovation or update project, part of the process often does involve installing a new drain assembly for the new sink.
The steps for installing the sink drain will depend on how different the new sink is from the old one, as well as what other components are being installed. For example, the new sink may have a different depth than the old one, so it may be necessary to perform some alterations to the branch drain pipe fitting entering the wall. Installation may be slightly more complicated if you are also installing a garbage disposal as part of the new sink installation.
Kitchen drain traps are available in various bundled kits containing different configurations of parts to match specific situations—some for single-basin sinks, some for double-basin sinks, and some for sinks that will include a garbage disposal. Both chromed copper and PVC plastic drain trap kits are available; most people now use plastic parts for kitchen sink drains, which are generally hidden from view.
Kitchen drains are usually 1 1/2-inch in diameter, rather than the 1 1/4-inch pipes often found in bathroom sinks, so make sure you buy the right size. Occasionally, you may find a 2-inch kitchen drain outlet. If so, there are adapter fittings that can transition a 1 1/2-inch drain kit to the 2-inch outlet pipe.
Although many drain trap kits include flexible, corrugated tubing that makes installation much easier, professional plumbers generally do not use these, as the rough corrugations are quite susceptible to catching grease and food particles and causing clogs. It's much better to use smooth pipes, cutting them precisely to size, to ensure a good flow of drain water.
Tip
If you're planning to replace a standard sink with a deep basin sink, you may find it necessary to lower the drain outlet in the wall to match the lower height of the new sink drain. Extra-deep farmhouse-style apron sinks often require this kind of alteration. Moving a drain outlet is a fairly complicated job that will probably require a professional plumber unless you are a very experienced DIYer.
Watch Now: How to Easily Install a Kitchen Sink Drain
Need more help? Talk to a plumber near you
Our partners can help you compare quotes from top-rated professionals near you
Get a Quote
Advertiser Disclosure
The offers that appear in this table are from partnerships from which The Spruce receives compensation.
Equipment / Tools
- Tape measure
- Marker
- PVC tubing cutter or hacksaw
- Channel-type pliers
Materials
- Kitchen drain trap kit
- Sink drain and strainer assembly (for each basin)
The Spruce / Kevin Norris
-
Check the Drain Outlet Height
Before removing the old sink and buying a new kitchen sink, it is a good idea to check the height of the trap arm on the old sink.
 The trap arm is the horizontal piece between the U-shaped trap bend (the P-trap) and the branch drainpipe in the wall. It connects to a sanitary tee fitting in the branch drain and should slope down toward the tee at about 1/4-inch per foot for proper drainage.
 Measure up from the floor or base of the cabinet to the center of the trap arm. If the height is more than 16 inches, you may find that a new sink will not allow for the necessary downward slope for the trap arm.
The Spruce / Kevin Norris
-
Lower the Drain Outlet, If Necessary
If you find that the existing drain outlet is not low enough to accommodate the depth of the new sink, you (or a professional) will need to open the wall and lower the position of the sanitary tee connecting to the drain pipe in the wall. This can be a somewhat complicated job that requires cutting away the back of the cabinet and the wall surface.
Our example is a case in point—the new sink left insufficient room for connecting a standard drain assembly to the drain outlet in the wall (left photo).
 So, the sanitary tee fitting serving as the drain outlet has been lowered (right photo). Keep in mind that the drain height must leave enough room for removing the trap and cleaning it out.
 If you need to lower the sanitary tee in the branch drain, it is a good idea to wait until the other parts of the drain are test-fitted before gluing and securing the fittings permanently. Leaving the fittings loose will allow you some room for adjustment.
Before continuing to the next steps, remove the old sink and install the new sink in the countertop. Our installation will include a double-basin sink with a garbage disposal fitted to the right basin.
The Spruce / Kevin Norris
-
Install the Garbage Disposal and Strainer
First, install the garbage disposal onto the desired side of the sink, since this takes up the most space.
Next, install a basket strainer onto the remaining sink basin. This is also a good time to install any other under-sink components, such as a water filter or a hot water dispenser.
 You will need to work around these fittings as you connect the drain pipes.
 The Spruce / Kevin Norris
-
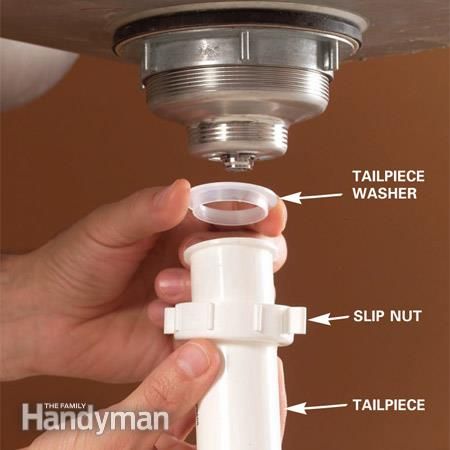
Install the Drain Tailpiece and Continuous Waste Pipe
The drain tailpiece is a short vertical length of straight pipe that joins the sink strainer to a tee fitting. The side outlet on the tee fitting will accept the continuous waste pipe coming from the garbage disposal (or the other sink basin), while the bottom outlet will continue on to the drain trap.
Temporarily install the tailpiece onto the sink strainer, using a slip nut (and slip washer, as applicable). Temporarily connect the curved end of the continuous waste pipe to the garbage disposal's drain outlet, using a slip nut and washer. Let the straight end of the pipe extend past the vertical tailpiece on the sink basin. The pipe should slope downward slightly toward the tailpiece.
Hold the tee fitting up to the tailpiece and waste pipe, and mark cutting lines on both pipes, where they will fit into the tee fitting.
 Now, cut the tailpiece and continuous waste pipe to length with a PVC tubing cutter or a hacksaw.
 Reinstall the tailpiece and continuous waste pipe, along with the tee, leaving the connections hand-tight. Adjust the pieces as necessary, making sure the continuous waste arm has a slight downward pitch toward the tee fitting.
Tighten the slip nuts slightly more with channel-type pliers. These do not need to be overly tight; the plastic threads can be damaged if you use too much force.
- Note: If your sink has a single basin, it will not require a tee fitting on the end of the tailpiece—the tailpiece will lead directly down to the drain trap. If you have a double-basin sink but neither basin will have a garbage disposal, the tee fitting is installed on one basin's tailpiece, with the side outlet of the tee accepting a continuous waste pipe from the second basin.
The Spruce / Kevin Norris
-
Connect the Drain Trap
The drain trap assembly includes a U-shaped trap bend and a J-shaped trap arm.
 The trap bend fits onto the bottom of the tailpiece tee fitting, while the trap arm extends into the drain outlet in the wall.
 Assemble the trap bend and trap arm together loosely with a slip nut and washer. Slide a slip nut and washer onto the straight end of the trap arm. Push the trap bend up into the tee fitting on the tailpiece while sliding the trap arm into the drain outlet at the wall.
Adjust the trap pieces as needed to create the most direct path from the sink to the drain outlet. Make sure the trap arm has a slight downward angle toward the drain outlet.
Mark and cut the trap arm as needed if it is too long to fit the space, then reinstall the P-trap assembly. Tighten all slip nuts with channel-type pliers. Again, don't overtighten.
Confirm that the continuous waste pipe and the trap arm slope slightly downward in the direction of the water flow, then check all of the drain connections to make sure they are tight.
Tip
Make sure to face the trap the correct way, with the sharp bend below the tailpiece.
 It may be tempting to turn it the wrong way in order to fit it into a small space, but it doesn’t work properly this way and may leak.
The Spruce / Kevin Norris
-
Check for Leaks
Run water in both sink basins and check for leaks at each pipe joint. Tighten up any connections that leak. Conduct a final test by filling up each sink basin and letting them drain quickly while you check for leaks below.
It's not uncommon for slip-nut joints to leak slightly. Fixing this usually requires just some minor adjustment. If initial tightening doesn't stop the leak, unscrew the nut, reposition the washer, and re-tighten the nut, making sure it's not cross-threaded.
The Spruce / Kevin Norris
how to assemble a sink and sink siphon
To carry out the simplest plumbing activities, it is not necessary to call a specialist, take time off from work and spend money on paying for services. For example, installing a siphon in the kitchen is a simple procedure that even a woman can handle.
If you correctly select the device, study the instructions for it and remember a few generally accepted rules, the process of cleaning, replacing or installing the siphon will pass quickly and without unpleasant surprises. 9Ol000
Siphon designs for kitchen
The question of buying or replacing a siphon arises when the old model fails, as well as for reasons not related to the device itself.
Suppose, along with the purchase of a new kitchen set, it is necessary, and the design of the new sink requires a different configuration of the appliance. Consider what types of siphons offer modern manufacturers.
We remind you that a kitchen siphon is a device that connects a sink to a sewer pipe, preventing an unpleasant smell from entering the room and facilitating the process of removing blockages
There are many options for classifying devices for creating, however, all types can be grouped into two broad categories:
- bottled;
- knee.
Knee, in turn, are divided into rigid or elastic (corrugated), and absolutely any type can have a more complex design if connected to a sink with overflow. It is also worth mentioning about (relevant for installation under the shower) and double - for installation under double sinks.
In addition to economical plastic models, siphons made of metal - brass, copper, steel or bronze - are also used. Their installation is relevant for styling the room, when the area under the sink is completely open
The bottle model is ideal for the kitchen, however, with a lack of free space or for other reasons, knee models (U-shaped and S-shaped) are also used. The latter types are more rational to install for plumbing fixtures with a minimum of free space - for example, under bathtubs.
Before you install a sink siphon in the kitchen, you need to decide on the model. We present several options, one of which may be useful to you.
Image gallery
Photo from
The advantage of this type is its simple design and quick disassembly/assembly if you need to remove a blockage or just perform preventive cleaning
In fact, this is a curved pipe, in the bend of which enough water accumulates to form a reliable water seal
Actually in fact, these are two different devices, however, during installation, it is necessary to consider their placement in a pair
Additional flexible pipe leads to a special hole in the sink - to prevent flooding in case of clogging of the drain hole
Due to its elasticity and the ability to stretch to the required length, corrugations are often used where it is impossible to install a rigid model.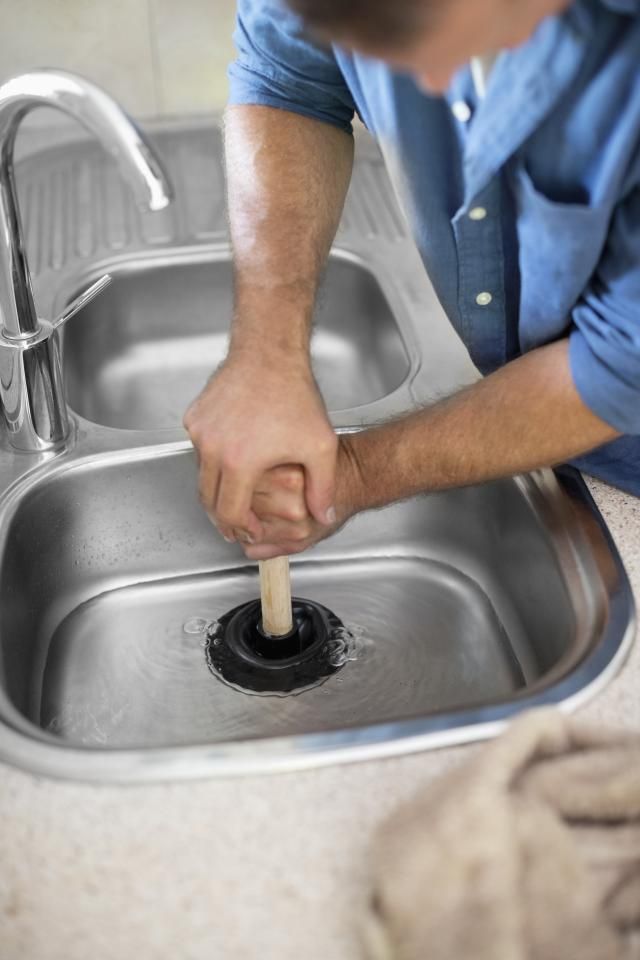
A steam sink is not uncommon in a modern kitchen. To increase the free space in the cabinet, one siphon is used for two sinks
It is used if it is necessary to connect several plumbing fixtures or arrange outlets for connection in an inconvenient place
In other words, a drain with a dry water trap. This variety is convenient for saving space, but it is irrational to install it in the kitchen, where there is a high risk of blockage
Option 1 - bottle siphon
Option 2 - elbow siphon
Option 3 - siphon with grinder
Option 4 - siphon with overflow
Option 5 - corrugated pipe 909003
variant 6 - double-bottle siphon double knee siphon
Option 8 - flat siphon
Thus, when choosing a new device, it is necessary to focus on the amount of free space under the sink, technical characteristics (reliability of the material and gaskets, throughput), the possibility of disassembly for maintenance, and if the siphon is not masked in the cabinet - then the appearance.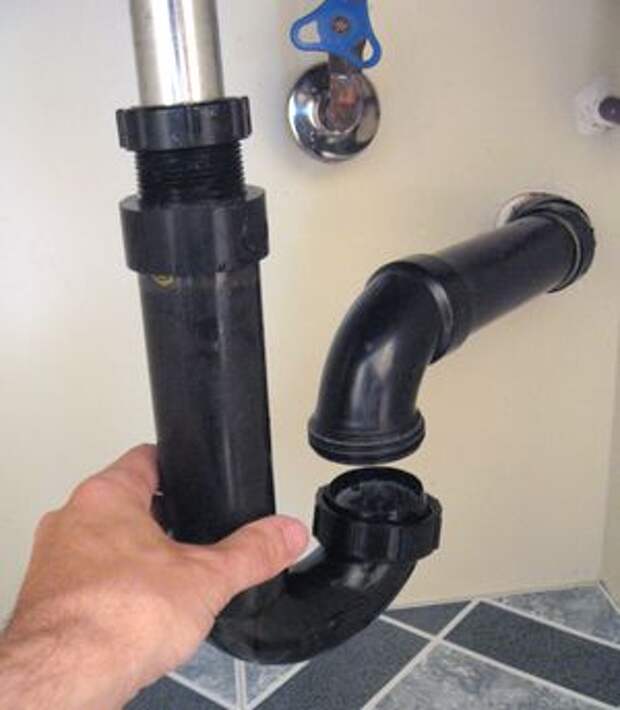
Assembly and installation instructions
Models are assembled in different ways: some models must first be assembled and then sealed to the sink drain and sewer pipe, others are partially assembled during the installation of the sink. Consider the options for assembling and installing popular types.
Installation steps for bottle siphon
When purchasing a device in a store, please note that there are 2 types of plastic models:
- inexpensive, consisting of 10 (or more) parts;
- branded, with integrated gaskets.
The second type is distinguished by the use of quality polymers - both plastic for the body and material for the sealing rings. Its cost is higher, but it will last longer.
In addition, it is much easier to assemble: it consists of only 3 parts, which are easy to connect and adjust. A typical device has at least 10 parts that must be installed in the right places without confusing the seals with each other.
The process of installing a siphon for a kitchen sink should be started after the plumbing is completely laid and furniture is installed, in other words, last.
Sometimes one of the parts - the drain - is mounted when installing the sink. As long as there is access to the back of the sink, it is easier to screw the fixing bolt. However, the design of bottle models is so simple and clear that they can be fixed on the sink at any time. For example, let's take an inexpensive model consisting of many elements. First, unpack the kit, check if all the parts are in place.
It is important that the tubes and the bottle part are smooth and tight, the corrugations are elastic, and the gaskets are tight, without flaws. Then we act according to the photo instructions:
Gallery of images
Photo from
We take a thin flat gasket, suitable for the diameter, and carefully pull it without distortions onto the place of the threaded connection of the "glass"
Cover - the second element of the plastic "glass" - tightly wind by means of a threaded connection so that the gasket is not visible
We take the pipe that connects the bottle element with the drain hole of the sink, and put a plastic union nut on it
In the same way we put on the cone gasket.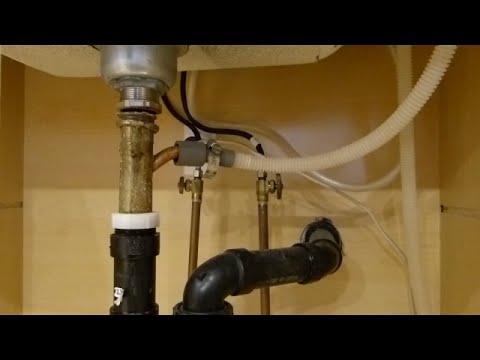 An important point: we install the gasket with the expanded end to the drain point
Insert the branch pipe into the upper hole of the bottle element, twist and carefully tighten the union plastic nut
On the corrugated tube, as well as on the branch pipe, we first put on the union nut, then the gasket suitable for the diameter
We insert the corrugated tube into the side hole of the “glass”, tightly tighten the union plastic nut
We mount the large blue gasket under the sink, between the nozzle and the sink, and fix the white gasket and the metal drain in the form of a lattice from above, fixing it with a long screw
Step 1 – installation of the gasket on the “cup”
Step 2 – screwing the cover of the “cup”
Step 3 – putting on the union nut on the nozzle
Step 4 – putting on the conical gasket on the nozzle
Step 5 - connecting the "glass" and the pipe
Step 6 - putting the nut and gasket on the corrugation
Step 7 - connecting the "glass" and the corrugation
Step 8 - distributing the remaining parts
Assembly is completed, it remains to install the siphon under sink.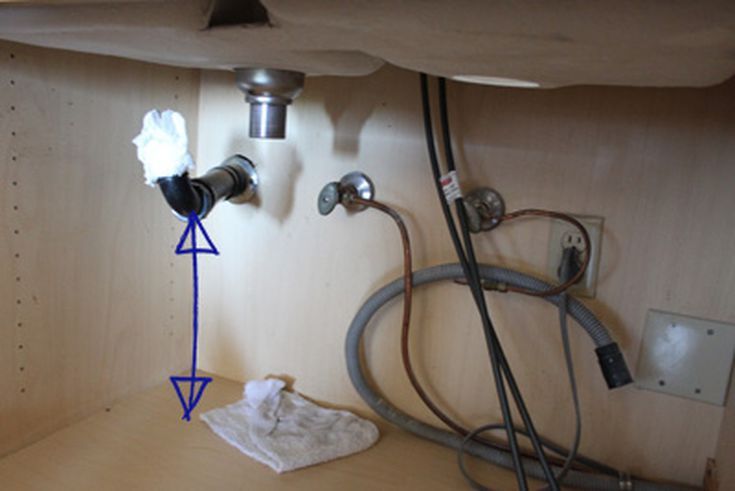 It is positioned so that the pipe is directed to the drain hole, and the corrugated pipe is directed towards the sewer socket. The bottle part should be at the bottom, it is in it that a water seal is formed.
Image gallery
Photo from
We place a metal grid with a white seal on the drain hole, insert a long fixing screw
If the neck is not inserted into the bottle part, screw it to the drain hole. If the siphon is already fully assembled, simply fix it with a screw
We attach the bottle part of the siphon to the neck, not forgetting to put a seal between the pipe and the neck
0003
Stage 1 - installation of a metal grate
Stage 2 - installation of the neck under the sink
Stage 3 - screwing the siphon to the neck
Stage 4 - tightening all union nuts
outlet - usually a wide branch pipe. To ensure the tightness of the connection, we use adapters and sealant.
How to install overflow model
The overflow is a handy contrivance that prevents the kitchen from flooding if the drain becomes clogged and water threatens to spill out of the overfilled sink onto the floor.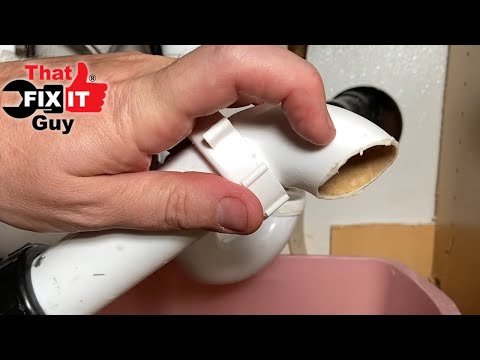
On the outside of the sink you can see several small holes or one large one. In the second case, a decorative piece is installed on the outside to cover this hole.
The overflow hole is usually located on the side - either on the wall of the sink on the side of the wall, or on the lintel between two sinks
The overflow device itself is an additional corrugated (rarely rigid) tube, which is fixed on the reverse side of the sink, just opposite the overflow hole, and the other end is inserted into the siphon pipe.
Mounting on the sink is carried out with a screw, hermetic connection with the nozzle is made by tightening the plastic union nut.
When installing the overflow, as well as when installing any sewer elements, it is important to hermetically connect all the fragments and be sure to use a sealant. Here, a dense rubber or plastic ring is fixed under the socket, fixed on the back of the sink. It can be round, oval or rectangular in shape.
Image gallery
Photo from
The hole can be on the opposite side or side, have a round shape or look like several small holes
In this case, the hole is covered with a decorative element, since the sink is made to order from artificial stone.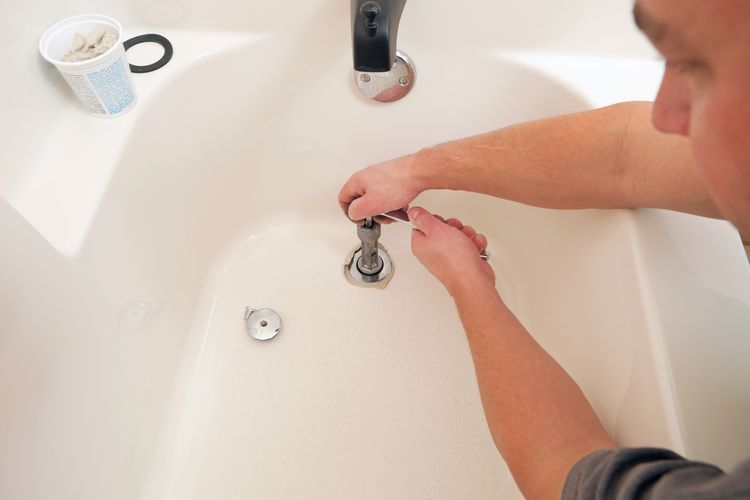 Inexpensive models instead of decor have several small holes in the steel sink
0003
Fix the corrugated tube with one end on the sink - opposite the overflow hole, insert the other end into the siphon pipe
Step 1 - prepare the hole for the overflow
Step 2 - prepare the decorative grill element
Step 3 - install the decorative element
Step 4 - installation of corrugations for overflow
After installing the device with overflow, it is necessary to check it for leaks: tightly close the drain hole, draw a full sink of water and watch how the liquid flows through the overflow into the siphon. If there are no leaks, the device is installed correctly. Otherwise, it is worth re-checking the presence of gaskets and tightening the union nuts more tightly.
How to do it under the kitchen sink is detailed in our article.
Connecting the siphon to the sewer
There are several ways to connect the siphon to the sewer pipe.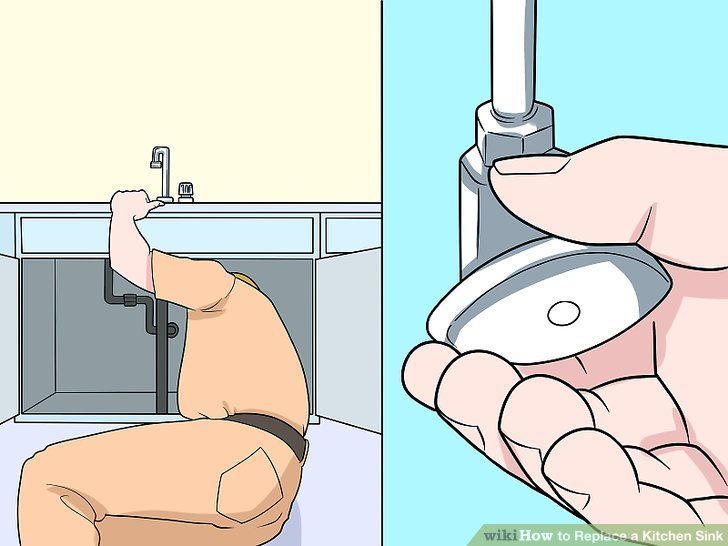 Their choice depends on the design of the device with a water seal, and on the location of the sewer outlet. The easiest way is when the installation of a kitchen sink is a stage of repair work: then, even when installing a sewer, the most appropriate wiring is thought out.
However, siphons are replaced more often than major repairs are made. This is due to breakdowns of the device, and with the replacement of furniture. Therefore, it is sometimes necessary to figure out how best to assemble a siphon for a sink and connect it to a sewer outlet on the go.
Corrugation is often used as a connecting element, however, it is much more reliable and more expedient to mount a smooth rigid element. Moreover, a short pipe is much better than a long one - so the probability of blockage is reduced to zero
Corrugated pipe is good because, thanks to its elasticity and mobility, it can be placed anywhere, and if necessary, stretched to the desired length. However, plumbing corrugation has a weak point - it wears out much faster than a rigid element.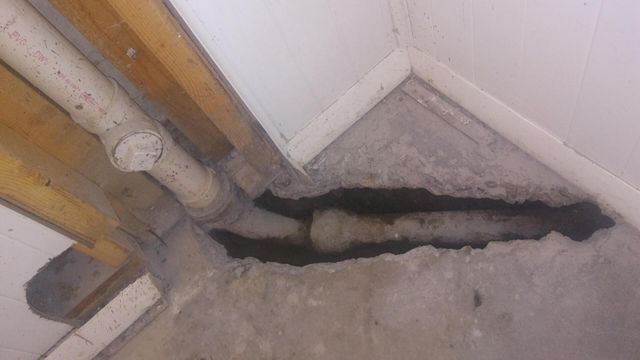
In addition, due to the softness of the pipe, it sags, thereby causing blockages. The ribbed inner surface of the pipe is also prone to accumulate contaminants, causing the material to stretch and lose its shape.
If possible (with a good location of the sewer outlet), you can independently replace the corrugated part with an ordinary piece of pipe for internal sewerage, cut to the desired length.
You can get acquainted with the replacement option using the photo gallery:
Image gallery
Photo from
Corrugated pipe from the siphon kit
Plastic rigid pipe D 40 mm
Installation of a rigid pipe 90/5 mm adapter
The smooth inner surface of the rigid pipe is a guarantee of protection against sagging and frequent blockages, which are characteristic of the corrugated counterpart.
The specifics and features of connecting a siphon to it are detailed in the article we recommend.
Conclusions and useful video on the topic
Videos are a great opportunity to consolidate knowledge about the assembly and installation of siphons, as well as learn how to practice the installation of plumbing equipment on your own, avoiding common mistakes.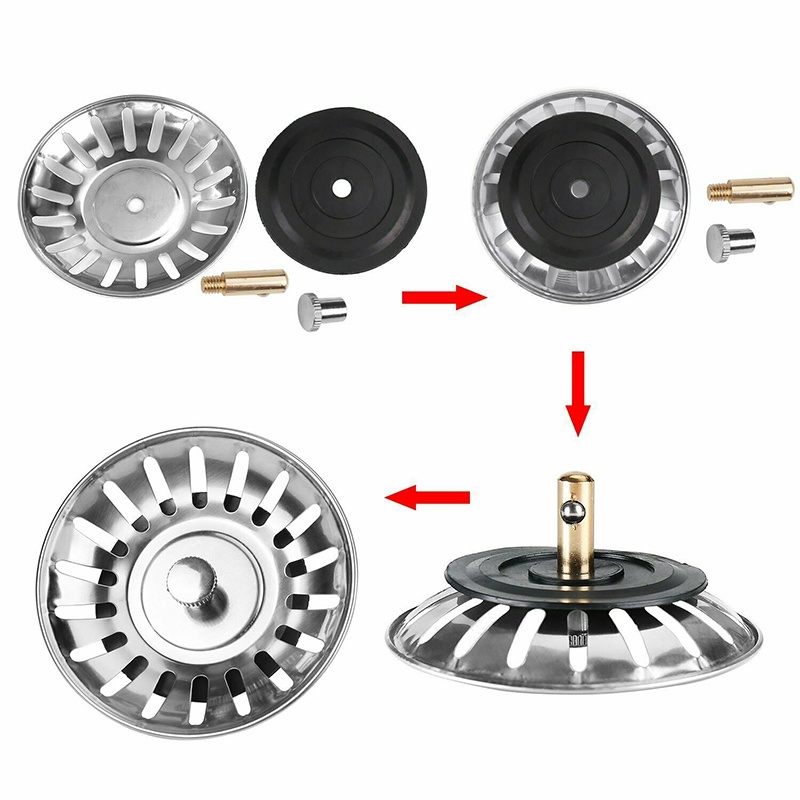
Video tutorial on replacing an old, failed kitchen sink siphon:
Non-standard installation of a siphon connected to a corrugated drain hole:
Assembly and tips for proper installation of an inexpensive siphon with overflow:
As you can see, assembling simple models does not take much time and does not require special knowledge. When replacing an old siphon, it takes more effort to dismantle worn-out equipment.
If you have no questions about installing a kitchen sink drain, you can do all the work yourself. To solve more complex problems of connecting the device, it is better to contact a plumber.
Would you like to share your personal experience with installing a siphon under a kitchen sink? Do you have useful information that you would like to share with site visitors? Please write comments in the block form below, express your opinion and post a photo on the topic of the article.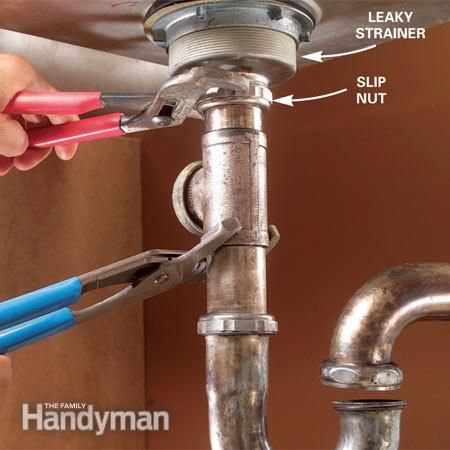
How to install and connect the siphon to the sink in the kitchen: 7 steps
The siphon is a plumbing part, without which it will not be possible to use the sink normally. Shops offer many options for sinks. The guide helps to understand the types and features of models, tells how they are arranged. It also includes step by step installation instructions.
What is a sink siphon?
This is a drain element that creates a water barrier, thereby preventing debris from entering the pipeline and unpleasant odors in the kitchen.
There are five main types of siphon:
1. Bottle siphon is a rigid structure with a screw-on detail at the bottom. This is very convenient, as blockages can be quickly cleared. This option holds not only debris, but also small items, such as rings. A corrugated soft or hard drain hose can be connected to this type of siphon.
2. Flexible - a corrugated tube with a bend that is fixed with a clamp. The place of bending creates a water seal. The main part of the siphon can be bent in the desired direction. A significant disadvantage of this solution is the roughness of the inside: due to this structure of the material, debris often lingers inside, so it needs to be cleaned more often than others.
3.Hidden - bottle variation. Outside, only a horizontal tube is placed, and the “bottle” itself is built into the wall. The cost of such models is higher because they do not spoil the interior.
Read also: How to choose a bath faucet: 4 secrets of a successful purchase
4. Pipe - rigid, has an S or U shape. The design can be either solid or collapsible. Some models are equipped with a stopper at the bottom point, which makes it easy and quick to clear the blockage. When installing such a siphon, it is important to match the drain holes of the sink and the inlet sewer channel as accurately as possible.
5. Flat - has either a tubular or rectangular body. This option is more compact than the others and costs more, but it gives more free space under the sink in the kitchen.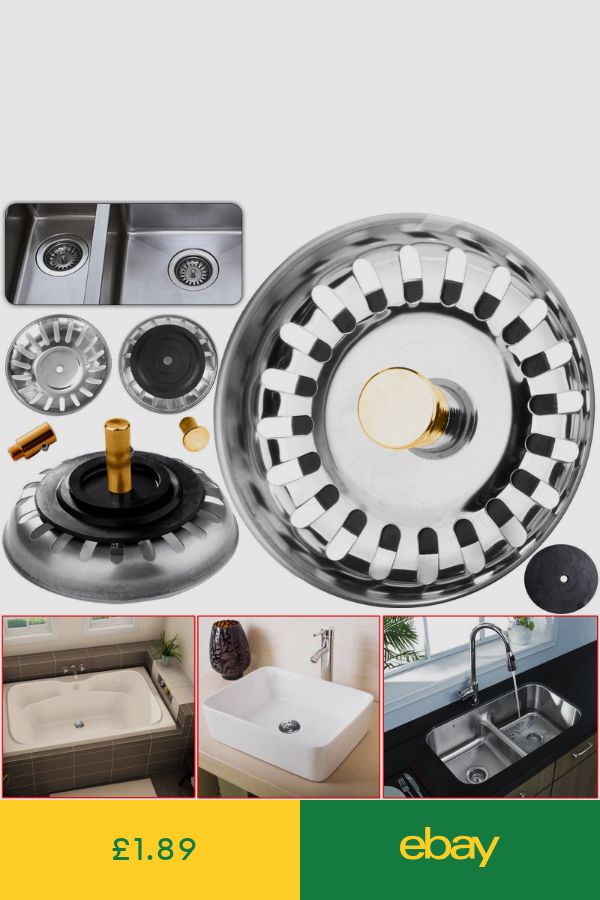 This makes it possible to install a cabinet below, place a small washing machine or dishwasher.
Tip : after delivery of the siphon, make sure that its elements are not deformed, and that all parts that should be included are in place.
Find out: How to choose a kitchen sink: 4 selection criteria
Overflow models
The main feature of this sink siphon is that the body is equipped with an overflow outlet on top. It is also called an overflow node or a tee. It prevents water from splashing outside the sink if the main bottom opening is closed.
The overflow pipe that connects to the assembly can be corrugated or rigid. The second option can be not only solid, but also sliding, which allows you to adjust the length. Effluent from the tee enters the water seal.
Design and function
Regardless of the type, the models perform the same function. In the curved part there is always a layer of water, which is a hydrobarrier. It prevents the gases that enter there during the discharge of drains from entering the kitchen, while the water is still drained into the sewer system.
Useful: How to choose a kitchen faucet - 3 plumbing parameters to consider when buying
Components
The main types of siphons and features of their device have been described above. Some design details are common to all models. Their components are represented by:
case of several parts;
- outlet fitting with embossed rings that connects to the kitchen sink from below;
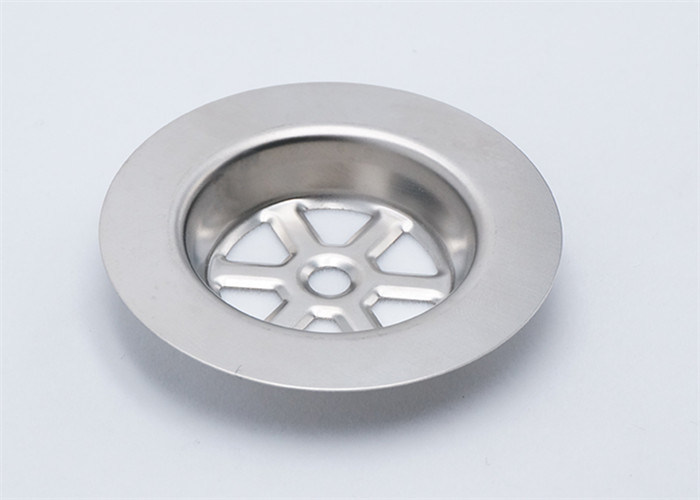
- mesh - takes on a protective function;
Tip : For a large family, a double deep washbasin, such as the N200, is suitable. It is made of durable artificial stone and is installed under the countertop.
- screw, which serves as a connection between the mesh and the nozzle;
- pipes for draining water into the sewerage system;
- gaskets: in the form of cones - seals between the elements, made of rubber - for fixing the outlet and sealing the protective grille;
- union nuts.
Learn more