Repairing a sash window
How to Repair Sash Windows
Project details
Skill
1 out of 5 Easy Requires patience and a steady hand to remove and replace the glass.
Cost
$70 per window
Estimated Time
2 days
Tools & Materials
-
Flat pry bar
-
Slotted screwdriver
-
Heat Gun (with nozzle shield)
-
Utility knife
-
Putty knife
-
Dremel with carving bit
-
Natural bristle paint brush
-
Synthetic filament brush
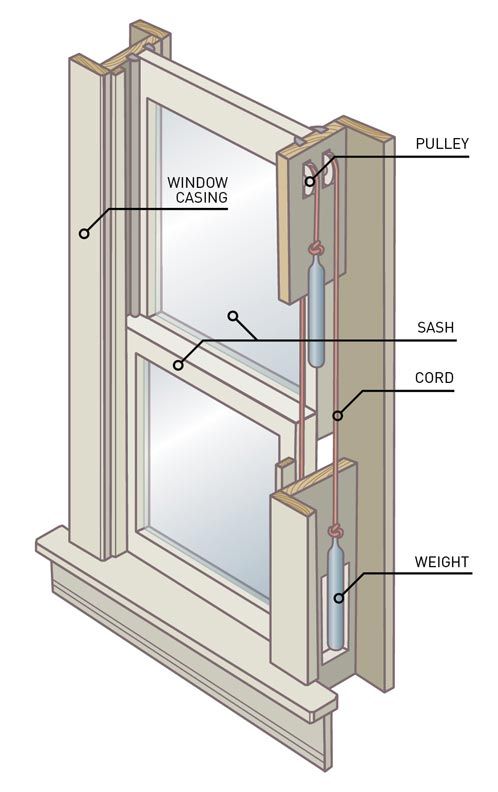
Single-pane double-hung windows from the 19th century don't have the best of reputations. They can be notoriously drafty, full of rattles, loose in the joints, or can simply refuse to budge. But as a number of studies have shown, when these windows are properly weatherstripped and paired with good storm windows, they can match the performance of new double-pane units for much less than the new ones cost.
Painting contractor John Dee, whose refinishing skills are regularly seen in the pages of This Old House, recently turned the windows in an 1882 house back into smooth operators—and increased their energy efficiency, to boot. As he shows on the following pages, it was simply a matter of methodically removing each sash from its opening, stripping off the old paint and putty, and regluing the joints with epoxy. With new putty, paint, and weatherstripping, the sash are ready to face the cold and last through the 21st century as good as new.
Painting contractor John Dee reattaches the stops, the last step in his window restoration. "Before this, opening a window was a wrestling match," he says.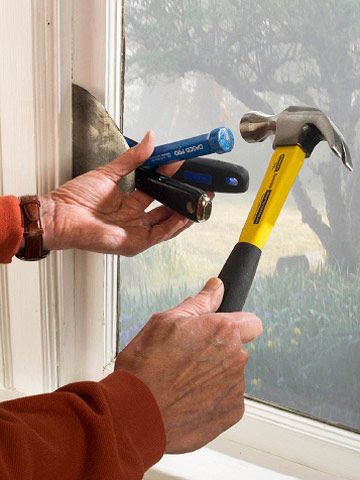 "Now, they just glide up and down."
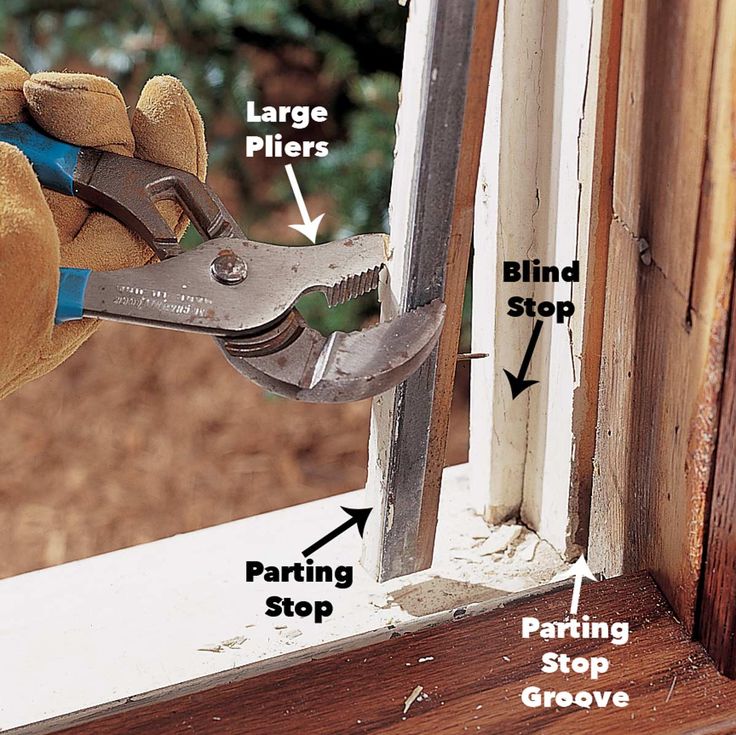
Step 1
Get the Sash Out
Photo by David CarmackPry off or unscrew the stops (the moldings in front of the lower sash).
Pull out the lower sash, and take off the cords or chains on both sides.
Knot the cords to keep them from being pulled into the weight pockets.
Remove the parting beads (the vertical strips holding the upper sash).
Pull out the upper sash, and take off its cords or chains.
Remove the sash hardware and store in a labeled bag.
Step 2
Free the Glass
Photo by David CarmackSoften old, hardened putty (glazing compound) with a heat gun set to medium and fitted with a nozzle shield. Scrape the putty away with a putty knife. This exposes the metal glazier's points; pry them out of the wood. Remove the glass, and label it so you know which opening to put it back into.
Step 3
Clean Out the Joints
Photo by David CarmackUsing a rotary tool such as a Dremel, grind away any soft or rotten wood wherever sash joints are loose or open.
Step 4
Apply the Epoxy
Photo by David CarmackTo rebuild the cleaned-out joints, first brush on the epoxy primer and let it set for about 20 minutes. Then, using a plastic scraper, mix the two parts of the epoxy filler into a goop the consistency of Vaseline. Force it into the joint, and spread the mix over the sides to restore the joint's original shape. Wait overnight, then trim the excess with a utility knife.
Tip: Clamp pieces of Plexiglas over the wet epoxy. When it hardens, take the plastic off. You'll have a smooth surface that doesn't need much sanding.
Step 5
Prime the Sash
Photo by David CarmackWait another day, until the epoxy is fully cured, then hand-sand the sash with 100-grit paper, and wipe up all the dust with a tack cloth. Seal the wood with a coat of oil-based primer.
Tip: "Without a coat of primer, the wood will suck the oils out of the putty and turn it brittle prematurely. " —John Dee, painting contractor
Step 6
Bed the Glass
Photo by David CarmackLay the sash exterior side up. Roll glazing compound into a long rope, between your hands and press it into the groove, or rabbet, around the pane opening. Gently press the pane evenly into the compound until it's bedded about 1/16 inch from the bottom of the rabbet.
Step 7
Insert the Points
Photo by David CarmackUsing a putty knife, slide each new glazier's point on the glass and push it point first into the wood sash. Plant at least two points, evenly spaced, on each side of the pane. For large panes, the spacing between the points should not exceed 12 inches.
Tip: "On warm days, lubricate the tip of the putty knife with linseed oil so that it doesn't pull out the glazing compound." —John Dee
Step 8
Tool the Putty
Photo by David CarmackPress another rope of compound around the edge of the pane. Make a smooth bevel between the glass and sash by pulling a putty knife over the compound. Repeat on the other panes. Wait at least a week, then coat the putty with oil-based primer. Apply a top coat of acrylic latex paint to the putty and sash.
Step 9
Rehang the Sash
Photo by David CarmackIf the windows have old weatherstripping, replace it; if there isn't any, add it. (See instructions for weatherstripping a window.) Clean and reattach the hardware; lubricate the pulley axles with a silicone or Teflon spray. Reattach the cords or chains to the upper sash, and reinstall the parting beads or replace them with new ones. Hook the cords or chains to the lower sash, then put both stops back on the jamb to hold the restored sash in place.
Tip: Strip paint-encrusted hardware by giving it an overnight dip in a warm Crock-Pot filled with sudsy water.
How To Restore Sash Windows
Self-taught window restorer Pam Rodriguez works on a home in Fort Worth’s Fairmont Southside Historic District.
Van Ditthavong
Pam Rodriguez didn’t set out to restore old-house windows for a living. While residing in Massachusetts, Pam learned restoration techniques on the fly, first in an 1875 church she volunteered to help revive, and then in her own home, a 1930s Dutch Colonial in Boston with 22 windows in dire need of repair. A confident do-it-yourselfer, Pam figured out techniques as she went, taking apart sash and frames, making the necessary repairs, then putting it all back together again. “I’m a restorationist at heart,” she says, so she learned to preserve original materials whenever possible.
In 2005, she returned to her native Texas to be closer to family. Not long thereafter, an acquaintance in Fort Worth’s historic Fairmount neighborhood faced a quandary when she discovered she would need to restore the crumbling old windows in her 1920s Colonial Revival. That turned into a job for Pam, and soon word of her skills got around. Today, she’s Fairmount’s go-to guru of window restoration.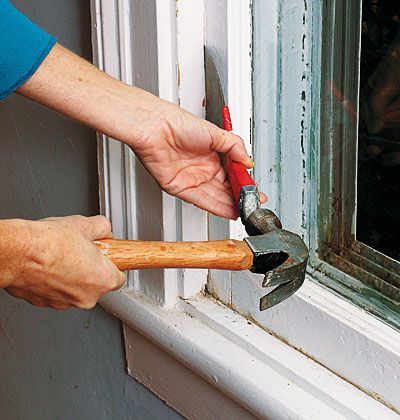
In the process, she’s run into “all kinds of weirdness,” like a window someone had taken out and reinstalled upside-down. She finds she can fix just about anything, though, if she takes a window all the way down to its frame. “These are old windows that have been here for 70, 80 years,” she says, “and it’s just a matter of a little bit—well, sometimes a lot—of maintenance to make them perfectly good again. If a window has hung in here that long and it hasn’t been totally abused, it’ll be here another 50, 100 years.”
There’s nothing quite like a well-maintained old-house window.
8 Steps for Restoring Sash Windows
1. Look for a knockout panel.
If a window is basically in good shape, needing only to have weights re-hung, Pam looks for a knockout panel (also called a pocket cover), a rectangle scored in the side of the frame that’s typically around 2″ wide and 6″ to 8″ tall—just big enough to pass a weight through. Generally, only higher-end windows have these (many in Fairmount do not). If one exists, though, it’s a handy way to access a sash window’s ropes and weights without removing the trim. Look for a horizontal line between stops in a frame to determine if you’ve got a knockout panel to work through. Especially if it’s been painted, you may have to apply a bit of force along the scored lines with a narrow implement (such as the skinny edge of a 5-in-1 painter’s tool or a box cutter) to open it up, but rest assured that it was, indeed, made for this purpose. (Note: On some windows, knockout panels are held in place by small screws.) If there’s no knockout panel, you may be able to saw one out using an oscillating multi-tool fitted with a wood-cutting blade. If you need to access more than just the weights and ropes, removing any trim around the window is your first step.
2. Remove trim, stops, and sash.
Pam begins the window restoration by removing nails and screws and carefully prying off trim and stops.
Van Ditthavong
The trim and interior stops come off first—hopefully intact. Pam uses a box cutter to cut through any paint and caulk, then begins prying trim from the frame using a 5-in-1 painter’s tool, which she likes because of its narrow dimensions. “I start by breaking the seal with the small pointed tip and turning it, eventually getting the whole narrow edge in so I can gently pry that trim apart,” she says. Do this carefully, easing nails out and removing screws if you find any. Gently apply pressure to pry trim away from the wall. After you’ve created some space, switch to a flat crowbar, again applying gentle force. The bottom sash comes off next. (It’s a good idea to mark this—and all other components—so you can be sure to put the window back together correctly. Pam recommends a fine-tip magic marker used in a spot that’s not going to be sanded or painted.) After that, the parting stops can be removed. Usually these split when Pam takes them out, but she tries to keep them intact if they’re otherwise in perfect condition by using pliers to ease them out once they’re loose.
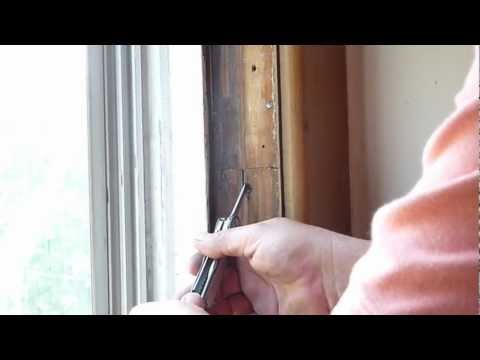 She replaces damaged stops with standard 1/2 ” by 3⁄4″ window trim from the local lumberyard. The top sash comes out last.
3. Assess the frame.
Old houses (especially those built on pier-and-beam foundations) have often spent years shifting and settling, so frames are rarely square and snugly fit when Pam exposes them. Moisture also can penetrate the frame’s lower joints, rusting the nails that hold the joints together or rotting the wood, causing the side jambs to drift apart. “Typically the frame is too big,” says Pam. “I’ve almost never found one too small.” Square frames are essential to good window function, so Pam uses a level and a square to correct any twisting, nailing in shims as necessary to create a solidly square frame, but being careful not to place shims near the window-weight well. If shims aren’t enough, she’ll add lattice strips where they won’t show. In the event of a window that’s expanded at the bottom, she finds she can often hide a board on the inside of the bottom of the frame.
Pam carefully removes glazing compound (which had been painted green along with the window frame) from the sash.
Van Ditthavong
4. Clean up.
Pam uses her trusty 5-in-1 painter’s tool to remove debris like old glazing compound, caulk, nails, screws, and broken glass. (A pull-type scraper with a rectangular blade also will work.) Paint, which is often layered so thickly in old houses that it can prevent windows from operating, needs to be sanded or removed at this point, too. (For safety tips on removing lead paint, see “Setting Up for Lead Safety” below.) Paint that’s thin and in good shape often can be left alone. Pam uses a rough sander to cut through thick paint, and in some cases employs a chemical stripper to soften the paint so it’s easier to scrape away. For a fine finish, she uses an orbital sander where possible, but in areas where a more delicate touch is required, such as interior trim with intricate carving work or a sash with routed areas, she relies on hand-applied sandpaper.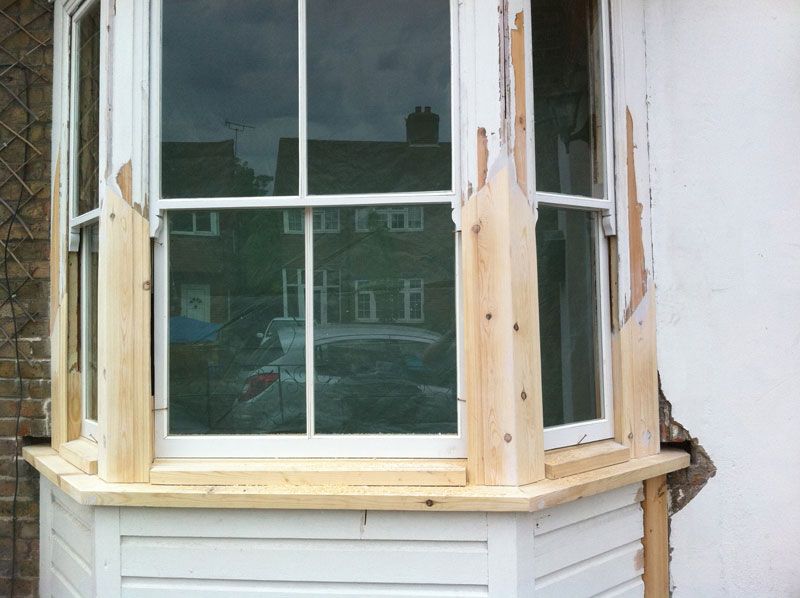 On those delicate parts, she’ll sometimes use a chemical stripper as well. Once the paint is removed, you can scrape away any rot and fill holes with putty or make repairs with wood epoxy.
5. Replace damaged or missing glass and glazing compound.
Original panes that are in good condition can stay intact. “If it’s in good shape, leave it alone!” Pam says. “I’ve broken many windows learning that lesson.” Where replacements are needed, Pam keeps an eye out for discarded wavy glass, since buying reproduction glass can get expensive. If salvaged glass isn’t the exact size she needs, she takes it to the hardware store to have it cut to size. To secure the glass in the sash, Pam loads a caulk-style gun with glazing compound. First, she runs a small bead in the channel, using that to secure the glass without pins or glazier’s points. Then she applies external glazing with the gun, running it along the edge where wood and glass meet. If the product-container tip and the wood edge are both clean, often she can achieve a neat, uniform line that way.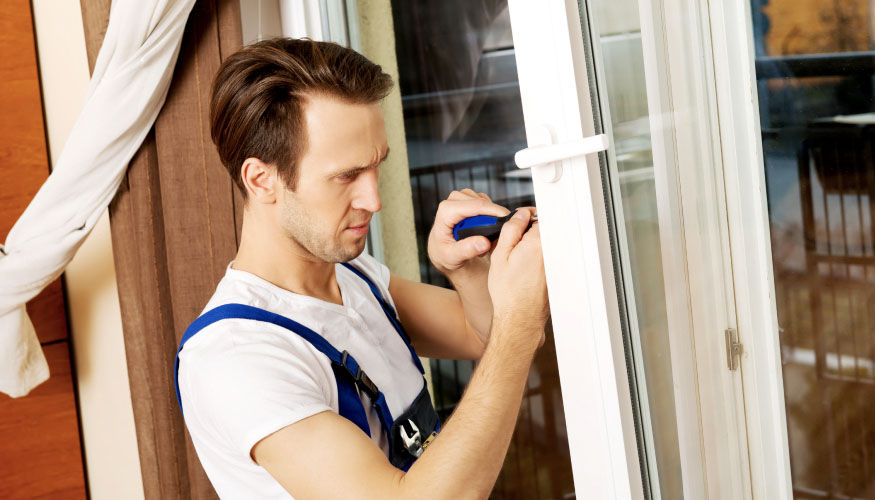 Pam advises smoothing down any imperfections with your finger. Then come back the next day, after it’s had plenty of time to harden up, and trim away any excess with a razor blade.
6. Stain or paint.
Interior sash can be painted or stained. For the latter, Pam prefers standard oil-based stains like those made by Minwax, and she always tests them on an old or hidden piece of wood to make sure the color is right before applying it to the sash and trim. Getting the right match can be tricky, so sometimes she’ll add a touch of paint with the same type of base as the stain to attain the correct color. A final coat of polyurethane follows the stain to protect the wood. (If the sash and trim are painted, though, no topcoat is necessary.) Exterior sash faces should always be painted for the best weather protection.
7. Address pulleys and ropes.
Pam nestles sash rope into an existing hole, then hammers it in place. The length of the rope fits into a routed channel along the sash.
Van Ditthavong
Weights are often missing from old sash-window frames—some were salvaged for early 20th-century war efforts, while others simply may have slid down inside the wall. Pam likens her pursuit of replacement weights to horse trading—eventually, she finds combinations that work, adding washers or nuts to get the balance right. She typically re-shapes old pulleys with pliers, though if she finds one with a point sharp enough to cut a rope, she will replace it entirely. New or old, pulleys need a regular application of spray lubricant to keep them running smoothly. As a general rule, she says, you should grease a pulley when it squeaks. Any lubricant will work, though one that comes with a skinny spray nozzle is easier to apply. If ropes need replacing, Pam prefers cotton over nylon, because it’s more authentic and tends to stretch less over time. (Plus, nylon has a greater risk of catching on an old pulley.) Purpose-made products labeled as “sash cord” are available, and, as a rule, lighter-weight cord can be used for smaller windows.
Once both sashes are in place, Pam checks the rope again and adjusts as necessary before replacing the interior stops and trim.
Van Ditthavong
8. Put it all back together.
“You’re basically starting over,” says Pam. “You have this wonderful wood sash. You have this wonderful wood frame. And then you put back as much of it as you can.” To reattach stops, Pam chooses nails that are small in diameter (typically 16- or 18-gauge) and just long enough (1/2″ to 3/4 “) to do the job so the nails don’t go through to the weight well. She uses longer finish nails for trim. And unlike many homes’ original builders, she uses as few nails as possible. A sash window goes together in the reverse order it came apart. This means the top sash with its ropes attached goes in first, then weights are tied on. At this point, Pam does an inital check to verify that everything is working properly. “Is something out of place?” she asks herself. “Does something need shimming?” Once confident that everything is in good working order, she replaces the parting stops, the bottom sash, then the interior stops. Finally, she mounts the trim.
Setting Up for Lead Safety
If your house was built before 1980, there’s a good chance your windows could contain lead-based paint. Always take the following safety precautions when working with painted windows:
- Isolate the work area from the rest of the building, and set up a containment area on the floor that extends at least 5′ beyond the work surfaces in every direction. Create the containment, which will help collect and contain dust and debris, by wrapping the edges of 6-mil poly sheeting around 1″ x 2″ wood furring strips.
- Work “wet” whenever possible. Mist a surface with water before cutting, scraping, or prying lead-painted surfaces. Mist down surfaces where dust and debris fall, and wipe up frequently with paper towels.
- Wear Tyvek slippers in the containment area, and remove them when stepping out of the containment. Change work clothes before leaving the work area. Always wash work clothes separately from your regular laundry, and double-rinse the machine before starting another load.

- Wipe the sash and your tools with a damp cloth before you take them out of the containment area.
- Wear a hat, goggles, and a respirator (N95-rated for wet work, N100-rated for dry work) to keep your hair, eyes, and lungs free of dust. The respirator should fit tightly around your face and completely cover your mouth and nose.
- Don’t eat, drink, or smoke while you’re working. Thoroughly wash your hands and face each time you leave the containment or work area.
- For more detailed lead-safe work practices, download “Lead Paint Safety: A Field Guide for Painting, Home Maintenance, and Renovation Work” at hud.gov/offices/lead/training/LBPguide.pdf.
Adapted from Save America’s Windows by John Leeke.
Online exclusive: Get more tips, tricks, and advice in our Q&A with another window expert.
Tags: Beth Goulart OHJ May/June 2009 Old-House Journal sash windows Van Ditthavong window repair windows
Repair and replacement of window sashes
- qualified craftsmen, high-quality materials from European manufacturers.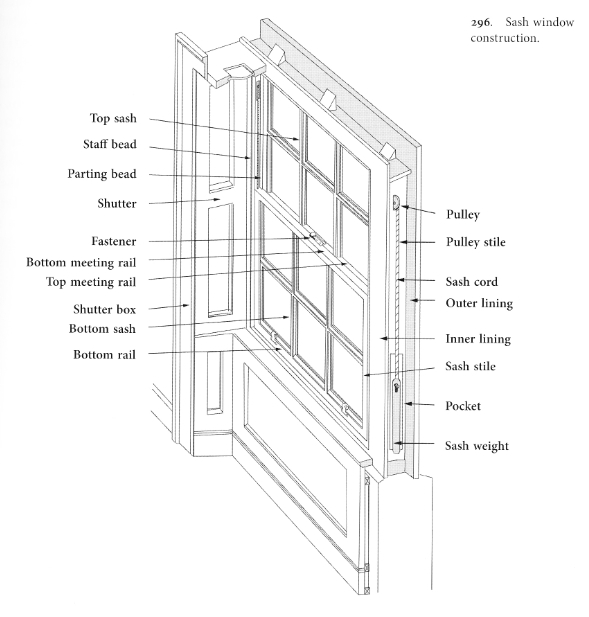
from 1100 p
Free consultation
Why do we need a replacement? The service includes not only the alteration of a blank double-glazed window, but also a change in the method of opening the sashes, dividing the window into sections, replacing worn / old sashes with new ones. In this case, you do not have to order a new window. Experienced craftsmen will carry out the necessary work without dismantling the old window structure. nine0003
Replacing a blind window with an opening one.
Changing the opening method: turn, turn-tilt
Adding a window.
Repair.
Which sash to choose?
Our "Window Factory" carries out both repair and replacement of sashes in plastic, wooden and aluminum windows. For work, components and materials from European manufacturers Deceuninck, REYNAERS, Alumark, Provedal, Siegenia, Roto are used with a guarantee of 12 months.
Before starting work, specialists go to the site, take measurements for free and advise on the choice of design.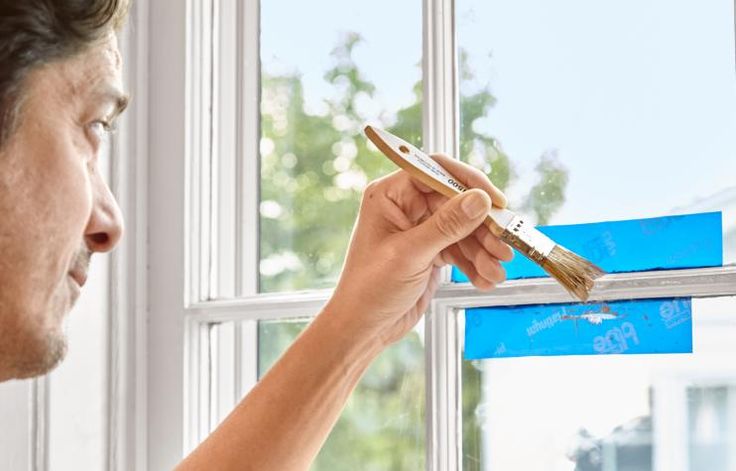
The following services are available to our customers:
- Installation of a tilt and turn sash instead of a standard swing sash. Adding special fittings will allow you to open the window in two planes. The flap can be used in winter ventilation mode.
- Cutting the sash into the blind part of the window structure. The service will be needed if there is a need for airing and opening the window. nine0030
- Dividing the opening with impost. Allows you to break the opening into several parts and set the desired type of sashes.
- Plunge into transom opening. Installation of a window leaf in a window structure is often used at trade facilities when it is necessary to make a window for the cash register.
- Inexpensive repair of plastic window sashes. In some cases, for the normal functioning of the structure, it is necessary to repair the sashes: the elements should not sag, close loosely or with difficulty. nine0030
The list of additional services includes the replacement of fittings, the installation of mosquito nets.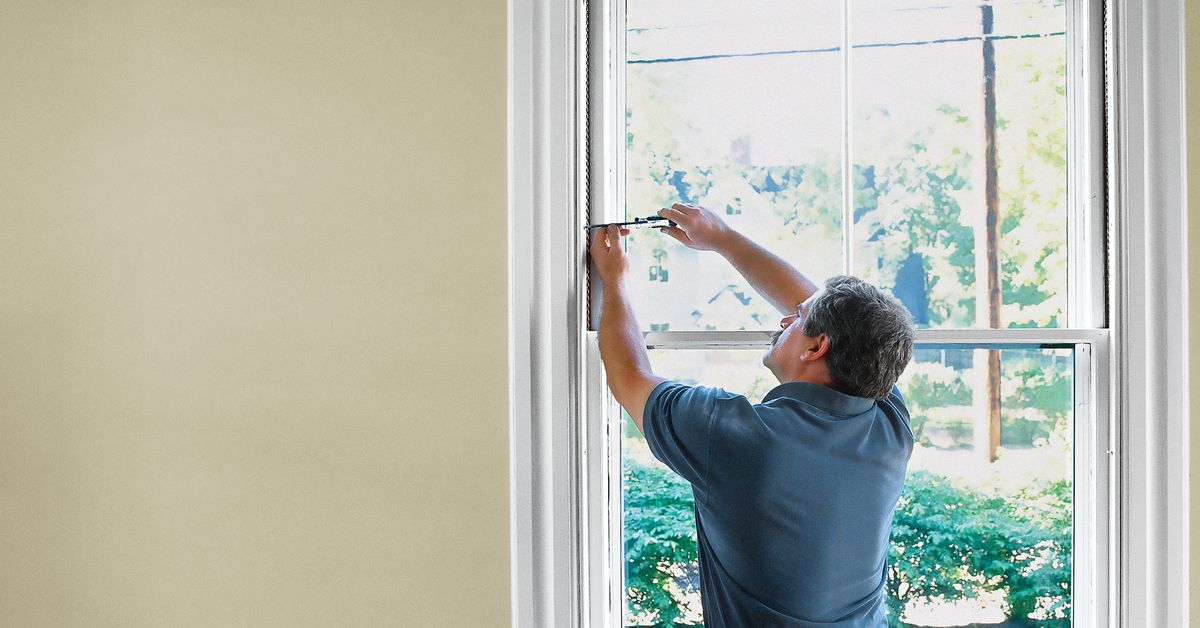
You choose how the doors open. Experts will help you decide on the selection, taking into account the design features and requirements for it.
When choosing sashes, it is also important to take into account the size of the window, the material of the profile, the type of double-glazed window (if necessary, it can be replaced with a colored, heated, thermal package, with sun protection).
"Window Factory" often has to change the sashes in the windows of private houses, apartments, offices, shopping centers, hospitals, schools and administrative buildings. Regardless of the complexity of the work, our masters hand over the project on time and provide a guarantee. We are trusted and recommended." nine0003
Free consultation
Why are our
employees so cool?
Our selection of employees is very simple and clear - we work only with those who love what they do!
Well, also because only 1 out of 13 applicants are selected for our team.
Vladimir
Anisimov
Service master
Vladislav
Boginsky
Service master
Maxim
Zavyalov
Order manager
Sergey
Savostin
Order Manager
Repair or replace?
Proper care is required for a window to last for a long time. This applies both to the structure as a whole and to its individual parts - sashes.
- In order for the fittings and sash locking mechanisms to work properly, they must be periodically lubricated. To do this, use special lubricants or engine oil (the liquid should not contain resins and acids).
- Window hardware needs to be adjusted seasonally. This allows you to change the level of sound insulation and the pressure of the sash to the frame. By winter, the clamps of the valves are tightened, and in the spring they are made more weakened. It is important to remember that the window seal reacts to temperature changes: it expands when heated, contracts when cooled.
 nine0030
 - It is forbidden to hang things on the sash, to exert a strong load. This may cause it to sag. But if the sash has sagged, it is lifted with a hex key, which must be placed vertically in the structure adjustment mechanism.
- Urgent repair of the sash will be required in case of broken glass, failed fittings. You shouldn't drag this out. Such breakdowns lead to depressurization of the structure, poor opening and other problems associated with the operation of the window. nine0030
- Sealing elements (elastic bands) also require periodic inspection. They are responsible for the tightness of the window, the tightness of the closing of the sash. The seal contour must be lubricated with silicone grease, which will protect it from drying out and cracking. If necessary, the seal must be replaced with a new one.
When is it necessary to install an impost?
An impost is installed when it is necessary to divide a window into several sections, make sashes, install a window. In this case, an impost is manufactured and installed, which is a vertical / horizontal jumper made of PVC profile. The impost material must correspond to the parameters and brand of the profile of the window itself. nine0051 Under production conditions, the impost is milled and reinforced.
Free consultation with an engineer
If you apply before 14:00, we can come to measure today!
Request a call
Photo gallery of works
In this section you can see examples of replacement of sashes in plastic windows with sashes with and without vents. Among our clients are owners of cottages, apartments on the first and last floors, employees of offices and government agencies.
Our "Window Factory" installs new sashes on windows of all sizes and shapes.
If necessary, specialists can supply suspended, sliding, tilt-vertical, tilt-horizontal sashes.
Seal can be not only black, but also other colors (gray, white, multi-colored).
Eget semper lectus pellentesque turpis elit sapien, porttitor sed quis. Gravida ultrices et mi. Gravida ultrices et mi. Eget semper lectus pellentesque turpis elit sapien, porttitor sed quis. nine0003
Eget semper lectus pellentesque turpis elit sapien, porttitor sed quis. Gravida ultrices et mi. Gravida ultrices et mi. Eget semper lectus pellentesque turpis elit sapien, porttitor sed quis.
Eget semper lectus pellentesque turpis elit sapien, porttitor sed quis. Gravida ultrices et mi. Gravida ultrices et mi. Eget semper lectus pellentesque turpis elit sapien, porttitor sed quis.
We have been operating
since 2004.
And we know everything about windows. Check it out!
Our quality control team conducts weekly surveys of our customers, measuring the Satisfaction Index.
1 million +
windows installed by us in Moscow.
763
new customers
in October.
92%
customers are
very satisfied with our work.
4%
customers are
satisfied with our work.
How the sashes are installed in a blind window
Our “Window Factory” can replace a blind window with an opening one in structures made of profiles from European manufacturers Deceuninck, Rehau, KBE. We also have experience working with plastic profiles of other brands, windows made of natural wood (pine, oak, larch) and aluminum.
Our “Window Factory” can replace a blind window with an opening one in structures made of profiles from European manufacturers Deceuninck, Rehau, KBE. We also have experience working with plastic profiles of other brands, windows made of natural wood (pine, oak, larch) and aluminum. nine0003
Installation of the opening sash consists of several steps:
- Measurement of the blind part of the structure where the new sash is planned.
- Making a sash.
- Removing the double-glazed window from the blind part of the window.
- Application of a feigned seal.
- Installation of hinges, fittings on the frame.
- Installation of the finished sash in place where the blank part was.
- Hardware adjustment.
Remember that damaged sash elements must be changed in a timely manner: locking fittings, handles, seals and other components. Prompt troubleshooting will save on the installation of a new design.
The sashes are made in our own production of our “Window Factory”. Production time depends on the complexity and volume of the design.
Free consultation
Cost of work
We offer you to get acquainted with the price list for standard and additional services. nine0003
The price depends on the complexity and volume of work. Before installation, specialists carry out diagnostics of the structure, take into account the profile, dimensions, shape of the window and the type of selected sashes. Additionally, you can order lamination, installation of mosquito nets, child locks, slopes and window sills.
Standard work
Diagnosis of the window system
Free of charge
Tilt&Turn sash installation instead of turn sash
from 1100p
Turn sash installation instead of fixed sash
from 1300p/opening
Submitting the wings in the deaf part of the window structure
by agreement
Recommended work
Adjustment
700p
Replacement of fittings
1150P
Installation of additional accessories
150P 9000 locks
500p
Replacement of double-glazed windows with energy-saving ones
900p
Preventive maintenance
Foundation lubricant
700p
Lubrication p
Order
Replacing seal
Problem:
seal worn out
from 450 p
Order
Replacing part of fittings
Problem:
breakdown, weak pressure
from 600 p
order
installation of window sills
Problem:
window sill or damaged
dated 950 p
order
Plastic plastic windows in Moscow
Rand our offices in Moscow and the Moscow region.
Addresses and opening hours
Mosquito nets
from 620 p
Slopes for
windows
from 250 p
Repair
windows
from 600 p
Roller blinds and blinds
from 620 p
Free consultation of an engineer
An engineer will answer all your questions, give recommendations on glazing your particular apartment and do it for free. You choose the time of arrival.
If you apply before 14:00, we can come for measurement today! nine0003
Request a call
How to repair plastic windows yourself
After installing a plastic window, the manufacturer usually assumes warranty service obligations. However, this period is not infinite, and averages 2-3 years. At the end of the time, any repair and maintenance work will be paid from your wallet. At the same time, it is important to understand that calling a specialist is not always advisable: some defects can be completely eliminated on your own, saving an impressive amount. Consider what problems with plastic windows can be solved independently. nine0003
Adjust the sash
Window sashes can sag and warp over time. The problem is easily fixed on its own, using a hex key with a diameter of 4 mm.
To fix this minor defect, open the window and remove the trim covering the bottom hinge. Here, at the top, is the adjustment groove.
Then everything is simple: the "hexagon" enters the groove and raises (turning the key clockwise) or lowers (counterclockwise) the sagging sash. nine0003
If the sash retracts, the adjustment is made in the horizontal plane. To do this, the decorative trim on the hinge is also removed, only the hex key is inserted into the lower adjustment groove. Further according to the scheme: rotation to the right shifts the window sash to the left, turn to the left - the shift occurs to the right.
The upper part of the window is adjusted in the same way. After the sash is fully opened, the necessary element opens in the upper part. There are also grooves for a hex key, the rotation of which in a given direction will move the sash in the right direction. nine0003
Adjust the pressure
Often, the vent for plastic windows is not provided by the design. To ventilate the premises, a mechanism is provided that opens the entire sash at a slight angle. The system is quite convenient, but in severe frosts this can lead to serious heat loss. You can correct the situation if you reduce the angle of the opened sash for the winter period.
To adjust the pressure angle, the sash must be switched to the double mode: opening and ventilation. In some window structures, this cannot be done - a special blocker is installed. In this case, you need to press the tongue located on the handle. When the sash is moved to the double position, the scissors-shaped structure opens, which performs a supporting function. To pull the sash closer to the frame, you need to turn the adjustment element in the desired direction with a hex wrench. After the manipulations, the sash returns to its original position. nine0003
It is worth noting that by adjusting the window sash pressure, you can get rid of drafts. If the problem persists, then the window structure needs to be repaired or replaced.
In addition, the sash pressure can be adjusted by trunnion locking mechanisms or strikers, which are responsible for opening/closing the window. The mechanism works according to this scheme: after turning the handle, the trunnions cling to the strikers, opening the sash. To adjust the clamp, you need to adjust one or the other element of the mechanism, depending on the type of fittings installed. nine0003
The pins (oval or round) can be adjusted with a hex wrench or pliers. To make the sash more tightly pressed against the frame, you need to tighten all the pins that are on the window sash.
How to solve problems with a handle or lock
Of all the elements of window construction, the handle is most often subjected to stress, which can cause it to break and, accordingly, be replaced. In addition, you can replace the standard handle with a lock that prevents children from opening the sash. You can do these procedures yourself, without resorting to the services of specialists. nine0003
For replacement, the handle is turned at an angle of 90 degrees, with a screwdriver, the fixing bolts are unscrewed. After that, the handle is removed from the groove, the replacement is carried out and the fasteners are screwed into place. When installing the handle-lock, the installation procedure changes slightly. First, a “comb” is placed, which will limit the opening width of the sash, then the handle and fixing bolts.
There are situations when the window handle gets stuck in the open position. The reason is a blocker that prevents structural failure. This element is triggered when the sash is abruptly moved from one position to another. There are several ways to solve the problem, depending on the installed hardware. For example:
- Press the spring-loaded metal plate against the rubber seal with your fingers.
- Press the latch tab until it is in the desired position.
If the above methods do not help, then the blocker is not in good contact with the locking mechanism. This happens in situations where the window design expands from the influence of external factors, and the latch begins to “slip”. To eliminate the malfunction, the plate that the blocker should cling to is unscrewed and a plastic gasket is placed under it. nine0003
The handle may not work correctly if the doors are sagging or there is no lubrication in the structural components. In the first case, it is necessary to adjust the sash, in the second case, apply a lubricant for PVC structures to the handle mechanism. If the problem is not solved, you will have to call a specialist.
Problem with switching the sash to the opening and ventilation mode at the same time
In such situations, the sash is installed vertically, pressing the upper part against the frame. Without closing the sash, the handle is moved to the open position. If the latch has worked, it is turned off, using one of the above methods. Then the sash is closed completely and the operation of the mechanism is checked by moving the handle to various positions. nine0003
Curved profile, installation of straightening plates
Sometimes there are situations when the profile of a window structure is arched. There can be two reasons for this phenomenon:
- Violation of technology during the installation of a window structure. As a result, the frame is stretched by anchor bolts, the clamping function is disturbed.
- Manufacturing defect, absence or failure of straightening plates - elements located between the profile and the double-glazed window.
If the installed windows are still under warranty, contact the manufacturer to have the defects rectified. In cases where the warranty period has expired, you will have to repair it yourself.
The raw material for the manufacture of a straightening plate can be a piece of plastic, identical in size ratio to the thickness of the double-glazed window. The installation process begins with the removal of the glazing bead with a construction spatula, the sharp part of which must be closed with a plastic overlay in order to avoid damage to the double-glazed window. Having gained access to the straightening plates, the double-glazed window is shifted to the side by 4-6 mm and the replacement is carried out. Please note that the installed plastic must not rest against the glass! Too tight fit can cause cracks. nine0003
How to change a double-glazed window
To carry out an independent replacement of a double-glazed window, you need to act as follows:
- Remove the glazing bead using a spatula and a wooden mallet.
- We take out a double-glazed window (required together!) And put it on the floor.
- Making measurements of width, height, thickness. These parameters must be reported to the manufacturer from whom a new double-glazed window will be ordered.
The straightening plates are then inserted.