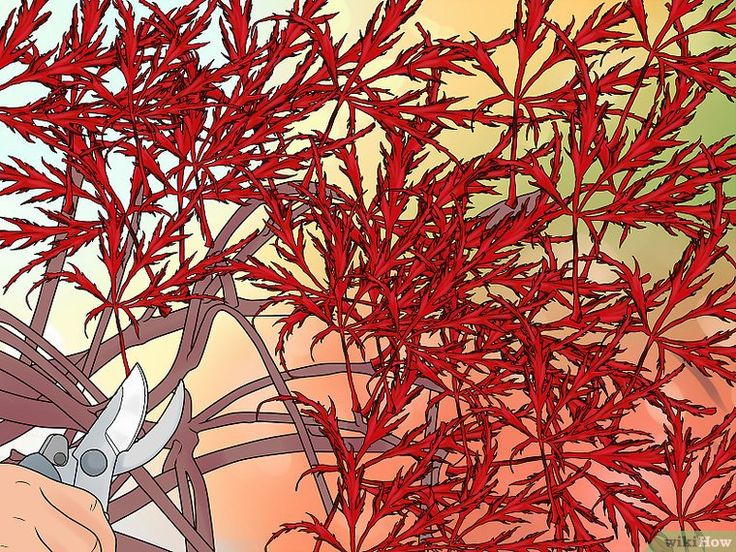
Repaint a wood table
How to Paint a Wood Table
Painter Mauro Henrique demonstrates how to take an old piece of furniture and give it a new life with a little bit of paint.
By Mauro Henrique
Share this story
Project details
Skill
1 out of 5 Easy Suitable for beginners
Cost
$30-$80
Estimated Time
4-5 hours
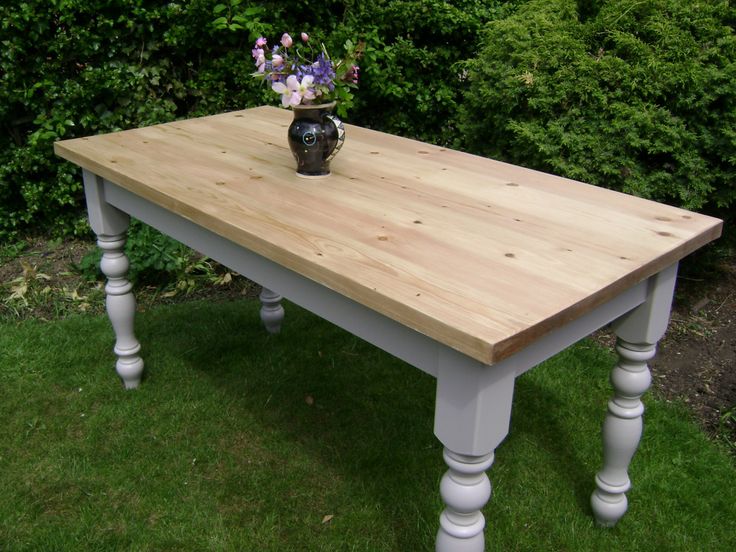
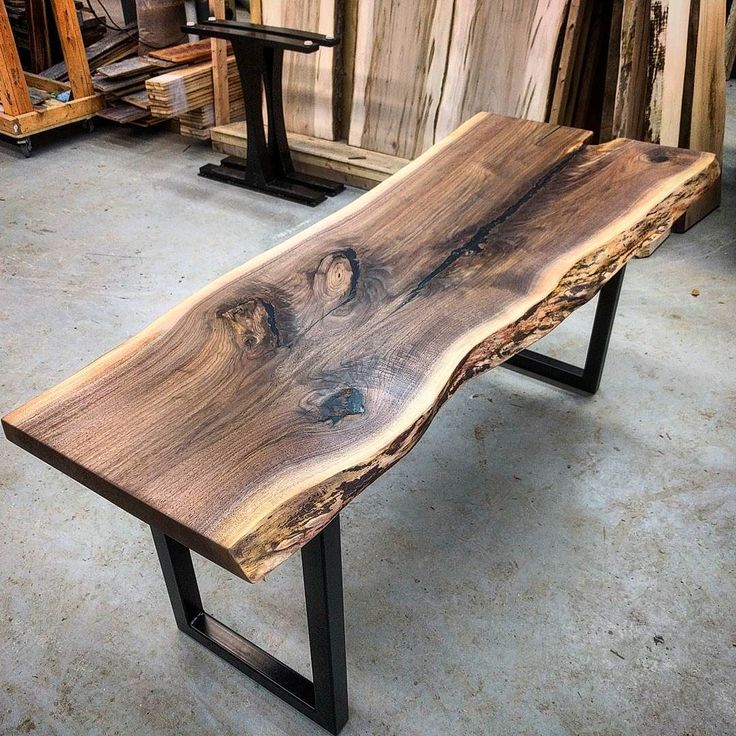
In this video, painter Mauro Henrique demonstrates how to refinish an old piece of furniture with the help of Kevin O’Connor. Mauro’s client has a table that belonged to her grandmother and she would like to spruce it up so it can come out of the basement and be showcased in her home.
Mauro decided it would be a great opportunity to teach the proper technique in painting old furniture. He goes through the steps of reviving the table and what tools to use. With a little bit of work and a little bit of paint, any old furniture can have a new life.
Start with Prepping the Wood
Prep work is key to any good painting job. Mauro and Kevin started by lightly sanding the table with 220 grit sandpaper, which can be done with any type of power sander, and cleaned up the remaining dust with HDX Tack Cloth.
Steps for Refinishing a Table:
- Remove any hardware from the furniture.
- Give everything a light sanding. Just enough to rough up the old paint and/or finish to give the new paint something to adhere to. Mauro used 220 grit sandpaper.
- To clean up the dust, Mauro used a HEPA vac. To make sure there is no trace left on the furniture, tack cloths can be used.
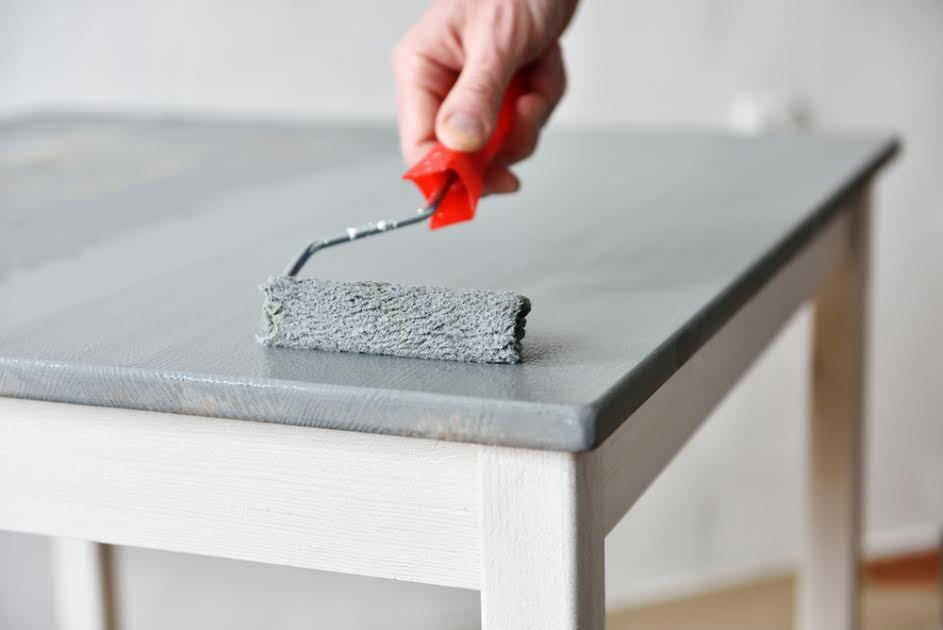
- Paint the primer on using a paint roller. Mauro suggests a roller because it will give a nice, smooth finish. He uses a mini roller with a 3/8 inch nap. Medium naps are good for semi-rough surfaces.
- Wait about 2 hours for the primer to dry.
- Start painting with the same technique. a. Mauro’s client wanted to see some brush strokes in the final texture. He uses the roller to get full coverage with the paint and then takes a brush and back brushes (without dipping it in paint) to create a modest brush stroke.
- Wait for the first coat to dry, then add the second.
- Once dry, add the hardware back on.
Related
How to Spray Paint Wood Furniture
Resources
To prime the table, Mauro used Zinsser BullsEye 1-2-3 Interior/Exterior Water-Based Primer, which is manufactured by Rust-Oleum. For the paint, Mauro used PPG Timeless Acrylic Interior Paint, in “Naval Blue” in a semi-gloss finish.
Materials
- Tack cloth
- Paint roller tray
- Water-based, regular primer
- Water-based, regular interior paint
Tools
Tools & Materials
-
220 grit sandpaper
-
Paint roller with 3/8 in. nap
-
Small paint brush
How to paint wood furniture: an expert guide |
(Image credit: Polly Wreford/Sally Denning / Jon Day / Annie Sloan )
Knowing how to paint wooden furniture is a useful skill that can help to breathe new life into old furniture. Whether you want to refresh a family heirloom, change your home's scheme for less, or want to reinvigorate a second-hand piece, painting wooden furniture is easy.
Painted furniture ideas are endless, however, the process is a lot different from painting wood trims around your home.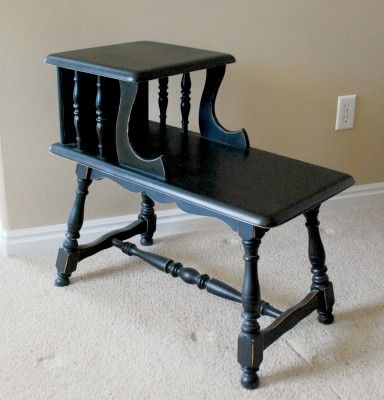 Preparation is key to ensuring a lasting, flawless finish so patience and a steady hand are required when tackling a furniture project. If the process is rushed, you risk marring the piece – something you will hope you avoid.
Here, we have spoken to experts to learn their top tips for painting wooden furniture, from picking the right piece through to finishing a project, so that you can achieve the best finish every time.
How to paint wood furniture
(Image credit: Getty Images)
Gone are the days of hastily assembled flatpack and cookie-cutter interiors. Today, interior design is all about personality and character. Antique and vintage stores are a treasure trove of beautiful pieces of furniture that you won't find anywhere else. However, these vintage gems often need a little TLC to bring them up to scratch or sometimes need a change of color to suit your look.
'Colorful furniture has made a huge resurgence over the last few years, but it has been hard to find exciting colored cabinetry outside of the bespoke sector,' says Claire Hornby, head of creative at Barker and Stonehouse . Learning how to paint wood furniture gives you the opportunity to create a piece full of color and character that perfectly complements your interior scheme.
That’s where the painted furniture revolution comes to the fore. Learning how to paint wood furniture can transform a boring brown dresser that's otherwise destined for landfill into the hero of your sustainable kitchen ideas.
In addition to creating characterful pieces for your home, learning how to paint wooden furniture will also save you money as lots of these antiques sell for a song, and also know that you’re doing your bit for the planet, repurposing rather than buying new.
1. Prepare your space
As with any painting project such as how to paint a wall or how to paint a door, you need to ensure you ventilate the area. For painted furniture projects this is easier, as the piece can often be moved outside into the open air or into a shed or garage. If the furniture cannot be moved outside, open up windows and internal doors to allow for a through-draft to help clear the air in your home.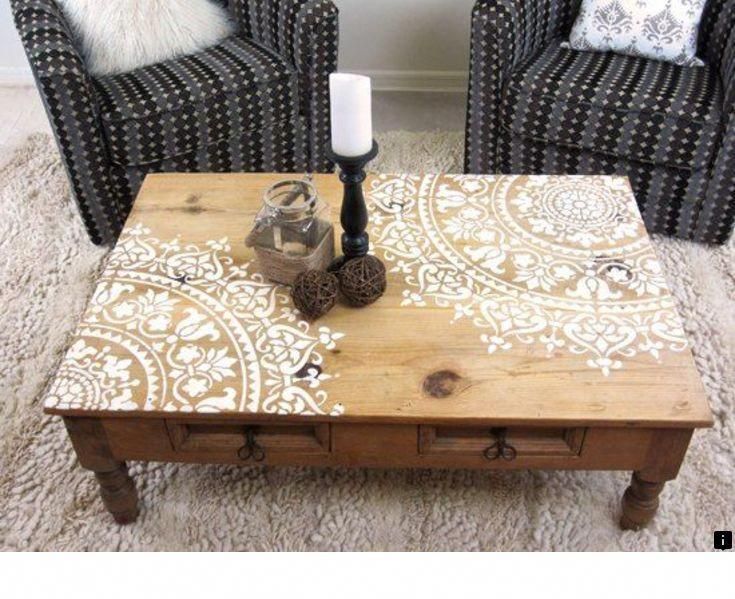
When painting wooden furniture, make sure you lay out a dust sheet to catch any dripping paint. This is especially important if you are painting inside or on outside deck ideas.
2. Prepare your furniture
Remove any hardware, doors, and drawers and dismantle any sections of the furniture that is easily removable to allow for even coverage across the entire piece.
Sanding is key before any repainting project. ‘It is always important to prepare the surface as outlined on the tin, even if previously painted,’ adds Hanna Ellis. If a piece has previously been painted, sand with coarse sandpaper to remove the previous color and leave an even surface, and vacuum or wipe away any dust. Wash unpainted furniture with sugar soap (available on Amazon) and then lightly sand. Wipe with methylated spirits to remove any dust or grease.
If you are looking to repaint a painted or glossed piece of furniture, it is important to remove this layer first. To achieve this sand the surfaces with coarse sandpaper, (between 60 and 80 grit). If your piece has intricate carving and detailing, treat it with a stripper to remove paint and gloss. If you're unsure of where to start then be sure to find out how to strip paint from wood.
For an unpainted piece, 'start with a good scrub with sugar soap to remove dirt, grease, old polish/wax or nicotine, rinse thoroughly and allow to dry,’ says Hanna Ellis of Frenchic Paints . Then follow by sanding with a light sandpaper (between 180 and 220 grit) to create a key to help the paint to adhere. Once having sanded your piece, wiped the surface with methylated spirits to remove any grease or dust. Then leave to dry for a few moments before painting.
3. Prime wooden furniture
Knowing how to open a paint can is also essential – yes, there is a right way to do it. While you often only have to prime certain surfaces, adding a coat or two of suitable prime to any project will allow for a more even layer of paint. Prime your furniture and allow it to dry for the recommended time as stipulated in the tin.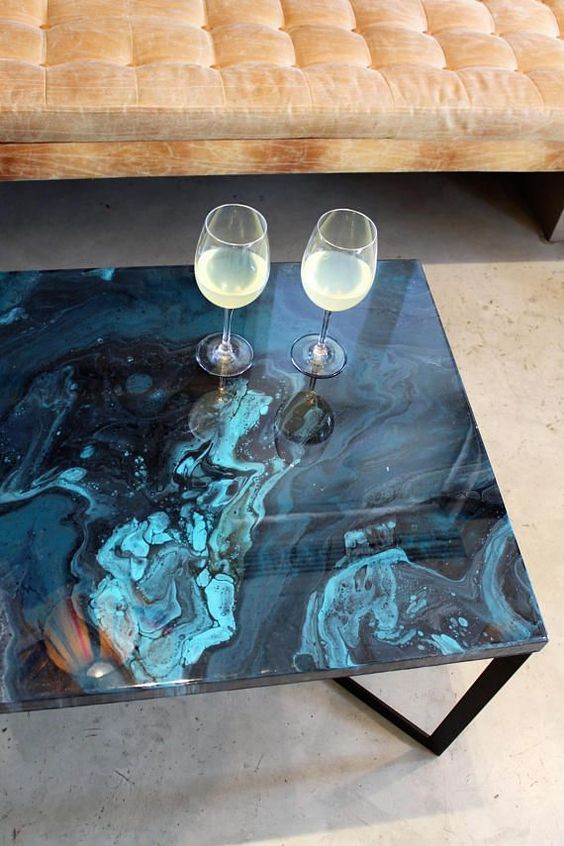 Drying time is key to ensuring that your finished piece isn't streaky or patchy.
4. Start painting
Once your primer has dried or if your paint includes a primer then you can start painting. Opt for a round brush and apply your first coat of paint, ensuring all details are painted thoroughly. You may need to change to a smaller, finer brush if your furniture as particularly intricate details that a larger brush cannot reach. Then allow to dry for the recommended time.
5. Apply a second coat
When this is dry then apply your second coat. If using milk paint, brush along the direction of the grain, while chalk and mineral paint looks best if painted in different directions.
6. Finish the piece
Finishes are key if you don’t want all your hard work to go to waste. Some paints, especially milk paints, are self-sealing meaning that after a few days of curing it will be incredibly durable. However, other paints such as chalk paints will need a wax or lacquer to prevent them from being marked or scuffed.
'Water could damage chalk paint if left unprotected. Opt for a specific chalk paint wax to protect your furniture while also giving a beautiful mellow sheen,' says Annie Sloan. 'Alternatively, you can use matt or gloss chalk paint lacquer. Matt will give a slightly clouded finish whereas gloss chalk paint lacquer will give a high-end sheen.'
Finding wood furniture to paint
(Image credit: Jon Day Photography)
The secret to finding a good piece of wood furniture to paint is to look for good bones. Look past ironmongery, colors and any scratches and instead look at the piece's silhouette. Ensure that it is well made, look for solid wood and dovetail joints. Check all mechanisms are working well and that the piece stands strongly and doesn’t rock or wobble.
'I hate the thought of well-built, carefully crafted furniture going to landfill. And while from an aesthetic point of view they might have seen better days, there is still plenty of life left in these old pieces,' says Claire Manton, founder of Claire's CraftHouse . 'With the interiors market looking to become more sustainable, upcycling is a great way to reuse pre-loved pieces, while unleashing your own creativity.'
Choosing the right brush for painting wood furniture
(Image credit: Cornish Milk Mineral Paint)
An often overlooked element, the right brush can make or break your project. When starting to research how to paint wood furniture, brushes are a key consideration.
‘There are different schools of thought on brushes, and it really depends on the type of paint you are using. For milk paint, which is water based and quite thin, synthetic bristles or a blend is better as they absorb less water meaning more paint ends up on the surface being painted, and stops the paint drying out too much on the brush. A slanted synthetic brush will give a great finish with milk paint or any thin water based paint,' says Carolyn Moore, owner of Old Fashioned Milk Paint .
'However, some of the thicker mineral/chalk paints will work better with a thicker natural bristle brush, even a round brush often used for waxing, as they hold more paint, meaning fewer dips in the paint and therefore fewer brush marks. If you are planning a lot of painting, look for a good quality brush – the best you can afford, to avoid annoying bristle shedding and ensure they stay in shape following repeated uses.'
The best paint to use on wood furniture
(Image credit: Annie Sloan)
There are lots of different paint finishes to choose from when finding out how to paint wood furniture. Your choice will predominately depend on the look you want to achieve, though it will also be guided by whether you are happy to use a primer and sealant or are looking for an all-in-one product. Also consider selecting eco-friendly paints to keep your project kind to the planet.
- Chalk paint is the most common choice of paint for wooden furniture and gets its name from the luxurious chalky finish it creates. ‘It’s a multi-purpose paint that applies to just about any surface, without the need for priming or sanding,’ says Annie Sloan, founder of Annie Sloan Paints .
- Mineral paint is crafted from mineral pigments combined with a binder, typically acrylic resin.
 'Unlike milk and chalk paint, which need to be sealed with a wax or varnish to prevent absorption of grease or moisture, mineral paint is waterproof and washable rather like an eggshell or satin paint,' says Carolyn.
 - Milk paint is quickly becoming a favorite for furniture restoration. 'Traditional powdered milk paints achieve a finish that is flat back to the grain and produces no brushstrokes,’ explains Joe and Reece Daden-Tapp of Cornish Milk Mineral Paint .
- 'It is perfectly possible to use a normal eggshell, satin or spray paint on furniture too, if you want a contemporary, sleek, full cover paint finish, as long as you prepare it well!' adds Carolyn.
How to avoid streaks when painting wooden furniture
(Image credit: Annie Sloan)
Avoiding streaks when painting wooden furniture, all comes down to your paint finish and your direction. ‘With milk paint it’s always best to brush along the direction of the grain, but there’s no need to worry too much about brush marks, (especially on raw wood as it sinks in like a stain), milk paint is very forgiving – it dries really fast, but with a light sanding using a super fine sanding sponge after each coat, it leaves a rich, buttery smooth finish and no brush marks.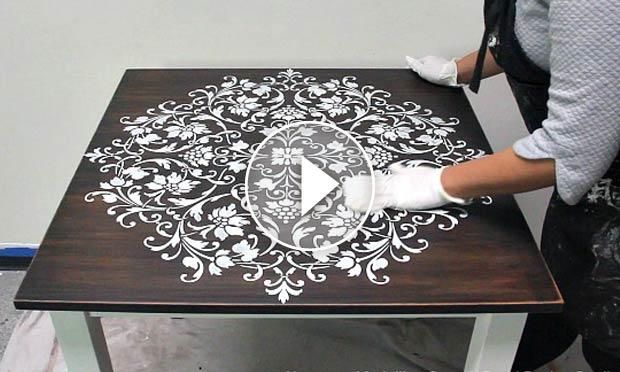 However with chalk and mineral paint, it is recommended to paint in different directions to avoid brush marks, and fat round brushes work better,’ explains Carolyn.
‘When applying the paint, try not to overload your brush as this can lead to overworking the paint which tends to cause dragging marks and unwanted texture. The other tip is to make sure you leave the correct amount of hours between coats,’ adds Hanna Ellis.
Do you need to prime wood furniture before painting?
You don't necessarily need to prime wood furniture before painting. This slightly differs from how to paint a wall where priming is vital to achieving a high-end finish.
Lots of chalk and mineral paints feature an integrated primer meaning that after a light sanding and a wipe down, you can apply the paint and still achieve a flawless finish. Some furniture paints will require a primer before use, be sure to check the tin before starting your project.
However, even if you do not need to use a primer, it is essential that you prepare the wood before you start painting.
Should I paint the interior of wooden furniture?
Whether you decide to paint the interior of your wood furniture is utterly up to you. 'Sometimes a thorough clean and some hemp oil or wax is sufficient to tidy them up,' says Claire Manton. 'It’s worth remembering that if an old piece has a musty smell to it, painting the interior can sometimes help by sealing odours into the wood, thereby reducing any unpleasant smells. Scented furniture waxes and salves are also a good way to freshen things up.'
Why does paint peel off wood?
Paint can peel off of wood for a number of reasons, however incorrect preparation such as the lack of cleaning, a primer, or the correct paint is often one of the main causes of peeling paint on painted wood furniture.
To prevent paint from peeling from wooden furniture make sure you follow through with the correct prep work and do not rush the process. While it may be tempting to rush through to complete the project, patience is needed to ensure the best finish. What's more, consider adding a protective finishing coat or wax to seal the paint in and prevent it from peeling due to every day use. This may be especially important on pieces you touch or move every day such as drawers, cabinets, or chairs.
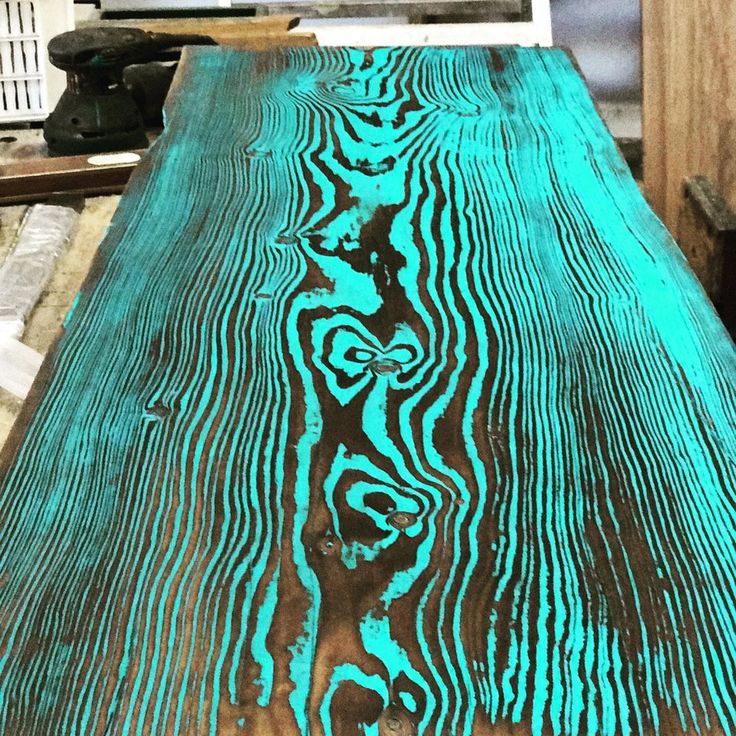
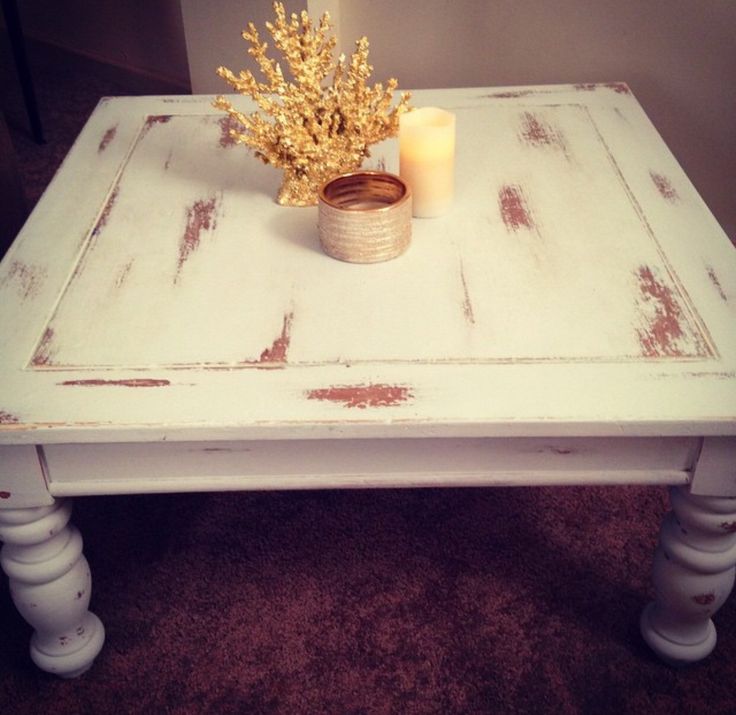
How do you create a vintage finish on wood?
The easiest way to make a vintage finish on wood is to use an antique-style glaze. There are myriad crackled glazes from which to use. Simply apply between coats of paint to create the distressed effect. 'If you are applying a crackle glaze, always choose a period style paint such as milk paint, which will result in a rich, matt finish as would find on older pieces,' recommends Carolyn.
However, for a traditional distressed look, then hand-distressing is the way to go. This is achieved by painting a piece of furniture a solid color and then buffing the corners and edges with a fine sandpaper to reveal the wood beneath. 'Begin by painting a piece of furniture one color and then, once it’s dry, paint over it with a completely different second color.![]() Sand back through to the first color and in some areas go back as far as the original wood. With the right color combination, it looks beautiful,' says Annie Sloan.
Sand back through to the first color and in some areas go back as far as the original wood. With the right color combination, it looks beautiful,' says Annie Sloan.
'You can make the process easier with any type of paint by applying wax to the corners/edges before painting, so the paint flakes in those areas,' recommends Carolyn. 'Any distressing works best when the wood beneath is darker – bright new pine showing through doesn’t look aged, so in that case it is a good idea to stain the wood before painting/distressing. You can even layer paint colors by using a darker color first and a lighter color on top, then distressing back to let the darker color show through – this creates a wonderful effect.'
What happens if you don't sand before painting?
If you don't sand before painting wooden furniture you will not achieve a smooth painted finish as paint will gather in any scratches or scrapes. It will also highlight any other natural flaws in the wood grain. Furthermore, if you don't sand before painting, your paint may not stick to the surface resulting in it peeling off once dry. This is because even a light sand provides a key onto which the paint can adhere.
Having graduated with a first class degree in English Literature four years ago, Holly started her career as a features writer and sub-editor at Period Living magazine, Homes & Gardens' sister title. Working on Period Living brought with it insight into the complexities of owning and caring for period homes, from interior decorating through to choosing the right windows and the challenges of extending. This has led to a passion for traditional interiors, particularly the country-look. Writing for the Homes & Gardens website as a content editor, alongside regular features for Period Living and Country Homes & Interiors magazines, has enabled her to broaden her writing to incorporate her interests in gardening, wildlife and nature.
wood, metal, writing, dining and kitchen, lacquered or white
Old tables are restored to extend the life of the product, to make the color suitable for the new interior.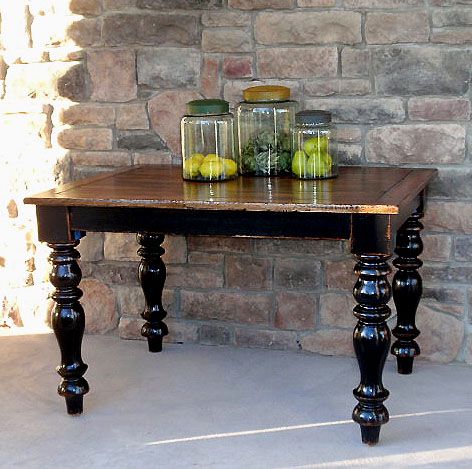 Sometimes a color change is combined with surface repair, cracks are puttied, potholes are repaired. You can paint the table white with your own hands, make stencils on the countertop or sidewalls. An excellent choice would be painting in bright colors, such pieces of furniture look good on verandas, terraces, balconies. nine0003
Preparatory work
They paint furniture in a room where smells and dust are not terrible. In the summer, the tables are taken out into the street, into the garage. In the cold season, they are painted in a ventilated room.
Preparation for work:
- The floor is covered with old newspapers or cloth. It is better to purchase protective cellophane, which is sold in hardware stores.
- The painting area must not be located near open sources of flame, such as fireplaces. nine0015
- small brush (2.5 - 3 cm) for touch-up;
- flask for paint, varnish or primer with squeezing plate for roller;
- respirator, goggles;
- hard cleaning brush; nine0012
- spatula, preferably rubber;
- emery machine.
- acrylic;
- alkyd;
- oil;
- latex;
- silicone.
- The table is turned over to treat all surfaces that are difficult to see under the tabletop.
- They work with a roller, and the joints of the legs, crossbars are painted over with a brush.
 nine0012
 - Turn the table to its normal position, roll over the table top.
- Allow each coat to dry completely before applying the next.
- nitro enamels dry and form a film in half an hour, the second layer will harden in 2 - 2.5 hours, you can use the table after 10 - 12 hours;
- acrylic paints will dry in 2 to 4 hours;
- aerosols regular - 23 - 30 minutes, latex - 4 - 6 hours.
- warm - small amounts of red, yellow color are mixed into the mass;
- cold - white is mixed with blue and green pigments.
- With a roller, the paint is rolled out over the surface starting from the middle, taken to the sides - this way it is easier to connect the edges of adjacent sections.
- Apply in thin layers.
- Wait for each coat to dry.
- The plane is thinly puttied, covering small chips, cracks with a mass, more often two-component compositions are used.
 nine0012
 - The surface is sanded with an abrasive after drying.
- Primer is applied by roller or sprayer and dried.
- Paint is also sprayed or applied with a roller, an airbrush is taken for a large square.
- temperature;
- air humidity;
- wind speed;
- atmospheric pressure;
- dye base;
- cover layer thickness.
- What paint to choose
- Water dispersion
- oily
- Acrylic
- Alkyd
- Enamels for wooden surfaces
- Other types of paint
- How to paint a wooden table nine0010
- Selection of tools and paint
- Surface preparation
- Painting process
- Drying the table
Prepare personal protective equipment, without which experts do not recommend starting work. Use protective masks from dust when grinding, protect hands with gloves made of rubber or polyethylene.
In white
71.91%
In bright color
14.61%
Under the old
,13.48%
voted: 178
Table surface preparation
The table is dismantled for a frame and a tabletop. It is more convenient to paint them separately. If the design is non-separable, they work as is, trying to carefully paint over hard-to-reach places. nine0003
Surface preparation algorithm:
Wash the table with a damp soapy sponge, wipe with clean water, dry.
The worktop surface is cleaned of old loose paint. If the old coating is not damaged and holds well, you can not remove it.
Bumps, cracks are puttied, after drying they are sanded, covered with primer.
Metal surfaces are treated with preparations that remove and prevent rust. nine0003
Tools and materials
The main tool of the painter is a roller. To paint the table with your own hands, it is better to choose a nozzle with a velor coating. Foam rubber can deteriorate from paint and not survive until the end of the work.
Set of required tools:
Materials needed: wood putty, primer (corresponding to the type of paint), paint remover, rags. Choose paint and varnish for the finish coat.
How to paint a wooden table
Remove old paint mechanically, apply washes or use a building dryer to soften the film. At the preparatory stage, chipped wood is detected. Putty is applied after washing and priming. If you putty on non-primed material, the composition will peel off after drying. nine0003
The dried putty is sanded, also primed using a roller. If you work with a brush, there will be small furrows from the hairs that look ugly, they are difficult to clean off.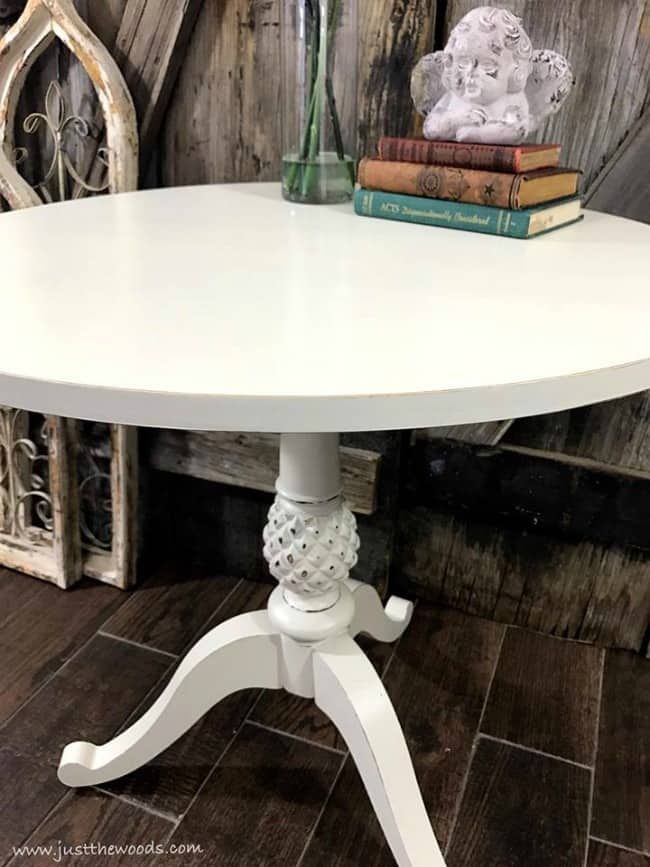
Color selection
First is determined with furniture color . Bright colors are suitable for a children's room, white is used in the living room or shades of beige and gray are added. Kitchens are painted with saturated colors that increase appetite, for example, shades of red, orange.
Wood table can be painted with compositions:
Ivan Bokorezov
Furniture reviewer and designer
Ask a question
For outdoor tables, you can use strong-smelling paints, for example, alkyd (glyphthalic, pentaphthalic PF), oil. Inside the house, tables for children are repainted with acrylic compounds, and latex products are chosen for desks. Dining rooms are updated with silicone compounds, because they have the greatest strength and are not afraid of household chemicals. nine0003
Technology
The easiest way to paint surfaces is to use an aerosol can. The jet is directed at an angle, led above the plane at a distance of 15 - 20 cm. They try not to release excess volume so as not to get streaks.
Roller technology:
If the surface has acquired the desired color, there are no spots, streaks, the surface is varnished for 1 - 2 times.
Conditions and terms of drying
Atmospheric factors influence the setting speed. For example, in humid conditions, in rainy weather (even if working under a canopy), the paint dries more slowly.
Approximate setting time of different compositions:
Film development speed is affected by wind speed when painting outdoors. nine0003
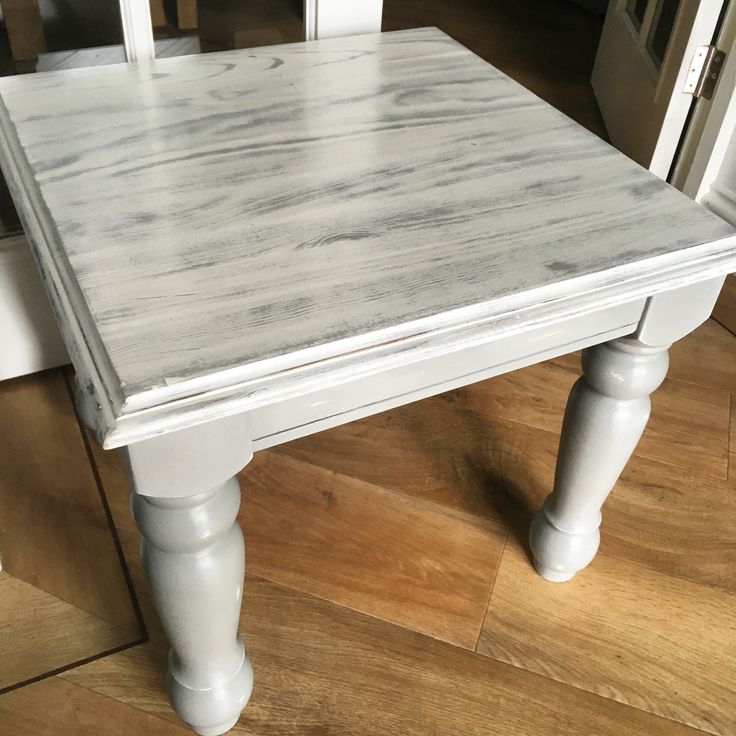
How to paint the table white
White tables are suitable for high-tech Scandinavian style interiors. If the original color of the table was pastel, soft, there will be no problems. For dark objects, repainting will differ only in the number of layers applied.
Paint selection
Shades of white in the interiorWhite compositions are matte and glossy. Matte absorbs rays, hides small irregularities. Glossy, on the contrary, emphasizes small protrusions, depressions, it is used on ideal planes. nine0003
There are also shades of white paints:
Use good quality acrylic paint that has high covering power, also use water-based, latex and silicone.
Technology
The surface is sanded with medium grit (No. 60 - 80), primed. On a rough surface, the paint shows better hiding power. nine0003
Further technology:
When the white color is perfectly even, varnish the surface with a matt or glossy varnish.
Metal table painting
Tables are carefully prepared for work, an anti-corrosion primer is applied. Corrosion is clearly visible on ferrous metal, but on galvanized metal, deformed areas also appear green like a patina, sometimes with a brown tint.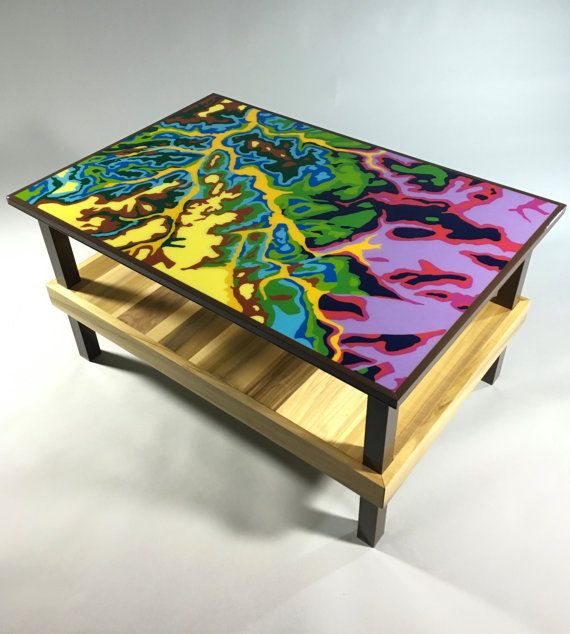 Apply special putties for metal. nine0003
Paint selection
For ferrous metal use alkyd or oil compounds. For copper bronze, aluminum tables, they take a primer in which there are epoxy resins. Well suited polyurethane paints. Use quick-drying nitro enamels.
Galvanized surfaces are painted with glyphthalic or pentaphthalic products. Such metals are resistant to negative factors, so anti-corrosion treatment is not always needed.
The primer improves the adhesion of the paint to the surface of the iron, it is rolled before painting. For all types of steel, quality paints based on acrylic are used. There are types in which additives are introduced against the destruction of the metal.
Technology
The surface is cleaned from rust, dirt, dust, degreased with acetone solvents.
Further work process:
Do not pick up excess paint, work in thin layers, it is better to make a larger number. They pass over the paint with varnish, it is applied 1 - 2 times. Otherwise, wax is used to polish the surface.
Conditions and terms of drying
Painted furniture is left for 1 - 2 days for complete drying, if possible. It is important to limit the access of insects to the room so that they do not stick to the plane. nine0003
Setting time depends on the characteristics of the environment:
Pentaphthalic dry within 24 hours, glyphthalic form a film longer - 36 hours. In aerosols, there are accelerators for the interaction of surface particles, the setting time is 20-30 minutes. The first coating with nitro enamel will harden within 20 - 25 minutes, the second - 6 hours, the third will be ready only in a day. nine0003
White
4.8
pastel colors of green, yellow, Bezh
4.7
Bright shades of blue, green, pink, red
4
Dark colors
9000 3.7often ask for
how to dilute the paint to dilute the paint to dilute the color increase its size?
Thinner may be added to the coloring compositions in the amount indicated on the packaging. Typically, this amount does not exceed 10%. If you pour in a lot of thinner, the paint will lose its characteristics. nine0003
Is it necessary to sand and sand the surface?
This treatment will create a smooth surface that will look attractive after painting. If the aesthetic side is not important, you can get by with surface leveling with putty and primer.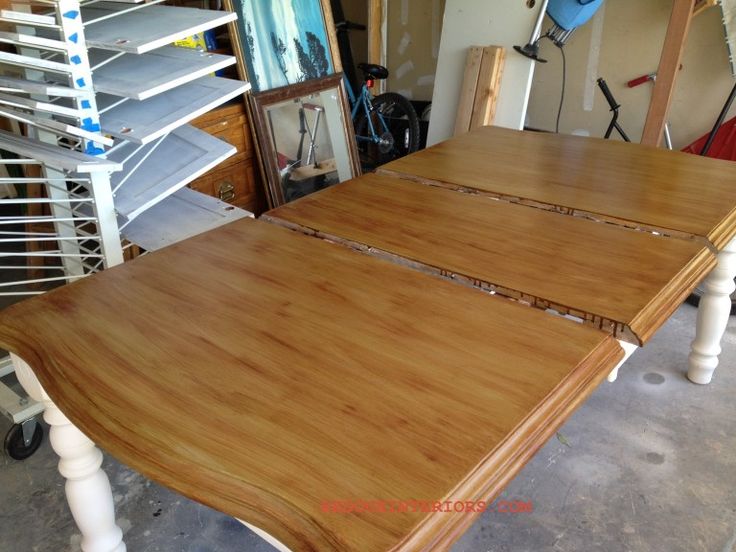
There are cheap and expensive paints on sale, can you save money?
Purchase products from well-known manufacturers - such paints are of high quality. Cheap analogues, at first glance, save money, but in fact require more layers, so the savings are doubtful. nine0003
in white and other colors, decor and features of painting different surfaces
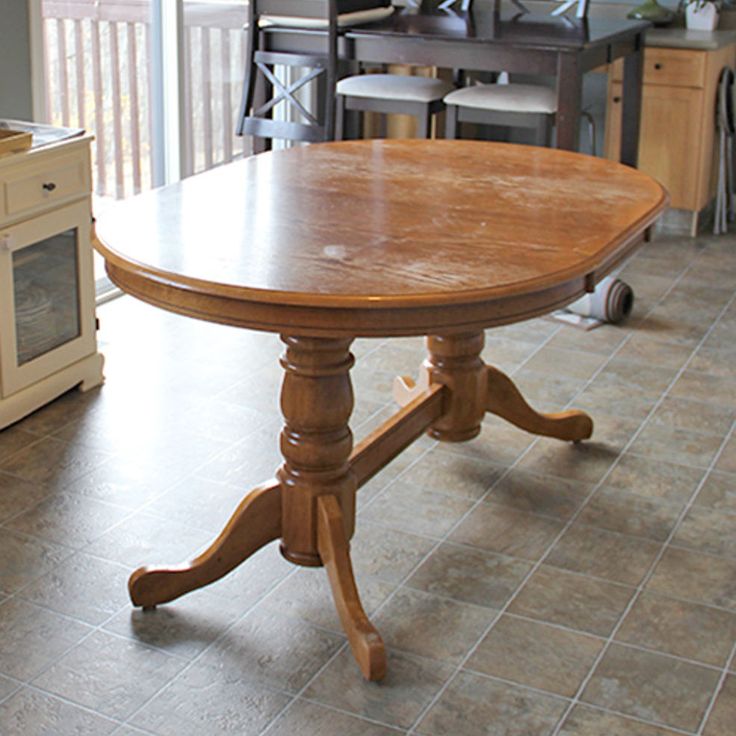
Sometimes you really want to update the interior on a budget. The paint on the old table was peeling and cracked a long time ago, but a new one would be expensive. Don't rush to get upset. You can repaint the table at home. Of course, some investment will be required to buy paints and tools. But it will be much more economical than buying new furniture.
In any home you can find an old wooden table that needs painting or restoration. nine0010Which paint to choose
A rich selection of colorful materials will confuse even an experienced home master.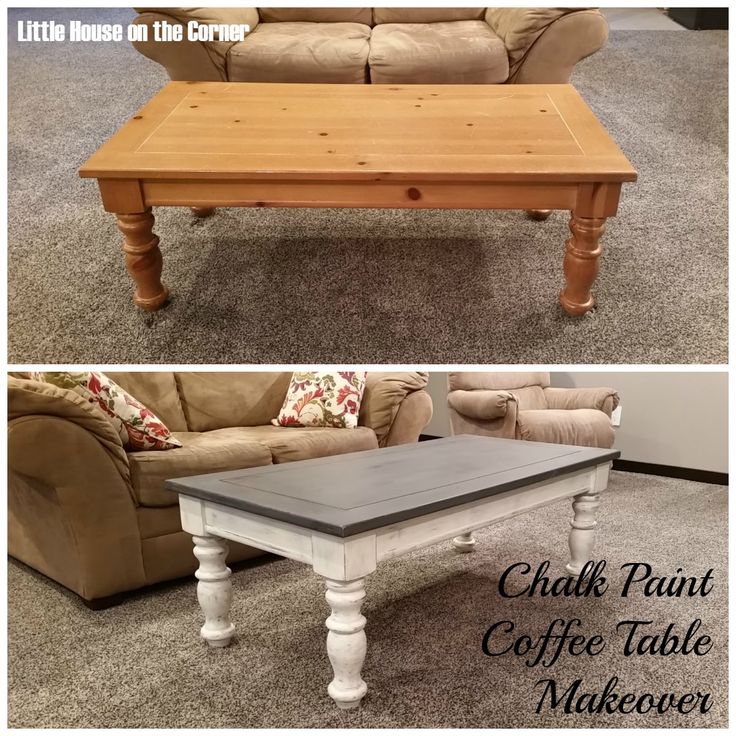 How to repaint the table and, most importantly, what paint to choose? To navigate the vast repair world, it is enough to get acquainted with the varieties of materials for painting the table. nine0003 Do not rush to replace it with a new purchase, because such a table can become an interesting design highlight and help express your creative nature.
Water-dispersion
Water-dispersion acrylic paint is simple and easy to use. Even a beginner can handle it. The tool gives a uniform coating on a wooden surface without lumps and air bubbles. If you do not like the result, and the paint is not yet dry, you can wash it off with cold water and start over. This is handy when you're painting furniture for the first time and don't know what to expect. nine0003 This is the best option for furniture that is in heated rooms, and not on a veranda or terrace.
Non-toxic, safe composition makes the product especially popular for restoration and painting of home furniture. When the surface of the table dries after the transformation, it acquires moisture-repellent properties. For the kitchen table, this will be a definite plus. Water-dispersion paint is also suitable for outdoor furniture and countertops.
Oil
Oil paint is used less often than others in everyday life, as it has a low degree of wear resistance. It contains drying oil, which is why the painted surface dries for a long time.
Oil paint cracks and chips over time, loses its beauty and peels off. To work with such a coloring composition, it is necessary to carefully prepare, sand and prime the wooden surface.
In order for the surface of wooden furniture to be evenly colored, shiny and durable, oil paints are usually used. nine0032 AcrylicAcrylics are incredibly popular. They are sold in different containers and in aerosol cans. The countertop can be painted with such a tool using a roller, brush or spray. Acrylic composition is safe for humans and pets. The paint has no unpleasant odors, it dries quickly.
The table can be painted without even taking it outside, right in the kitchen, if a constant supply of fresh air is provided. The paint is resistant to temperature changes, does not crack in the cold and withstands hot climates. This is a versatile product for the home craftsman to update not only the table, but also other furniture. nine0003
The only drawback of the product is that it can wear off and fade over time. There are also mechanical scratches.
Acrylic paints - water-dispersion compositions, which include polymers, water, pigments and additives that improve the technical properties of materials.Alkyd
Alkyd enamel available matt or glossy. Combining such textures, you can achieve incredible results in the restoration of furniture. The tool has increased resistance to frost and harsh climate, is not afraid of either the sun or aggressive chemical compositions of detergents. nine0003
Enamel paint is sold in aerosol and container. Alkyd enamel is suitable for outdoor furniture.
During operation, an unpleasant pungent odor will be emitted which may cause dizziness, nausea and aggravation. Therefore, it is necessary to prudently acquire a respirator and other personal protective equipment.
Enamels for wood surfaces
Nitro enamel paints for wood surfaces are not very popular due to low wear resistance. A countertop painted with such a tool quickly becomes unusable due to a change in temperature and under the influence of sunlight. If you painted the countertop with enamel paint, the furniture must be kept in the shade at all times due to UV sensitivity. nine0003
But these paints are inexpensive, which allows you to update the color of the furniture every season. Due to the toxic composition, the product is best used for street design. Nitro-enamel paints dry quickly, but you should adhere to the duration of complete drying for 1-2 days.
A high-quality coating can also be created using enamels. They are resistant to light, mechanical stress, not subject to corrosion.Other types of paint
The paint industry provides a wide range of products to repaint the table. When choosing any other paint, please note that it is intended for painting wooden surfaces. Also, the choice of coloring agent will directly depend on the type of wood. The paint should not only decorate the table, but also protect its structure from the negative influence of the environment, from the penetration of moisture, from the appearance of mold. nine0003 When a coating extends the life of an entire product, it becomes clear how important the choice of paint is.
How to paint a wooden table properly
Before you begin the painting process, prepare everything you need for the job.
Selection of tools and paint
When choosing paint, focus on the location of your table. Will he be outdoors or indoors? When you purchase quick-drying dyes, this does not mean that the furniture can be used in a couple of hours. Let the paint dry for at least a day, preferably two. The coating must not only dry, but also harden so that small efforts or mechanical actions do not leave dents behind. nine0003 If the paint is not water-based, it would be better if the whole process of painting the wood did not take place in the living room.
When you have decided on the coloring composition, allocated the time and place, outlined and thought through the design, it's time to prepare the necessary materials. You will need:
- various paint brushes and paint rollers;
- paint sprayer if the countertop is large or you have several pieces of furniture;
- tray for paint, where it can be picked up with a brush or rolled; nine0012
- antiseptic for wood surfaces to prevent mold;
- a primer that will prevent paint from soaking into the wood and provide a smooth, beautiful finish;
- gloves, respirator, goggles and other personal protective equipment;
- pre-treatment chemicals or wire brush to remove old paint or varnish;
- pieces of cloth and old newspaper to clean up smudges and drips. nine0012
Surface preparation
Preparing the countertop for painting requires some skill. But this step cannot be skipped. If you apply new paint to an old coating or varnish, the surface of the table will soon become covered with new cracks and chips. Sanding, cleaning the countertop from old paint fragments, puttying, eliminating cracks and depressions provides excellent adhesion between the wood and the fresh coloring layer. nine0003 Let the primer dry well before applying the first coat of paint.
- If you are painting the entire table, take it apart. If you plan to refresh only the countertop, then this procedure is not necessary.
- Use a grinder, stiff brush or sandpaper to prepare the surface of the furniture to be restored. Remove the remnants of varnish or old paint, level the surface, eliminate all irregularities and roughness. The more thorough the preparation at this stage, the better the paint will lay down. nine0012
- Apply primer. It is desirable that it be in the color of the future paint.
 If you plan to paint white, choose a primer of the appropriate shade.
 - Apply painter's tape to areas you don't plan to paint. It is better to prevent the coloring composition from getting into unwanted areas than to wash the blots later.
- Keep a rag handy to wipe your hands or any drips. It is also recommended to cover the floor with newspapers or film so as not to get dirty in the paint. nine0012
The painting process
The painting process is fun and even creative. How you paint the surface will determine the future appearance of the entire table.
- Prepare the area for painting, remove all unnecessary items, wear protective clothing and gloves. Cover the floor with unnecessary newspapers, film or paper. nine0012
- If you have spray paint, shake the can well before use.
 All components inside must be mixed.
 - If your paint is in a can, pour some into the special tray or tray. So it will be convenient for you to dip the brush or roll out the roller.
- While painting, spread the paint evenly over the wood surface. Try to apply thin layers and let them dry. It is better to do several of these approaches than to apply paint tightly at once. Such a coating dries slowly, forms smudges and bumps, it is easy to deform and leave marks. nine0012
- Allow each coat to dry thoroughly before applying the next. Only in this case, the surface of the table will be painted evenly, without bald spots and gaps.
- Paint the top first, then the legs and other details. Make it a rule to move from large planes to smaller ones. Lastly, paint the decor elements and accessories.
- It is better to make a multi-layer coating, apply the coloring composition at least 2-3 times.
- If you want a light wood texture and roughness, lightly sand the top after it dries.
 nine0012
 - After complete drying of the product, varnish can be applied.
- Protective tape can be removed after all layers have dried.
Table drying
Painted furniture should dry for a day or two in a well-ventilated area or outside in a shady area. Do not touch with your finger and check the surface. Assemble furniture only after all parts have dried, do not screw the legs to the countertop until the drying process is completed. It is important to protect the freshly painted table from flying insects. Otherwise, they may stick to the surface and leave marks. nine0003 After the allotted time, it will be possible to use the updated furniture.
Table Decoration Features
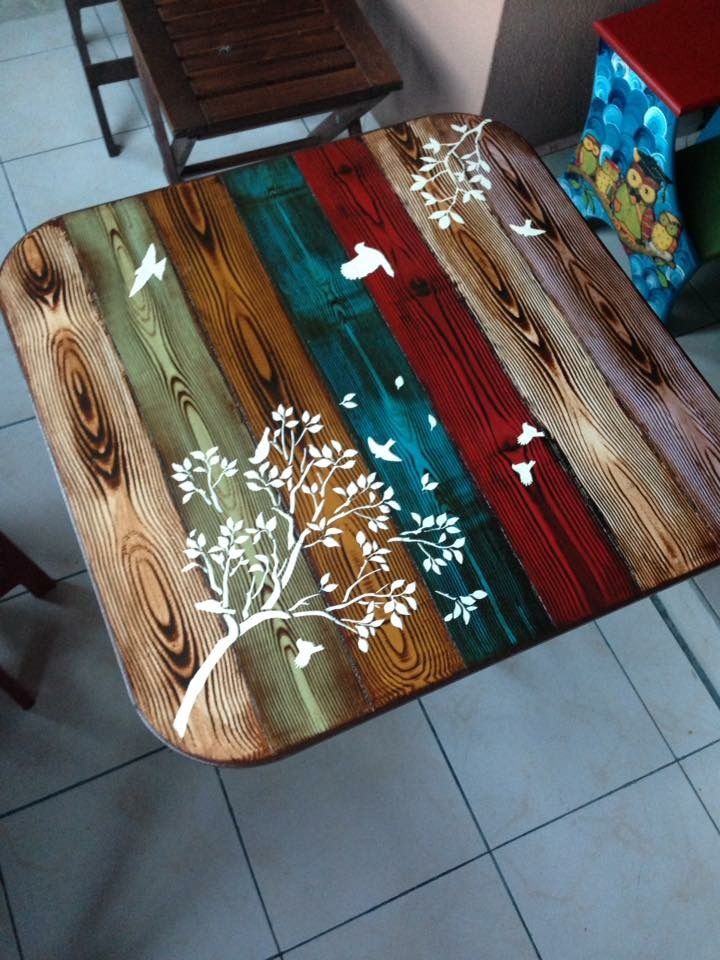
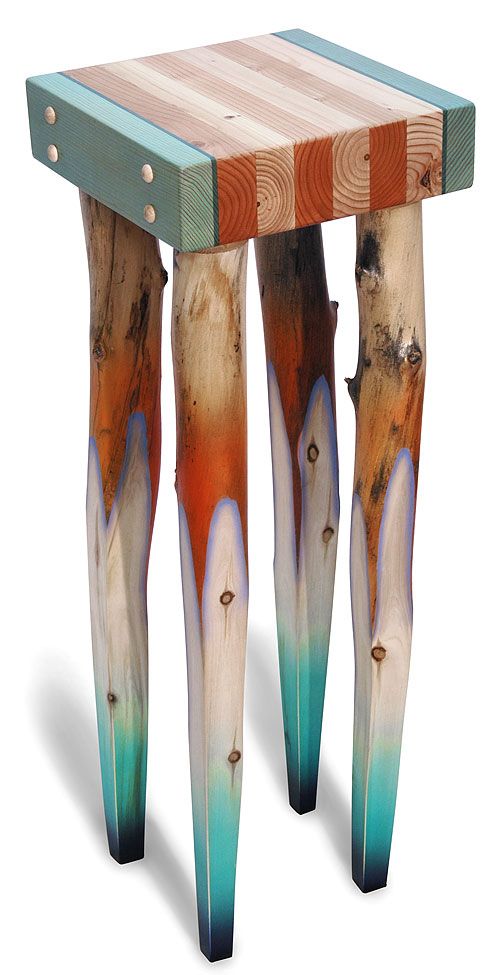
When the paint is completely dry and hardened, it's time to start decorating. There are several techniques that you can use at home. They are good because they do not require expensive investments and are easily created at home.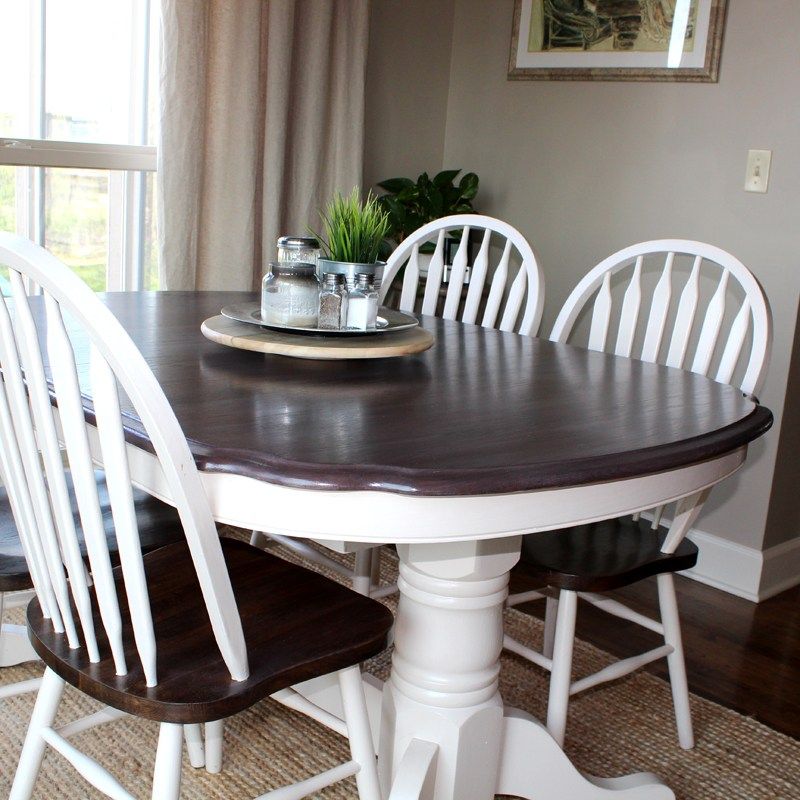 This is a great option for updating a child's room.
- Decoupage. For this technique, you will need napkins with a beautiful pattern, brushes and PVA glue. Select the topmost layer of paper with a decorative element, attach it to the countertop and apply glue on top with a brush. Make sure that the napkin does not tear, does not form air bubbles and does not move from its original position. After the glue has completely dried, the decorative element is covered with a transparent varnish. nine0012
- Tulle. Find a piece of tulle with a beautiful pattern. Wet the material, apply to the surface of the table and fix. Paint the tulle evenly with spray paint or a brush. After drying, remove the impromptu stencil. It will look especially impressive if you use contrasting colors of the coloring composition.
- Artificially aged wood looks stylish in a home interior. To do this, sand the surface of the table with sandpaper and wipe certain areas with ammonia. When they darken, walk again with sandpaper and varnish.
 nine0012
 - Patination. This method produces beautiful, dark, vintage stains on a wooden surface. Apply a patina with a stain or other suitable product, wait for it to dry and remove unnecessary layers with a foam sponge.
Painting other types of tables
In addition to the dining table, there are ladies' tables, coffee tables, writing tables and others. A large number and variety of species sometimes baffles the master. The more complex and ornate the decor, the more carefully painting of all nuances is required. In such cases, it is better to use a spray gun or aerosol cans. nine0003 Finely sprayed coloring composition gets into hard-to-reach places where no brush can reach, and even more so a roller.
If you want the grain of the wood to show well, do not use a primer. Choose liquid paints that will not further level the surface of the furniture. Such a coloring composition will repeat the relief of wood.
If you want a smooth desk, like a desk, go for thick enamel with a matte finish.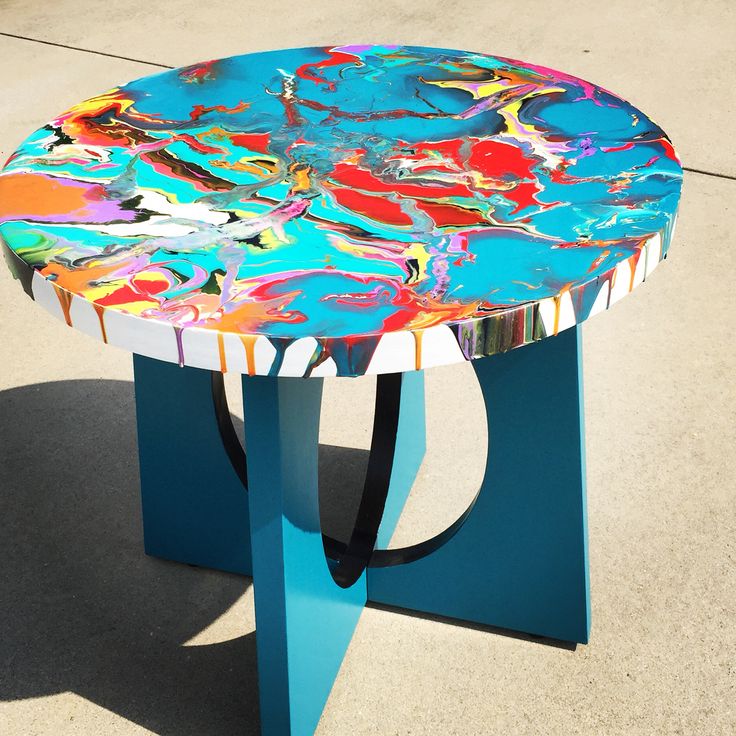
Very old furniture usually has damage, dents, chips and cracks. There is an unnecessary texture in the form of a bug-eaten surface. The fittings have already weakened, the legs have become loose and the tabletop is slightly “walking”. It is not enough just to repaint such furniture, it needs to be repaired and restored.
First, disassemble the table into as many parts as possible. Wash the surface of the countertop and legs, dry and carefully examine. All damage and dents can be leveled with putty and primer. Tighten the fittings or replace with a new one. nine0003 Old tables are often made of good, strong wood that will last for many more years.
Painting the table white
White shades of furniture come with warm or cool undertones. In the first case, yellow, orange and reddish shades are mixed with white. If the interior is made in cold colors, add some green or blue colors to the white paint.
How to paint a children's table with your own hands if it is dark in color? For pre-treatment of countertops, choose brightening pastes or primers in white shades. This will allow you to repaint even the darkest furniture. Each layer of the painted surface must dry well. The finish can be matte or glossy. For extra shine, varnish the table. In this case, the white furniture will literally shine. nine0003 For the effect of antiquity, you can choose materials for painting in the desired color and completely cover the surface, wait for it to dry, then carefully remove the top layer partially with a sponge.
Basic difficulties and errors
Common mistakes can lead to unexpected results. This can ruin the mood and furniture. Therefore, follow a few rules and do not make the mistakes common to beginners.
- Thin the paint in the proportions indicated in the instructions. This is important so that the paint does not turn out to be too thick or, on the contrary, liquid.
 Failure to follow these simple guidelines will result in streaks and uneven coverage. nine0012
 - Allow the product to dry well. If you start using the table before the paint is completely dry, there is a risk of leaving dents, fingerprints, dark spots or scratches on the table top.
- Poor grinding of the surface makes it uneven and bumpy. Even if it is not striking, after staining, especially in light colors, all flaws will be noticeable.
- Insufficient putty also reduces the resource of finished furniture. If it seems to you that the legs can not be puttied, then over time, cracks and damage will only increase in size. This table will quickly fall into disrepair. Do not ignore inconspicuous areas and loose fittings, repair and update everything on time. nine0012
- Test the paint on a small area of the product. Does it lay down well, is the result satisfactory, how many layers do you plan to apply? It is advisable to decide on these nuances in advance so as not to improvise on the go with an unexpected result.
Rules for the care of a painted table
The painted surface does not require special care. But there are unacceptable things that can interfere with the smoothness or texture of the decorative coating. nine0003
- Wipe the lacquered or polished table only with soft cloths or microfiber cloths. Do not use rough sponges, scrapers or cloth with fittings. This may leave marks or scratches on the countertop.
- If you have varnished the surface of the furniture, do not clean it of dust with a wet method. This removes the natural shine and makes the lacquered table look matte. Remove dust with a special brush or vacuum cleaner.
- The unpolished surface can be washed, but in such a way that the water does not stagnate. Remove excess liquid immediately and wipe the countertop dry.