Planting dill seeds in pots
Everything About Growing Dill in Pots
Search
Growing Dill in Pots? Learn everything you need to know for proper dill plant care in this informative article.Dill is a biennial herb but grown best as an annual. It can self-seed and keep growing like a perennial if you grow it in clumps on the ground. It’s an excellent choice for your container herb garden, as well.
Dill has feathery green fronds like a fern and has a sweet aroma like licorice and anise seeds. This popular kitchen herb is used both as a spice and herb. Harvest the fresh fronds to prepare salads, vegetables, sauces, meat, seafood, fish and curry dishes and use the seeds to flavor pickles, stews, sauerkraut, rice, and bread.
Botanical Name: Anethum graveolens
Other Names: American Dill, Aneth, Aneth Odorant, Anethi Fructus, Anethi Herba, Anethum sowa, Dill Herb, Dill Weed, Dillweed, Dilly, Eneldo, European Dill, Faux Anis, Fenouil Bâtard, Fenouil Puant, Huile d’Aneth, Indian Dill, Madhura, Peucedanum graveolens, Sua, Satahva, Shatpushpa, Sotapa, Sowa
USDA Zones: 3 to 11
Type of Plant: Biennial, grown as an annual.
Plant form and Size: Dill has feathery foliage that can grow up to 2-4 feet tall and 1-2 feet wide. (Depending on the variety)
Soil pH: 5.5 to 7.5
Types of Dill
Dill has a range of varieties from Bouquet, Superdukat, Fernleaf, and Long Island Mammoth. Out of these, the Superdukat is particularly preferred for cooking needs and to grow in a pot, compared to Long Island Mammoth.
1. Bouquet
This showy variety has bright yellow flowers. This variety can grow large, usually between 24 to 36 inches tall. Because of this, it is best grown outdoors. Just be sure to plant this variety after the danger of frost has passed.
2. Superdukat
This compact hybrid variety of Dill is grown specifically to be more flavorful, and the size makes it suitable for container planting. This cultivar can grow between 12-24 inches tall but is slower to grow compared to Bouquet Dill. It is also reluctant to decline, so it has the benefit of being used for a more extended period. If you prefer more leaves than seeds, this is the variety to grow.
3. Fernleaf
A dwarf variety of Dill, this can be a great window garden plant for indoor growers as it doesn’t need much space to grow. It remains about 12-18 inches in height. This plant thrives best in a temperature range between 60-75 F (16 C to 24 C). Be sure to place it in a location where it can receive at least 6 hours of sunlight per day.
4. Long Island Mammoth
As with any variety of Dill, this plant forms taproots and doesn’t transplant well. So if you’re growing it in a container, be sure that it is at least 12-14 inches deep and wide because the Long Island Mammoth can grow up to a height of 36 inches with a spread around 24 inches. It’s commonly grown by commercial dill producers and thrives best outdoors.
Propagating Dill
You can’t grow dill from cuttings. You may try to root it in water, but this usually doesn’t work. Growing dill from seeds is the best option.
- Instead of growing dill seeds in seed trays, sow them directly in desired pots as dill plants form long taproots and don’t transplant well.
- Sprinkle dill seeds in pots and cover them with a 1/4-inch layer of soil mix.
- Keep the soil evenly moist while the seeds germinate, which is usually 7 to 10 days. You’ll have to wait till 21 days if the growing conditions are not optimum or seed quality is poor.
- Wait until the seedlings are 4-6 inches tall and thin them to one or two plants per pot, saving only the strongest ones.
- You can start the dill seeds indoors in spring, 4 weeks before the last expected frost date.
- Or, sow outside on your balcony or patio, after all the dangers of frost are passed and weather perks up to around 60 F (15 C).
- Keep sowing seeds every 3 weeks for successive planting. You can plant seeds in summer as well if it’s cool in your area.
- Grow dill in fall, too, begin planting last seeds at least 2 months before your first frost date.
Growing Dill in Hot Climate
If you’re growing dill in a warm climate (USDA Zones 9b-11), start seeds after the summer, in fall, when the weather is comparatively cold.
- Keep growing seeds successively to grow dill in winter and up to spring.
- It may die when your hot summer approaches unless you save the plant from heat.
- Shield it from the afternoon sun and hot wind and water it more often to keep the soil evenly moist.
- The plant will bolt in heat, keep trimming the flower buds before they open. Also, check out our article on how to grow dill in tropics here for more information.
Choosing a Container
Since dill forms a long taproot, choose a 5-gallon container that is at least 12 inches deep and wide similarly. In such a pot, you can grow one plant. For smaller varieties, select 10 inches deep pot. To grow a couple of dill weed plants together, get a much bigger pot.
Requirements for Growing Dill in Pots
Position
Provide a location that receives full sun or at least 6-7 hours of direct sunlight and good air circulation. You can grow dill in part sun, but it will not become bushier there than it would be in full sun.
If you’re growing dill indoors, keep it at a South or West-facing window for optimum growth. In a subtropical or tropical climate, save this herb from the intense afternoon sun, especially in summer.
Soil
Use well-drained, loamy potting soil when growing dill in pots. While it can tolerate poor soil, it’s a good idea to mix 20 percent aged manure or compost at the time of planting to make your growing medium slightly richer.
Watering
If the growing location is sunny and windy and the dill plant is growing in a clay pot, it will dry out faster, and you’ll have to water regularly to keep the soil mildly moist.
When growing indoors or in part sun, water only when the soil is about to dry. In the hot climate or summers, you’ll need to keep the soil moist.
Tip: Avoid overwatering to prevent root rot. Similarly, don’t practice overhead watering to stop fungal diseases and water around the base of the plant.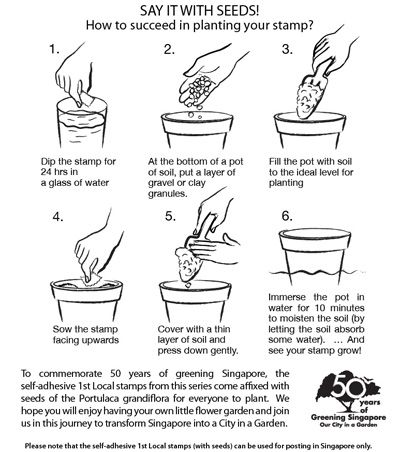
Staking
Dill is a floppy herb and tends to fall once it grows taller because of its weak and hollow stems. It’s better to use a plant stake like a bamboo stick or metal rod to support it.
Dill Plant Care in Pots
Fertilizer
Once your dill plant has grown several inches high and around 2-4 weeks older, it’s a time to fertilize it. Feed it every 4 weeks with a balanced liquid fertilizer in half of its prescribed strength on the label.
If you want to avoid chemical fertilizers, side-dress this herb with aged manure or compost, once or twice during the growing season.
Pruning Dill and Deadheading
- Pinch back the top growing tips of young 4-5 inches tall dill plant to make it bushier as you do with other herbs.
- If you’re harvesting this herb regularly, you don’t need to prune it.
- Don’t trim more than 1/3 of its growth at one time for either pruning or harvesting.
- Trimming the leaves from the top promotes bushier Dill growth.
 This forces the plant to grow outward instead of upward.
 - Never allow your dill plant to flower unless you want to collect the seeds. This step increases its vegetative life.
- Remove as soon as the umbels of yellow flower buds (dill flower heads) appear, otherwise the plant flowers, form seeds and die.
Also Read: How to Prune Herbs
Pests and Diseases
Dill may get parsley caterpillars and tomato hornworms. Handpick the pests away from the plant. Aphids love this herb too, so keep an eye on them. In diseases, Leaf Spot and Mildew can be a problem, if you’ll practice overhead watering.
Harvesting Dill and Storage
Harvesting Dill Leaves
Once the plant reaches an ideal height of 8 inches–Start harvesting. Use a garden snip or a pair of scissors to harvest according to your needs.
For this, nip off individual leaflets close to the stem and lay them in one layer on a baker’s rack or something similar. Once dry, keep them in an airtight jar.
Refrigeration
You can keep extra trimmings in the refrigerator, and they’ll remain fresh for a few days. Fold them in a damp paper towel, and secure them in a plastic bag. Or you can freeze entire stems and clip the leaves as you need them. Store them frozen in butter or vinegar, so that they leave a tangy taste in your cooking.
Tip: Dill leaves have the best flavor before flowering.
Harvesting Dill Seeds
After about 60-80 days from sowing, dill flowers will appear and seed. These seeds will be mature in 2-4 weeks, depending on the climatic conditions. Trim the seedheads when seeds turn flat and brown and before they fall on the ground.
Tip: If you’re not growing dill in pots for seeds, snip off the flower buds before they open and seed. This way, the plant will keep growing and direct its energy on vegetative growth.
Drying
Hang seedheads upside down in a paper bag, so that the dry seeds fall into it. Collect and store the organic seeds in an airtight container and use them as the way you want.
Join our 2.8 Million Followers
Social Followers
2.5MFollowers
219kFans
36kSubscribers
YouTube
How to grow dill in a pot on your deck
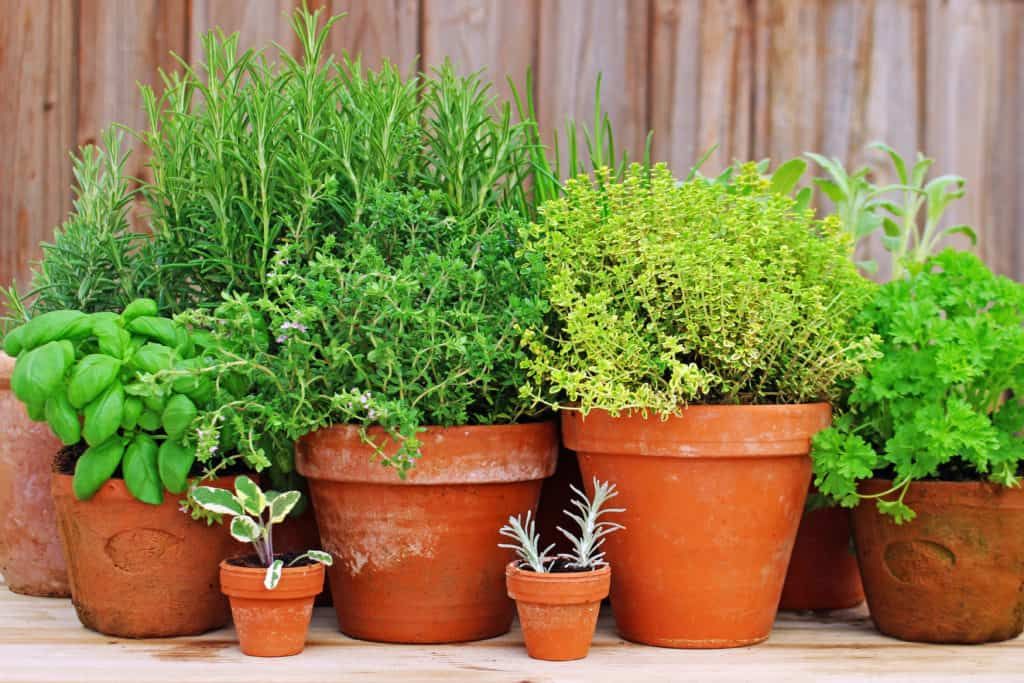
A step-by-step guide to growing dill in pots on your patio or deckI got my start growing herbs with the usual suspects: basil, oregano and thyme. They’re the familiar flavors you find in pasta sauce, pizza and soups, and they’re easy to grow in pots.
But after a couple of seasons I was itching to branch out — and dill was next up.
Like a lot of herbs, dill (anethum graveolens) is easy to grow in pots and easy to harvest for use in the kitchen.
This perennial herb with fern-like feathery leaves produces one of my favorite flavors. Imagine dill pickles, dill dip with rye bread … not to mention dill on roasted veggies, in soup, or on fish.
And there’s truly something magical about a good piece of salmon baked with a hunk of dill butter on top. YUM.
The leaves can be used as an herb in all those ways and the seeds from its lacy yellow flowers have culinary uses as a spice for pickling, bread and more.
Dill is part of the parsley family, which also includes carrots, celery, and spices like caraway and cumin. But it grows a lot taller than some of those low-growing cousins, topping out as high as 3 or 4 feet.
However, some of the most common culinary varieties of dill tend toward a dense 18 inches — totally doable for a container garden!
And the bright yellow flowers attract butterflies and other beneficial insects.
In other words, dill is awesome, it’s easy to grow in a pot or container, and it’s a great herb with a unique flavor to broaden your cooking horizons.
So read on for easy instructions for growing dill in a pot for your deck or patio garden!
This post may contain affiliate links.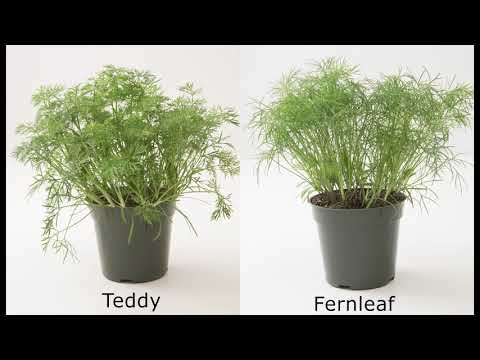 If you buy something through these links, we may earn a small commission at no cost to you.
Growing dill in pots
How to start dill from seed
Dill should be started from seed, not seedlings.
Dill seedlings set down a long taproot like carrots do, which makes it hard to transplant them without doing damage.
For this reason, one important thing to remember with dill is to sow seeds in the container you plan to use all growing season, since they don’t transplant well.
Ideally, sow dill seeds after danger of frost has passed. In most zones, the best time is between April-May. If you’re not sure when that is, check out this frost dates calculator.
Don’t be intimidated by starting dill from seed or let that deter you! It’s not hard:
-
- First, choose a deep container at least 12-18 inches deep and 12 inches wide, with good drainage holes at the bottom.
 That taproot needs room to grow vertically and support the 2-4 feet of the plant’s full height, so don’t skimp on container size.
 - Next, fill with good quality potting soil mixed with a handful of compost or other aged organic matter, and sprinkle a few seeds on top, toward the center of the container. You can get soilless potting mix at garden centers, of course, or make your own potting mix. You want loamy soil texture with essential nutrients, nothing fancy.
- Cover with a thin layer of soil, about ¼ inch.
- After that, keep soil evenly moist and seedlings should appear within two weeks.
- First, choose a deep container at least 12-18 inches deep and 12 inches wide, with good drainage holes at the bottom.
Clay or terracotta pots are great for lots of patio garden plants because clay dries well between waterings and a lot of herbs prefer drier soil.
But in this case, dill prefers steady moisture, so a plastic or glazed ceramic pot may be a better fit. Just make sure it’s plenty deep!
Can I grow dill from cuttings?
While it’s not ideal to start potted dill from seedlings, it is possible to grow dill from cuttings set in water.
What’s the difference between a seedling and a cutting?
- A seedling is a young plant grown from seed.
- A cutting is a piece of a stem, leaf or root taken from an established plant. This makes the new plant a clone of the original. Generally, cuttings are taken to recreate the qualities of the parent plant.
To take a dill cutting, first find a stem with 3-4 inches of new growth and snip with sharp scissors. Then pull off the bottom leaves and set in a container of water. No need to fertilize.
TIP: Keep in mind that roots can easily tangle if you’re growing multiple cuttings. Don’t put more than 2-3 cuttings in each container.
Once the cuttings have grown a few inches of roots (generally in 2-3 weeks), gently set in potting soil.
How to thin dill seedlings and position on your deck- After another 10-14 days, once seedlings are a few inches tall, thin down to one or two seedlings per container.
 It can be a little heartbreaking to pull healthy seedlings out of the soil, but the goal is to keep the strongest one so it can live its best life.
- Finally, once the seedlings are thinned, set the container outdoors anytime after the last frost. Keep soil moist but not soggy until you make the move.
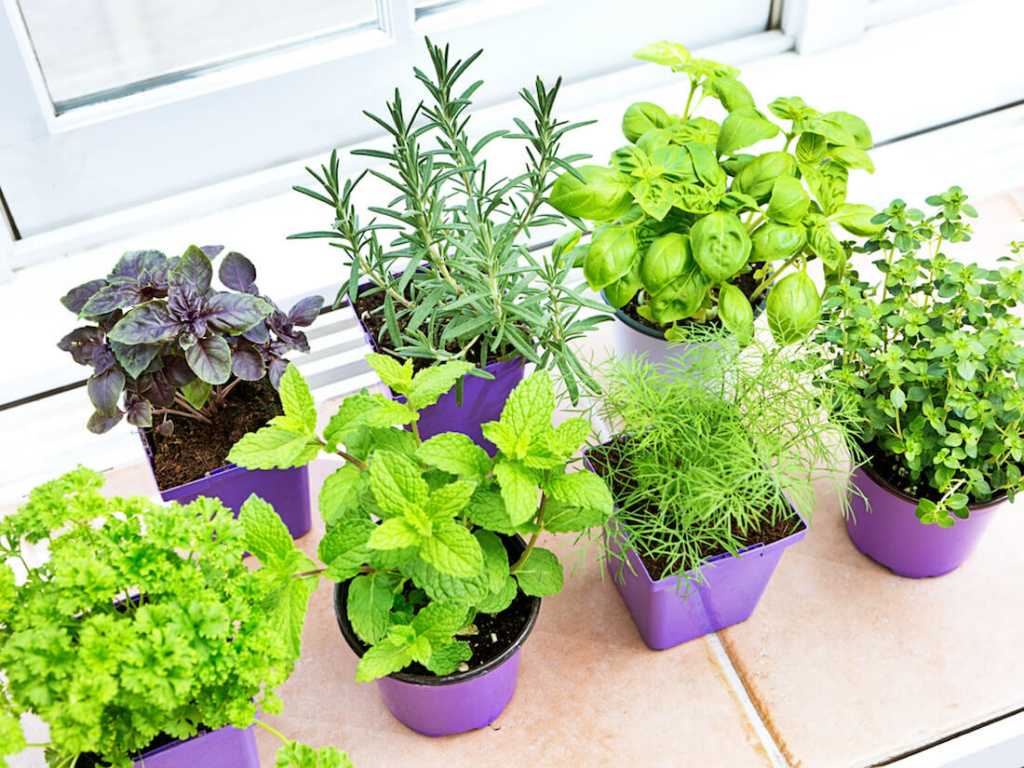
What variety of dill does best in a container garden?
There are a lot of varieties out there, some better than others for culinary use or flowering. Here are a few varieties that do especially well in container gardens:
- Bouquet is a great choice, a popular dwarf variety with dark green leaves and abundant seeds from the plentiful yellow flowers.
- Fernleaf is a compact, productive variety that grows about 18 inches tall and does very well in containers. This is a good one to plant if your patio or deck gets less than 6 hours of direct sunlight per day.
- Compatto is another compact option, only growing to about 12-18 inches tall and slower to bolt than some others.
- Dukat tops out between 12-24 inches and has a high oil content that makes it great for culinary use.
I’m growing fernleaf dill this year and while it had a slow start, it picked up the pace and it’s doing awesome now! Next year I’ll also try bouquet dill and see how they differ.
Choose a sunny spot on the deck for your dill
Dill likes: plenty of direct sun, steady water, moderate temps, protection from wind, support when it gets tall
Dill doesn’t like: lots of shade, intense heat, drying out, falling over
In other words, find a sunny spot that gets 6-8 hours of sunlight, with some wind protection. Dill does well against a wall or trellis for some support. Staking is another option.
How to take care of a potted dill plant on your deck or patioMany herbs are great edible plants for a container garden – they’re small and not overly fussy about conditions. Even with minimal care they can produce enough to use in your kitchen throughout the growing season. And drying or preserving them gives you plenty for winter.
Dill is undeniably one of them! Read on for easy-to-follow instructions for keeping dill happy, alive and thriving.
1. Keep dill moderately wateredWhile many herbs like to dry out between waterings, dill prefers steady moisture. Water when the top inch of the soil feels dry.
2. Go easy on the fertilizerDill doesn’t need much fertilizer. Add a bit of compost or slow-release fertilizer when first planted and a small amount in late spring, and you should be good to go.
3. Stake dill to keep it upright
While not as necessary for dwarf varieties like fernleaf, dill can often benefit from a bamboo stake to prevent falling over or blowing in high winds. If you decide to stake, do it early so you don’t disturb roots at the base of the plant. These 18-inch bamboo stakes (ties included) are perfect for light, feathery dill.
How to harvest dill in a pot
Dill should be ready to harvest about 8 weeks after you first sow the seeds.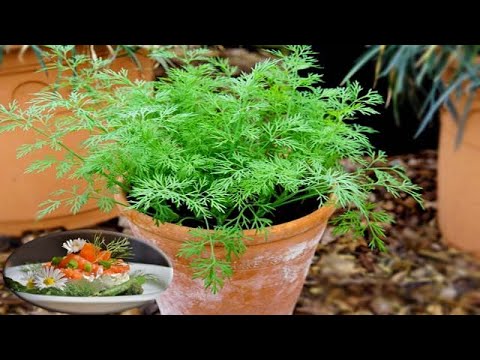
To harvest dill leaves:
You can pick some as soon as the plant is established with leaves big enough to use, preferably at least 4-6 inches tall. Be sure to harvest older leaves first, picking or snipping leaves close to the stem, starting from the top of the plant.
TIP: You’ll get the best flavor from fresh dill leaves picked before it bolts (produces dill flowers), so don’t wait. Once the bright yellow flowers bloom, the plant stops sending energy to the leaves.
To harvest dill seeds:
After your dill plant bolts (produces flowers), cut off the seedheads when they start to turn light brown. Dry completely in a paper bag for a few days, then separate the seeds from the chaff.
Watch how and when to harvest dill leaves:
As I’ve said, dill is a fun, easy herb to add to grow in a pot on your deck or patio.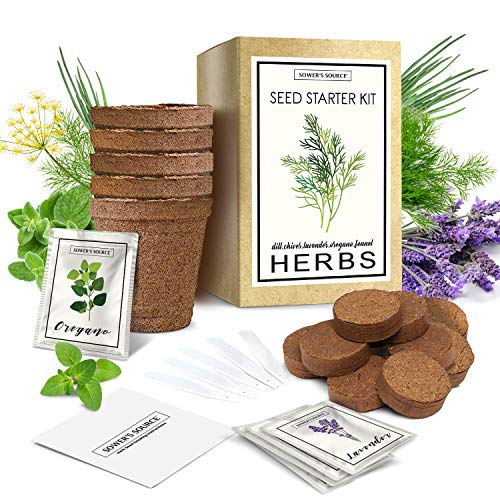
Just make sure it has a deep pot, steady sun and water, and some protection from the wind. You’ll be making amazing fish, potato salad, and your own pickles in no time!
Planning to grow herbs in pots on your deck? These articles can help round out your container herb garden:
- Growing oregano in pots
- How to grow basil in a pot
- Growing rosemary in containers
- How to grow thyme in a pot
- How to grow catnip in a pot
- Growing chamomile in pots
Growing dill indoors on a window
Having fresh herbs on the table all year round is a cherished dream of many housewives. Growing dill right in an apartment at room conditions on a windowsill in pots has long been popular, because this is a great opportunity to get vitamins even in winter.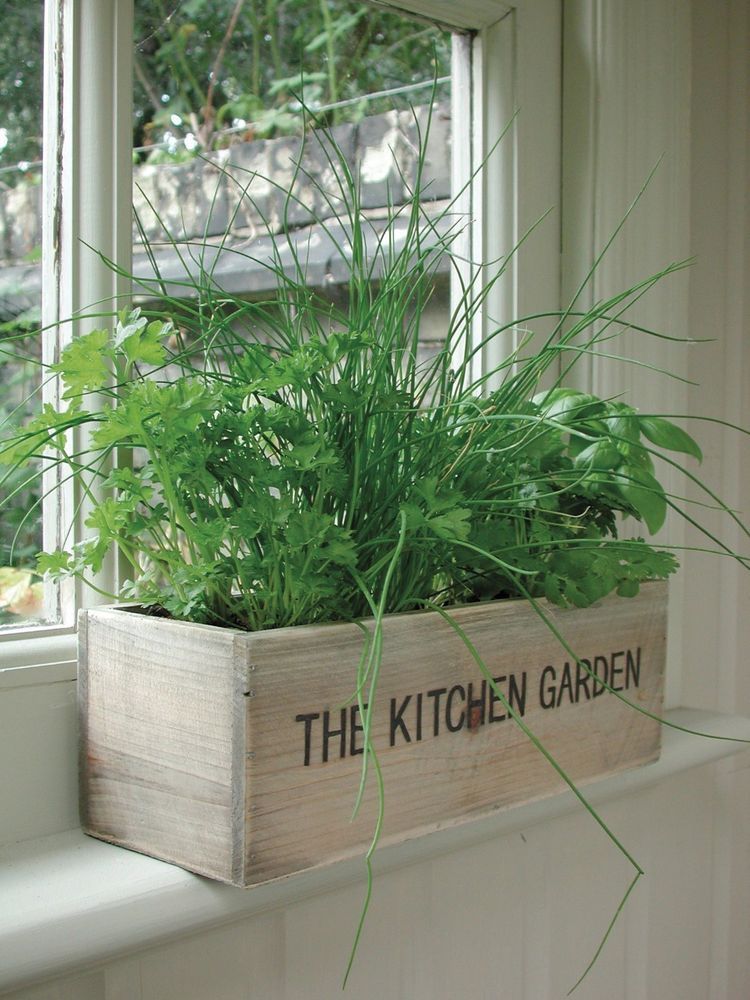
Dill is an unpretentious plant, easy to grow even for an inexperienced gardener, with a lush crown that will decorate the house. Thus, dill grown in a pot in an apartment combines both aesthetic and functional aspects.
There is a myth that home-grown dill is smaller and less aromatic than its counterpart from the garden. However, in reality, the difference between them is hardly noticeable, it depends only on the efforts that a person makes in order to help green sprouts to sprout.
In order to get a bountiful harvest, it is worth preparing for the cultivation of dill in advance. There are only a few basic principles to follow for success:
- For sowing at home, early ripe varieties of greenery, such as Gribovsky, Grenadier, Richelieu, Grinberg or others, are suitable. The speed of ripening is important, since the time of the first cuts and the taste characteristics of dill depend on it;
- Any container is suitable for planting, from an ordinary flower pot to a special tray.
 The main thing is that its volume is deep enough for the development of the root system. Sprouts should have enough free space;
 You can grow dill on a windowsill at room conditions in an ordinary flower pot
- Land for growing dill at home is suitable both from a garden plot and bought in a store. Remember that it should be rich in minerals. Regular feeding of plants during the growing season also helps to increase the yield;
- Before planting, dill seeds should be soaked in water at room temperature for a period of five hours to two days. To disinfect seeds and prevent the development of plant diseases, a medium solution of potassium permanganate is used, in which the seeds must also lie for three hours. It should be noted right away that the seeds that, after soaking, did not sink to the bottom of the container, can be immediately discarded, since they are of no value and most likely will not sprout.
Dill seeds must be soaked before planting.
 Those that remain floating above should be immediately discarded
Planting and caring for dill at home
A thin layer of expanded clay is placed on the bottom of the container, which is covered with earth about three-quarters of the height of the tray, go a little more. The earth is moistened, the soaked seeds are laid out, and they are sprinkled with an earthen layer of 1-1.5 cm. It is not worth burying the seeds deeper, otherwise they will not be able to germinate. After that, water with settled water. Moreover, it is more expedient to do this from a spray gun in order to blur the ground.
The final step is to create a greenhouse effect. Ordinary plastic bags used to cover pots are suitable for this purpose. A favorable microclimate is created under the film, in which dill will successfully germinate. The accumulated condensate will not allow plants to remain completely without moisture. The first sprouts of dill grown on the windowsill appear already in the first or second week after planting.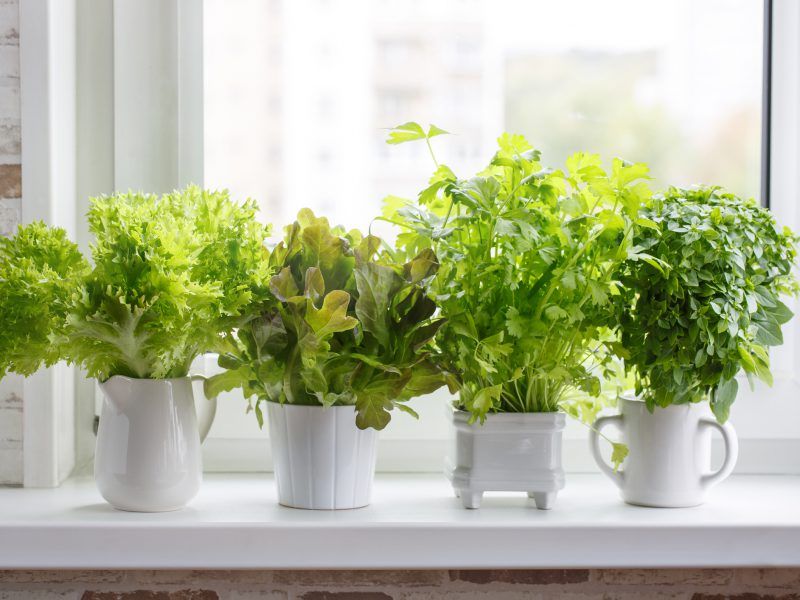
The only thing left to do is to ensure that the plants receive sufficient watering and sunlight. To do this, they are put on the windowsill for a period of at least ten hours a day. In this case, the pots must be constantly rotated so that the plants do not have a curvature in the development of the stem. In the conditions of a short day, the illumination of plants with the help of ultraviolet lamps will be a good option.
If the planting of seeds was too dense, the sprouts must be thinned out, and also remember to water, otherwise the plants will be weak and stunted due to lack of nutrition and crowding.
Harvesting dill grown in the apartment
The first slight pinching of tender dill leaves can be done already in the third or fourth week, and the first cuts should be done in a month. In the second month after planting, there will be an abundant bush of thick and pleasantly smelling dill in the pot.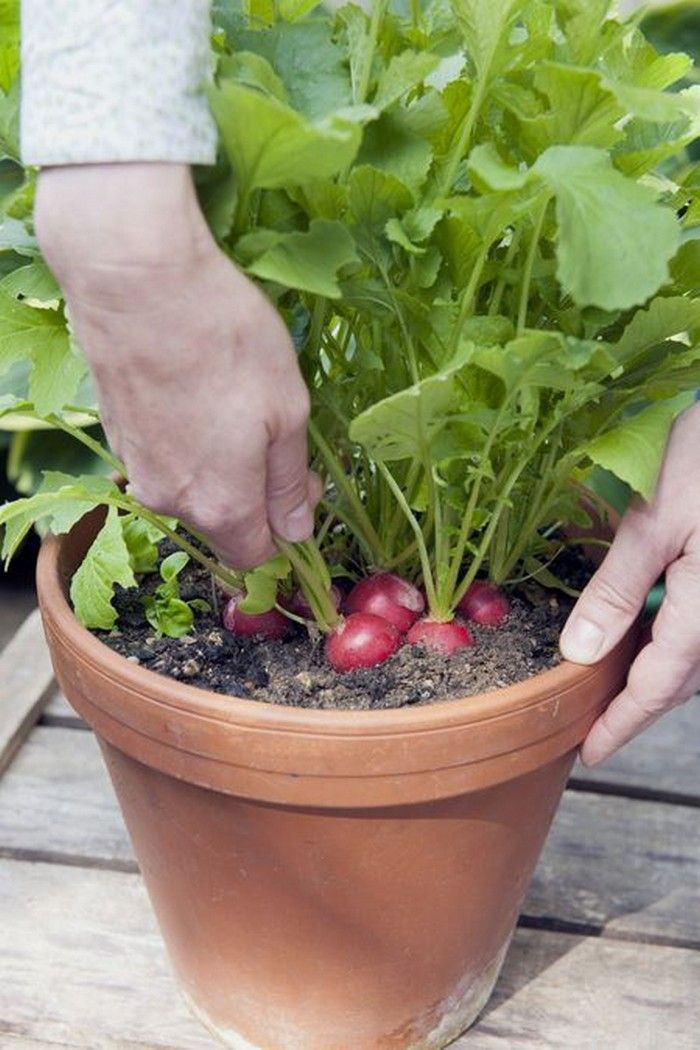
Home-grown dill is much more valuable and useful for adding to dishes. Growing it is easy, which means you can always have a fresh sprig of dill on the table.
how to plant houses in an apartment in a pot, is it possible in winter, how much grows in these conditions, why is it better not to sow an early variety? Russian farmer
Pot soil Selecting windows Preparation of seed material Step -by -step processing procedure
Pros and disadvantages of growing greens of the house in the apartment
An indisputable advantage of growing dill on the windowsill is the ability to enjoy this spicy culture for a long time. In this case, the plants are always at home at hand. The process of cultivating crops at home does not depend on weather conditions and seasons , it is possible to create the required climate on your own.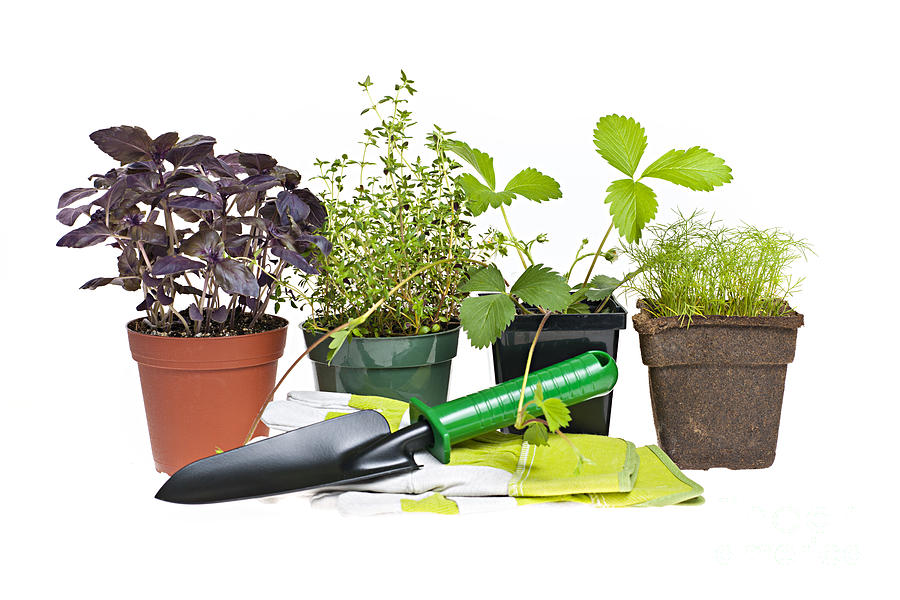
As for the shortcomings, the culture requires some care, especially in winter. It will be necessary to create conditions for good illumination with the help of fluorescent lamps. Otherwise, growing dill is quite simple, using the recommendations below.
What are the best varieties to plant?
The first thing to do when you want to grow dill on your windowsill is to choose the right variety. There are no specific varieties sectioned specifically for growing at home. The main difference between dill varieties is the duration of spice ripening.
The following types of varieties are distinguished:
- early-maturing;
- mid-season;
- late.
Varieties of early species form a green mass in a short time and quickly produce flower stalks. The foliage of such plants does not grow lush, which is why you should not grow such varieties of dill at home. They will quickly begin to form seeds.
Is it possible to sow late varieties of dill and how long will they ripen? As for late-ripening varieties, this is ideal for planting in a pot at home.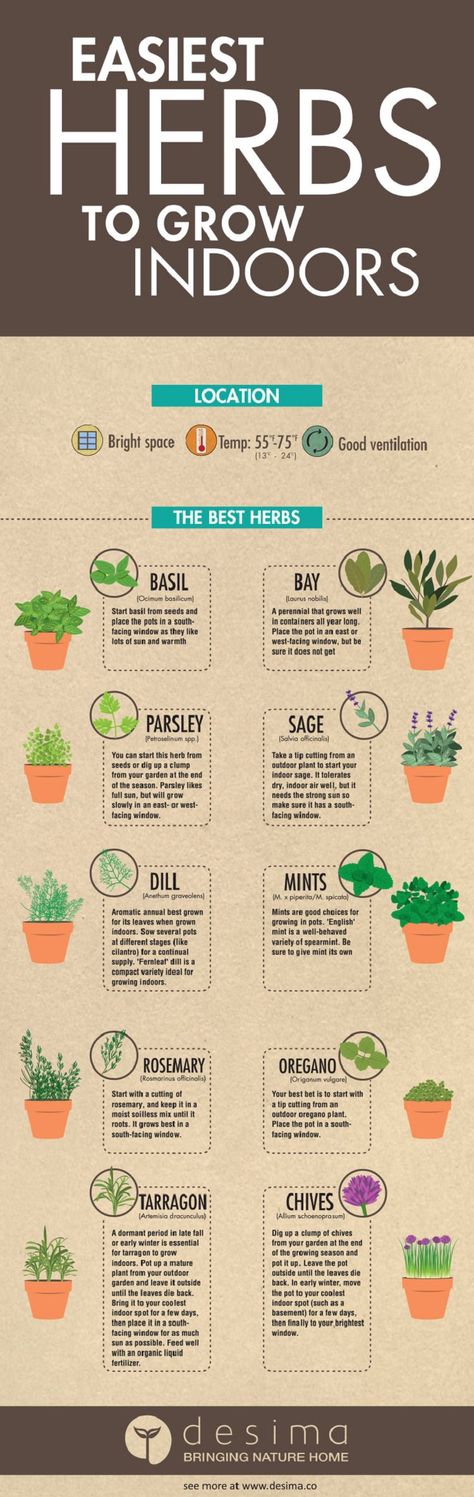 The culture of late varieties does not have time to ripen during the summer and gives a good green mass for a long time.
List of late-ripening varieties that should be preferred for sowing seeds in a pot at home:
- Amazon;
- Alligator;
- Dill;
- Buyan;
- Fireworks.
On the recommendation of amateur gardeners who grow this seasoning at home, you can also choose an early ripe variety, suitable:
- Grenadier;
- Gribovsky;
- Kibray;
- or mid-ripening Richelieu.
How to plant?
Sowing seeds in a pot involves several preparations.
Before sowing, you will need:
- determine the capacity for the plant;
- purchase or prepare soil;
- decide on a place for a spice plant;
- Prepare seed.
Each of the stages of preparation requires compliance with certain conditions and recommendations.
Pot
Suitable for planting dill flower pots up to 2 liters . If it is planned to sow a large number of plants, then ordinary wood boxes can be used. It is important that special drainage holes are made in the selected container. It is required to select a suitable pallet for the container.
There are no special requirements for the dill pot. The only thing worth focusing on is the convenience of placing plants on the windowsill. You can use peat pots for sowing seeds, and then transfer them to a pot for further cultivation.
Soil
Be sure to provide a drainage layer of 2 cm at the bottom of the selected container or flower pot. For this, ordinary expanded clay is used. If it is not possible to use expanded clay, then ordinary sand will do.
If you do not want to prepare the soil yourself, then you can buy ready-made in the store and mix it in a 1: 1 ratio with garden soil or use the purchased soil in its pure form.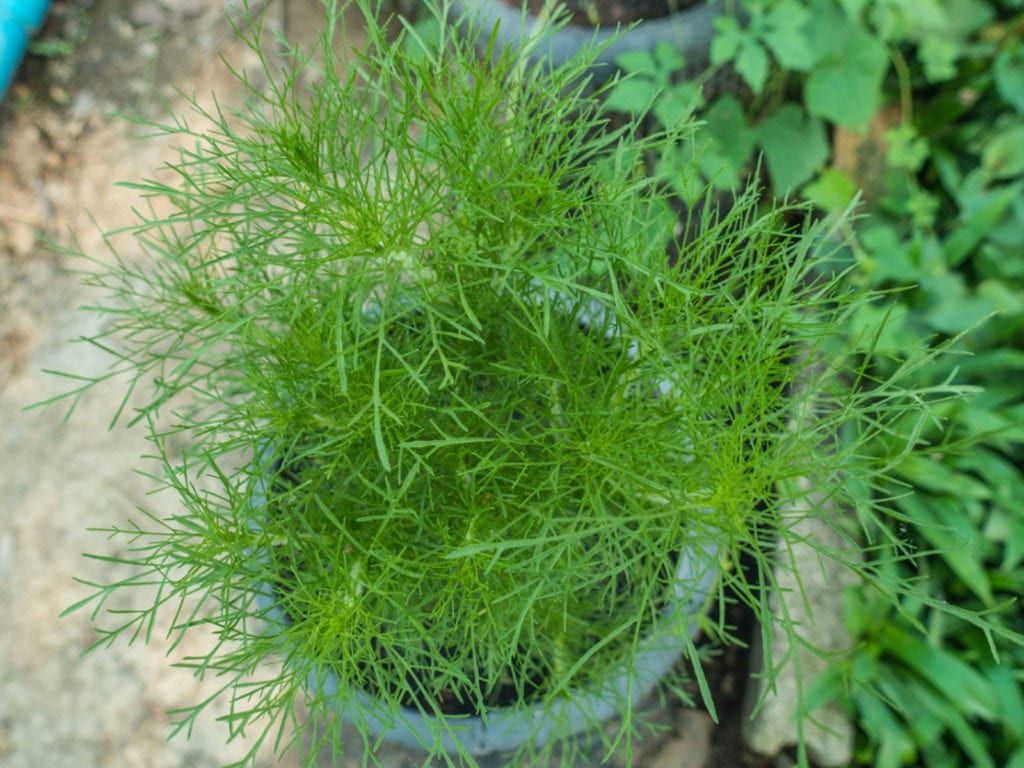 When preparing the soil yourself, you need to mix garden soil, peat, humus and universal soil in equal amounts.
Window selection
Dill is considered a long daylight crop, so it is recommended to choose the brightest window for the plant to grow. It is better to place pots with cultivated spice on the southeast or south side of the house. It is not forbidden to grow dill in the room, but additional measures will be required to make up for the lack of light. In any case, it is important to choose the brightest place for the plant.
Seed preparation
Seed preparation is recommended before sowing. Preparatory measures are as follows:
- The required amount of inoculum is placed in a piece of gauze or bandage and immersed in warm water for 1-2 days.
- Prepare a solution of pale pink potassium permanganate and immerse the seeds for 15-20 minutes in the liquid, then rinse with water.
- Additionally, you can process the seed and use a growth stimulator, for example, Epin.
 You need to dilute the product according to the instructions and leave the seeds in the solution for 3-4 hours.
Next, you can immediately sow dill in a flower pot or other container in which it will grow on the windowsill of the house.
March-August is considered the most suitable time for sowing dill, however, given that at home the temperature is generally constant and subject to adjustment, seeds can be sown at any convenient time. The only thing worth considering is the possibility of creating optimal conditions for the growth of culture.
Step-by-step landing procedure
Sowing seeds is carried out in accordance with the following algorithm of actions: Prepared soil is poured into the selected container and watered abundantly with water, but the soil is not allowed to become waterlogged.
- If the container is long and allows sowing several plants, then grooves are made in it, up to 1 cm deep. 1-2 seeds per container are enough.
- After spreading the seeds in the soil, they are covered with a small amount of soil and covered with foil. Leave the pots in a warm, well-lit place.
- After the first sprouts appear (about 11-14 days from sowing), the film is removed and the pots are placed in their permanent place of growth.
How much does it grow at home?
If the culture is properly cared for, the required amount of light and heat, then the first foliage can be cut off already after 1.5 months.
Many people grow dill at home, including on the balcony. You can learn about the intricacies of the process on our website.
How to care?
Caring for the plant, you will need to perform the following activities:
- Watering the soil . You need to water the plant, focusing on the condition of the soil. Watering should be carried out after the almost complete drying of the soil. In no case should the soil be allowed to become waterlogged, as well as its complete drying.
- Top dressing . Fertilize once every 6 weeks. At the same time, the amount of fertilizer is the same throughout the growth of the crop. Mineral fertilizers intended for vegetable crops are used for top dressing. They must be diluted in accordance with the instructions of the purchased product.
- The temperature of for dill should not exceed 20 degrees. If the temperature regime exceeds the specified one, then you need to take care of the maximum increase in daylight hours and spray the plants with water daily.
In addition, periodically turn the pot 180 degrees. You can do this daily. Such an event will allow the plant to stretch upwards, and not grow towards the light. As for additional lighting, it is required only in winter.
Special care in winter
In winter, it is necessary to provide additional lighting during crop growth. Install lamps at a height of 60 cm above the culture.