Growing garlic at home
Growing Your Own Garlic - How to Plant Garlic
As far as I'm concerned, garlic gets the blue ribbon for backyard produce. It grows easily, tastes great, and takes up little room. Even those with small gardens can raise enough to be self-sufficient in garlic for a good part of the year.
All you have to do is plant the the right varieties at the right time and in the right soil. Then harvest when the timing is right and store correctly. Here are the steps:
1. Choosing Types of Garlic
Getty Images
If you look in a specialist catalog, you'll find dozens of varieties, but for general purposes, the most important difference is between softneck and hardneck.
Softnecks get their name because the whole green plant dies down, leaving nothing but the bulb and flexible stems that are easy to braid. Hardnecks have a stiff stem in the center that terminates in a beautiful flower — or cluster of little bulbs — and then dries to a rigid stick that makes braiding impossible.
Softnecks, standard in grocery stores, are the easiest to grow in mild regions. They keep longer than hardnecks, but they're less hardy and produce small, strong-flavored cloves. Hardnecks do best where there's a real winter since they're more vulnerable to splitting — or simply refusing to produce — in warm climates.
Gardeners in most of the U.S. can try some of both. Specialty sellers will suggest best bets based on your climate and tastes (check out your gardening zones here). It's also wise to get some seed stock from your local farmer's' market. Whatever that garlic is, it's growing where you are.
2. Planting Garlic
Mid-fall, plant garlic bulbs in loose, fertile soil that's as weed-free as possible. Insert cloves root-side down about 8 inches apart in all directions, burying the tips about 2 inches down. Green shoots will come up; mulch around them with straw. After a hard freeze kills the shoots, draw the mulch over the whole bed.
In spring, pull the mulch back when the new shoots emerge. Give them a shot of mixed fish emulsion and liquid seaweed. Keep them weeded. Water only if the soil is dry 2 or more inches down, never pouring water into the crowns of the plants.
3. Cutting Garlic Scapes
Getty Images
I spent most of my gardening life cutting off the flowering scapes of hardneck garlic so they wouldn't draw energy from the bulbs. Then I read a story about a garlic growing guru who said it didn't matter a whit.
Well, it isn't really much bother. Tender young scapes are delicious and older, curly ones look wonderful in the vase. I set up an experiment, allotting 30 spaces each, in two rows, and planting the same variety in both of them. When the garlic were about half-grown, we set about cutting the scapes, but only from one row of the plants. At harvest, after trimming, we got 5 pounds of garlic out of the cut row, 6.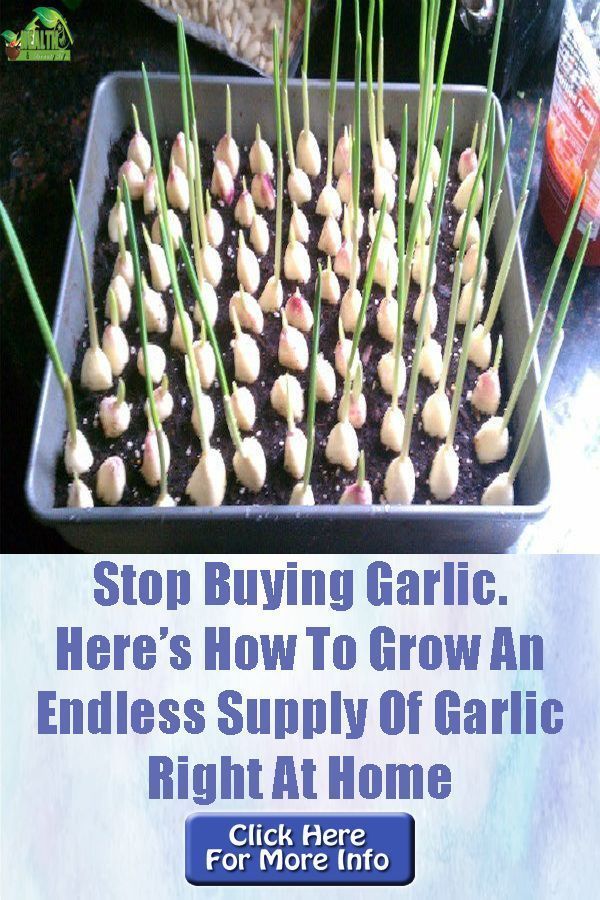 5 pounds out of the one we left alone.
Tips for Cutting Garlic Scapes
1. There's no harm in taking a few to eat, but don't wait until they're large. Most of the scapes for sale are bigger than the 4 to 6 inches long; they should be that length for best flavor and texture.
2. You can cut some for a vase too, but don't take them too soon. If you wait until the tops are well-developed, you might get a head of tiny garlic grains that can be used whole and unpeeled in place of minced garlic. Or you'll find a clump of small round bulbs, called topsets, that can be stored all winter long and planted close together in early spring, producing the garlic equivalent of scallions.
4. Harvesting Garlic
Getty Images
Garlic varieties are divided into early, midseason, and late, depending on your climate zone and the weather during the growing year. Heat speeds them up, cold slows them down. Although the harvest window is wide if you plan to eat the garlic fresh, it's narrow if you want to ensure maximum storage life.
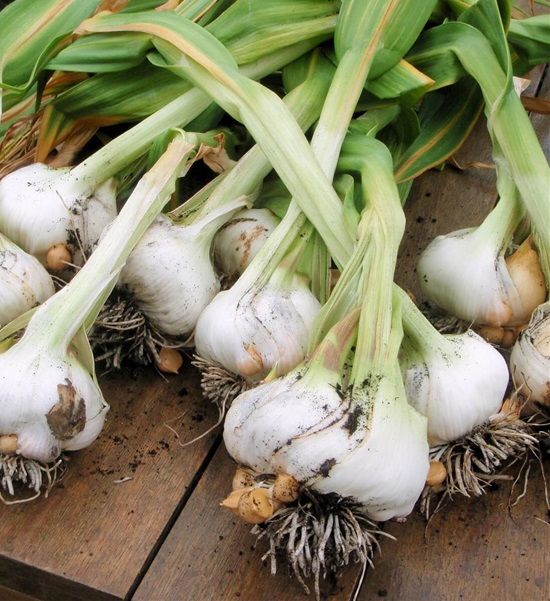
The bulbs are ready when most of the lower leaves have browned. The upper ones will still look green. "Lift the bulbs" usually describes moving things like daffodils, but it's also a good way to think about harvesting garlic. Those heads are more delicate than they seem.
Choose an overcast day when the soil is dry. Loosen the soil with a digging fork, inserting it well away from the heads, then lift them out of the row and place them in a flat carrier.
5. Curing Garlic
Let the whole plants dry in a single layer out of the sun, where it's warm but not hot. When the outer skin is papery, brush off as much dirt as possible and clip the roots. Rush this a bit if you're braiding garlic stems. If you wait until they're completely dry, they tend to crack and break.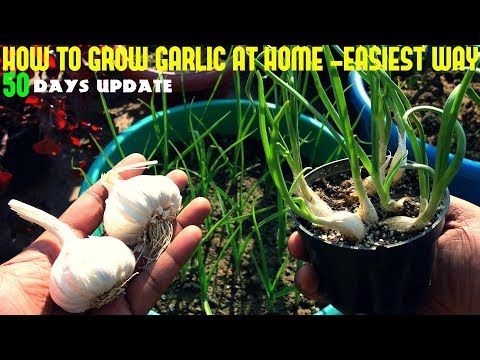
The finished garlic will still look dirty compared to anything commercial. Leave it that way because further cleanup can shorten storage life. If you can't bear the way it looks, try removing the outer layer of wrapper.
6. Storing Garlic
Getty Images
The ideal temperature is between 55 and 70 degrees Fahrenheit, with moderate humidity and good air circulation, in the light, but they must be out of the sun. We keep our garlic stored in an unheated, but insulated, closet. Those less-fortunate in the storage department should avoid the refrigerator (excess cold leads to sprouting) and plastic bags, which can cause rot.
Related Stories
- 13 Homemade Weed Killers That Work
- 12 Vegetables You Didn\'t Know You Could Eat Again
- 15 Summer Flowers for the Prettiest Garden Ever
Garlic: How to Plant, Grow, and Harvest Garlic Bulbs
Growing your own garlic is always exciting.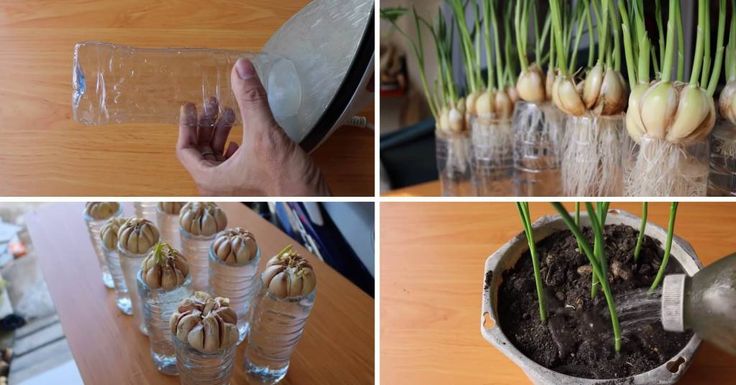 This pungent bulb adds flavor to countless recipes—and is so healthy! Just plant cloves in the fall, and you’ll be rewarded with a bountiful garlic harvest after winter! Before you plant, it’s important to know which variety is a match for your climate—and your cooking!
About Garlic
Garlic is one of the few crops that you plant in the fall! You simply plant a clove from this year’s head of garlic, cover with mulch, and harvest in summer during the middle of the vegetable garden season. After you harvest and clean out the bed, you can plant another crop in the same bed!
You can also enjoy garlic leaves or “scapes” which appear in early spring. They’re delicious stir fried or in salads.
In addition to having an intense flavor and many culinary uses, the “stinking rose” also serves as an insect repellent in the garden, and it has been used as a home remedy for centuries.
Can You Plant Store-Bought Garlic?
We do not recommend this. Most grocery store garlic heads have been treated.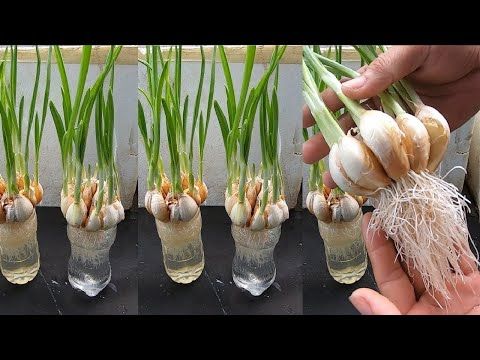 Plus, most commercial garlic comes from large-scale farming areas with mild climates (such as California), so the garlic may not be suited for growing in your own climate and may carry pests or diseases with it as well.
If you want big bulbs, use “seed” garlic from a local nursery, farmer’s market, or online seed supplier. Or, keep some of your best heads of garlic from your harvest to replant! But before you plant garlic, make sure you know the difference between the two main types of garlic: hardneck and softneck garlic – and which type will grow best in your climate. See Recommended Varieties below.
Planting
Garlic does best in full sun, so select a planting site that receives 6 to 8 hours of sunlight per day. A couple weeks or so before planting, prepare the soil by mixing in a healthy helping of compost or aged manure.
If your garden soil is poorly draining or high in clay, garlic grower Robin Jarry of Hope, Maine, suggests growing in heavily mulched raised beds instead. “I plant in raised beds for good drainage, and then mulch with about 6 inches of old hay after the ground freezes. I never water my garlic—I like low-maintenance vegetables!” Raised beds should be 2 to 3 feet wide and at least 10 to 12 inches deep.
When to Plant Garlic
Garlic is most often planted in the fall (between late September and November). In areas that get a hard frost, plant garlic cloves 6 to 8 weeks before the first fall frost date, before the ground freezes.
Garlic does best if it can experience a “dormancy” period of colder weather—at least 40˚F (4°C)—that lasts 4 to 8 weeks. By planting garlic bulbs in the fall, they have time to develop healthy roots before temperatures drop and/or the ground freezes, but not enough time for the garlic to form top growth. Then, by early spring, the bulbs “wake up” from their dormancy and start rapidly producing foliage, followed by bulbs, before the harshest heat of summer stops their growth.
In mild climates, you can plant garlic cloves as late as February or March, but the resulting bulbs won’t be as large. However, you can still enjoy the garlic scapes during the summer. (Scapes are the plant’s tender green shoots and have a mild garlic flavor. Enjoy on eggs, in salads, as a pizza topping, or in stir-fries!) If you plant in the spring, wait to do so until after the soil can be worked and it crumbles apart easily.
How to Plant Garlic
-
- Select large, healthy cloves, free of disease. The larger the clove, the bigger and healthier the bulb you will get the following summer.
- Break apart cloves from the bulb a few days before planting, but keep the papery husk on each individual clove.
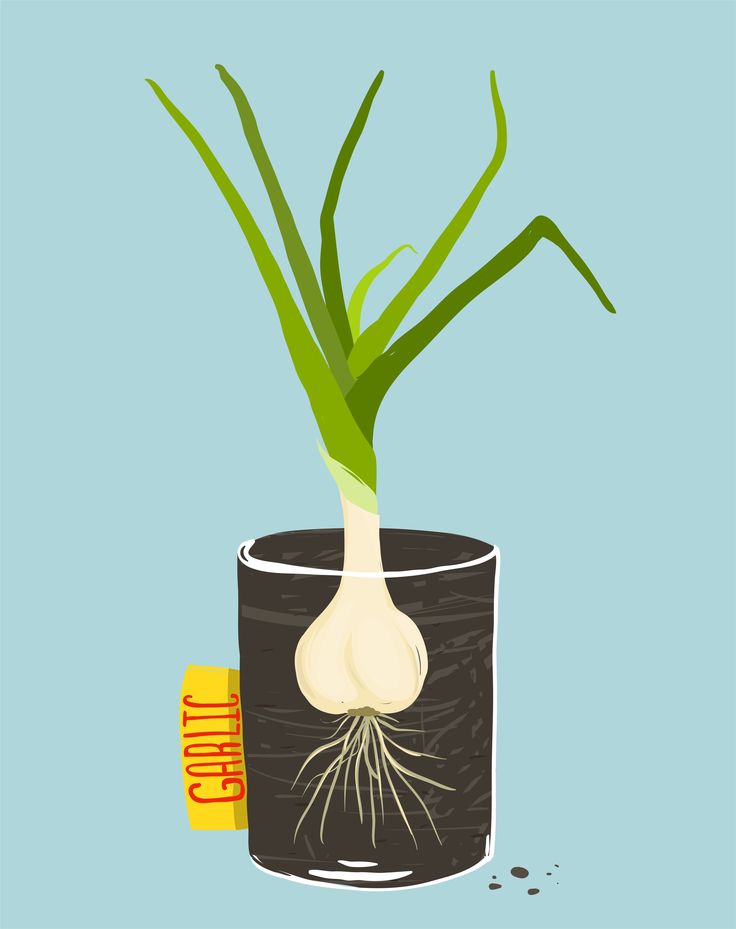
- Plant cloves 4 to 8 inches apart and 2 inches deep, in their upright position (with the wider root side facing down and pointed end facing up).
- Plant in rows spaced 6 to 12 inches apart. A single 10-foot row should yield about 5 pounds of the fragrant bulbs, depending on the variety.
In this short video, Ben shares his tried and tested techniques for planting a truly spectacular crop of garlic.
cultivation, planting, care in the open field
There are 2 varieties of garlic: winter and spring (1). You can tell them apart by the bulbs.
Winter garlic. It has an even number of cloves in the head - from 4 to 10. They are large and arranged in a circle. And in the center there is always a stem - the rest of the stem. The problem with winter garlic is that it does not store well.
Spring garlic. Its teeth are arranged in a spiral, and they are of different sizes - larger on the outside, smaller closer to the center. And there are many more - up to 30 pieces. And there is no stem in the center. This variety of garlic is perfectly stored - it can easily lie for a whole year until the next harvest.
Winter garlic is planted before winter, spring - in spring, respectively, their care has differences.
Cultivation of garlic
Garlic is a rather unpretentious crop; in many gardeners it grows almost without care and gives good yields. But still, he has one requirement - the soil must be pedigree. Therefore, before planting on the site, fertilizers must be applied (calculation per 1 sq. M):
- humus - 1/2 bucket;
- rotted sawdust of deciduous trees - 1/2 bucket;
- ash - 5 glasses;
- fluffy lime - 5 cups.
Fertilizers should be mixed, spread evenly over the area and dug up by 10 cm. And he does not like urea and potassium chloride.
Place for garlic should be sunny - this is a light-loving crop.
Planting garlic
The timing of planting garlic depends on its variety.
Winter garlic. It is traditionally planted 2 to 3 weeks before the onset of hard frosts, in late September - early October (2), when the soil temperature drops below 15°C.
Planting pattern is as follows:
- row spacing - 25 cm;
- in a row - 10 - 15 cm;
- planting depth - 8 - 10 cm.
Spring garlic. It is planted in the spring, no later than the end of April (3). He is not afraid of frosts, therefore, the earlier you plant, the more likely it is that the crop will have time to ripen - this is especially true in regions with a short summer. The optimum soil temperature is 5-6 °C.
Planting pattern:
- row spacing - 25 - 30 cm;
- in a row - 8 - 10 cm;
- planting depth - 2 cm.

The cloves are planted at a depth of 3 - 4 cm, and when they begin to take root, they themselves go deep into the soil by 6 - 8 cm (4).
Outdoor garlic care
Watering. It should be regular, but up to a certain point:
- in April-May - once a week: 10 liters per 1 sq. m
- in June-July - 1 time in 2 weeks: 10 liters per 1 sq. m;
- from August it is not possible to water.
In rainy summers, garlic does not need watering.
Top dressing. As a rule, in fertile areas of this crop, it is enough that they were applied to the soil before planting. On poor soils, it is useful to additionally feed it with phosphorus and potassium - fertilizers must be applied between the rows 2 weeks after planting the cloves:
- double superphosphate - 30 g (2 tablespoons) per 1 sq. m;
- potassium sulfate - 20 g (1 tablespoon) per 1 sq. m.
- Winter garlic is important to cover in the winter - mulch with humus, compost or peat with a layer of about 5 cm, - advises agronomist-breeder Svetlana Mikhailova.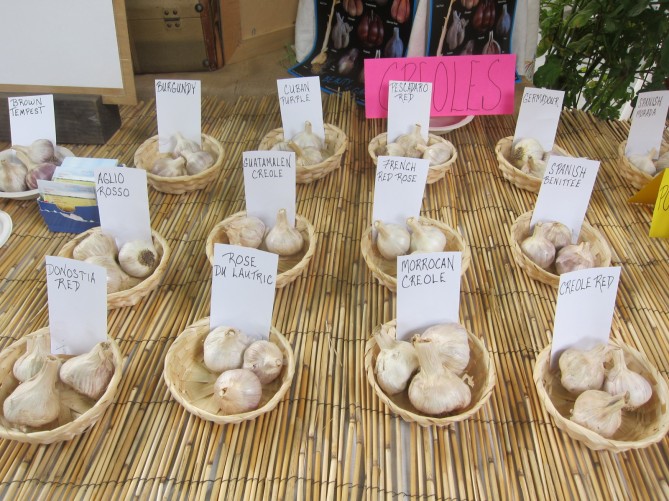 - This should be done in late autumn, at the end of November. The mulch will help keep the bulbs from freezing if the winter turns out to be snowless and the frosts are severe. In the spring, as soon as the snow melts, the mulch must be removed so that the cloves in the soil do not get wet.
“Caring for spring garlic also has its tricks,” continues Svetlana Mikhailova. - It happens that in the cold summer, the ripening of the bulbs slows down, and they may not have time to ripen before the autumn frosts. In this case, in mid-August, you can collect the leaves in a bunch and tie them in a knot - then they will stop growing, the plants will direct all their forces to the ripening of the bulb.
Garlic harvesting
Garlic harvesting time also depends on the variety.
Winter garlic. It is usually harvested at the end of July. There are three signs that it is already ripe:
- the covering skin begins to crack on the inflorescences, and the bulbs are exposed, but this only applies to shooter varieties - yes, garlic arrows usually break out (5), but you can always leave a couple of plants with inflorescences to use as beacons;
- lower leaves turn yellow;
- The outer, covering scales of the bulb become dry - this can be seen if you dig up one plant.
Spring garlic. It is removed later - around the end of August. Most varieties of this group do not form arrows, so yellowing of the leaves and lodging of the tops can serve as a visual signal for harvesting.
Photo: pixabay.com– It is better to dig up garlic with a pitchfork – this way there is less chance of damaging the bulb, recommends agronomist Svetlana Mikhailova. - You need to dig in dry weather. After harvesting, the garlic, together with the tops, is removed to dry - for about a week it should lie under a canopy.
After drying, cut off the roots and stems of the bulbs, leaving a stump of about 10 cm (if the garlic is to be stored in braids, the stems are not cut).
Garlic storage rules
There are many ways to store garlic, but practice shows that almost all of them are unreliable. The best way is to braid the plants in the same way as you do with onions.
But there are nuances here:
- garlic stalks are hard and brittle, it is difficult to braid them, so you need to weave straw or twine there;
- Braids should be stored at a temperature of 1 - 2 °C - onions are stored at room temperature, and garlic dries quickly in heat.
Large heads are stored longer, so the small ones should be eaten first.
Popular questions and answers
agronomist Svetlana Mikhailova answered our questions about growing garlic.
Should garlic cloves be peeled before planting?
No way! Covering scales - reliable protection of teeth from mechanical damage, diseases and pests. Peeled cloves will rot rather than germinate.
Should winter garlic be watered after planting?
No. It will be enough for him to take root in the autumn rains. Over watering can cause tooth decay.
Can winter garlic be planted in spring?
It makes no sense. For winter varieties, it is important that there are low temperatures after planting. And the spring is too warm. If planted in April, the bulbs will grow inferior and will not be stored. And besides, underdeveloped teeth cannot be used for planting - they form roots very slowly and freeze out in winter.
Is it possible to plant spring garlic before winter?
It is possible, but spring varieties, when planted in autumn, take root worse and often freeze, therefore, they will give a crop much less than winter varieties.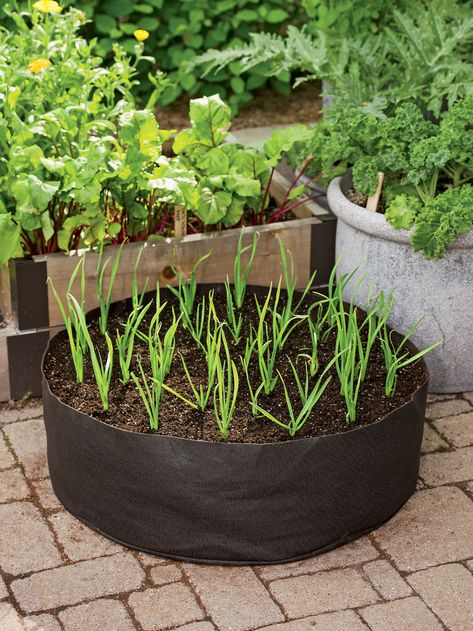
Why does winter garlic turn yellow in spring?
There may be 4 reasons:
- cold spring - in such a situation, the leaves begin to grow, and the roots cannot yet extract nutrients from the soil;
- lack or excess of moisture in the soil;
- acidic soil;
- Fusarium disease.
Sources
- Fisenko A.N., Serpukhovitina K.A., Stolyarov A.I. Garden. Handbook // Rostov-on-Don, Rostov University Press, 1994 - 416 p.
- Pantielev Ya.Kh. ABC vegetable grower // M .: Kolos, 1992 - 383 p.
- Group of authors ed. Polyanskoy A.M. and Chulkova E.I. Tips for gardeners // Minsk, Harvest, 1970 - 208 p.
- Shuin K.A., Zakraevskaya N.K., Ippolitova N.Ya. Garden from spring to autumn // Minsk, Uradzhay, 1990 - 256 p.
- Yakubovskaya L.D., Yakubovsky V.N., Rozhkova L.N. ABC of a summer resident // Minsk, OOO "Orakul", OOO Lazurak, IPKA "Publicity", 1994 - 415 p.
secrets of growing tasty and healthy spices at home - Fazenda
In urban apartments, one rarely sees a person who grows garlic in the house.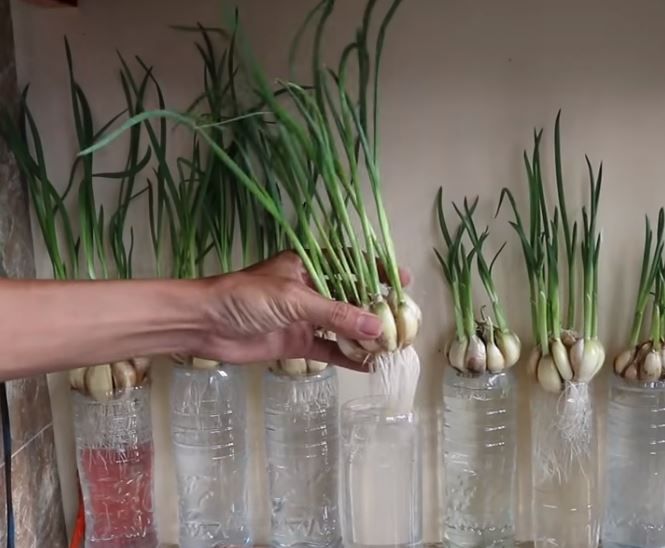 Gardeners are more accustomed to planting onions or parsley on the windowsill, although caring for planting garlic is no more difficult than caring for green onions.
In addition, its feathers contain a large amount of useful substances. They give a piquant taste to any salad or meat dish, and are indispensable for colds. Young greens have a mild, delicate taste. It is not as spicy as a garlic head, but is also very fragrant.
Contents
- Conditions for growing garlic at home
- Choosing a variety
- Choosing planting material
- Preparing the soil for planting
- Preparing a container
- Where to place pots of garlic?
- Planting garlic in the ground
- Getting garlic feathers in water
- How to grow garlic hydroponically
- Caring for garlic on a windowsill
- Air temperature
- Watering
- Lighting
- Fertilizing
- Harvesting
- Benefits of growing homemade garlic feathers
Conditions for growing garlic at home
At home, garlic is grown mainly for herbs. You can collect them already 1 month after planting. It is planted both in separate pots and among other plants as a compactor.
Experienced people grow it in several containers. In this case, you can enjoy greenery continuously.
If the goal is to grow not only the greens, but also the heads themselves, the feathers must be trimmed regularly. Arrows must not be allowed to grow. In the house, the heads of garlic grow small, with a small number of cloves. To get them, you need to spend a lot of time - at least 8 months.
Choice of variety
Winter varieties of garlic should be chosen for planting indoors in autumn, but it is also allowed to plant spring varieties. If the hostess began to sprout a head of garlic, it can be planted in the ground. It is recommended to take zoned varieties as seed material. Most famous:
- Polish;
- Otradnensky;
- Jubilee;
- Skiff;
- Sochi-56;
- Garkau;
- Kharkiv.
Selection of planting material
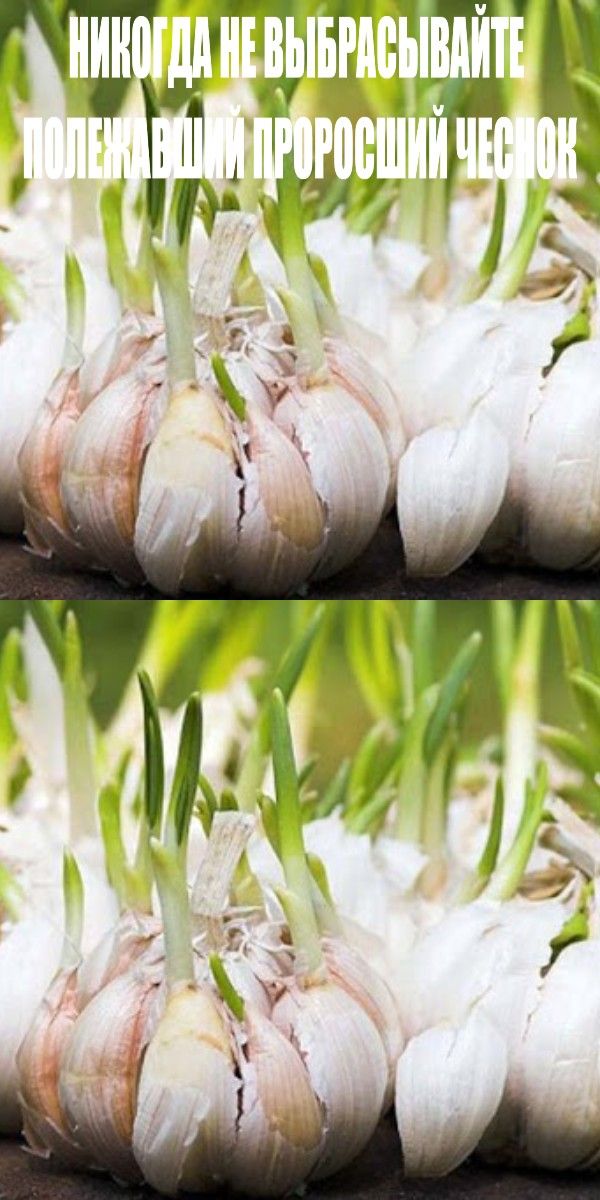
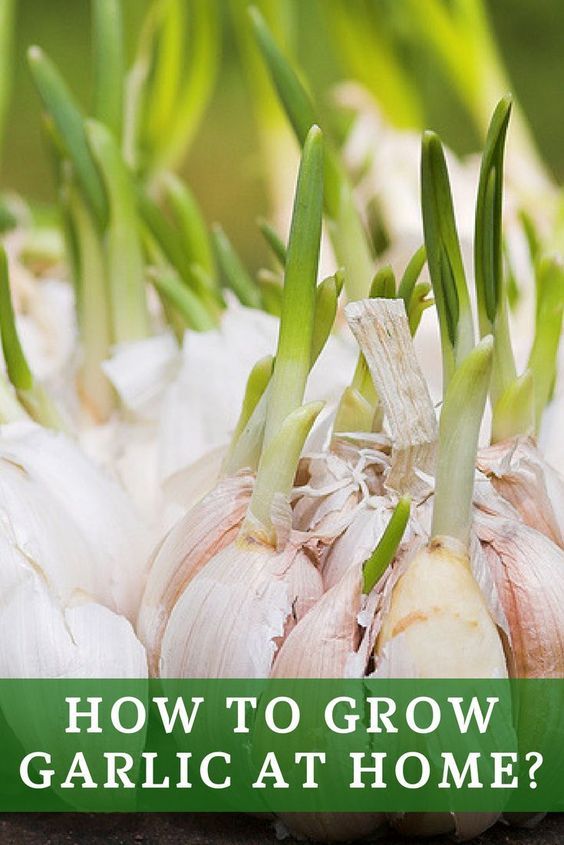
The easiest way to grow garlic is from sprouted cloves. They sprout within a week after planting, not germinated after 2 weeks.
[note]It is possible to grow garlic from seeds. However, this method is labor intensive and takes a lot of time and effort. Do not choose this option for indoor greens.[/note]
Planting cloves must be healthy, without signs of mold, decay, damage. Soft, yellowed specimens are also not suitable for landing.
Before planting, it is recommended to treat them with a weak solution of potassium permanganate.
Soil preparation for planting
Garden soil is suitable for planting. She must be fertile. This culture does not like loamy soil. If the owners decide to make the soil mixture themselves, it should include:
- land from the plot;
- humus;
- sand;
- charcoal.
The second option for preparing the soil mixture is to mix the earth from the garden, peat, humus in equal quantities.
[advice] You can also buy universal soil for indoor plants or for seedlings in the store. During planting, it is recommended to add special fertilizers for onions, garlic or wood ash to it. [/advice]
Before planting, any soil must be treated in known ways:0003
- potassium permanganate solution;
- by roasting in the oven, microwave, etc.
Preparing the container
Any container with a drain hole is suitable for planting garlic: flower pot, box, container, etc. Its depth should be 15-20 cm.
Before landing on the bottom, it is necessary to fill in a layer of drainage:
- broken brick;
- pebbles;
- expanded clay;
- small stones, etc.
The container can be made of any material: wood, plastic, glass, ceramic, etc.
Where to put the garlic pots?
Containers with garlic are placed in a sunny place. The room should be pretty cool. The best places for seedlings:
- closed balcony;
- window sill on the south side;
- loggia;
- porch, etc.
Planting garlic in the ground
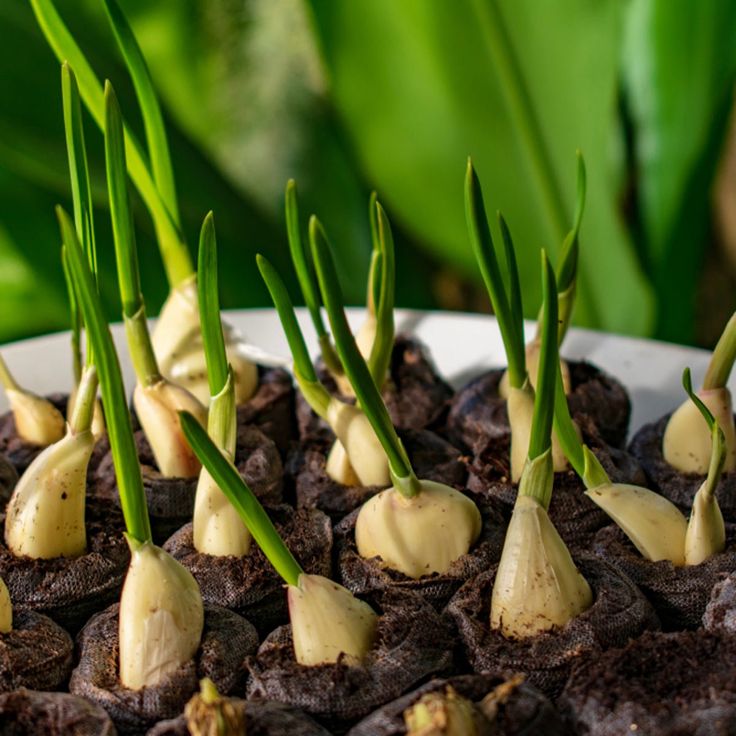
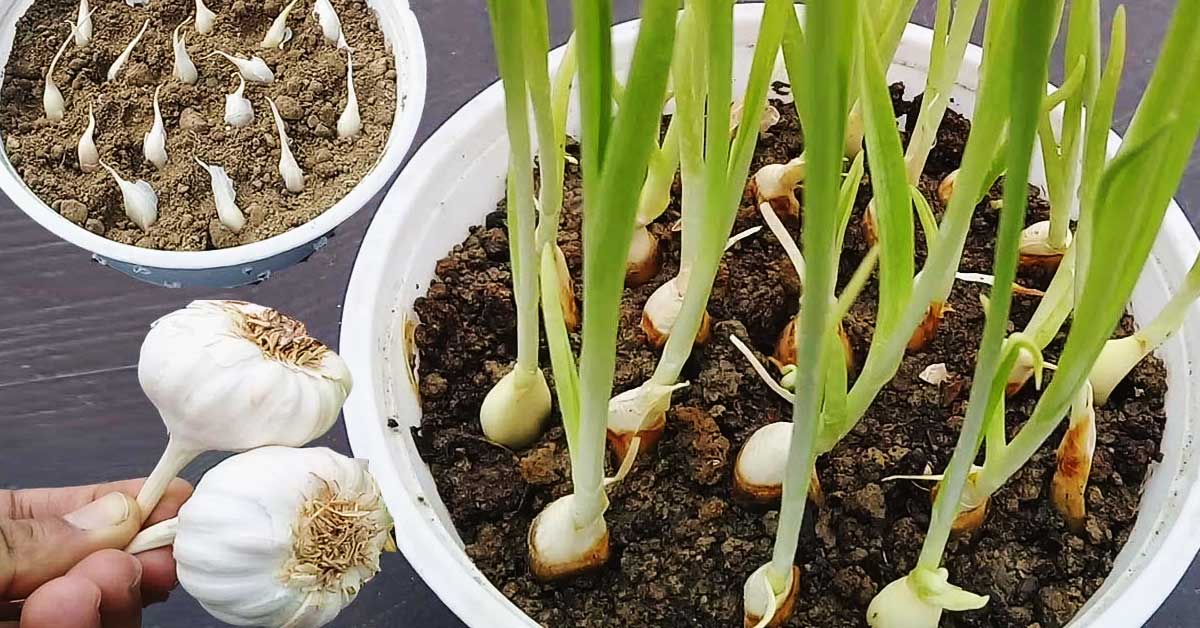
When growing in the ground, take garlic cloves and plant them to a depth of 2-3 cm with the pointed part up. The distance between them should be 4-5 cm. The soil is slightly moistened in advance. A clove can also be planted next to another houseplant.
For continuous greenery, it is recommended to plant several boxes at intervals of 5-10 days.
Winter varieties are planted in autumn. During the spring planting of spring crops, they are germinated in advance. To do this, you can take a small amount of cotton, wet it and leave the cloves to germinate on it for several days.
Preparation of garlic feathers in water
Garlic greens can also be obtained without the use of soil. To do this, the slices need to be cleaned and put in a shallow container. Pour into half of the vessel. Feathers can be cut for the first time after 3 weeks, then after 2. Harvest can be obtained 3 times, then the clove must be replaced with a new one.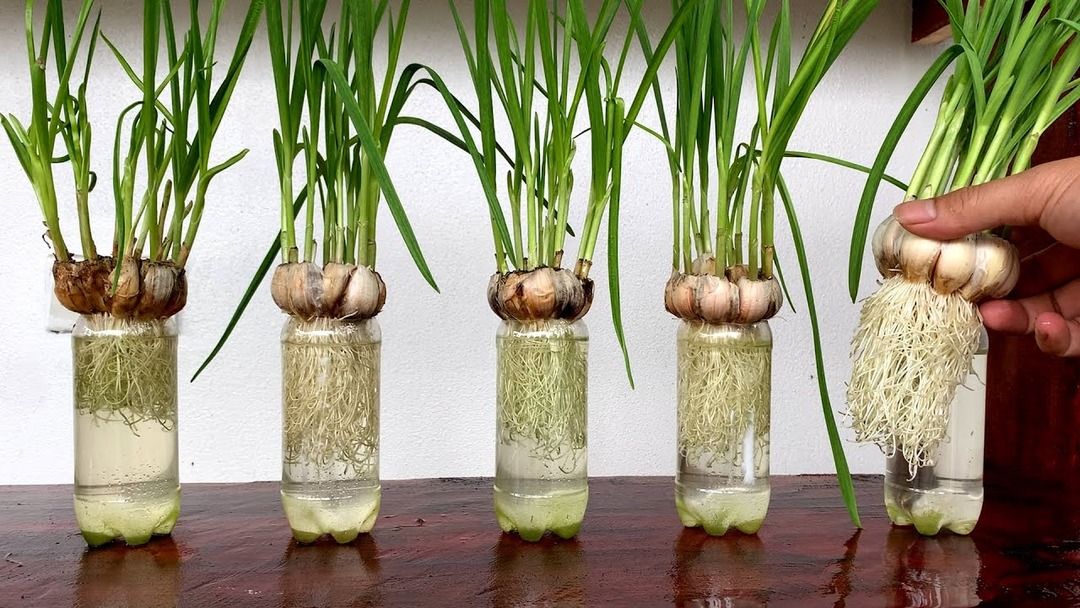
How to Grow Garlic Hydroponically
Growing vegetables hydroponically is another method of growing vegetables without soil. This is a new method, here the following can serve as a substrate:
- mineral wool;
- perlite;
- peat;
- vermiculite;
- foam rubber;
- coconut fibre;
- fine expanded clay;
- gravel;
- sphagnum moss, etc.
These materials should be washed thoroughly with boiled water before use.
The whole system is that the plant is planted on a substrate and fed with a special liquid. There is special equipment for this, but experienced lovers of greens and vegetables have learned how to do it on their own.
- Take 2 containers. One of them must be larger than the other. Holes are made on the walls and bottom of the smaller pot. Then the smaller pot is filled with the substrate, the plant is planted in it.
- Large container should be opaque and fit a smaller pot.
 A special solution is poured into it.
 - Place the pot with the substrate inside the solution container. The substrate should be 1-2 cm submerged in the liquid.
- Place an aquarium air compressor in the bottom of a large pot.
Vermiculite is one of the most popular substrates for garlic.
Caring for garlic on the windowsill
Planting garlic in an apartment is not difficult to care for, as this culture is unpretentious. It grows like a houseplant. All care comes down to:
- watering;
- optimum temperature;
- top dressing.
Arrows on the plant must be removed in a timely manner. They can also be eaten. In the house, garlic is not affected by pests, and it does not get sick.
Air temperature
At an air temperature of 0-15°C, small bulbs may form. If garlic is grown for greenery, it should be kept on a windowsill, balcony, where the air temperature will not be lower than 20°C.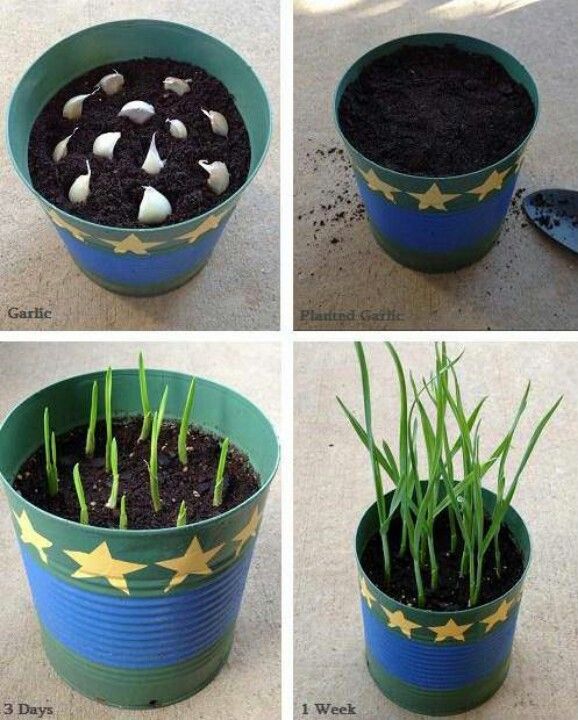
Watering
Garlic requires well-drained soil after planting. But you can't overflow them. Watering should not be frequent, but plentiful. Moisturize as the earth dries out (depending on the temperature in the room) with settled water at room temperature no more than 1 time in 2-3 days.
After wetting the soil, it is recommended to loosen it.
Lighting
Garlic must have at least 8 hours of daylight. For its growth, it is better to choose a well-lit part of the house. With insufficient sunlight, it is required to illuminate with fluorescent lamps. They are installed at a height of 50 cm from the plants.
Top dressings
Garlic plants need nitrogen the most. Fertilizers are applied only under the root. You can feed with:
- sticks;
- liquid preparations;
- granules.
In the city, in the absence of organic matter, complex mineral fertilizers are used. If possible, you can also use mullein, chicken manure or wood ash.
Harvesting
The greens are cut when the sprouts have grown to 15-20 cm using sharp scissors. They reach this size in a month.
[note] Feathers should be used immediately after cutting. So they will give all their flavor to the dish, retaining the vitamins.[/note]
If the garlic was planted not only for the sake of greenery, the bulbs can be dug up after 8-10 months. After that, you need to put them in a dry, cool place to dry for 1 week.
Benefits of growing homemade garlic feathers
Garlic has long been famous for its antibacterial properties. Its greens, like the head itself, contain a large amount of phytoncides, which make it a natural antibiotic.
Garlic chives can be added to any dish. They go well with any side dish. It is useful to add it to salads, meats, fried potatoes, etc.
Planting garlic can be done by both an experienced gardener and a beginner. By planting it, you can diversify your diet with a new type of greenery.