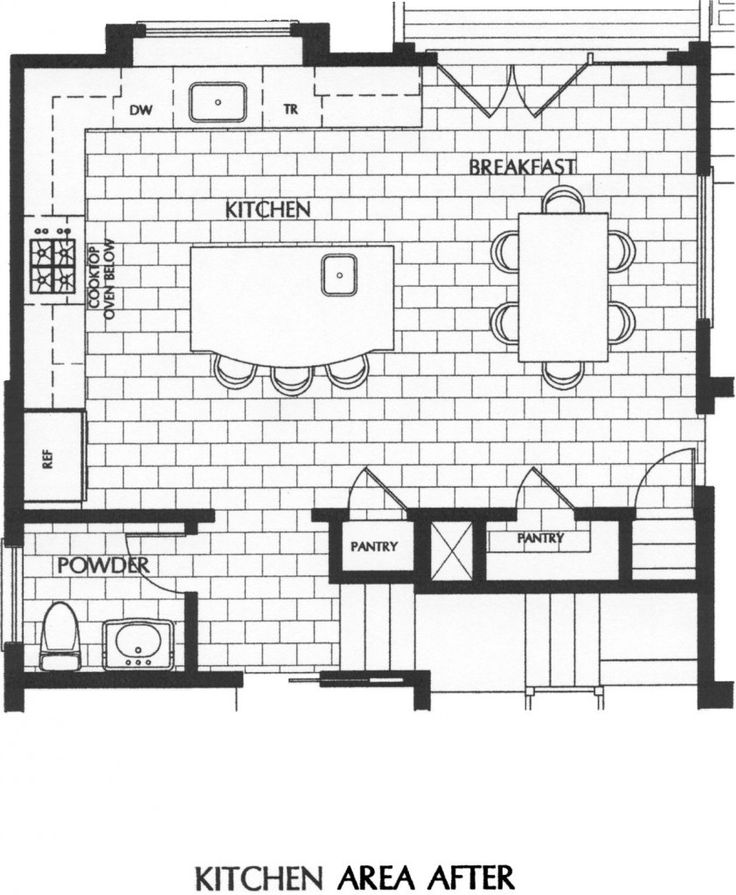
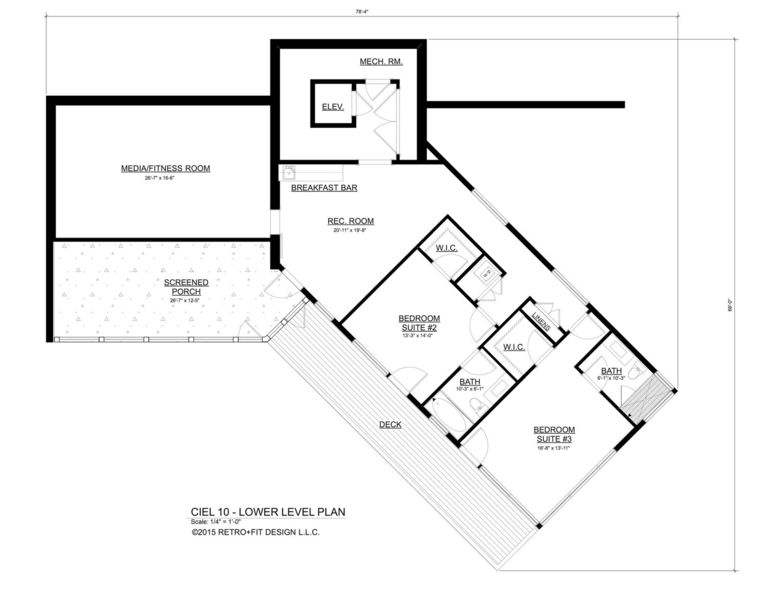
Plans for breakfast bar
How to Build a Breakfast Bar
Every kitchen needs a little perch where you can sip your morning cuppa and scan the headlines before heading out the door each morning—or where the kids can munch on cookies after school or do their homework while a parent prepares supper. If you crave that extra space in your kitchen, here are a few DIY breakfast bar styles for you to choose from.
Measurements and Choosing Your Bar TopBefore you start constructing anything, consider a few details.
Breakfast Bar HeightThe average bar height is 42 inches tall. You want to keep your bar between 36-42 inches or else your barstools won’t fit under comfortably.
Whether you want your bar built extending out from a wall, to create a division between spaces—or along an empty wall as a shelf—you need to leave an adequate passageway. Forty-two inches is the magic number, here, too. Remember, even if you have enough room to walk, you may need to fit appliances, furniture, or even a wheelchair through the space at one point or another.
Before deciding where to build your bar, find the studs in the wall. You want to mount the bar on at least two studs, which are spaced 16 inches apart behind the drywall. Use a stud finder to locate them, then measure out where the bar will go.
How Deep Should a Bar Top Be?Pretty much any solid surface, at least 24 inches deep, could make a beautiful bar top. Consider a solid piece of hardwood, cut straight or with its natural live edge. Or, purchase a solid surface countertop like Corian, use ¾-inch plywood, or something salvaged like an old door. Once you choose your top, cut it to size and finish as desired before making the base.
How to Build an Extension BarThis style extends out from a wall, supported by a pedestal at the other end. Homeowners often choose this style to provide a division between the kitchen and family room. For the pedestal, you can purchase a 5-by-5-inch pre-made wooden beam, or use a salvaged porch pillar or an old barn beam.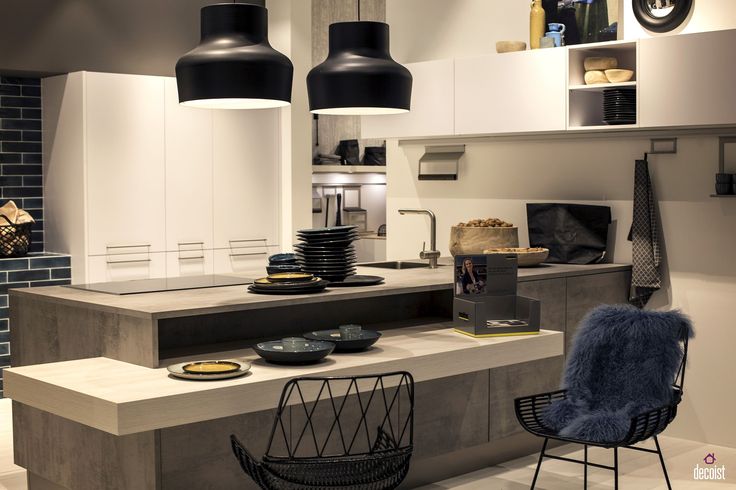
- First, create a support system using the 2x6 pieces by screwing them together to form an I shape. You’ll mount one end of the I to the wall and secure the other end to the pedestal. Paint, stain, or finish to match the top.
- Once you have the base support finished, mark a small line 42 inches from the floor at each stud you chose in your supporting wall. Use your level to make sure they’re even. Also, make a center mark on the side of the pedestal that will face the wall.
- With someone assisting you to hold the base in place, use your drill to secure one end to the wall with two screws, one above the other, on each side of the central piece.
- Next, screw the other end of the base to your pedestal, lining up the center mark you made with the center board.
- Run a bead of construction adhesive along the top edge of your base. Lay the bar top in place, centered.
- Once it’s where you want it, screw in place from the underside.
If you don’t have the room for a bar to extend out into the room, a shelf along the wall makes a nice place to eat your morning toast.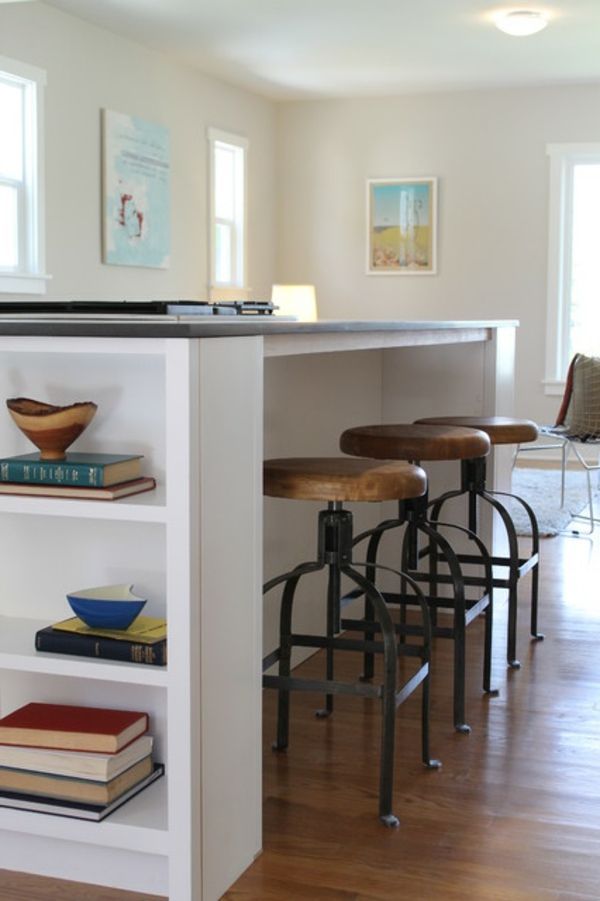 For this style, you only need the bar top of your choice and a few shelf brackets or architectural corbels. If your bar is over 4 feet long, use more than two.
- Find the studs in your wall using a stud finder and mark lines 42 inches up from the floor. Use your level to make sure they’re even.
- Screw your shelf brackets or corbels to the wall at those marks.
- Lay the bar top, centering it over the brackets, and screw in place.
If you already have a kitchen island, adding a breakfast bar is easier than you think. Simply buy and install a new countertop for the island that is a few feet larger on one side to create an overhang. If you can’t match the old counter you’re removing, never fear. Just opt for another color or material that coordinates equally well with the room
Other Breakfast Bar OptionsIf you’re not the handy type, or you want something temporary, consider purchasing a ready-made island on wheels.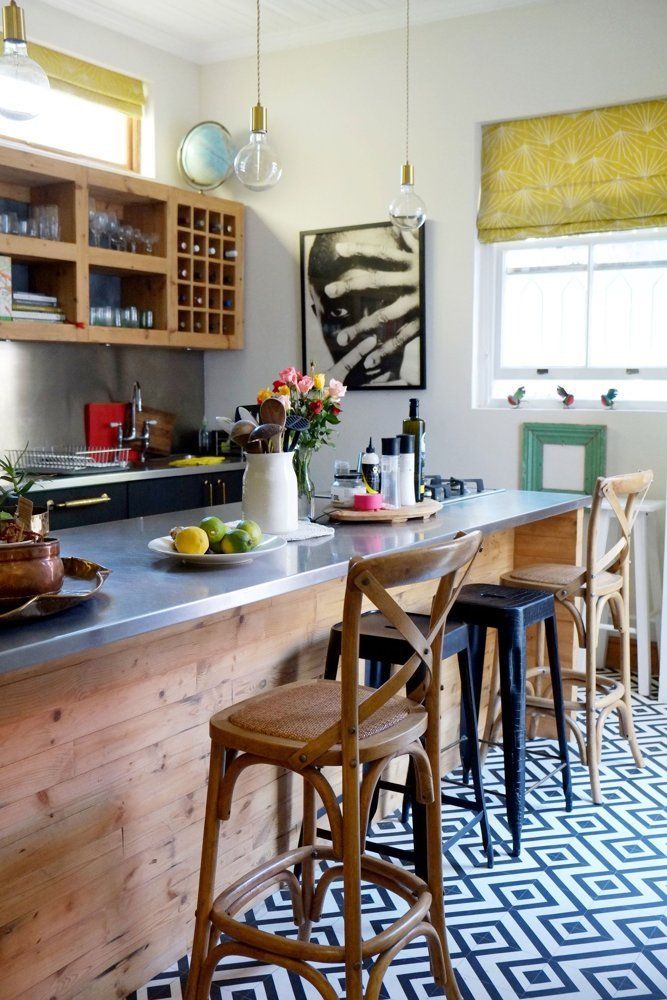 Here are some ideas to whet your appetite: a kitchen center and breakfast bar, and a breakfast bar on wheels.
Once you have your breakfast bar in place, pop some cookies in the oven so you have something to savor while trying it out.
Recommended Tools:
Tools & Materials
-
Saw
-
Drill
-
Pencil
-
Tape
-
Level
Breakfast bar ideas: 10 clever ways to add a bar area in your kitchen
Our breakfast bar ideas are all about maximising the functionality of your kitchen. Of all the kitchen diner ideas out there, incorporating a breakfast bar is one of the best for flexible living.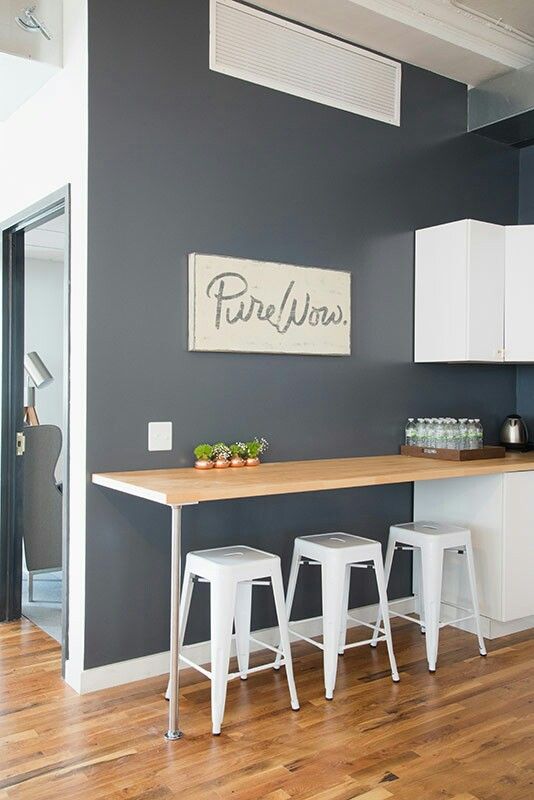 Perfect for enjoying a quick coffee break, lunch on the hop and easy family suppers. When entertaining, a breakfast bar can also double up as a buffet area to serve drinks and canapes.
A breakfast bar will take up less space than a dining table surrounded by chairs and can be used to boost the prep areas in your kitchen, too. Where to install a breakfast bar depends on your kitchen layout and how much space you have to spare.
One of the most popular kitchen island ideas is to add a breakfast bar. ‘Positioned away from the ‘working zone’ of the island, a breakfast bar allows friends and family to comfortably socialise with the hosts, without getting in the way when cooking is in full flow,’ says Richard Moore, Design Director, Martin Moore.
Breakfast Bar Ideas
Before you get carried away with Insta-worthy breakfast bar ideas, decide how many stools you would like to accommodate. If you’re just seeking a quiet spot to check Socials, then a single stool tucked in a corner is ideal.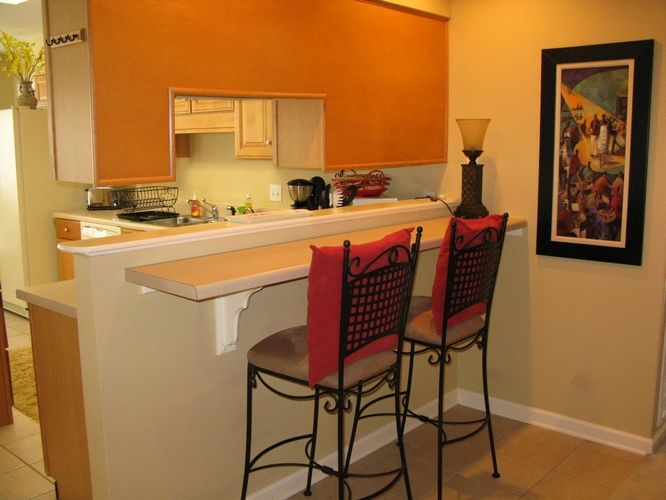 But if you want to enjoy breakfast together as a family, each member will need a seat.
Allow at least 50cm width per stool, plus about 15cm either side for easy access. ‘Don’t forget to consider how much space the stools will take up in the room when in use,’ adds George Forsyth, Director, Drew Forsyth & Co. ‘You’ll need to allow sufficient space behind seated guests for others to pass by without getting stuck!’
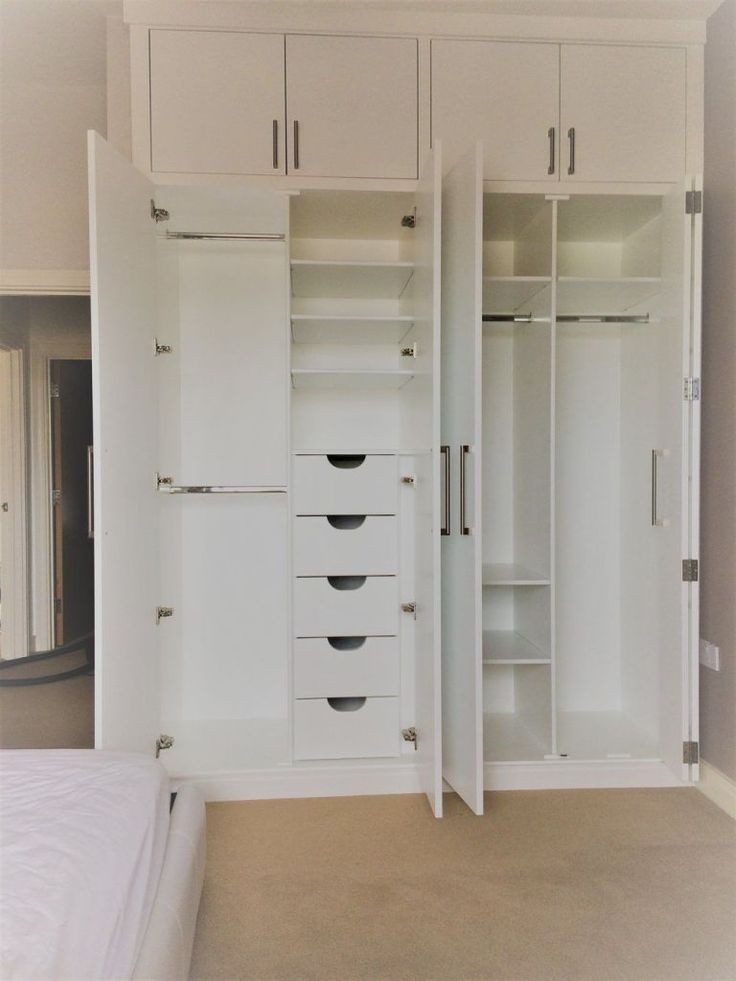
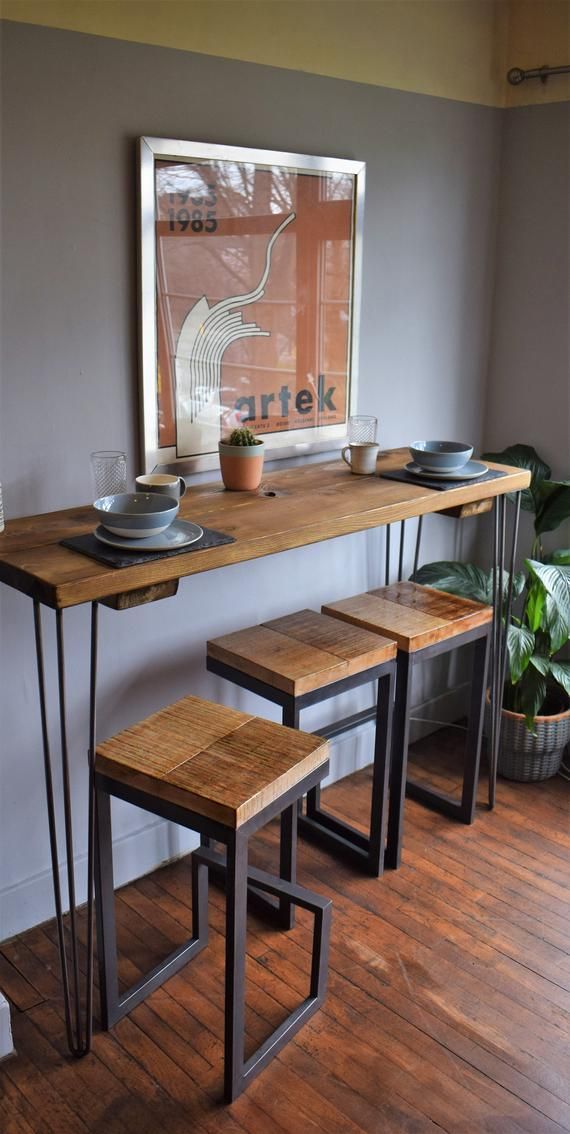
1. Tuck a breakfast bar into the corner
(Image credit: Future PLC)
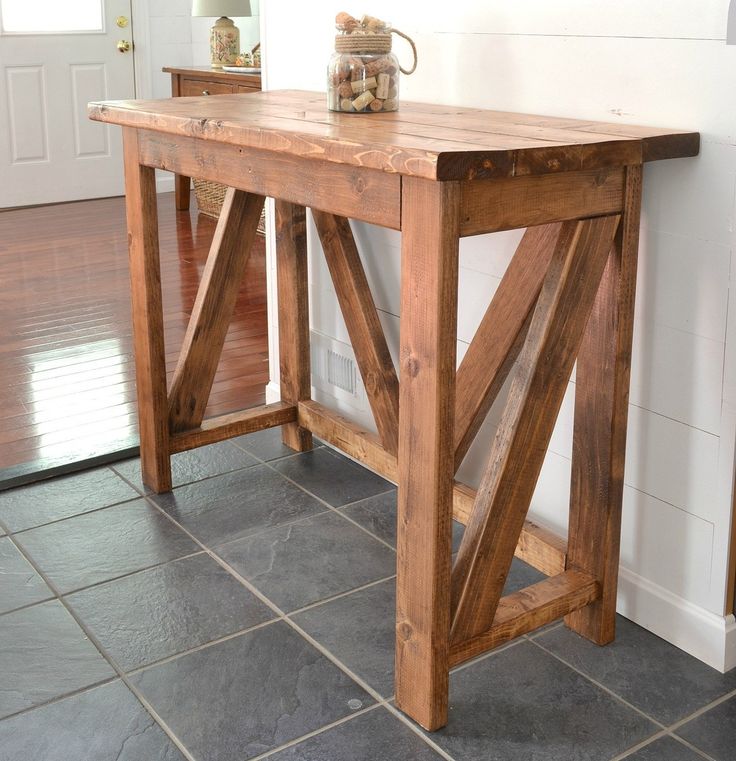
If you don’t have an island or other kitchen surface to spare, consider building a standalone breakfast bar in a quiet corner away from any busy entrance or exit routes. Bring it away from the corner to accommodate extra stools and create a more sociable experience without sitting with your back to the room.
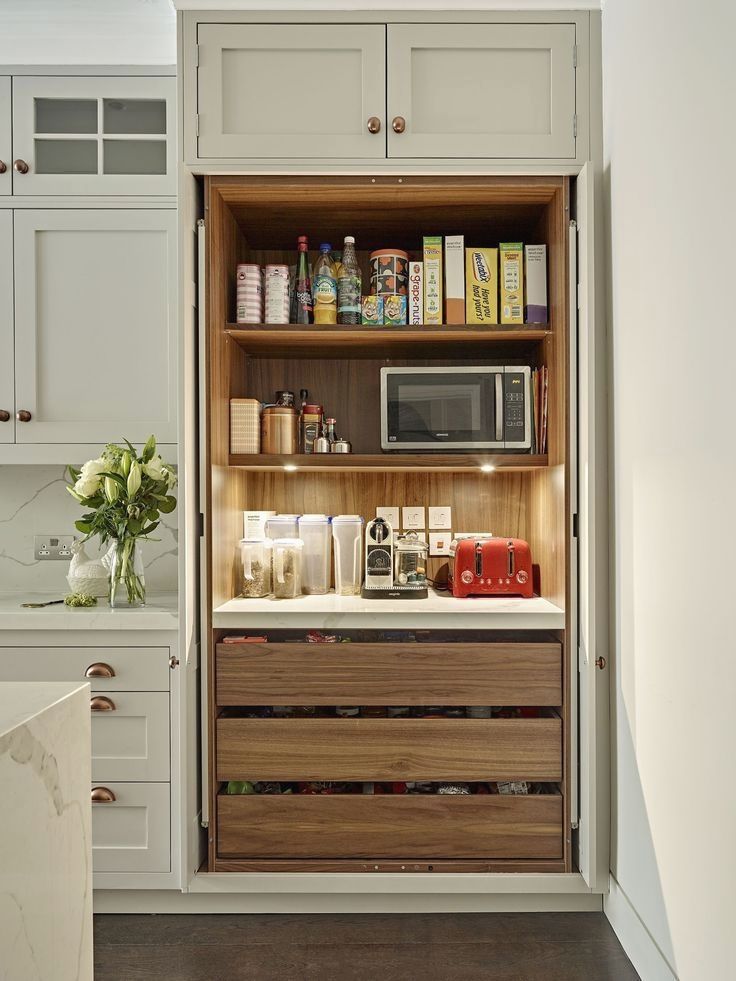
Make it super functional with storage above and below for breakfast supplies and tableware. Using the same worktop as the kitchen will achieve a sense of cohesion and prove practical in terms of easy cleaning and stain resistance.
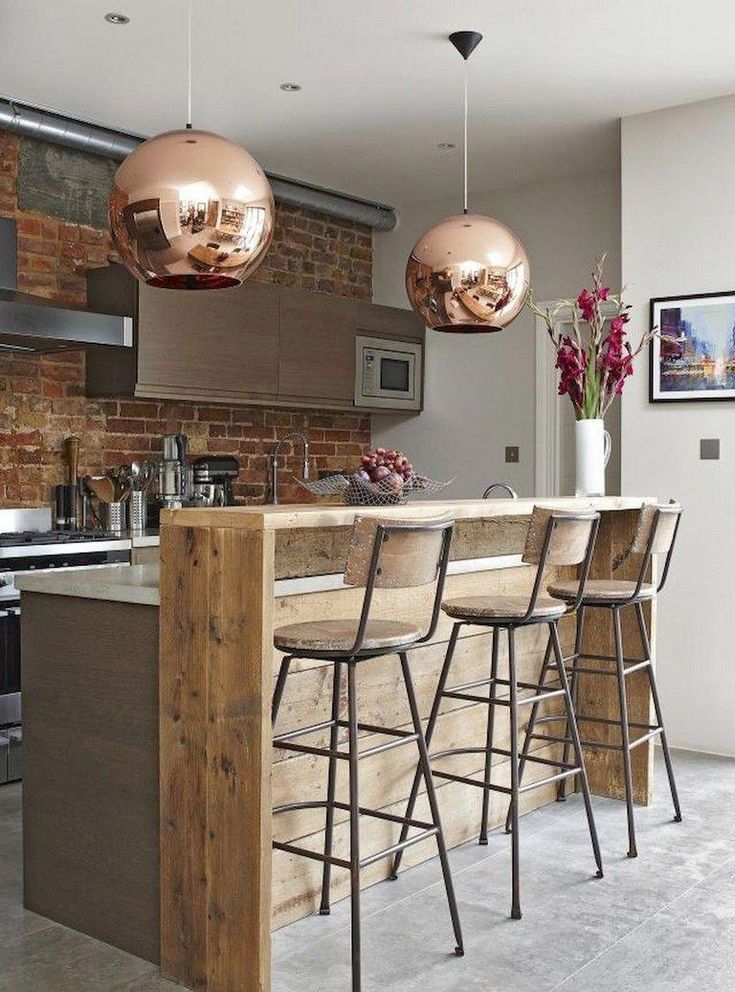
2. Raise the bar
(Image credit: Future PLC)
High-level breakfast bars have a host of benefits. In terms of design, it enables a switch in surface materials that can create a striking feature and allows something a little more forgiving to rest your arms on than cold stone or quartz.
From a safety point, a raised bar can provide a level of protection from hot oil splashes if there’s a hob on the island and keeps children away from sharp knives when you’re prepping. Don’t be tempted to go too high though, ideally no more than 106cm/42in, or you’ll struggle to source stools that are tall enough to sit comfortably.
3. Add a simple island overhang
(Image credit: Future PLC)
In smaller kitchen one of the simplest ways to add bar-style seating is to overhang the worktop on the front or ends of an island. If you’re overhanging worktop without any additional corner supports, don’t go deeper than 30cm/12in to avoid load-bearing issues when guests inevitably lean on the bar.
Two or three standard 60cm/24in base units with a 90cm/35in-deep worktop above is an easy, off-the-shelf solution that won’t break the bank. Choose backless bar stools that can be tucked underneath when not in use.
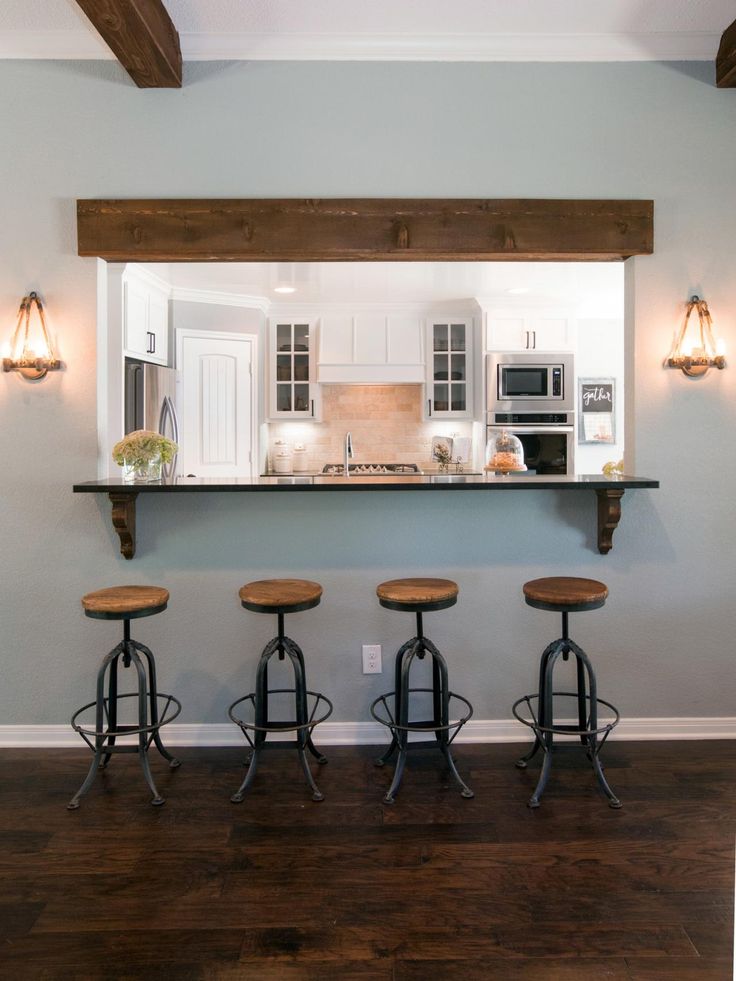
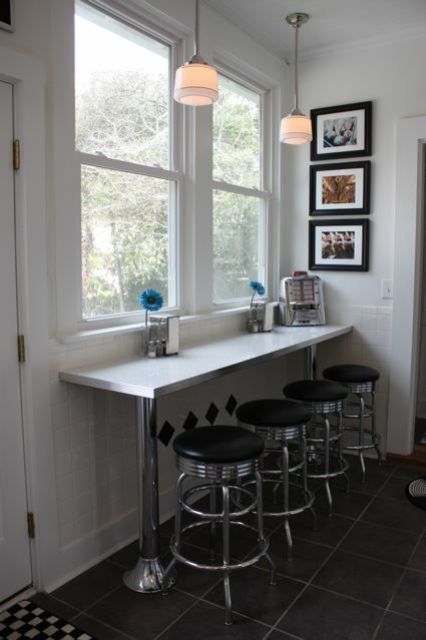
4. Work with a wall-mounted breakfast bar
(Image credit: Dunelm)
No island? No problem. A section of kitchen worktop installed shelf-style at the end of a run of units can provide a quiet spot for your morning coffee. Yes, you will have your back to the room, but that’s not always a bad thing, especially if you’re busy at a laptop or children are beavering over their homework.
Be as generous as possible with space so the area doesn’t feel compromised or cramped. Aim for at least 1m-width of worktop for two stools, 1.5m for three if possible.
(Image credit: Future PLC)
Use benches instead of bar stools to accommodate more guests – perfect for children’s parties, and it looks great, too. This chic design idea requires a lower-level breakfast bar for ease when it comes to getting on and off the benches as those sat in the middle will need to slide along.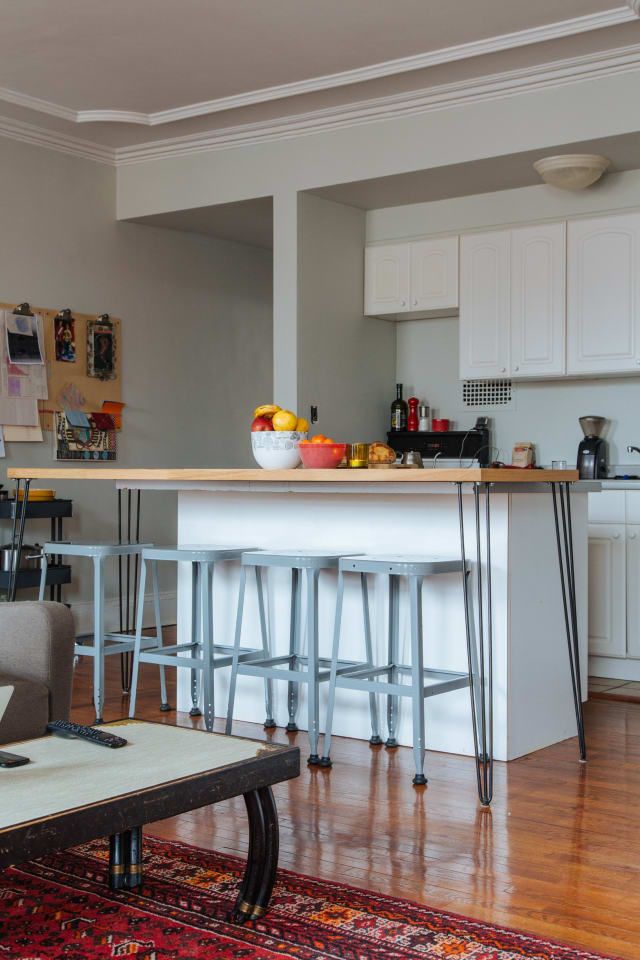
Add cushions and faux fur to boost comfort levels and create a cosy Scandi-inspired look. Make sure the benches you buy are solidly built and heavy, so they won’t tip backwards when loaded up with kids!
6. Impress with a floating bar
(Image credit: Woodstock Furniture/Nichola Yarsley)
A cantilevered breakfast bar is hard to beat on the wow-factor front. This structural bar also offers plenty of leg space beneath for seating comfort.
‘A floating breakfast bar requires careful engineering for stability – usually a steel frame is concealed under the worktop and bolted to the floor under the island,’ explains Andrew Hall, Director, Woodstock Furniture . ‘But the results are well worth it. Not only is it guaranteed to impress, but it also leaves more flooring visible, which boosts the sense of space.’
7. Consider stools on two sides
(Image credit: Future PLC)
A linear line of bar stools may be one of the most popular breakfast bar ideas for an island but it’s not the most sociable way to sit. If you’d prefer to make eye-contact while quaffing that wine, go for an L-shape configuration.
Containing the breakfast bar in one corner of an island will also leave more worktop space clear, leaving room for a generous hob. Use lighting to define the bar area – a low slung pendant on a separate light switch will illuminate the bar by night, while throwing the rest of the kitchen into darkness.
8. Drop a breakfast bar down to dining level
(Image credit: Future PLC)
Perching on a bar stool is no problem for short periods, such as a quick lunch stop or coffee break, but if you’re lingering for longer dining chairs are undoubtedly comfier. Go for chairs with cushioned seating and high backs for maximum support.
Dropping a breakfast bar down to dining height (76cm/30in) will also provide a small splashback area to install electrical sockets – perfect for plugging in a laptop or charging devices when working from home.
9. Save space with a slimline bar
(Image credit: Future PLC/Chris Snook)
Experts recommend leaving a walkway of at least 90cm-1m wide around an island or dining table to prevent obstructing the flow of movement when cooking. One of the advantages of a breakfast bar is it can be made much narrower, without effecting functionality.
‘Freestanding breakfast bars take up much less space than dining tables or islands, particularly when styled with stools that will be tucked underneath,’ says Melissa Klink, Head of Design, Harvey Jones . ‘Before investing in a breakfast bar, make sure you choose the right size for your space. A small breakfast bar will look out of place in a large room and vice versa.’
10. Take a decorative approach
(Image credit: The Main Company)
The empty void beneath a breakfast bar is ripe for an injection of colour and pattern. As the surface often comes under fire from flailing feet, especially those of small children, choosing finishes that are scuff-resistant and easy to clean.
Patterned tiles can look particularly striking and can be matched to a kitchen splashback idea for a coordinated scheme. We also love metal cladding like aged bronze or copper sheets, which can be made-to-measure and attached using adhesive.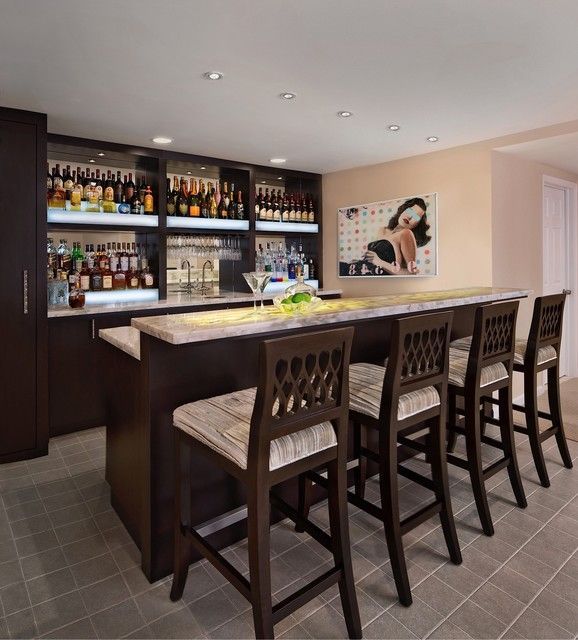
What is a breakfast bar?
A breakfast bar is essentially a casual spot to pull up a stool in your kitchen. It can run the full length of an island, complete with four-to-six stools, or be little more than a shelf in the corner, or a short overhang at one end of an island.
‘A breakfast bar is a great way to get more out of your kitchen,’ says Graeme Smith, Head of Retail and Commercial Design at Life Kitchens . ‘Breakfast bars keep everyone socially connected in the space and can make it easy for hosts to cook away while guests chat.’ In more recent years, breakfast bar ideas for kitchen life include another place to work from home – one where you’ll never be too far from the coffee machine!
What should you consider when planning a breakfast bar?
Location is likely to be your first consideration. Some layouts, for example one with an island or peninsula, lend themselves more readily to a breakfast bar. The keys thing to think about location-wise is whether there is enough space behind the breakfast bar for people to pass by – allow at least 60cm, but ideally 90cm.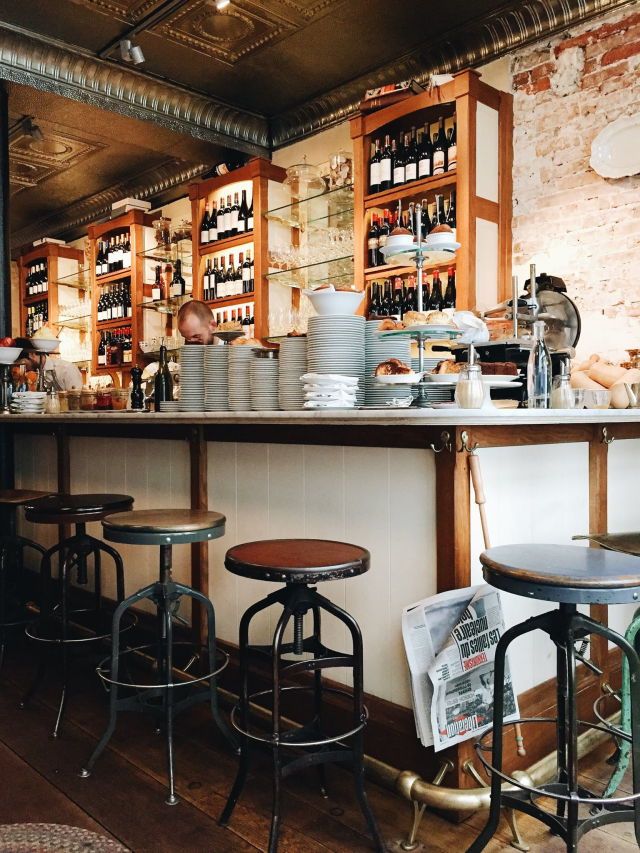 It should never cause an obstruction.
‘In terms of materials, any surface used for a breakfast bar should be easy to wipe clean, durable and ideally resistant to scratches and stains too,’ says Simon Boocock, Managing Director, CRL Stone . 'Quartz and stones are very low maintenance but can be unforgiving on glassware, not to mention cold on your arms. Switching from quartz on your main kitchen surfaces to a warmer surface like wood for the breakfast bar is a great solution.'
What height should a breakfast bar be?
There are no set rules on what height a breakfast bar should be, but you’ll make stool shopping easier if you plan the height according to the dimensions of the two most popular stool options, which are counter stools or bar stools.
A counter stool, sometimes called kitchen stool, is aimed at breakfast bars that sit at standard kitchen worktop height. This is around 90-95cm/35-37in from the floor, with the stools ranging from 60-75cm/24-30in high (to seat height).
A bar stool is aimed at higher breakfast bars, be that a standalone bar or a raised section on an island or peninsula unit. If this is your preference, go for a height of about 100-106cm/39-42in, and buy bar stools with a seat height of 75cm/30in or above. You can take the stress out of bar stool shopping by choosing a height adjustable design that can be made higher for children and lower for adults.
Linda Clayton is a professionally trained journalist, and has specialised in product design, interiors and fitness for more than two decades. Linda has written for a wide range of publications, from the Daily Telegraph and Guardian to Homes & Gardens and Livingetc. She has been freelancing for Ideal Home Magazine since 2008, covering design trends, home makeovers, product reviews and much more.
How to make a bar in a cafe or restaurant: the rules that are important to know!
Bar counter is one of the main elements in creating the image of a restaurant, bar, cafe or club. The visitor's impression is formed from the first minutes of their stay in your establishment.
If the interior of the restaurant is made in a certain style, and the bar counter matches it, then the guests of your establishment will favorably perceive the offered dishes and drinks, appreciate the quality of service and will definitely visit you again.
Organization of a bar
Proper organization of a bar can bring up to 60% of the profit to an establishment, even if it is not a nightclub or a cocktail hall, but an ordinary restaurant. Think over the design, take into account the parameters of the bar station, install high-quality equipment, and the results of your efforts will undoubtedly delight you.
The bar counter is the center of attention of the restaurant guests, and it is here that most of the visitors spend their time. The rack should be attractive, stylish and functional with thoughtful ergonomics.
Since appliances rarely fit into a stylish interior (hi-tech and loft styles can be an exception), all equipment is built into the design of the bar counter.
Bartender's workplace
Bartender's workplace is a zone of special attention for guests of the establishment. It should be comfortable for everyone here: visitors - to relax, and bartenders and the administrator - to work.
To keep the glassware, utensils and drinks for making cocktails close at hand and arranged in a certain order, the bar counter should have many shelves and storage compartments.
Entrust the design and manufacture of the bar station to the specialists of . Choosing a beautiful and stylish counter, you can lose sight of important professional nuances that will affect the quality and speed of customer service, and therefore profit.
Ideally, if the bartender of the future restaurant also takes part in choosing the bar counter . Delivery and installation of the rack is a lengthy process, so order it in advance.
Important:
- provide a place to store dishes (glasses, plates)
- make room for teapots
- bar equipment must be attractive and reliable
- the dimensions of the tabletop should allow placing glasses on it and not hinder the movements of the guest and the bartender
- properly organize the space
Bar counter width - 70-80cm, tabletop thickness not less than 5cm. The optimal height of the bar counter should not exceed 150 cm, the height of professional counters is 114 cm.
These numbers are related to the standard bar stool height. With such parameters of the bar counter, the working conditions of the bartender are the most favorable, since he does not have to constantly raise his hands.
Properly organized space inside the rack increases productivity by 2-3 times. Plan the arrangement of cabinets, equipment and storage areas so that any item can be reached while standing still.
It is realistic to achieve such placement when the bartender does not leave the workplace when ordering 70-80% of drinks, working simultaneously with a coffee machine, with a blender and with a beer tap.
Equipment
The number of drinks for each bar is individual and depends on the concept of the restaurant. The range should be quite varied. At the same time, the presented alcoholic drinks should be in demand, and not stand for beauty.
Don't skimp on bar equipment. Choose professional equipment and you will never regret such an investment. What to choose?
Speedrack - hanging or built-in shelf for alcohol, "bottle pocket". Provides quick access to the main ingredients when preparing drinks or cocktails.
Container for cut fruit.
Glasstation - Dish rack from low and frequently used to high. Usually located on the left.
Icebucket - large ice bucket.
Heavy duty ice maker . The preparation of some drinks requires a large amount of ice, which should always be available.
Coffee machine and blender made of metal.
Professional refrigerators sensibly installed at the back of the showcase at the bottom so that visitors cannot see them
How to place?
According to the rules of ergonomics, all machinery and equipment should be placed in those places where it will be convenient to use it and where you expect to find it.
Basic rules:
- everything that is put or poured must be located to the right of the bartender, and where it is put or poured - to the left
- those positions that are ordered most often are placed in the speedtrack in front of the bartender.
- on the left - shaker and dishes, then straws and other decorative elements
- garnish box: a container with chopped fruit for garnishing cocktails. Located next to bottles
- to the left of the bartender is a sink, and to the right is a beer tap
- install the coffee machine behind the tap.
The placement of equipment depends on the specialization of the institution, for example, a beer tap in a pub takes center stage, but in a coffee shop, a coffee machine comes to the fore.
Proper placement of equipment takes into account the location of the restaurant's utilities.
The supply of electricity and the installation of electrical wiring are based on the power that the bar equipment will consume.
The choice of equipment with optimal performance depends on the number of potential bar guests. Having decided in advance on this issue, you can design a bar counter of a suitable shape and size.
Materials
Materials for the manufacture of a bar counter can be different, but they must be wear-resistant. For example:
- wood (oak, beech)
- natural stone
- acrylic and artificial stone
- metal
- plastic
- glass
Artificial stone bar counter ideal for restaurants, clubs and cafes. It is possible to make a rack of any configuration from artificial stone and at the same time it will be practical, comfortable and easy to maintain .
Due to the non-porous surface, it does not absorb moisture and dirt. Such a rack is easy to repair and restore its appearance.
In expensive elite establishments, wooden bar counters are installed - this is a classic option.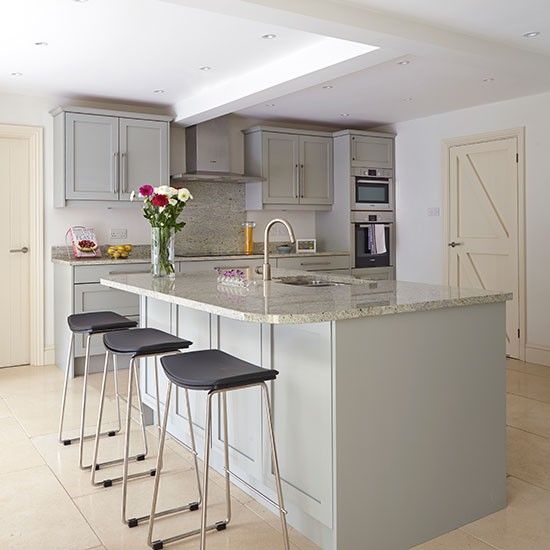 At such a counter, the visitor involuntarily spends much more time than he planned. As an option, the combination of wood and epoxy is now relevant.
Wood is durable and has a beautiful texture, which gives the whole structure a respectable and sophisticated look. As a result of this approach, the most pleasant and harmonious atmosphere is created, which attracts visitors.
Wine cabinet
Wine cabinet for storing beverages is a high-tech modern product. Wine cabinets maintain an optimal microclimate for storing wine and are installed in any heated room with a stable power supply.
Wine cabinet, whiskey cabinet or cognac cabinet are designed for long-term storage and are great for displaying drinks in a sales area. That is why their design is given special attention.
Expensive restaurants with a reputation prefer wine cabinets with natural wood (beech, poplar, cherry, oak) or genuine leather finishes. Impeccable maintenance of the desired temperature inside the refrigerator is the main characteristic of cabinets for elite alcohol.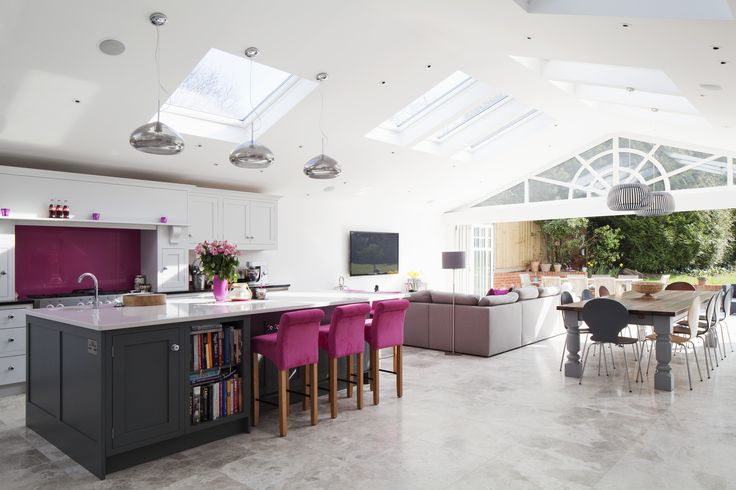
Wine cabinet for bottles equipped with several temperature zones:
- for storage
- to give the required temperature before pouring into glasses
Most wine cabinets are equipped with carbon filters. They do not allow pungent odors to penetrate inside and affect the quality of the wine. Note that some wine cabinets do not have compressors and are equipped with thermoelectric cooling, which allows you to avoid vibration and store wine in ideal conditions.
Furniture
Make sure to purchase quality cabinets, shelves, bedside tables and other furniture accessories. This will help to hide the products, materials and components that are used in the kitchen and near the counter for preparing certain dishes and drinks from the eyes of customers.
Do-it-yourself bar counter for the kitchen with drawings and diagrams. Task plan
Contents
- Do-it-yourself bar counter for the kitchen with drawings and diagrams.
 Plan-task
 - Deciding on the layout
- Shopping: buying materials
- Preparing the frame
- Laying the first tabletop
- Upper tabletop and cladding
- Creating an author’s decor
- Bar at home
- Wooden bar counter for home
- Do-it-yourself loft bar counter. Types of bar counters
- Do-it-yourself bar counter made of plasterboard. Do-it-yourself drywall bar counters for the kitchen
- About drywall bar counters for the kitchen: pros and cons
- How to make a do-it-yourself drywall kitchen bar counter: step-by-step instructions
- How to make a wooden bar counter with your own hands?
- Views of this design.
- Materials for manufacturing
- Bar counter can be made in different textures and materials.
- For a standard bar made of wood, in any case, you will need the following set of materials.
Do-it-yourself bar counter for the kitchen with drawings and diagrams.
 Plan-task
 - We find drawings of the required type on the Internet or draw them ourselves
- We select and purchase everything necessary
- Assemble the frame
- Mount the base and bottom tabletop
- Mounting the top and sheathing
- We are engaged in decoration
Now the do-it-yourself bar counter for the kitchen begins its life!
Deciding on the layout
Choosing it taking into account the area of the kitchen, as well as the general style. For example, semicircular wooden bar counters are not at all written in hi-tech style. If you choose a hybrid drain with a regular table on one side, find the table you need or the exact drawing.
Here is an assembly of the classic one-piece model. This option is not the most difficult and quite common, which is why the choice fell on it.
Having decided on the design, it is now necessary to prepare an exact sketch. It reflects all dimensions in three dimensions and, optionally, an indication of the materials.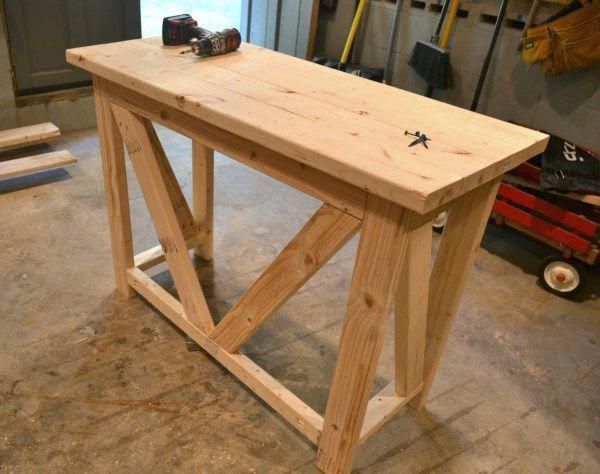 Let's stick to the classic height of 1.1 meters.
Shopping: buying materials
Lacquer creates a smooth decorative wood finish
The bar counter in the kitchen we have chosen with our own hands will require the following materials:0037
From the timber, we cut out the elements of the supporting structure according to the drawings and connect them with nails. Two things are important: different parts should fit as closely as possible to each other and be on the same level. No distortion is allowed here.
Add guides to the resulting bars. We make them from purchased boards. We place the guide strictly vertically, align them to size. Making mistakes at this stage, you run the risk of "distorting the vertebrae" of the future stance. Do not do everything by eye, use the level, if possible - laser.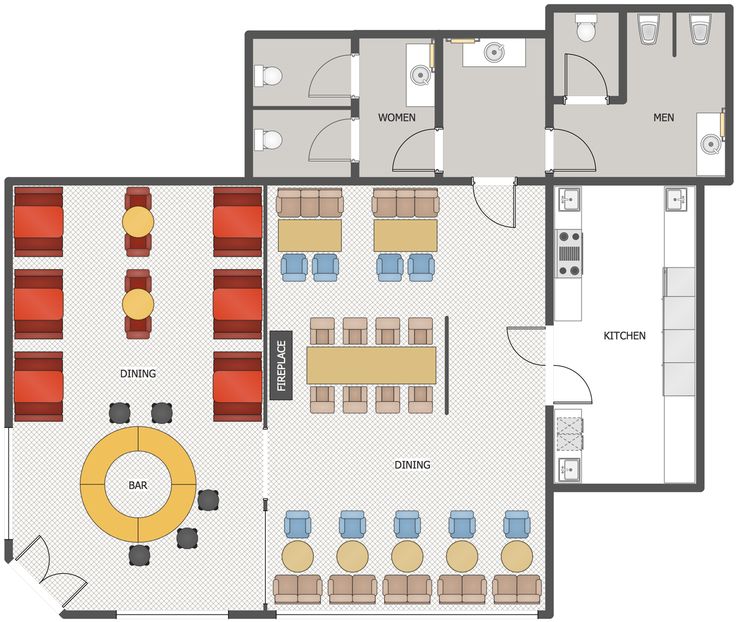
Putting on the first worktop
After assembling the frame, we begin to create the flooring. To do this, we use sheets of plywood, which we carefully nail to the base - do not overdo it so as not to break the plywood.
Then, from fiberboard we prepare the bottom tabletop. By the way, this stage is simplified if a bar counter is made from a countertop that was purchased earlier. After that, we connect the frame and the lower part of the table top with small self-tapping screws. Inside the structure, we divide the space into several separate recesses using plywood sheets.
Do-it-yourself bar counter: laying plywood on supports
Top and paneling
Our do-it-yourself bar counter in the kitchen is almost complete. First of all, we prepare the upper part of the countertop from the same fiberboard. Here it is important to monitor the tightest fastening between the parts. When it is ready, the rack is sheathed with plywood sheets.
Now the skirting boards and finishing nails come into play. For reference: finishing nails - they are lining - these are nails with a barely noticeable head of the required colors. So, with the help of these nails we fasten decorative skirting boards and a bar counter made of wood with our own hands is almost ready. Here you can be creative, the main thing is to sheathe the corners. In principle, a do-it-yourself bar counter from a countertop is also a worthy solution.
Creating an author's décor
Now it's an easy but protracted step. We cover the rack with stain, carefully each element, not missing a single millimeter. After complete drying, apply varnish. Coat the rack in two to three coats, it will take about 2 hours to fully dry. Thus, it will take you approximately 10 hours to completely finish this. This is all done to protect it from moisture and air. At this stage, you should be extremely careful!
Do-it-yourself folding bar counter. Bar at home
The home bar presented here is elegantly designed and designed for efficient bartending.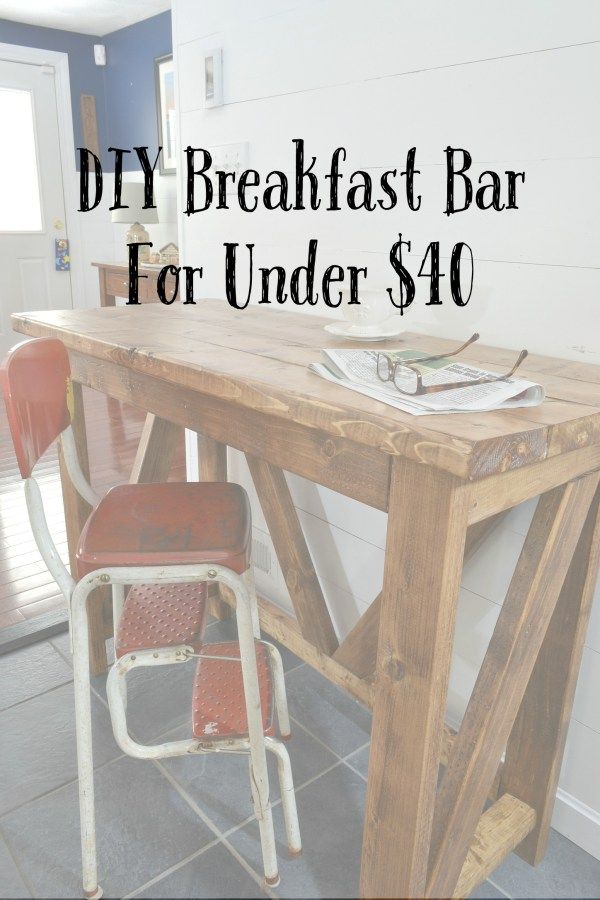 A small refrigerator provides access to cold drinks and ice, and convenient cabinets allow you to conveniently store all kinds of drinks. Although this is a "dry bar" (without plumbing), the design can be changed, there are many ways to do this. If you want to make a stationary structure, running water is not a problem. This compact corner bar has glossy black MDF backsplashes with decorative appliqués that form a horizontal grid pattern on the panels. The cherry plywood table top rests on an L-shaped knee baffle, creating a comfortable bartending space. Flip-up lift bars in the bar at one end provide easy access to the work area. Key components - cabinets, laminated countertops, a refrigerator and Asian-inspired finishes - form the basis of a home bar.
Below is a drawing and parts list with dimensions in inches. Multiply by 2.54 to convert to centimeters.
How to assemble a bar at home, see the master class on step by step photos.
Photo Source: www.blackanddecker.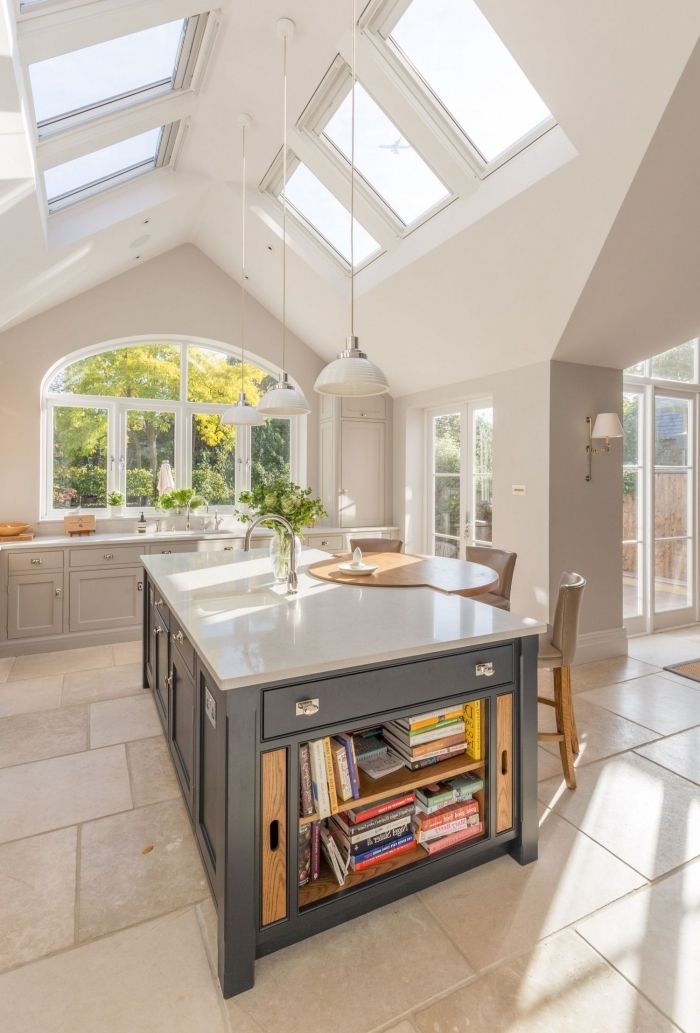 com/ideas-and-inspiration/projects/build-a-dry-bar
Wooden Home Bar
Most of us want our home to be special. Some people like game rooms equipped with the latest technology, others devote their free time to making a solid office with a real library, and someone else wants their own cinema. If you have free space and want to build something interesting and original, you need to make a choice. There are many ideas, but let's look at what can fit in any home, does not take up much space and is suitable for both bachelors and married men. Bar. Or, to be more specific, the bar that all activity revolves around and the one that impresses your guests the most. Here you will find a specific example with step-by-step photos of how to make a wooden bar counter for your home with your own hands. Instructions are on the site, the link is under the photo gallery.
Do-it-yourself loft bar counter. Types of bar counters
To choose a bar counter, it is very important to navigate all types of placement of this interior element in order to choose the most successful option.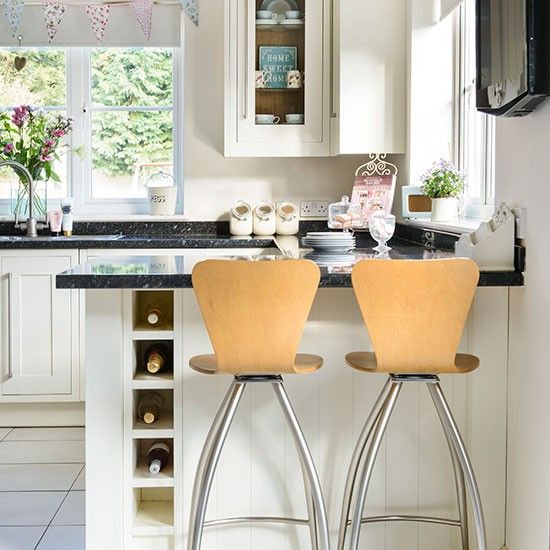
A handmade bar counter will not only be an aesthetic element in the interior, but will also bring practical benefits in saving space.
The bar counter can be placed as follows:
- Peninsula - one end rests against the wall, the counter itself will be taken out separately from the working or dining area. This option is suitable for the Scandinavian interior style or for the classics, but it cannot be used for the loft style because this is a specific division of space.
- On the basis of the window sill - the table top is beckoned to a higher one, and a pair of legs is also added. Such a rack is combined in one line with the working area of \u200b\u200bthe kitchen. In the conditions of life not in an abandoned warehouse, but in a city panel house, this option would be appropriate for a loft style. The tabletop can be made of acrylic stone or glass.
- Wall-mounted - permanently placed and installed along the wall. It is also suitable due to the lack of division of the room into zones.
- Island - accommodation is possible only in large spacious kitchens from 20 square meters. The size of the island must not be less than 1 square meter, and the distance from the island to other surfaces must not be less than 1.5 meters. This is a separate working functional or dining area in the center of the kitchen space. Also great for loft style due to functionality.
Do-it-yourself bar counter made of plasterboard. Do-it-yourself drywall bar counters for the kitchen
Do-it-yourself bar counter for the drywall kitchen will make the room stylish and modern. Its independent production is suitable for those who have already installed a headset and want to supplement it. After installation of the structure, the finish is selected based on the interior. You can tile the rack, paint it, or use self-adhesive materials.
In the article we will analyze in detail the nuances of bar counters and the features of their manufacture.
About bar counters made of plasterboard for the kitchen: pros and cons
Bar counters are often used in studios. They are necessary to separate the dining and living areas. Designers distinguish between mini and classic module types. The latter are larger in size, have niches for installing small household appliances, lighting. Like most non-standard pieces of furniture, bar counters have certain advantages and disadvantages.
Let's start with the positives:
- Mounting in small spaces is allowed.
- The product is used instead of a standard dining table.
- Space saving for corner posts.
- The interior element can be equipped with shelves and niches.
- Ideal for quick bites as no serving is required.
- Chairs can be tucked under the counter when not in use, saving space.
Along with the advantages, there are also disadvantages. There are not so many of them, but you should still pay attention:
- installation at a height of more than one meter from the floor;
- Only 2-3 people can dine at a time;
- the impracticality of using the rack in a large family.
When developing a project, consider all the details, think in advance about the number of drawers, shelves, hidden niches. Remember that it will be comfortable to sit only on special high chairs with a footrest. It is not always convenient for older people to be in this position, moreover, it is traumatic for children.
How to make a drywall kitchen bar with your own hands: step by step instructions
Gypsum board is a versatile material used for interior decoration. With the help of a profile, various, including complex geometric shapes and compositions are created. Before you understand how to make a drywall bar counter with your own hands, you should prepare for the process.
Tip . Be sure to make a drawing or diagram of the product to scale. If this is difficult for you, contact the services of designers.
Making any piece of furniture takes time, patience and care. The kitchen bar is no exception. When the project is studied in detail, they begin to prepare the working space and the necessary materials:
- drywall sheets;
- metal profile;
- dowels and screws for fastening;
- putty;
- seam tape;
- sealant;
- building level;
- utility knife;
- drill or screwdriver;
- grouting tool.
Finishing materials are additionally prepared. When painting, a tray and a roller are additionally needed. If you plan to lay tiles, you will need a special glue. Be sure to use protective equipment (mask, gloves, goggles).
Next, we proceed to the step-by-step instructions for making a bar counter:
- Determine the length, width, height and depth of the product.
- Transferring the drawing from a piece of paper to the floor (in the place where the rack is mounted).
- We manufacture a frame from an aluminum profile according to the specified parameters and dimensions (the more solid parts, the stronger the structure).
- We fix the product on the floor and mount the cross bars to increase rigidity (crab fasteners are used).
- The created frame from the profile is sheathed with plasterboard of the appropriate size (the material is cut without effort, with a simple clerical knife or jigsaw).
- We fasten drywall parts with dowels or self-tapping screws (it is better to use a screwdriver to work faster).

- The cap should be screwed in using the recessed method in order to subsequently hide its presence with putty. The pitch width of the self-tapping screws is 20-30 cm.
- Glue sickle on all obtained joints, cover the heads of self-tapping screws with putty.
- After drying, sand the areas with a trowel (dry) until a perfectly smooth surface is obtained.
- Finish by applying a primer and then installing the skirting board if required by the construction.
The main bar frame in the kitchen is ready. After we proceed to its final finishing. As a top, you can use chipboard sheets, countertops, ceramic plates or glass, mosaic tiles (it all depends on the design). The base is usually covered with paint. It is convenient to do this with a roller, and in hard-to-reach places a brush is used.
Conclusion
If you have the time, desire and finances, anyone can equip the kitchen with a bar counter created by their own hands. According to the described principle, products for living rooms are made.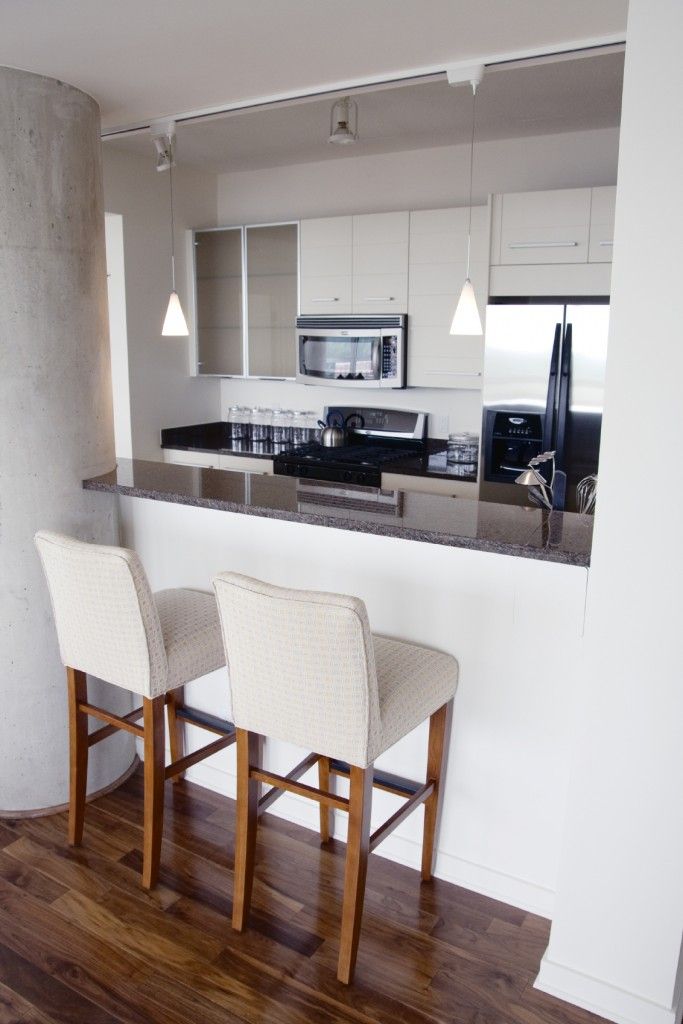 If you follow the specified sequence of actions, you will not have problems.
Do-it-yourself bar counter made of wood. How to make a wooden bar counter with your own hands?
How to make a wooden bar with your own hands? It’s worth starting with the concept of a bar counter. This is an element of the interior, as well as a tool for division, that is, the main task is to divide the space into several zones - work and leisure.
Bar counter - an element of the interior, as well as a tool for dividing space
But with the help of such an element, you can significantly save space in the room. In small kitchens of Khrushchev-type apartments, it will perfectly help to combine a dining table with a functional surface. This will unload the room and make it more spacious.
Bar counter made of wood in a small kitchen
Bar counters are sold in almost all furniture stores, but with basic building skills, you can make a “barque” with your own hands.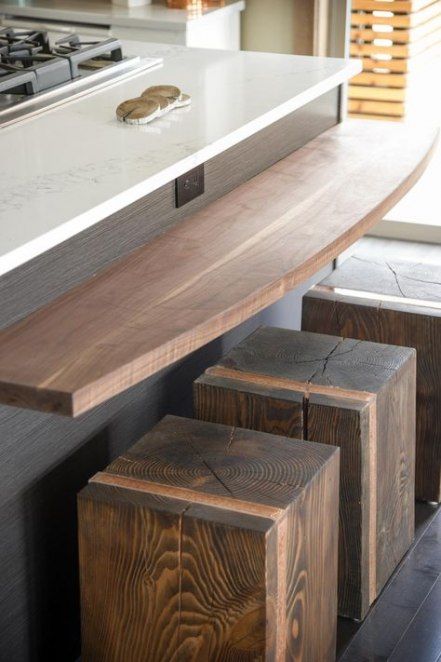 How to do this is described in the article. When choosing a type of bar counter for the kitchen, several parameters should be taken into account: functionality; harmony of separation; aesthetic appearance and convenience.
A wooden bar should look aesthetically pleasing and harmonious
Views of this design.
- Classic. The modules are placed at a height of 100-120 cm, and a table is already located on them. High wooden chairs will perfectly complement this design.
Classic wooden bar counter
- Combined. Combines work and lunch function. In such cases, the height of the rack should be at the same level with the rest of the countertops.
Combined. Combines work and lunch function.
- Central. For space zoning, it is located in the center of the kitchen and divides it into a dining and working area
For space zoning, it is located in the center of the kitchen and divides it into a dining and working area
- Mobile.
 Due to the design, it can easily change its location or fold if necessary.
Due to the design, it can easily change its location or fold if necessary.
The central location is characteristic of classic English style, as well as high-tech style. As for other styles, the bar counter will fit perfectly into art deco, loft, minimalism, gothic and classic. Its use in such styles as country, Provence, Italian style will be inappropriate.
The central location of the high-tech wooden bar counter
The following elements can be distinguished as the main structural elements. Support. A bar on which, on the one hand, the edge of the tabletop rests. Maybe, both aluminum pipe and brickwork, it can also be suspended. This is not a necessary element for counters located in the central location. The countertop is the material and shape that will suit your kitchen. Additional elements are glass hangers, shelves for alcohol, a hidden cabinet and so on.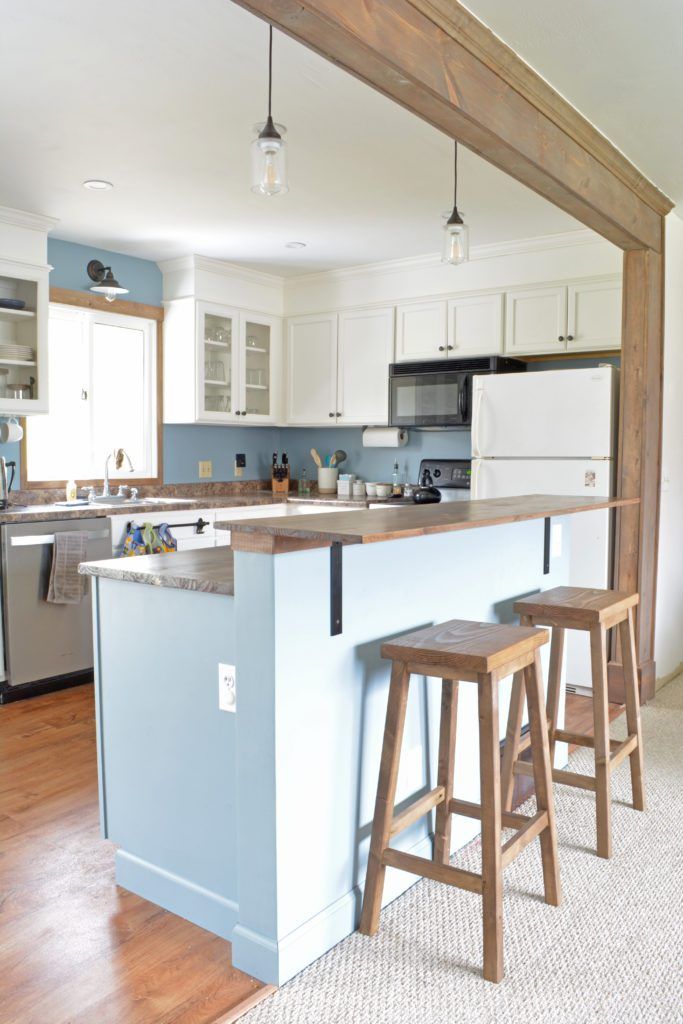
Bar counter with a bar and place for glasses
Materials for making
Important! Please note that the future material for the bar counter should be combined with the rest of the materials in your room.
Bar counter can be made in different textures and materials.
- Drywall is a money-saving pseudo-option. The design itself will be cheaper than from other materials, but further finishing and maintenance is much more expensive. The advantage of a rack made of such material will be the ability to create any shape.
Plasterboard bar counter
- Plastic is very brittle. Any careless movement or strong blow can punch a large hole in this object.
Plastic bar counter
- Chipboard - more expensive than the previous options, but more practical to use. The color scheme of this material is very diverse and therefore you do not have to spend money on additional finishing.
Chipboard bar counter
- Natural wood is not a cheap option, but it will look elegant and fit into any interior.
Natural wood bar counter
- Brick or stone - rarely used in apartments due to the heavy weight of the final structure. Usually, only a support is made of bricks laid out in several rows. A specific set of materials can only be compiled after a drawing or sketch has been created.
Natural wood bar with stone support
For a standard bar made of wood, in any case, you will need the following set of materials.
- Blocks of wood and canvas for the tabletop.
- Fiberboard sheets, plywood sheets.
- Self-tapping screws.
- Trims.
- Wood glue.
Important! When choosing wood for a countertop, it is important to consider the strength of the solid wood, its resistance to wear (shrinkage, cracking and grooves), as well as resistance to chemicals.