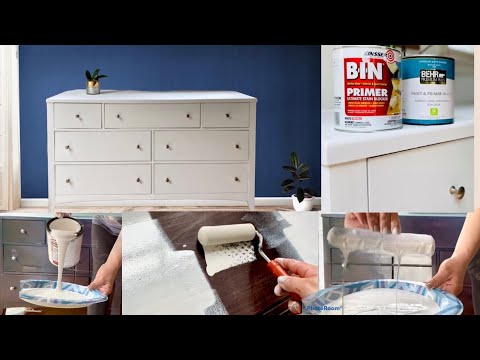
Paint wood furniture white
5 Things You Need to Do When Painting Furniture White
Curious about how to paint furniture white? Is there a secret to painting white furniture? This cabinet is given a white painted furniture makeover. Follow these 5 tips to painting furniture white for a result you will love.
Do you ever wonder how to paint furniture white? Is there a secret to painting white furniture? Maybe there is a secret white furniture paint that is like the holy grail to furniture painting? Nope, there isn’t. I wish there were. The truth is- I don’t think there is one best paint for painting furniture whether white or any other color. Of course, there is furniture paint and then there is wall paint. There is quality paint for furniture and lower quality paint. At the end of the day, most people find what they are comfortable with using and stick with it. But let’s stay focused on the end game here, which is painting furniture white. So, when you plan to paint wood furniture white you really need to make sure that you take a few necessary steps to ensure a quality end result that you will be happy with.
Disclosure: This post contains affiliate links for your convenience. I may be compensated if you make a purchase after clicking on my links. Click here for my full disclosure policy.
Materials Needed / Source List
- Orbital Sander
- Primer
- Yellow Detailer Sponge
- Dense Foam Roller
- Cling On Paint Brushes
- Painters Tape
- Shop-Vac (clean up your mess)
- Find all of my favorite tools and products on my Amazon Page here
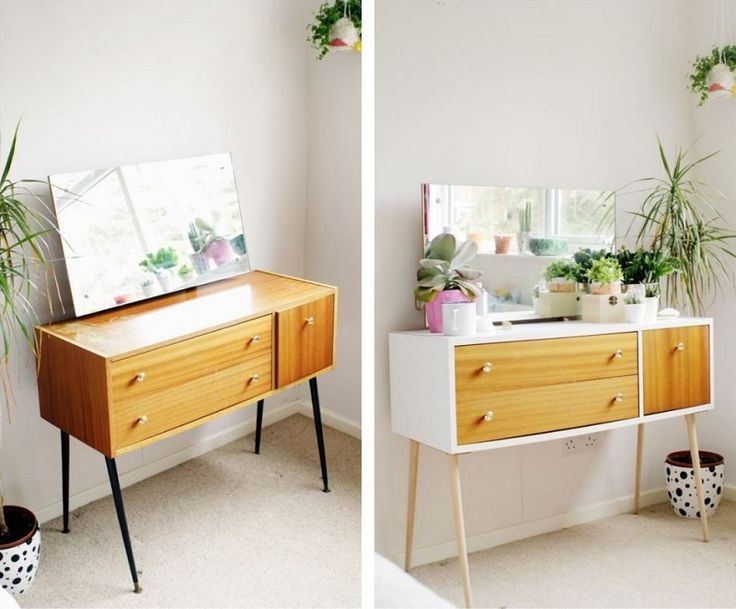
Unfinished Wooden Cabinet
This plain wooden cabinet is up for a makeover. The owner scooped it up for only $20! She asked that it be given a makeover just like the one I did for her over 3 years ago.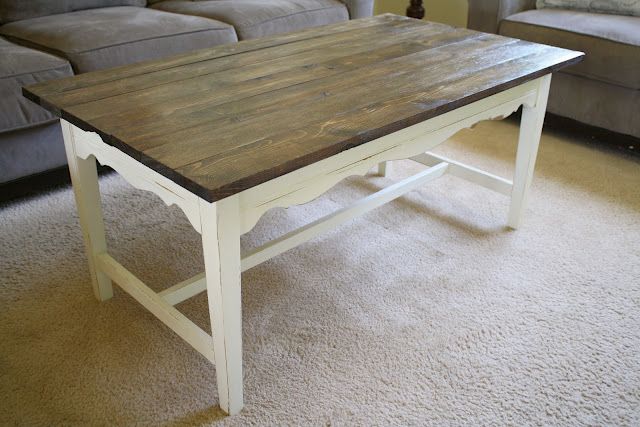 She loves color but likes to keep her painted furniture neutral so it will remain timeless as her decor may change. Smart lady! This is the piece that was made over 3 years ago: Timeless White Painted buffet This is the piece that we are about to give a furniture makeover.
Make sure to stick around all the way to the end, its Furniture Fixer Upper time where my fellow furniture painting friends join in and share their projects as well.
First Step to Painting Furniture White
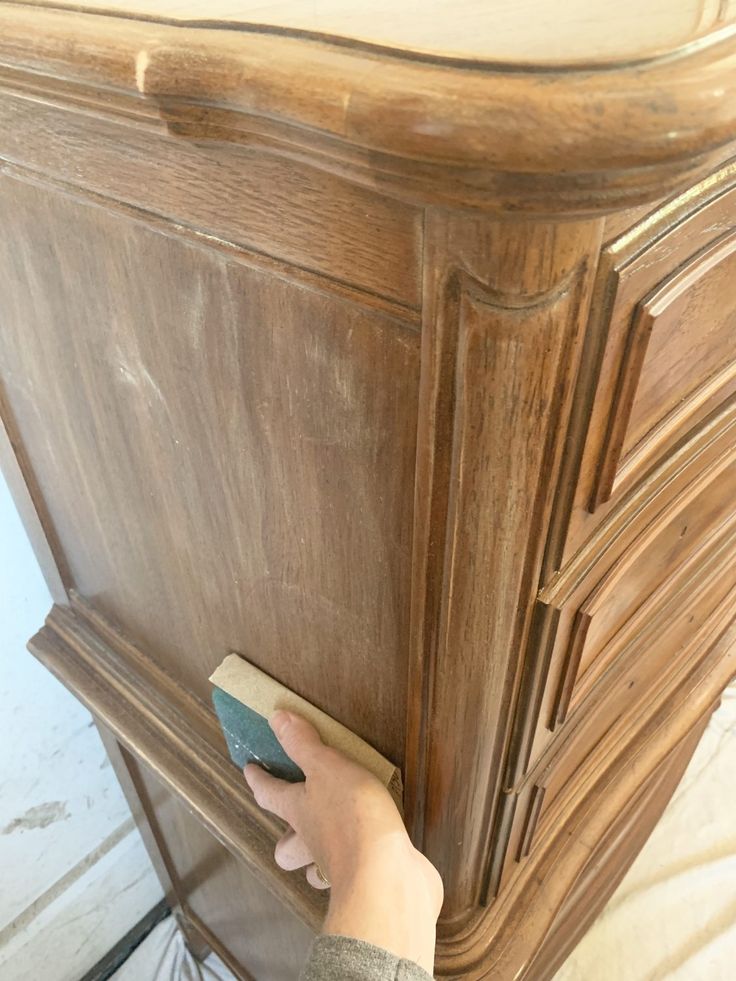
The first step when painting furniture white, or painting furniture any color for that matter is the prep. Prep is probably the most important step in furniture painting. This is my go-to process for How to Prep Painted Furniture. In addition to the standard prep process this cabinet is getting a new stain top, so the wood must be sanded down using my favorite orbital sander.
Now that your piece of furniture is cleaned, sanded and prepped I always like to use a primer before painting furniture white. You can find other painted furniture projects that required primer here: primer. I admit that I didn’t use to use primer at all since most chalk paints claim that it isn’t necessary. But over time, I’ve realized that I prefer to err on the side of caution, especially when using white furniture paint. I prefer to seal in any possible bleed through as well as create a nice foundation before painting wood furniture white. The primer that I use and trust is a shellac based primer and you can find it HERE.
When applying primer to furniture I tend to find that a simple foam roller works best for the flat areas, and a chip brush works great for getting into the details, or crevices. Here is the cabinet with two coats of white primer.
Painting Wood Furniture White & Step Three
You may be unsure as to which white furniture paint to use for your painted furniture project. There are so many different types and brands of paint out there. For this project, I’m creating a custom mixed white paint using both an off-white, and a stark pure white. You can get great furniture paint online HERE.
When you paint furniture white, even with a primer you will still need a minimum of two coats of white paint. There is less pigment in white furniture paint making it sometimes seem as if it’s see through. Don’t get discouraged, with primer and two coats of paint your piece will start to look beautiful. This is with two coats of the custom mixed white furniture paint on the cabinet.
Step Four in Creating a White Painted Finish
Step four is actually a step that you should do throughout the entire process.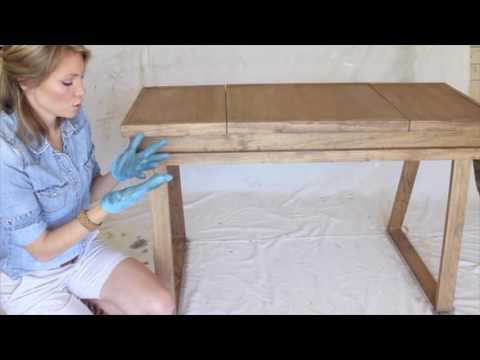 In between each coat of primer, and paint you should lightly sand your piece of furniture. By sanding between coats, you are maintaining a smooth soft finish and you also get the opportunity to see if you missed a spot anywhere along the way. You don’t have to go crazy, a quick once over with a 320 grit is fine.
After you give a quick sanding, always make sure to go back and remove the dust that you just created. A clean lint-free cloth to wipe away the dust works perfectly. You can find them online HERE. This applies to every time you sand your piece of furniture, both sanding between coats and distressing.
Lastly, before sealing your piece go ahead and use an old hairdryer to blow away any sanding dust that may fall into the corners or crevices. You don’t want to seal your dust onto the piece.
Sealing your Furniture and Step Five
Now you should have your piece of painted furniture all cleaned, prepped, primed, painted, sanded and ready for sealer.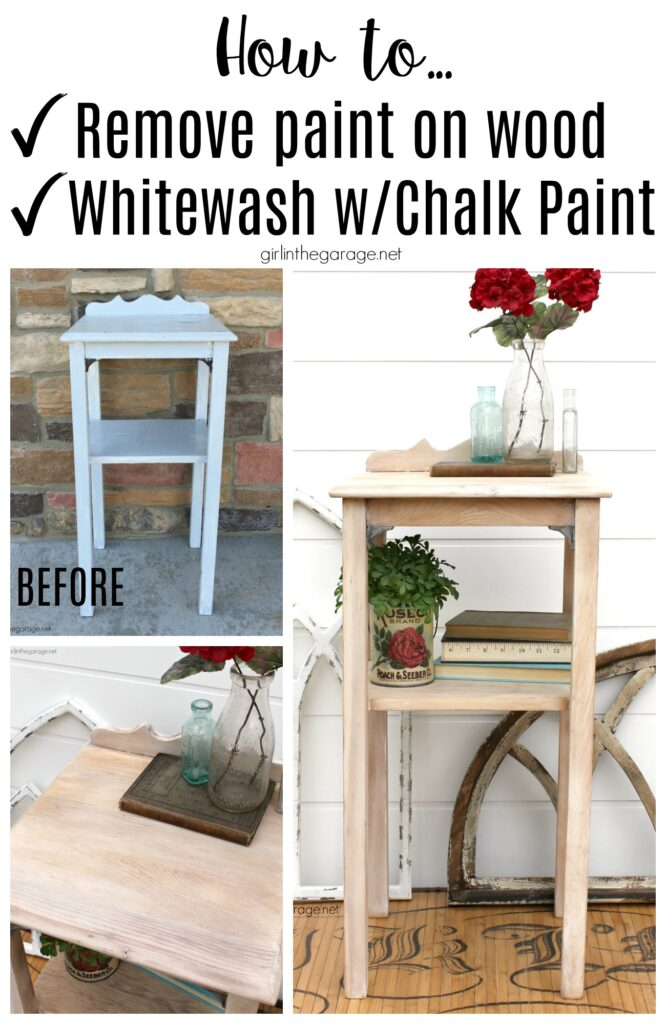 One major issue that many furniture painters seem to have is that when they are painting furniture white is that they worry about their clear sealer turning yellow. No one wants a yellow tinge over their white painted furniture. This is my little secret that I like to do when sealing a white painted piece of furniture.
Click here to Pin this post for later.
Sealing White Furniture Tip
First, I grab my clear sealer. Then squirt your clear sealer onto a plate and then I dab a little bit of my white furniture paint in with my clear sealer. Just enough to give the sealer a white tint. You don’t want to add a lot of the white paint, just a little.
Apply your white tinted sealer to your white painted furniture using your favorite sponge applicator. I absolutely love my yellow sponges, but as I went to find my last one I realized that it was missing. Apparently, my husband used it and destroyed it by accident! To right his wrong, he ordered my three new ones to replace my one damaged one. Yay me! You can find my favorite yellow sponges HERE. Today I have to resort to using a blue sponge until my new yellow sponges arrive. 🙂
To make sure that your sealer doesn’t pool up in the corners or crevices, go back with a chip brush and remove any excess sealer.
Recap
Don’t forget these basic tips when painting furniture white:
- Clean / Sand / Prep
- Prime
- Minimum 2 coats of white paint
- Sand between Coats
- Add white paint to tint your sealer
Here is a full tutorial with VIDEO showing how I seal my painted furniture projects: Sealing Painted Furniture
Click here to Pin this post for later
White Painted Cabinet Makeover
When you are finished you should have a white painted makeover that you love!
Click here to Pin this post for later
The top of this cabinet is finished using a dark protective wood stain. Click here for a detailed tutorial on How to Apply Wood Stain. The hardware is finished using metallic bronze. You can find more painted hardware projects here:
Wait! Don’t Go! It’s that time of the month again for:
Furniture Fixer-Uppers
A few of my creative and talented blogger friends and I have joined together in our monthly Furniture Fixer Uppers share. Let’s see what my friends are up to! Make sure to click the links below the image to check out all the amazing projects that my bloggy girls are working on this month.
- Confessions of a Serial DIYer
- Prodigal Pieces
- Girl in the Garage
- Petticoat Junktion
- Just the Woods (you are here)
- Interior Frugalista (couldn’t make it this month, she’s on a beach in Mexico sipping drinks with fancy umbrellas)
Don’t Forget – Follow Just the Woods and Share this post to Inspire others:
FACEBOOK * INSTAGRAM * PINTEREST
secrets to the perfect finish
Learn how to paint furniture white without yellowing or bleed-through.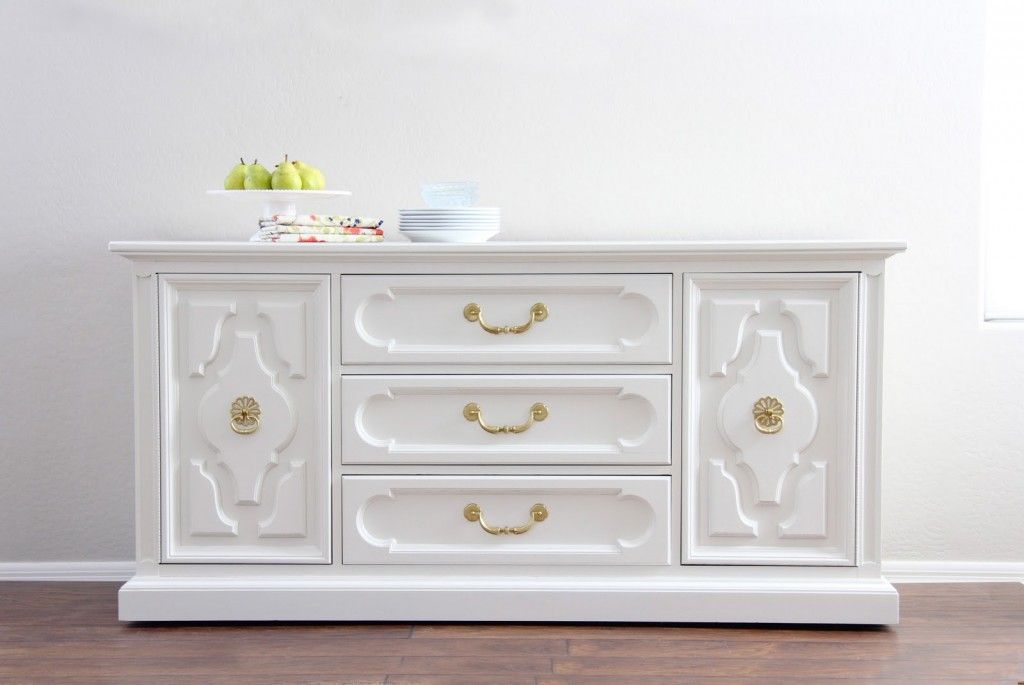 I’m sharing all of my tips and tricks for painting furniture white and getting a perfect finish.
Painting furniture is one of my favorite ways to create a beautiful, one-of-a-kind home on a budget. I love painting furniture with bold, bright colors, but there is also something magical about painting furniture white.
It is so fresh and simple and can work with absolutely any style from farmhouse to midcentury modern to contemporary. And if you’re painting furniture to sell, white furniture is always in demand.
But painting furniture white also comes with a couple of unique challenges.
For one thing bright white paint does not cover as well as other colors of paint. I have tried many, many types of paint and across the board, white paint requires more coats of paint than other colors.
But by far the biggest problem with painting furniture white is yellowing.
This post contains affiliate links which means if you make a purchase after clicking a link I will earn a small commission but it won’t cost you a penny more.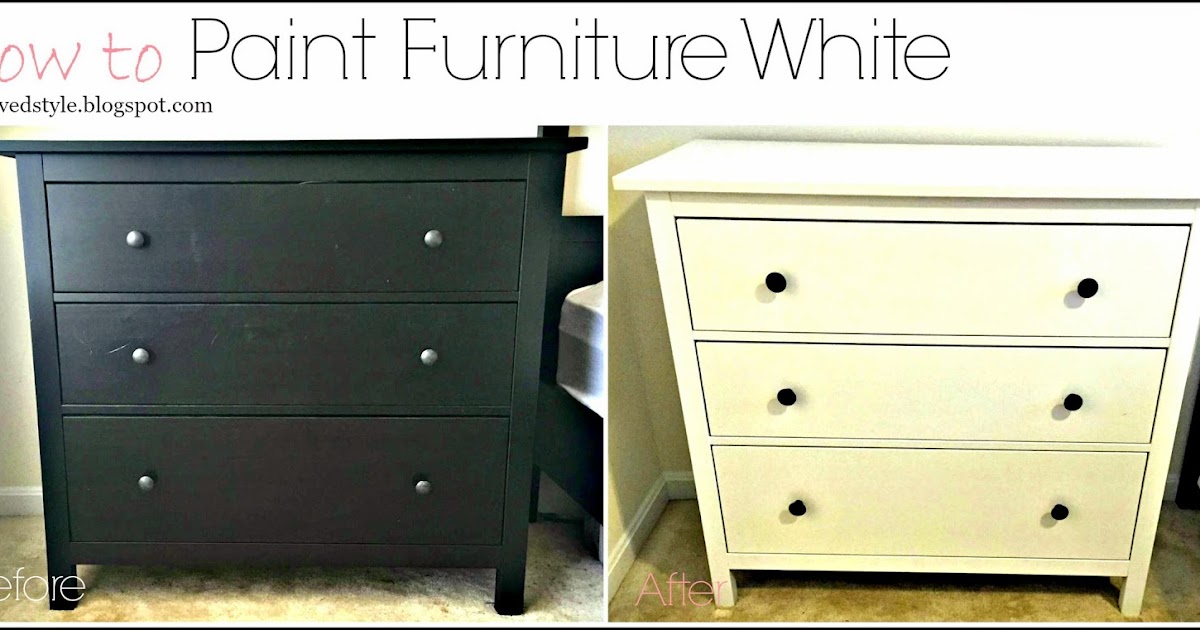 Click here to see my full disclosure policy.
How to prevent white paint from yellowing
The last thing you want to see when you’re putting the last coat of fresh white paint on a piece of furniture is dingy yellow spots, but it’s a pretty common problem.
There are two main reasons white paint yellows.
- Bleed-through. When you paint wood furniture, the moisture in the paint can cause the wood grain to open and release wood tannins, or natural oils within the wood. When you paint furniture white, these tannins will cause your beautiful paint finish to look yellow and splotchy.
- The sealer. Whenever you paint furniture, you need to protect your paint furniture with a clear sealer. Some sealers like polyurethane naturally yellow with time and should never be used over light color paints. But sometimes even the sealers that are supposed to be non-yellowing cause problems over white paint. To be fair, they probably yellow over any color paint, but it’s only noticeable over white paint.

To prevent your white furniture from yellowing, you need to take steps to prevent bleed-through and use the right sealer.
How to prevent bleed through
Preventing bleed-through is pretty simple. All you need to seal in the tannins is a good oil-based primer. Water-based primer isn’t going to cut it, but don’t worry, you can still use a water-based paint like chalk paint or latex paint over an oil-based primer.
My favorite is Zinsser Cover Stain oil-based primer. Every time I’m planning to paint a piece of furniture white, I start with this primer. Well, now I do anyway. I used to try to skip this step and learned pretty quickly that it is definitely necessary.
(I’ve also got a whole post about when you need to use primer and when to skip it if you’ve got more questions.)
Using primer also helps with the problem of needing so many coats of white paint to get even coverage. Starting with white primer cuts down on the coats of paint you will need to get even coverage. And since most paints cost considerably more than primer, this is a real money-saver.
Non-yellowing sealers for white furniture
The second tricky part of painting furniture white is the sealer. Most painted furniture needs to be sealed to protect the paint finish from scuffs, stains, and scratches. But some sealers yellow over time and ruin your beautiful white finish.
Finding the right sealer to protect your white furniture is trickier than you might think. Oil-based sealers like polyurethane are especially prone to yellowing, but even ‘non-yellowing’ sealers like polycrylic can still yellow if they are applied too thickly.
My favorite sealer for painted furniture is General Finishes High Performance Top Coat. It is easy to apply and gives a very durable finish. But even General Finishes had to put a disclaimer on their website about their finish yellowing over white paint.
General Finishes background was originally on the professional side, and the incidences of yellowing topcoat over white paint were almost nil, and when our sprayable professional finish, Enduro White Poly, is used, there have been no incidences.
But as the use of our paints has increased in the up-cycling and furniture refresh markets, we have heard more reports of our topcoat yellowing.
You can tell from their statement that their finish definitely can be used over bright white furniture if applied correctly. If pros can do it with no problem, than the rest of us should be able to make it work as well.
After talking to a few painting pros and painting many pieces of furniture white with fantastic results, I’ve learned a couple of simple tricks to prevent your water-based sealer from yellowing.
- Use several very thin coats of sealer. Thick, gloppy coats are much more prone to yellowing.
- Mix some white paint right into your sealer. Mix your first coat of sealer with 10-15% white paint and 85-90% sealer. Follow with a second and third coat that are 100% sealer for durability.
The best white paints for furniture
Let’s talk about paint for a minute. Every line of furniture paint has a great white paint. In fact most paint lines had several shades of white: a pure white and several other whites with more of a gray or yellow undertone.
Personally, I am partial to pure bright whites. I love pure white because it looks fresh and clean with any color scheme.
The downside of pure white is that it has less pigment than other paints, so it almost always requires more than two coats of paint to get even coverage. White paints with a touch of color tend to need fewer coats of paint.
There are tons of great paints out there, but here are a few that I really love to work with. (And if you want to know more, I have a whole post about the best paints for furniture.)
Bright whites
- General Finishes Milk Paint in Snow White
- DecoArt Satin Enamels in Pure white
- DecoArt Americana Decor Chalky Finish in Everlasting
- Dixie Belle Chalk Paint in Cotton
Whites with a cool/gray undertone
- Fusion Mineral Paint in Lamp White
- Dixie Belle Chalk Paint in Fluff
Whites with a warm/beige undertone
- Fusion Mineral Paint in Raw Silk
- Wise Owl Chalk Synthesis Paint in Antique Villa
- Dixie Belle Chalk Paint in Drop Cloth
Ready to tackle a piece of furniture? Here’s a step-by-step guide to getting the perfect white finish on furniture.
Supplies for painting furniture white
- Cleaner – this is my favorite cleaner to use when painting furniture
- Wood Filler if needed to fill cracks and scratches
- 220 grit sandpaper – if needed to smooth wood filler or rough areas
- Oil-Based Primer – this primer is a must when painting white furniture
- Small foam roller
- Paintbrush – any high quality paint brush will work. These Purdy angle brushes are my favorite for getting a smooth finish on painted furniture.
- White paint of your choice.
- Non-yellowing sealer: I love General Finishes Flat Out Flat for distressed, vintage finishes and General Finishes High Performance Top Coat for smooth, more modern finishes. If you missed it, there is more info on using these topcoats on white furniture above.
- Foam brush or blue sponge applicator – I recently discovered the blue sponge applicator and it is awesome for getting a really smooth finish when applying topcoat.
Tutorial: how to paint furniture white
Painting furniture white is pretty similar to painting furniture any other color, but getting a perfect finish is definitely trickier when you’re using white paint.
These step-by-step instructions include everything you need to know to prevent the bleed through, yellowing, and uneven finish we talked about earlier.
Prepping your furniture for paint
The first step to any furniture painting project is to give your furniture a good cleaning. It’s definitely not the most fun step, but it has to be done. Even if you do everything else right, paint simply isn’t going to stick to dust, dirt, or grease.
I like to use Krud Kutter PrePaint Cleaner for cleaning. It’s quick and easy and gets the job done. A simple mixture of water and dawn dish soap also works well.
Once your furniture is clean and dry, look it over to see if any repairs need to be made before painting. If anything is loose or needs to be repaired, this is the time to do it.
Remove any hardware you don’t want painted. If you are planning to replace any drawer pulls or knobs, check to see if you will need to change the placement of the screw holes. If so, fill in the old holes with wood filler and sand smooth. You can fill any deep scratches with wood filler as well.
When the wood filler has completely dried, sand it smooth with 220 grit sandpaper.
In most cases you don’t need to sand your entire piece of furniture before painting, but there are a couple of exceptions.
If your furniture has a very slick, glossy finish, it’s a good idea to lightly sand the entire thing with 220 grit sandpaper to rough it up just a bit. This will help give the primer a better surface to grip. And if your furniture has any spots that are rough to the touch, you can use sandpaper to sand them smooth.
After sanding, clean off all of the dust.
Priming your furniture
You don’t have to use primer every time your paint a piece of furniture. But if you are painting furniture white, primer is always a good idea.
As I mentioned above, one of the biggest issues with painting furniture white is bleed-through. The best way to stop bleed-through is to start with a coat of oil-based primer.
I use Zinsser Cover Stain oil-based primer all the time and it has never failed me. And yes, you can use any paint over an oil-based primer including latex paint or chalk paint.
A small foam paint roller works great for priming the large, flat sides of your furniture piece and a paintbrush can help get any edges and crevices the roller can’t reach.
I recommend keeping a separate paintbrush on hand for applying oil-based products like primer. Also, remember that whenever you paint with oil-based primer or paint, you will need to clean your paintbrush using mineral spirits rather than water.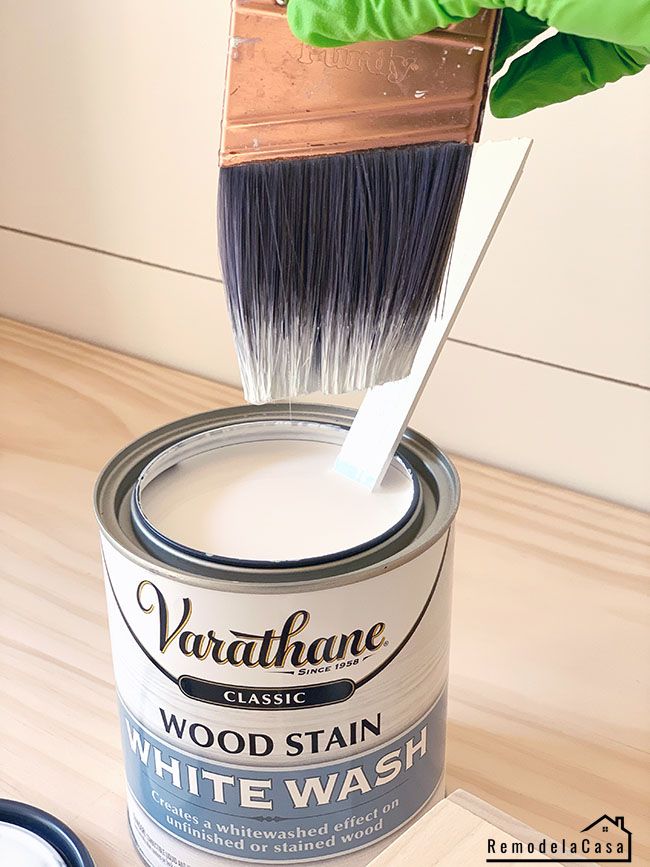
Don’t worry if your furniture looks messy and blotchy with only the primer. That is totally normal and once you start painting, it will look much better.
Painting your furniture white
And now for that gorgeous white paint you chose!
Again, you can paint the large, flat surfaces of your furniture with a small, foam roller and then use a paintbrush to prime any areas the roller can’t reach. These are my top paintbrush picks if you aren’t sure what kind to use.
As I mentioned above, it will probably take three or more coats of paint to get an even finish. Be sure to let the paint dry completely between coats and avoid the temptation to touch up the paint while it is still wet.
What to do if you still have bleed-through
There have been a few times when I still had a few small spots of yellow bleed-through on my paint finish even after properly priming. This is almost always because I missed a few spots with the primer.
How will you know if it is bleed-through? If you yellow or brown spots or streaks appear on your fresh paint, you have bleed-through.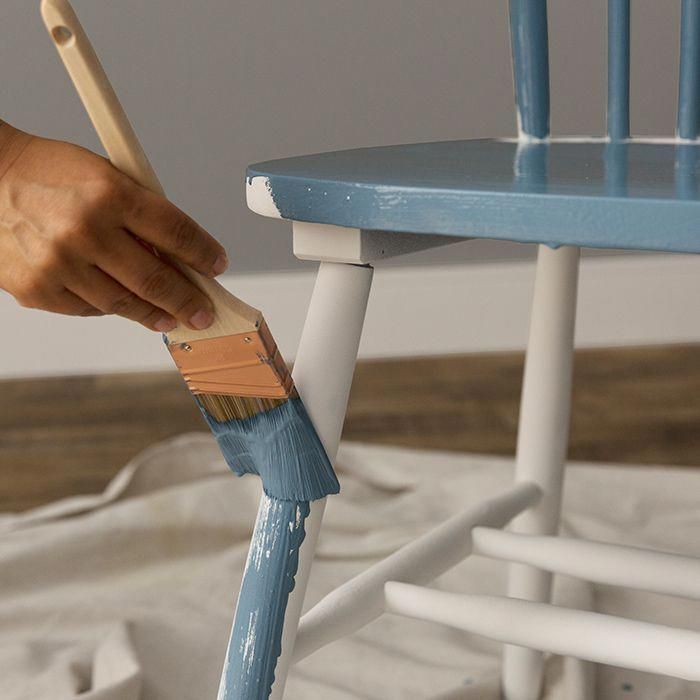
If this happens to you, don’t panic. You can fix it without completely starting over.
But you do have to fix it. If wood tannins are messing up your paint finish, adding more coats of paint absolutely will not work. (Believe me, I’ve tried.)
Allow your paint to dry completely. Then pull your oil-based primer back out. Use a paintbrush to paint an even coat of primer just around the spots where you are having bleed-through.
You don’t need to re-prime the entire piece, but do make sure you completely cover the trouble spots. Once the primer is completely dry, you can continue painting.
Sealing your white furniture
The final step is sealing that beautiful paint finish. Sealing your painted furniture is one of the most important things you can do to make sure your paint finish lasts. Of course as I mentioned before, this step is a bit trickier when painting furniture white.
I prefer to use General Finishes High Performance Top Coat.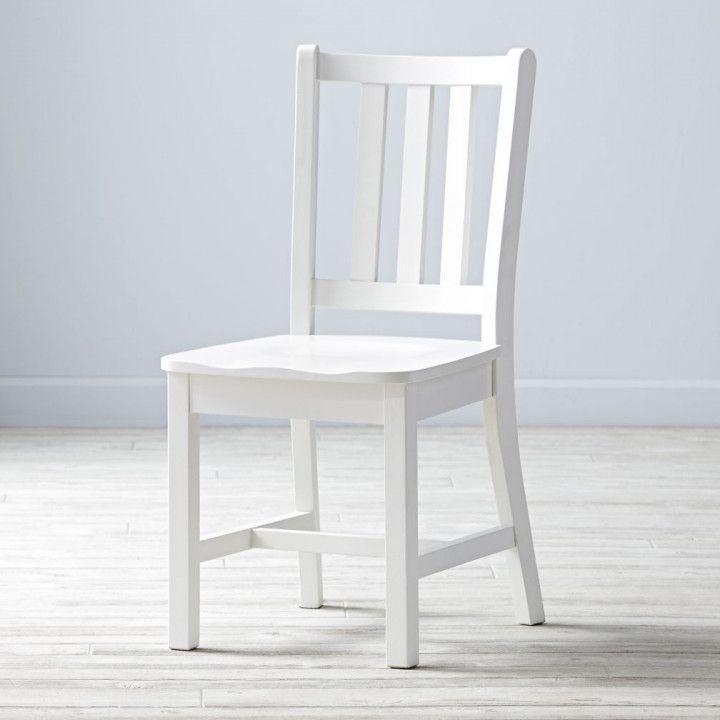 I typically apply my topcoat with a foam brush, but I recently started using the blue sponge applicator from Dixie Belle paints for applying my topcoat and love the smooth finish it gives.
If you used more of a creamy/warm shade of white, you won’t need to worry so much about your paint yellowing. You can apply your topcoat straight from the can. Just be sure to use several thin, even coats.
If you used a pure white shade, it helps to mix some of your paint with your sealer. You can mix them in a spare paint can or even a plastic cup. Mix your first coat of sealer 15/85 paint to sealer. (You don’t have to be exact; just estimate.)
Follow with a second and third coat that are 100% sealer. Remember to use several thin coats and apply the sealer in long, even strokes rather than a lot of short back and forth strokes.
I like to do 3 – 4 coats of sealer on high traffic furniture pieces. You may be able to get away with 2 coats on furniture that doesn’t get handled often and on pieces with a distressed finish. (Since any chips and dings will just add to the distressed look rather than ruining the finish).
Once your final coat of sealer is dry, you can begin using your painted furniture, but be extra gentle with it for the first several weeks.
Paint can take up to 30 days to fully cure/harden even after it is dry to the touch. This is the time when it is the most likely to get scratched and dinged.
Okay, now you’re prepared. Go forth and paint all the furniture white!
Materials
- Wood Filler
- 220 grit sandpaper
- Oil-Based Primer
- White paint
- Sealer
Tools
- Small Foam Roller
- Paintbrush
- Paint Tray
Instructions
- Prep the furniture piece by giving your furniture a good cleaning.
- Take care of any necessary repairs.

- Remove any hardware you don’t want painted.
- Fill in the old holes with wood filler and sand smooth.
- Prime with an oil-based primer using a small foam paint roller for priming the large, flat sides of your furniture piece and a paintbrush to prime the small areas.
- Once the primer is dry you can paint the large, flat surfaces with a small, foam roller with the white paint of your choice. Use a paintbrush to paint the smaller areas.
- Repeat with 2-3 coats of paint, allowing the paint to dry completely between coats.
- For high-traffic pieces, finish with 2 coats of a nonyellowing water-based furniture sealer.
Recommended Products
As an Amazon Associate and member of other affiliate programs, I earn from qualifying purchases.
-
3M 9000NA-20-CC Sandpaper Aluminum Obyide, 9-Inch by 11-Inch, Very Fine
-
Purdy 144024420 White Bristle Series Adjutant Angle Sash Paint Brush, 2 inch
-
FoamPRO 184 Finest Finish Mini Roller (High-Density Foam) 4"
-
KRUD KUTTER PC326 PC32 Prepaint Cleaner/TSP Substitute, 32-Ounce, Original Version
-
General Finishes High Performance Water Based Topcoat, 1 Quart, Satin
-
Zinsser 03504 Cover Stain Interior/Exterior Oil Primer Sealer, 1-Quart, White
Google Web Story: How to Paint Furniture White
How to paint white furniture at home
A chest of drawers that you inherited from your grandmother, an old mirror in a wooden frame, a chair whose color has become boring - these things are connected with the past and sometimes we feel sorry to send them to a landfill. Yes, and there is no need to get rid of them. Often an old chest of drawers is very dear to us, and these memories cannot be replaced by any new model from the store.
Therefore, we are faced with the task of updating it. How to paint furniture at home? You will find the answer to this and some other questions in this article.
Contents
- How to paint old furniture with your own hands?
- How to paint furniture white?
- How to paint antique furniture?
- We paint old furniture with our own hands
- Whitening with bleaching paste
- Express whitening
All it takes is a little patience and diligence, paint and a brush, which are available in every self-respecting hardware store, and you can update your favorite dresser or chair with your own hands.
How to paint furniture white?
Metamorphosis in white is a great way to extend the life of old interior items, old equipment and give them new life.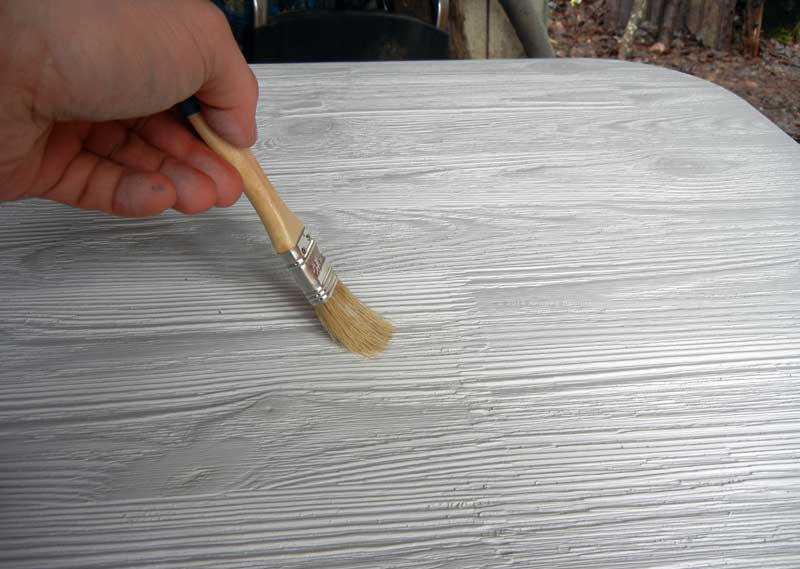 Do you dream of wooden doors in the Provence style?
Or maybe you want to transform a table that has served you for many years into a Provence style kitchen interior? Are you attracted by the white wardrobe in the nursery, which will be a great addition to the nautical-style interior? Or maybe you have long dreamed of a white chest of drawers in the bedroom or shelves in the bathroom? All in your hands.
How to paint antique furniture?
Do-it-yourself antique Provence style white furniture can be finished to look old and very stylish. How to paint furniture in Provence style? You will need to treat the furniture in two steps:
- bleaching,
- light sanding.
The best wood products for this purpose are made of solid wood: oak, pine, birch, beech.
What paint to paint the furniture white and what tools do you need?
For work, you should prepare:
- dark pigment and white acrylic paint or two colors of acrylic paints,
- white wax candles,
- brushes,
- coarse and fine-grained sandpaper,
- knife, , .

We paint old furniture with our own hands
- Clean the surface of the dresser or chair from dust, wipe it several times with a damp cloth and leave to dry completely.
- If the surface is painted, remove the varnish layer with sandpaper (first coarse, then fine).
- Places you want to emphasize: carvings, slats, edges, should be covered with a darker paint (brown and blue shades are ideal here). Leave the paint to dry.
- For an uneven and natural effect of worn corners, wax previously painted areas with dark paint. The wax will make sure that the next coat of paint won't stick to those areas.
- Paint the entire surface with white paint, preferably several times, with drying intervals. Avoid stains.
- Places covered with an additional layer of paint and wax should be rubbed with a knife. Do not press too hard - this way you will get a good effect.
- Rub the entire surface with fine sandpaper to level the surface.
Bleaching with bleaching paste
Bleaching with bleaching paste consists of wiping wood with a special paste containing wax and pigment. Characteristic white lines appear on the wooden surface, so it will look older. Porous wood is suitable for such bleaching - trees such as oak, ash.
You need to buy in the store:
- special paste,
- prepare the paint in the selected color,
- metal brush,
- hard brush,
- cloth,
- piece of rough and fine sanding paper.
Work order:
- Wipe the clean surface of the chair or chest of drawers several times with a damp cloth and leave to dry.
- If the surface is painted, remove the varnish layer with sandpaper.
- Paint the surface with paint, let it dry.
- Using a wire brush for wood, make tiny grooves according to the grain orientation.
- Apply whitening paste, fill the grooves well and wait for the paste to dry.

- Wipe the surface with a dry cloth.
- Lacquer the surface.
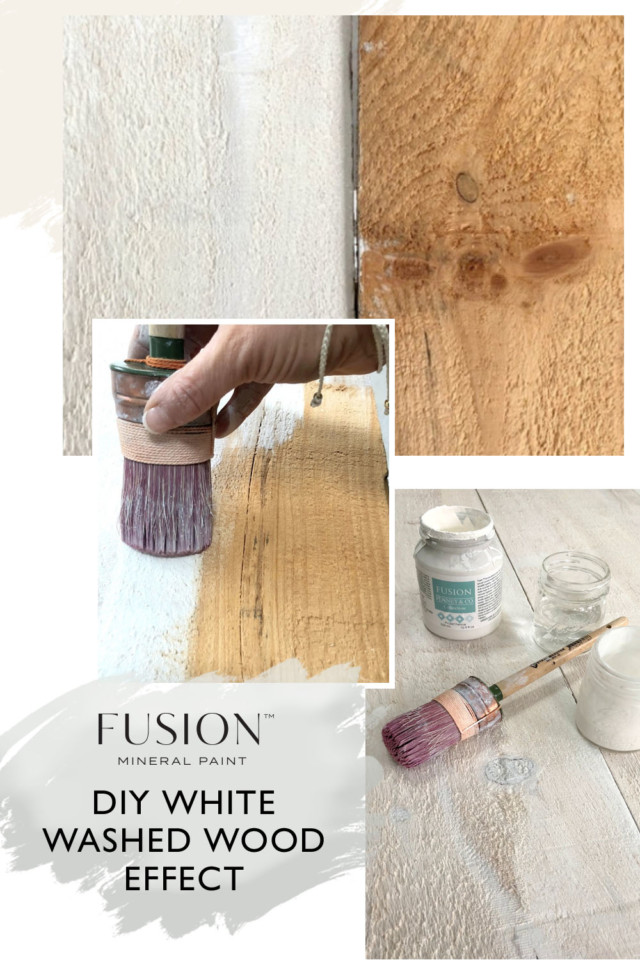
Express whitening
If you want to give new life to a simple wooden stool, you can do it with the effect of washed off white paint. Nothing could be easier.
You will need:
- sandpaper,
- white paint,
- varnish,
- brush.
How to use:
- Wipe the wood surface with sandpaper.
- Using a brush, apply a coat of paint.
- When the paint is dry, remove excess paint with a tissue.
- Lacquer the wood.
Bleach is a good way to freshen up old furniture. In this way, you can update rattan country furniture, old stools, grandmother's table and chest of drawers with beautiful carvings, an old mirror frame and other wooden interior elements, creating beautiful decorations in the Provence style.
How to repaint white furniture at home
Gusevsky Andrey Anatolyevich
An old wall repainted white
Many people wonder how to repaint furniture that was originally dark in white. Of course, this is not difficult to do even at home. The most important thing is how to prepare the piece of furniture that we will be repainting.
If there are concerns that it will not be possible to cope with the task qualitatively, you can turn to a trusted master. So you will be sure that your dear piece of furniture will not become a victim of the experiment.
You also need to take care of security measures. This is not only goggles and gloves, you also need a respirator or a gauze bandage on your face. It will be needed both from the smells of paint and chemicals, and from dust when removing the old coating and cleaning the surface.
Again, you need to decide where you can repaint the furniture. The room should be well ventilated and there should be no small insects in it, which, sticking to a freshly painted surface, will let all the work down the drain.
What tools and materials will be needed
Some materials and tools that will be needed to repaint furniture
To clean a piece of furniture from the old coating and paint it, we need:
- Detergent diluted in warm water - to clean and degrease the surface .
- Soft brush - sweep away dust after sanding.
- Primer - for leveling the surface of the product.
- Putty - for sealing deep cracks, scratches and chips.
- Screwdriver set - take apart a piece of furniture.
- Rubber spatula - for primer and filler.
- Building dryer or chemical special products - for removing old varnish.
- Acrylic paint in cans or cans.
- Tray for paint, if it is in a can.
- Lacquer matt or glossy - for protection and gloss of the painted surface.
- Roller - for painting wide surfaces.
- Brushes - for painting small details and corners.
- Masking tape or film - to protect non-paintable surfaces (mirrors, glass).
Tip! Choose a primer with a shade that matches the color of the paint. When choosing brushes, make sure that the bristles do not crumble.
Which paint to choose
But the photo shows how huge the choice of white paint is
It is better to use furniture and water-based paint (see Choosing what to paint old furniture with).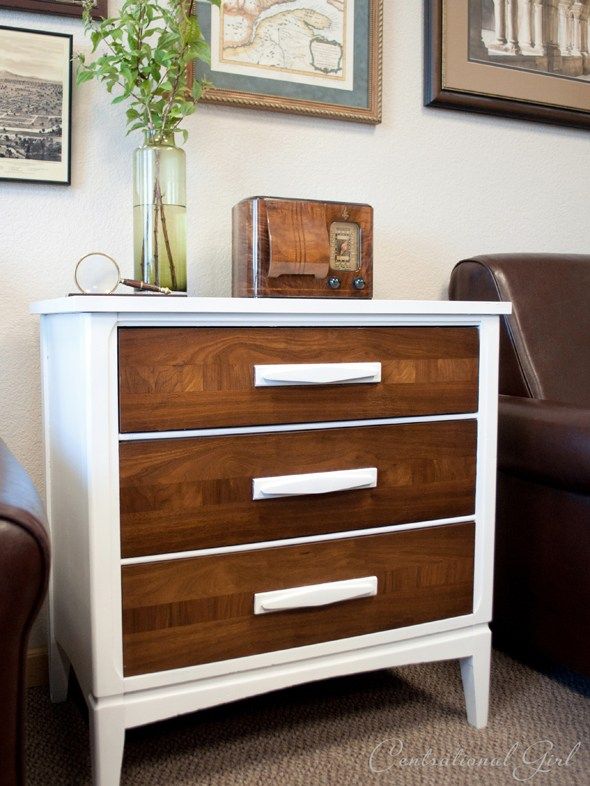 These include acrylic compounds, they are non-toxic and breathable, giving the wood the ability to "breathe". This is a very important factor, it will help protect the product from mold and mildew. In addition, acrylic paints are practically odorless, and we will not have to put the household out of the house while repainting the furniture.
Solvent-based alkyd paints are also good. Their price is the same as that of acrylic. They are particularly suitable for damp areas such as bathrooms.
Oil paints and nitro paints are suitable if there is a separate room for painting furniture, as they take longer to dry than acrylics and have a rather strong smell.
When choosing a paint, you should immediately choose a primer for it. Manufacturers produce paint and primer for their paint, so their adhesion will be much more effective.
Arriving at the store, we see what a variety of white paint is presented. What shade to repaint the furniture in white?
Professionals advise taking probes and attaching them to furniture for a few days to observe. For example, lighting is very important when choosing a shade. Natural light changes throughout the day, and in the evening we turn on the light bulbs and the hue changes.
Different shade colors look different. Matte paints create a soft look by absorbing light. Glossy paints reflect light, which makes whites very bright.
White colors can also be:
- Warm - halftones of red, orange or yellow are added to white.
- Cool - white with green or blue undertones.
Interesting! If there is a purple undertone in the white color, then over time the color will begin to appear pink. White paint with yellow undertones has been in vogue for many years and is now considered old fashioned.
When choosing shades of white, you need to take into account both the lighting and the overall picture of the entire interior of the room.
Getting started
Cleaning furniture before painting
Below is a step by step guide on how to repaint furniture by yourself:
- First you need to properly wash the piece of furniture with a detergent diluted in water.
 We are waiting for complete drying and disassemble the product for spare parts (drawers, doors and handles).
 - We clean all planes with sandpaper with a fine-grained surface. This will help erase the old paint and even out small irregularities in the product.
- Apply a layer of primer to level the entire surface of the furniture, wait for drying. If there are deep scratches or chips on the surface, we close them with putty. On top, apply another layer of primer.
- We clean everything from dust and dirt with a soft dry brush, you can also use a vacuum cleaner. It is not recommended to wipe the dust with a damp cloth, as the dirt will clog into the pores and cracks of the surface.
- We cover the places that we will not paint with masking tape or film. You also need to protect the floor and nearby objects, especially if you use spray paint.
- Apply the first layer of paint to a completely dry product and wait until it is completely dry. Only then can the next layer be applied.
 Two or three layers are enough for a piece of furniture to acquire a new white color.
 - When all layers of paint are completely dry, you can apply a coat of varnish. Depending on what you want to see, you can use both glossy varnish and matte. It will protect furniture from wear and tear and give a special charm.
Old lacquered furniture
Removing old lacquer with a spatula
How to repaint lacquered furniture? Yes, just like repainting polished furniture and any other. The only catch is the old cracked varnish or polish. E
can be removed in several ways:
- The mechanical method is the cheapest and most affordable , but also the longest and most laborious. Old polishing or varnishing is removed with sandpaper or scrapers. After choosing it, do not forget to wear safety glasses so that dust and small pieces do not get into your eyes.
Learn more
- Organize laundry room shelves
- Houses with extensions
- Best furniture vacuum for pet hair

- Shower tile pictures of bathrooms
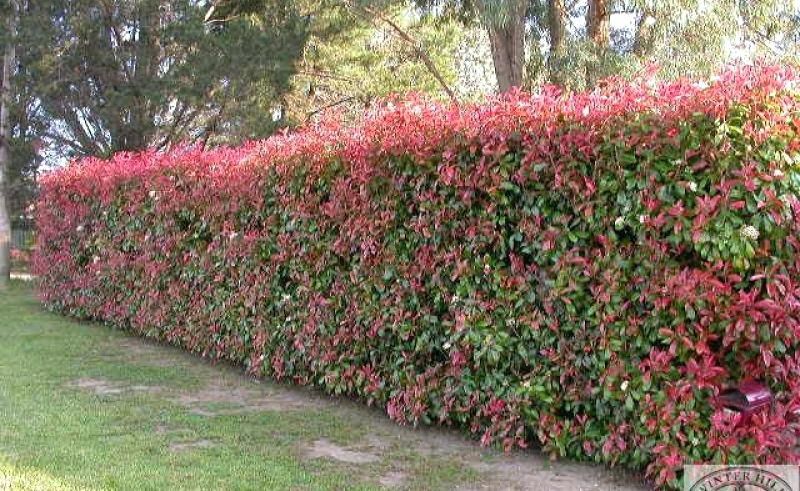
- Best privacy hedge in shade
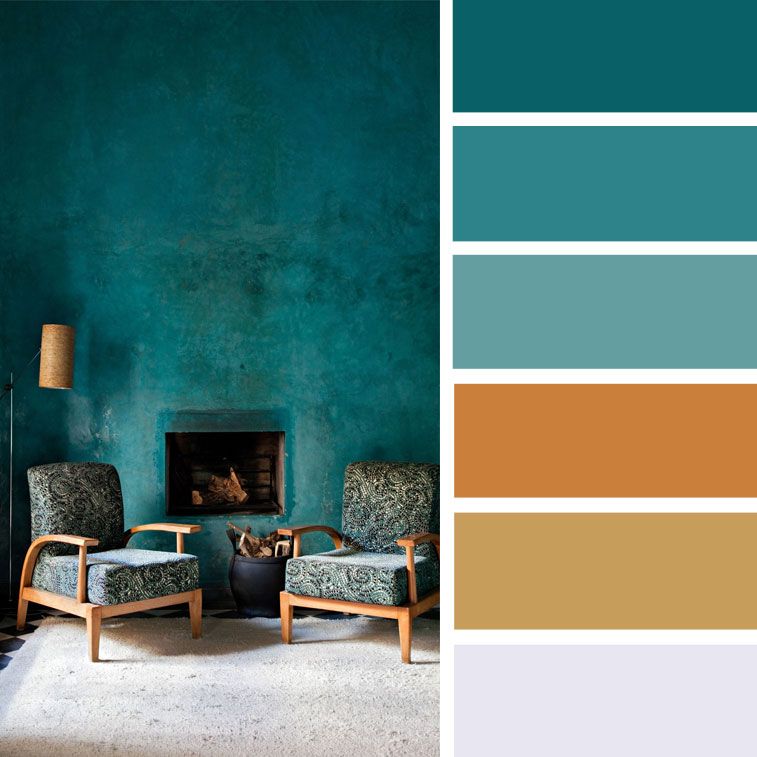
- Room colour schemes
- Which plants benefit from coffee grounds

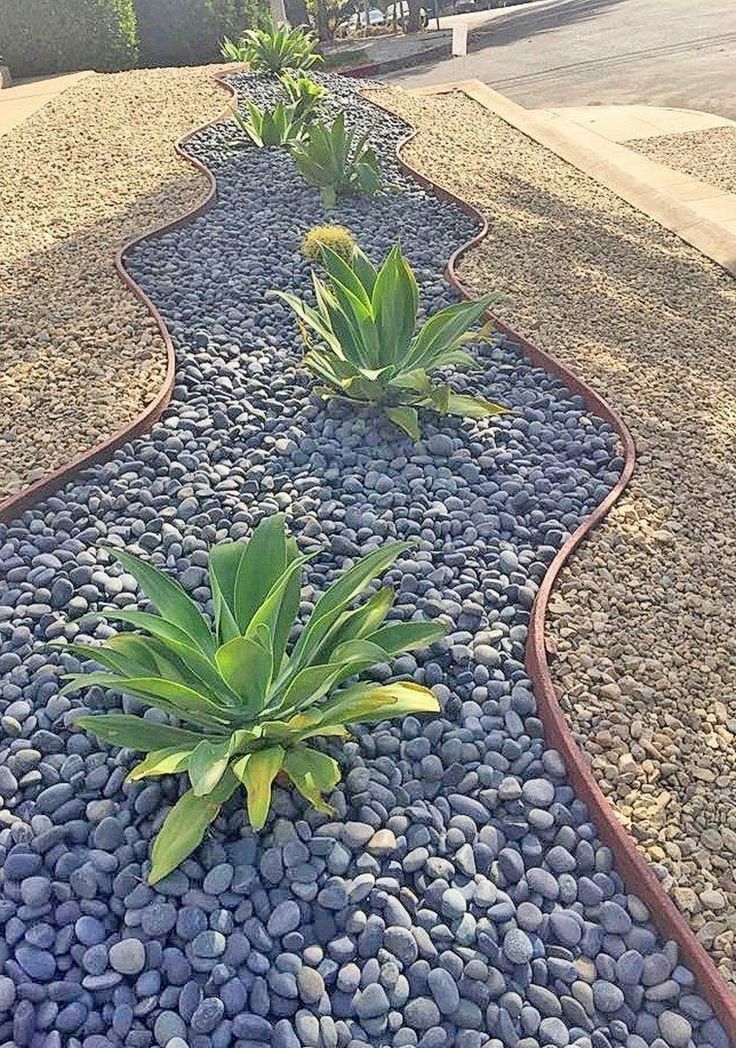
- Low maintenance landscaping rocks
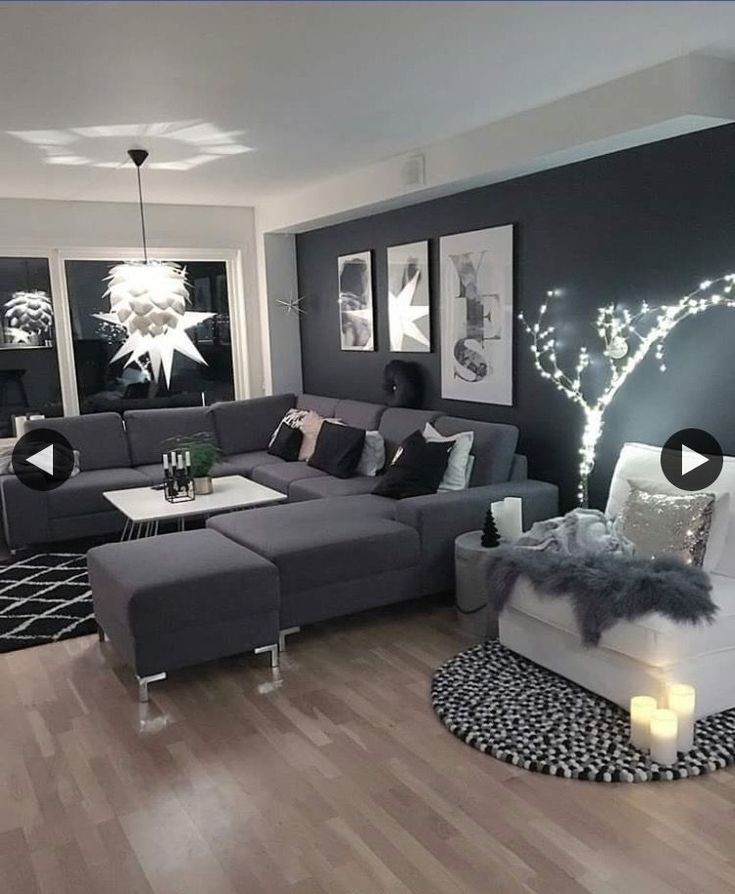
- Living room decor ideas grey walls
- Best entryway color
- Color combinations for kitchens
