Paint to go over wallpaper
How to Paint Over Wallpaper
So, you want to change the look and feel of your room, starting with a fresh coat of paint.
Standing in your way, though, is a layer or more of wallpaper that was surely the delight of whoever chose it, perhaps many years ago. And that might even be you. But wallpaper trends come and go.
Should you paint over the wallpaper? Can it even be done? Let’s start with the wisdom of doing it or not doing it, and then (spoiler alert) launch into the how-to.
Can You Paint Over Wallpaper?If you ask a painting expert or paint manufacturer, you will likely be told that the best approach is to remove the wallpaper first and remove any residual adhesive before painting. But there are times when removing the wallpaper can actually harm the wall beneath.
That can happen if the wallpaper was installed over unfinished drywall or plaster. Or you might be facing the removal of multiple layers of wallpaper, which would make the task exponentially more difficult.
Some wallpaper should not be painted over. That would include wallpaper that is peeling in multiple places, and certain types of wallpaper such as fabric-backed vinyl.
But the good news is that these types of wallpaper are fairly easy to remove. In fact, fortunately, the rule of thumb is that the bad candidates for painting over are easy to remove, and the wallpaper that would be difficult to remove is a good candidate for painting over.
So, before deciding to leave the wallpaper in place, try to remove it. Let your success or failure to be your guide. And also consider that while removing wallpaper can be a major hassle, removing wallpaper that has been painted over is an even more major hassle.
The bottom line is: Yes, you can paint over wallpaper with some exceptions and considerations. The secret’s in the preparation. Here’s how it’s done.
Steps for Painting Over WallpaperFollow these steps to learn how to paint over wallpaper in your home.
Wipe the dust and dirt off the walls with a barely damp cloth. Primer won’t stick well to a layer of dust.
If the walls are greasy and grimy (think highly-used kitchen), clean them with a diluted solution of TSP. Don’t soak the walls with the water or solution because that could soften the adhesive below the wallpaper and cause it to loosen or bubble.
Leave plenty of time for the walls to dry.
Step 2: Repair any damages to the wallpaperLook for peeling edges or seams, as these are the weakest areas in terms of adhesion. Some experts recommend using a thin layer of wallpaper seam adhesive to reattach these loose fragments.
Another recommendation is to lift those areas with a thin putty knife, cutting the loose bits away and filling in with spackle to create a level surface, then sanding lightly when completely dry.
If the wallpaper has a texture you don’t want to detect through the paint, the whole wall should be sanded until smooth, using either a palm or orbital sander. With a slightly damp cloth, wipe away dust.
Using painters tape, carefully tape off any molding, trim, wainscot, or baseboard you want to protect.
Step 4: Prime the wallsNo matter which type of topcoat you will be using—oil-based or water-based—you want to use an oil-based primer. That’s because a water-based primer could soak into the wallpaper and loosen the adhesive.
An oil-based primer will not do that. Just as with painting, use a brush to cut in the corners and edges, then use a roller to finish the big stretches.
Allow plenty of time to dry according to the manufacturer’s directions. Make sure there is plenty of ventilation in the space.
Step 5: Start paintingOnce the wallpaper is cleaned, repaired, and primed, paint it as you would any other surface. This will be especially necessary if the wallpaper has a bold pattern, or if you are applying light-colored paint over dark-colored wallpaper. You’ll likely need two coats, with plenty of drying time in between.
Painting over wallpaper can be done, and sometimes it should be done rather than removing the wallpaper.
As with many home improvements, the quality of the result depends on the effort exerted at the beginning. In other words, it’s all in the preparation.
Supplies Needed
- Goggles
- Gloves
- Mask or respirator
- Long-sleeve clothing
- Bucket of warm water
- TSP (trisodium phosphate)
- Soft cloths
- Putty knife
- Wallpaper seam adhesive/spackle (as needed)
- Sandpaper (150- to 180-grit)
- Painters tape
- Oil-based primer
- Brushes and roller
- Mineral spirits
- Topcoat paint of your choice
How to Paint Over Wallpaper
Home Projects
hacks
Painting
by Erin Johnson
updated Sep 8, 2022
We independently select these products—if you buy from one of our links, we may earn a commission.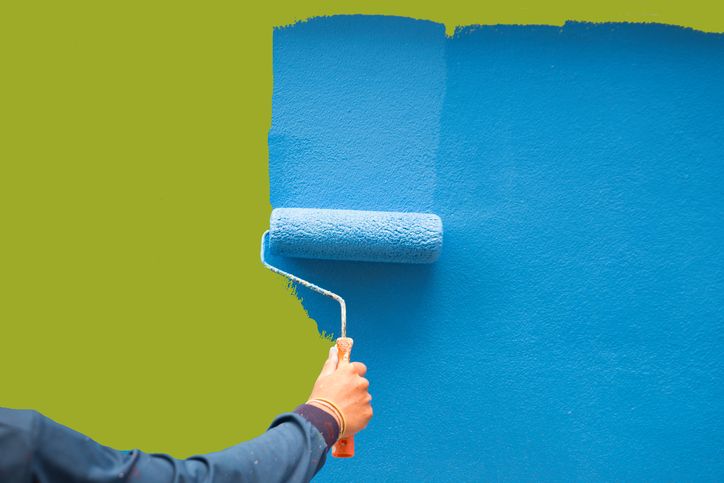 All prices were accurate at the time of publishing.
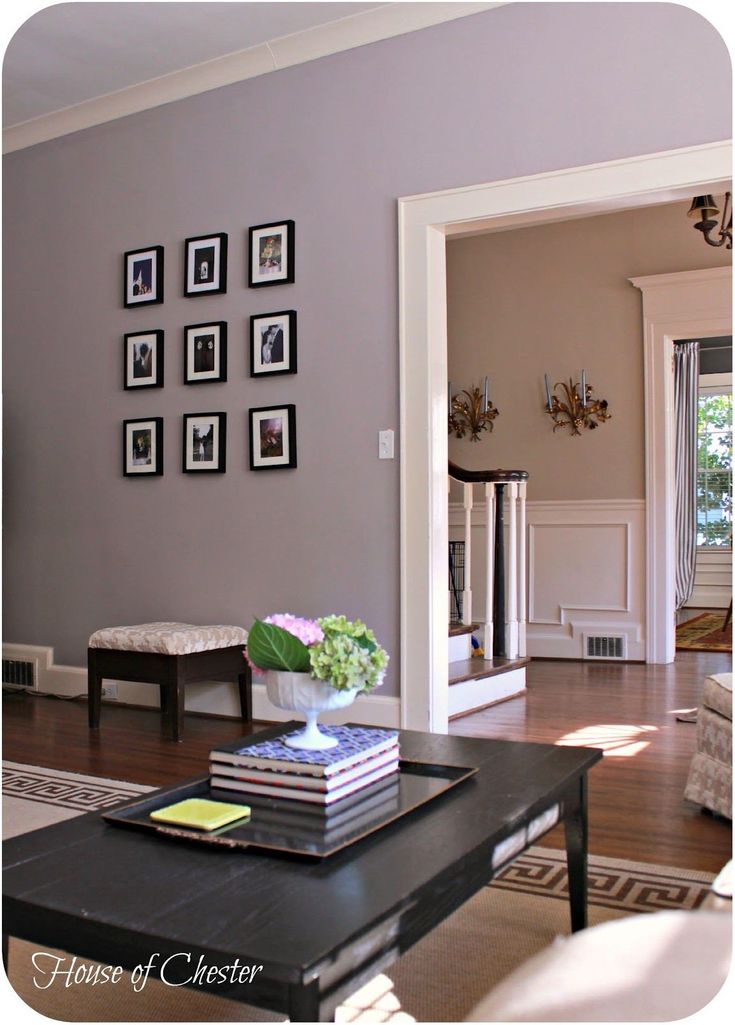
See More Images
We love wallpaper. Give us wallpaper on ceilings, or removable wallpaper in rental spaces or dorm rooms. We’ll take it anywhere—it can be a great, bold way to add some personality to your space. But sometimes, you move into a home with existing wallpaper that’s just not your style and you’re not up for a complete wallpaper removal project, so can you just paint over it? Ian Snyder, professional painting contractor of The Happy Brush in Hudson Valley New York, says yes, you can paint over wallpaper—if you follow these essential tips.
For more content like this follow
When Should You Paint Over Wallpaper?
When deciding whether to paint over wallpaper or not, Snyder says it really comes down to the time and money you’re willing to spend on the project. “There are different types of wallpaper, and some come off easy, and some do not come off,” Snyder says.
He suggests testing a small spot. If you can get the wallpaper to peel off, you will be able to steam it off altogether. But if you find that the paper is really stubborn and you’re going to have to dig behind the paper to remove it, then the process runs the risk of damaging the wall behind it. In that case, painting over it might be the better option.
“If it really is hard to come off and it’s more than one layer of paper—sometimes old homes have two or three layers—and if time and money are of the essence, do not try to remove it,” Snyder says.
The size of the space may play into your decision, as well. An open living room will give you adequate space to put in some elbow grease, but removing stubborn wallpaper from a small bathroom or tiny closet might prove to be more of a headache than you’re willing to take on.
How to Paint Over Wallpaper
If you’ve decided that painting over the wallpaper in your room is the best course of action, check out the below tips from Snyder on how to do it correctly.
1. Wear protective gear.
You’re going to be working with some strong chemicals, so be sure to protect your skin. Here’s what you should have.
It’s also worth investing in a $30-$40 respirator mask to protect your lungs. Be sure to open some windows to get some ventilation going to help alleviate the smell, as well.
SavePin ItSee More Images
2. Choose the right primer for the job.
If you’re dealing with older wallpaper, then it was most likely pasted to the wall over a chemical compound called sizing, which helped protect plaster walls from the moisture of an adhesive. “If you go to paint it, that glue can stain your paint if you don’t seal it,” Snyder says, “so you have to use an oil-based or shellac-based primer first before you paint over it.”
You’ll want to use an oil-based primer over the wallpaper before you paint. Oil-based primers can take longer to dry, and the smell will be overbearing, but some fast drying options are now available.
“Oil-based primer will block anything coming through,” Snyder says. “Whether there are patterns on the wallpaper or the glue behind it, it will block that so you can paint right over it.” Check the instructions on your oil-based primer to make sure it’s compatible with water-based latex paints.
While oil-based primers can be great, Snyder says the strong smell is worth noting, and when possible, he prefers to use B-I-N shellac-based primer instead. The smell dissipates faster and it dries in 15 to 30 minutes (and it tends to dampen any bubbles out of the wallpaper because it sucks the moisture out). You’ll be able to use latex paint over this primer.
When using oil-based primer, have mineral spirits on hand to clean up any spills or outside-the-lines moments, as well as your brushes afterward. If you’re going to use alcohol or shellac-based product, have denatured alcohol on hand to clean up.
Snyder says it’s important to use quality products and recommends Purdy or Corona brand brushes, and roller covers in a ⅜-inch-thick size. “Don’t go cheap on brushes and roller covers!” he says. “Better brushes and covers mean better coverage and application.”
3. Prep your space.
Clean your walls with a damp (not wet!) rag to remove any dust or dirt that might have collected on your wallpaper. Tape off the wall trim to protect it from the primer. It’s best to move as much of the furniture out of the room as possible; make sure to cover whatever you can’t move.
4. Repair any obvious problem spots
Are parts of the wallpaper peeling off, or are the seams popping up in spots? Snyder says to take a sheetrock knife, cut off the loose piece, then use a brush to paint the B-I-N primer over the spot to seal it off. For seams that might be curling up, he recommends cutting off the part that’s curling and sealing it with B-I-N, as well.
“Any exposed areas, seal it with B-I-N first, then you can use spackling compound over it once it’s dry,” Snyder says. If you have textured wallpaper, he recommends using an orbital or palm sander with 150-180 grit sandpaper to smooth down the surface to an even level.
See More Images
5. Prime before painting over the wallpaper
Your surface is smooth, clean, you’ve taken all safety precautions, and now you are ready to apply primer. Snyder advises taking a “less is more” approach when starting. “Oil-based primers and B-I-N primers can be kind of splashy,” says Snyder. “Go slow at first. Less is more. Use a little bit until you get used to the feel of it.”
Once your primer has dried, reinspect to see if there are any rough spots in the wall. If you need to go back to fix something at this point, Snyder recommends using 3M Patch Plus Primer spackling compound because it already contains primer; that way, you won’t have to re-prime the entire wall. If you take your time and are using quality products, one coat of primer should do.
6. Paint over the wallpaper
Once the primer has dried, you’re ready to officially paint over your wallpaper and give your space the style stamp it deserves. Find instructions for how to paint a room here.
How to paint walls: over wallpaper or immediately over putty
You can paint walls in different ways: someone applies paint immediately over putty, someone first glues the wallpaper and paints it already. Together with Evgeny Zimin, an apartment renovation and decoration specialist, we compared two wall painting technologies to find out which one is simpler, more practical and cheaper.
Material Handling
Leveling
The key step in preparing for wall finishing is leveling the surface, so you still have to plaster and filler, no matter what technology you choose. But in the case of wallpaper, the process is much easier. nine0009
If you paint over wallpaper, you can carefully not putty: close the cracks and smooth out the pits, and the rest of the bumps will not catch your eye because of the texture of the wallpaper itself. You can easily handle the job yourself. The main thing is to evenly connect the joints when gluing wallpaper and choose a suitable roller for painting. The easiest way to work with non-woven wallpaper, because in the case of them, glue is applied to the wall, and not to the canvas.
Pros and cons of different paintable wallpapers
Paper ones are the most budgetary, but they are easily torn and soaked when painting.
Non-woven is convenient to glue, they provide additional sound insulation, but deteriorate due to water: put a stain - and you have to repaint.
Vinyl can be washed, but in a fire they release toxic substances, which many are afraid of. Some vinyl wallpapers are produced on non-woven base.
Glass fiber - the most durable, washable and environmentally friendly, therefore more expensive than the rest.
If painting over putty, plaster the wall, apply putty and level carefully. Then stick on fiberglass - a material that will protect against "hairline cracks" that look like cobwebs. Next, cover the wall with polymer putty in two or more layers to level it as much as possible. And to create a perfectly smooth base, sand the surface at the finishing stage. It is very important to level the wall well, because any flaws will become visible when you paint it. nine0009
The walls must be leveled to the smoothest possible state, even before applying decorative plaster, so that the coating does not peel off.
Painting
Whether you paint over wallpaper or putty, be aware that paint that has been applied incorrectly can leave streaks and smudges that need to be covered up with a new coat. The main mistakes during painting:
- work with a roller chaotically
- put too much paint on it
- paint with strong pressure
On the other hand, well-painted walls look like a single whole, without joints and roughness. To get such a result, it is better to hire an experienced master.
Practicality
Cracks
Many people don't do final repairs in a new apartment for the first few years, because they are afraid that expensive finishing materials will be damaged when the house shrinks.
If you paint over putty, fear is justified: because of the shift of the walls, cracks can actually appear on them. Then the surface will have to be puttied and painted again. If during this time the paint faded in the sun or for other reasons changed shade, the room will need to be repainted entirely. nine0009
If you paint over wallpaper, you don't have to worry: small, medium and even large cracks will not be visible behind the wallpaper, especially when it comes to glass. They additionally reinforce the wall and are difficult to tear because they contain strong starch-impregnated fiberglass threads.
Mechanical damage
If you have small children and pets at home, it is better to choose wallpaper for painting. Minor scratches from the claws will be less visible, and children's drawings can always be washed or painted over. The most resistant in this respect - glass. Any stains from them can be washed off with household chemicals, and it is very difficult to scratch them. nine0009
Painted plaster is much easier to damage, for example, you can accidentally hit the wall when rearranging furniture. The paint may peel off from bumps and cracks.
Contamination
If you have painted over putty, it is better to wash the walls no more than twice a year in dry, sunny weather so that they dry quickly and without streaks. When choosing a shade, keep in mind that dark colors get dirty much more than light ones.
A washing method that suits one type of paint may ruin another. Wipe water-based paint with a dry sponge. For acrylics and silicones, choose mild products such as soap or dishwashing gel. Wash alkyd enamel with a solution of ammonia and water. nine0018If you have painted over wallpaper, then the further surface care is similar: wash vinyl and glass with a little water and liquid soap. To avoid leaving streaks, change the water regularly to clean, and at the end blot the wall with a cotton towel. Clean twice a year: in spring and autumn.

Design
Color
If you don't like how the paint looks on the walls or you find a better shade, it's not a problem. You can repaint the putty wall as many times as you like, at least every week, the main thing is that the previous layer dries. And wallpaper has about 15 "lives", so with each painting, their service life is reduced. nine0009
If you plan to combine several colors on one wall, it is better not to use paintable wallpaper. They absorb paint, so it will not be possible to make clear boundaries between the two colors.
Texture
Embossed walls are easier to make with wallpaper: simply select the appropriate texture in the store.
If you are painting over putty and want a nice rough effect, use decorative plaster. Before painting in the final color, it is better to paint it in white so that the final shade lies evenly. nine0009
Cost
At first glance, the method of wallpapering looks more expensive, because, in addition to paint, you need to buy "canvas".
But this is not so, because the difference is compensated by the consumption of material and work time. Because of the capillary effect, walls do not need to be painted from corner to corner: the wallpaper absorbs and evenly distributes the paint over the surface. Therefore, paint consumption is reduced. Wallpaper is painted in one layer, economically distributing excess paint on the wall.
nine0083 Evgeny Zimin apartment renovation specialist
I recommend choosing smooth wallpaper for painting. Better paint non-woven with a density of 130 g / m²: it looks like whatman paper, the walls with it become perfectly even, and such wallpapers serve up to 30 years. In addition, they are sold in rolls of 25 m, and the price per 1 m² is lower. Unlike walls painted immediately over putty, on which damage will have to be covered up over time, wallpaper will last much longer. nine0009
If you are painting over putty, please note that you will need to apply two coats of paint.
The walls absorb some of the composition, so the first layer is faded. In addition, there is always a risk that flaws in the plaster will come up or the paint will lie unevenly. The consumption of material is greater, therefore, the price is higher. And the speed of work, on the contrary, is slower. Depending on the paint, each layer dries from 2 to 24 hours.
Points to remember
Choose your finish according to your own priorities. If it is important for you that the walls are easy to repair, choose wallpaper for painting: scratches and drawings can be quickly and spot-painted. If you want to change the interior design from time to time, stop at the putty walls. Unlike wallpaper, they can be repainted regularly. If you are looking for the most practical and reliable finishing option, stick glass wallpaper under the paint: they are not afraid of stains, cracks, or mechanical damage. nine0009
11.04.2022
instructions for walls and ceilings
What types of wallpaper can be painted?
See also
Photo selection of wallpaper for painting in the interior
Wallpaper for painting is produced in white.
They are also longer and wider than regular rolls. Manufacturers offer several types of coatings that can be painted:
- Non-woven. Non-woven wallpaper is ideal for painting. The coating looks stylish and masks the defects of the wall. Non-woven fabrics tolerate repeated repainting, but the relief will become less noticeable. They can be painted from the wrong side, and then glued. nine0029
- Glass fiber. In fact, these are anti-vandal wallpapers made of durable material and resistant to mechanical damage. On the wall, cullet looks like a seamless canvas, hiding surface irregularities. The coating is durable, can be painted many times. Before painting, the canvases are treated with a primer.
- Paper. These are fabrics treated with a special composition, smooth or embossed. They are able to withstand 2-3 repaints without losing their original appearance. The dye is applied in a thin layer, it is not necessary to impregnate the canvas. When revealing bald spots and stains, you need to paint with a second layer.
nine0029
- Linkrust. Wallpaper is produced in a neutral color, then comes staining or artistic painting. It is recommended to paint a day after pasting, or wait 2-3 days. The second layer is applied after 4-5 hours if necessary. Linkrusta features are original patterns, they can be distinguished from the general background.
- Washable. The wallpaper is treated with a special water-repellent composition to protect the coating from the effects of steam and moisture. After painting, the wallpaper loses its protective properties, so varnish is applied over the paint. From the category of washable coatings, you can paint vinyl wallpapers. Most often, washable wallpapers are used in the interior of the kitchen. nine0029
- Liquid. In fact, this is an analogue of plaster. Liquid wallpaper is sold as a ready-made mixture or dry matter (diluted in water before work). Acrylic varnish is often applied to liquid wallpaper - it provides the coating with durability and resistance to cleaning.
The coating itself looks original, pleasant to the touch. After painting, all effects disappear. You can change the color when applying the mixture to the wall by adding color to the mixture.
Which wallpaper should not be painted? nine0005
Please note that not all wallpapers can be painted.
- One-layer paper wallpaper - quickly gets wet and slides off the wall;
- paper based vinyl;
- textile;
- acrylic-based washable wallpaper - the paint does not dry well, leaves streaks and streaks;
- flat vinyl;
- photo wallpapers.
DIY painting tools
Painting tools required for painting.
- The first and most important tool is a paint roller. The end result depends on it. See the relevant section for tips on choosing.
- Roller requires squeezing mesh tray.
- You can dilute the paint in a pallet or any other container.
- Use a small brush to paint corners, along ceilings and floor skirtings.
- A film is needed to cover the floor, windows, window sill.
- Skirting boards and small elements are sealed with masking tape. nine0029
- Use a rag or sponge to remove splashes.
- For work you will need a telescopic handle for a roller, a stepladder or a stool.
DIY painting technology
Painting a wall covering is no different from other painting jobs. The main thing is to choose the right paint, prepare the room and other inventory
Preparation before painting
Before work, it is necessary to prepare the room and walls for painting. Things to consider:
- Wallpaper should be painted after the glue has completely dried.
- Glass fiber is pre-treated with a primer.
- Remove traces of glue from non-woven wallpaper, otherwise defects will emerge after painting.
- Paints tend to dry quickly.
It is recommended to pour a little into the tray, and keep the jar closed.
- The consistency should resemble liquid sour cream. Mix thoroughly before use until a homogeneous mass is obtained.
- If you are not satisfied with the tone, you can add color. The composition is prepared immediately for the whole room, otherwise different shades will turn out. nine0029
- Glass fiber must be painted with a minimum of 2 coats. An interval of 10-12 hours is required between work.
- Optimum temperature for painting 17-25°.
- Do not paint wallpaper with open windows - due to the draft, the sheets may fall off.
Painting process
When the equipment and walls are ready, you can start painting.
Step-by-step guide
- Remove or cover furniture.
- Cover doors, window sills, plinths with masking tape. nine0008
- Immerse the rollers in warm soapy water, wring out and rinse with clean water or roll over masking tape - there will be no fluff on the surface to be painted.

- It is recommended to start painting from above - with a small roller or brush, process 5-10 cm from the ceiling along the perimeter of the room.
- Carefully paint wallpaper near the floor with a small roller or brush.
- Paint relief elements with a brush.
- With a large roller, paint the wall from top to bottom, avoiding bubbles and streaks. Do not hold the roller in one place. nine0008
- If necessary, apply a second coat (after the first has dried).
- After the paint has dried, the walls can be covered with clear acrylic varnish to protect them from dirt.
- Use a cloth to remove splashes, rinse and dry brushes and rollers.
Video instructions
Many people have doubts before work, especially if the person is not a house painter. A video with explanations will help you understand the technology of painting wall coverings. nine0009
Finishing
The most important step in painting, but there are simple methods for beautiful DIY wall decoration.
Emphasis of texture
To emphasize individual elements on the wallpaper or to add volume to the pattern, the technique of texture highlighting is practiced. Without waiting for the wallpaper to dry completely, gently blot the area of \u200b\u200bthe pattern with a damp cloth or sponge, removing the dye. After the surface has completely dried, the desired shade is given to the pattern. nine0009
There is a non-woven wallpaper for painting from the wrong side. To highlight the texture element, the selected pattern is painted in the desired color or remains in a natural (usually white) tone.
Combination of 2 or more colors
A combination of colors is practiced to highlight individual zones.
There are several options: a combination of related shades, a gradient (using one color with a smooth transition from a light shade to a dark one, or vice versa), and a combination of two contrasting colors. nine0009
Knowing the rules of coloring will not hurt here. Otherwise, it is not recommended to use more than two colors in order to avoid bad taste.
Combination possible in any direction:
- horizontal,
- vertical,
- diagonal.
Painting wallpaper with your own hands
A popular way to design wallpaper after painting is to apply a picture. Modern tools will help even inexperienced craftsmen cope with the task. There are many options for drawing, consider some of them. nine0009
- With a textured roller. The tool is a regular paint roller with a convex pattern. Before work, you can practice on extra pieces. For confidence and alignment of the pattern, you can mark the wall.
- Using a stencil.
It can be made independently from plastic or cardboard. The stencil is attached to the wall with masking tape. After preliminary marking (to ensure the perfect alignment of the pattern), paint is applied to it with a sponge. After 5-10 minutes, the stencil is removed, the next section is painted in the same way. nine0008
- Freehand or artistic. If you have artistic skills, you can independently create a picture on the wall. For those who cannot draw, a special device, a projector, will help. A sheet with a drawing is brought to him, and the contours displayed on the wall are outlined in pencil. The finished image is painted in the desired color.
- With stamps. Another popular way to draw on wallpaper is to use a stamp. It is smeared with paint, pressed against the wallpaper for a few seconds. You can be creative and create an abstract composition using improvised means. The disadvantage of stamping is a blurry or blurred pattern, streaks. nine0008
Tips for streak-free painting
Painting wallpaper has its own tricks.
To achieve a perfect result without streaks, it is worth considering the recommendations of experienced painters:
- You need to paint a dry and clean wall.
- Use natural bristle rollers.
- If old ink is being used, test it on unwanted sheets first - you don't know how it will behave.
- Apply the paint in a thin layer and distribute well on the surface. nine0029
- Paint hard-to-reach spots with a brush.
- It is good to impregnate the roller with dye.
- Use a spray gun or airbrush if possible.
Which paint is best for painting?
When purchasing a dye, it is necessary to start from the coating material and the purpose of the premises (apartment, office, etc.).
Type of wallpaper Base color Paper Aqueous emulsion Non-woven Water-based and water-based Glass fiber Acrylic and Latex Linkrust Liquid oil and acrylic wax paste Basic rules for choosing paint
What to consider when choosing paint:
- Latex paint is recommended for sunny rooms - it does not fade with regular exposure to sunlight.
nine0029
- For kitchens and bathrooms, latex or acrylic paint is the right choice. They are resistant to moisture and steam.
- Matte paint masks surface defects, dims bright lighting.
- Satin paint is durable, recommended for bathrooms and kitchens.
- Glossy paint compensates for the lack of lighting in darkened rooms.
- Water-based paint washes off quickly. Not suitable if frequent washing of walls is planned in the future. nine0029
- A water-dispersion composition is suitable for painting bathrooms and kitchens - it is not afraid of water and cleaning.
Which roller is best for painting?
Anyone planning to paint wallpaper by hand should use a paint roller. There are several types of tools, the difference is in the length of the pile and the width of the device.
- Velor roller with a short pile is good for painting smooth wallpapers. It will also help to slightly roll the drawing, for example, when highlighting an element in texture.
nine0029
- Deep relief is better to paint with a long-haired fur roller. The villi are able to penetrate the entire depth of the texture, painting over the most inaccessible places.
- Smooth sheets can be painted with a foam roller. But it leaves bubbles on the wallpaper, reducing the quality of the work.
Peculiarities of ceiling painting
Wallpapering the ceiling is popular for interior decoration. The algorithm of actions when painting the ceiling is the same, but there are nuances that are important to consider:
- Cover the floor, window sills, and furniture with foil if possible.
- Paint the ceiling plinth the same color as the ceiling. To protect the wallpaper, stick painter's tape along the edge of the plinth.
- It is better to work during daylight hours in order to evaluate the result in daylight and electric lighting.
- If a primer treatment is required, it must have the same base as the paint.