How to tile a stair
How to Install Tile on Wooden Stairs | Home Guides
By SF Gate Contributor Updated August 04, 2021
You can install tile on wooden stairs if the stairs are solid, flat and level. The stairs must also be stable enough to withstand the weight of the tile. These four criteria must be met before you start the tiling process. If the stairs are solid and able to withstand the weight of the tile but not flat and level, you can install a sub-floor cement board to create a smooth, flat and level surface. Installation of cement board is also used to stabilize wooden stairs.
Installation of the Tile
-
1. Remove the Trim
Prepare the wooden stairs and the surrounding area for tile installation. Remove the trim, carpet, rugs or other items from the stairwell area. Place the trim in a safe location.
-
2. Remove the Tacks
Remove nails, tacks or staples from the wooden stairs and the corresponding wall where the trim was removed.
-
3. Correct Any Holes or Cracks
Inspect each step for holes and cracks. Fill the holes and cracks with wood putty. Allow the putty to dry for 60 minutes, then sand to create a smooth surface.
-
4. Cut the Nose Board
Cut the nose board from the front of each step. The nose board is the portion of the step tread that extends past the vertical backboard, or riser, of each step. Cut the nose board flush with the riser using either a jig saw or a circular saw.
-
5. Sand the Surface
Sand the cut area to create a smooth and flat work surface. Sand first with a belt sander then finish by hand with sandpaper.
-
6. Sweep Away the Dust
Remove sanding dust and other debris from the steps. Sweep the area, then wipe down each step with a damp cloth or sponge. Start at the top wooden step and work down the staircase.
-
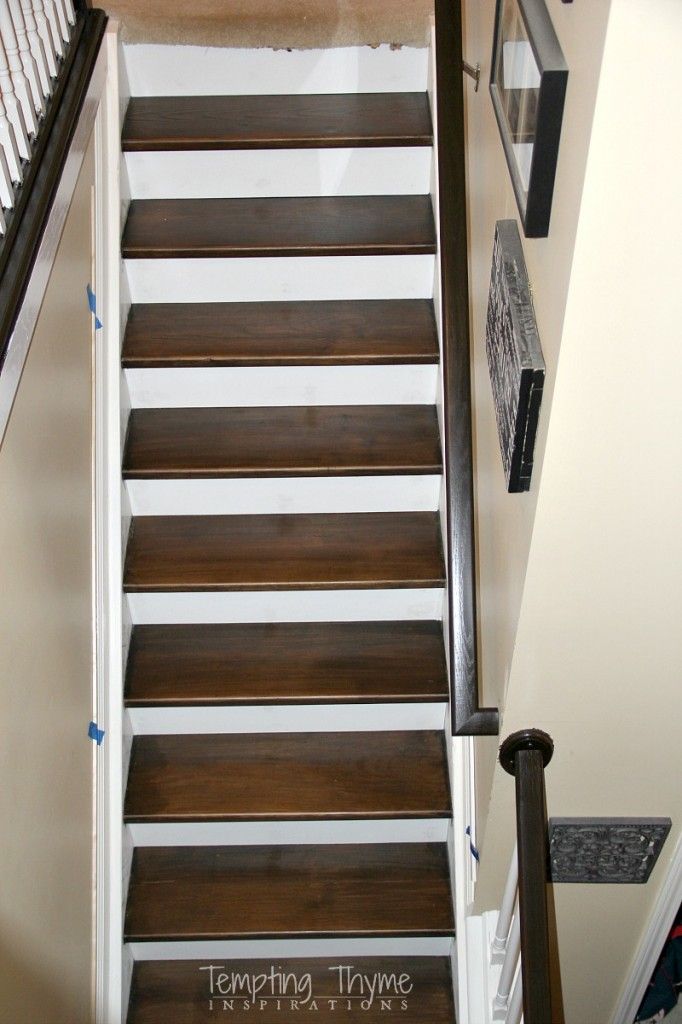
7. Start Adding Tiles
Start tiling on the top step and work down, instructs How To Specialist. Position the first tile in the center of the riser, or vertical step surface, of the step. Move the tile so the front edge is even with the step tread surface. Place a 1/8-inch spacer on each corner of the tile. Place the tiles to either side of the center tile in place. Repeat the process across the row. Mark the tile for cutting at either end and behind the first row of if needed.
Remove the tile from the step. Make all necessary cuts.
-
8. Add the Thin-Set
Apply a thin, 1/8-inch layer of thin-set adhesive to the back of the tile. Position and place the first tile in the center of the riser. Place a spacer on each corner. Repeat the process with the remaining tiles for the row.
-
9. Secure the Tiles
Secure the tile to the tread in the same fashion as the tile placed on the riser.
 Position the tiles so the gaps between each tile are in line with one another. Align the front edge of the tile flush with the surface of the vertical tile on the riser. Cut the tiles as needed.
 -
10. Continue Until All Tiles Have Been Installed
Move to the next wooden step and repeat steps 8 through 13 until the entire set of wooden stairs is tiled. Allow the thin-set adhesive to dry 24 hours before continuing.
Installation of the Grout
-
1. Mix Your Grout
Mix a batch of grout according to the manufacturer's instructions on the package. Not all grout is mixed the same. Manufacturer's differ in the water to grout ratio.
-
2. Start at the Top of the Stairs
Start grouting on the top step and work down.
-
3.
 Apply the Grout
 Apply a liberal amount of grout to the tread on the step with the grout float, says Home Depot. Spread the grout over the tile surface and move it into the spaces between each tile. Remove excess grout with the edge of the grout float. Repeat for a total of two steps.
-
4. Wipe Away Excess Grout
Remove the excess grout from the surface of the tile. Wipe the tile with a damp cloth or sponge. Be careful not to remove the grout from the spaces between the tile. Add more grout if needed.
Move down two steps. Repeat Steps 3 and 4 until all tile is grouted.
-
5. Wait for the Grout to Dry
Allow the grout to dry and harden for 24 hours.
-
6. Wipe Away Any Remaining Film
Wipe the tile surface down with a damp cloth or sponge to remove grout film. Allow the grout to set 24 hours. Wipe the surface of the tile one more time to remove and remaining grout film.
Things You Will Need
Safety glasses
Pry bar
Hammer
Level
Wood putty
Putty knife
Jig saw or circular saw
Belt sander
Sandpaper
Broom
Dust pan
Damp cloth or sponge
Tile
1/8-inch tile spacers
Pencil
Tile saw
Thin-set adhesive
Notched trowel
Grout
Water
Mixing container
Grout float
Tip
Install sub-floor cement board after section 1, step 2 if the area requires leveling or is in need of stabilizing.
Regrout the tile if necessary after 24 hours. Look at the grout to see if it has shrunk or cracked. Add another coat of grout to the steps to fill in the gaps.
Warning
Wooden steps may shift after the tile has been installed.
 The grout or tile may crack due to the shifting of the stairs.
References
- How To Specialist: How to Tile Stairs
- Home Depot: How to Grout Tile
Tips
- Install sub-floor cement board after section 1, step 2 if the area requires leveling or is in need of stabilizing.
- Regrout the tile if necessary after 24 hours. Look at the grout to see if it has shrunk or cracked. Add another coat of grout to the steps to fill in the gaps.
Warnings
- Wooden steps may shift after the tile has been installed. The grout or tile may crack due to the shifting of the stairs.
hints and tips from the experts |
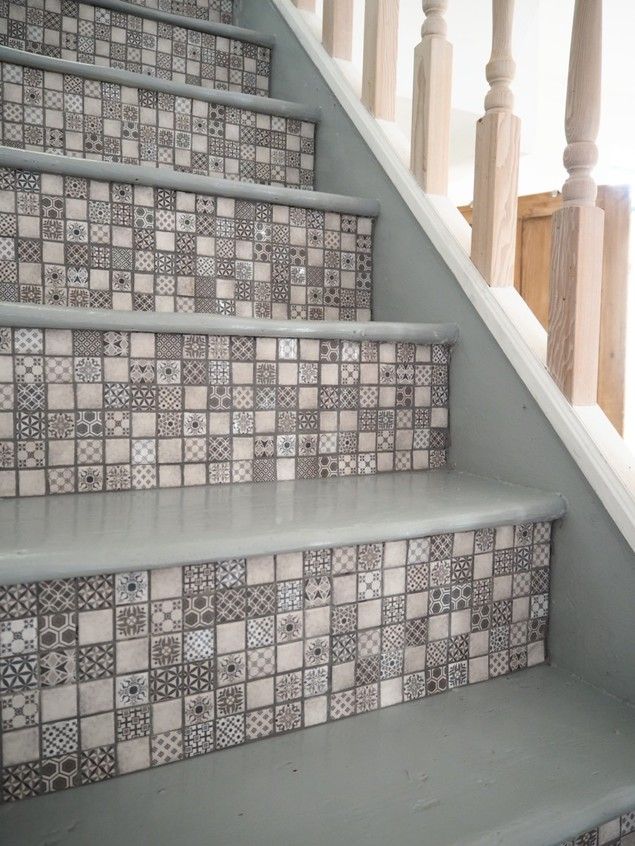
(Image credit: Future)
When decorating the home, one area that is often overlooked is the stairs. While we think about surfaces in terms of walls and floors, adorning them with paint, wallpaper, carpet, timber, stone, laminate, porcelain and yes, tiles, stairs can also have a huge impact on the finished look and feel of your interior.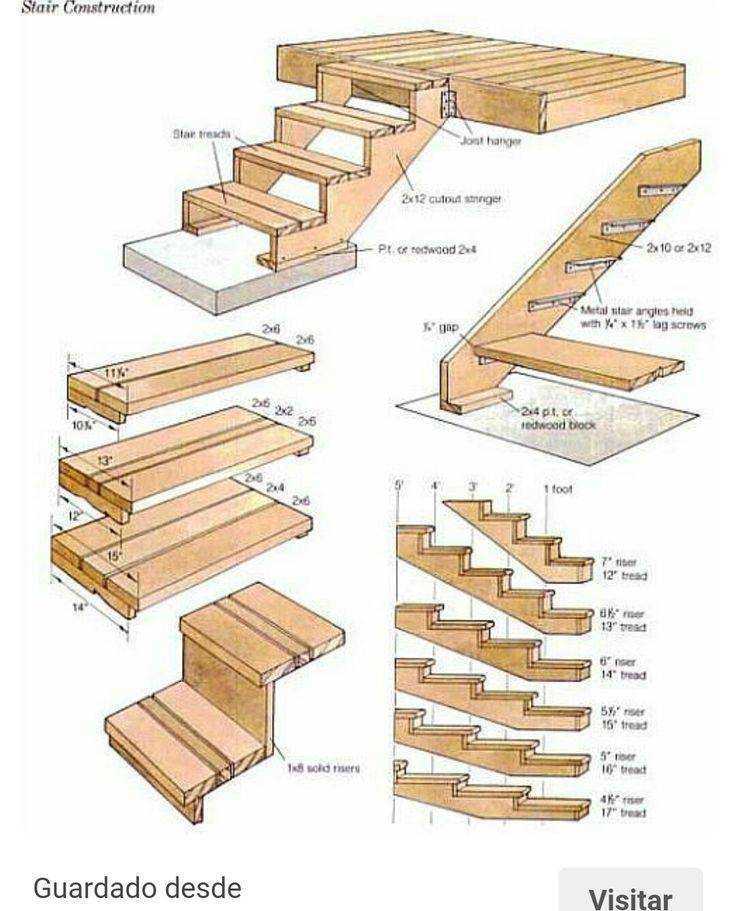 So why not tile the stairs and give the hallway an update that creates a warm welcome into your home.
There are plenty of tricks you can do to make this task easier and it’s a project that any confident DIY-er can take on over a weekend.
‘When tiling stairs, it's best to work your way from bottom to top in order to get things lined up just right on the risers,’ explains Todd Saunders, CEO of Flooring Stores , a resource for finding the right type of flooring and contractor for any project. ‘Getting specific tiles for the edges of the treads will save you a lot of time on the wet saw. It's also best to go with a tile that has some texture to it to provide for better tread.’
So, with this in mind, here’s our handy guide on how to tile stairs, with expert advice from the professionals. You can also find more in-depth advice on grouting tiles, how to tile a wall and how to tile a floor as well as how to clean kitchen tiles, which will all help boost your tiling knowledge.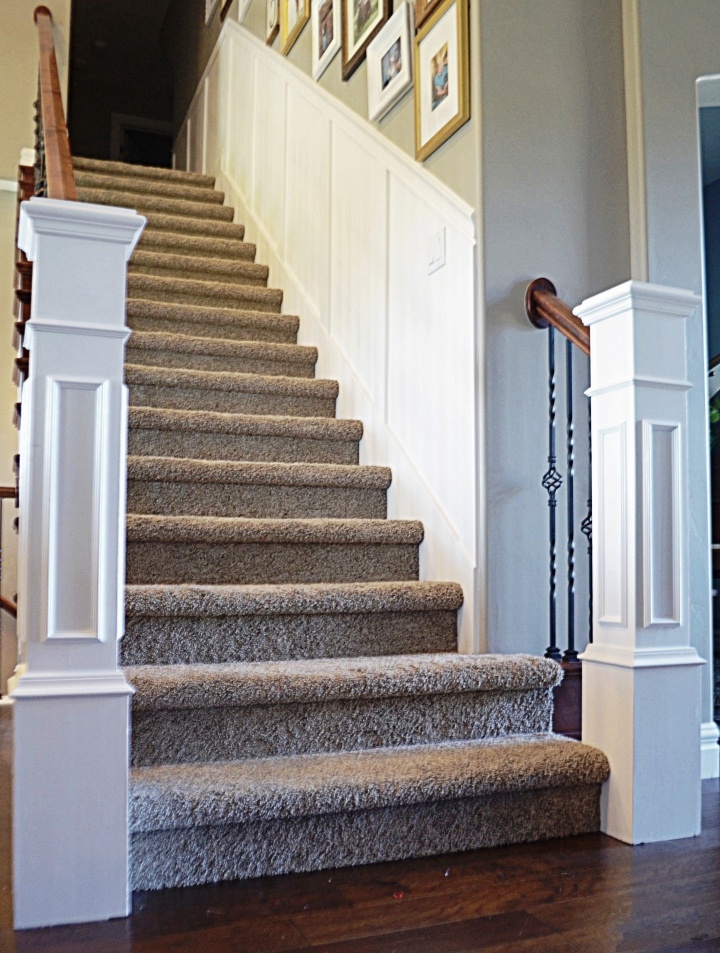
How to tile stairs
While stairs are certainly a practical and necessary part of any two-storey home, they can also be turned into a statement area with a decorative tiled finish.
1. What you'll need
Before you begin, get all your tools and materials together and, most importantly, choose a time to tackle this project when no-one needs to pop upstairs. Try to start it when everyone’s up and out for the day and you can make an early start.
You’ll need the tiles of course, as well as water, a spirit level, thin-set mortar, tile cutter, bucket, grout float, rubber hammer, notched trowel, safety gloves and eye protection.
2. Measure up before your start
To work out how many tiles you need, start by measuring the stairs. Measure the length and width, taking care to include the vertical risers as well. Multiply the total length by the total width to get the total area in square meters.
‘If your stairs are an irregular shape, it’s best to divide different areas up for measuring and then add the separate measurements together to get an overall measurement for all of the stairs,’ advises Simon Reading, tiling expert at Housetastic .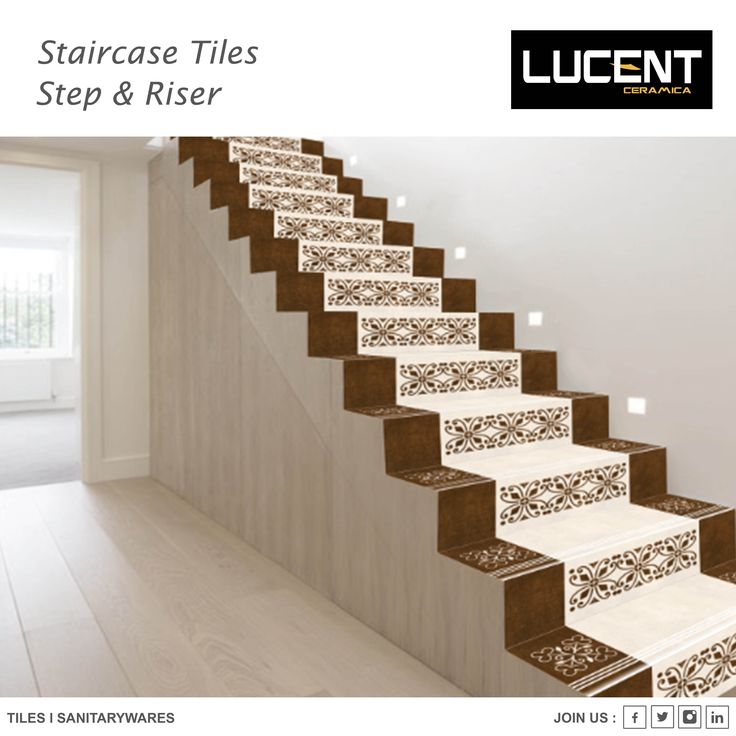 ‘It’s recommended that you add an extra 10% to your final measurements to accommodate for any mistakes or breakages during the installation.’
3. Prepare the stairs
Once you’ve measured the space to see how many tiles are required and bought your tiles, you need to ensure the area is level, dry and clean. This will prevent any cracks forming in the tiles once applied. ‘Before tiling, your floor must be completely secure without any obvious movement,’ recommends Harriet Goodacre, brand communications manager and tile consultant at Topps Tiles . ‘Depending on the weight of your tiles, you may need to reinforce the stairs themselves – for this, we recommend enlisting a professional’s help.’
Use a spirit level and if there are any uneven areas, create a smooth surface ready for tiling with a mortar and trowel. For wooden staircases, Simon Reading also recommends adding backer boards to each step. ‘Tape each joint and then tile over the boards. This is because wood can expand over time, so the grout is more likely to crack if you tile on top of natural wood,’ he says.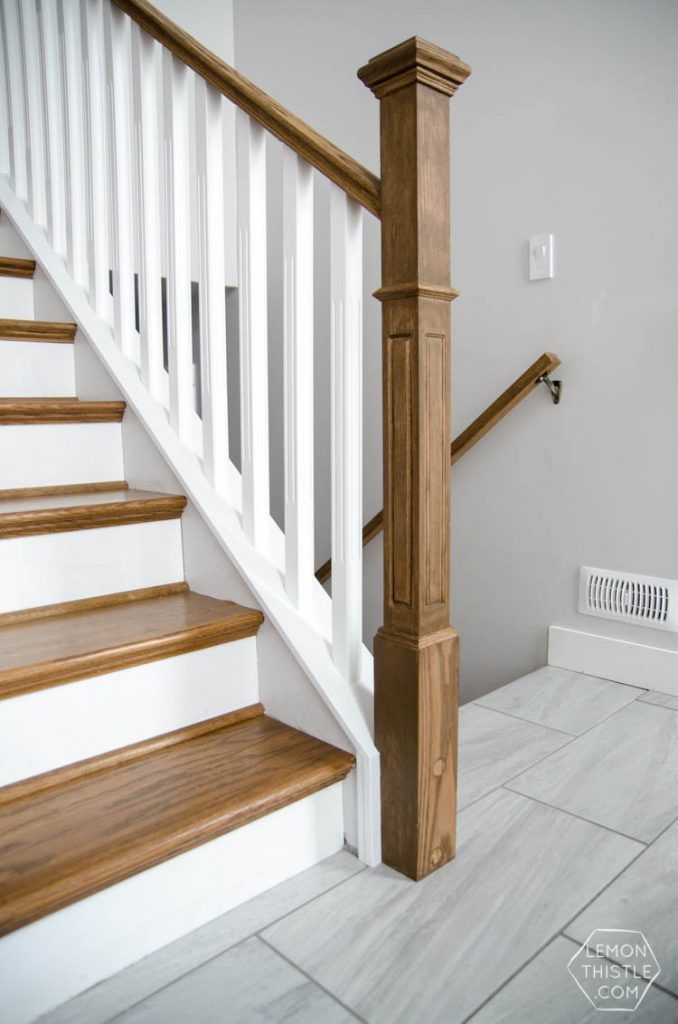
4. Apply adhesive
First, add a few drops of water with a wet sponge to the tile adhesive to help it bond to the staircase. Don’t add too much though. Next, using the flat edge of a notched trowel, apply a layer of adhesive to the surface of the stair.
‘Create a semi-circle to ensure an even and consistent layer of adhesive,’ says Simon Reading, ‘And be sure to cover a wider space than the tile itself of around two inches, as this will allow you to correct any misjudgements. Once you have applied this even layer, you can then move on to use the comb side of the trowel to help ensure the adhesive is even while also allowing it to better bond to the tile.’
5. Lay the tiles
Have your tiles ready, including any cut ones, so that you can crack on without any interruptions and prevent the adhesive drying out before you’ve finished. Use the spirit level to make sure all tiles are straight and even. You can use a rubber hammer and tap gently for any tiles that aren’t even. Don’t tap too hard as this will crack the tiles.
‘Mark a middle point on every riser and work from the centre outwards - use your trowel to apply adhesive to the back of the tiles and apply to the riser, lining the upper edge of the tile flush with the edge of the stair tread,’ advises Harriet Goodacre. ‘Next, apply the tiles to the stair tread, lining up the tile so it’s flush with the edge of the riser tile. Finally, place the tile on a bed of adhesive, press down and slide into place to ensure the adhesive sticks properly. Use a spirit level to ensure it’s even and flat, then insert a tile spacer in between each tile for even spacing.’
5. Finish with grouting
Once you’ve finished tiling and the adhesive is dry, you can move on to the grouting between the tiles. This will help to keep them in place. Take the grout float to smooth out the grout over the gaps and press firmly into each joint. Once it’s set, wipe the surface with a damp cloth the remove any excess. Leave for 24 hours for everything to set fully then finish with a final wipe down with a damp cloth.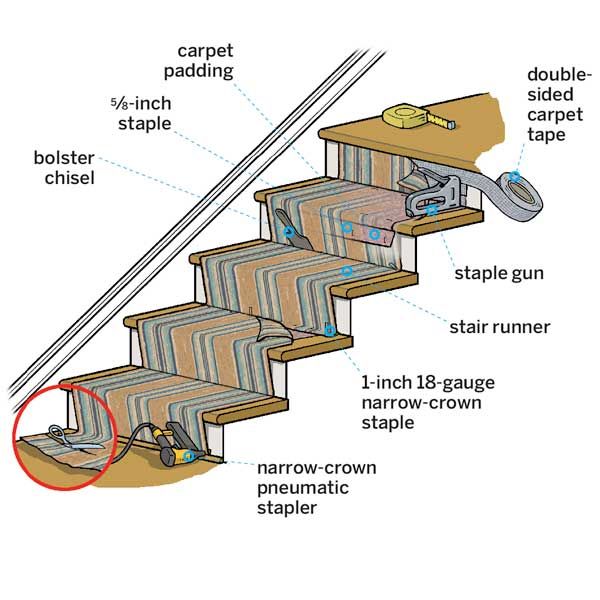
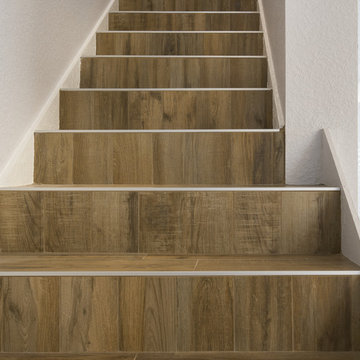
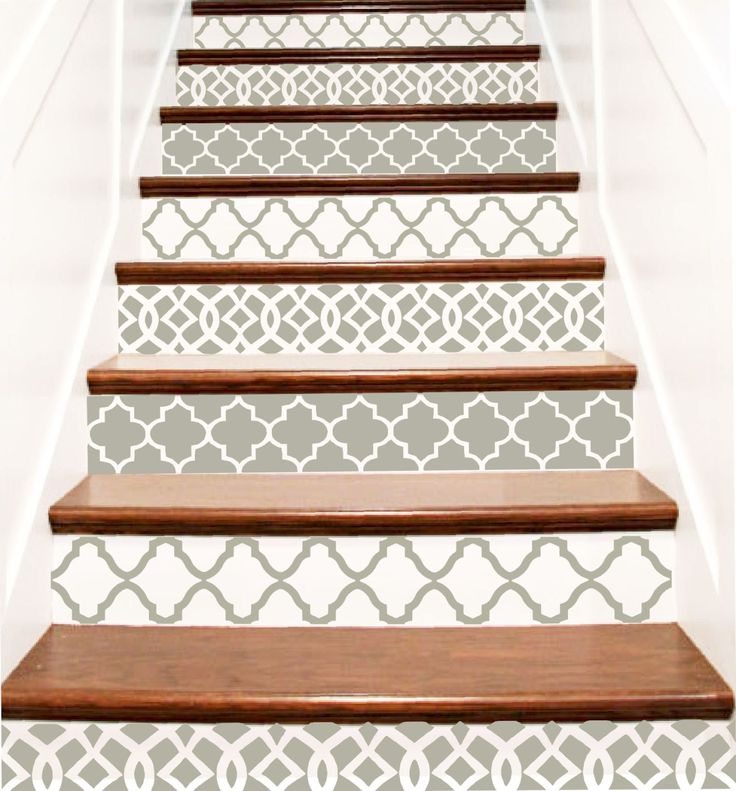
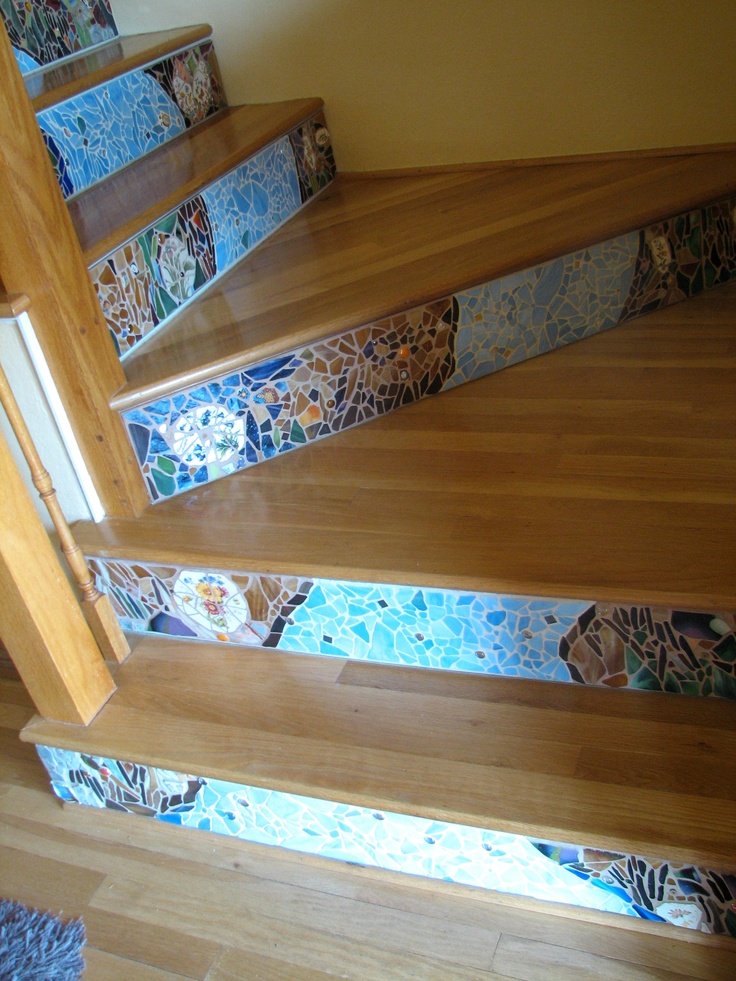
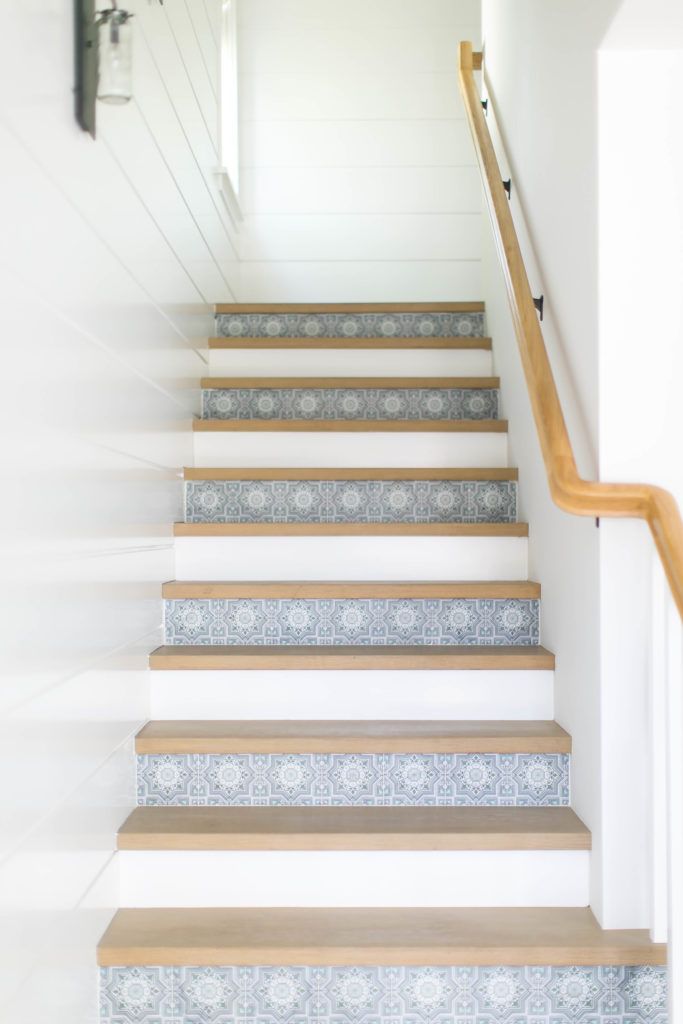
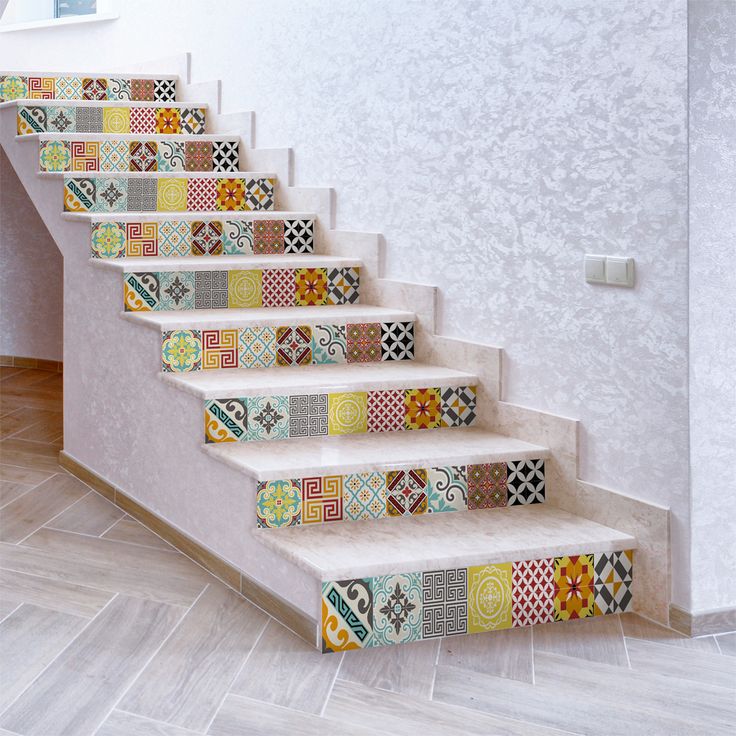
Which tiles are good for stairs?
Porcelain is the most recommended tile for stairs. This is because it’s a material which is strong, hardwearing and will last a long time. There are all sorts of decorative patterned designs to choose from, as well as timber and stone lookalikes that can be matched with flooring in the hallway and downstairs area for a cohesive look.
How do I tile a bullnose staircase?
For this type of staircase, you’ll need enough bullnose tiles for all the outer edges of the stair treads as well as tiles for the treads and risers. Tile the bullnose first then the tile between the bullnose and riser and then the riser pieces. Use tile spacers to help.
Hayley is an interiors journalist, content provider and copywriter with 26 years experience who has contributed to a wide range of consumer magazines, trade titles, newspapers, blogs and online content. Specialising in kitchens and bathrooms, she has twice won the CEDIA Award for Best Technology feature.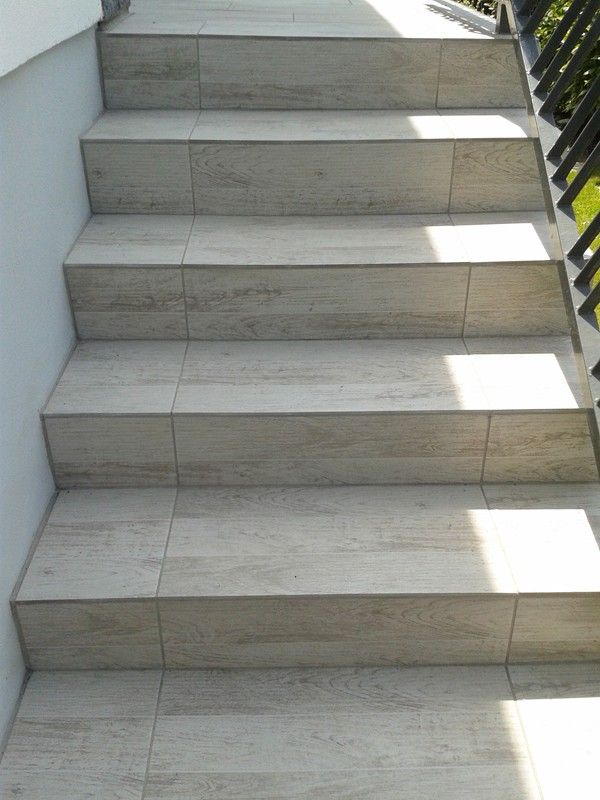 Hayley writes for H&G about kitchens, bathrooms, cleaning, DIY and organizing.
Stair cladding - what material to choose? Finishing the stairs with stone
Stairs play not only a practical, but also an aesthetic role in the house, so their appearance should be determined by the overall concept of the room. Often, finishing is done with the following materials:
tiles;
- wood;
- natural stone;
- carpet;
- laminate;
- paint etc.
At the same time, the choice of materials for finishing the stairs directly depends on what its base is made of. It should be said that stairs made of concrete are quite strong and reliable, it is possible to realize a structure of any size, configuration and style from this material. That is why in private houses concrete is most often used for the construction of flights of stairs. nine0004
Such a base can be designed according to the taste of its owner, because concrete does not provide for any technical or aesthetic contraindications to the use of one or another material.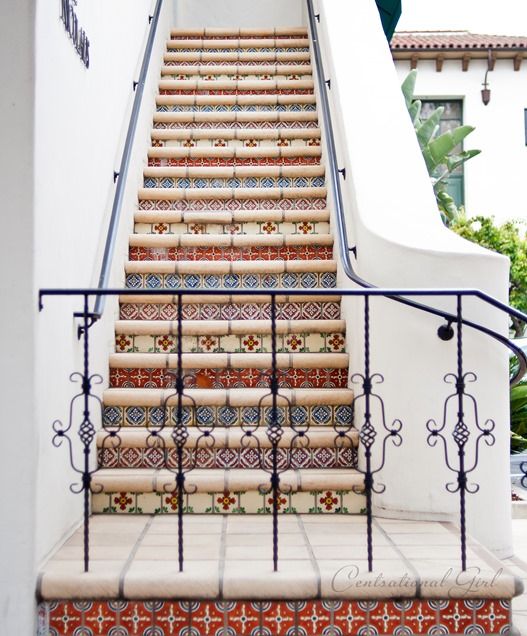 However, due to the fact that it is necessary to veneer vertical, horizontal surfaces, steps and skirting boards, it becomes necessary to use a material that is easy to install.
Special attention should be paid to the preparatory stage prior to finishing. Whatever material is chosen for the finishing cladding, the concrete surface must be leveled and prepared before it is installed. In any case, when choosing a finishing material, one should not forget about the parameters of sound insulation. nine0004
As you can see, materials for finishing stairs can be quite diverse, the main thing is to make the right choice. Below we will consider all popular finishes in more detail.
Railings, balusters and balustrades
We should not forget about railings and railings, which in one case or another can be represented by:
- wood;
- metal;
- concrete;
- stone.
If the stairs are finished with tiles, the railing can be made of metal, stone or wood, depending on the taste preferences of the customer.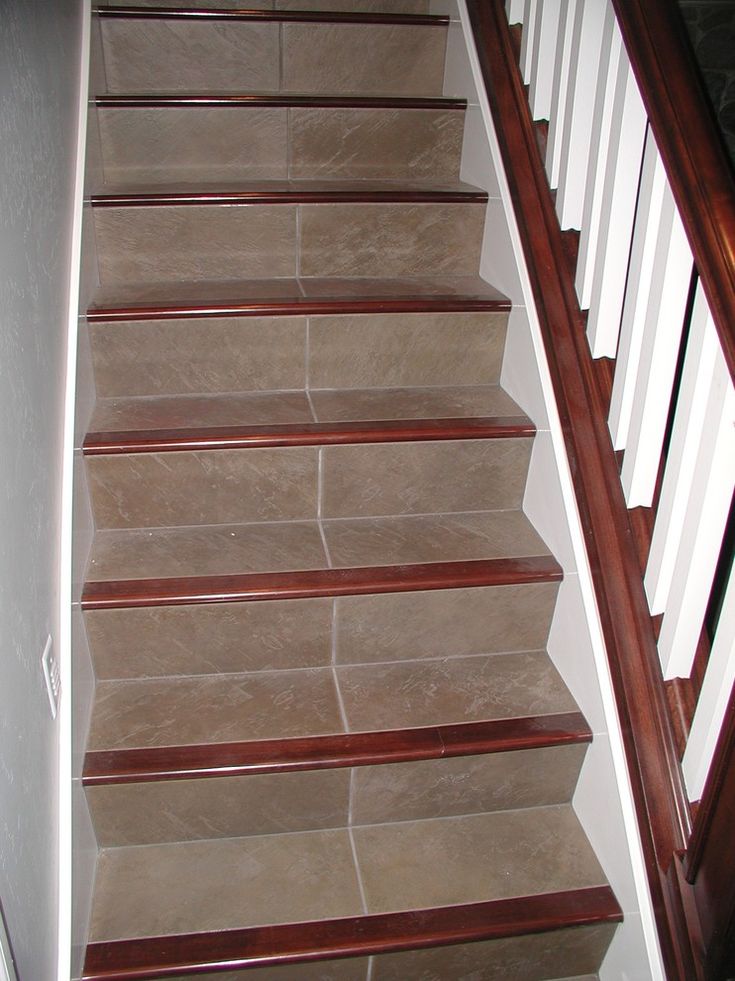 Much here depends on the construction budget. nine0004
Find out more about the possibilities of framing stairs with stone railings and balusters here.
Wood finish stairs
In most cases, wood finishes are preferred because they are natural, give the stairs a finished, aesthetic look, and wear out slowly.
Among all tree species, the most popular for such work is:
- oak;
- ash; nine0007
- beech;
- larch.
All of the above breeds are durable and aesthetic. At the same time, the thickness of the panels must be at least 3 cm, otherwise the structure will not last long, quickly losing its aesthetic appearance. Remember that the perception of the whole composition largely depends on the color and stylistic decision. The tree implies multiple variations of shape and color, the decoration of the stairs with wood is suitable for any room, no matter what design style is embodied there.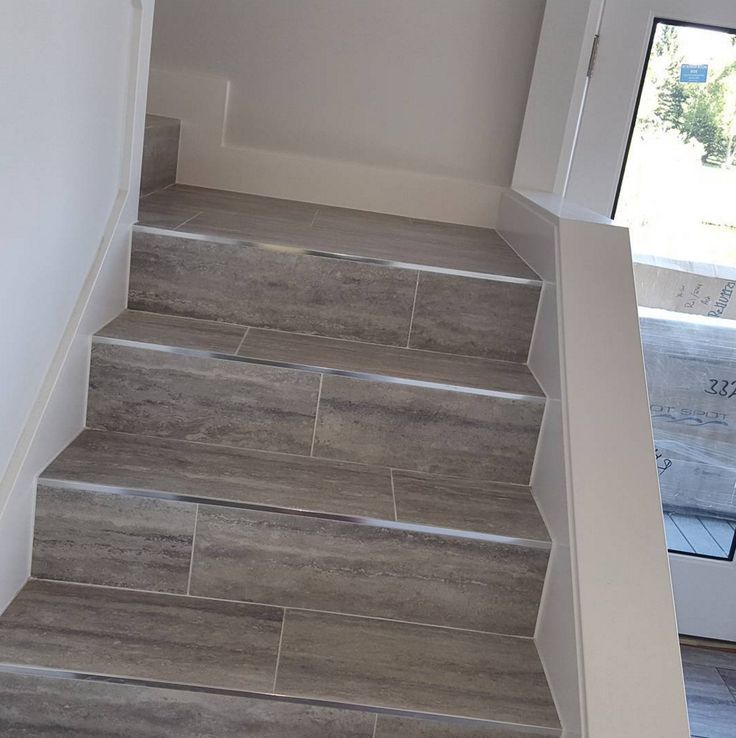 nine0004
Many are interested in the question of whether it is possible to make this kind of decoration with one's own hands. Of course, you can, but for this you need to have multiple tools and skills, because without experience with wood, you run the risk of simply spoiling the purchased panels. That is why it is preferable that the finishing of the steps of the stairs, and the entire structure as a whole, is carried out by professionals.
The use of smooth, polished wood is fraught with numerous pitfalls. For example, such surfaces do not provide sufficient traction with the sole. That is why it is possible to use embossed wood boards or install special overlays here. In any case, it will not be enough to install the structural wooden parts in their places, after that they will need to be treated with special varnishes in several layers. This is necessary so that the materials for finishing the stairs retain their attractive appearance for as long as possible. nine0004
How to save money on finishing stairs
If the economic issue is acute and wood does not fit in its price range, you can turn to more “budget” finishing options, including:
- carpet;
- painting.
For example, when finishing a concrete staircase with carpet, the resulting structure will have excellent sound insulation performance. A feature of this finish can be considered that it does not require special preparation - only finishing work. The ends of the flight of stairs in this case can be tiled, painted or sheathed with wood. Thanks to the variety of budget options for carpeting, anyone can choose the best option in one case or another. nine0004
If we talk about painting, then this option is applicable only in case of careful preparation of the stairway. It is best to paint concrete stairs or wooden structures. However, it is preferable to simply open the latter with varnish of the chosen tone so that their appearance remains natural and natural. Concrete monoliths are pre-plastered and primed. Staining is perhaps the cheapest way to finish, but it is relevant only in a modern interior, if the classic is embodied in the room, then such stairs will look out of place here.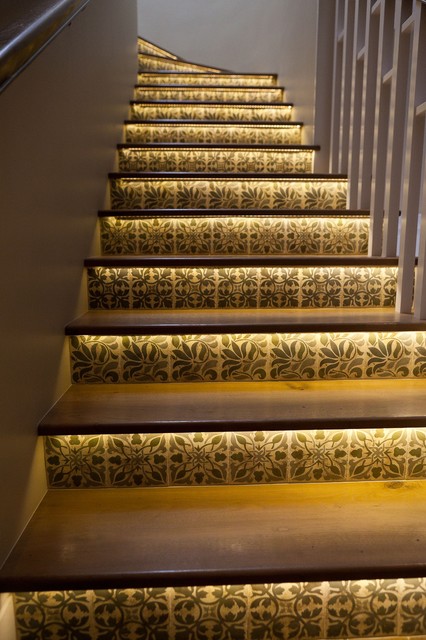 nine0004
In general, the choice of materials for finishing stairs depends on many factors, so in each individual case the concept will be completely different.
Staircase with natural stone
Natural stones such as granite, marble and others have always been highly valued and used in the interior of noble people. At the same time, the decoration of stairs with marble has always been considered a luxury. Modern technologies for the extraction of these beautiful natural materials have made this fossil available to a wide segment of consumers, but the cost of finishing is quite high. nine0004
It is hard to imagine a more status acquisition than a marble staircase with wrought iron railings or stone figurines. With this decoration, your house will appear as a fairy-tale palace of the royal family. The monumentality and respectability expressed by these finishing materials means a lot, so if you want to get a luxurious interior, natural stone will be an excellent choice.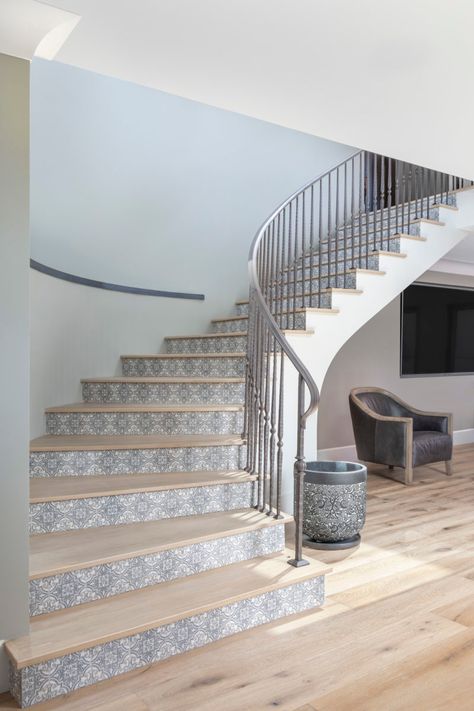
The high cost of work and the raw material itself is due to the complexity of its processing and installation, as well as a long preparatory stage. However, the stone for finishing the stairs is a win-win material. The owners of such stairs receive a respectable interior and good service for many decades and even centuries. This material is durable and easy to use, but most often requires only a concrete frame due to the impressive weight of stone slabs. nine0004
As you can see, the choice of materials for finishing the stairs is rather difficult, here it is necessary to proceed from multiple individual indicators, including:
- work budget;
- technical characteristics of the building;
- aesthetic wishes of the owners;
- general design of premises, etc.
The main thing is that the material you choose in the end is beautiful, environmentally friendly, wear-resistant and durable. In order to choose the best material in a particular case, you can rely on your preferences or ask for help from experts specializing in this kind of work.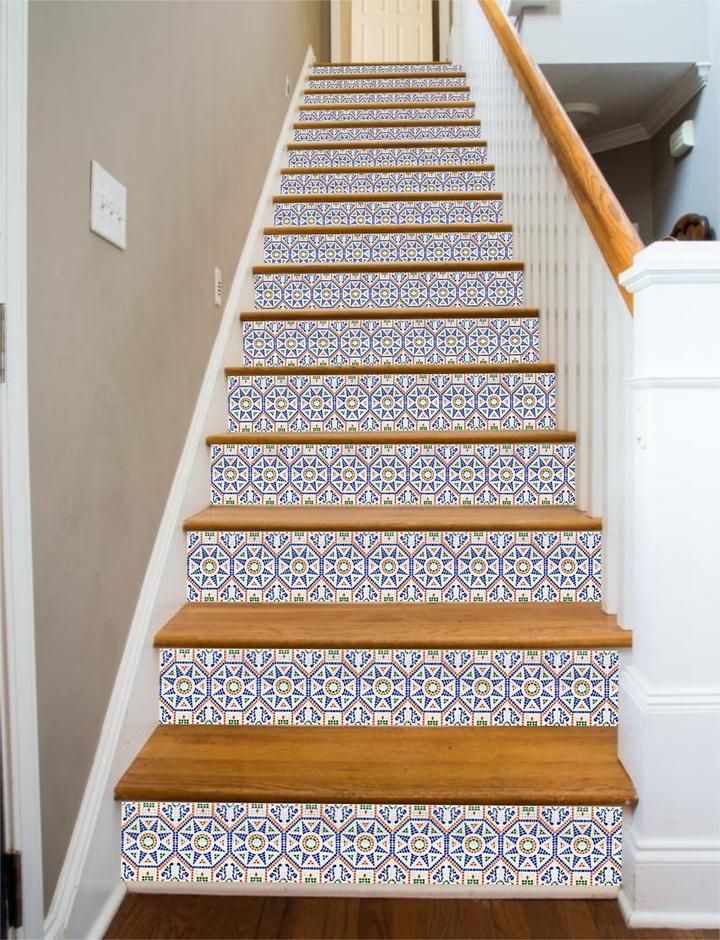 In any case, the choice should be approached very responsibly. nine0004
Finishing concrete stairs in a private house: carpet, linoleum, laminate, stair lining: tiles, stone, wood
The construction market today offers such a large selection of materials suitable for finishing concrete stairs in a house. Laminate or tile, linoleum or carpet, wood or stone, which is better to choose so that the design becomes not only beautiful, but also warm, quiet and durable?
A variety of materials are used to decorate stairs, most of which have the necessary strength and wear resistance. Therefore, it is worth choosing a finishing method based on personal preferences and financial capabilities of the owner. After all, each of the proposed options has its own advantages and disadvantages. nine0004
Contents
Inexpensive finishing materials
1.2. Painting concrete stairs
1.3. Linoleum finish
1.4. Carpet trim
1.5. Finishing with laminate
Finishing a concrete staircase in a house with materials with a long service life
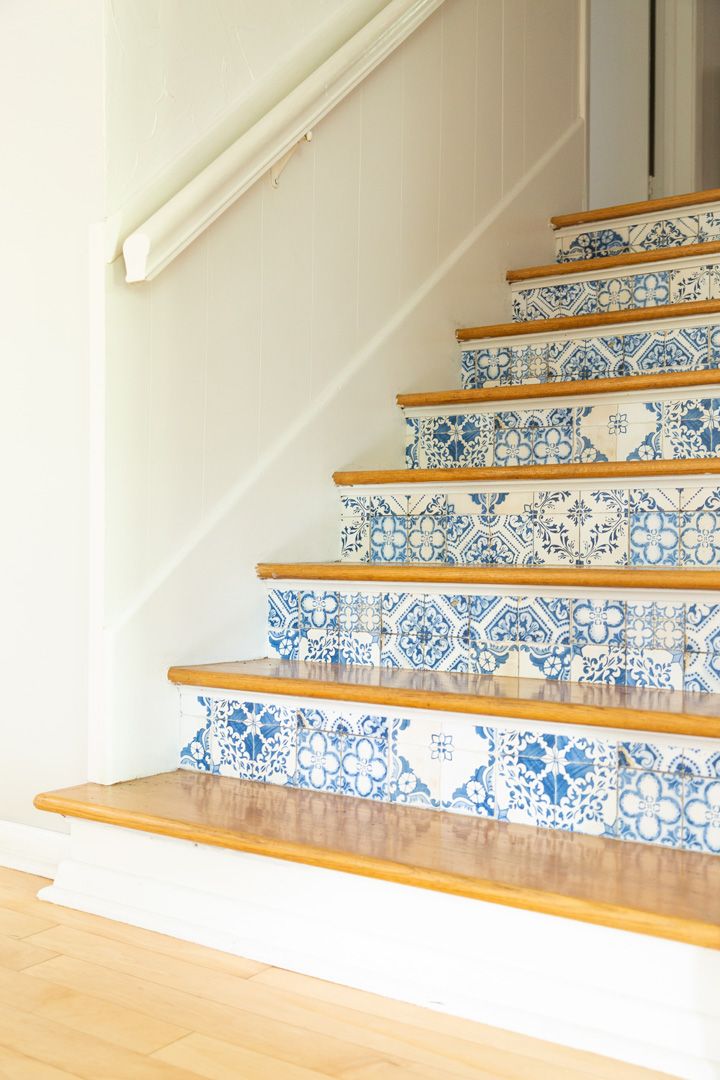
2. 1. Cladding with clinker tiles
2.2. Stone cladding
2.3. Finishing with wood
Finishing a concrete staircase in a private house 10 examples with photo
Inexpensive Finishing Materials
Concrete stair owners on a budget should consider inexpensive materials. Painting, finishing with laminate, linoleum or carpet allows you to quickly give the design an aesthetically attractive look.
Painting a concrete staircase
The cheapest and fastest way to transform a concrete staircase is to paint it. This method of finishing will be an excellent solution in cases where the design does not require special aesthetics and durability of the coating, because the life of even the most wear-resistant paint is only 5-7 years. nine0004
Today, manufacturers offer a huge selection of paints of various compositions and colors. The most suitable for concrete are:
- Epoxy enamels that provide a bright glossy finish and have high elasticity and durability.
 The main drawback of the composition is a strong toxic odor that disappears as the paint dries.
 - Polyurethane compounds. Provides a wear-resistant coating with good adhesion to the substrate. The best option for finishing concrete stairs with high traffic. nine0007
- Acrylic and alkyd paints resistant to moisture and temperature extremes. Widely used for finishing outdoor concrete stairs. Depending on the components included in the composition, they have different characteristics. Therefore, before buying, you should familiarize yourself with the scope of a particular paint.
Another disadvantage of staining, even with the correct application of the composition, the steps of the stairs will remain sonorous and cold. Therefore, for residential premises, other types of finishes are usually used. nine0004
Linoleum trim
Linoleum is another inexpensive material that is great for finishing concrete stairs in a private house. Such a coating has good noise-absorbing properties, high hygiene and decorative effect.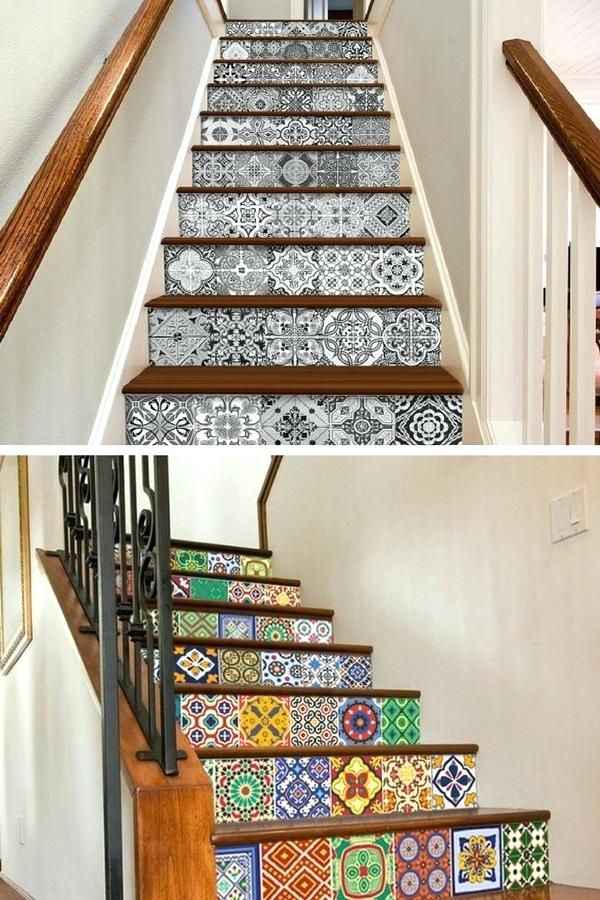 For finishing, two types of material are used - elastic PVC linoleum or more rigid marmoleum, resistant to abrasion.
In this case, it is not necessary to finish all the surfaces of the stairs, it is enough to cut the canvas to the size of the tread (horizontal part of the step) and attach the strips to a special glue. nine0004
Important! Linoleum is a thin material, so all surfaces are leveled and sanded before laying it. Marmoleum is less sensitive to irregularities - protrusions up to 1.5-2 mm high are permissible on the base.
The service life of this coating depends on the characteristics of the material. On average, linoleum will last 10-15 years, marmoleum - at least 20 years.
Carpet trim
Carpet is the coziest material for finishing concrete stairs in the house, warm, elastic and pleasant to the touch. Such coverage is relevant in homes where there are elderly people and children. Carpet is safe for slipping and falling. In addition, the material has high noise-absorbing properties. nine0004
Due to the high plasticity of the fabric, laying carpet is not particularly difficult and does not require the involvement of craftsmen. It is better to fix the carpet on the concrete stairs with glue or with brass rods or skirting boards. Also today, many manufacturers offer special carpet pads on the steps.
Tip! The carpet will last about 10-15 years. However, you can extend its service life by laying polyurethane foam, felt or other substrate under the material. nine0004
The main drawback of carpet is the rapid contamination of the canvas. Therefore, for finishing a concrete staircase, it is preferable to choose an easy-to-clean coating made of artificial materials with a short nap.
Laminate finish
A quick and inexpensive way to tidy up a concrete staircase is with a laminate finish.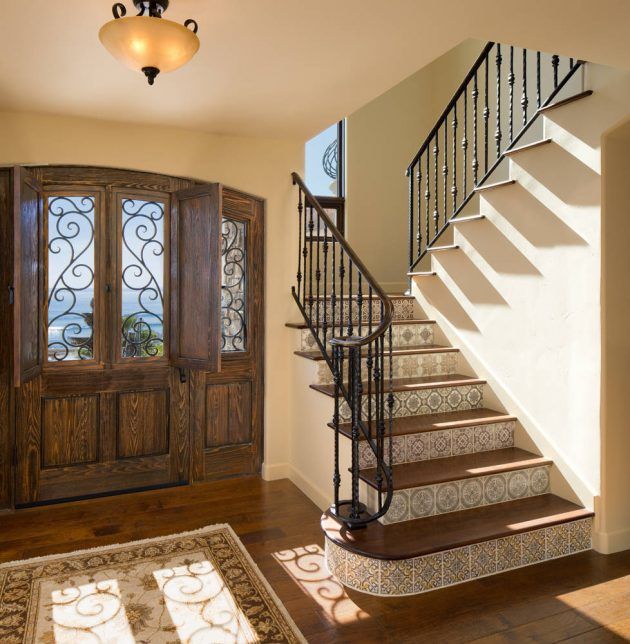 At the same time, the finish is exclusively decorative in nature, the material is not very durable. Facing is carried out with a class 31-34 laminate, which is designed for intensive use. Also, a parquet board is often used to finish a concrete staircase, a more expensive material that emphasizes the status of the owner of the house. nine0004
Installation of laminate or parquet boards is carried out with liquid nails or special glue. Before laying the base is carefully leveled and polished.
Important! Finishing a concrete staircase with a laminate is carried out exclusively from solid boards. It is unacceptable to use trimming even for facing risers and other elements that are not under load.
Depending on the class, the service life of a laminate suitable for finishing a concrete structure is 7-12 years, a parquet board is 12-15 years, subject to the operating conditions.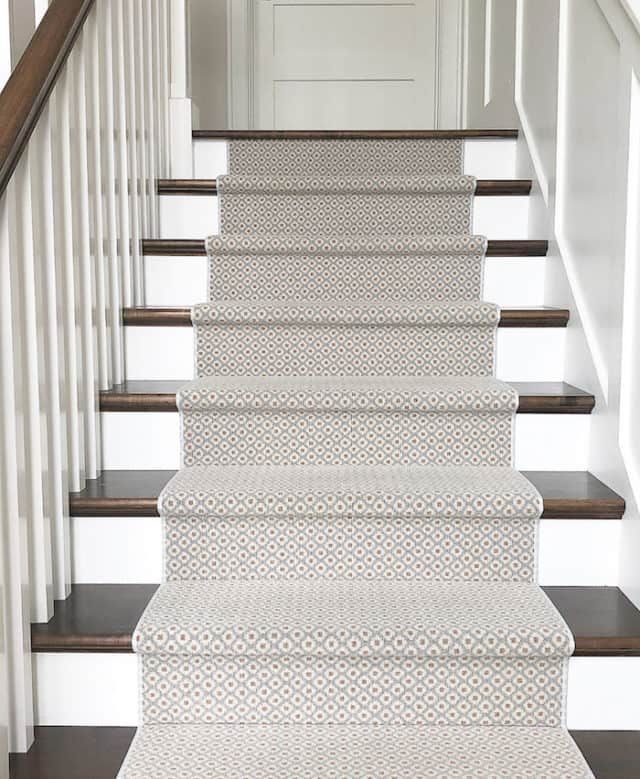 nine0004
Finishing a concrete staircase in a house with materials with a long service life
Owners who are not limited in budget can choose more expensive materials that have a long service life. Natural stone, porcelain stoneware or noble wood will last for many decades without losing its fresh and attractive appearance.
Clinker tiles
Clinker tiles are a practical and durable solution for finishing concrete stairs. This environmentally friendly material, made from shale clays using a special technology, is distinguished by high strength, abrasion resistance and aesthetics. Also, for facing a concrete staircase, floor ceramic tiles and porcelain stoneware are used. nine0004
Tip! The main disadvantage of conventional tiles and porcelain stoneware is the labor-intensive laying of the material, which requires experience and special tools to trim. Therefore, it is better to purchase ready-made clinker steps with a rounded leading edge and an anti-slip coating.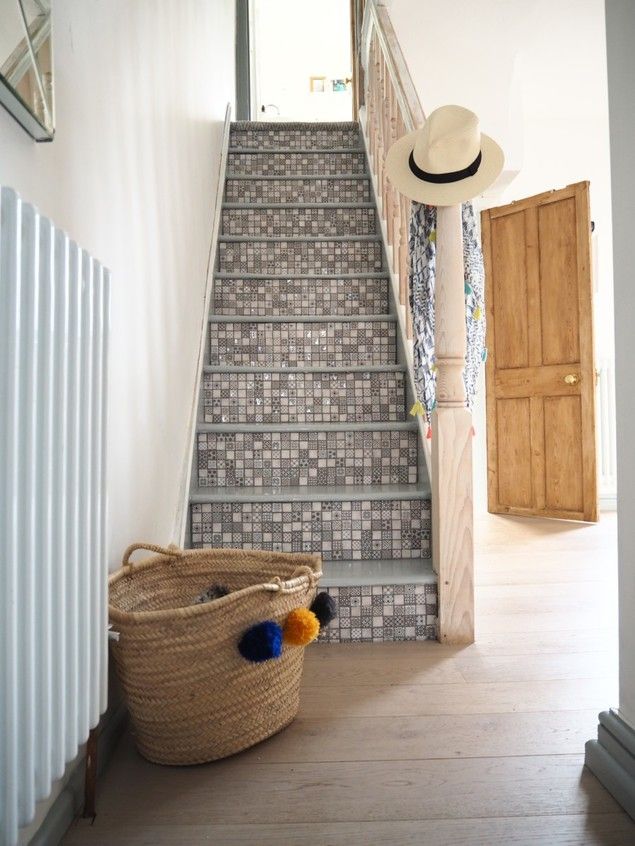 With the right selection of sizes, this option is easy to install and does not require fitting panels.
The service life of clinker tiles without losing their original appearance is 30-50 years. nine0004
Stone cladding
Stairs with natural stone cladding fit perfectly into classic interiors. For cladding, both noble marble, onyx or granite are used, as well as rocks of simpler basalt or non-porous sandstone. As an alternative to expensive natural coating, artificial stone is also used to finish the steps of a concrete staircase. (photo below).
The advantages of this coating include:
- material resistance to any external influences mechanical, weather, biological or chemical;
- durability The service life of marble or granite is calculated in centuries, artificial stone is more than 50 years;
- hygiene and low maintenance.
Along with the positive properties, the stone finish has serious disadvantages:
- the heavy weight of the finished structure, which compensates for the partial cladding of the stairs; nine0006 poor heat and sound insulation of the stone steps are noisy and cold, often slippery;
- high cost of materials and work.
Tip! You can solve the problem with low heat and sound insulation of stone steps by covering the center of the stairs with a carpet.
Wood trim
Wood trim in a private house is considered one of the best options to ennoble a nondescript structure and give it a luxurious and presentable look. This material is characterized by high thermal insulation properties, does not weigh down the structure and organically fits into any interior. Depending on the design, the entire surface of the stairs is lined with wood, only the steps or the linings are mounted on the treads. nine0004
For work, different types of wood are used from inexpensive pine to noble oak.
Important! When choosing a breed for finishing, the operating conditions of the stairs are taken into account. For houses of permanent residence, where the structure is subjected to heavy loads, it is advisable to use hardwood varieties that are resistant to abrasion and mechanical stress.