Paint a wood dresser
How to Paint a Dresser to Make It Look New Again
You Can Do This Without Sanding Depending on the Paint
By
Lauren Thomann
Lauren Thomann
Lauren Thomann is a jewelry expert passionate about crafting and DIY home improvement, writing on both topics. She has been in the antique jewelry business for over 13 years. She completed formal training on diamond and gemstone courses at the Gemological Institute of America and makes her jewelry from reclaimed materials and antiques. While refurbishing her 1916 bungalow on her own, she shares lessons learned through her DIY and home improvement articles.
Learn more about The Spruce's Editorial Process
Updated on 07/11/22
Heirlooms at Home
Project Overview
Solid hardwood dressers are often built like tanks and are meant to last for decades. If you have one looking a little worn, don't trash it or give it away as a freebie. It likely has several good years left, so why not refurbish it or paint over it? Even if it has previously been painted, you can give it a new coat of paint.
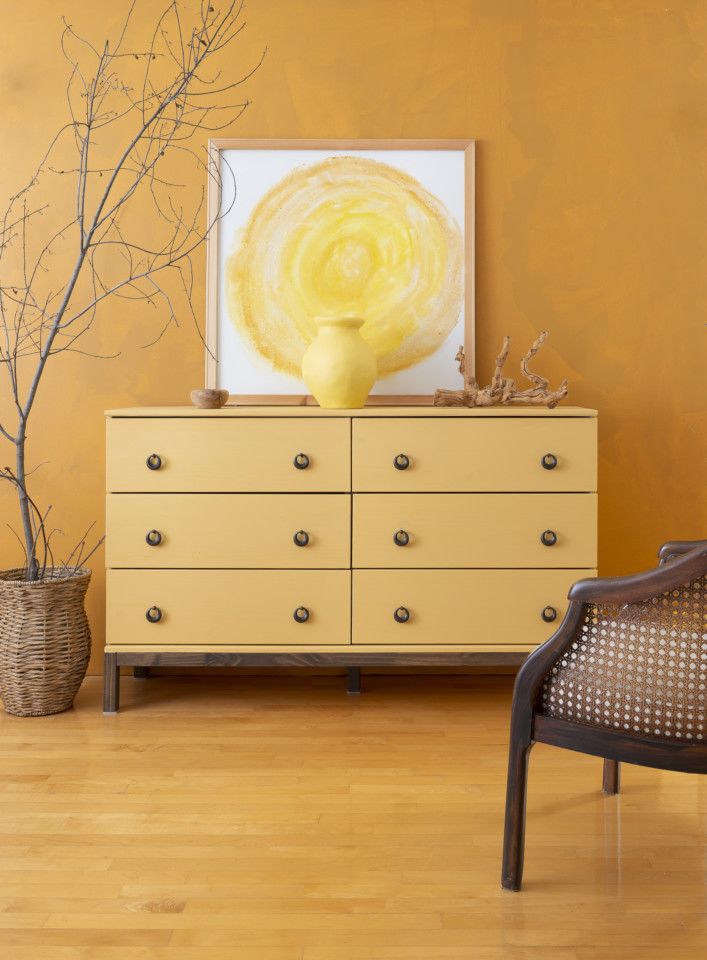
We decided to paint this solid wood vintage dresser in Himalayan Salt from The Spruce Best Home Chalky Finish Paint line. Chalk paint offers a soft but refreshed vintage look—and it's a perfect way to update other pieces of furniture, such as an end table. When painting furniture, you have a couple of options, including a brush or a paint sprayer. Since paint sprayers have become more affordable and user-friendly, they are embraced by furniture painters as a brushless, even way to apply paint.
Opting to repaint the dresser in a solid color lightened the overall look and made the piece more eclectic. To maintain a little vintage charm, we buffed in some dark wax and created a subtle antique finish. Your choice of furniture paint—whether chalky, acrylic, milk, or more—can also change the look and feel of your refurbished piece.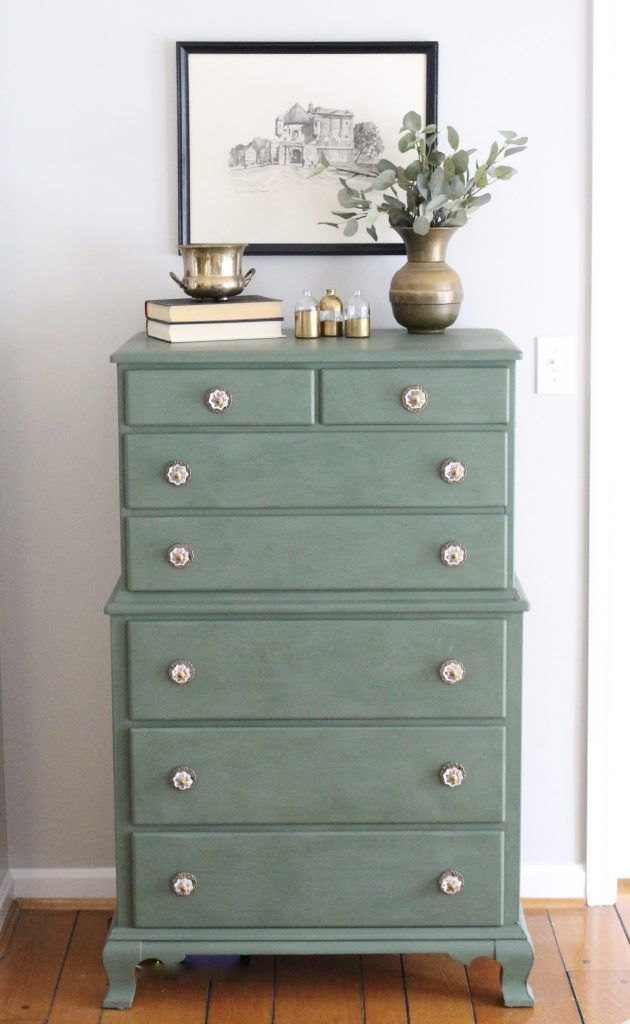 Review the following steps to recreate something similar.
Preparation
Before grabbing your paintbrush and getting started, remember that not all dressers are good candidates for repainting or refinishing. Antique dressers should be evaluated before painting to ensure that altering the appearance won't devalue the piece. This dresser had been painted numerous times, and the faux wood look using brown paint was heavy and worn.
Prep work is vitally important when painting a dresser. To start, empty all the drawers. Working on the dresser will be much easier when it's not loaded with stuff. Then use a screwdriver to remove the drawer pulls carefully. Take a few minutes to clean them well if you intend to put them back on the dresser after painting them.
You also need to evaluate whether the dresser needs sanding or not. You might not need sanding if the furniture piece has a nice smooth finish. But, you might want to give the paint some grooves in the furniture to create a bond.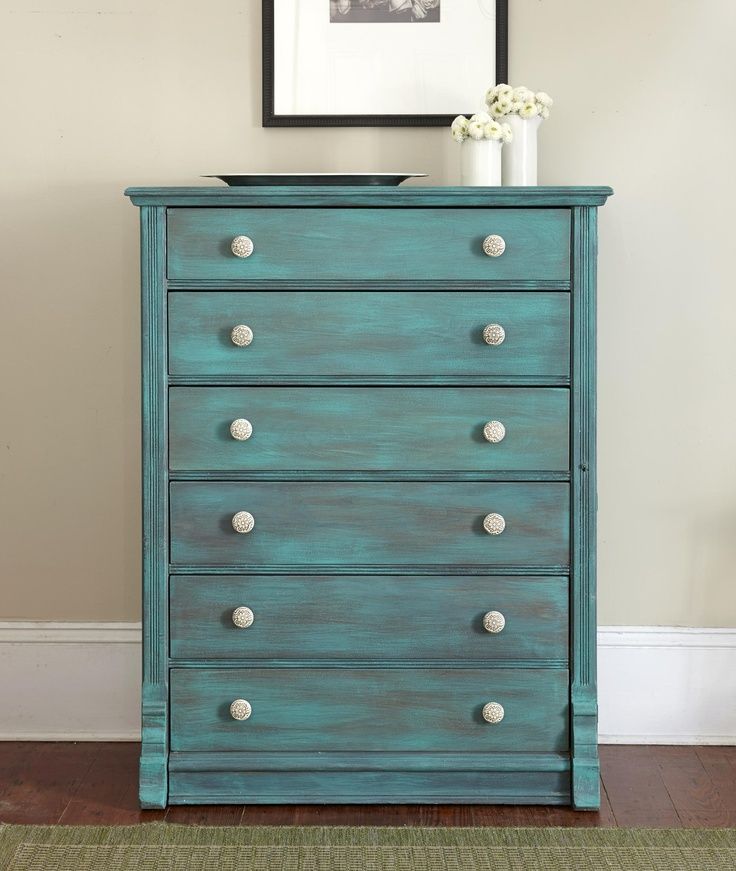 Also, note that although chalk paint is often known as a paint that requires little to no prep, you might consider using a primer to get the chalk paint to stick well and seal in the first coat of paint.
Upcycle a Dresser with Just One Coat of This Special Paint
Equipment / Tools
- Screwdriver
- Medium-grit sanding block (optional)
- Clean lint-free rags (for cleaning and waxing)
- 1 to 2 Small paint rollers
- Paintbrush
Materials
- 1 quart The Spruce Best Home Chalky Finish Paint
- Wax finishes (clear and dark)
- Vinegar (optional for cleaning)
- Wood primer (optional)
Lauren Thomann / Heirlooms at Home
-
Sand the Existing Finish
If your dresser has a smooth finish and is in good shape, feel free to skip this step if you use chalk paint. However, if you want to smooth out some rough edges, use a medium-grit sanding block to sand off any high points.
Prepping for Chalk Paint
The great thing about working with chalk paint is that it will adhere to most existing finishes. If you are using another type of paint, such as one with a lacquer or shiny finish, you'll need to sand the dresser down so that the new paint adheres well.
Lauren Thomann / Heirlooms at Home -
Clean the Dresser and Let It Dry
Remove any dust and debris from the surface. If the surface is not pristine, dust will get stuck in the paint and compromise the finish. Use a damp, lint-free cloth to wipe down the dresser. Allow the dresser to dry completely.
Stain Removal
Remove tougher stains and gunk with a combination of equal parts vinegar and water.
Lauren Thomann / Heirlooms at Home -
Roll on a Coat of Paint
Read the directions on the paint can for specifics. You might need to add a tablespoon or so of water to thin out the chalk paint to a desirable consistency prior to painting.
Use a roller to paint the larger surface areas and create a finish that does not have visible brush strokes. Roll paint onto drawer fronts and drawer sides to ensure a smooth finish.
How Much Paint Do You Need?
A quart of The Spruce Best Home Chalky Finish Paint will cover 60 to 100 square feet. That is enough paint to cover an average dresser with two to three coats.
Lauren Thomann / Heirlooms at Home -
Trim With a Brush
Not every surface of the dresser can be painted with a roller.
With a paintbrush, fill in the edges and any detailing the roller didn't hit. Allow the paint to dry completely. Depending on the paint used, you may need to apply one to three coats.
Wait about 48 hours before applying the final protective finish.
Lauren Thomann / Heirlooms at Home -
Buff on a Wax Finish
For latex and oil-based paints, you won't necessarily need to put a finish coat on a dresser.
 However, if you're painting with chalk paint, wax finishes are a common finishing step. We buffed on two different wax finishes: a clear and a dark.
 Following the manufacturer's instructions, apply the clear finish to the entire dresser. Focus the dark wax finish on details and around the edges. Use the same rag used to apply the clear wax to buff the dark wax for best results. The transitions should look seamless from one wax to the next.
Lauren Thomann / Heirlooms at HomeImprove the Drawers
One way to make a dresser seem new again is to improve its function. This quick trick will help old wooden drawers slide easier and not get stuck.
Buff on a clear wax finish on the wood rails of the dresser drawer. Then buff on the same wax finish on the inner rails where the wood pieces slide against each other.
-
Reattach Your Hardware
The last touch is adding back the decorative hardware. You can reuse the existing knobs without refinishing them to retain that authentic antique vibe.
Lauren Thomann / Heirlooms at Home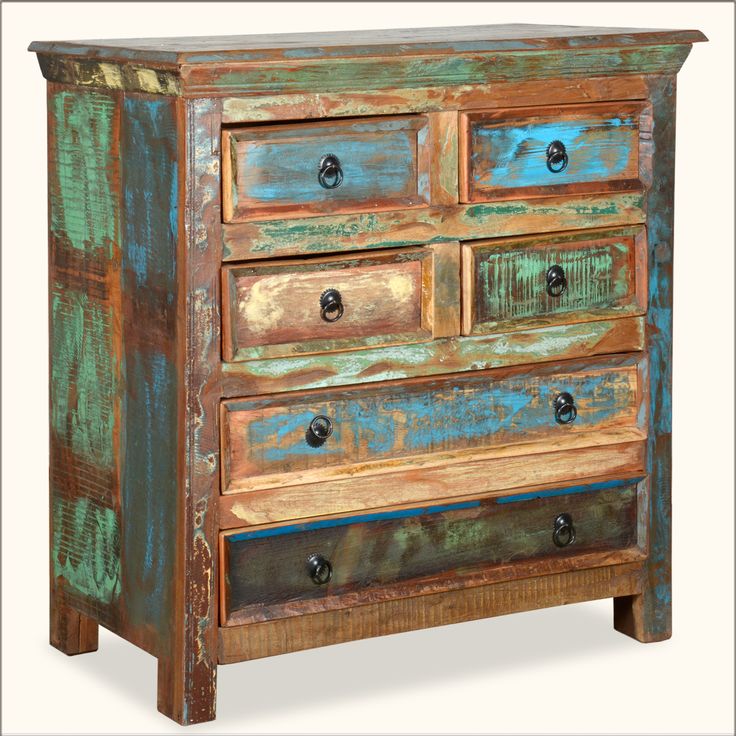 If you prefer, update your hardware in a similar style so you won't have to drill any extra holes.
Watch Now: Fun Ways to Use Chalky Finish Paint
How to Paint a Dresser
Looking to update an old dresser? Find out how to paint a wood dresser the easy way for a gorgeous, smooth finish.
I love a good furniture makeover; there’s something about the mix of creativity and restoration that – at the risk of sounding overly dramatic – stirs my soul. So a recent painted dresser makeover for our master bedroom was both cost effective and therapeutic. 😉
Rather than show you a simple before and after, though, I wanted to give a step by step tutorial on how to paint a dresser. In today’s climate of long lead times and high cost, I think it is especially sweet to be able to restore an old piece to new life. Whether it’s a family heirloom, a new-to-you antique, a fun vintage find, or simply a high quality new-ish dresser that needs a fresh look, being able to restore an outdated dresser is such a helpful skill!
Finding a Quality Used Dresser
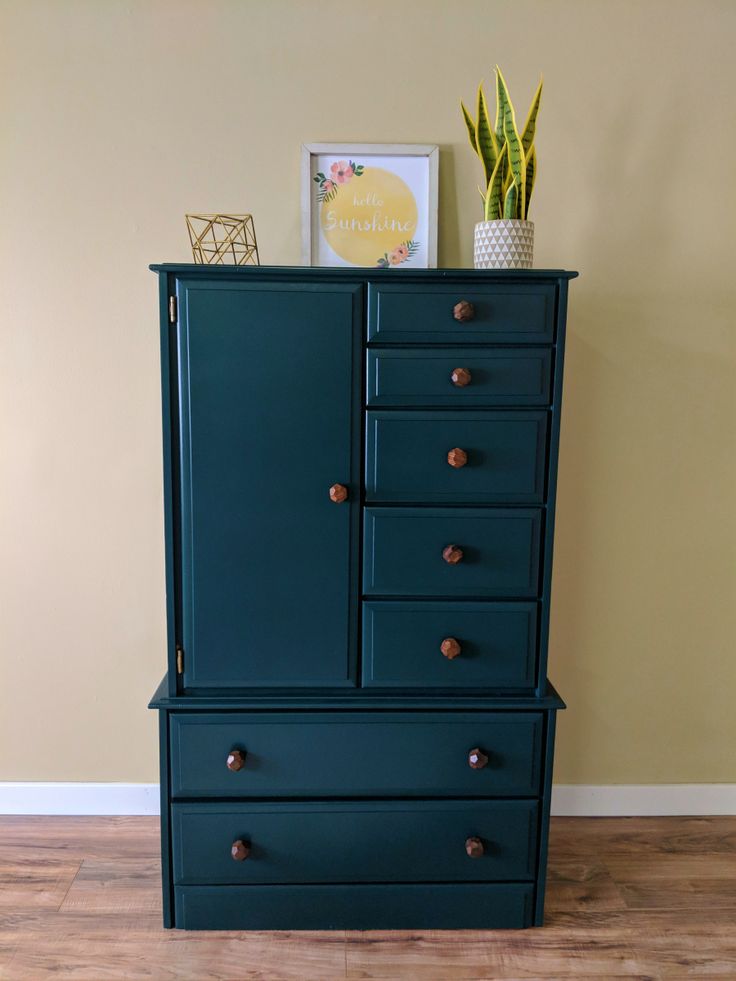
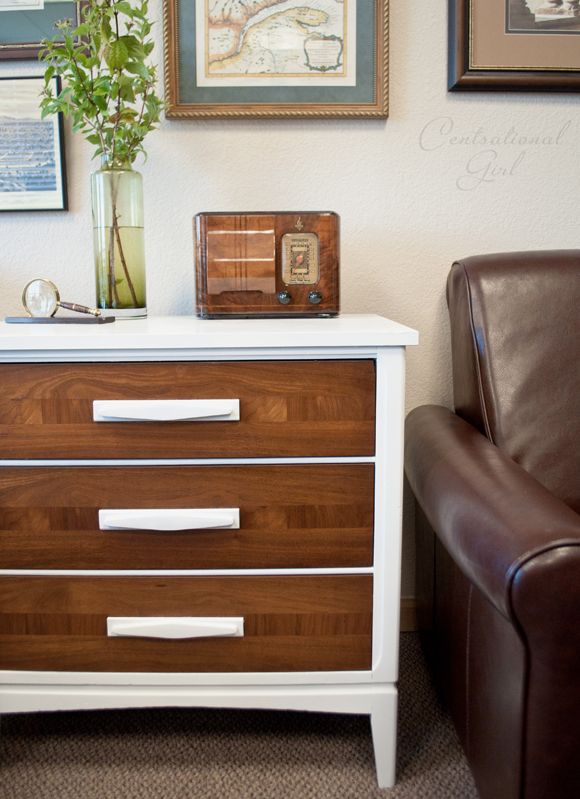
First, here’s a quick look at the piece I recently painted. After a couple of years of living with furniture that didn’t really fit the layout of our master bedroom, I finally decided to move my beautiful empire dresser out to the ranch and get a long, low dresser that fit our space better.
I found this dresser on Facebook Marketplace locally, and with dovetail drawers, smooth glide drawer slides, and velvet lining, I was thrilled with the quality I got for the price.
the dresser beforeIt’s a more modern shape and style than I often choose for furniture, but I knew I wanted a painted dresser that was a bit stately and yet simple to complement the wood grain on the more ornate antique washstands I restored for bedside tables.
Also, just wait on that blank wall around the window… I’ve got big plans! For the dresser, though, I was looking to achieve a smooth, modern, matte finish in a deep moody blue. Let me show you how.
This is not sponsored, but a special thanks to Fusion for providing the paint. All opinions are my own!
How to Paint a Dresser
This post contains affiliate links.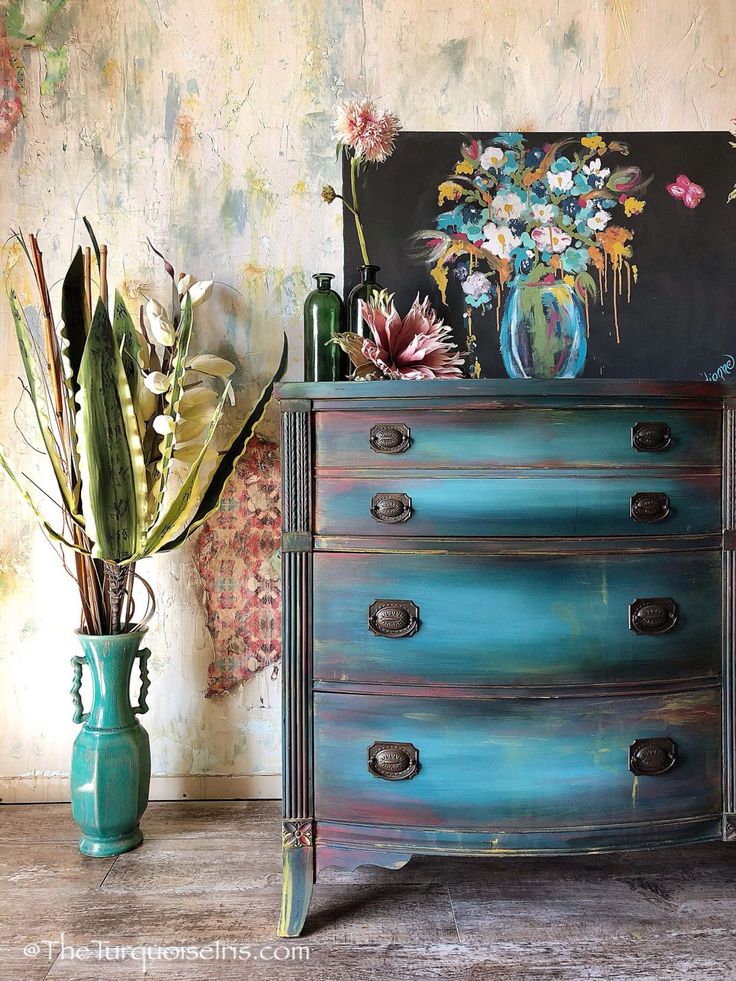 Click here to read my full disclosure.
Tools and Supplies:
- palm sander with variety of sand paper (sanding block can work if you don’t have an electric sander)
- old rags and spray (like Krud Kutter or Simple Green) for cleaning
- high-quality furniture paint (I used a custom blend of Coal Black and Homestead Blue Fusion Mineral Paint at roughly 1:1)
- trim roller + tray, high-quality 2″ angled paint brush
- optional: Rub ‘n Buff for the hardware (I used gold leaf)
I’ve put together a video tutorial for you. For more details and written instructions, keep reading below.
1. Remove drawers and hardware
Pull each drawer all the way out of the dresser body and set it aside with the drawer front facing up. Then remove all knobs, pulls, and decorative hardware. Store these safely in a cup or bag so you don’t lose them.
As you do so, inspect the dresser for any serious damage to the previous finish. If there are significant chips or deep scratches in the finish, take a moment to fill those with wood filler before the next step. Trust me, the prep work is worth it!
2. Lightly sand
Using medium grit sandpaper (I like 150), give the dresser a light sanding. If it needs more smoothing, go over a second time with 220 grit paper.
You do not need to remove the previous finish entirely since you are going to paint the dresser. You just want to scuff up the previous finish and smooth out any inconsistencies. If the previous finish was glossy, be sure to sand enough to remove that sheen, as this could make your paint not adhere very well.
3. Clean
It is important to remove all sanding dust as well as any leftover grime, grease, or dirt. I suggest a quick wipe down with an old rag to remove the majority of the sanding dust. Then spray the dresser with Krud Kutter or Simple Green and wipe with a lint-free cloth to ensure a clean, oil free finish.
4. Paint first coat
My goal for this dresser was a smooth and durable finish free of brush strokes (if you want a textured chalk paint finish, then this is not the right technique for you.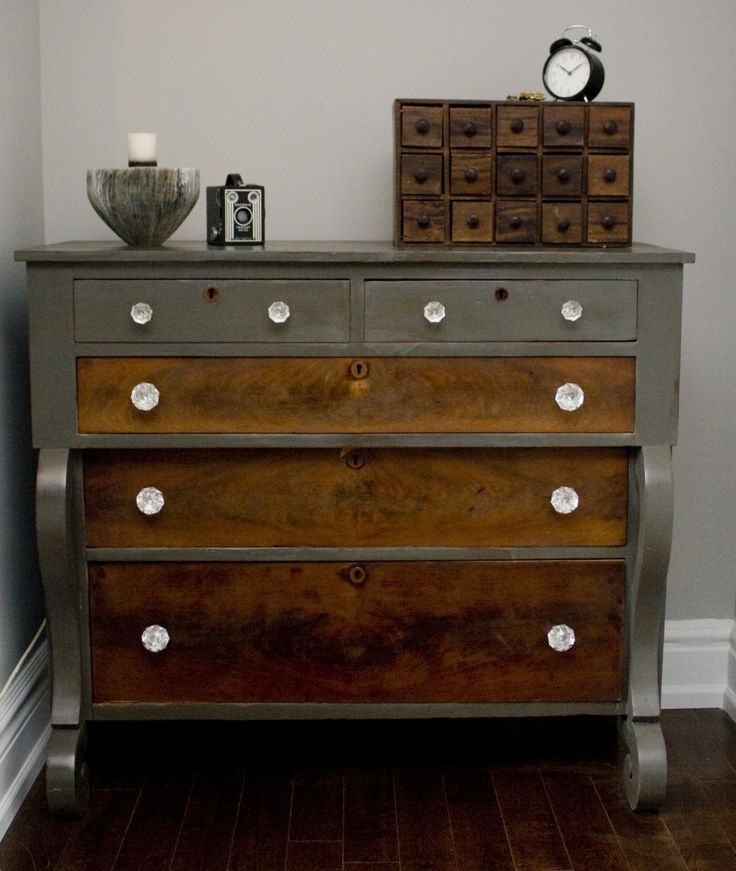 ) Using a high-quality synthetic brush or a small foam roller made for trim paint, apply the paint in smooth long strokes, being careful to avoid paint drips. Let it dry completely.
5. Paint second coat
Repeat step 4 for the second coat.
6. (Optional) Apply top coat
Fusion mineral paint does not require a top coat, and our dresser will simply hold decorative items, a lamp, and my clothes when I fail to put them away ;)… so I did not seal it. But if you know your dresser will receive significant traffic, then you might choose to seal it with a polyurethane or water-based top coat (scroll down to see related posts for more tips on top coats!).
7. (Optional) Update hardware
While your paint dries, you might consider updating your hardware. I gave these drawer pulls a little facelift with Rub ‘n Buff, which is my favorite gold wax product. I just wiped it on with a paper towel and rubbed off the excess.
8. Install hardware
Once everything has fully dried, reinstall your hardware.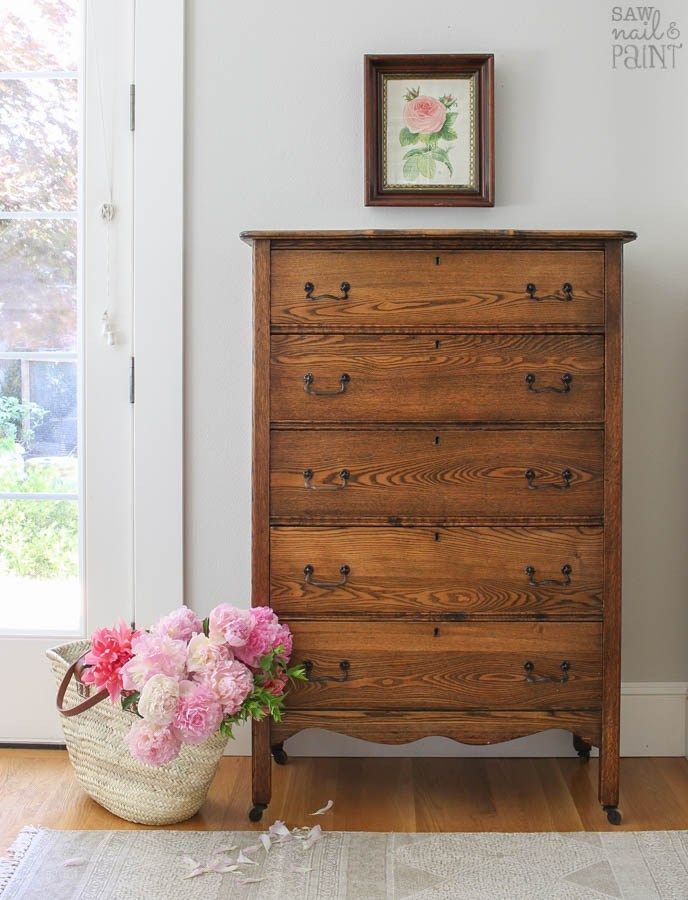 Then use the dresser carefully for at least of couple of weeks to allow the paint to fully cure to its hardest finish.
Painting Furniture FAQs:
Can you paint a dresser without sanding?
You can, if you use chalky paint or mineral paint, but I would advise against it. A very light sanding (not to remove the finish, just to scuff it up a bit) will smooth out imperfections and increase your paint’s adherence and therefore durability.
Do I need to prime my dresser before painting?
That will depend on the previous finish and type of paint (and color) you are using. As you saw above, it is possible to paint without primer if you prepare the wood properly (a light sanding to remove any glossy finishes) and use a paint made to adhere, such as mineral paint or chalky paint.
However, if you are planning to use latex paint or oil based paints, I advise priming. If you are trying to paint a very dark wood dresser white, then you might want to prime just to cut down on the number of coats of paint required.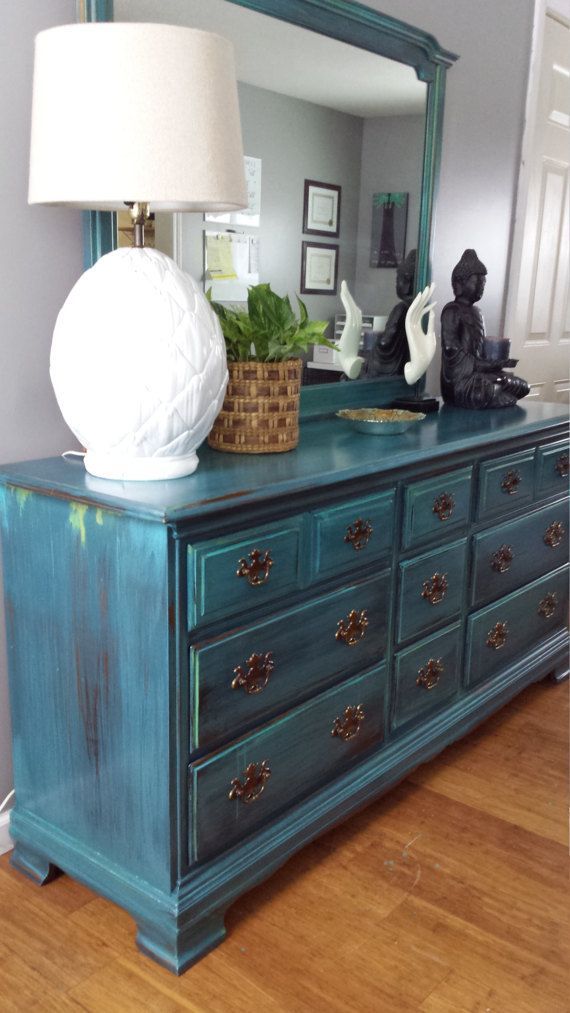 If the wood is especially dark or varied and you want a clean, light color, then I advise an oil based primer.
What kind of paint do you use on a dresser?
My favorite paint to use on dressers (and most small furniture pieces) is Fusion mineral paint. However, I have also had success with chalk paint, latex, and even oil-based paints. The important thing is that you prepare the dresser to receive the paint properly. If you choose latex or oil paint, you will want to use satin, semi-gloss, or gloss for durability.
Can you paint a dresser with spray paint?
I love using spray paint on outdoor furniture and accessories, but I would not advise using it on a dresser since spray paint does not always give you a very even finish. And most dressers have large flat areas that would be difficult to spray paint without some inconsistencies in the finish.
Alternatively, you could use a paint sprayer, with mineral or latex paint like I did on our murphy bed, but I find that taping off all the drawers and openings of a dresser is very tedious and hardly worth the work since dressers are simply not very large.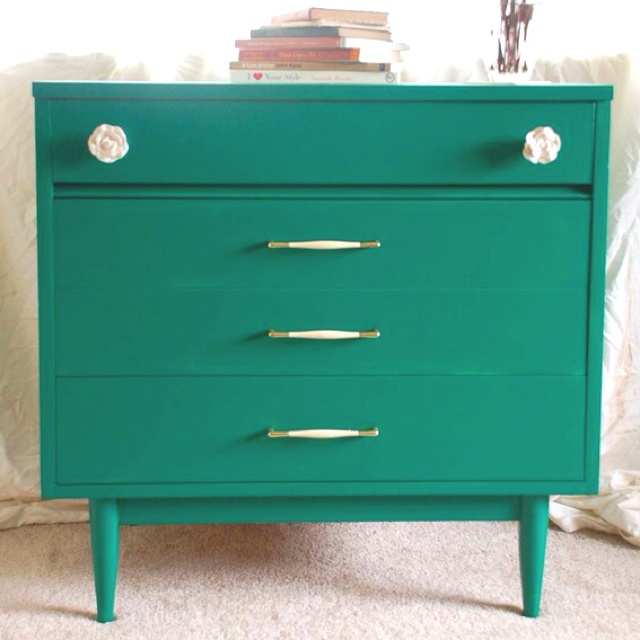
Can I follow these instructions for other wood furniture (like chairs, beds, tables, etc.)?
Yep! These same instructions could be followed for most pieces of furniture. However, I do recommend a top coat for a table or desk to give it greater durability.
Other Furniture Painting Tips
Here are a few more posts you might find helpful when painting furniture. Get tips on poly, waxes, stripping furniture, and more!
Happy painting!
How to paint a chest of drawers: a beautiful workshop on how to update an old chest of drawers with your own hands
It was an ordinary red chest of drawers - Alison Holly, the owner of the Apple & Oak decor store, decided to repaint it in an unusual way. The change took only one day.
Caroline Sharpnack
Caroline Sharpnack
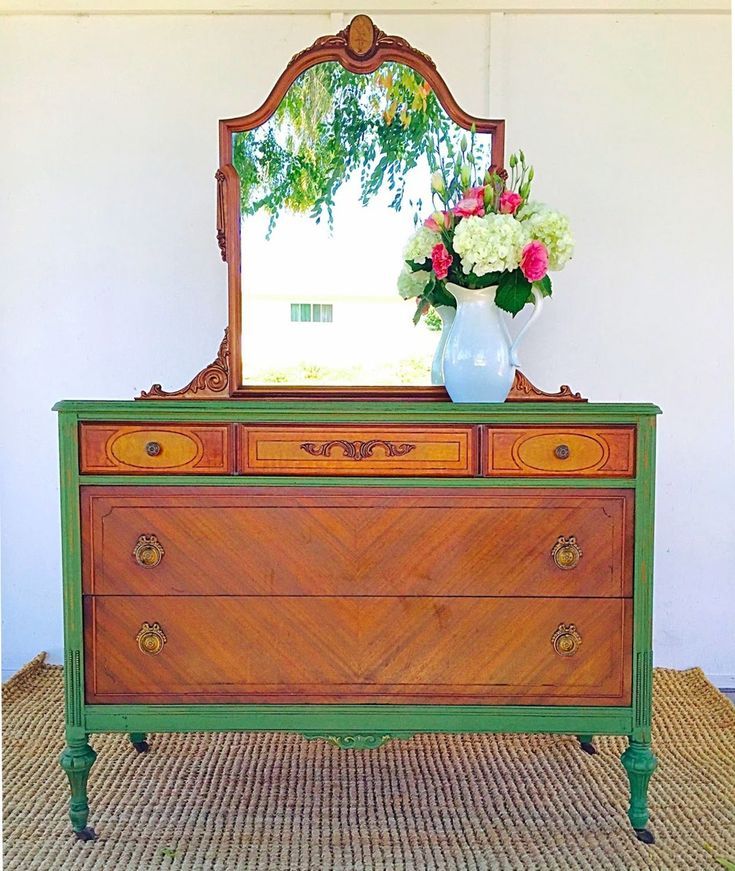
Tutorial: how to paint a chest of drawers in different shades of the same color
The gradient painting technique is suitable for any style of wood furniture, whether it is a coffee table or a large chest of drawers, as in this case.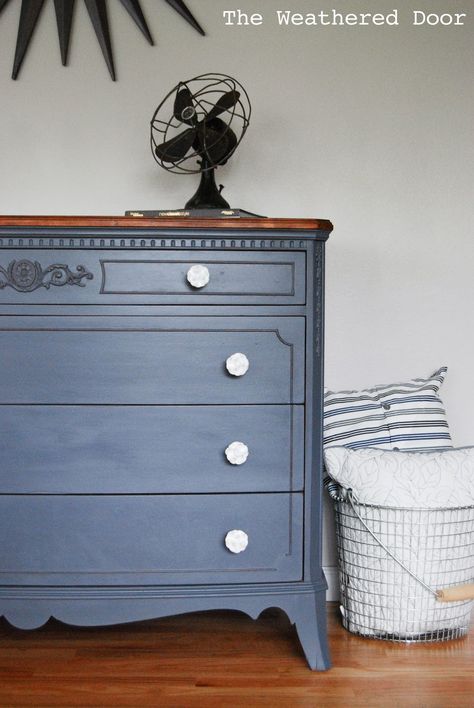 And our master class will help you do everything right and quickly.
Tip: All painting jobs are best done outdoors so the paint doesn't fly onto floors, walls and furniture. And the unpleasant smell in the apartment will disappear much longer. If possible, work outdoors. In order not to stain the grass with paint, place pieces of cardboard under the parts to be painted.
Photo: Susan Walton
You will need:
- Chest of drawers or any other wooden furniture.
- Pieces of cardboard to protect surfaces from splashing paint.
- Electric grinder or sandpaper sheets.
- Primer, varnish.
- Roller, sponge and paint tray; brush for painting boxes, paint, paint sprayer.
- Respirator, gloves.
Step 1: Prepare for painting
Remove the drawers from the furniture and remove all fittings. Use a soft, damp cloth to remove dust and dirt from the chest of drawers.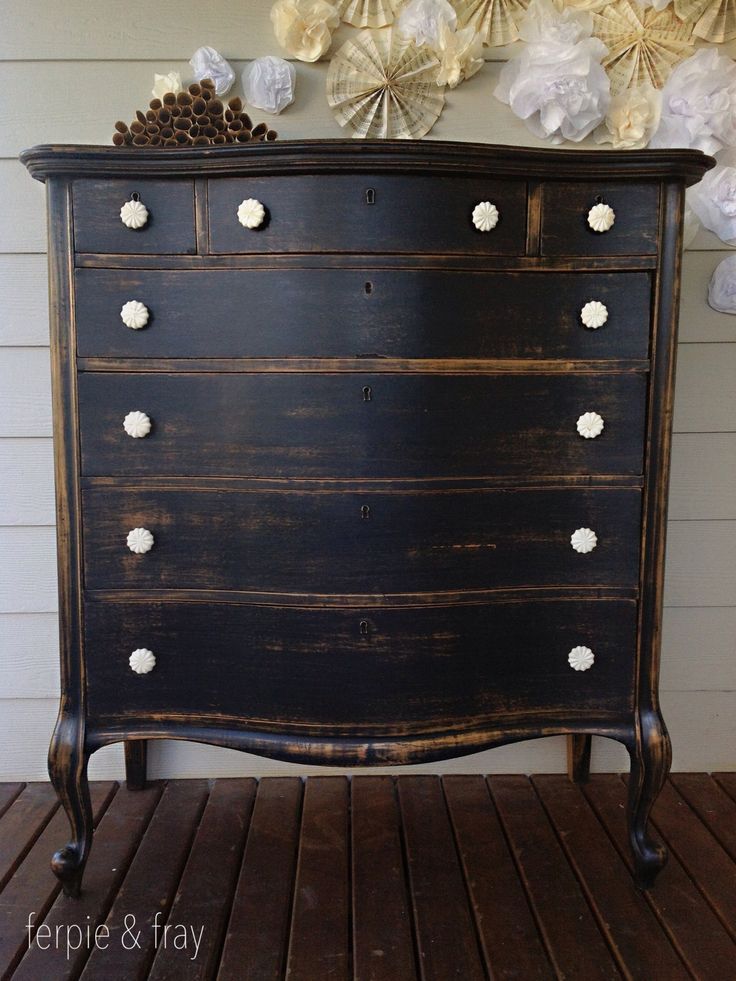
Step 2: Sand the surfaces
Lightly sand the sides and top of the furniture with a sander or sandpaper. If necessary, repeat this procedure - all surfaces to be painted should be smooth.
Important: Don't forget your personal protective equipment. All work must be carried out with gloves and a respirator.
Step 3: Prime the furniture
Before repainting an old chest of drawers, apply an even coat of adhesive primer to the surfaces. Alison used a primer from Fusion Mineral Paint, which is perfect for when you need to go from dark to light.
Use a roller to prime the outer surfaces of the furniture. Do not forget about the boxes - it is more convenient to handle them with a brush. Be sure to prime all parts of the furniture that will be visible.
Step 4. Dry
Put the drawers back in place and let dry. It took about 1 hour for the composition that Alison used to dry completely.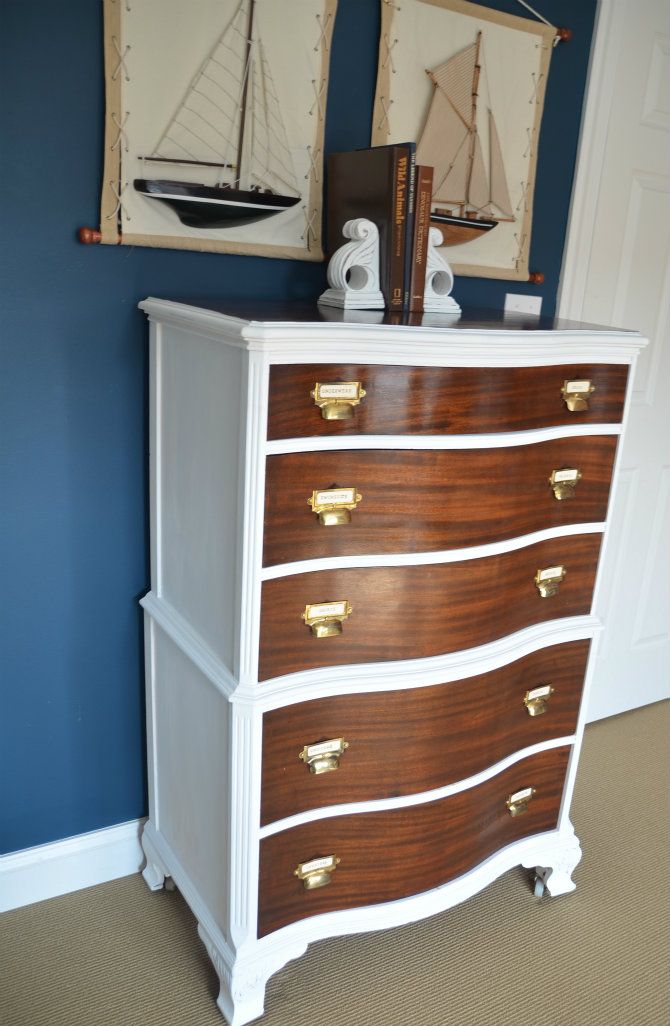 Read the instructions on the jar with your composition.
Step 5: Mix the colors
To update the chest of drawers and get a gradient effect, you will need several shades of the same color, but different in tone.
Alison chose white and green from Behr - Ultra Pure White and Underground Gardens - and mixed them in different proportions.
Tip: If you don't want a gradient effect, you can make the furniture solid. For example, paint a chest of drawers white.
Tip: Once you've decided which color to paint your chest of drawers, you can prepare as many shades as you like. To create a lighter tone, simply add white to the previous resulting color. Ideally, mix the right amount of cans using the tinting machine in the store.
Before you proceed to the next step, compare the resulting colors by laying them out side by side. If the shades suit you, you can start coloring.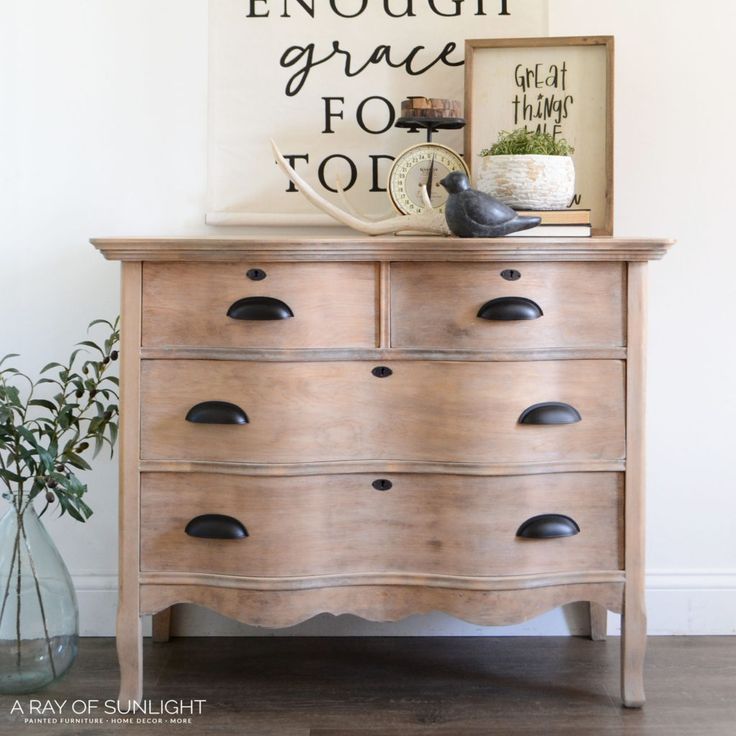
Step 6: Paint the chest of drawers
Spray paint the top of the chest of drawers and the upper third of the sides with the first base shade. Alison chose the height of the drawers as a guide, which she uses as a border for changing the shade. You can use the same principle in your project.
Apply the next shade in the middle area. And in the lightest tone, paint the lower third of your closet or chest of drawers. Leave to dry.
Step 7. Fix the result
When the paint is completely dry, apply a fixing coat - at least on the top of the chest of drawers. This layer will protect your furniture from scratches and make it easier to care for. Alison chose Tough Coat from Fusion Mineral Paint.
Important: Make sure the chest of drawers is completely dry before screwing the handles back on.
Caroline Sharpnack
We've finished the chest of drawers.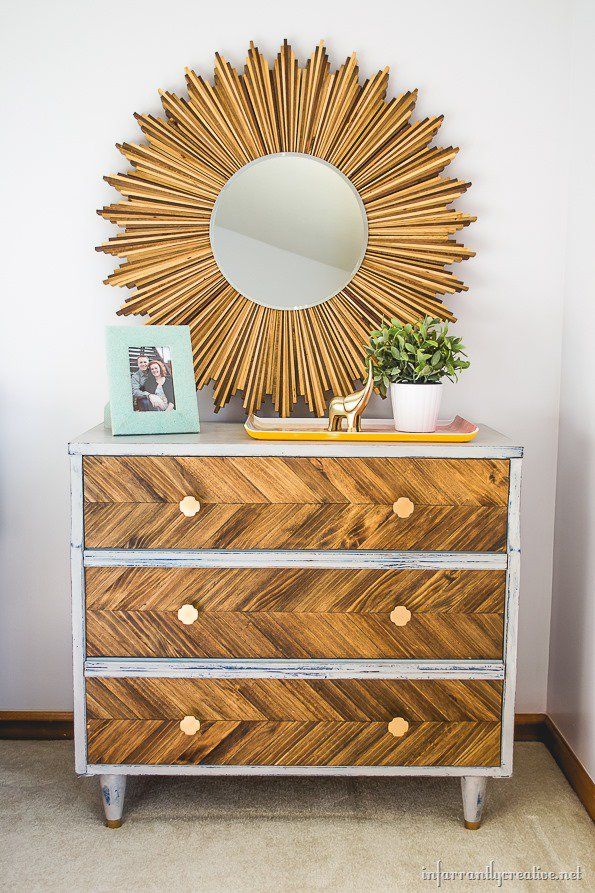 Now it is ready to take place in the interior of your home!
YOUR TURN…
Have you tried painting a chest of drawers or other pieces of furniture? Show us what you got. To What other ways to quickly update an old chest of drawers do you know?
Sponsored
Traumküchen: kompetent geplant, handgefertigt, professionell eingebaut
Sponsored
NRW | Ihre neuen Lebensräume aus unserer Hand!
DIY painting instructions, video and photo
As a functional and practical piece of furniture, a chest of drawers is simply indispensable, but as a visual image, especially in a modern interior, it can be archaic or outwardly old. The simplest painting of the chest of drawers will help to fix this, which will restore and refresh it and make it more fashionable and modern.
Photo of the change in the appearance of the chest of drawers after painting
Renewing the furniture with paint
You can be sure that many still have good, interesting, but already old furniture.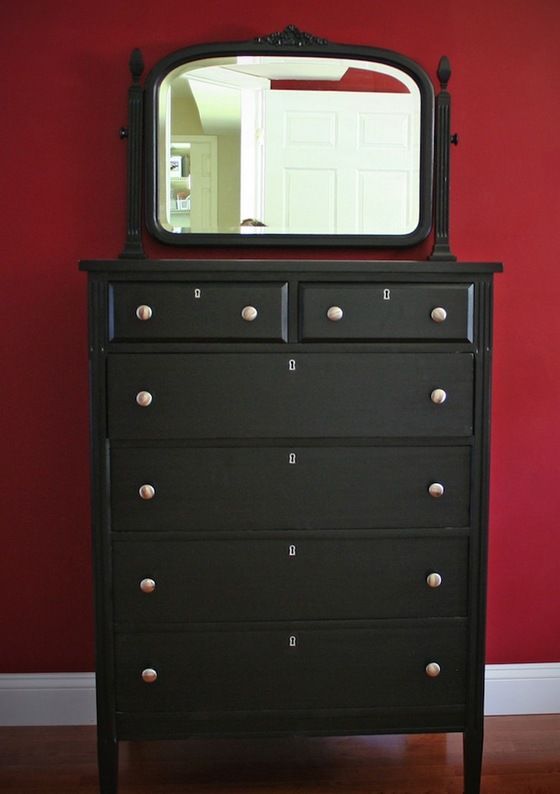 Among these "dinosaurs" is a chest of drawers. Interestingly, furniture of really high quality, which today costs a lot of money, can simply gather dust in the country house or in the back room, losing the last remnants of its appearance, but it’s enough just to restore it.
At home and completely on your own, restoration is possible, and it will be closest to painting work.
To update a piece of furniture you will need:
- A small paint roller and several brushes of different sizes.
- Acrylic paint in a specific color. If the staining goes white, then tinting will not need to be done.
- Fine sandpaper.
- Wood putty, it is good that it is acrylic, like paint.
- Varnish for woodworking.
Acrylic putty will hide defects visible to the eye
Tip!
If you want to give your furniture an even more decorative appearance after painting, you can add gold leaf or surface painting.
For painting, it is enough to purchase simple templates.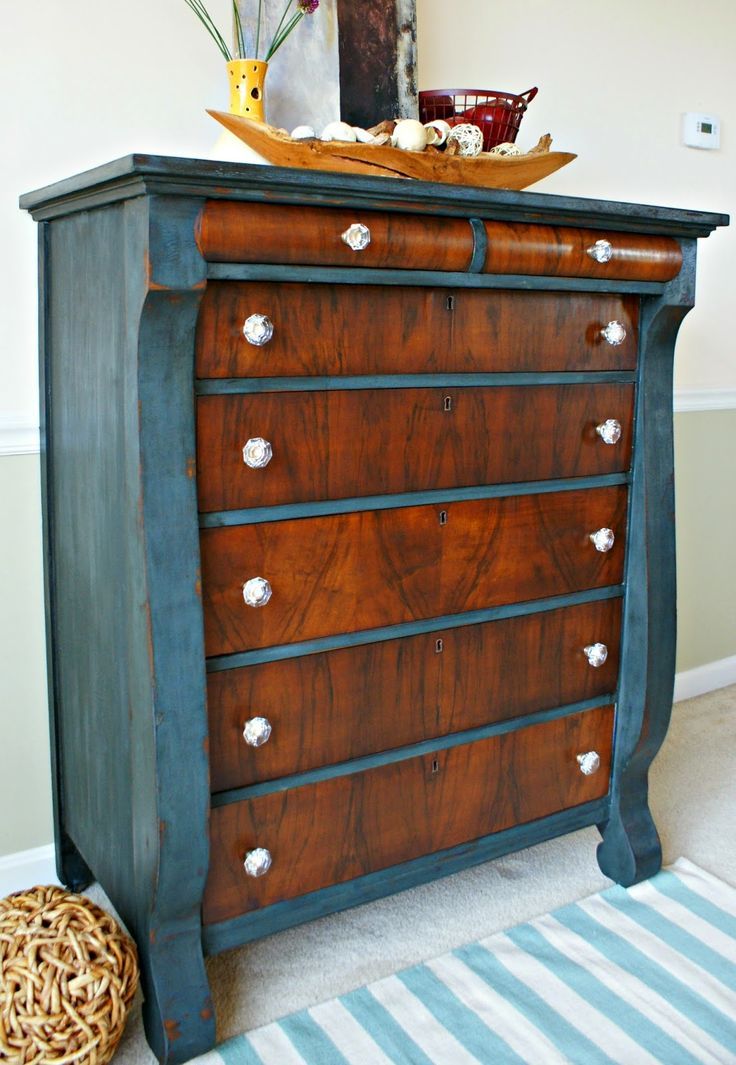
Preparation
Painting begins with surface preparation.
This process cannot be bypassed, and therefore we will display it briefly and step by step:
- The surface of the furniture is leveled . To do this, grinding is performed first with an average fraction of sandpaper, and then with a minimum one. Here, by the way, you can use a grinding machine.
- Defects in wood, and these are cracks from drying out, will need to be repaired with acrylic filler.
- The surface is primed with special primer .
Sanding can also be done with a machine or special drill bits
The choice of paint for furniture
It is clear that now there are enough paints and varnishes and each has excellent technical indicators and characteristics. However, not every paint is suitable for use on a wooden surface.
It must be understood that the dye should have the most effective look.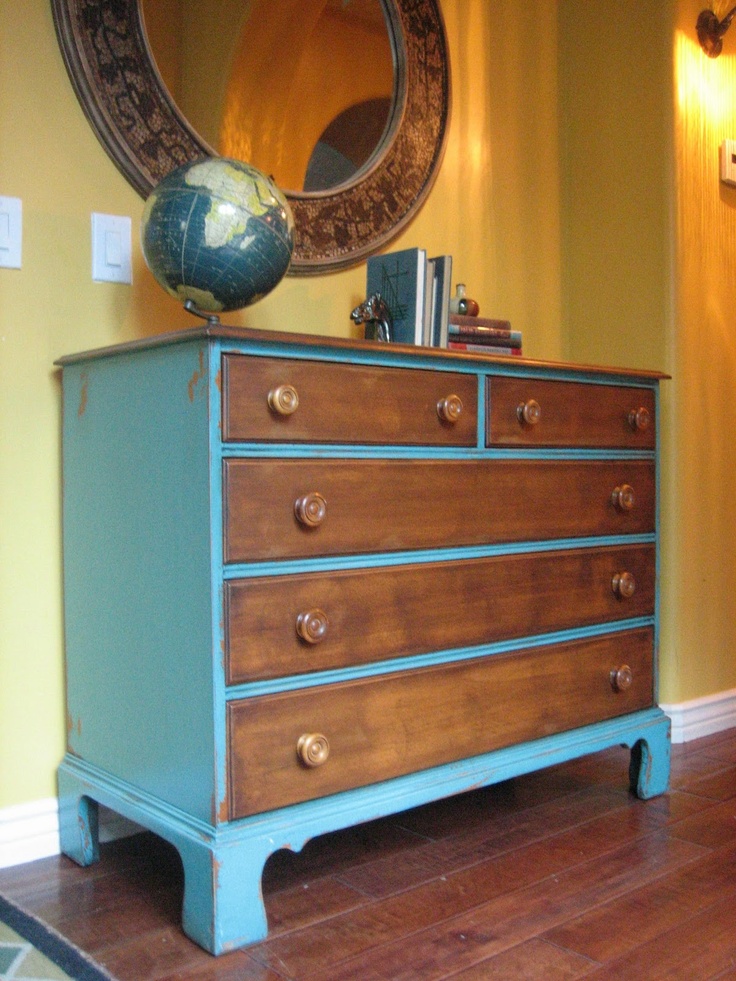 In addition, an indicator of resistance to abrasion and mechanical damage is important. Oil, enamel paints, varnish are suitable for these indicators and requirements. However, acrylic paint is most often chosen.
This is not surprising, because just for the restoration of an old chest of drawers, and for painting a new one, but in a different color, the advantages of acrylic dye will be required, and these are:
- Safety for humans.
- Absence of a sharp and unpleasant smell.
- Acceptable price.
- Easy to apply.
- Tintable - the paint can be any color.
- If necessary, this paint is diluted even with water.
Acrylic variety for painting furniture
Removing the old coating
A separate issue in the restoration of chest of drawers is the removal of the old layer of paint. It is not always enough to simply sand the surface.
There are several ways to remove the coating:
- Mechanical.
- Thermal.
- Chemical.
Each of them has its own distinctive features, however, the probability of damage to the surface of the furniture must be taken as a basis. Therefore, the mechanical option can be excluded.
It will be convenient to carry out chemical removal if the room is well ventilated. When using special washes and solvents, a pungent odor is emitted.
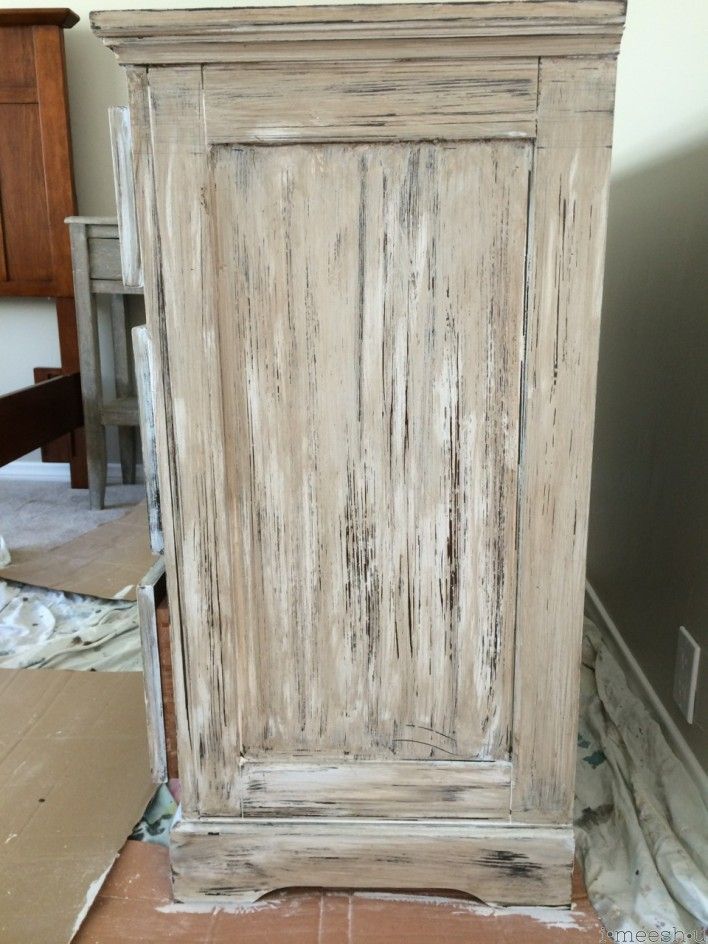
Thermal removal can also be carried out, this requires a blow dryer. In principle, it is quite convenient to remove the old coating with hot air, the main thing here is to carefully remove the softened paint with a scraper without damaging the surface of the chest of drawers.
Thermal stripping of chest of drawers
And yet, the instructions always assume that the work of removing the old coating from the chest of drawers will be carried out strictly along the fibers, and not across.
Important!
Do not use a damp cloth or sponge to wipe the surface of the chest of drawers after removing the old coating.
Dye residue will only go deeper into mini cracks in the wood.
Painting
Before painting, an acrylic-based primer is applied to the cleaned surface of the dresser if acrylic paint is chosen. It is best to use a simple brush for application. With its help, the application is accurate and not a single surface area is missed.
As soon as the primer dries, the application can begin.
There are two options here:
- Work with a roller and brushes.
- Apply material with a spray gun.
The easiest method of application remains with a brush
Do-it-yourself painting of a chest of drawers with a spray gun will require at least a little, but experience in working with a spray gun. But, if there is such experience, the paint will lie on the surface just perfectly, evenly and accurately, without streaks.
And painting in the first case, with a roller and brushes, goes according to the usual, standard rules of any painting work.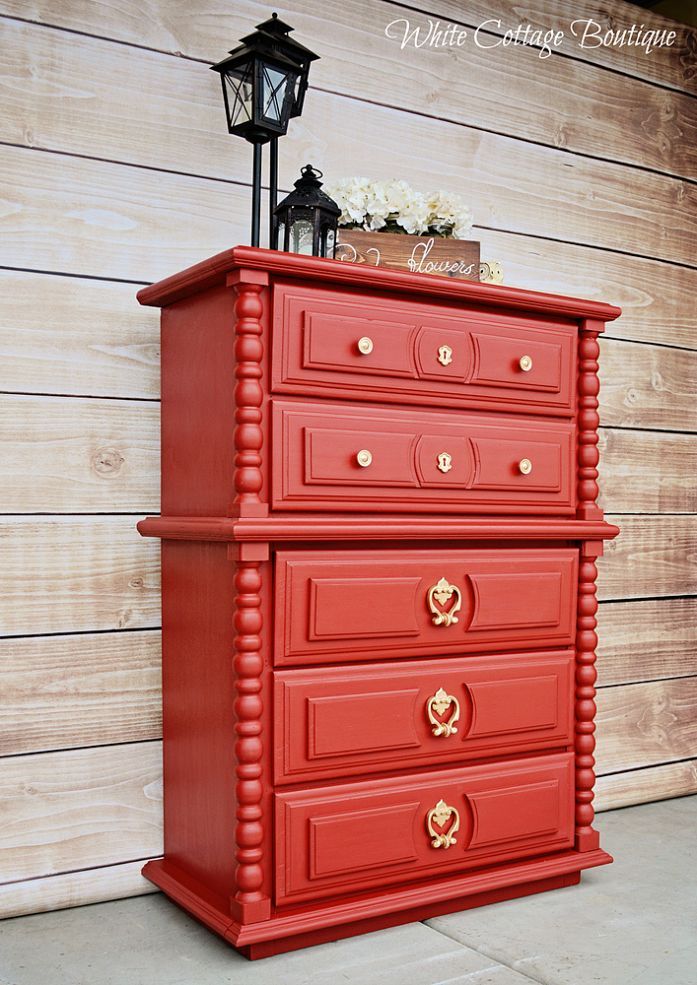 The first layer is applied with a roller from top to bottom. To do this, a small amount of dye is poured into a special tray, the roller rotates in it and then it is already carried out over the surface of the chest of drawers.
The first layer is interesting because after it it is already possible to determine the main type of surface. It can simply be a decorated drawing, drawing, painting. It is necessary to determine the second layer initially, so that it does not turn out that the layers are too contrasting, and the bottom one will be translucent, for example.
You can decorate a chest of drawers using simple templates
If the dyeing goes the simplest in one color, then it is recommended to apply the second layer perpendicular to the first.
There is another interesting variant of coloring a chest of drawers, when not paint is applied to the cleaned surface, but varnish. This allows you to leave the entire structure of the wood visible, which also brings a certain element of style to the decor.