Outdoor cooking station plans
15 DIY Grill Stations - With Free Plans
- Home
- Node
Submitted by Ana White Admin on Tue, 05/31/2022 - 07:18
Get grilling!
With spring and summer right around the corner, we find ourselves spending more time outdoors, entertaining and grilling!
Adding a grill station to an outdoor space makes it easier and more enjoyable to bbq and prepare outside. A grill station allows "the cook" to mingle and not miss the gathering. If you enjoy being outside and having a great bbq but don't have a grill station, NOW IS THE TIME!
Here are 15 of our favorite grill station plans to get you started.
If you do build please share, we love seeing your projects!
1. Nesting Grill Station
I love portable gas grills so much, I had to make an entire grilling station based around one! Build your own nesting grill station for a portable grill! Features grill table with storage for propane tank and grill, as well as a counter height dining/serving table. This is a great space saving option for prepping, grilling, and dining, plus it stores away neatly when done!
2. Charcoal Grill Island
From Gina at Lady Goats! "The design is based on a photo I saw of a potting table, which goes to show this would also make an amazing potting bench (cut the hole on top to suit your needs, or create a slab-top and use this as an outdoor buffet/serving station!).
Oh, I didn't mention!! It has a tilt-out bin!"
The extra storage and counter space make this a perfect charcoal grill station option!
3. Patio Cooler Grill Cart Combo
This Cooler Grill Cart Combo is from Brad at Fix This Build That! "The project is made from cedar to withstand the elements and give it a nice classy look."
We love the look and added storage shelf at the bottom with extra counter space for prepping the food!
4. Simple Rolling Bar Cart
An outdoor bar cart is great for prepping food or creating a drink station for outdoor grilling and entertainment. Its designed to stand for outdoor use, but you can wheel it inside - for filling it up with beverages and snacks too!
5. Rolling Outdoor Grill Island
This awesome outdoor grill island is by Pneumatic Addict! Here Elisha teams up with Simpson Strong Tie to put this rolling island together with some steel studs and connectors.
We love the ability to custom build this grill cart around your barbecue unit and the fact that it's portable to take with you if/when you move.
6. Rolling Cart with Cooler Storage
Want to add cooler storage into a grill cart? Check out this tutorial by C.R.A.F.T.! Keep cold drinks handy for your guests and while you prep and cook!
We like the idea of adding hooks for utensils and hand towels, maybe even a paper towel dispenser.
7. Big Green Egg Table
If you're looking for Big Green Egg table plans in any size, check out Dogwood Nation! With extra prep space and an added lower shelf, this is a great way to incorporate the Big Green Egg!
8.
 Small Galvanized Top Grill Cart
If you just need a little extra prepping and storage space, this cute little grill cart with galvanized top by In Between Chaos is perfect! Even better, then grill season is over, bring it inside for an extra kitchen cart!
9. Rolling Grill Side Cart with Storage
Houseful of Handmade has the plan for this awesome side grill cart, which includes a drawer, extra shelf, prep space and propane tank storage! The perfect addition to support your grilling experience!
10. Mobile Island Grill Cart
This mobile grill cart by DIY Huntress has it all! With added hooks and paper towel storage keep all of your grill needs close by! We love the incorporated cubbies and wire baskets for extra storage. Perfect for outdoor grilling!
11. Rolling Bar Cart with Removeable Tray
This bar cart, AKA beverage cart, party cart, decorative plant cart, grill cart, is made entirely of 1x3 boards (well, except for the wood wheels). It features a top tray that is fully removable, and bottom shelf with slatted design for easy water drainage, curved handles for easy moving, and two large wooden front wheels, moving your party outdoors - or indoors come unplanned weather changes, is as easy as it is stylish.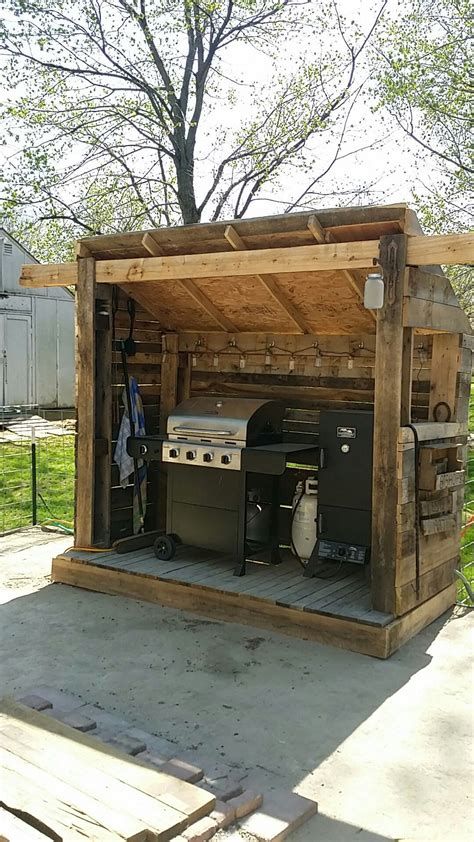
12. Portable Table
We're thinking outside the box with this one. This is our portable workbench plan, but we've seen it used as a mobile or tailgate grill table as well!
13. Grill CArt and BBQ Prep Table
This sweet BBQ cart is by Woodshop Diaries! It is larger in size and will accommodate different sized portable or charcoal tabletop grills, with plenty of prep space! We love the added casters and handle for easy mobility.
14. Outdoor Serving Center
This awesome serving center by Kreg is a great addition for outdoor entertaining! Keep drinks and condiments chilled and within easy reach. The design allows for added prep space on top. Made from cedar this outdoor serving station is sure to last!
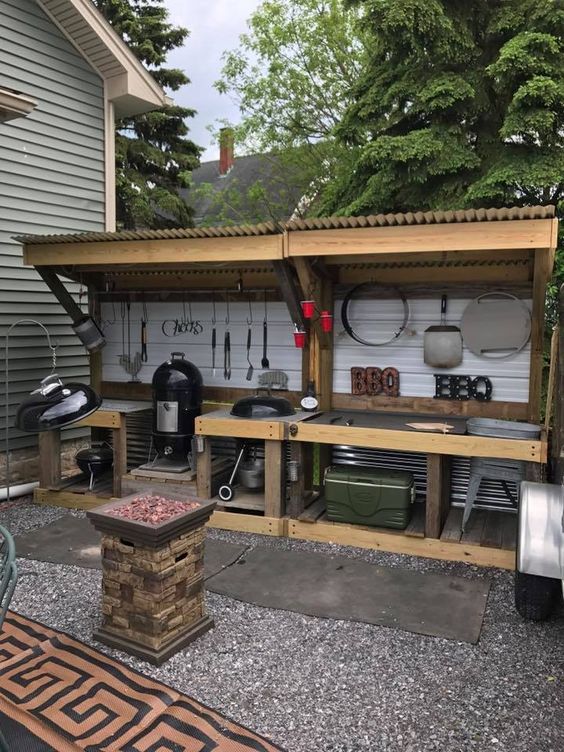
15. Grill Island
This grill island has all the prep surface, tons of storage and room to sit and eat! This beautiful design is by Houseful of Handmade. We love the added casters and stainless steel top. Added seating allows for family or guests to sit and give the cook company!
Pin For Later!
18 Easy Homemade Grill Station Plans
Why buy expensive grills that come with a grill station when you can DIY a cost-effective grill station yourself? The best part of DIYing your own grill station is that you can customize the size of the station and design them accordingly.
You can DIY a spacious grill station or you can make small, compact, and easily movable ones, the choice is up to you!
Now, if you’ve made a smart decision of DIYing a grill station, let’s look at some fabulous DIY grill station ideas available on the internet.
Table of Contents
1. DIY Outdoor Kitchen Built-in Grill Station
This DIY outdoor kitchen built-in grill station design is stunning. The Youtuber from Mr. Build it, further added a pergola on top of his grill station which amplified the beauty of the overall look.
He explains everything in detail in this video including the supplies he bought for the project. Moreover, you can find the tools used in the description box. If you’re into such creative DIYs, you must check out Mr. Build it on YouTube.
2. Rolling Outdoor Island Building Plans
We all love straightforward plans with no unnecessary bluffs, don’t we? This outdoor island is fantastic at it has an in-built grill and also is easily movable. It is also quite spacious and has enough space to accommodate a few dishes.
All the material and tools required are mentioned in this plan and the step-by-step instruction is very clear and thorough.
Check the Tutorial Details
3. Easy DIY Outdoor Kitchen | BBQ Island and Bar | How to Build Grill Station
These Youtubers from Let’s Wing It DIYed a BBQ island because they wanted an area to grill as well as enjoy with their guests.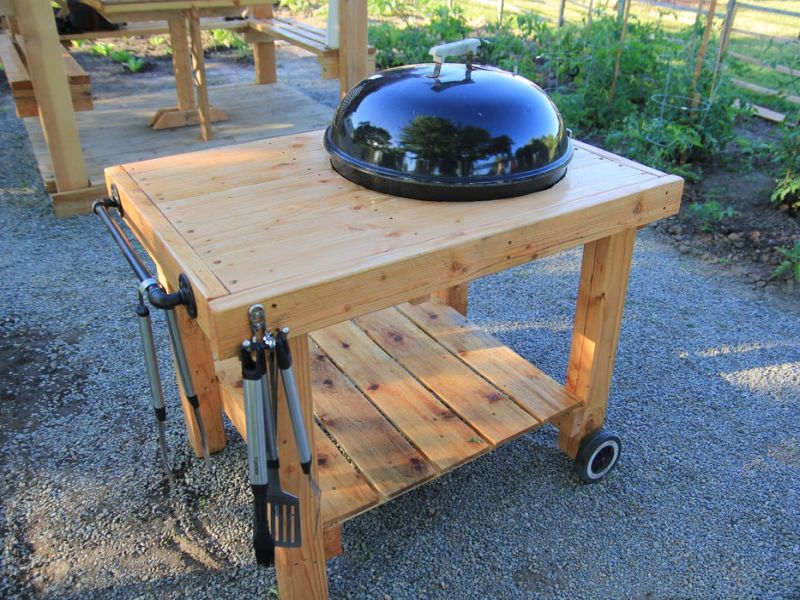 They completed this project for under $500 and it took them 2 days to finish the DIY.
The result is absolutely stunning. However, make sure to customize this project plan such that it fits your grill.
4. The Perfect Barbeque
Make this movable grill/barbeque stand for under $600! The major supply for this project is wood pallets. Moreover, the grill machine and a sink are in-built onto the station.
Dimensions and project plans are not elaborated on in this written tutorial. However, if you’ve good knowledge of woodworking, this step-by-step guide should be enough for you to get started with this project.
Check the Tutorial Details
5. Blackstone Grill Station
Just as for the previous tutorial, we’d not recommend this tutorial for you if you’re completely new at woodworking.
However, Just Fooling Around is definitely not just fooling around and has an astounding collection of DIYs on their channel.
6. Building a Grill Station with Concrete Countertops
This DIY grill station features a concrete countertop. The grill for which the station was designed in this tutorial is stainless steel propane grill from Home Depot.
So, if you have the same grill you can proceed on this DIY without a second thought as most of the dimensions are mentioned on the description box and the video is incredibly descriptive.
In case you’re interested, HomeMadeModern has an exclusive set of creative DIYs that mostly include woodworking.
7. Big Green Egg: Concrete Top Table Plans
Do you own a Big Green Egg grill? If yes, here’s the easiest DOY grill station tutorial for you. All the supplies necessary are listed on the blog post and the illustrations and pictures will make this DIY experience for you quite simple.
If you don’t believe us, you can check the comment section yourself. The ‘Thank yous’ and compliments will definitely inspire you to DIY one.
Check the Tutorial Details
8. How to Make a Brick Grill – DIY Temporary Brick Hibachi Grill
Earlier, when we said you can design your grill station to be as compact as you want, we weren’t lying. In this tutorial learn how to make a temporary grill using bricks. What’s more, you don’t need gas to use this grill at it uses charcoals.
DIY this 5-mins grill anywhere you want and your entire yard/garden can be considered as the grill station.
9. Grill Station – Tutorial build with granite and 4×4 posts
This outdoor grill station is small yet awesome. Small size automatically means less cost, less effort, and less DIY time. All the comments on the comment section of this blog post seemed encouraging.
The downside of this written tutorial is that the instruction is written in paragraphs. All the dimensions and supplies are written in the paragraph itself. All you need to do is give this blog post a good read.
Check the Tutorial Details
10. Build with Roman – How to Build a Willard Grill Station w/ Kamado Pad – Tips and Tricks
This DIY grill station features a 32’’ summerset sizzler grill that does not have an infra-red burner. The major supplies for this project are concrete blocks.
If you’re not very skilled at woodworking or if you’re a lazy DIYer, this project is perfect for you as it requires minimum effort and time. You can find some interesting DIYs, that use stones, on Romanstone Hardscape.
11. DIY Portable Outdoor Grill Station and Bar Combo
If you were in search of a video tutorial with free project plans attached to the description box, we’ve finally found one.
Watch this short ‘how-to’ to gather ideas and follow the plan, the link to which is mentioned on the description box, thoroughly to DIY an excellent portable outdoor grill station and bar combo.
Real Cedar – Design Inspiration & DIY Plans has an excellent set of attractive and creative DIYs, primarily using cedar lumbers.
12. BBQ at Home: How to Build a DIY Grill Station
Rather than an actual DIY tutorial, this blog post is more of an in-depth guide for DIYing a grill station. From the type of grills to information on how to design your own drill station, this post covers it all.
Even if you’ve decided on which tutorial to follow, we’d highly recommend giving this blog at least a read as you’ll learn how to customize these DIY grill station designs effectively.
Check the Tutorial Details
13. DIY Weber Grill Cart BBQ Station
If you’re a fan of charcoal grills and own a charcoal Weber grill, scroll no further – this tutorial is for you!
This Youtuber Darbin Orvar completed this project for under $100, including the supplies and a new set of grill tools. How affordable is that? The video is pretty elaborative and you can find the cut list on the video’s description.
14. Gio’s DIY at Home – Grill Station / Island
If you’re a beginner at woodworking, or simply at these kinds of DIYs, you can give this tutorial a pass.
However, if you’re just in need of inspiration and brief instruction on the procedure, this short YouTube tutorial by Gio’s DIY At Home might cater to your need. Remember that no dimensions, cut list, or supply list are mentioned in this tutorial.
15. Mr. Goats’ Father’s Day Gift
This DIY grill station for charcoal Weber grill is small yet stunning. The drawer feature at the bottom portion makes this DIY unique.
The project plan is divided into three sections; shopping list, cut list, and step-by-step instructions below each illustrative figure with dimensions. Thus, this DIY tutorial is very easy to follow along.
Check the Tutorial Details
16. BBQ table DIY – Outdoor grill station for Kamado Joe or Big Green Egg table & concrete countertop
Here’s another Kamado Joe or Big Green Egg grill station tutorial. The Youtuber, at the beginning of the video, clearly mentions the adjustments you’ll have to make while DIYing the station for Big Green Egg grills.
This grill station accommodates two Kamado Joe Classics and features a concrete countertop.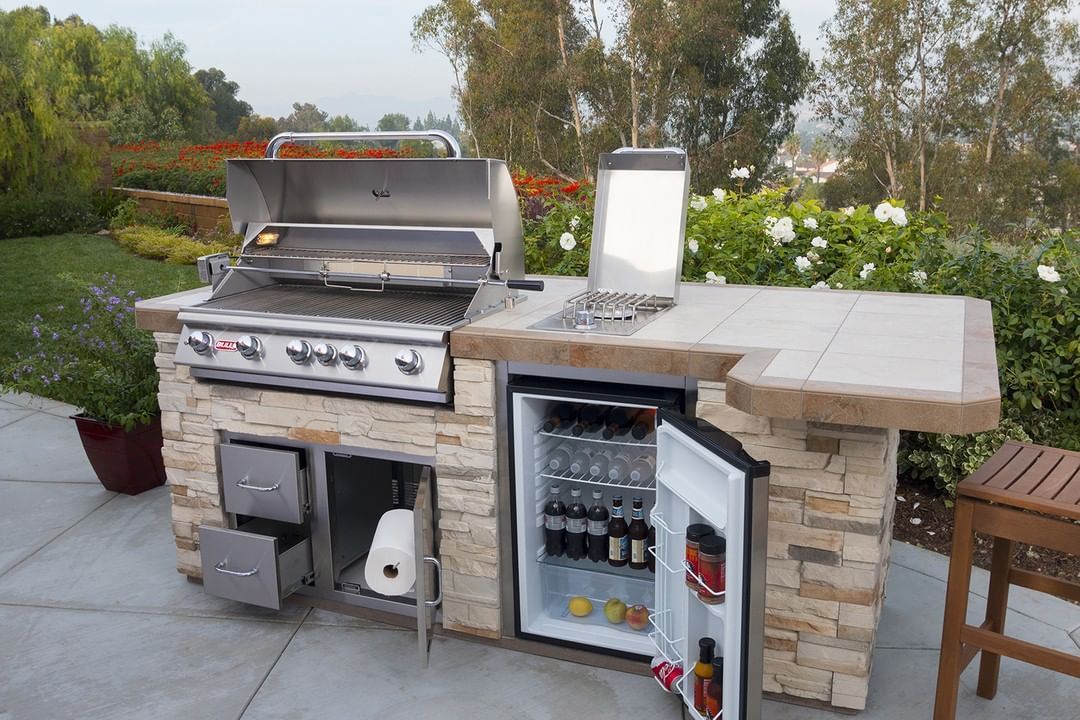 If you loved the idea of making a grill station for two grills, you must check the tutorial out.
17. How To: Custom-Build The Ultimate Outdoor Kitchen
This DIY grill station might be the easiest and simplest grill station you can ever make. Basically, it is a small cart with a concrete countertop and an in-built grill.
If you’re a beginner, we’d recommend this tutorial for you as it is quite long and every small detail is pointed out. If you loved this DIY grill cart design, this simple DIY should be a no-brainer for you.
Check the Tutorial Details
18. DIY Grill Cart
Unlike the previous grill cart, this grill cart is two-story and also features a paper towel roll rack and a sliding hot plate.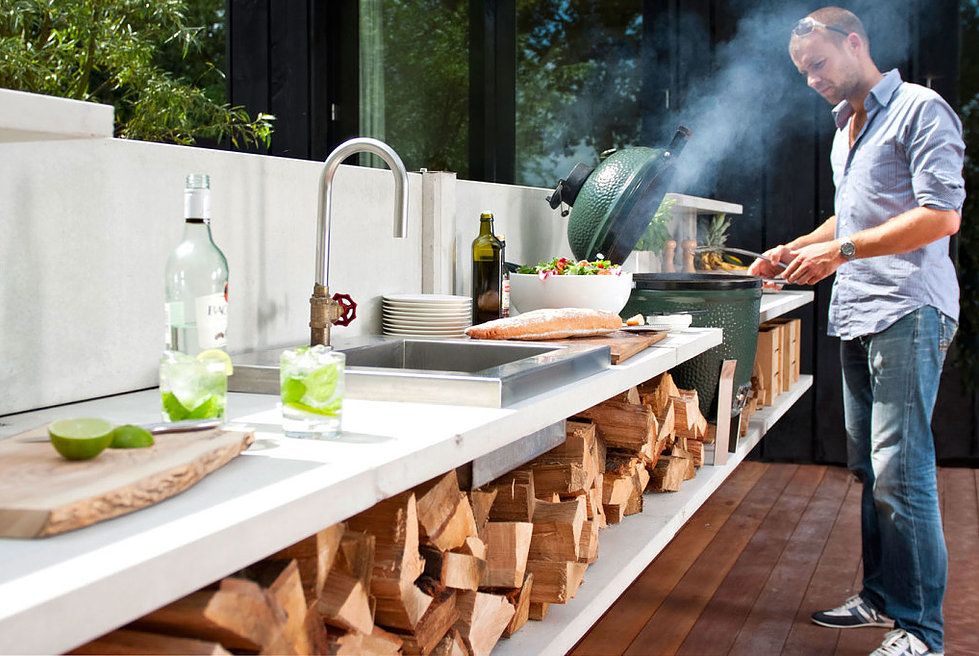 The Youtuber from HomeMadeModern explains the process quite well and makes the DIY look incredibly simple.
If you’ve made your mind that you want to make this DIY grill cart, you can find a more detailed tutorial on their website.
Summary
From small movable grill carts to heavy concrete and stone outdoor grill stations, we’ve covered almost all types of DIY grill stations. If you’re a beginner to these types of home-making DIYs, you can start small rather than not trying at all.
Grilling is not always about eating. Sometimes, it’s about spending fun times closed ones and a grill station serves as a perfect outdoor mini-kitchen for such occasions. So, get your supplies ready and start the project right away!
Open Kitchen - Ideal layout for small spaces
Open plan kitchen plans are very popular in new build homes as most have a kitchen with dining area or some sort of open plan living space. As our lifestyles change, so do the ways we use our homes, and many have opted to redecorate their Victorian terraces and move to an open floor plan.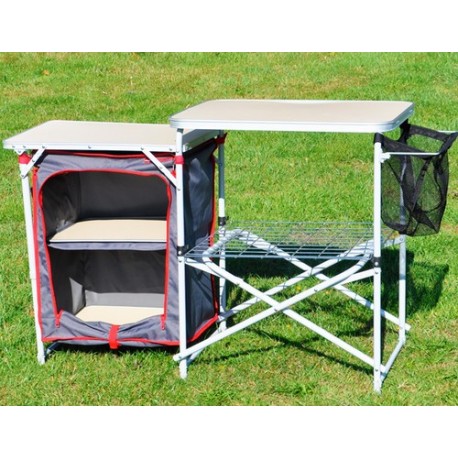
If you're looking to create an open plan design in a home you're building or renovating, it's sure to enhance the feeling of light and space. However, it is worth thinking carefully about the design so as not to sacrifice privacy and comfort. Here you will see houses that show how a well-executed open-plan kitchen design can work.
Pendant lights above the dining table help break up the empty space between the kitchen, dining room and living room; creating a flexible space for games and entertainment.
Light and space were key in this home for the large glass areas. The kitchen has laminate flooring, but the living room uses wood to dissipate heat.
This kitchen-dining room is truly impressive. A huge window that takes up the entire wall fills the dining room with light and creates a feeling of spaciousness, while the ceiling in the living room is very high and has levels and reliefs for a more cozy home feeling.
If your home has more than two stories (as is often the case when converted to an attic) then you need to make sure your open plan space complies with building codes regarding fire and evacuation.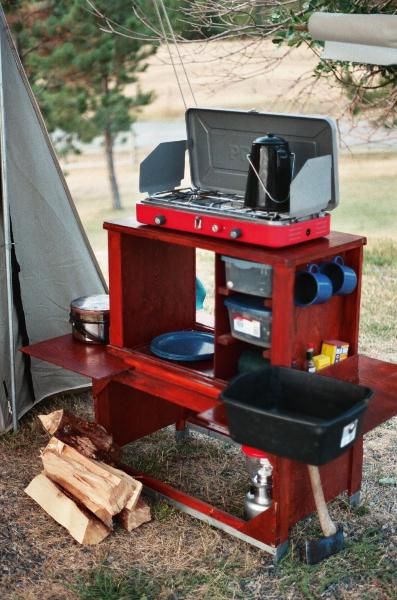 This is usually a problem if an open area is your primary means of escape. In these cases, fire doors between the kitchen and the first floor, as well as a fire exit from the first floor, may be needed.
If you can leave the first floor without going through the kitchen and opening up the open plan area, then this shouldn't be a problem. In any case, it's wise to look into fire suppression systems such as sprinklers and smoke screens to limit the spread of fire and smoke throughout the home.
This open kitchen is glazed at the back of the house, which means that the light comes into the back of the house. A casual living room with wooden elements creates a feeling of home comfort.
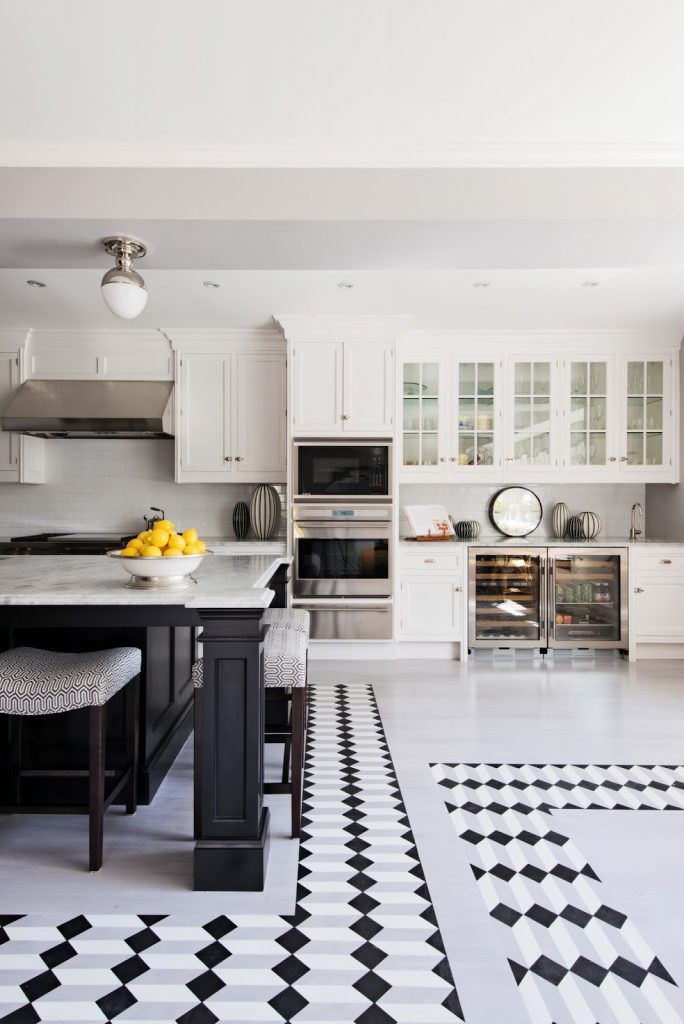
The kitchen is the heart of the home in this city mansion. The rectangular kitchen island makes efficient use of space by separating areas for cooking and relaxing.
This beautiful kitchen shows off a few rustic elements. Industrial-style green pendant lights illuminate the dining table at night, while large windows at the front and back of the home flood the space with natural light during the day.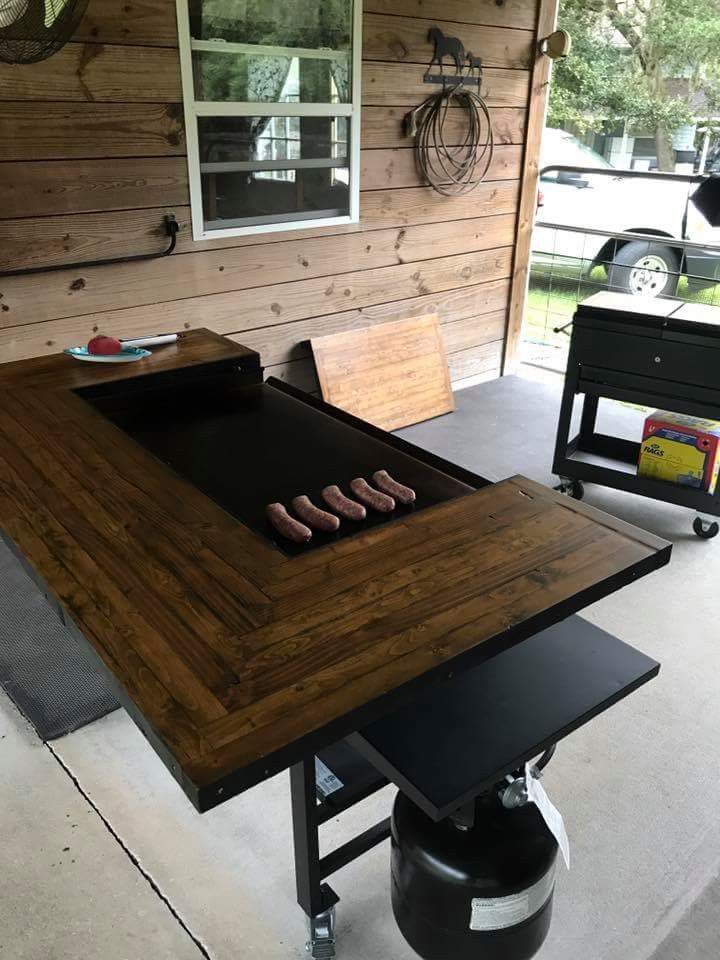
Open Kitchen Design
Some of the best outdoor spaces work so well because they have well-defined areas for different tasks. Ideally, you should divide the room without affecting the flow of light. You may also want some secluded areas, but if you have small children it is important to think about where you can work or play and where they will play.
Use breakfast stands, islands, or low-level furniture (or walls with low beams) to divide the space. It is very efficient to use different floor levels whenever possible, but think carefully about safety and steps in areas where you can cook or play.
Lighting is an unobtrusive and practical way to decorate a space. Use low pendants in the dining area and spotlights for task lighting. It is also good to use different floor coverings in each area of the room. It also means you can use softer floors in cozy spaces and harder floors in the kitchen or dining room.
What could have been extremely large has been artfully divided into cozy and practical spaces for relaxing and eating.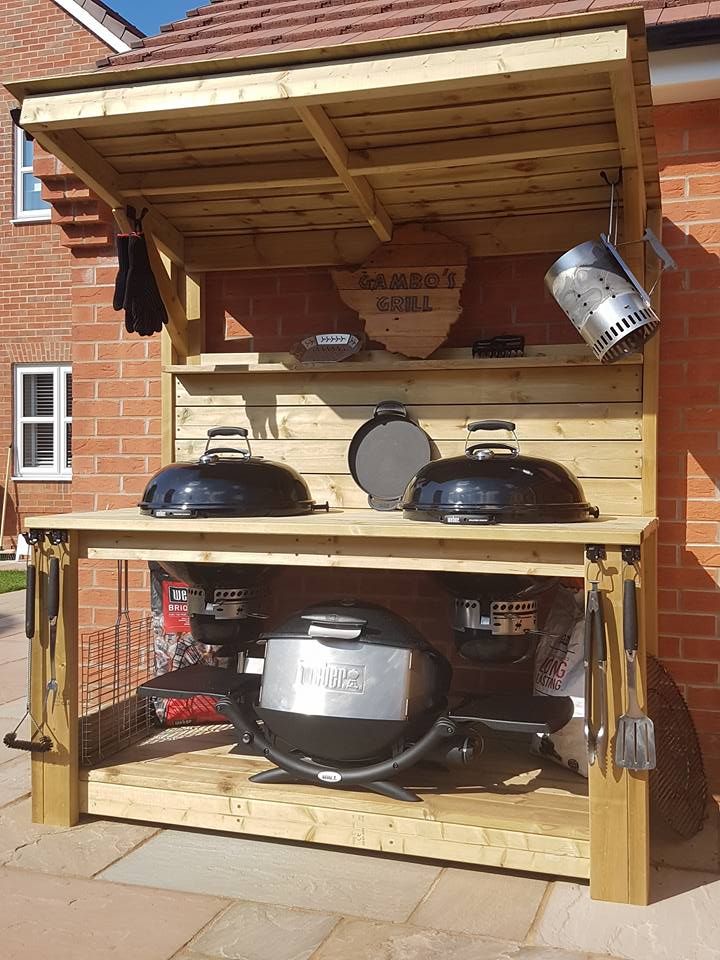 In this design, a modern kitchen island provides a work area.
The horseshoe-shaped kitchen separates the space from the dining area. A double-height vaulted ceiling above the dining area will help maximize the space, as will the use of pendant lights.
The architect who owns this home used several popular zoning techniques to break his kitchen into a dining area. The dining table sits next to a beautiful painting and black paneled wall, while the kitchen is clearly defined by a minimalist island and a few pendant lights. The sink and cooking surface are located in front of the dining area so that the hosts can talk to any dinner guest from the kitchen.
Open spaces present a cooking smell and steam filling problem everywhere. Therefore, a good extraction medium is required. If possible, place the kitchen near the window and as far as possible from the living quarters. An efficient hood is also needed, but look for quieter models so as not to interfere with people relaxing in the living room.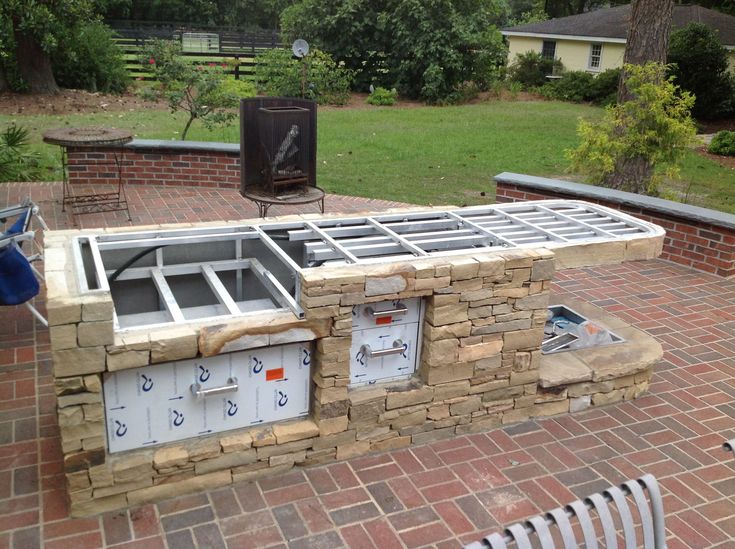
If you are still concerned about smells and steam (or noise) from the open kitchen, then it might be wise to install sliding doors between the kitchen and the living room.
The open kitchen of this new building style incorporates the hallmarks of American open-plan living, often repeated across the pond.
A stone-covered island creates a focal point and meeting space in the center of the room, and there is also space for a laid-back dining experience.
Open studio kitchen combined with living room and dining room
ADVERTISING
Recently, in economy class private houses, it has become popular to make the living area open, connecting rooms with each other with wide openings or combining different functional areas in one volume - a common open space not separated by partitions.
Large rooms make it easier to breathe and give a feeling of freedom. Connecting and unifying rooms reduces the area of corridors and halls, provides greater convenience and comfort of living in the house, and also allows you to create a unique interior in these rooms.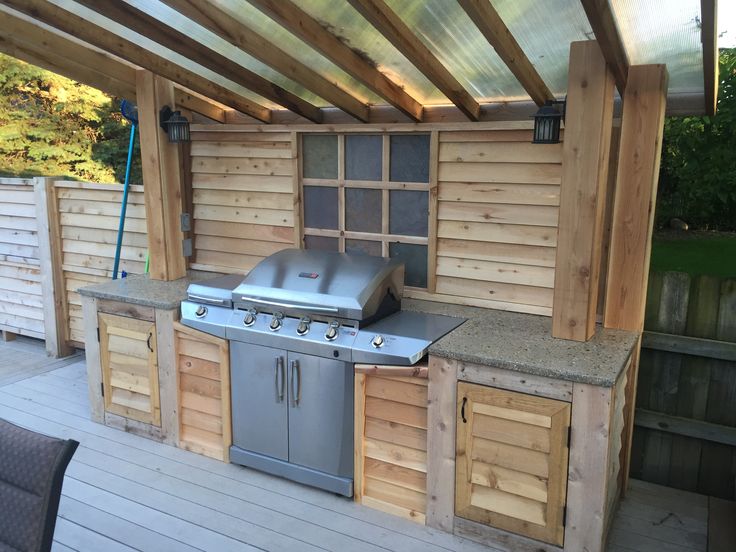
ADVERTISEMENT
The most popular combination of rooms in the house is the kitchen, open towards the dining room and living room. Such a layout creates a spacious daily zone in the house, and also makes it possible to communicate between people who are in the premises of this zone.
The processes of cooking in a modern kitchen are quite fast. The emission and spread of unpleasant odors and other harmful substances is minimal. For this reason, there is no special need to separate the kitchen from other rooms.
The food in the kitchen is usually prepared by the hostess or the owner of the house. It is not humane to deprive them of contact with other household members while cooking.
It is convenient when the dining room is located between the kitchen and the living room. Meals are served from the kitchen. From the living room, the household and guests go to the dining room. This arrangement of the premises of the daily zone corresponds to the natural course of events.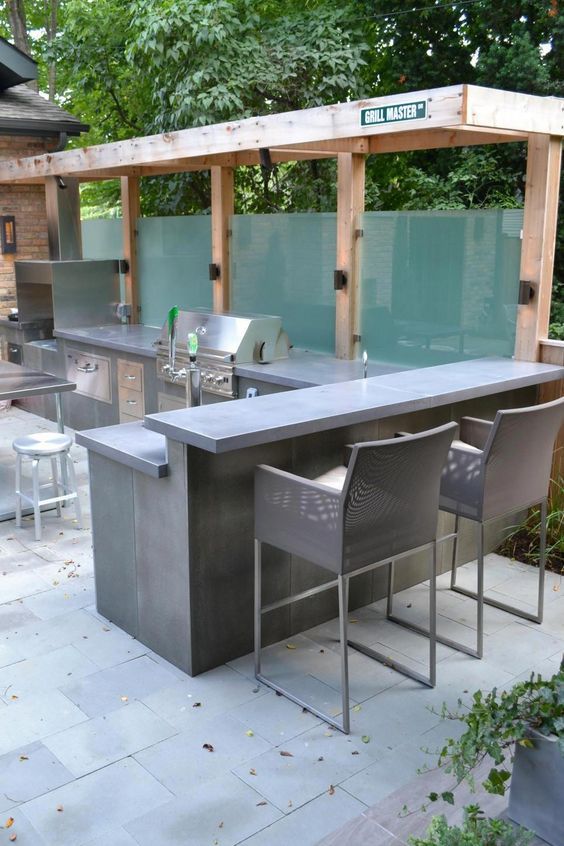
Life in the canteen goes on even after the meal is over.
Keep in mind that the studio's open kitchen requires increased attention to keeping it clean and tidy. And the sounds and smells from the kitchen can interfere with guests and household members in the living room.
There are several options for planning a house with a combination of kitchen, dining room and living room. These options differ in the degree of openness of the kitchen towards the dining room and living room.
The degree of openness of the kitchen also dictates certain requirements for the interior of the combined premises.
Wide open kitchen
The kitchen area in this option is wide open towards the living room: 3 - kitchen 9.8 m 2 ; 4 - dining area 5.5 m 2 ; 5 - living room area 29.2 m 2 .
The interior of the kitchen, when viewed from the hall, should be in harmony with the living area in terms of style and color.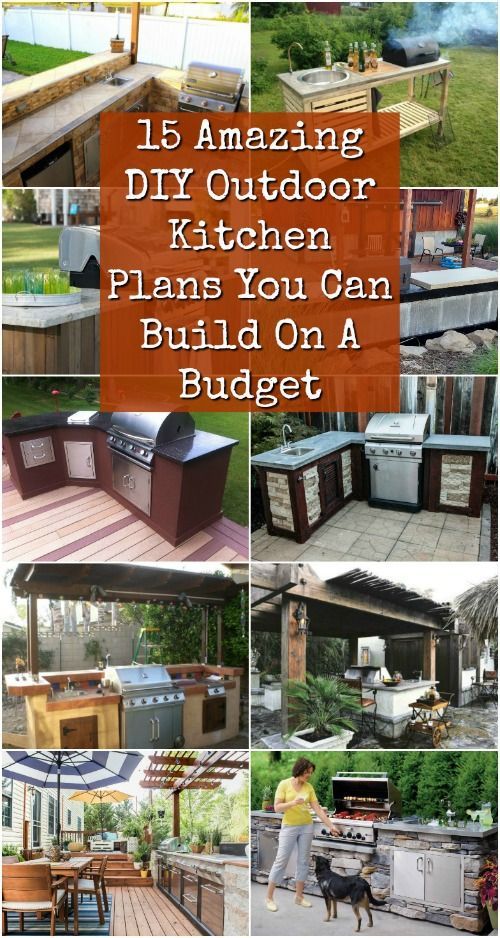
Islands in the kitchen
Left island: 3 - kitchen 11.9 m 2 ; 4 - canteen 9.0 m 2 ; 5 - living room 28.0 m 26 - living room + dining room 32.2 m 2
On the border of the kitchen and dining room there is an "island", which includes a table, stove and sink. To make it convenient to cook, the kitchen table on the island should be at least 40 cm in length, and the width of the passage around the island should be at least 80 cm .
The layout with the island is convenient because it allows several people to work in the kitchen at the same time, and the cook on the island faces the living room.
tempered glass partition is installed between the living room (item 5) and the dining room (item 4). The partition has a sliding door made of the same material. This solution ensures constant visual contact between people in the kitchen and in the living room. But the sounds and smells from the kitchen will not reach the living room and disturb the guests.
In the picture on the right, a table with a stove is adjacent to a fireplace shaft and a built-in kitchen cabinet. Such a layout closes the kitchen more from the guests.
Kitchen behind the fireplace
3 - kitchen 9 m 2 ; 4 - living room 30.5 m 2The fireplace somewhat limits the degree of openness of the kitchen. Most of the kitchen is not visible from the living room.
Visual contact between the hostess in the kitchen and people in the living room is difficult. But the hostess hears well what the guests are talking about, and can, if desired, go out and participate in the conversation.
Kitchen in the room at the dining table
5 - living room + kitchen - 27.4 m 2 The dining table, located in the room near the kitchenette, is convenient to use as an additional work surface when cooking.
Serving the dining table does not require any extra movement from the hostess.
Kitchen behind partition
4 - kitchen 10.9 m 2 ; kitchen + dining room 28.6 m 2The position and width of the opening in the partition determine which part of the kitchen will be visible from the living room. The dining table further limits the connection between the living room and the kitchen.
Kitchen behind closed doors
8 - kitchen 11.1 m2; 6 — living room + dining room 35.1 m2The kitchen can be separated from the living room by closing the sliding or hinged doors in the partition. By closing the door from the hall, the kitchen can be completely isolated from other rooms. This may be necessary if dishes with a strong smell are prepared in the kitchen.
A closed kitchen is also convenient when important guests are being received in the living room, negotiations are being held, and a hired chef is working in the kitchen.
At your request, this kitchen can be both open and closed.
Kitchen behind the bar
3 - kitchen 10.6 m 2 ; 4 - living room + dining room 25.8 m 2Bar counter with a height of 100 - 120 cm. closes the view of the kitchen part from the living room and decorates the interior. At the bar you can drink and eat without setting the dining table.
How to make an open kitchen functional and, at the same time, spectacular?
Connecting the cooking area to the living room has many advantages. The path from the sofa to the refrigerator is shortened, snacks, coffee and tea are always at hand. However, there are no ideal solutions - in a house or apartment with an open kitchen, a mountain of dirty dishes does not allow you to forget about yourself, and the pleasant aroma of coffee that spreads through the rooms can be muffled by the smell of burnt dishes. Fortunately, there are ways to avoid such situations. You just need to think carefully about the interior of the kitchen.
In a small kitchen, you don't have to give up shallow shelves, which are great as a place for condiments and small dishes. In parallel with planning the layout of furniture and equipment, a lighting project should arise.
Kitchen combined with living room and dining room
A small open kitchen can be connected to the neighboring areas of the house or apartment to varying degrees - included in the common space of the dining room and living room or visually separated in some way, while maintaining a functional and convenient combination of all areas. See layout options at the beginning of the article.
Kitchen interior, wide open towards the dining room and living room
The kitchen is fully integrated with the living room.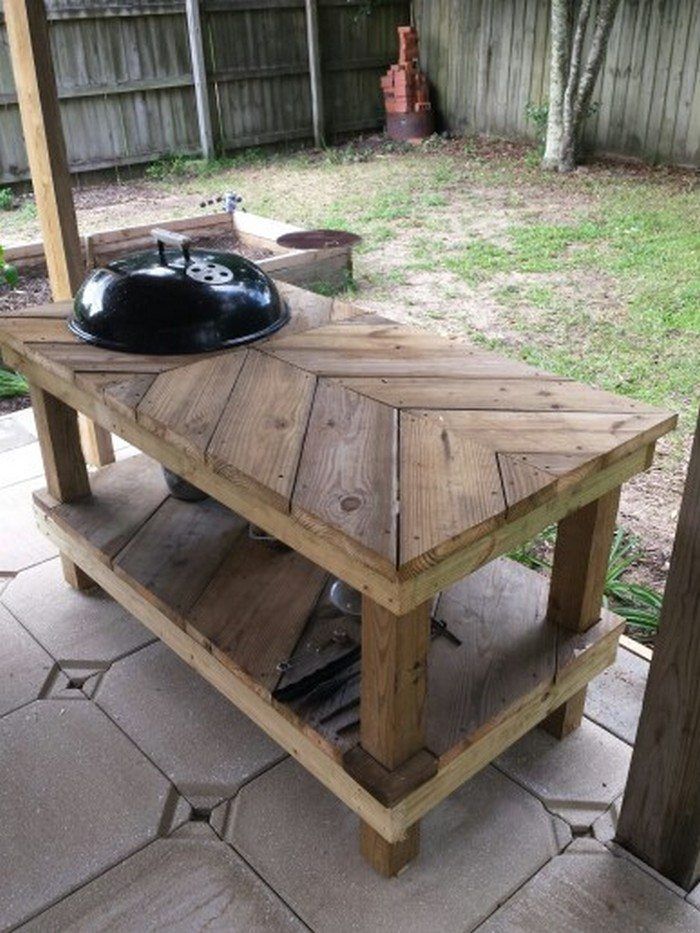 Having chosen this solution, we must ensure that her decor works with the rest of the space. We will not feel good if the kitchen stands out strongly in the interior and gives the impression that it got there by accident, as if there were no wall separating it from the living room. The kitchen should not be an element that attracts attention and dominates the space.
The borders of the kitchen, dining and living areas should be soft and hardly noticeable. If some elements of individual zones move into neighboring zones, we will achieve greater consistency of the entire interior.
The furniture that is installed in both of these spaces has a great influence on the nature of the perception of the common space of the open kitchen and rooms. It is a very good idea to choose kitchen cabinets that match the shape or materials used with the dining and living room furniture.
In modern interiors, kitchen cabinets often blend seamlessly into the walls of the living room or merge with the doors and furniture shelves, which emphasizes the single-space character of the living area. You can enhance this effect by abandoning the traditional handles in doors and drawers in favor of the “push-to-open” system (pressed and opened). The use of this method of controlling doors and drawers will allow you to get a smooth surface that resembles a wall with a carefully chosen rhythm of vertical lines.
A way to better integrate the kitchen space with the seating area can also be the use of a variety of finishing materials in height. If we decide that the hanging cabinets in the kitchen will be made of a different material than the floor cabinets, we will get a separation effect that will add lightness to the interior.
The floor is a surface that can emphasize the boundary of the division of zones in the room, or smooth it out. We achieve the effect of unity and smooth blurring of the boundary between the kitchen and the living room by using a single type of floor covering.
We get a greater feeling of coziness if the warmer and softer floor of the living room enters the kitchen area.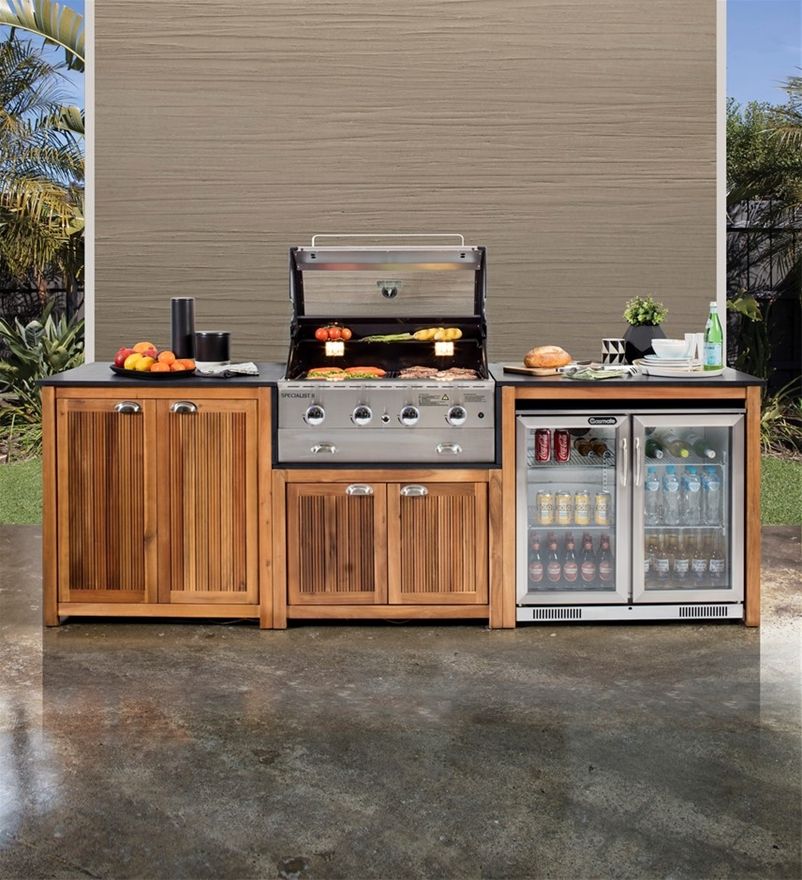 You should not completely abandon the well-washable, but hard and cold flooring in the kitchen. But it is better to minimize the dimensions of such a floor - only near the sink with a sink and a stove.
The inclusion of the living room floor in the interior of the kitchen gives the impression of a harmonious interpenetration of both functional areas.
Kitchen interior bordering the living room
There are many ways to mark the boundary between the open kitchen and the living room, at least symbolically.
For example, a kitchen located in an alcove is naturally isolated from the common space.
A kitchen in a corner makes it more open, but also allows for a clear definition of boundaries.
Each additional action - the installation of a bar counter, a kitchen island, or even a dining table on the border with the living room, will emphasize the allocation of the kitchen area.
You can mark the boundary between the kitchen and the living room - by lowering the ceiling level or raising the floor level in the kitchen area, or by placing lights on the ceiling accordingly.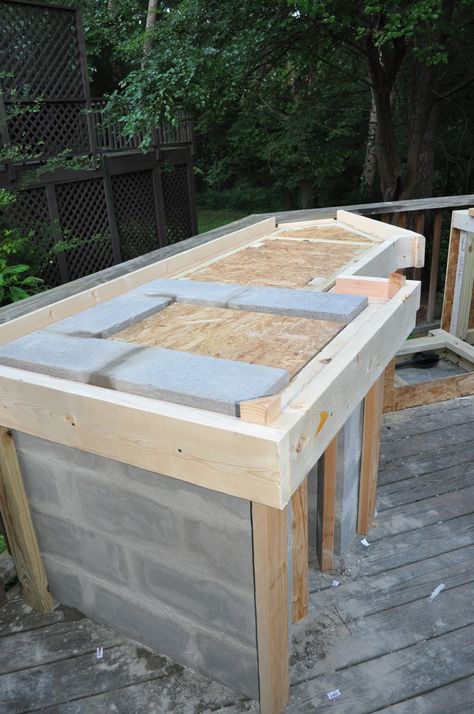
We can shape the kitchen space with light partitions, such as partially open or transparent glass partitions. By placing such a partition, you can not only visually separate the kitchen, but also add new functions to it. The partition can serve as a support for a small kitchen table or be a screen covering an unpresentable view of the sink.
The stepped shape of the ceiling allows you to gently define the kitchen area. It also gives us the opportunity to experiment with lighting, which will be an additional element of the kitchen space.
The same wallpaper in the living room and in the kitchen visually unite the rooms. Glass protects the wall above the worktop from dirt - a practical and almost imperceptible detail in an elegant interior.
White is a very neutral color - it does not draw attention to itself and at the same time allows you to fully emphasize the beauty of the wood.
The variety in the appearance of the top and bottom gives the kitchen an interesting character and allows you to install furniture in the living room that has the same shade as the floor in the kitchen and living room.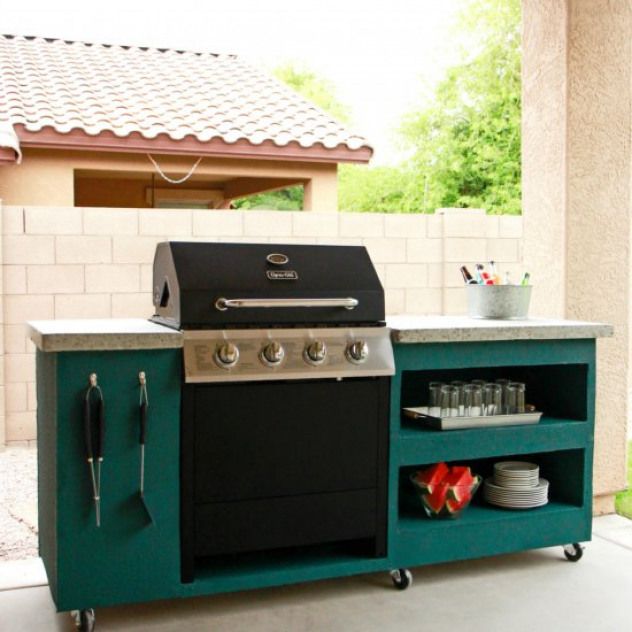
Choice of materials for kitchen arrangement
Kitchen cabinets
Kitchen cabinets in the same color scheme or texture as used for the living room furniture will visually integrate the open kitchen with the living space. And vice versa - the choice of materials that contrast with those used in the living room can add dynamics to the entire interior and give it an individual character.
Wall cladding over countertop
Choosing a smooth material (in the form of panels) instead of tiling will give the room a modern look. Such a wall is more practical, due to the smooth surface without seams - it is easy to clean.
The range of cladding wall panels is currently very rich. We can choose panels from laminate, wood, glass and other modern materials. Custom-made glass panels are also very popular, which, thanks to the printing technique, can be dyed, patterned and matched to any interior. Similar opportunities for obtaining any pattern on the wall are provided by laminated photo wallpapers.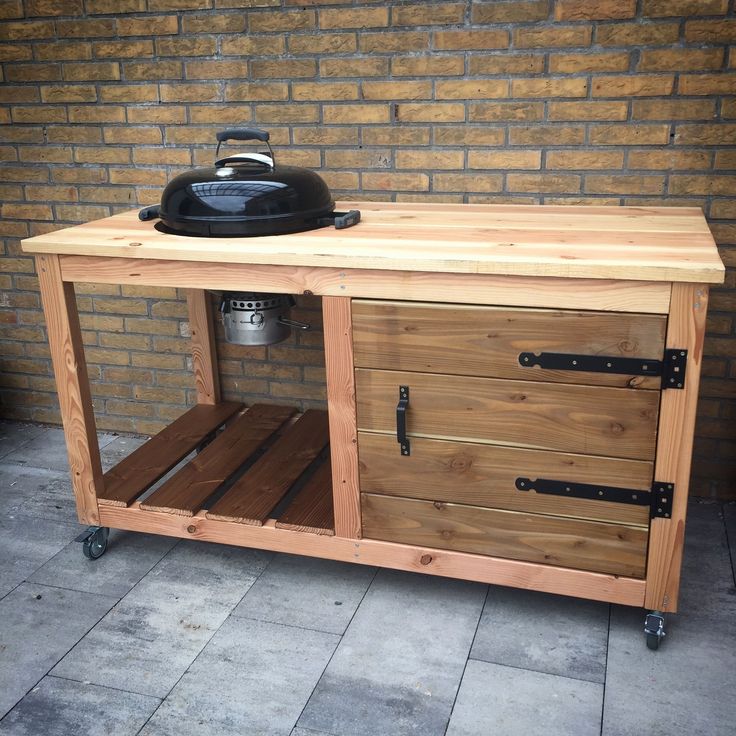
Kitchen worktops
Worktops made of wood always look good, especially in kitchens combined with a living room. They give the interior a cozy character.
Industrial-modern kitchens often use architectural concrete or stainless steel countertops.
If we prefer a worktop that is inexpensive, easy to install and maintain, we can opt for laminate and other composite worktops. Countertops made of modern materials are very durable and available in a wide range of colors, often with a finish that mimics other materials - stone, steel, concrete, wood.
The kitchen island cabinet helps to hide the hustle and bustle of the kitchen, and it also houses a piece of equipment - the sink. The hood installed behind the doors of the wall cabinet is also almost invisible in the interior.
Kitchen design tips
Kitchen interior planning should begin with determining the necessary set of kitchen appliances - stoves, microwaves, sinks, refrigerators, ovens, as well as the composition of kitchen furniture. They do this by remembering the sequence of the cooking process. It is necessary to provide food storage (refrigerator, pantry, cabinet), placement of pots, kitchen utensils and dishes (pantry, cabinet, shelves), processing (desktop), sink (sink), heat treatment (stove, oven, microwave, multicooker, toaster , coffee machine).
Worktop for food processing, the science of ergonomics recommends placing it between the stove and the sink. So, we will shorten the path along which a person most often moves when cooking.
Let's try to put the sink in as little visible place as possible (the sight of dirty dishes will spoil even the most interesting composition). A good way is to place the sink on a side wall less visible from the living room. It is also a good idea to decide to close this part of the kitchen with a partition or hide it behind a high barrier.
It is also worth thinking about the location of the refrigerator (especially if it is very large and tall), so that its appearance does not dominate the interior. For the built-in model of the refrigerator, we can find a place for it in high cabinets, along with an oven and a microwave. To install a conventional refrigerator, you can provide a niche in the line of kitchen furniture.
The element that usually serves as the central point of the kitchen interior is a place for cooking with a hob and a kitchen hood hanging above it. Modern forms of stoves, hobs and hoods with a hood have departed very far from traditional designs. Their diversity gives us the opportunity to match these pieces of equipment to any interior, both in terms of shape and material, as well as color. We can make the range hood almost invisible, blend them in with the surroundings, or vice versa, position them so that they attract attention and represent the heart of the kitchen design.
The peninsula between the kitchen and the living room separates both these zones, and at the same time unites them, allowing guests and hosts, for example, to communicate while cooking together. The kitchen, open to the living room, does not dominate the interior, it is present, as it were, in the background. Light kitchen cabinets without visible fittings can hardly be distinguished against the background of white walls.
The kitchen helper is very useful when preparing food. When not needed, it sits under the countertop.
When thinking about setting up an open kitchen, it is worth paying special attention to the ventilation of the room already at the design stage. We must take care that in the kitchen part of the house or apartment there are two ventilation ducts . One channel is left open for ventilation of the room, and a kitchen hood is connected to the other - this will ensure effective air exchange.
Building regulations (clause 6.5.8 of SP 60.13330.2016) require in residential buildings for rooms in which gas equipment is located (gas boilers, water heaters, cookers, etc.), to provide mechanical forced exhaust ventilation and natural or mechanical supply ventilation.
If we do not have the technical capacity and our kitchen has only one ventilation duct, then there are two variants of the ventilation device in the kitchen with one duct.
Option 1. The kitchen hood is connected to the only ventilation duct in the kitchen through a tee on the duct. A non-return valve is installed behind the round ventilation grille. When the extractor fan is turned on, the damper leaf blocks the passage of air through the ventilation grille.
If the kitchen hood above the stove is connected to the only natural ventilation duct in the kitchen, then the filters, valves and fan in the hood practically block the natural draft in the ventilation duct. A kitchen with the hood turned off remains without ventilation, which worsens the air exchange throughout the house. To correct the situation, it is recommended to place a tee with a check valve on the side outlet in the air duct between the natural ventilation channel and the kitchen hood.