Ninja flip toaster oven
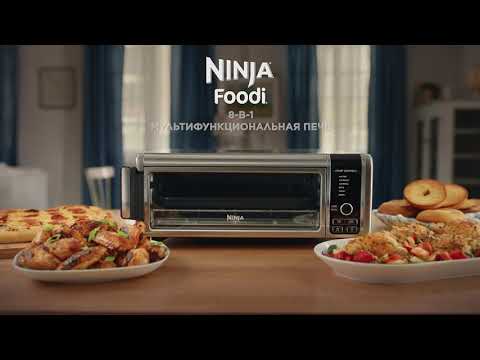
Ninja® Foodi™ 2-in-1 Flip Toaster- Ninja
†OFFER DETAILS
Promotion valid on ninjakitchen.com through December 4, 2022, at 11:59pm ET, while supplies last. This offer is not valid with any prior purchases. Consumer pays all applicable sales tax. SharkNinja reserves the right to cancel or modify this offer at any time. Orders cannot be shipped to PO boxes or Hawaii, Alaska, Puerto Rico or other territories outside of the contiguous 48 states.
To save 20% on orders of $150 or more, enter CYBER20 in the coupon code box during checkout on ninjakitchen.com. Coupon code can only be used once per order. 20% off discount applies only to order subtotal, before shipping and taxes, of $150.00 USD or more on ninjakitchen.com. Models CP307, CP301, CM401, SF301, EG201, OG701, OG751, OG701RD, C53300, C300B1, C35000W, C39500, BN601, JC101, ST101, MC1001, C30480, C50480, C33000B, CW102, BN401, CI101, DCM201, KT200, K31300B, K30020, K30018, K32002, K31300, BW1001, C30020Z, C30026Z, C30030Z, C30235, C30928, C30830, C60020, C60026, C60030, C62000, C30630, C30628, C20215, C20235, C20020, C20026, C20030, C20465, C30528, C30530, CFP201SS, C59500SS, B32002, B33003, and B35005 available from ninjakitchen. com do not count toward required subtotal of $150.00 USD and are not eligible for discount. Cannot be combined with any other coupon code.
To save 15% on orders of $100 or more, enter CYBER15 in the coupon code box during checkout on ninjakitchen.com. Coupon code can only be used once per order. 15% off discount applies only to order subtotal, before shipping and taxes, of $100.00 USD or more on ninjakitchen.com. Models CP307, CP301, CM401, SF301, EG201, OG701, OG751, OG701RD, C53300, C300B1, C35000W, C39500, BN601, JC101, ST101, MC1001, C30480, C50480, C33000B, CW102, BN401, CI101, DCM201, KT200, K31300B, K30020, K30018, K32002, K31300, BW1001, C30020Z, C30026Z, C30030Z, C30235, C30928, C30830, C60020, C60026, C60030, C62000, C30630, C30628, C20215, C20235, C20020, C20026, C20030, C20465, C30528, C30530, CFP201SS, C59500SS, B32002, B33003, and B35005 available from ninjakitchen.com do not count toward required subtotal of $100.00 USD and are not eligible for discount. Cannot be combined with any other coupon code.
To save 10% sitewide, enter CYBER10 in the coupon code box during checkout on ninjakitchen.com. Coupon code can only be used once per order. Models CP307, CP301, CM401, SF301, EG201, OG701, OG751, OG701RD, C53300, C300B1, C35000W, C39500, BN601, JC101, ST101, MC1001, C30480, C50480, C33000B, CW102, BN401, CI101, DCM201, KT200, K31300B, K30020, K30018, K32002, K31300, BW1001, C30020Z, C30026Z, C30030Z, C30235, C30928, C30830, C60020, C60026, C60030, C62000, C30630, C30628, C20215, C20235, C20020, C20026, C20030, C20465, C30528, C30530, CFP201SS, C59500SS, B32002, B33003, and B35005 available from ninjakitchen.com are not eligible for discount. Discount is applied to order subtotal before shipping and taxes. Cannot be combined with any other coupon code.
Ninja Foodi 8-in-1 Flip Mini Oven review: a compact cooker
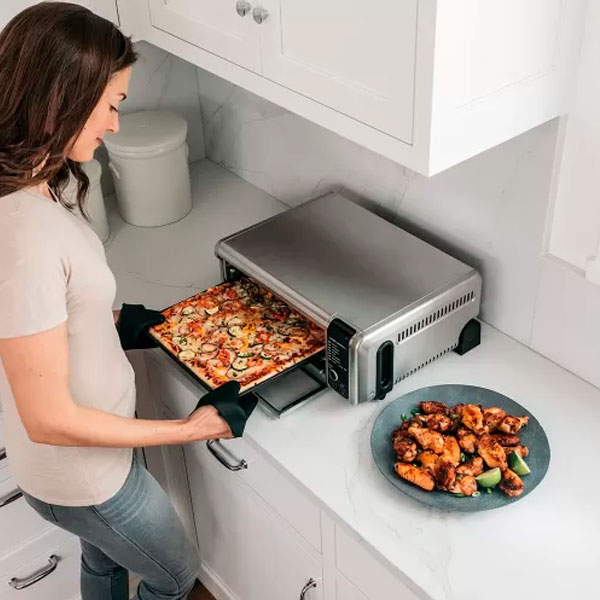
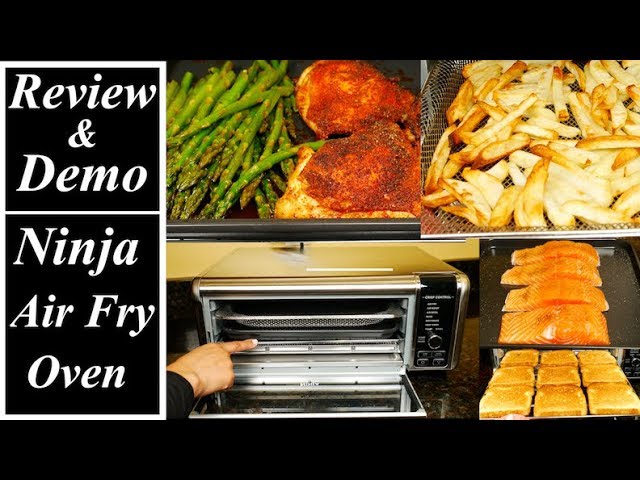
We tried out the Ninja Foodi 8-in-1 Flip Mini Oven to see if it's a good choice for your kitchen. Designed to slot right into smaller kitchens without taking up too much space, this oven has a unique flip feature that allows it to be folded away when not in use, massively reducing its footprint on your kitchen counters. It's a popular choice for those in apartments, or simply those who need more space to cook in their kitchen, but is the Ninja Foodi 8-in-1 Flip Mini Oven any good? We put it to the test, making cauliflower buffalo wings, air frying salmon, and roasting vegetables to see if it's a must-have toaster oven.
Ninja is known for making some of the best toaster ovens, and given that it also makes great air fryers, it's no surprise that the Ninja Foodi 8-in-1 Flip Mini Oven combines the best of both. It has an air fryer mode, as well as broiling, toasting, and even dehydrating function. The bottom can be opened for easy cleaning, but I found that some areas were tricky to reach when I did try and clean the oven after prolonged use.
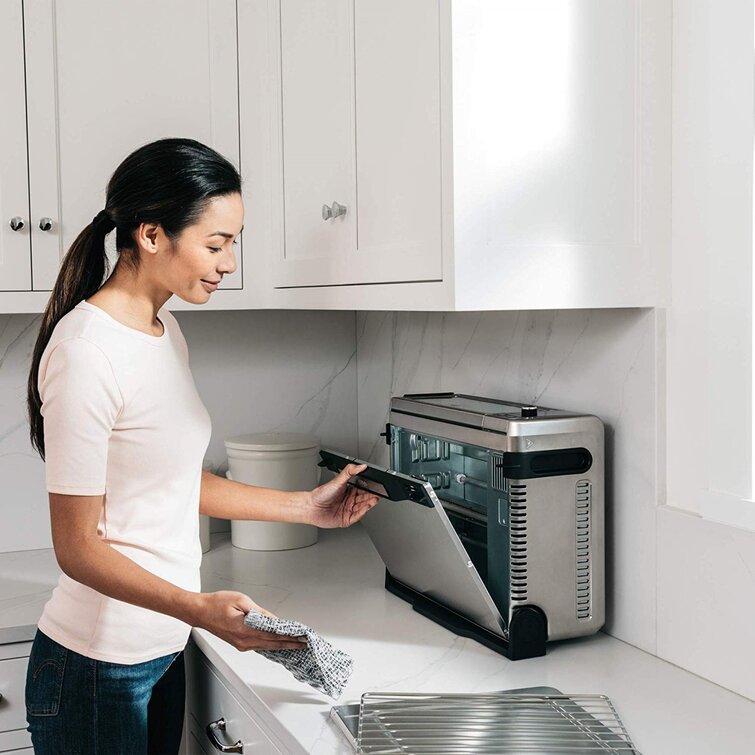
If you lack cooking space in your home or you want a compact toaster oven to take some of the pressure away from your regular oven, the Ninja Foodi 8-in-1 Flip Mini Oven is a great choice. I love how easy it is to flip away and press it against the kitchen wall, which will buy you a lot of space on your kitchen counter if you're dealing with a chef's kitchen or a smaller space.
Today's best Ninja Foodi 8-in-1 Digital Air Fry Oven deals
£199
View
£199
View
£199
View
Show More Deals
Ninja Foodi 8-in-1 Flip Mini Oven: Specifications
(Image credit: Ninja)
- Capacity: 13" pizza, 9 slices of toast or 4-lbs in air fry basket
- Cooking programs: 8
- In the box: Cooker unit, crumb tray, air fry basket, sheet pan, wire rack
- Modes: Air fry, air broil, air roast, bake, dehydrate, toast, bagel, keep warm
- Power: 1,800 Watts
- Dimensions: 19.
 72 x 7.56 x 14.96 inches
Ninja SP101: unboxing
(Image credit: Future)
The Ninja Foodi 8-in-1 Flip Mini Oven comes in a large, hefty box with a range of inserts to easily slot inside the oven. When the oven is not in use, you can turn it back onto a rear flip-away base, and then push it back against your kitchen wall. This clears plenty of space in front of the oven, which is great for preparing food before putting it inside the oven to cook.
When flipped up, your oven can open from underneath. This gives easy access to clean the inside of the oven, and when you remove the crumb tray you'll find it easy to remove any splashes or food residue.
(Image credit: Ninja)
The cooking modes in the Ninja Foodi 8-in-1 Flip Mini Oven include air frying, air roasting, air broiling, as well as baking, toasting (as well as a mode for bagels) and even dehydrating.
The timer and temperature can be adjusted using the dial, and then it's a case of pressing down on that dial to start or pause your cooking mode.
The control panel on the Ninja Foodi 8-in-1 Flip Mini Oven. I received the UK model, which has the same modes but calls them slightly different names.
(Image credit: Future)
Toasting in the Ninja Foodi 8-in-1 Flip Mini Oven
A toaster oven is designed to replace the best toaster as well as microwaves and air fryers, but if it can't toast, that won't save you on the space a toaster will take up in your kitchen.
The Ninja Foodi 8-in-1 Flip Mini Oven comes with a toast and bagel mode. You can choose the level of browning and the amount of slices inside your oven when cooking on the toasting mode. The bagel mode will heat from only one direction as opposed to above and below, which will leave the edges of the bagel soft and perfect for making a warm sandwich.
(Image credit: Ninja)
I was impressed by both the bagel toasting and the regular toasting in the Ninja Foodi 8-in-1 Flip Mini Oven. Everything came out even, with some slight marks from the wire rack on one side of the toast. I didn't find that the top toasted more than the bottom when using the regular toasting mode, so it's perfect for sandwiches, paninis, and warming pastries.
Cooking fish in the Ninja Foodi 8-in-1 Flip Mini Oven
I've become accustomed to using the best air fryers when cooking fish at home, so I tried the Ninja Foodi 8-in-1 Flip Mini Oven out on the air roast mode when cooking salmon.
Salmon is quite a fatty fish, so I've found that a lot of fat can drip away when cooking it in an air fryer. This happened with the Ninja Foodi 8-in-1 Flip Mini Oven too, and I was concerned that the juices dripping away would cause an issue if they fell directly onto the heating element.
The Ninja Foodi 8-in-1 Flip Mini Oven crumb tray sits underneath the heating elements, but they are guarded by a metal grated cover. You can put a drip tray underneath to prevent the fat from the salmon falling onto the elements.
You can illuminate the inside of the Ninja Foodi 8-in-1 Flip Mini Oven using a button the control panel, which made it easy to monitor it while it was cooking.
My salmon cooked in the same time as an air fryer, about 12 minutes in total, which is a lot less than if I'd cooked it in an oven. The fish was crispy and perfectly cooked, and there was no difference in cooking between the fish that was at the back of the oven, and the one at the front.
Making chicken wings
I used the air fryer tray to make chicken wings with the Ninja Foodi 8-in-1 Flip Mini Oven. After marinating my chicken in buffalo sauce for a few hours, I laid it out in the air fryer tray and put it in the oven. The air fryer tray can only go in the top oven latch, but you can put the wire rack beneath it to cook other elements of a meal simultaneously.
(Image credit: Ninja)
Like salmon, chicken wings are quite fatty, so there was a lot of fat and also buffalo marinade dripping down from the tray insert to the dripping tray. This became baked-on, and a little tricky to clean.
With a pre-heat time of only a minute, the SP101 has the wings cooked in record time. After 15 minutes in the oven they were perfectly cooked and ready to serve. I had to use oven gloves to hold the tray while I put the wings onto a plate, and then left the oven to cool fully before putting it back against my kitchen wall.
(Image credit: Ninja)
Baking in the Ninja Foodi 8-in-1 Flip Mini Oven
Anyone who's read my reviews of the best stand mixers will know that I'm an avid baker, so I was keen to try the Ninja Foodi 8-in-1 Flip Mini Oven out to bake.
The Ninja Foodi 8-in-1 Flip Mini Oven doesn't come with a muffin tray, but you can buy a 12-cup muffin pan on the Ninja site if you love to cook cupcakes.
I used the baking sheet, which is 13x13 inches, to place my cupcake cases in the oven. I was concerned that they would touch the top of the oven when they rose, but I had no issues. I would definitely refrain from cooking bread or a full-sized cake in the Ninja Foodi 8-in-1 Flip Mini Oven, but that's down to the smaller internal capacity as opposed to any issues in its ability to cook.
Cleaning
(Image credit: Ninja)
The insert trays, including the drip tray, can go in the dishwasher with the Ninja Foodi 8-in-1 Flip Mini Oven. That's great, because a lot of stubborn oil and residue can become baked onto the inside of the air fryer.
When you remove the crumb tray you can pull the base open and clean the inside of the oven. Ninja advises to just use soap and water to do this, but I found that the heating elements became quite dirty and difficult to clean if I didn't clean them after every use. This didn't create any issues in cooking, but it did lose some of the aesthetic value of the oven.
Should you buy the Ninja Foodi 8-in-1 Flip Mini Oven?
(Image credit: Ninja)
If you plan on using this as your primary oven, you may struggle with the shortness of the cooking space. Not all trays slot into every cooking space in the oven, and it is definitely too short to bake bread or cakes. You will also struggle to fit a whole chicken into this oven, so I would suggest opting for a larger toaster oven if you plan on using this as your primary cooking unit.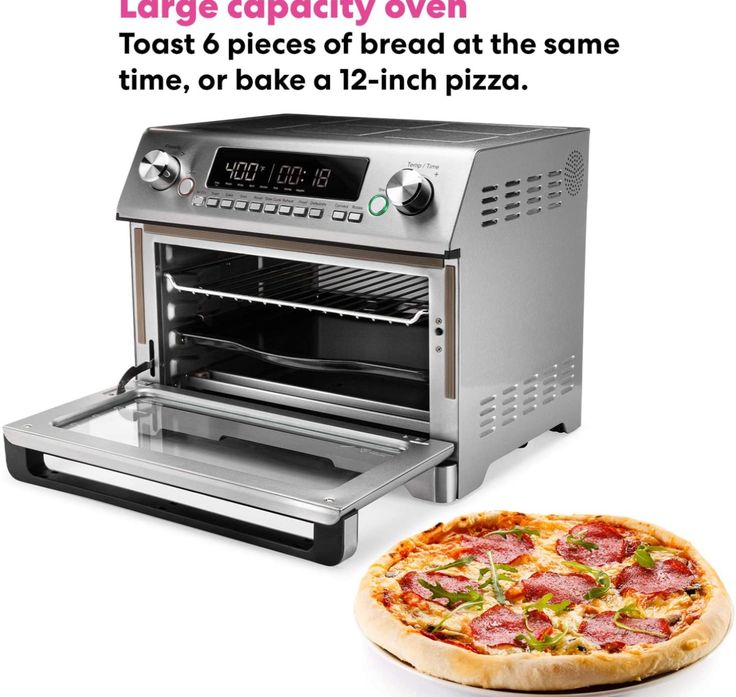 If you have an oven to cook larger items and want a smaller toaster oven to cook side dishes or make speedy midweek meals, the Ninja Foodi 8-in-1 Flip Mini Oven would be great for you.
Another big reason to buy the Ninja Foodi 8-in-1 Flip Mini Oven is the pre-heat, which is so quick that it can save you a lot of time when cooking. The cooking and toasting is even, the quality of the air frying is great, and the controls are very easy to get to grips with.
As I've said, I found cleaning in the Ninja Foodi 8-in-1 Flip Mini Oven quite tricky. The inserts can go in the dishwasher, which is great, but the heating elements themselves are hard to clean because they cannot be removed.
Today's best Ninja Foodi 8-in-1 Digital Air Fry Oven deals
£199
View
£199
View
£199
View
Show More Deals
About this review, and the reviewer
Millie Fender is our Editor for all things small appliances at Homes & Gardens. She spends a lot of time testing everything from toasters to air fryers and recommending the very best ones to readers.
All our reviews are tested from home, and the Ninja Foodi 8-in-1 Flip Mini Oven review is no exception. Millie tested it from August to November to fully make the most of all its capabilities before bringing you this review.
Millie Fender is Head of Reviews on the Homes and Gardens Ecommerce team. She specializes in cooking appliances, such as the best kettles, and also reviews outdoor grills and pizza ovens. Millie loves to bake, so she will take any excuse to review stand mixers and other baking essentials. When she's not putting products through their paces in our dedicated testing kitchen, Millie's reviews are conducted at home, meaning she uses these products in her own day-to-day life.
90,000 User Flip-Toster Flip-2 series Ninja ST1 ST100
Guide to the owner FODI ™ FLIP TOASTER
Ninjakitchen. com
com
PURCHASE REGISTER
Registrationyourninja.com
Scan the QR code with your mobile device
http://registeryourninja.com
Write down this information
Model number: -
Serial number: -
Business Date: -
(Save the receipt)
Shopping store: -
Technical characteristics
TIP: You can find the model and serial number on the QR code label located on the base of the device.
Report this AD
Important security measures
Only for domestic use • Before use, read all the instructions
when using electrical appliances, you should always follow the main security measures, including the following:
Warning
- Before use Read all the instructions .
- Remove and discard all packaging materials and labels before use.
- This device may be used by persons with reduced physical, sensory or mental capabilities, or lack of experience and knowledge, if they are supervised or instructed in the safe use of the device and understand the dangers involved.
- Inventory all contents to ensure you have all the parts you need to operate correctly and safely.
- DO NOT start the machine without the crumb tray fully installed.
- NOT move the appliance to the oven position without fully inserting the tray. NOT disable the pan detection switch.
- Keep the appliance and power cord out of the reach of children. Do not allow children to use the appliance. Careful supervision is required when used near children.
- NOT use an extension. The short power cord is used to reduce the risk of children grabbing the cord or becoming tangled, and to reduce the risk of people tripping on the longer cord.
- NOT let the cord hang over the edges of tables or counters or touch hot surfaces, including stoves and other heating ovens.
- NOT put on a hot stove or oven. NEVER use the outlet under the counter.
- NEVER leave the device unattended while it is in use.
- NOT Cover the crumb tray or any part of the machine with aluminum foil. This may cause the device to overheat or cause a fire.
- To protect against electric shock NOT , immerse the cord, plugs, or main unit housing in water or other liquid.
- NOT use the appliance if the power cord or plug is damaged. Check the device and power cord regularly. If the device is malfunctioning or has been damaged in any way, stop use immediately and call for support.
- Avoid food contact with heating elements. DO NOT insert excessive or oversized food, metal foil bags, or utensils as they may cause a risk of fire or electric shock.

- Special care must be taken when hot food is in the appliance. Improper use may result in injury.
- ALWAYS use the lightest toasting setting when reheating toast.
- NOT Close the air intake or outlet openings while the device is in operation.
Doing so will prevent even cooking and may damage the appliance or cause it to overheat. - DO NOT insert anything into the ventilation openings and do not block them.
- NOT Use accessories and attachments not recommended or sold by SharkNinja.
- DO NOT place objects on the surface, including food, while the unit is in operation, except for permitted accessories recommended by Ninja.
- Make sure they are clean and dry before installing any accessories in the device.
- Designed for countertop use only.
NOT place the unit at the edge of the worktop. Make sure the surface is level, clean and dry.
- This unit is for home use only.
NOT Do not use this device for its intended purpose. Improper use may result in injury. - NOT for outdoor use. NOT use in moving vehicles or boats.
- DO NOT work indoors or under cabinets.
- Provide sufficient space at the top (minimum 10 inches / 254 mm) and on all sides (minimum 4 inches / 102 mm) for air circulation.
- NOT place something on the device while it is in operation. A fire may occur if the unit is covered or touched with flammable materials, including curtains, draperies, walls, etc., during operation.
- HE while cooking, spray any type of aerosol can or fragrance inside the appliance.
- Be careful when inserting or removing any object from the device, especially if it is hot.
- Output voltages may vary, affecting the performance of your product. To prevent possible illness, check with a thermometer that the food is cooked to the recommended temperature.
- HE insert a metal utensil such as a knife into the appliance to remove stuck toast, bagels and other items. This may damage the heating elements or cause electric shock.
- Unplug the appliance and allow it to cool before cleaning any food that is stuck or spilled into the cavity.
- HE Place any of the following materials in the machine: paper, cardboard, plastic, baking bags, etc. They can start a fire.
- Special care should be taken when using containers made of any material other than metal or glass.
- NOT touch hot surfaces. Unit surfaces are hot during and after operation. To avoid burns or injury, ALWAYS use safety pads or insulated oven mitts and use accessible handles and handles.
- Please refer to the Cleaning and Maintenance section for regular maintenance of the device.
- Cleaning and maintenance must not be carried out by children.
- Press the power button to turn off the device and allow it to cool completely before cleaning, moving and inverting for storage.

- Unplug it when not in use. To disconnect, grasp the plug by the body and pull it out of the socket. Never pull on the flexible cord when disconnecting from the mains.
- HE clean with steel wool. Fragments may break off the gasket and touch electrical parts, resulting in an electric shock.
- DO NOT store any materials other than the supplied accessories in the unit when not in use.
- NOT use the appliance as a heat source or for drying.
- NOT use a baking tray without a handle.
Indicates reading and reviewing instructions to understand the operation and use of the product.
Indicates the presence of a hazard that could result in personal injury, death, or significant property damage if the warning contained in this symbol is ignored.
Be careful to avoid contact with hot surfaces. Always wear hand protection to avoid burns.
For domestic and domestic use only.
SAVE THESE INSTRUCTIONS0014 NOTE: The crumb tray at the back of the machine is not completely removable. ASSEMBLY INSTRUCTIONS: Securely attach the handle to the baking tray by turning it fully clockwise. MOVE BETWEEN COOKING POSITIONS NOTE: You can sneak a peek at the food while it is cooking by removing the tray. The device will stop until the tray is inserted. NOTE: To prolong the life of your accessories, we recommend washing your accessories by hand. Our cord management system is designed not to interfere with the operation of the toaster. Option 2: outlet on the left or behind the toaster FUNCTIONS USING THE COOKING FUNCTIONS NOTE: To unlock the lever, simply turn the device over to the toaster position. fry Preheat NOTE: If you are cooking for less than 10 minutes, the clock will count minutes and seconds. If you cook for 10 minutes or more, the clock will only count minutes. SHADE HINTS Bagel NOTE: The heating elements will cycle on and off during browning to maintain the set temperature. CLEANING ERROR MESSAGES Why do the oven functions not light up when the appliance is in a horizontal position? Why does the display show "LOC"? Why does the message “NO PAN” appear on the display? Can I watch food while the appliance is cooking? Can I reset the device to default settings? Why do the heating elements seem to turn on and off? We offer a custom accessory kit for your Ninja® Foodi™ Flip Toaster. Visit ninjaaccessories.com to expand your options and take cooking to the next level. To order additional parts and accessories, visit ninjaaccessories.com or contact customer service at 1-877-646-5288. To help us better serve you, please register your product at Registeryourninja.com and have your item handy when you call. One (1) year limited warranty applies to purchases made from authorized retailers OOO Marktlit Operating. What is not covered by this warranty? Now to get service SharkNinja Operating LLC SP101UK Mini Foodi Flip Oven THANK YOU 9® Foodi® Ninja® Oven for purchasing Mini Oven Ninja0014 https://ninjakitchen.co.uk/register-guarantee/ PURCHASE REGISTER Model Number: Voltage: 220-240V~, 50-60Hz TIP: You can find the model and serial number on the QR code label located on the base of the device. PRODUCT REGISTRATION: Only for domestic use • Before use, read all the instructions The main unit B. Basin for frying in air C. Exposure PRODUS D. E. Removable crumb tray To order additional details and accessories, visit ninjakitchen.co.uk or contact the customer support service at 0800 862 0453. NOTE: For durability, we recommend washing accessories by hand. FUNCTIONS CONTROL PANEL DISPLAY AND CONTROL BUTTONS USING THE COOKING FUNCTIONS Aerofry Roasted grill Oven Toast Bagel Dehydrate Keep warm DAILY CLEANING DEEP CLEANING TIP: In case of sticky food residue, leave accessories overnight in soapy water. TURNING STORAGE Our cord management system is designed so that it does not interfere with the operation of the oven. We offer a range of custom-made accessories for your Ninja® Foodi® mini oven.
B Baking tray
(Place in the oven position function block) Hand wash only
A click will be heard. "LOC" will appear on the display if the toasting lever is not in the locked position. BEFORE USE FOR THE FIRST TIME

Avoid personal injury or property damage.
POWER CORD MANAGEMENT 
Option 1: exit on the right
Insert the cord into the left hook on the back of the toaster. Twist the cord so that its wide side is horizontal to secure the cord to the hook.
Insert the cord into both hooks on the back of the toaster. Twist the cord so that its wide side is horizontal to secure the cord on the hooks. USING THE CONTROL PANEL
OVEN: Bakes everything from your favorite pizza to cookies evenly.
BROYLE: Roasts and evenly browns the top of foods such as cheese toast.
REHEAT: Quickly reheat cooked food, such as a slice of pizza.
TOAST: Toasts up to 2 slices of bread evenly to the perfect level of darkness.
BAGEL: Perfectly toast up to 2 bagel halves when placed cut side first in the toaster. An icon on the device will show the indicated direction.
DEFROST: Turn on for extra time when using the toast or bagel functions with frozen bread.
NOTE: Defrost and reheat functions are not included in all models.
CONTROL PANEL DISPLAY AND OPERATION BUTTONS
NOTE: "LOC" will appear on the display if the toasting lever is not in the locked position.
NOTE: "NO PAN" will appear on the display if the tray is not inserted at the start of cooking. You can sneak a peek at the food while it's cooking by removing the baking sheet. The device will stop until the tray is inserted.
NOTE: The cooking time and temperature will return to the settings from when the appliance was last used.
NOTE: The cooking time and temperature can be changed at any time during cooking. USING YOUR FOODI ™ FLIP TOASTER
To turn on the appliance, plug the power cord into a power outlet and press the button.
Switch to oven position
In the "Toaster" position, turn the appliance over and move the toaster lever to the lock position or until you hear an audible click.
Oven
Cooking starts when the tray is correctly inserted. Cooking will not start if the pan is not fully inserted.
NOTE: Broil works at high temperature (400°F). The temperature is not regulated.
 Select REHEAT. The last set temperature will appear on the display.
Cooking starts when the tray is correctly inserted.
until the time is less than 10 minutes.
NOTE: The keep warm function is not available on all devices.
Switch to toaster position
Turn the unit over in the oven position.
The toast arm will raise and return to its original toasting position.
If the slices of bread don't fit together, try turning them sideways so they fit better.
Place the cut side towards you so that the control panel is on the right.
Select the TOAST function.
NOTE: Temperature control is not available for the toasting function.
NOTE: Check the toasting process by lifting the lever to raise the toast. The toasting will not be paused, so immediately after checking, lower the lever down.
NOTE: The machine uses an algorithm to ensure color consistency when toasting from a cold or preheated machine. As a result, the total time of the toasts may change - to add more or less time, press the shading buttons.
NOTE: The heating elements will cycle on and off during cooking to maintain the set temperature.
NOTE: Check the browning process by lifting the lever to raise the bagel slices. The toasting will not be paused, so immediately after checking, lower the lever down.
NOTE: The unit uses an algorithm to ensure color consistency when toasting on a cold or preheated unit.
As a result, the total toasting time may vary depending on the shade level. To add more or less time, click the shading buttons.
Defrost
CLEANING
The device should be thoroughly cleaned after each use.
NOTE: Empty the crumb tray frequently.
Make sure the crumb tray is fully inserted before cooking. The crumb tray cannot be removed from the device.
A non-abrasive liquid cleaner or mild spray can be used to clean the outside of the device. Before cleaning, apply the cleaner to the cloth, not to the surface of the device.
NOTE: Avoid cooking greasy, greasy foods that create grease splatters, as accumulated grease will be more difficult to remove over time. ERROR MESSAGES AND FAQ
Contact Customer Support for the following error messages. "Er1", "Er2", "Er3", "Er4", "Er5", "Er6" or "Er7"
Turn off and unplug the device and call Customer Service at 1-877- 646-5288 . To help us better serve you, please register your product at Registeryourninja.com and have your item handy when you call.
Why won't the appliance turn on?
 The front of the pan should be adjacent to the front walls that surround the chamber.
 The device is designed to accurately control the temperature for each function by adjusting the power levels of the heating elements.
PURCHASE ACCESSORIES
SPARE PARTS ONE (1) YEAR LIMITED WARRANTY
Guarantee uveraye applies Lu Llie ur yield owner and Lu only the original product and is not transferable.
SharkNinja warrants the device to be free from defects in materials and workmanship for a period of one (1) year from the date of purchase, when used in a normal home environment and maintained in accordance with the requirements set forth in the User's Guide, subject to the following conditions: and exceptions:
What does this warranty cover?
 These defects include damage incurred during the shipping, alteration or repair of the SharkNinja product (or any of its parts) when the repair is performed by a repair person not authorized by SharkNinja.
If your appliance does not function properly when used in normal household conditions during the warranty period, visit ninjakItchen.com/support for product care and self-help. Our customer service specialists are also available at 1-877-646-5288 to assist with product support and warranty options, including the ability to upgrade to our VIP warranty options for certain product categories. To help us better serve you, please register your product on site register your Inja.com and have the product handy when you call.
SharkNinja will cover the customer's costs of sending the device back to us for repair or replacement. A fee of $20.95 (subject to change) will be charged when SharkNinja ships the repaired or replacement unit.
Now to file a warranty claim
You must call 1-877-646-5288 to file a warranty claim. You will need a receipt as proof of purchase. We also ask you to register your product online at
Join yourninja.com and have the product handy when you call so we can help you better. A customer service specialist will provide you with return and packaging instructions.
How State Law Applies
This warranty gives you specific legal rights, and you may also have other rights which vary from state to state. Some states do not allow the exclusion or limitation of incidental or consequential damages, so the above may not apply to you.
USA: Needham, MA 02494
1-877-646-5288
ninjakitchen.com
Illustrations may vary from actual product.
We are constantly striving to improve our products, so the specifications herein are subject to change without notice.
NINJA is a registered trademark of SharkNinja Operating LLC.
FOODI is a trademark of SharkNinja Operating LLC.
This product may be covered by one or more US patents. See sharkninja.com/patents for more information.
© 2021 SharkNinja Operating LLC.
printed in China
ST100SERIES-IB-MP-MV13
@ninjakitchen Documents / Resources
Published Vanjacle Tags: Flip-STV, NINNIZE Instructions for NINJA Mini Oven SP101UK Foodi Flip
Instruction Manual
ninjakitchen. co.uk/registerguarantee
Scan the QR code with your mobile device
………………………..
Serial number: ……………………….
Purchase date: ……………………….
(Keep receipt)
Purchase store:………………………. SPECIFICATIONS
W: 2000W-2400W
Visit ninjakitchen.co.uk or call 0800 862 0453 to register your new Ninja® product within 28 days of purchase.
You will be prompted for the store name, purchase date and model number, as well as your name and address.
Registration will allow us to contact you in the unlikely event of a product safety notice. By registering, you acknowledge that you have read and understood the instructions for use and the warnings set out in the accompanying instructions.
Important security measures
when using electrical appliances, the main security measures should always be observed, including the following:
 Doing so may cause the oven to overheat or catch fire.
NOT place the oven at the edge of the worktop. Make sure the surface is level, clean and dry. 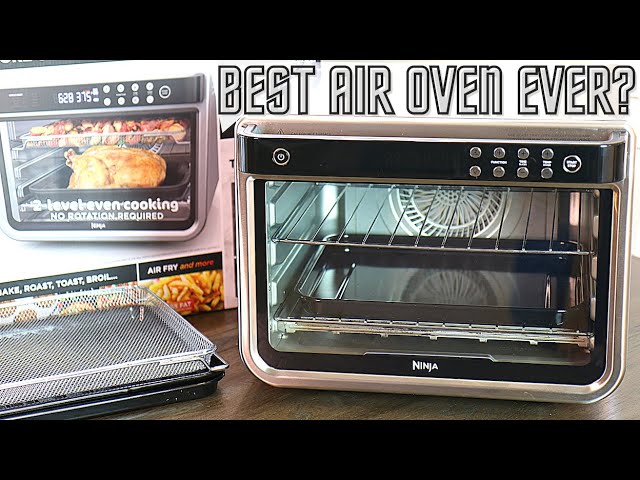

Indicates reading and reviewing instructions to understand the operation and use of the product. Indicates the presence of a hazard which, if not ignored, could result in personal injury, death, or substantial property damage. Be careful not to touch the hot surface. Always use hand protection to avoid burns. For domestic and domestic use only. PARTS
(the attached power cord is not shown)
(use in the upper guide position)
(always apply to the lattice)  Wire rack
(keep in bottom rail position)
(always place under bottom heating element) Accommodation
before the first use of
 Make sure the room is well ventilated. This removes any packaging residue and traces of odor that may be present. This is completely safe and does not affect the operation of the oven.
 USING THE CONTROL PANEL
AIR FRY: Cook foods that are traditionally fried - such as chicken wings, french fries and chicken nuggets - with little or no oil.
FRY: Get crispy on the outside and perfectly cooked on the inside for full size oven meals, larger proteins and roasted vegetables.
GRILL: Grills meat and fish and evenly browns the top of the casserole.
OVEN: Bakes everything from your favorite cookies to homemade pizza evenly.
TOAST: Toasts up to 6 slices of bread evenly to the perfect level of darkness.
BAGEL: Perfectly toast up to 6 bagel halves when placed cut side up on the wire rack.
DEHYDRATE: Dehydrates meats, fruits and vegetables for healthy snacks.
KEEP WARM: Keeps food hot for up to 2 hours.
NOTE: The time and temperature will always be the cooking time and temperature that were set when the oven was last used. 
NOTE: Press and hold the START/PAUSE button for 3 seconds to return to the function selection.
When using the Toast or Bagel function, this button will adjust the tint level instead of the temperature.
NOTE: The cooking time and temperature can be adjusted at any time during the cooking cycle. 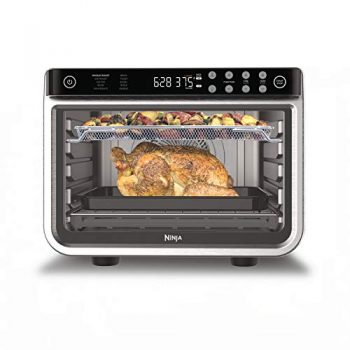
NOTE: The indicator will turn on automatically when there are 30 seconds left of cooking.
:
Press the TEMP / DARKNESS button again to set the temperature.
If the ingredients are oily, greasy or marinated, place the basket on a baking sheet.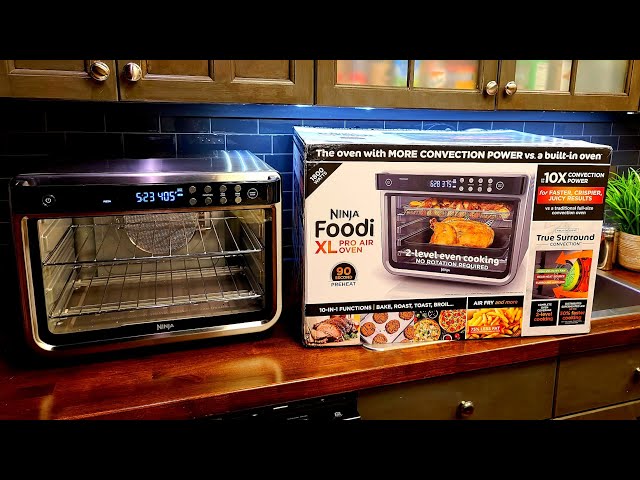
Use the dry roasting basket.
For greasy, oily or marinated ingredients, use a fry basket with a tray underneath.
NOTE: The timer will start counting down as soon as the appliance has warmed up. If the ingredients are not ready to be sent to the oven, simply turn the knob to add time.

Press the TIME/SLICE button again to set the time.
NOTE: If the cooking time is less than 1 hour, the clock will count minutes and seconds. If cooking lasts more than 1 hour, the clock will count down the hours and minutes.
NOTE: Food cooks faster when using the BAKE function than when using the BAKE function, so for traditional oven recipes, reduce the cooking time by 30% and reduce the temperature to 10°C.
When the appliance beeps to indicate that it is preheated, immediately place the baking tray on the wire rack. Close the oven door.
NOTE: The timer will start counting down as soon as the appliance has warmed up.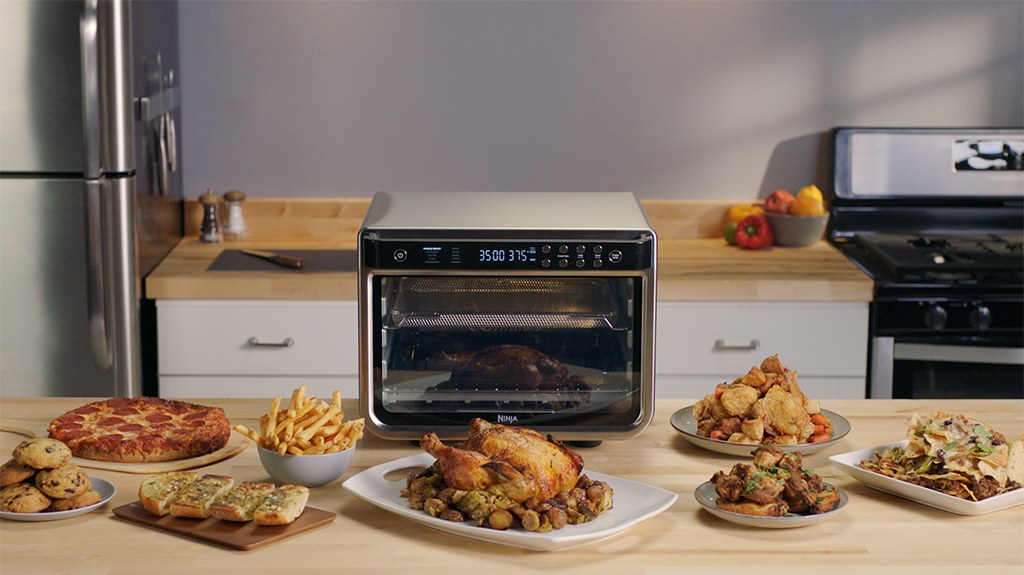 If the ingredients are not ready to be sent to the oven, simply turn the knob to add time.

NOTE: If the cooking time is less than 1 hour, the clock will count minutes and seconds. If cooking lasts more than 1 hour, the clock will count down the hours and minutes.
When the appliance beeps to indicate that it is preheated, immediately place the baking tray on the wire rack. Close the oven door.
NOTE: The timer will start counting down as soon as the appliance has warmed up.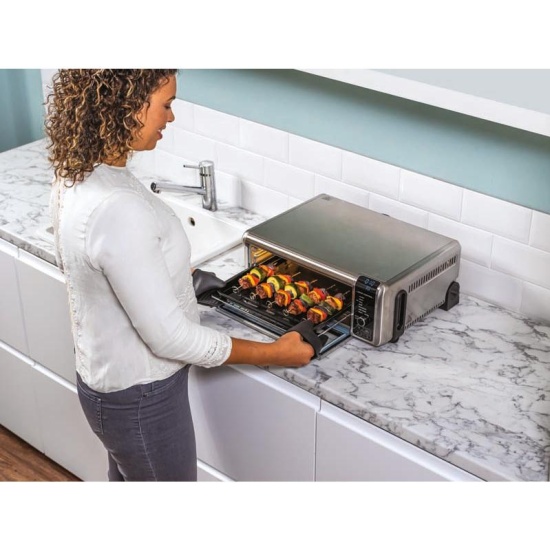 If the ingredients are not ready to be sent to the oven, simply turn the knob to add time.
NOTE: For best results with baked goods such as cookies, line a baking sheet with parchment paper.
TIME/SLICE button again.
Press the TEMP/DARKNESS button again to set the darkness level.
NOTE: There is no temperature control for the TOAST function and the unit does not preheat in Toast mode.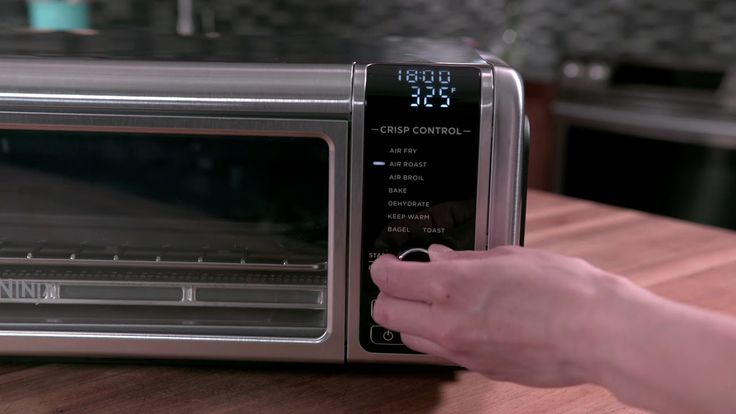 It is very important to choose the exact number of slices to avoid over or under flavor.
Press the TEMP/DARKNESS button again to set the darkness level.
NOTE: Temperature control is not available for the BAGEL function and the unit does not preheat in BAGEL mode. It is very important to choose the exact number of slices to avoid over or under flavor.  Close the oven door and press START/PAUSE to start cooking.
NOTE: Keep warm function is not available on all models.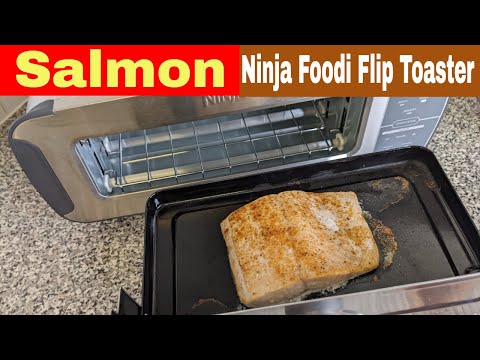
NOTE: There is no temperature selection for the Keep Warm function.
NOTE: The appliance does not heat up in keep warm mode. CLEANING, MAINTENANCE AND STORAGE
The device should be thoroughly cleaned after each use.
NOTE: Empty the crumb tray frequently.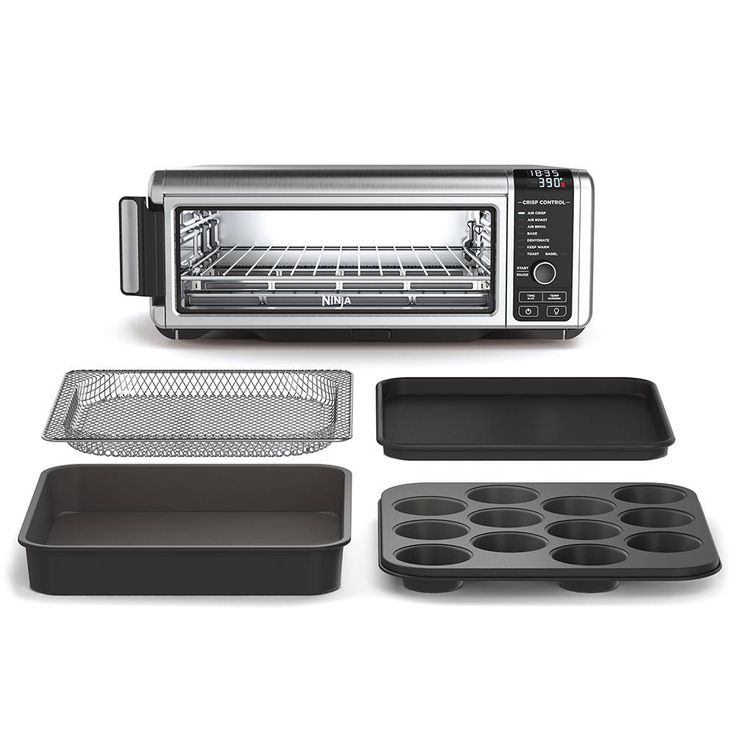 Wash by hand if necessary.
WARNING: NEVER put the main unit in the dishwasher or submerge it in water or any other liquid.
CORD MANAGEMENT
Option 1 Outlet on the left
Option 2 Outlet on the right
Option 3 Outlet behind the oven
ACCESSORIES TO PURCHASE 
Visit ninjakitchen.co.uk to expand your options and take your cooking to the next level.
Error
“CALL CUST SRVC” and the next "Er7"
Turn off your device and call Customer Service on 0800 862 0453. To help us better serve you, please register your device online at ninjakitchen.co.uk/registerguarantee and have your product handy when you call.
FAQ
Why does the oven not turn on?
- The oven must be upside down to switch on.
- Make sure the power cord is securely plugged into the outlet.
- Plug the power cord into another outlet.
- Reset the circuit breaker if necessary.
- Press the power button.
Can the oven tray be used instead of the roasting basket with roast function?
- Yes, but crunchy results may vary.

Do I need to adjust the time and temperature for traditional oven recipes?
- When cooking traditional recipes in the oven using the roasting function, reduce the cooking time by 30% and the temperature by 10°C.
Can I reset the device to default settings?
- The oven will remember the last setting used for each function, even if you unplug it.
To restore the default oven settings for each function, press the TIME / SLICE and TEMP / DARKNESS buttons simultaneously for 5 seconds.
Why do the heating elements seem to turn on and off?
- This is normal. The oven is designed to precisely control the temperature for each function by adjusting the power levels of the heating elements.
Why does steam come out of the oven door?
- This is normal. The door is ventilated to release the steam generated by products with a high moisture content.
Why is water dripping from under the door onto the counter?
- This is normal. Condensation from foods with a high moisture content (such as frozen bread) may run down the inside of the door and drip onto the counter.
Why is there noise coming from the control panel?
- When the oven is hot, the fan turns on to cool the control panel.
Can foil or baking paper be used?
- Do not use aluminum foil. However, baking paper or greaseproof paper is recommended when baking or to keep the pan clean.
Can the accessories be washed in the dishwasher?
- For durability we recommend hand wash accessories. In case of adherent residues, allow to soak in before cleaning.
Notes
Report this AD
Visit us online in:
Ninjakitchen.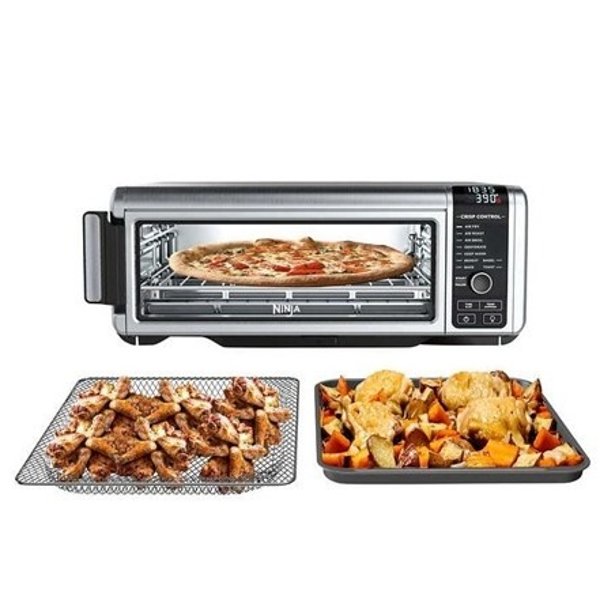 co.uk
co.uk
or subscribe to any of our pages on social networks:
Keep these instructions. Save for future use.
This label indicates that this product must not be disposed of with other household waste throughout the EU. To prevent possible harm to the environment or human health from uncontrolled waste disposal, dispose of responsibly to promote the sustainable reuse of material sources. To return your used device, please use the return and collection systems or contact the retailer where you purchased the product. They can hand over this product for environmentally friendly recycling.
SharkNinja Europe Limited 3150 Century Way,
Thorpe Park, Leeds, LS15 8ZB, United Kingdom
SharkNinja Germany GmbH, c/o Regus Management GmbH Excellent Business Center 10
Stockenha 16 + Frankfurt am Main, Germany
Illustrations may differ from actual products. We are constantly striving to improve our products, so the specifications herein are subject to change without notice.