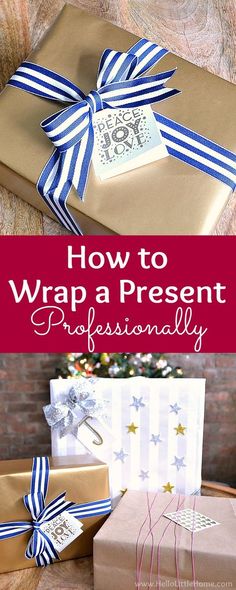
How to wrap a thin present
How to Wrap a Present Efficiently With This Math-Based Hack
- If you’re not sure how to wrap a present, there’s an easy hack you can try.
- The clever trick—wrap diagonally, not horizontally or vertically—is based in math.
- Basic geometric principles explain how it works.
Not sure how to wrap a present? Consider learning the diagonal gift wrap hack, which is age-old wisdom in some circles—a graduate student even wrote a paper about the math of the perfect gift wrap in 2007, and it’s how Subway sandwich artists already wrap your lunch.
The secret to the economy of the diagonal wrap is that, for specific book-shaped things, it significantly cuts down on the redundant areas of paper, while maximizing your coverage. I watched a video on how to do it and planned an object size and paper size that match the conditions: a little too short in either direction when wrapping in a traditional squared-off way. In an example, I wrapped a flat, 4 × 5 “book” in a 7 × 9 sheet.
Caroline Delbert
The green and pink dotted lines show where you fold over, and I’ve shaded the resulting flaps to show the sad leftover square we typically conceal with a separate piece you tape on as a patch. Bonus points if you make the patch from a scrap you should never have cut off your whole piece to begin with.
I wrapped a flat “book” with an area of 20 (4 × 5) in a sheet with an area of 63 ( 7 × 9). If somehow wrapping could be absolutely, perfectly efficient, I’d need a minimum of 40 to cover the flat rectangle with area 20. The wrapping sheet has enough to do this job with 23 square units leftover. Where are they going? I need a sheet that’s long enough in one direction to completely wrap around my item. For the 4 × 5 book, that means at least 8 in one direction or at least 10 in the other. An 8 × 8 or 10 × 6 sheet would be enough.
Caroline Delbert
When you turn the paper 45 degrees, the same size sheet of paper suddenly looks huge. You’ve moved all the extra dead space in the corners so that now it forms the longest part of your sheet, which easily folds across and makes a comfortable overlap zone with the opposite flap. I turned my illustration just about 45 degrees exactly to make the demonstration easier, but you definitely don’t have to be that exact. This same spatial idea is how envelopes are made, and most envelopes are made of rounded rhombuses, not squares.
More Wrapping Tips 🎁
- How To Use Math To Wrap Gifts
Again, the secret is how you’re wrapping all the way around the item. A diamond orientation means you’re folding over right triangles, with the longest side of each one, the hypotenuse, covering the entire edge of your item. If the tails of each end wrap all the way around your book and overlap even a little bit, your entire book is enclosed.
Our effective wrapping length increased from 7 or 9 to over 11 inches for each diagonal. A folded “fortune teller” shows us how elegantly this can work when our piece of paper is square, forming a perfect juncture with no overlap.
Cheryl Zibisky//Getty Images
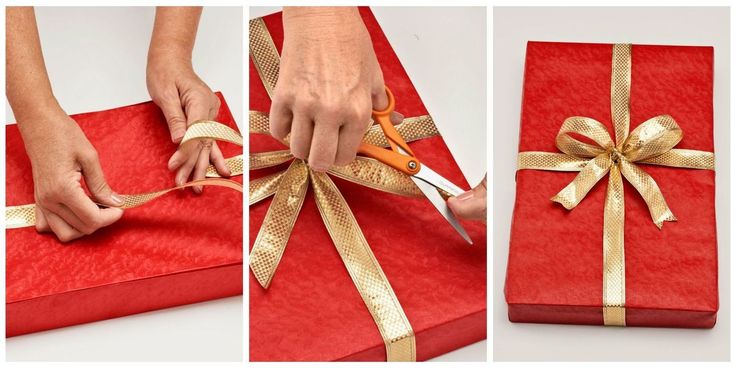
If you insist, the most efficient squared-off way to wrap a book is to cut enough paper to wrap around it one way and trim the other edges short so you can carefully fold them together and tape them. This is how you use the least paper in this configuration, but it requires unnecessary amounts of finesse, more tape, and very neat edges on your cuts of paper.
Most people cut the ends long and just fold them over around the back of the book, but that requires clever folding and looks messy despite it. Save some stress, paper, and tape and just turn your book 45 degrees.
Before You Go ...
- The Best Gifts for Tool Lovers
- The Best Gifts for Woodworkers
- The 35 Best Gifts for the Handyman
Caroline Delbert
Caroline Delbert is a writer, avid reader, and contributing editor at Pop Mech.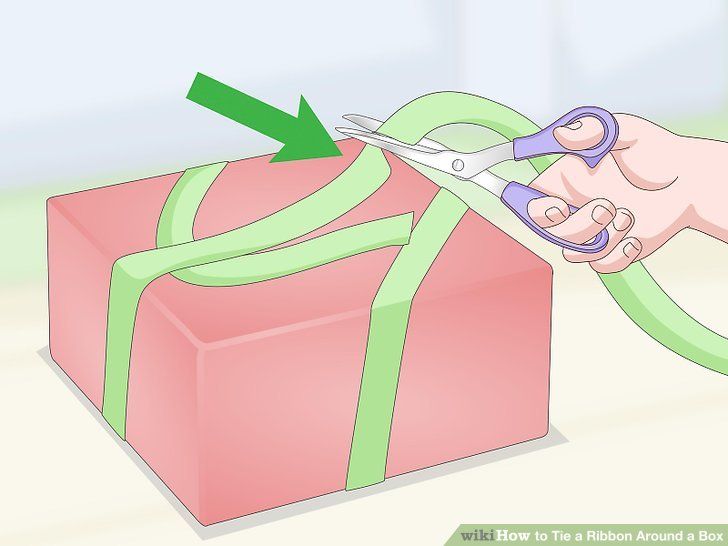 She's also an enthusiast of just about everything. Her favorite topics include nuclear energy, cosmology, math of everyday things, and the philosophy of it all.
Tips for wrapping gifts of any shape
You set aside a few minutes to sneakily wrap your gifts and suddenly realize you have an object that doesn’t fit the traditional rectangular shape. Of course, you can always put your oddly-shaped item in a box and wrap it normally, or stuff it in a gift bag with tissue paper. But if you don’t have a box or bag on hand, there are other ways to wrap it—without the end result looking like garbage.
If you’re crafty, you can find loads of solutions for wrapping unusual shapes, but not everyone is. For this guide, we focused on methods that require nothing but the stuff you’re guaranteed to have: wrapping paper, tape, and scissors.
The cylinder method: for candles, hexagonal boxes, and other tubular shapes
Let’s start with gifts that comes in boxes, but not cubic ones—maybe a shape that has more than four sides or looks like a straight-up cylinder.
In this case, you can wrap it much like you’d do with a rectangular prism: Just roll the paper around the sides and fold the edges in on the top and bottom. The difference is how you turn the edges. Instead of bending in each corner, you’ll want to create small creases around the circle, as shown in the above video from Alison Westwood of wrapping service Eclipse Gift Wrapping. (Westwood adds a crafty flower decoration at the end, which is not necessary—the edges will look just fine as long as you follow her instructions.)
You can adapt these instructions to pentagonal, hexagonal, and other polygonal boxes with more than four sides. You just need to make those creases at each corner, as shown here.
The diagonal method: for when you don’t have enough wrapping paper
Ever get down to the last gift of the bunch, and your final strip of wrapping paper is just too small to fully envelop the box? Or maybe you’re wrestling with a box so big that even a full sheet of paper won’t cover it. Well, thanks to some geometric wizardry, you can make your limited resources work.
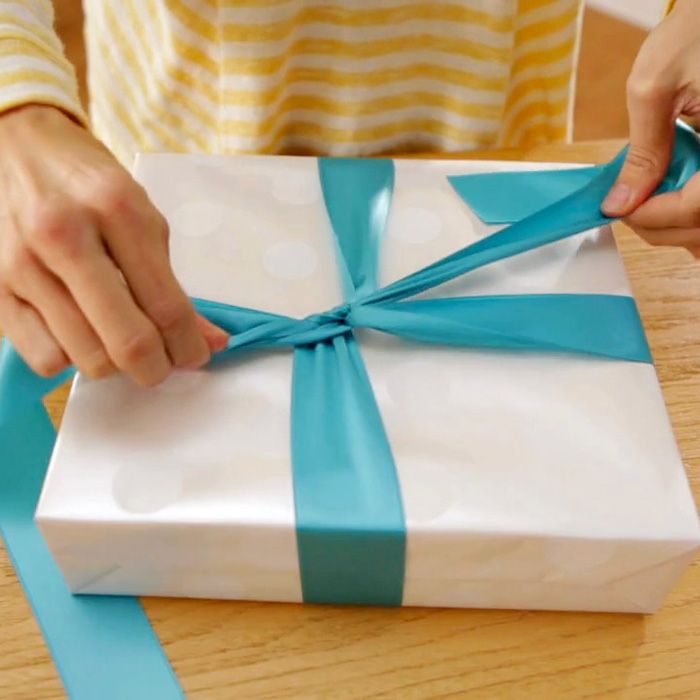
To use the diagonal method, try turning the gift diagonally and pulling the corners of the wrapping paper up the sides, as shown above in Kallie Branciforte’s video from her YouTube channel But First, Coffee. This method often allows you to cover the entire surface area of the box without leaving any exposed cardboard.
If you still don’t have enough paper for the diagonal method, here’s an alternative that lets you grab multiple pieces of wrapping paper to cover up those exposed portions. It’s more of a last resort, but with the neat method for folding the corners, it’ll at least look decent instead of haphazard.
The tennis racquet method: for large, relatively flat items
Sometimes, you have a shape so odd—like a tennis racquet, guitar, or some other flat object with round edges—that one side is basically guaranteed to look bad when you use a single sheet of wrapping paper.
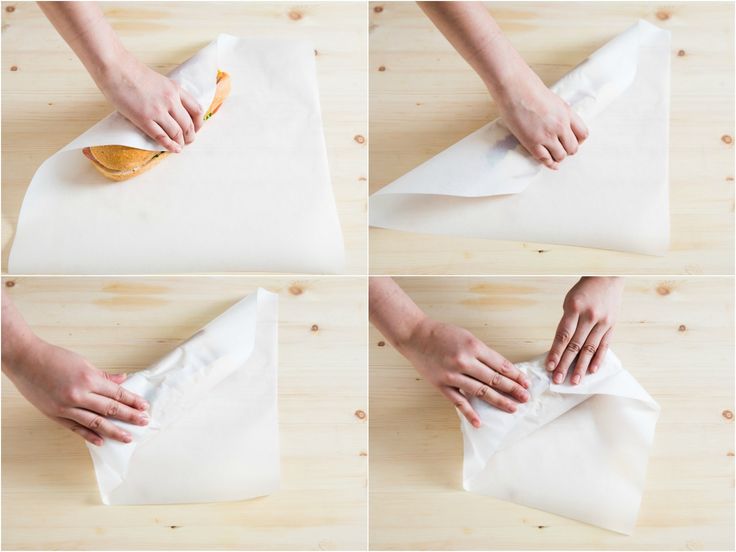
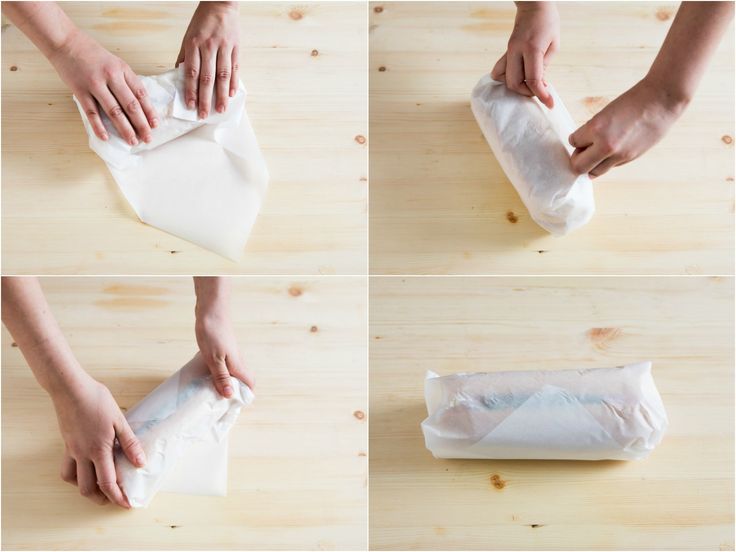
Instead of trying to wrap the whole thing in one piece, you can make it much cleaner by wrapping each side individually. Nilda Garcia, of now-closed New York City stationary store Kate’s Paperie, demonstrates that method in the above video from DIY site Howdini. In summary, you wrap one side cleanly, leaving a portion of the top exposed—then flip it over and wrap the other side in the same way. One of the two sides will still have a slightly patchy appearance, but it’ll look a heck of a lot better than if you used only one sheet of paper. Just flip it so the good-looking side faces up before you put it under the tree.
The wine bottle method: for…well, you know
Because wine is such a common gift, and has such an odd shape, you can find dozens of wrapping methods dedicated to bottles. However, most of these techniques require tissue paper (which is a lot more forgiving on weird shapes) or gift bags—and we need an option that requires neither.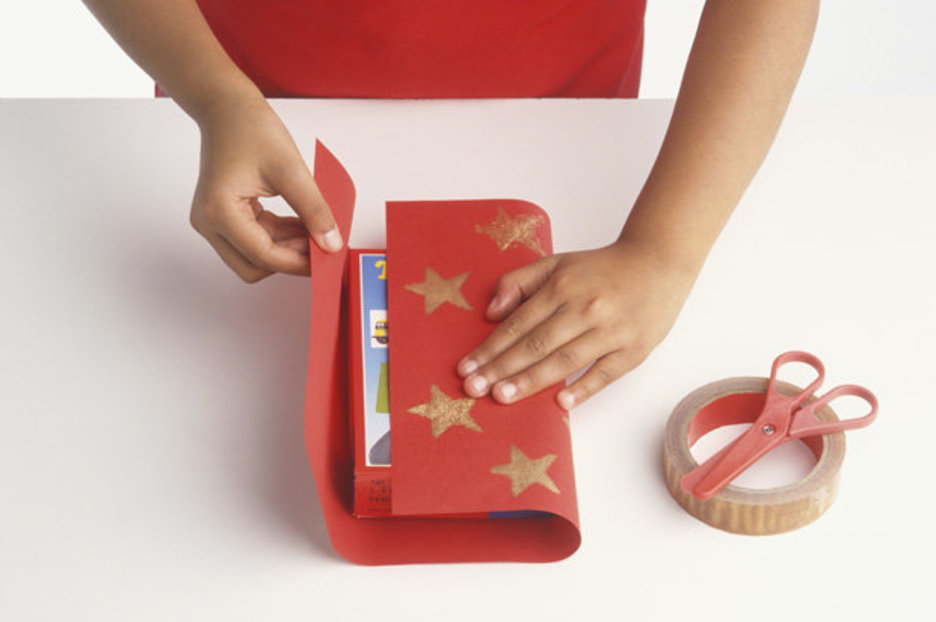
Thankfully, Hallmark’s YouTube channel shows off an easy way to do it without a lot of supplies. Wrap the bottom like you would any other cylinder (the video’s host uses scissors, but you can use the aforementioned cylinder method instead), then twist the top like a candy wrapper. If you have a ribbon, string, or gift tag, slap that on top of the twist to hide the crumples. If you don’t, a small piece of plain, differently-colored wrapping paper might do the trick.
The envelope method: for small, oddly-shaped items
For boxless stuffed toys and other shapeless trinkets, you’ll have to get a bit more creative… and essentially create your own box out of wrapping paper.
The above video from DIY Projects shows how to create an envelope that should work for just about any bauble. If your item is more spherical, like a ball, the video demonstrates a pyramid-like envelope that’ll work for that, too.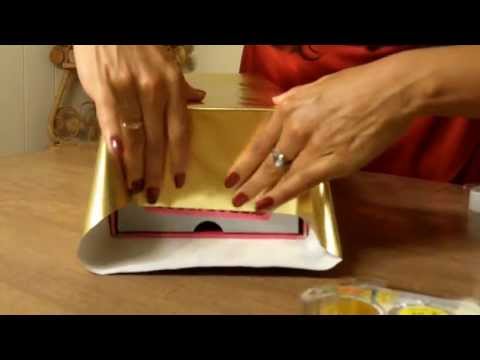
The gift bag method: for everything else
If literally none of the above options work for you—and you don’t have a gift bag handy—you can turn a large piece of wrapping paper into a gift bag that’ll fit just about anything.
This method is a tad more complex, but essentially involves cutting a large strip of paper and turning one edge into a flat-bottomed bag. This works for anything: weirdly-shaped blister packs, Tonka trucks, or even spherical gifts like a basketball (though you could also use aluminum foil for that). In the video above, the wrapper ties the ends off with a ribbon, but if you don’t have one of those, your gift will look just fine with the top edge taped down.
Whatever method you use, don’t stress too much about getting it to look perfect. Your recipient will appreciate the gift itself much more than the wrapping job—and they’ll only see it for five seconds before tearing into your meticulous work.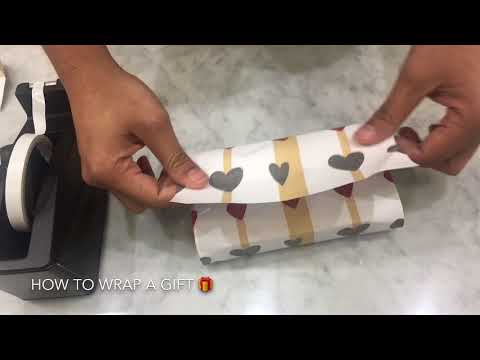
How to beautifully wrap a gift of any shape and size
December 28, 2021 Advice
Cool ideas and detailed instructions with photos and videos are waiting for you.
How to wrap a rectangular gift the classic way
Frame: Hallmark / YouTubeWhat you need
- Wrapping paper;
- scissors;
- plain tape;
- double sided tape.
How to wrap a gift
Unfold the paper and place the gift on it. From the narrow side, measure so much paper that it covers the parallelepiped by three quarters. nine0003 Frame: Hallmark / YouTube
Measure the same amount of paper from the opposite side and cut off the excess.
Image: Hallmark / YouTubePlace the wide side of the gift on the narrow edge of the paper.
Frame: Hallmark / YouTubeFlip it to the side.
Frame: Hallmark / YouTubeThen put it down and put it down again.
Frame: Hallmark / YouTube Measure about 5 cm from the gift and cut the paper along this line.
Turn the gift down the side you want it to open. Attach the narrow edge of the paper to the middle of the top edge and fix it with ordinary tape. The paper should fit snugly into the box. nine0003 Frame: Hallmark / YouTube
Stick a piece of double-sided tape to the opposite edge of the paper.
Frame: Hallmark / YouTubeGlue this edge to the far edge of the top surface of the gift. If everything is measured correctly, the paper will fit snugly and will last just to the right place.
Frame: Hallmark / YouTubeNow seal the sides of the present. Fold down the top edge of the paper and secure with regular tape.
Frame: Hallmark / YouTubeRun your fingers over the protruding paper to make crisp folds. nine0003 Frame: Hallmark / YouTube
Fold the side of the gift paper over and secure.
Frame: Hallmark / YouTubeFold and glue the other part of the package in the same way.
Frame: Hallmark / YouTube Flatten the bottom edge, stick double-sided tape on it and attach it to the gift.
Tape the opposite side of the gift in the same way. Run your fingers along the edges of the rectangle - so the shape of the package will be clearer.
What else is there
A square-shaped gift is wrapped in much the same way:
How to wrap a rectangular gift diagonally
Frame: BeatTheBush / YouTubeWhat you need
- Wrapping paper;
- scissors.
How to wrap a gift
Lay out the paper on a flat surface. Place a gift in the corner: the edges of the wide side should be in contact with the edges of the paper.
Frame: BeatTheBush / YouTubeTurn the gift on its side and then lay it flat again.
Frame: BeatTheBush / YouTube Bend the opposite corner of the paper and measure a point on it about 5 cm from the corner of the present. In the photo, the person just points to this point.
Holding your finger at the desired point, unfold the paper and cut along the line passing through the mark.
Frame: BeatTheBush / YouTubeCut another line perpendicular to the first. You will have a square piece of paper. nine0003 Frame: BeatTheBush / YouTube
Take one corner of the paper and fold it under the present.
Frame: BeatTheBush / YouTubeThen crease the right corner a little and fold this part of the paper. Run your fingers through the folds. The packaging should fit snugly around the gift.
Frame: BeatTheBush / YouTubeFold in the opposite corner in the same way.
Frame: BeatTheBush / YouTubeFold this piece of paper over. Walk your fingers along all the folds formed.
Frame: BeatTheBush / YouTubeStart folding the rest of the package. Make sure that the paper does not come out to the sides.
Frame: BeatTheBush / YouTube Fold the paper, leaving a corner.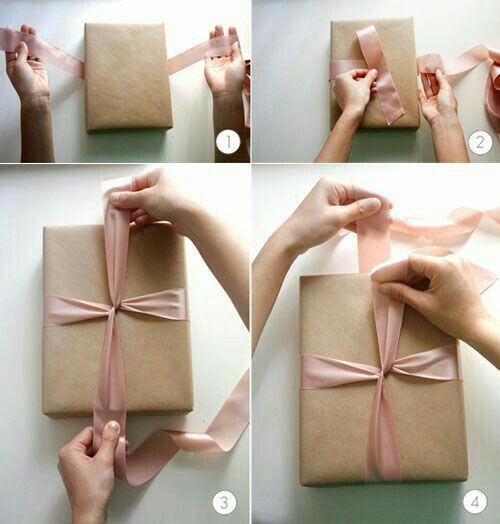
Fold the top of this corner over and run your fingers along the edge of the gift.
Frame: BeatTheBush / YouTubeSlip the loose piece under the corner pieces of the paper. Look for details in the video:
What other option is there
This method uses adhesive tape, but much less paper is needed than in the previous ones. nine0003
How to make a draped box for a rectangular gift
Shot: Shiho Masuda / YouTubeWhat you need
- Wrapping paper;
- corrugated paper;
- scissors;
- plain tape;
- double sided tape;
- tape - optional.
How to Wrap a Gift
Cut two identical large rectangular pieces of wrapping and crepe paper. Lay the wrapping paper face down and place the corrugated paper on top. Bend the bottom narrow edge a couple of centimeters. nine0003 Frame: Shiho Masuda / YouTube
Fold the same edge so that the new folded strip is two times wider than the previous one.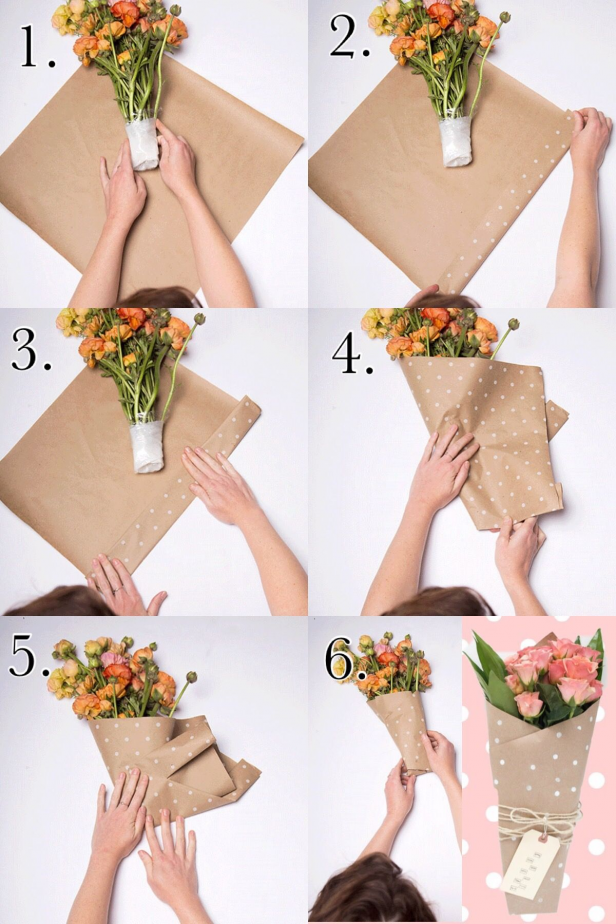 In order not to be mistaken, watch the video instruction below. Fold this strip four more times.
Unfold the paper. You should have noticeable folds.
Frame: Shiho Masuda / YouTubeFlip the paper face up. From the middle of the bottom edge, cut off the corner to the beginning of the fifth fold.
Shot: Shiho Masuda / YouTubeSlightly straighten the corrugated sheet to the left. Fold all the paper into a fan along the marked folds. Look for details in the video. nine0003 Shot: Shiho Masuda / YouTube
Turn over the package and fix the fan with tape in several places.
Shot: Shiho Masuda / YouTubePlace the present on the paper. Bend the part with the fan, as shown in the photo. Lay the opposite side of the package on top. See how much you need to cut so that this part is hidden under the first. Then cut off the excess.
Shot: Shiho Masuda / YouTube Open the paper. Put the left side on the gift and fix the right side on it with double-sided tape. nine0003 Shot: Shiho Masuda / YouTube
Turn over the present. On one side, fold the sides of the paper inward.
Frame: Shiho Masuda / YouTubeFold the top edge of the paper inwards and cut off the excess if necessary. Glue the bottom edge with double-sided tape.
Shot: Shiho Masuda / YouTubeRepeat the same on the other side of the gift. Tie a ribbon if desired.
Other options
Instead of a fan, you can make a straight drapery:
Diagonal drapery also looks impressive:
And another cool tie-wrapping option especially for men:
need
- Wrapping paper;
- plain tape.
How to wrap a gift
Place the gift on the paper at an angle as shown in the photo. nine0003 Frame: Do It On A Dime / YouTube
Fold a small corner of the paper into a gift.
Frame: Do It On A Dime / YouTubeFold the piece of paper to the left of the gift and secure with tape.
Frame: Do It On A Dime / YouTubeFold the corner at the top as shown in the photo.
Frame: Do It On A Dime / YouTubeFold this part of the package into a gift. Make the fold clearer - this is the future pocket.
Frame: Do It On A Dime / YouTubeFlip the gift over and glue the tip of the piece of paper from the previous step. nine0003 Frame: Do It On A Dime / YouTube
Fold the remaining paper in the same direction and secure with tape.
Frame: Do It On A Dime / YouTube Put something in the pocket on the other side of the gift.
What other options are there
This video shows how to wrap a flat gift:
You can make a box with a straight pocket: rectangular gift Frame: Shiho Masuda / YouTube
Items needed
- Wrapping paper;
- scissors;
- double sided tape;
- scrapbooking paper or other decorative paper;
- tape.
How to wrap a gift
Cut a rectangle from the wrapping paper. For one side of it, measure the smallest edge of the gift six times, and then measure the largest one once. The other side should be such that the paper easily covers the gift lying on it. All the details are in the video below. nine0003
Place the gift inside the middle of the paper. Fold the bottom edge over and run your fingers along the edge of the rectangle.
Frame: Shiho Masuda / YouTubeThen fold the top of the paper over and mark the fold with your fingers.
Frame: Shiho Masuda / YouTube Glue the bottom to the top. The paper should fit snugly against the gift.
Fold the corner of the paper as shown in the photo.
Frame: Shiho Masuda / YouTubeFold the rest of the corners in the same way. Lay the gift seam side up. nine0003 Frame: Shiho Masuda / YouTube
Bend the top corners to the center.
Shot: Shiho Masuda / YouTubeCut a strip of decorative paper slightly longer than the present and twice as narrow as the present. Slightly bend the long edges and stick double-sided tape on the sides.
Frame: Shiho Masuda / YouTubeGlue the strip horizontally to the top corners of the wrapping paper.
Shot: Shiho Masuda / YouTubeFold forward the bottom corners of the paper and glue them to the strip. Frame
: Shiho Masuda / YouTubeTie a ribbon around the gift.
How to wrap a gift of any shape in a paper bag
Image: Martha Stewart / YouTubeWhat you need
- Wrapping paper;
- scissors;
- double sided tape.
How to wrap a gift
Lay the paper face down. Place a gift on top and fold the side of the paper. Measure out enough packaging to completely cover the gift.
Frame: Martha Stewart / YouTubeCut the paper along the marked line.
Frame: Martha Stewart / YouTubeRemove the present. Tape one edge of the paper with tape. Bend the opposite side approximately to the middle.
Frame: Martha Stewart / YouTubeGlue the side with the tape on top.
Frame: Martha Stewart / YouTubeFold the bottom edge over a few inches. Then straighten and bend this piece of paper on the sides so that you get triangles. Their middle should fall on the intended fold. Details are in the video below. nine0003 Frame: Martha Stewart / YouTube
Fold the top corner of the resulting figure to the middle. Bend the bottom corner so that it slightly overlaps the top.
Frame: Martha Stewart / YouTube Fold in the edge of the bottom triangle. Glue it to the top. Unfold the bag and put a gift in it.
Double-fold the open end of the bag and secure with tape.
If the gift is heavy, place thick cardboard on the bottom of the bag to secure it. And on top, you can make holes with a hole punch, thread the tape there and tie it. Then the edge does not have to be glued. nine0003
How to wrap a gift of any shape in a paper bag
Frame: Ryman Stationery / YouTubeWhat you need
- Wrapping paper;
- scissors;
- corrugated paper optional;
- plain tape optional;
- tape.
How to wrap a gift
Cut a large piece of paper and lay it face down. To make the packaging look more interesting, you can place the same piece of corrugated paper on top. Place a gift in the middle. nine0003 Frame: Ryman Stationery / YouTube
Bring two opposite corners of the paper together at the top.
Frame: Ryman Stationery / YouTubeWhile holding the top of the structure, add another corner of the paper.
Frame: Ryman Stationery / YouTubeAnd then the last corner.
Frame: Ryman Stationery / YouTubePinch the paper over the gift and spread it over the top to make the package look prettier.
Frame: Ryman Stationery / YouTubeFor reliability, you can paste this place with tape. At the end, tie it with a ribbon. nine0003
What other option is there
This method is ideal for balloon-shaped items:
How to wrap a gift of any shape in a paper envelope
Frame: DIY Projects / YouTubeWhat you need
- Wrapping paper;
- scissors;
- double sided tape.
How to wrap a gift
Cut a piece of paper and fold it in half crosswise. One half should completely cover the gift. nine0003 Frame: DIY Projects / YouTube
Expand the sheet. Fold the long edges over about 1 cm. Fold the sheet again to form a fold slightly below the center. Glue tape to the bottom edges to a new fold.
Frame: DIY Projects / YouTubeGlue the bottom side of the paper to the top.
Frame: DIY Projects / YouTubeFold the corners of the remaining paper as shown in the photo.
Frame: DIY Projects / YouTubeGlue these corners and stick a strip of tape on top.
Frame: DIY Projects / YouTubePut a gift inside and close the envelope.
How to wrap a gift in the form of a cylinder
Frame: Gift Elements / YouTubeWhat you need
- Wrapping paper;
- scissors;
- double sided tape.
How to wrap a gift
Cut a long rectangle out of paper. Its width should be such that the paper on both sides reaches the middle of the cylinder, set on its side in the center of the paper.
Curl the narrow side of the paper slightly. Place the gift on its side in the middle of the package and wrap it with the opposite side of the paper.
Frame: Gift Elements / YouTubeGlue the folded edge on top so that the paper fits snugly around the gift.
Frame: Gift Elements / YouTubeTemporarily fold one edge of the paper over to place the gift straight up.
Frame: Gift Elements / YouTubeFold over the top of the paper. Take one resulting corner and bend it to the gift.
Frame: Gift Elements / YouTubePlace paper on top as shown in the photo and video below.
Frame: Gift Elements / YouTubeContinue folding the paper in the same way in a circle, making sharp folds.
Frame: Gift Elements / YouTubeInsert the remaining rectangle under the top of the package.
Frame: Gift Elements / YouTube Do the same for the back of the gift. If a small hole has formed in the middle, cover it with a piece of paper or decorations.
Other options
This tutorial will come in handy if you don't want to use tape or just don't have it on hand:
How to wrap a triangular gift
Frame: 5-Minute Crafts / YouTubeWhat you need
- Wrapping paper;
- scissors;
- plain or double sided tape.
How to wrap a gift
Cut a rectangle larger than the gift from the paper. Lay the paper face down, place the gift approximately in the middle. Fold up the bottom narrow edge of the paper. nine0003 Frame: 5-Minute Crafts / YouTube
Fold in the lower right corner as shown in the photo. If you're having trouble, watch the video tutorial below.
Frame: 5-Minute Crafts / YouTube Raise the right side of the paper.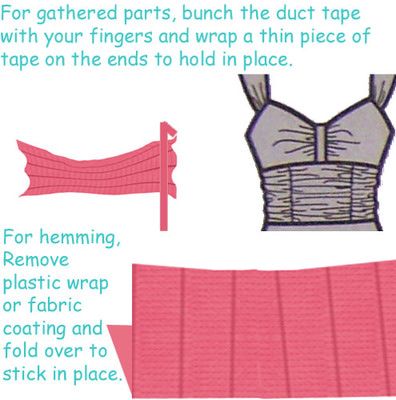
Fold this part near the sharpest corner.
Frame: 5-Minute Crafts / YouTubeWrap the gift with the rest of the package.
Frame: 5-Minute Crafts / YouTubeSecure the tip with tape.
How to gift wrap a bottle
Frame: Martha Stewart / YouTubeWhat you need
- Two types of wrapping or corrugated paper;
- scissors;
- double sided tape;
- tape.
How to gift wrap a bottle
Cut out two paper rectangles. One of them should be slightly smaller than the second. Place them on top of each other.
Frame: Martha Stewart / YouTubeTurn the paper over so that the smaller rectangle is on the bottom. Put the bottle in the corner. nine0003 Frame: Martha Stewart / YouTube
Start wrapping the bottle in paper.
Frame: Martha Stewart / YouTubeFold the right corner of the paper to the bottom.
Frame: Martha Stewart / YouTube Continue to twist the bottle and fold the right edge of the paper. The video below shows the packing process in detail.
Wrap the bottle completely in paper. Tape the end of the package with tape.
Shot: Martha Stewart / YouTubeSqueeze the package around the neck of the bottle. nine0003 Frame: Martha Stewart / YouTube
Tie this place with a ribbon.
What other options are there
In this video you will find three more ways to present the bottle in an original way:
no box, envelope, candy shape, round, flat, large, soft, step by step instructions
Contents
Giving gifts is just as pleasant as receiving them, but in addition to the prepared surprise, packaging is also important, which will give it a complete and presentable look. But in order to understand how best to pack a gift in gift paper, you should study several features and options for this procedure in order to choose the most optimal one for yourself. nine0003
Choice of paper
The most common way to present a gift is gift paper.
It comes in several types, each of which has its own differences:
- Glossy sheet paper. Paper in this case can be of various colors, both monophonic and multi-colored. The density of the sheets is minimal, which allows them to be used in various interesting wrapping options.
Most often this type of paper is used for packing boxes in the shape of a square and a rectangle. nine0003
- Kraft. Characterized by increased wear resistance and density. The kraft paper is much rougher to the touch than the previous version and has a ribbed surface with a cross section.
Great for gifts in retro or provence style, as well as large sizes. Such packaging requires additional decoration on top.
- Quiet. This type of packaging is papyrus paper. Its thin airy structure allows you to give a gift an elegant and elegant look. nine0012
Tissue is also used as a filler in a gift box. It is convenient to wrap objects of complex geometric shapes in this paper, which gives them additional volume.
- Polysilk. It is a stretch film that is applied with a metallic shade. Happens only in one-color option.
Used for wrapping objects with sharp corners and toys. In this case, the gift is placed in the middle of the packing list, and the edges rise up and are decorated with a bow made of the same material. nine0003
- Corrugated paper. Large embossed material used for gift wrapping. Often this look is complemented by polysilk bows, which gives the package a sophisticated look.
Any objects can be wrapped in such paper: boxes, bottles, tubes.
- Mulberry. Wrinkled paper design. Available in various colors, and in some cases has an ornament or pattern.
Used as a wrapper for objects of any shape. If necessary, the gift is complemented by a small decor on top.
Choice of colors
How to pack a gift in gift paper, as well as give it sophistication and presentability, will help to study the features of using different shades of material.
The package and the item inside must be in harmony with each other , as color mismatch can spoil the overall impression of the surprise. nine0003
Basic colors:
- Yellow. Solar color, reminiscent of a ray of sunshine. A gift wrapper made in this tone gives a warm and cozy shade. Ideal for giving a surprise a childish spontaneity and playfulness. It is not recommended to mix with other colors. But you can add purple, brown, blue or green decor on top.
- Orange. A shade that embodies strong positive emotions, and also sets you up for admiration. But at the same time, it is important not to overdo it, since it is this color that can both decorate a gift and spoil it. It is ideal to combine an orange wrap with green, yellow, brown, purple, blue and red. nine0012
- Pink. Great for gifts for women, as it evokes touching and joyful emotions. It is best to combine it with all shades of red and purple, and an additional decor of a white shade will help to effectively emphasize the tone.
- Violet. This option is ideal for a mysterious and extraordinary gift, as it symbolizes secrecy, mystery and fantasy. It is best to combine this tone with white, silver, yellow and pink for gift wrapping. nine0012
- Red. This tone of packaging means fiery feelings and passion, and sometimes symbolizes irritation and anger. Therefore, giving preference to this color for gift wrapping, you should weigh everything if we are not talking about surprises for the New Year, since red is very relevant for this holiday.

The perfect combination of red packaging with silver, gold, white, pink and gray tones.
- Blue. It is recommended to use this tone for wrapping a gift for a man, as it is associated with success, nobility, fidelity. The dark blue color harmonizes perfectly with blue, silver, white, yellow, and for lighter tones it is recommended to select pale shades of yellow and pink. nine0012
- White. This tone is universal, as it can be combined with any bright color. But you should not give preference to it as the main color for packaging, as it is cold and therefore the impression of the gift will be the same. It is best used for contrast, using details in this shade, which will give the surprise a sense of celebration.
- Green. Considered a neutral shade that is appropriate for any occasion. The variety of tones of this color allows you to choose the right option for packaging. Green tone symbolizes wealth and respect.
 Dark shades are recommended to be combined with yellow, orange, white and gold, and light colors - with brown, gray, yellow. nine0012
- Grey. Used to wrap a gift that symbolizes nobility and restraint. And to give sophistication, you should combine it with red, pink and purple hues.
- Brown and black. These tones are rarely used, although they are recommended for a formal gift. But in order to dilute the tone, it is recommended to complement the wrapper with details in silver, purple or gold.
- Silver, steel and gold. These colors are best used as a complement to the main color. But at the same time, it should be borne in mind that steel and silver are cold tones, and therefore they should set off the packaging made in the same palette.
But with details in gold tones, it is better to decorate a gift made in warm colors. In addition, these colors are successfully combined with white and black.
If you choose multi-colored gift paper, you should make the details from the tone present in the package, but not dominant. nine0003
This will unobtrusively emphasize the gift and give it a sophisticated look.
Wrapping a standard size box
How to wrap a gift in a standard size gift paper: it will help to follow certain procedures. For the first time, you should practice on the newspaper, and after working out the procedure, use the prepared material.
Step-by-step instructions:
- Measure the required amount of paper. To do this, put the box in the center face down and leave a few centimeters of paper on the sides so that it is completely enough for all sides. nine0012
- Make a 1 cm fold on the vertical side of the paper and stick double-sided tape to it without removing the protective layer on the other side. Connect both sides so that they fit snugly into the box. After that, glue them according to the proven principle so that the junction is exactly in the center.
 If everything is done correctly, then the seam will be almost invisible.
 - On the side, fold the top edge of the paper to fit the box. Then wrap the valves on the side. And stick adhesive tape on the edge (1 cm) of the bottom side without removing the protective layer. Bend it and see that the seam is exactly in the center. Only then glue it on. nine0012
- Turn the box over with the seam down and check that the box is tight.
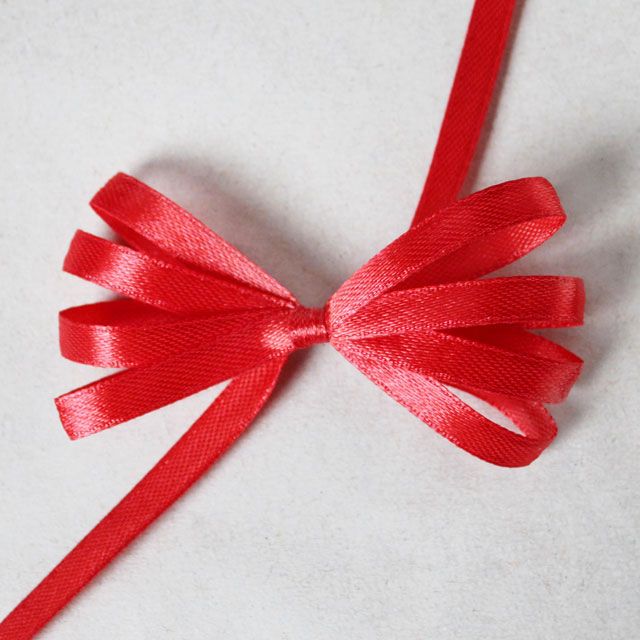
- Decorate the box with a ribbon or a bow, choosing them according to the characteristics of the main shade.
Square or Rectangular
Most of the gifts are already factory packed in the form of a square or rectangular box, but to give the surprise a more sophisticated look, it is necessary to wrap it in beautiful gift paper.
How to wrap a square or rectangular gift:
- Spread the prepared material on the table with the reverse side up.
- Wrap the box with paper on all sides and leave an extra margin of 4-5 cm.
 Then cut off a piece from the roll.
 - Make a 1 cm fold along one of the long edges and stick double-sided tape over it, leaving the protective layer on top.
- Fix the second long edge also with a small piece of adhesive tape 1.5 cm further from the center of the box. nine0012
- Put the prepared fold on top, but in such a way that it runs exclusively in the center. After making sure of this, remove the protective layer and stick.
- To fold in the remaining two sides, the side flaps must first be folded in tightly.
- Then make a 1 cm fold around the edge of the underside of the paper and stick double-sided adhesive tape on top.
- Press the top edge firmly against the box and secure in the center with a small piece of adhesive tape.
- Then fold over the prepared bottom edge so that it runs exactly in the center of the side. nine0012
- If everything matches, remove the protective layer of adhesive tape and stick it firmly.
Finally, the center seam can be hidden with a satin ribbon in the desired color.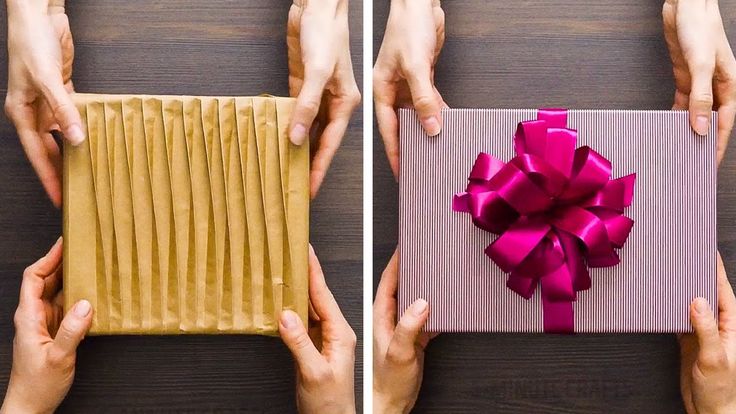
Long box
To make a gift in a long box presentable, follow the specific procedure:
- Measure the length and width of the box.
- Cut off a strip of paper according to the calculations obtained, adding a margin of 3 cm.
- Spread the prepared sheet wrong side up on a hard surface.
- Center the box.
- Make a 1 cm fold along the bottom edge and stick double-sided tape on top of it.
- Fold the top side tightly over the edge of the box and secure with a small piece of adhesive tape.
- Place the prepared fold on top and glue evenly.
- Fold the side flaps inward on the remaining sides to form a triangle. nine0012
- Then fix the upper edge tightly over the box.
- Make a 1.5 cm fold at the bottom and stick adhesive tape on top.
- Then fix it on top of the previous layer.
Round or oval
How to wrap a gift in round or oval gift paper, these recommendations will help you understand, since in this case the procedure is carried out a little differently.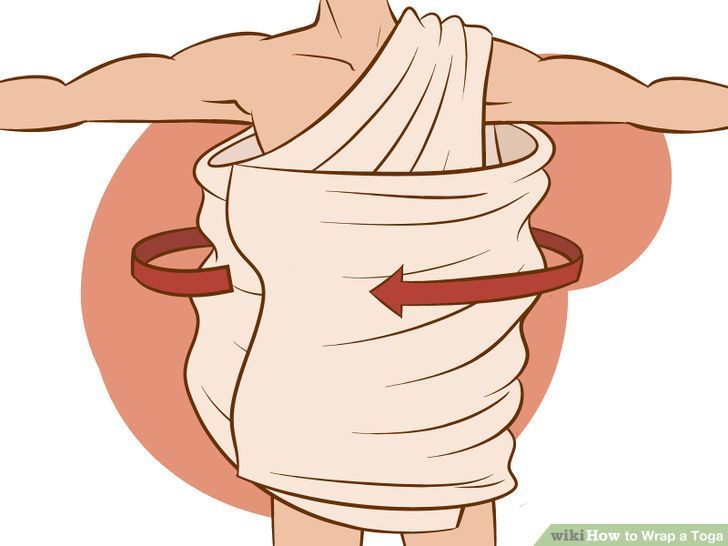
Step by step:
- Measure the height and width of the box, add 3 cm each and cut a strip of gift paper.
- Turn the box on its side, screw it up completely, leaving a margin of 1.5 cm at the top and bottom, but first remove the lid.
- Carefully fold the remaining edges into and down the box, securing them with tape.
- Cut out a circle of gift paper 0.5 cm smaller than the bottom of the gift and glue it on. nine0012
- Make a similar circle according to the size of the lid, but at the same time, increasing its diameter by 1.5 cm, glue it, and bend the resulting margin down with decorated folds.
- Cut off a strip 1 cm wider than the lid of the box, glue it on the side, and tuck the remaining stock in the middle and fix it with tape.
Flat
To pack a gift in a flat box, it is better to use the following best option:
- Measure the height and width of the box.
 nine0012
 - Calculate the required size of a piece of paper by adding the value of the length and twice the result of the width of the gift.
- Place the gift across the back of the paper.
- Glue a small piece of adhesive tape to the bottom corner of the paper and fix it in the center of the box.
- Fix the opposite corner of the paper on top in the same way.
- Fold over the sides and fold inward 1.5-2 cm on the remaining sides. nine0012
- Fix the remaining 2 sides alternately with adhesive tape in the center.
- Disguise the fixing point with additional decor.
Custom size
Gifts are sometimes irregularly shaped, which makes packing a little more difficult.
In this case, you can resort to the following tricks:
- Cut out a base from thick cardboard, the size of which should be equal to the diameter of the gift.
 nine0012
 - Cut a strip of corrugated paper or polysilk in the same way, adding a margin of 2 cm.
- Make a 1 cm fold along the side edge, and stick double-sided tape on top without removing the protective layer from the top side.
- Secure the bottom edge of the paper from below in the center of the prepared base with adhesive tape, creating decorative folds.
- Place the gift box inside and seal the edges on the side by laying the prepared fold on top. nine0012
- Tie the top of the wrapper with a colorful ribbon.
How to pack a big gift
Sometimes the size of a gift can be much larger than the standard — just paste over the factory packaging with the material you like and decorate it with a satin ribbon or bow on top.
In the case of a huge gift, it is enough to wrap it with foil or cover it with gift paper, and decorate it with additional decor on top. Such packaging is easy to remove later when presenting a gift. nine0003
If the gift is small
If the gift fits in a small box, don't overburden it with a wrapper.
It is better to use the following packaging option:
- Cut out a square from gift paper, the length of the sides of which should be 2 times the height and width of the gift.
- Center the box across the paper.
- Raise the ends of the material up, joining them in the center.
- Secure with a thin tape and carefully straighten the edges. nine0012
More ideas on how to wrap a small gift.
Packing without a box
It is possible to pack an original gift without a box. In this case, you can make a special bag out of gift paper, which will give the surprise a special look.
How to wrap a gift:
- Cut a strip of gift paper according to the size of the gift, adding 5 cm in length and width.0012
- Apply double-sided tape to the side fold and join the edges.
- On the opposite side, move your hand to form an even fold.
- Wrap paper at the bottom 3-5 cm, depending on the width of the gift.
- Straighten out the resulting top and bottom sides and screw the side flaps into the middle.
- Make a 1 cm fold at the bottom edge and stick on double-sided adhesive tape.
- Fix the edges to each other by placing the tape side over. nine0012
- Put your hand inside the bag, straightening the bottom and folding the sides inward.
- Make holes for the handles from above with a hole punch and make twine in them, fixing them with knots at the ends.
How to wrap a gift in an unusual and creative way
How to wrap a gift in gift paper in an unusual and creative way, the following options will help:
- Packing in the form of a shirt . This method will help to present a gift to your beloved man in a fairly original package. The shape of the package resembles a men's shirt made of wrapping paper.
 nine0012
 - Candy. This wrapping method is especially useful when the gift needs to be wrapped very quickly. But at the same time, the unusual shape of the packaging can give it a sophisticated look.
- In the form of an envelope. This type of packaging is suitable for small flat gifts. If desired, the addressee of the future recipient can also be written on top of the envelope.
Shirt package
This gift package is suitable for a small gift for men. nine0003
To use it, follow the steps in the following order:
- Cut a piece of paper twice the width and length of the gift and add a margin of 2-3 cm.
- Flip the material over.
- Bend the sides so that they meet exactly in the center. This will be the front side of the shirt.
- Turn the future shirt over and fold the top edge of the paper towards you.
- Turn the package over with the front shelves and fold the corners, imitating a collar.

- Turn the bottom edges of the halves outwards so that they protrude beyond the edges of the shirt.
- Fold the entire piece in half, tucking it behind the collar.
- In this case, the edges turned outward will be on top and will be the sleeves.
If desired, the packaging can be supplemented with small details.
In the form of a candy
An excellent way to pack a gift without a box is the shape of a candy. nine0003
Even a child can do this method:
- Take the necessary sheet of gift paper, the width of which is equal to the gift, adding a margin of 2 cm, and the length exceeds it by 1/3.
- Wrap the gift and tie the side ponytails with ribbon or twine.
Envelope
Sometimes it is enough to pack a surprise in a decorated envelope made of gift paper.
To make it, you need to perform several basic steps:
- Unfold the paper and fold it in half.
- Place a gift on top, but leave a margin of 3 cm on all sides.
- Cut according to the received parameters.
- Unfold paper in one layer and place face down.
- Fold the sides inward 1 cm and the top edge 2 cm.
- Glue the sides, leaving the top fold unchanged.
- Place the gift and make a hole on the top side with a hole punch. nine0012
- Pass the ribbon through and tie the flap of the envelope into a bow.
Box design
You need to pack a gift not only in gift paper, but also complement it with an unusual design. But how to do it right and what to use from improvised means, you need to figure it out.
The most original box decoration ideas:
- Tags. This add-on looks very stylish and, besides, you can write your wish and the name of the recipient on it. To do this, you need to cut out the tags from thick cardboard and make holes in them with a hole punch.
 You can attach to the box with a ribbon or twine. nine0012
- Newspaper. In the absence of gift paper, you can create a unique design using an old newspaper. This will help to decorate a gift in a retro style.
- Butterflies. This decor will help to give a gift an unusual romantic look. At the same time, butterflies should be cut out of cardboard of different sizes. Bend their wings up and fix them on the package with double-sided tape.
- Ball of thread. A small box can be placed inside a colorful ball of thread. To do this, you need to wrap the gift and attach a tag with the necessary instructions and wishes on top. nine0012
- Buttons. The unusual packaging can be emphasized with the help of these accessories by pasting the box with them on one or several sides. To do this, you need to choose buttons of different sizes, but a suitable tone.
- Pompoms.
 Gifts in winter can be decorated in this way. This will emphasize warm feelings and give the box an original look. It is best to make pompoms from woolen threads, choosing the optimal shade for the main tone of the box. nine0012
 - Pictures. You can give a gift a certain charm with the help of photographs. They should be glued on top of the box on the sides and on the lid.
- Geometric shapes. Place several types of figures on the sheets, using paper of various shades. Cut them out and stick them at a distance of 5-7 cm over the twine. Decorate the box by wrapping the resulting thread up and down.
- Fresh flowers. This option is a great addition to the main gift. It is best to use flowers of small diameter, placing them in the form of a bouquet in the center of the box and tying them with a satin ribbon of a suitable tone. nine0012
- Branches of needles. Complementing a gift with this decor, you can give it an unusual original look.