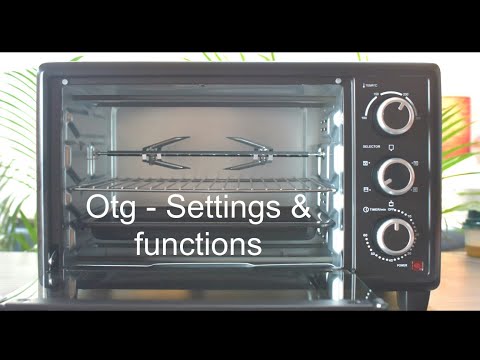
How to use toaster oven
3 Basic Toaster Oven Settings and How to Use Them
With all of their settings, functions, buttons, racks, and whatnot toaster ovens can be confusing.
The good news is there are only 3 settings you need to know to get dinner on the table or a fresh-baked cookie in your hand. So grab a cup of coffee, friend, and let’s chat about your basic toaster oven settings.
The most important thing you need to know about cooking with a toaster oven is that the settings control the heating elements inside your toaster oven.
If you have a digital toaster oven, each setting may also provide a preset or suggested cooking time for specific items like cookies or toast.*It’s important to note that the presets do not know exactly what you are cooking. If you select the “Cookies” setting, your toaster oven doesn’t know if you’re making mini chocolate chip cookies or giant sandwich-sized ones.
Just like with a traditional oven you (and your good judgment) are still very much a part of the toaster oven cooking process.
3 Basic Toaster Oven Settings
There are only 3 settings you need to know when you’re getting started with your toaster oven – Bake, Broil, and Toast!
The Bake Setting
This is the setting you’ll likely use the most.
It’s similar to a traditional oven with most of the heat coming from the bottom elements. Usually, the top elements are also on but using a much lower wattage than the bottom elements.
Depending on your type of toaster oven, it may cycle or pulse the top and bottom elements to vary their intensity and help your little oven maintain an even temperature.
Here are a few differences between baking with an oven vs. a toaster oven:
- Your toaster oven will preheat quicker. Depending on the size, it will preheat 30% to 50% faster than a traditional oven.
- Your toaster oven will usually bake faster. Until you get used to baking with your toaster oven, begin checking on your dishes about 5 to 10 minutes earlier than the shortest cook time listed on your recipe.
- Most toaster ovens have hot spots or areas that are warmer than others. To even out browning and baking, rotate your pan halfway through the bake time.
To give you an idea of how using the Bake setting works, below are basic instructions for the Breville Smart Oven Pro (BOV845BSS). For directions on using your specific toaster oven, please refer to your manual.
- Select the “Bake” setting
- Set the temperature called for in your recipe
- Set the time called for in your recipe
- Press start to begin preheating
- Once the toaster oven indicates it’s preheated, place your pan inside, close the door, double check that the timer has started (adjust the timing as necessary) and begin cooking.
If your toaster oven is not digital, you’ll want to preheat it for at least 5 minutes before adding your pan. Remember to reset the timer for the full cooking time after preheating.
For help with convection baking check out this post on Everything You Need to Know About Convection Toaster Ovens.
The Broil Setting
Broiling is a lot like grilling in that the heat is coming from one direction. With the broil setting your toaster oven uses direct radiant heat from only the top elements. During broiling, the bottom elements will be off.
Broiling is great for melting cheese on a batch of nachos for one, roasting red peppers, making indoor s’mores, or quickly cooking thinner slices of vegetables like eggplant or zucchini. Tim and I don’t eat meat but I hear it’s pretty popular for steak and seafood too.
Below are some basic tips for using the Broil setting, please refer to your manual for directions on your specific toaster oven.
- Most toaster ovens do not have you preheat with the Broil setting.
- Generally, you’ll want to use the top rack placement.
- Always use a broiler-safe pan, if you’re not sure just use the pan that came with your toaster oven.
- The heat is only from one direction.
 If you want to cook or brown both sides of an item, make sure to flip it.
 - Use caution when grabbing pans that have been broiled, they will be extremely hot.
- If you find you’re burning food with this setting, adjust the rack height to a lower position.
- If your toaster oven has an adjustable broiler, play around with adjusting the temperature (500°F, 400°F, 300°F) or intensity of the heat (High, Medium, Low).
The Toast Setting
I won’t sugarcoat it. Toaster ovens do not make the best toast. At least, I’ve yet to use a toaster oven that made toast as well as a stand-alone toaster. That said, our little ovens toast good-enough for us.
As you’ll see below, the Toast setting is a bit more nuanced than the other settings.
Heating: With the toast setting, both the upper and lower elements are distributing an equal amount of heat.
Temperature: On a toaster oven with knobs or dial controls the intensity of the heating is set by using the temperature dial.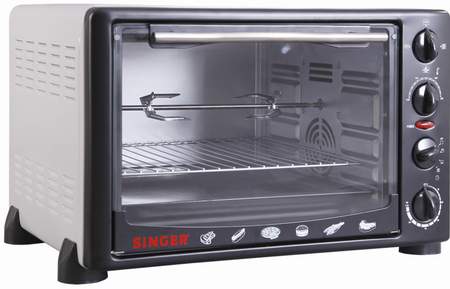 While digital toaster ovens usually have a pre-programmed high temperature that is not displayed.
Rack Position: Some toaster ovens suggest the top rack placement while others stick strictly to the middle. For the best results, refer to your manual for the appropriate rack position.
What’s the difference between Light, Medium, and Dark?
Time.
The Light, Medium, and Dark settings control the amount of time the food is toasted to achieve your desired results.
Most toaster ovens/countertop ovens with digital controls allow you to set the toasting level from light to dark along with the number of slices. The toaster oven will then automatically adjust the cooking time depending on your selections.
These types of countertop ovens usually have a way to let them know if you are using frozen bread too.
On the Breville Smart Oven Pro (BOV845BSS), it’s the snowflake button. Pressing it will add an additional 15 seconds per slice for defrosting.
Like with the Bagel feature, we’ve been fairly happy with the Breville’s toast presets, though we have found Broiling works better for sourdough and other bread with low sugar content.
How to Make Toast in a Toaster Oven
On a toaster oven with knobs or dial controls, you’ll need to manually set the temperature you want and the amount of time to toast.
- First, place your bread slices in the center of the cooking rack (refer to your manual for the correct rack placement).
- If your toaster oven has a functions dial, set it to Toast.
- Next, set the temperature. These types of toaster ovens usually direct you use a high heat (like 450°F) but you should play around with the temperature settings to find your sweet spot.
- Lastly, set the timer. The exact time will depend on your tastes, type of bread, the number of slices, and your toaster oven. It could be as low as 2 minutes and 30 seconds or as high as 5 minutes.
Instead of relying on those random Light, Medium and Dark marks on your timer take 5 minutes and make some toast.
Do It Now: Find Your Perfect Toasting Time
- Grab your cell phone, open the clock app and switch it to the stopwatch.
- Place a slice of your favorite bread in the toaster oven.
- Adjust the settings to Toast, set the temperature to 450°F (or your preferred number) and the time dial to 4 or 5 minutes.
- Start the stopwatch.
- After about 2 minutes and 30 seconds start watching the toast.
- As soon as the bread is as browned and toasted as you like, stop the stopwatch.
Now you know exactly how long to toast your bread. You can even mark it on the toaster oven if you want.
Can I Use The Broiler to Toast Bread?
Yes, but you need to hang out and remember to flip the toast over. Also, since the heat is only coming from the top elements it might not toast or brown the bread evenly.
How to Toast Bread With Your Broiler Setting
- Adjust your rack to the top position.
- Set the toaster oven to the Broil setting.
- Place your bread in the center of the rack and close the door.
- Broil the toast for 1 to 2 minutes, carefully flip the toast and broil for 1 to 2 minutes more.
- Remember, no promises for even browning 🙂
There you have it, everything you need to know about your basic toaster oven settings to get started!
I know it might feel a little overwhelming at first. But once you get used to your little oven you’ll be cooking up all kinds of tasty treats and yummy meals.
Start with something easy like these super addictive roasted sweet potato rounds, a baked potato or any toaster oven veggie recipe. If you want to give broiling or toasting a try treat yourself to a tasty batch of Cinnamon Toast or Broiled Zucchini or Summer Squash.
Whatever you make, have fun!
How to use a toaster oven
When it comes to kitchen appliances, few are as versatile and convenient as the toaster oven. These remarkable little appliances are often small and contained enough to go right on the countertop, despite being able to take some of the workloads off your oven. Most toaster ovens aren't large enough or powerful enough to entirely replace your full-sized oven. Still, you'd be surprised at how much you can do with these convenient appliances.
From baking and broiling to roasting and reheating, toaster ovens have come a long way since their original inception. But not all toaster ovens are the same, as many of them vary in power and size. Still, with a little bit of know-how and practice, you'll be cooking up delicious foods in no time. The first step, after getting a toaster oven, is to learn how to use it. Some parts may be familiar, but there are many tips and tricks to uncover if you want to get the most out of your new appliance.
How to use a toaster ovenBefore using your new kitchen appliance, it needs to be set up. This means removing any packaging material that might be on it, including zip ties or plastic covers, and plugging the appliance in where it will be safe. Remember, these are small ovens, and they can get quite hot, so it's vital to place them somewhere where it won't be a fire hazard.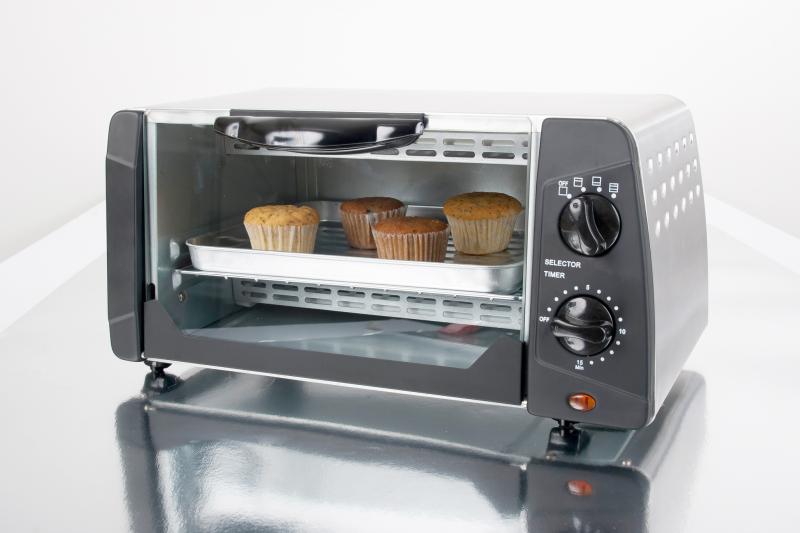 A clean, dry section of the countertop can work well.
Once the toaster oven is safely arranged and plugged in, it's time to consider what you want to cook with it. While many types of food can be cooked in these appliances, it's sometimes best to review the different styles they can use. Specifically, many toaster ovens can be used for broiling, baking, defrosting, roasting, reheating, and more. It's easy to see why these can make great kitchen gifts.
See also: The best toaster oven 2021: Breville, Cuisinart, and more
Broiling
Adding that final blast of searing heat is even easier with a toaster oven. Thanks to the appliance's compact size, getting your food close to the heating element is more accessible and less energy-intensive than a traditional oven. Depending on the model, you may have multiple rack heights to choose from. With broiling, you want the food as close to the heating element as it can get without touching it, and this can mean placing the rack on a higher shelf.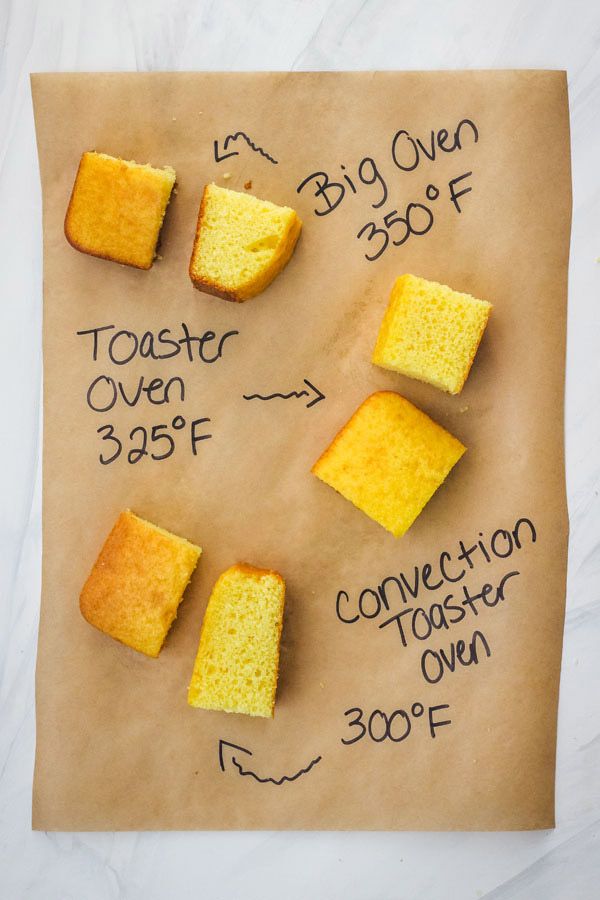
Many types of food can be broiled in a toaster oven. Still, some of the more recommended options are foods like seafood and small vegetables. A fish filet with a light side of vegetables is an excellent example. Because broiling heats the surface of your food at a higher rate than the interior, it won't work with anything too thick (by the time the interior is cooked, the outside will be burnt).
Once you've chosen your meal, arrange the food on the baking pan and place it on the rack. From here, cook times will depend on your food and the toaster oven itself. Different brands and models vary in their strength, design, and size, leading to different cook times. Consult the manual for your toaster oven to see recommended cook times.
BakingOne thing that these appliances can excel at is baking. Especially with smaller dishes that don't need the full size of a traditional oven. Small batches of cookies, a chicken breast or two, or even casseroles and lasagnas. Any of these dishes might be baked in the appropriately sized toaster oven.
Baking takes longer than broiling, even in these compact appliances. However, baking a small meal can be much faster than using a traditional oven with the right toaster oven. A significant part of this is the relative size. Toaster ovens have a lot less space that they need to heat. The trade-off is in how much food you can cook at once.
Baking in these is often as easy as setting the mode to 'bake' and choosing the desired temperature. Next, place the food you want to bake in an appropriate container and put that in the toaster oven. Whether making cookies on a baking sheet or lasagna in a casserole dish, baking with the toaster oven is like a full-sized oven in principle. Beyond safety, the essential parts are to have the right time and temperature.
See also: Best toasters 2021: Cuisinart, KitchenAid, Breville, and more compared
Roasting
Roasting usually uses the same cooking mode as baking, with the main difference being that roasting uses higher temperatures.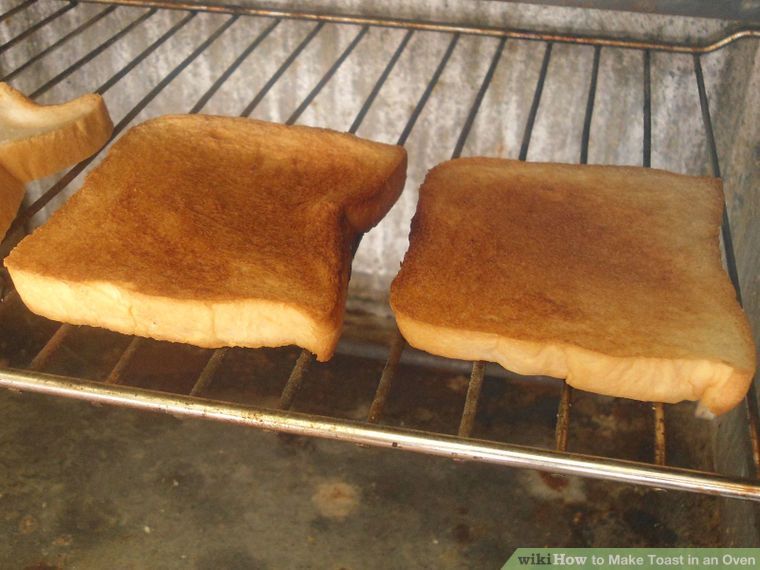 If your toaster oven has enough space in it, you can roast many different meals and foods in it. A good toaster oven can roast many tasty things, from a small roast beef to fish filets, bacon, and vegetables.
To roast food, use the bake setting on your toaster oven. If yours has a 'roast' mode, select that instead. If you're unsure, you can consult the manual for that brand and model. After choosing the suitable mode, set the temperature and timer. It's best to consult a cooking recipe to determine what to set these variables to.
One of the big perks of these small appliances is that they can be used in tandem with a full-sized oven. For instance, if you're roasting smaller casseroles or side dishes while your main oven holds a turkey or similarly large dish. Toaster ovens can help ease the pressure around holiday cooking and make the kitchen a smoother experience.
DefrostingOne of the less glamorous but consistently useful functions of a toaster oven is that many can be used to defrost frozen foods.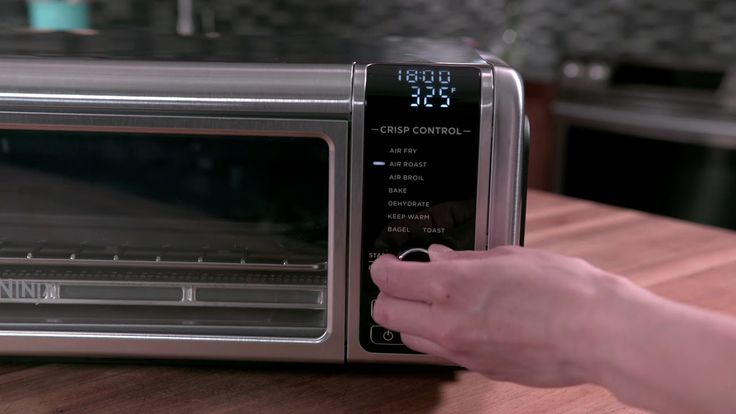 Depending on the model, it may have a prebuilt mode for defrosting, or you may need to set the temperature and time manually. This can save time and hassle if you want to defrost things quickly without using a microwave. While not as fast as a microwave, defrosting with a toaster oven is still a quick method.
To defrost, place the frozen food in a safe container within the appliance. This may be a baking pan or some oven-safe glass like a casserole dish. Once your food is safely in the oven, select the 'defrost' option on your toaster oven. Depending on the make and model, it might be necessary to consult your manual to find the defrost settings.
How to use a toaster oven FAQZDNET Recommends
Why you need a toaster and how to use it: tips and tricks
June 5 2020
Even a child knows what a toaster is, because for more than a century this kitchen appliance has been pleasing humanity with the magnificent tastes and aromas of toasted bread.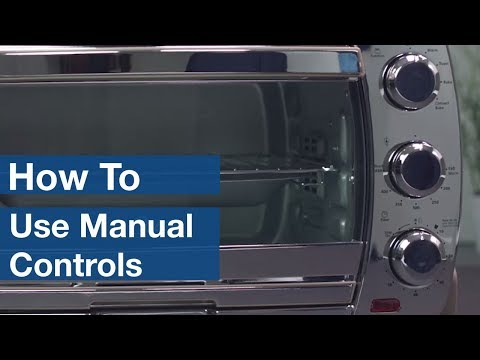 It is enough to figure out how to use the toaster to indulge your loved ones with crispy and mouth-watering toast for breakfast every morning. Just a couple of minutes - and you can easily warm up croissants, toast buns or make an excellent base for sandwiches. It is not surprising that every housewife wants to have such a device in her kitchen. Let's figure out how the toaster works and how to properly use the device in order to maximize its service life.
What is a toaster and how does it work
A toaster is a useful kitchen appliance for toasting bread. The first device of this type was created in 1893 by the Scottish inventor Alan McMasters. Over time, it was refined by American and European engineers, turning into an advanced automatic device with wide functionality.
Construction and specifications
To understand what a toaster is and how it works, you need to be familiar with its design features. It is a compact device in a metal or plastic case, in the upper part of which there are slots for bread.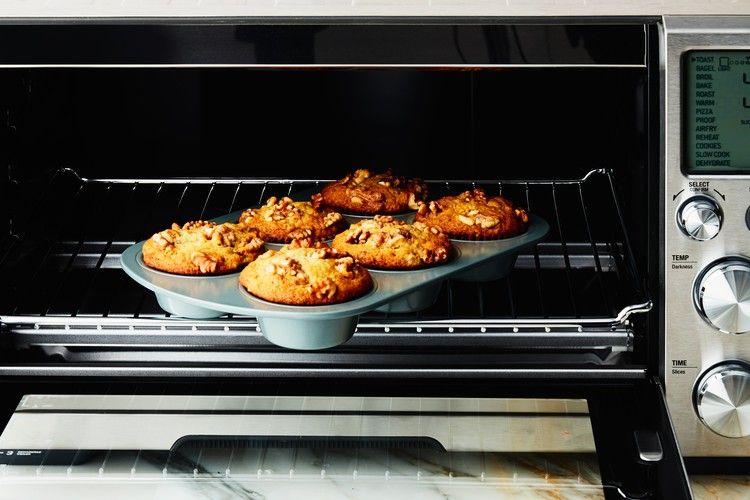 Each compartment has heating elements made in the form of nichrome spirals. On top is a bread basket with an electromagnet that holds it in the heaters while the device is running.
If we consider how the device works, it is worth noting that its body has a built-in regulator that allows you to set temperature modes. The thermostat is responsible for the choice of modes, thanks to which you can easily adjust the temperature and drying speed. Many appliances have a timer and electronic control that controls the cooking time depending on the selected settings.
It is hardly worth explaining what a toaster is for and why to use it, because everyone knows that it greatly facilitates cooking and helps to toast bread without using oil. But in order to achieve the best result in cooking, when buying a device, special attention should be paid to its technical characteristics. Modern manufacturers offer users a wide range of devices that can have the following parameters:0003
- Power - the speed of roasting largely depends on it.
 The range of this indicator for different models is from 0.6 to 1.6 kW, which affects electricity consumption.
 - The number and shape of compartments - the device can be equipped with 1, 2 or 4 toast compartments. Sometimes manufacturers suggest using one long slot that fits 2 slices of bread.
- Temperature modes - there can be from 6 to 11. The more heating modes, the easier it is for the hostess to adjust the degree of roasting.
Before you figure out how to turn on and use the toaster, you need to explain how the machine works. After selecting the appropriate mode and placing the pieces in the basket, the compartment with the loaves is lowered into the body, after which the electrical circuit is closed and the timer is started. At the end of the roast, the timer kicks in and cuts off the power supply from the electromagnet that holds the basket. The fried bread rolls up and the appliance turns off.
Toaster functions
Finding out what a toaster is, let's consider what functions housewives can use. The device is needed, first of all, for drying and frying flour products - ordinary bread, buns, bagels, other muffins. However, modern devices are capable of solving many other useful tasks:
- reheat slices without drying;
- defrost food;
- do one side roasting;
- print on toast;
- cook sandwiches;
- fry a cutlet or scrambled eggs at the same time (if using the additional frying surface).
Many models can lift small slices high or automatically center bread for more even toasting. Additionally, the package includes a tray that must be used to collect crumbs. Understanding how the device works, please note that it has a special compartment that allows you to store the cord compactly so that it does not break.
Toaster operating modes
If you have already understood what a toaster is and plan to use this appliance, you should take into account that it can operate in several different modes:
- Mechanical - the simplest design in which the roasting process is controlled by the user independently .
- Semi-automatic - characterized by the presence of a thermostat that turns off roasting after the toaster reaches the set temperature.
- Automatic - the most advanced models that can be used with little or no human intervention.
If you are looking for a toaster that combines wide functionality, stylish design and advanced operating modes, we invite you to familiarize yourself with the range of our online store. High-tech models from Braun are at your service, which will help you quickly and easily fry slices. Toasters from a German manufacturer are able to dry bread with different intensities and allow you to cook exactly the breakfasts you like.
How to use the toaster at home
The toaster is easy to use. Even the person who bought the device for the first time will be able to cope with its management. The main thing is to understand how this device works and what are the basic rules for its use.
Inserting bread slices
The holes are designed to accommodate standard size slices.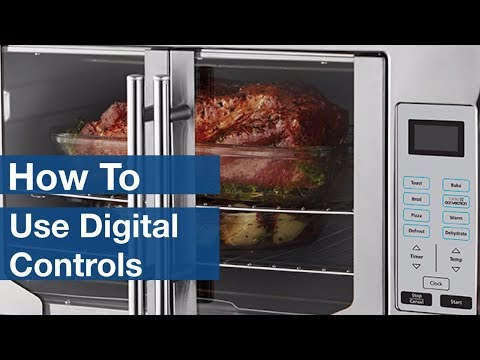 Bread for toasting can be cut independently or purchased at the store already cut, but it is desirable that the slices be of the same thickness. Starting to use the device, place them in the slots. As mentioned above, many models have automatic centering and center the loaves on their own if you place them unevenly. Other products can be used in the same way, but toast is considered the best cooking option.
Degree of roast
The next step in the instructions, what is and how the machine works, is to select the temperature mode. It is set using the adjusting knob, which is usually located on the front panel. Heating is selected depending on the desired degree of roasting. In particular, setting 1 allows you to get lightly browned bread, and setting 6 can be used for deep browning. If you're just getting started with what a toaster is, try starting with setting 2 or 3. It's always easier to finish toast than to throw away burnt slices.
Cooking process
After selecting the temperature setting, switch on the appliance by pressing the lever. The appliance will automatically lower the basket of bread and begin cooking. If you decide to use an automatic machine, it will automatically determine the required frying time and turn off as soon as the toast is ready. Considering how the toaster works, we note that many models are additionally equipped with mechanical controls and the “Cancel” key, thanks to which you can control the degree of roasting yourself.
Caring for your toaster key
To ensure that your toaster will last for many years, it needs to be taken care of. The main rule is to clean the device after each use. Regularly wet the outside of the cabinet to keep it free of grease and dust. When cleaning the interior, do not use water or common detergents. For this, there are special tools recommended by the manufacturer. If the appliance is equipped with a removable tray, it must be taken out, rinsed thoroughly and dried with a towel.
Important! Please note that a device such as a toaster has a high degree of fire hazard.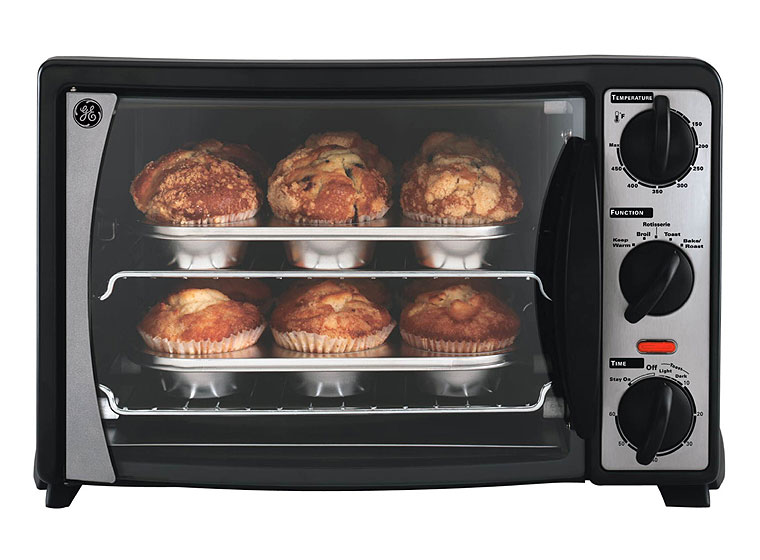 Therefore, all manipulations to care for him should be carried out only after disconnecting from the outlet.
Toaster Tips and Tricks
Even if you know what a toaster is and how a kitchen appliance works, it doesn't guarantee that you'll make perfectly toasted bread. To make the slices really tasty and crispy, we recommend using the following rules:
- Always fully load the slots for good doneness. If they are designed for four slices, then that is the number of slices that must be put in the basket when loading.
- If thick slices are used, they may touch the heaters, resulting in fouling. Excessively thin pieces will quickly dry out and turn into crackers. Therefore, after buying the device, it is better to experiment a little and choose the optimal size of the loaves.
- What should not be done is drying the bread at maximum temperature during the first use. Until you know the capabilities of your kitchen assistant, there are always risks of cooking a burnt cracker.
 Start using the appliance at medium temperatures.
 - The toast will be too hot immediately after toasting. To get it out of the basket, you must use an oven mitt or wooden tweezers.
If you follow these simple recommendations and rules for using the device, you can constantly delight your household with simple but delicious breakfasts. Ready-made toasts are served with cheese, jam, butter, and any other products. The toaster helps diversify the family's diet, makes it really healthy and tasty.
Tell
Share
Share
Share
New comment
Sign in with
Submit
HOW TO USE THE TOASTER - 5 useful tips
It is much easier to toast, toast or reheat slices of bread in a toaster. The task is clear, and there are many nuances to make toast in the toaster evenly fried and ruddy. After all, the clumsy in no time turn the toast into a burnt cracker.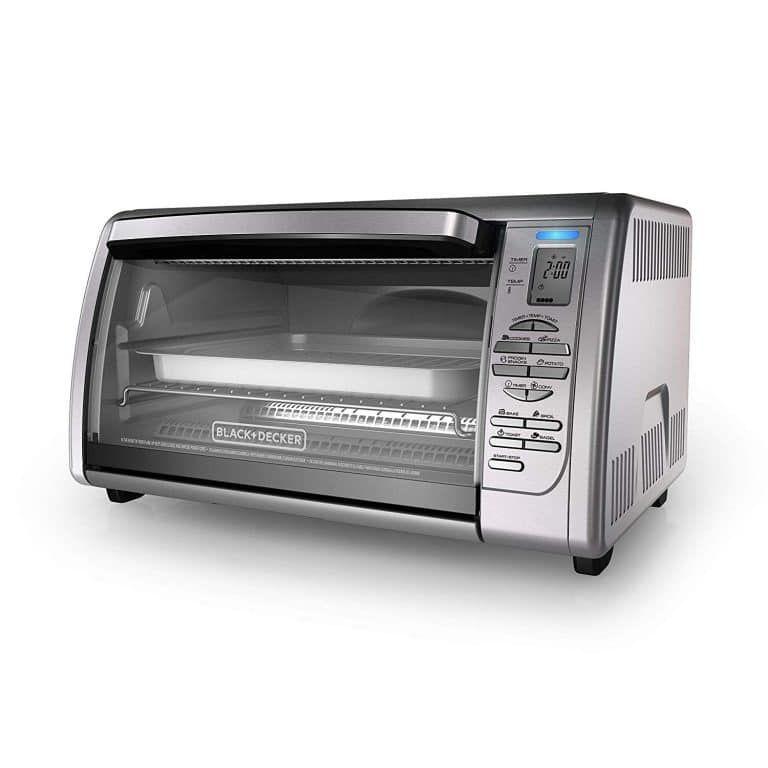
What you can cook with the toaster
In addition to toasting bread, the toaster can heat up a croissant, cinnabon or burger, soften food and dry breadcrumbs. And dried bread, as you know, is the basis for a variety of sandwiches.
It can be served with fruit, honey, chocolate or peanut butter. Unsweetened toasts are rubbed with garlic, spread with butter or eaten with cheese, sausage, fish.
Previously written: Toaster or sandwich maker - which is better: 10 choices to help you
How to make toast in a toaster: simple instructions
The toaster can be mechanical, semi-automatic or automatic. Depending on the type, it may differ in modes and features for convenience, but the principle of operation is the same.
Select the desired mode, press the lever to start toasting. The basket with future toasts will lower and the bread will start toasting, thanks to the heating elements located on the sides.
Slice thickness
The thickness of the slice plays an important role.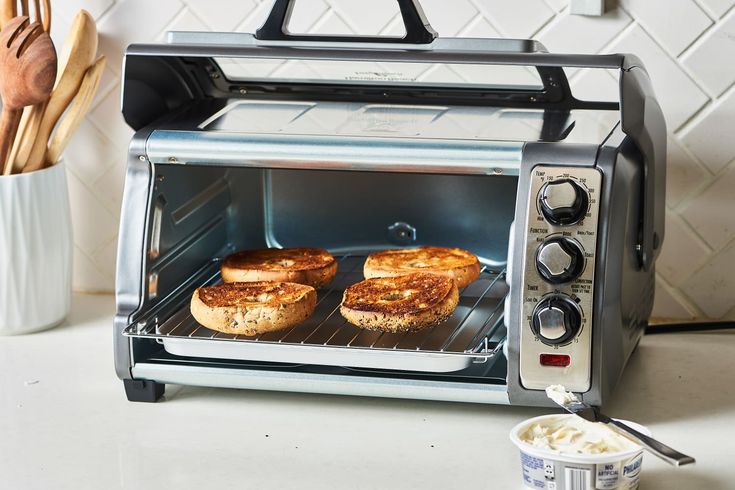 Too thin will quickly fry and, most likely, will dry out. Too thick a piece is fried unevenly, it may not work with a crisp. It is better to use bread of the same thickness. Frozen slices must first be thawed.
Interesting article: How to make toast without a toaster: 3 options
Degree of toasting
The temperature set in the appliance affects the degree of doneness. Some models may have an indicator or a mode switch - this simplifies cooking. If the slices are thin and porous, such as ciabatta, yeast bread or with a lot of baking powder, choose a gentle mode with a lower temperature. If the bush is thicker and dense in structure, the mode is medium and higher.
You need to adjust the temperature depending on what exactly is being cooked - for a sandwich with cheese, the temperature is lower, for croutons it is higher.
Read also: Top 9 best toasters: a detailed review
Cooking time
Automatic models turn off by themselves when the selected temperature is reached. Some models may have a timer. In mechanical models, it is better to start with cooking from 30 seconds. If necessary, lower the bread basket again.
Caring for the toaster
After using the appliance, you need to shake out the crumbs or empty the tray, otherwise they will burn the next time you use it.
From crumbs stuck on the walls and dust, the toaster must be cleaned manually using a brush. This must be done carefully so as not to damage the heating elements. Unplug the toaster first.
Washing the inner chamber is contraindicated, only wipe the outside with a damp cloth.
More on the topic: 10 Tips for Household Appliance Care
What kind of bread is best for a toaster
Special bread for toast is best. It is called so not only because the size and thickness of the slices is ideal for a toaster. Toast slices crumble less, stay fresh longer, and don't seep through the oil or sauce as much. Therefore, for sandwiches in the toaster, it is better to use it.
But if you prefer other varieties, you can take any other - this is not a problem. Whole grain, yeast-free, with bran, from different types of flour is suitable for making toast. The composition of the bread or the shape of the slice does not affect the preparation of toast. The main thing is that the slices are the same size.
Tips and life hacks for using the toaster
To ensure that the slices always come out the right way, and the toaster lasts for a long time, we share five useful life hacks:
- Bread should not touch the walls of the device Otherwise, it will burn, and the toaster may break.
- Toast with toppings that melt, do not leave unattended
The device may break or start a fire in the house. - Do not get stuck loaves with foreign objects
It is more expedient to carefully lift the lever and get a slice. Or turn the toaster over, trying to knock it out.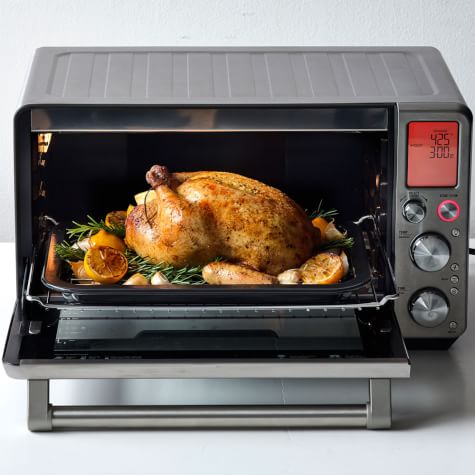
- If you need more toast, set a lower temperature for the next load
Spirals have already heated up in the previous session. If the model does not have automatic temperature control, all subsequent toasts will be more toasted. - Spread thick pastes on chunks better after cooking
So confiture or honey will spread better under the influence of temperature, and spices will open more when heated.
Safety and Do's and Don'ts
Toaster is a fire hazard. Before using the sandwich toaster, make sure that the appliance is installed away from curtains, textiles, and flammable objects.
It is strictly forbidden:
- Cover the toaster during operation.
- Use liquid ingredients.
- Wash with water or other detergents.
- Retrieve toast with metal objects.
- Clean without unplugging.
In order not to burn yourself, it is safer to take out freshly cooked toast with tongs, chopsticks, or a spatula.