How to use a roller for painting
Paint Roller Techniques and Tips (DIY)
Updated: May 19, 2021
Paint faster and smoother with the right rolling techniques
Next Project›
Family Handyman
These DIY painting tips will help you roll your walls quickly and smoothly—without leaving roller marks. We'll show you the tricks and techniques that painting pros use to get a perfectly painted room. All you need are some basic tools to paint fast, get great results and make clean up a breeze. Painting is one of the least expensive ways to make over a room, so grab a roller and let's get to work.
By the DIY experts of The Family Handyman Magazine
- Time
- Complexity
- Cost
- A full day
- Beginner
- $51–100
A slightly different approach
Load the paint roller cover with paint
Load the paint roller cover with paint by dipping into the paint about 1/2 in. and then rolling it against the screen. Filling a dry roller cover with paint will require five or six repetitions. After that, two or three dips are all you need. Leave the roller almost dripping with paint.
A good paint roller holds the sleeve in place
This paint roller, the Wooster Sherlock, is sturdy and designed to keep the roller cover from slipping off while you paint.
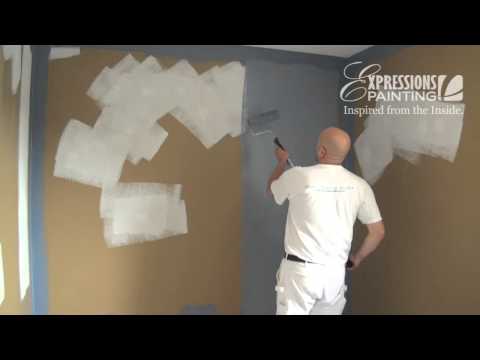
Most of you have probably used paint rollers before, with varying degrees of success. Maybe you just plunged right in and started rolling, developing your own technique as you went. Or maybe you read the instructions telling you to apply the paint in some pattern, usually a “W,” before rolling it out. We’re going to show you a slightly different approach. In this article, we’ll teach you a simple method to quickly spread a smooth, even coat of latex paint on the wall. It’s not fancy, but it gets the job done in record time and eliminates common problems like light areas, roller marks and built-up ridges that sometimes plague first-time painters.
However, even the best technique won’t work with poor-quality equipment. Don’t waste your money on those all-in-one throwaway roller setups when you can buy a pro setup that will last a lifetime. Start with a good roller frame. To extend your reach and give you better control, screw a 48-in. wood handle onto the end of the paint roller. You could also use a threaded broom handle. You’ll need a container for the paint. While most homeowners use paint trays, you’ll rarely see a pro using one. That’s because a 5-gallon bucket with a special bucket screen hung over the edge works a lot better.
Here are a few of the advantages of a bucket and screen over a paint roller pan:
- It’s easy to move the bucket without spilling
- The bucket holds more paint. You won’t have to frequently refill a pan.
- You’re less likely to trip over or step in a bucket of paint.
- It’s quicker and easier to load the paint roller cover with paint from a bucket.
- It’s easy to cover a bucket with a damp cloth to prevent the paint from drying out while you’re taking a lunch break.
Use an old drywall compound bucket or buy a clean new bucket. Add bucket screen and you’re ready to go.
How to properly paint a wall
Photo 1: Roll paint on the wall
Lay the paint on the wall with a sweeping stroke. Start about a foot from the bottom and 6 in. from the corner and roll upward at a slight angle using light pressure. Stop a few inches from the ceiling. Now roll up and down back toward the corner to quickly spread the paint. You can leave paint buildup and roller marks at this step. Don’t worry about a perfect job yet.
Photo 2: Reload the paint roller and continue rolling
Reload the roller and repeat the process in the adjacent space, working back toward the painted area.
Photo 3: Back roll the entire area
Roll back over the entire area you’ve covered to smooth and blend the paint. Don’t reload the roller with paint for this step. Use very light pressure.
Roll up and down, from floor to ceiling and move over about three-quarters of a roller width each time so you’re always slightly overlapping the previous stroke.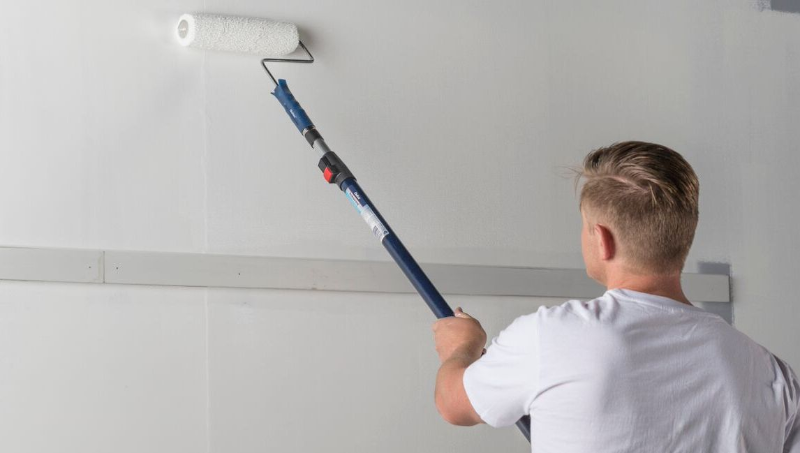 When you reach the corner, roll as close as you can to the adjacent wall without touching it. Repeat Steps 1 through 3 until the entire wall is painted.
Take a wool-blend roller cover for a spin
Use a quality roller sleeve
A good roller cover is the most important part of your rolling setup.
The most important part of your paint rolling setup is the roller cover, also known as a sleeve. It’s tempting to buy the cheapest cover available and throw it away when you’re done. But you won’t mind the few extra minutes of cleanup time once you experience the difference a good roller cover makes. Cheap roller covers don’t hold enough paint to do a good job. It’ll take you four times as long to paint a room. And you’ll likely end up with an inconsistent layer of paint, lap marks and built-up ridges of paint.
Instead, buy a 1/2-in. nap wool blend roller cover and give it a try. (One good one is the Sherwin-Williams Poly/Wool cover, which is a combination of polyester for ease of use and wool for maximum paint capacity. ) With proper care, this may be the last roller cover you’ll ever buy.
Wool covers do have a few drawbacks, though. They tend to shed fibers when they’re first used. To minimize shedding, wrap the new roller cover with masking tape and peel it off to remove loose fibers. Repeat this a few times. Wool covers also tend to become matted down if you apply too much pressure while painting. Rolling demands a light touch. No matter what roller cover you’re using, always let the paint do the work. Keep the roller cover loaded with paint and use only enough pressure to release and spread the paint. Pushing on the roller to squeeze out the last drop of paint will only cause problems.
Video: Best Paint-Rolling Tools
Tips for a perfect paint job
Smooth the paint
Smooth the paint along the ceiling using a long horizontal stroke without reloading the roller with paint. If you are skilled enough to roll within an inch of the ceiling while rolling vertically, you can skip this step.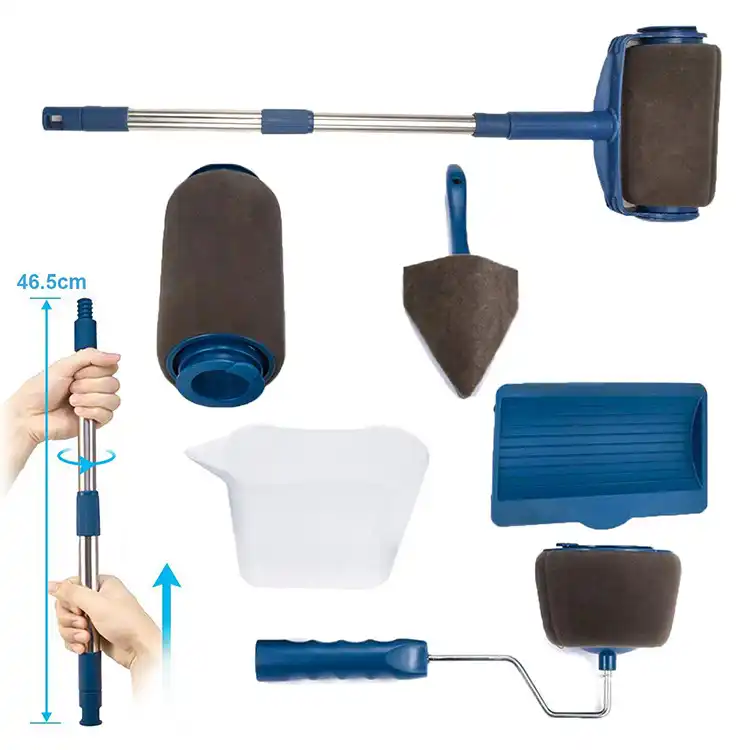
Lay paint on the wall
Lay paint on wall areas above and below windows and doors with a long horizontal stroke. Then smooth it off with short vertical strokes so the texture will match the rest of the wall.
Keep a wet edge. Keeping a wet edge is crucial to all top-quality paint jobs, whether you’re enameling a door, varnishing furniture or rolling paint on a wall. The idea is to plan the sequence of work and work fast enough so that you’re always lapping newly applied paint onto paint that’s still wet. If you stop for a break in the middle of a wall, for example, and then start painting after this section has dried, you’ll likely see a lap mark where the two areas join. The rolling technique we show avoids this problem by allowing you to quickly cover a large area with paint and then return to smooth it out—which brings us to the second important painting technique.
Lay it on, smooth it off. The biggest mistake most beginning painters make, whether they’re brushing or rolling, is taking too long to apply the paint. Photo 1 shows how to lay on the paint. Then quickly spread it out and repeat the laying-on process again (Photo 2). This will only work with a good-quality roller cover that holds a lot of paint. Until you’re comfortable with the technique and get a feel for how quickly the paint is drying, cover only about 3 or 4 ft. of wall before smoothing the whole area off (Photo 3). If you find the paint is drying slowly, you can cover an entire wall before smoothing it off.
Get as close as you can. Since rollers can’t get tight to edges, the first painting step is to brush along the ceiling, inside corners and moldings. This “cutting in” process leaves brush marks that won’t match the roller texture on the rest of the wall. For the best looking job, you’ll want to cover as many brush marks as possible with the roller. Do this by carefully rolling up close to inside corners, moldings and the ceiling. Face the open end of the roller toward the edge and remember not to use a roller that’s fully loaded with paint. With practice, you’ll be able to get within an inch of the ceiling rolling vertically, and can avoid crawling up on a ladder to paint horizontally like we show above.
Pick out the lumps before they dry. It’s inevitable that you’ll end up with an occasional lump in your paint. Keep the roller cover away from the floor where it might pick up bits of debris that are later spread against the wall. Drying bits of paint from the edge of the bucket or bucket screen can also cause this problem. Cover the bucket with a damp cloth when you’re not using it. If partially dried paint is sloughing off the screen, take it out and clean it. Keep a wet rag in your pocket and pick lumps off the wall as you go. Strain used paint through a mesh paint strainer to remove lumps.
Scrape excess paint from the roller before you wash it. Use your putty knife, or better yet, a special roller-scraping tool with a semicircular cutout in the blade. Then rinse the roller cover until the water runs clear.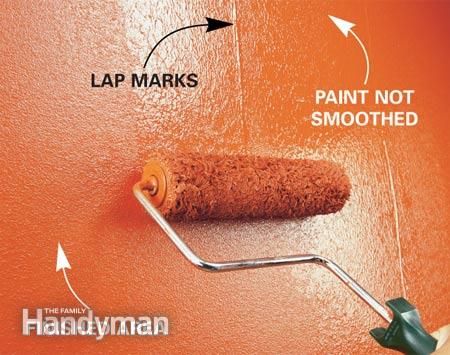 A roller and paint brush spinning tool simplifies the cleaning task. Just slip the roller cover onto the spinner and repeatedly wet and spin out the roller until it’s clean.
How to Properly Paint a Wall: The Best Coat of Paint Can’t Hide Bumpy Walls
Fill holes with lightweight spackling compound and sand them smooth when it dries. Then go over the entire wall with 100-grit sandpaper mounted in a drywall sanding handle. The ultimate setup for this job is a pole-mounted drywall sander with a 100-grit mesh drywall sanding screen, but any method of sanding off old paint lumps and bumps will do. Next mask off the baseboard and window and door trim. Slide the blade of a flexible putty knife along the edge of the masking tape to seal it. Otherwise paint will bleed underneath.
How to Properly Paint a Wall: Avoid Fat Edges and Roller Marks
Ridges of paint left by the edge of the roller, or “fat edges,” are a common problem. And if left to dry, they can be difficult to get rid of without heavy sanding or patching.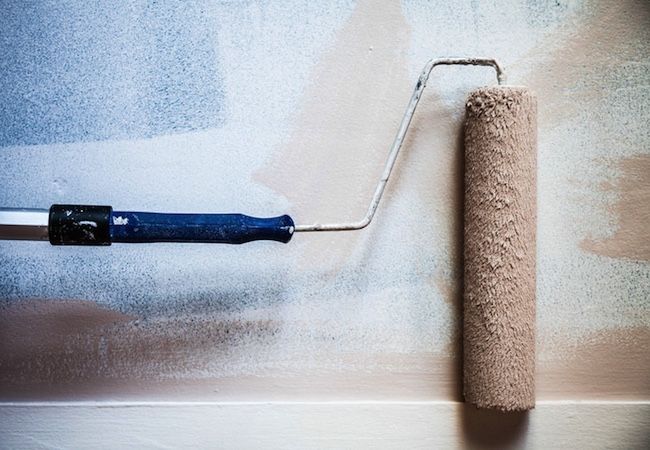 Here are a few ways to avoid the problem:
- Don’t submerge the roller in the paint to load it. Paint can seep inside the roller cover and leak out while you’re rolling. Try to dip only the nap. Then spin it against the screen and dip again until it’s loaded with paint.
- Don’t press too hard when you’re smoothing out the paint.
- Never start against an edge, like a corner or molding, with a full roller of paint. You’ll leave a heavy buildup of paint that can’t be spread out. Starting about 6 in. from the edge, unload the paint from the roller. Then work back toward the edge.
- Unload excess paint from the open end of the roller before you roll back over the wall to smooth it out. Do this by tilting the roller and applying a little extra pressure to the open side of the roller while rolling it up and down in the area you’ve just painted.
Required Tools for this Project
Have the necessary tools for this DIY project lined up before you start—you’ll save time and frustration.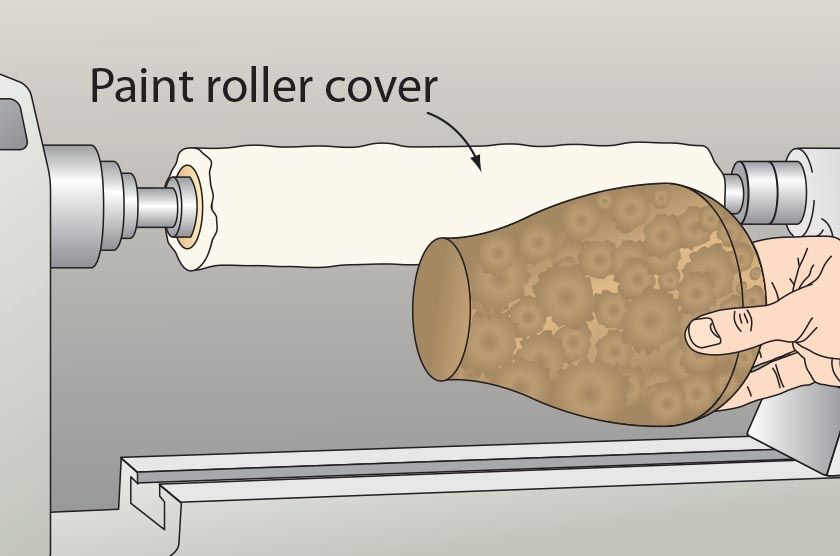
- Bucket
- Paint roller
- Paint scraper
- Paintbrush
- Putty knife
- Roller screen
- Roller sleeve
Threaded wooden handle
Required Materials for this Project
Avoid last-minute shopping trips by having all your materials ready ahead of time. Here’s a list.
- Paint
- Painter's tape
- Primer
Originally Published: November 14, 2019
Similar Projects
How to Use a Paint Roller on a Wall
Updated: 06-06-2016
Home Decorating For Dummies
Explore Book Buy On Amazon
Knowing how to use a paint roller can help you eliminate streaks in your paint finish. Applying paint with a roller can cut painting time by almost half. Using proper roller technique can help you save paint, protect your equipment and improve the look of your finished paint job.
Gather your tools.
You’ll need a roller cover and roller cage, paint, stir sticks, paint tray and liners, spray bottle of water (for latex paint), Paint thinner and tray (for alkyd paint), and a 5-in-1 tool.
Prep your materials.
Put your roller cover on the cage. Stir your paint thoroughly, and pour about ½ and inch into the tray’s well.
Dampen the roller cover.
Prepping your roller ensures faster painting — and saves paint. For latex paint, dampen your roller cover with water from your spray bottle or the faucet. For oil-based paints, roll the alkyd-appropriate roller cover in the tray of paint thinner. Scrape off excess moisture with your 5-in-1 tool.
Roll the roller down into the paint tray.
Roll down the slope of the rake in to the paint well. Properly loading the roller cuts down on spatter and drips and improves coverage.
Distribute the paint on the roller evenly.
Lift the roller out of well and place it at the top of the rake. Roll it back down the rake but not into the well.
Repeat Step 5 to evenly load the roller.
Continue moving the roller up and down the rake until the roller no longer drips.
Hold the roller properly to improve your control.
Hold it in your dominant hand. Stand with your feet shoulder-width apart and your roller directly in front of you for control. If you’re using an extension pole, place your dominant hand toward the bottom for control and your non-dominant hand at the middle position for leverage and pressure.
Paint a diagonal upward stroke.
Use a long, slow, upward diagonal stroke to unload the first part of the “M” pattern.
Make a diagonal downward stroke.

In a continuing motion, follow the first upward stroke with a long, slow stroke downward at a diagonal.
Continue by finishing the "M" pattern.
In a continuing motion, use another long, slow, upward diagonal stroke and another long, slow downward diagonal stroke to finish the “M” pattern.
Cross the "M" with horizontal strokes.
Paint a series of horizontal strokes working from the bottom of the “M” to the top.
Smooth out the section.
Smooth the section by making a series of downward strokes from top to bottom.
Repeat steps 4-12 to complete the wall.
Repeat the process of loading and painting. Working in small sections, move from dry areas to wet ones, overlapping the wet edge each time.
About This Article
This article can be found in the category:
- Walls & Painting ,
How to use the paint roller correctly
11/25/2020
It seems - what could be easier than painting the walls, the ceiling of the floors? But, faced with this work, especially for the first time, the understanding comes very quickly: everything is not as simple as it seems at first glance. That is why most people who make repairs prefer to carry it out by hired workers, although this does not always end well. We will tell you how to use a tool like a paint roller to do the painting yourself during the repair and not spend extra money on hiring craftsmen. We will also share information on how to choose the right roller.
Choosing the right paint roller
The roller is the most popular tool after the brush, which is used for painting different surfaces. In fact, it is used for many other repairs - in general, this thing is quite versatile.
All rollers differ in different working parts, as well as in their size and shape. They can be suitable for several types of paint or other solutions and compositions, or they can be highly specialized.
Rollers are subdivided according to the type of their "fur coat" or working cover. The painting tool in this case is divided as follows:
· Rollers with a fur coat are designed for painting floors, walls, ceilings;
Foam rubber is ideal for water-based paints;
Natural fur rollers are also suitable for water-based adhesive solutions and paints;
Also available with polyester coated rollers
Polyacrylic and polyamide rollers.
When buying rollers, pay attention to the fact that they have a mandatory mark on whether they can work with aggressive substances. If there is no such mark, then the roller is suitable only for water-based paints.
A faux fur roller is considered universal, if you don’t want to bother with the choice, then this will be the best option. With it, you can apply anything and any paint.
A velor roller is good for finishing and painting, but only on smooth surfaces.
Foam rubber proved to be excellent when applying varnishes, stains, impregnations, water-dispersion paints. It can also be used more than once - it keeps its shape well and after washing and drying it easily restores it. For thick paints, such a roller may not be suitable - it will leave bubbles, which means the surface will simply be uneven.
A flock roller is a combination of natural textiles and polyurethane fibers. Differs in durability and water resistance.
The felt roller is suitable for aggressive paints based on any solvents, goes well on any surfaces, leaves an even paint finish.
A thread roller is needed to work with both oil paints and water-dispersion paints.
Rubber rollers are not intended for applying paint and serve a completely different purpose. We'll talk about them some other time.
A microfiber roller is more suitable for impregnations, primers, glazes. It can be applied to smooth and embossed surfaces.
Separately, it is worth saying a few words about the rollers themselves: most of the commercials are made of plastic, less often you can see metal ones, and even less often - wooden ones. The first option is the most popular because of its convenience and low cost. All rollers can be either solid or have a longitudinal seam.
Criteria for choosing a paint roller
Choosing a roller will not be difficult if you first decide for which specific paint you need it. Above, it was not in vain that we talked about roller coats and their diversity. For greater simplicity, remember: foam rubber and polyester rollers are good for water-based and water-dispersion paints, and for all others, including paints on hard and aggressive solvents, with a faux fur coat. Alkyd-based paints can be applied with velor rollers or polyamide, nylon. After you have decided on the type of painting tool, you need to think about the size. The most correct would be to buy a paint roller in two sizes: large and small, for hard-to-reach places.
Before buying, take the roller by the handle, it should be comfortable for you and lie well in your hand. See that it is non-slip.
Also buy a paint tray, without a special container for a roller it will be very inconvenient to work. After all, a roller, like a brush, cannot be put into a jar. As an option, you can cut a bottle of water lengthwise, but this is a so-so solution, very clumsy and shedding paint is easier than a lung, and you won’t be able to squeeze out the excess. The tray under the roller is quite inexpensive, and if you put a plastic bag on it, and only then pour the paint, then it will be in working condition for a very long time. Such containers have a embossed drain surface, against which the roller can be easily pressed, removing excess paint. Thus, the paint itself will be spent extremely economically.
How to paint with a roller: surface preparation and work itself
Before starting work, clean the surface of old paint. If necessary, it must be plastered, leveled and be sure to prime after that. Choose a primer that matches your paint.
Wash the new roller under running water and soap and let dry. This advice from the masters should not be neglected. Such rollers paint much better.
After preparing the paint (stir it thoroughly), tools and surfaces can be dulled for the work itself.
Roller guide on the surface evenly, without jerks and separation. Take your time, work carefully and smoothly.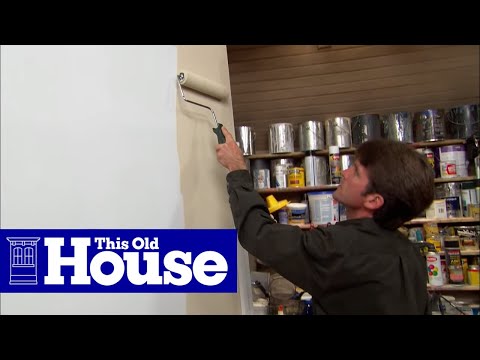
Do not be afraid that the first time the paint is applied in a thin layer, it should be so - this is a feature of rollers of any type. After the first layer has dried, it will be necessary to paint over everything again. Usually they are painted with a roller two to three times, then the coating will be even and beautiful.
To avoid unsightly strokes, change the direction of movement of your roller, you need to do this with each subsequent application of paint to the surface.
To make the color even - do not slow down, paint without interruptions and a long rest. Don't jump over another wall without finishing the one you started. The sequence is very important here. Dip the roller in the paint only after it stops leaving a mark on the wall.
After painting, wash all tools in an appropriate solution, do not let them dry. Be sure to work in good lighting, then you will see all the places of non-painting, and all the shortcomings and will be able to quickly correct them.
For greater convenience, use the life hack of old painters: divide the entire area into squares of five strips according to the size (width) of the roller in each, start painting from the upper squares according to the scheme: first the second and fifth strips, then the fourth, first and third last. The next layer - on the contrary, first the third, first and fourth, and only then the fifth and second. As a result, you will evenly paint over the square without flaws. Also, if you work according to such a cunning scheme, there will be no smears, while the work will move much faster.
Take your time when painting with a roller, use our advice, do not try to be in time somewhere and set a record. Learn slowly, do everything carefully, thoughtfully - let you initially work not at the speed of seasoned painters, but the result will definitely please you.
The article was prepared by the master Roman for the customers of the store Levsha. rf
rf
How to paint with a roller
Contents
-
1 Choosing a paint roller
-
2 Preparation for painting
-
3 Painting process
-
4 Conclusion
The most commonly used equipment in the repair is a conventional roller, because it allows you to work with a large area and at the same time limit the consumption of paint and varnish materials, while maintaining the desired layer thickness and uniformity of coverage. Before you start working with this tool, you need to learn the technology, how to properly paint with a roller to achieve the best quality.
Using a paint roller is convenient and practicalHowever, paint rollers come in different shapes, sizes and materials, each used for a specific job and paint. Therefore, in order to qualitatively paint the surface, you need not only to be able to use the tool, but also to choose it correctly.
In most cases, repair work is best left to qualified professionals who already have enough practical experience and can guarantee the result.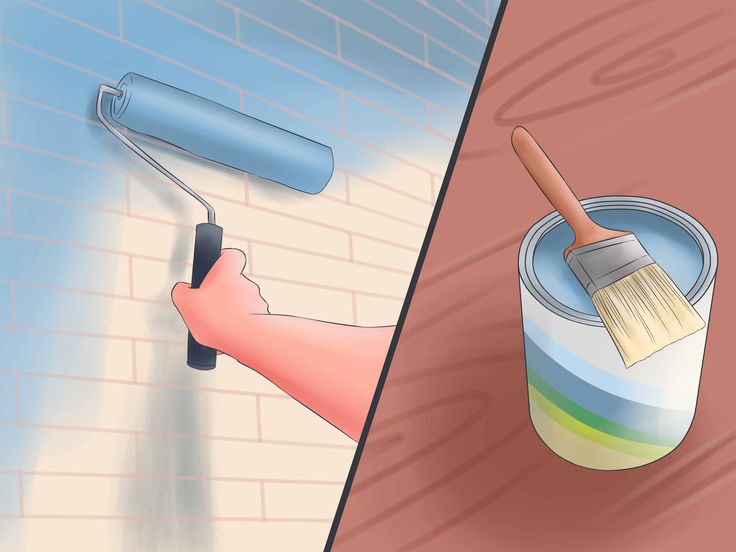 But it is far from always possible to hire third-party specialists, and you have to do the work yourself. If you do not know how to paint walls with a roller, then before starting work it is better to study special literature or get advice from a friend who already has similar experience. In any case, you should thoroughly study the technology and strictly adhere to it, even if some things are not entirely clear to you.
Choosing a paint roller
There are several different types of paint that are used for certain types of surfaces. In this regard, it becomes necessary to use different types of rollers for efficient operation. To choose the right tool, you need to study the main types of rollers and understand for what purposes they are used. According to the type of material used in the manufacture and scope of application, all rollers are conditionally divided into several main types:
- foam;
- fur;
- filamentous;
- velor.
Foam rollers are a versatile product as they can be used on almost any kind of surface. They are most effectively used to work with various varnishes, as well as water-based or adhesive-based paints. It is impossible to use a foam rubber product for working with emulsion or oil paints, since the solvents included in their composition destroy the foam rubber and the tool quickly becomes unusable.
The foam roller can be used to paint any surface.Fur tools are used to paint large areas of walls and ceilings. Suitable for enamels and oil-based paints. These products differ from their counterparts in high wear resistance and long service life. This tool can effectively work with surfaces that have small depressions or cracks, since the fur base allows you to penetrate all the bumps and apply a uniform layer. Before you paint the walls with a roller, pay attention to this type of tool.
Fur rollers are suitable for painting large surfaces Thread rollers are suitable for working with most types of paints and varnishes. Their main feature is the ability to easily clean the tool from the working mixture and reuse it with a different type of paint, but they also have their drawback. Due to the use of threads in the manufacture, the coloring matter is splashed and it is necessary to have a lot of experience in order to cover the surface qualitatively without damaging the surrounding objects.
Velor roller is the best option for beginner painters. It is used to work with emulsion and oily substances, but it does not absorb the working mixture well and requires its constant renewal. It is usually used for decorative purposes, as it provides an even and smooth layer of colorant.
Velor roller used for decorative purposesRollers can be divided into three main types according to their design:
- facade;
- textured;
- combined.
The facade roller is designed to work from the outside of the building and its internal mechanism has a special bearing, which is specially installed to reduce speed and prevent splashing of the working mixture.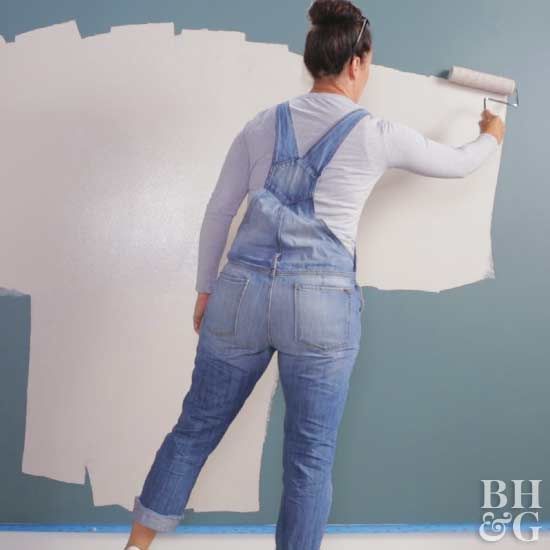
Textured products can be made from various materials such as:
- rubber;
- metal;
- plastic;
- silicone.
In some cases, several types of material may be used at the same time. Such products are designed for applying paints and varnishes to the treated surface and at the same time creating textured elements in the form of patterns, ornaments or randomly arranged geometric shapes. Such rollers are used for decorative purposes for applying a finish.
Pre-painting
Before applying the paint with a roller, you need to provide yourself with additional accessories to achieve maximum quality. These accessories can be:
When choosing a tool for the job, pay attention to the material and surface quality. For example, for smooth surfaces, you can use a roller with a fine pile, but if the surface has a large texture, then the pile should be of medium or large length to thoroughly paint all the recesses and bulges. When painting surfaces with glossy paints, it is better to use a tool with a fine pile and good quality, since on low-quality products the pile begins to fall out and stick to the surface, which negatively affects the aesthetic appearance.
Painting process
Before painting the walls with a roller, it is necessary to protect the surrounding area from accidental penetration of the working substance with a special building film. It is also necessary to wear overalls, goggles, gloves, a headgear and a respirator. If possible, it is recommended that the room be adequately ventilated to remove toxic fumes.
The technology of painting with a roller differs depending on the type of surface The painting process starts from the top, gradually moving to the lower areas. Before work, it is necessary to conditionally divide the workspace into sections and process each of them separately. The roller must be lowered into a container with paint and soaked well with the working substance. Then it is necessary to roll out the tool on a special corrugated surface in a container, this will ensure an even distribution of the coloring matter over the surface of the tool and remove the excess mixture, preventing splashing.
When painting large surfaces, the movement of the roller should be from top to bottom with a slight diagonal offset. This is done so that each next colored strip overlaps part of the previous one and does not form clear separations.
Video on how to paint with a roller:
To achieve the maximum quality of the final result, it is necessary to remember the basic rule - it is better to apply several thin layers than one thick one. Apply the paint material evenly, rolling the roller over the surface as much as possible.