Refurbish old cabinets
How to Refinish Cabinets and Give Your Kitchen a New Look — Bob Vila
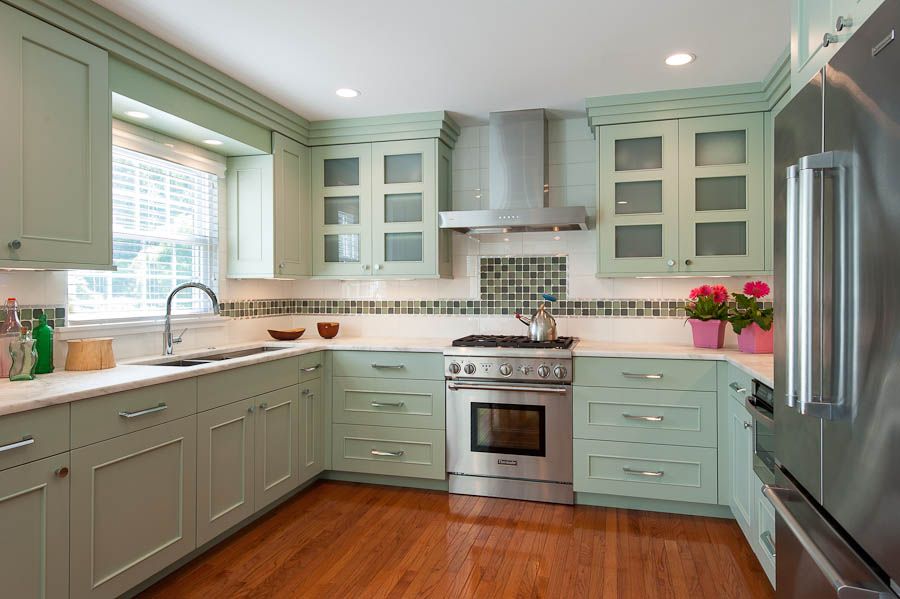
Photo: istockphoto.com
Refinishing cabinets is one of the best ways to give your old, ho-hum kitchen a fresh new look, and it can make a big difference in the way you feel about a space. After all, having expensive cabinets hanging on your kitchen walls doesn’t mean much if you don’t like the color. That’s why many homeowners think about refinishing cabinets with a stain color of their own choosing. It is a big job, but there’s an even bigger payoff.
Before you begin refinishing your cabinets, however, it’s best to do a little detective work. You need to know what materials you’re working with to see if the job is even possible. But, with that research and a lesson on how to refinish cabinets, it’s possible to give a kitchen a serious upgrade.
Safety Considerations for Refinishing Kitchen Cabinets
Before we go too far, it’s important to consider the safety and environmental concerns involved with kitchen cabinet refinishing. You’ll probably need to employ harsh chemicals and create a lot of airborne particulates, so safety does matter.
First, make sure to refinish the cabinets in a well-ventilated area. If the cabinets aren’t mobile, open windows and use a box fan to keep air moving. Next, be sure to wear a respirator when working with chemicals or sanding to avoid inhaling harmful substances. Finally, avoid damaged or stained skin by donning a pair of chemical resistant gloves.
Finally, remember that some chemicals used in kitchen cabinet refinishing (particularly during stripping or staining) are flammable, so be sure to play it safe around any heaters, open flames, or anything of the sort. Oily rags can also combust if left in a pile, so hang them to dry before throwing them out.
RELATED: The Best Under Cabinet Lighting of 2021
Method 1: Refinishing Cabinets to Make Them Lighter
Photo: istockphoto.com
Refinishing darker cabinets to make them lighter is probably the most involved method of refinishing, and it takes some specific knowledge, tools, and materials. With the following list and steps in mind, you should be able to remove the finish, paint, and stain from wood-based cabinets to bring them to a lighter finish.
– Sandpaper
– Paint stripper
– Chlorine bleach (if necessary)
– Wood filler
– Wood sealer
– Denatured alcohol
– Stain
– Varnish
– Respirator
– Rubber gloves
– Sanding block
– Scraper
– Putty knife
– Orbital sander
– Rags
– Paintbrush
– Steel wool
– Tack cloth
STEP 1 : Remove the cabinet doors.
Before embarking, remove one of the doors and sand off a small area of the finish on the back. Do the same to an area at the back of a rail or stile (horizontal or vertical framing member).
If the doors and drawer fronts are made of hardwood, remove them and take off all the hardware.
Note: If the doors and drawer fronts are fiberboard, forget about refinishing them with stain. The only way you’re going to get the cherry, oak, or birch tones you love so much is by applying a veneer or buying all new doors and drawer fronts.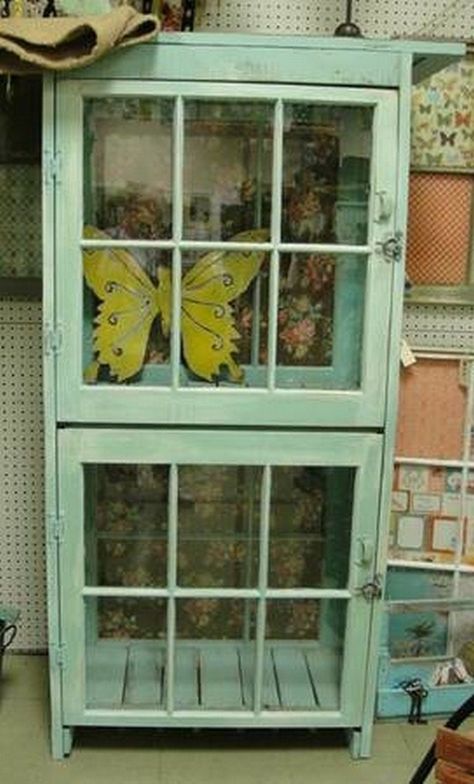
STEP 2 : Strip the old finish from the cabinets.
In a well-ventilated room (or outdoors), use a paint stripper to remove the existing finish. Removing a clear coat finish should be a lot easier than removing paint, but you may have to use an aggressive stripper or chlorine bleach to remove the old stain. The job is messy and potentially unhealthy, but if you’re careful, it’s better than blowing thousands of dollars on new cabinets.
Note: Removing paint from cabinets, or any wood furniture, requires patience. Not all of the paint lifts off after the first application of remover, and maybe not after the second or third, either. It’s imperative to work in a ventilated space, to wear a respirator, to wear protective gloves and a long-sleeve work shirt.
Use a sharp scraper to remove as much finish as possible and use whatever you have on hand (old spoons, dental tools, etc.) to scrape contours and crevices.
STEP 3 : Fill damaged wood with wood filler, then proceed with sanding the cabinets.
Fill dents and deep scratches with wood filler, then sand thoroughly until all finish is removed and the wood is super smooth with no scratches.
Make your first pass with an orbital sander using 100-grit paper, your second with 180-grit paper, and your last pass with 220-grit.
STEP 4 : Apply a sealer.
Before applying it, thin out the sealer to a 50-50 concentration with denatured alcohol.
Apply the sealer (this is sometimes called a wood conditioner). A sealer does just what it says: It seals the surface with a light, thin coating so that when you apply stain, the color goes on evenly. Zinsser’s Bull’s Eye Seal Coat, an alcohol-based sealer that’s easy to apply and dries fast, is a good option.
When the sealer dries, lightly rub with 000 steel wool, then clean the surface thoroughly with a tack cloth.
STEP 5 : Apply the stain.
Apply stain using a soft cotton rag, a brush, or a brush in combination with a rag. Experiment until you find a combination that allows you to apply a consistent tone.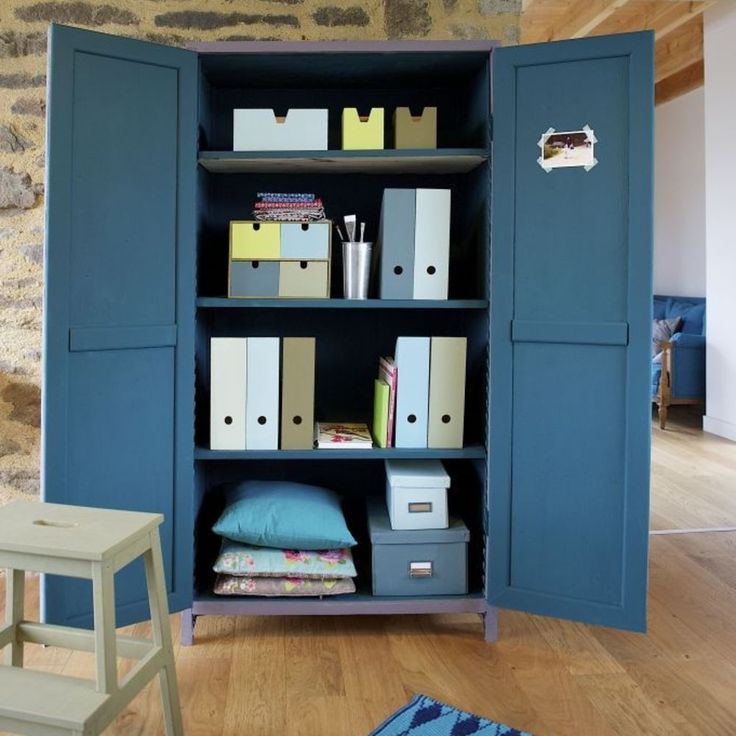
If the stain is going on too dark, rub some it off. Too light? Don’t worry. You can apply another coat after the first one dries.
Once the stain dries, follow up with another very light rubbing with 000 or 0000 steel wool before cleaning with tack cloth.
Note: It’s always wise to experiment on the backside of a single door before committing to the project, just to be sure you’re going to be pleased with the results.
STEP 6 : Add a protective varnish to the cabinets.
Now you can apply a protective coat of clear polyurethane varnish. Applying any clear coat must be done in a dust-free environment.
Read the directions on the can and follow them, but when it comes to thinning, you may need to deviate from the product literature. Most makers say you won’t have to, and maybe that is the case under perfect conditions, but I find that it’s usually necessary to pour in a little mineral spirits to keep the polyurethane flowing smoothly and drying without brush marks.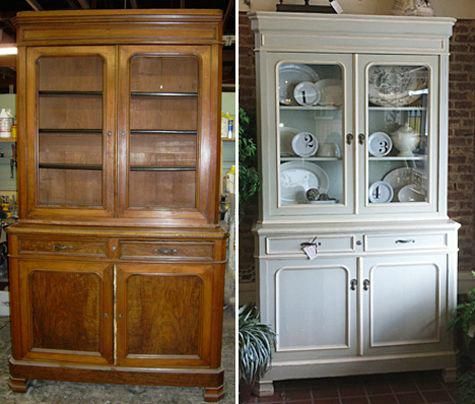
RELATED: These Cabinet Customizations Are Totally Worth It, According to Pro Organizers
Method 2: Refinishing Kitchen Cabinets to Make Them Darker
Photo: istockphoto.com
If you want darker-toned cabinets than what you currently have, you may be able to simply tint the existing finish. This method of refinishing kitchen cabinets, or cabinetry in any space, is much easier to accomplish than others that require stripping and sanding, but there are still a few ins and outs that you need to know.
SUPPLIES– Respirator
– Rubber gloves
– Trisodium Phosphate (TSP)
– Water
– Sandpaper
– Tack cloth
– Tinted polyurethane varnish
– Paintbrush
– Polyurethane finish
STEP 1 : Remove and wash doors and drawer fronts.
After removing the doors, drawers and hardware; begin by thoroughly washing grease and wax off the cabinets with TSP and water.
STEP 2 : Sand and dust the cabinets.
Lightly sand and wipe off the dust with a tack cloth.
STEP 3 : Apply a tinted polyurethane.
Experiment with a tinted polyurethane varnish (such as Polyshades by Minwax) to see if you can achieve the tone desired. Tinted polyurethanes combine stain and varnish in a single product.
Note: It’s always wise to experiment on the back side of a single door before committing to the project, just to be sure you’re going to be pleased with the results.
RELATED: How to Stain Cabinets
Method 3: Repainting Kitchen Cabinets
Photo: istockphoto.com
While it might make the biggest impact, repainting kitchen cabinets is actually quite a bit easier than restaining them. And, since you’re applying a whole new coat, the color possibilities are endless.
SUPPLIES– Respirator
– 220-Grit sandpaper
– Foam sanding block
– Tack cloth
– Degreaser
– Primer
– Paintbrush
– Paint roller and tray
– Enamel cabinet and trim paint
STEP 1: Remove the cabinet doors and hardware.
Start by removing the doors, door knobs, drawer fronts, drawer pulls, and other hardware from the cabinets. For very large kitchens, it’s a good idea to number the cabinet doors and drawer fronts to ensure you know where to put them back.
STEP 2: Lightly scuff the cabinets’ surfaces.
Cabinets are typically smooth and covered with a bit of polyurethane. While primer can adhere to this surface, it’s better to scuff it up a bit first. Put on a respirator and use the 220-grit sandpaper and foam sanding block to lightly scuff the surface of the boxes, face frames, drawer fronts, and doors. The foam sanding block should be able to get into intricate door profiles.
Keep in mind that your goal isn’t to sand down to bare wood. Instead, you simply want to roughen the surface of the existing finish to give the primer something to hold on to.
RELATED: The Best Primers for Kitchen Cabinet Transformations
STEP 3: Clean the cabinet surfaces.
After scuffing, remove the dust from the cabinets with a tack cloth. Take your time with this step as any dust that stays behind is going to create a rough texture on the cabinet.
While you’re sanding, you’re inadvertently transferring oils from your fingers to the cabinets. Also, cabinets see a lot of cooking oil, as well, and neither substance is conducive to a great paint job. The answer to this conundrum is to use the degreaser to clean the entire surface of the boxes and doors. Once clean, the surface is ready for primer.
RELATED: The Best Paint for Kitchen Cabinets
STEP 4: Prime the cabinets.
After pouring primer into the paint tray, use the paintbrush and roller to coat the boxes, face frames, doors, and drawer fronts with primer. Be sure to brush the primer into any cracks or corners, especially along the door profiles. This finish might look a bit streaky, but you should only need one coat of primer before moving to paint.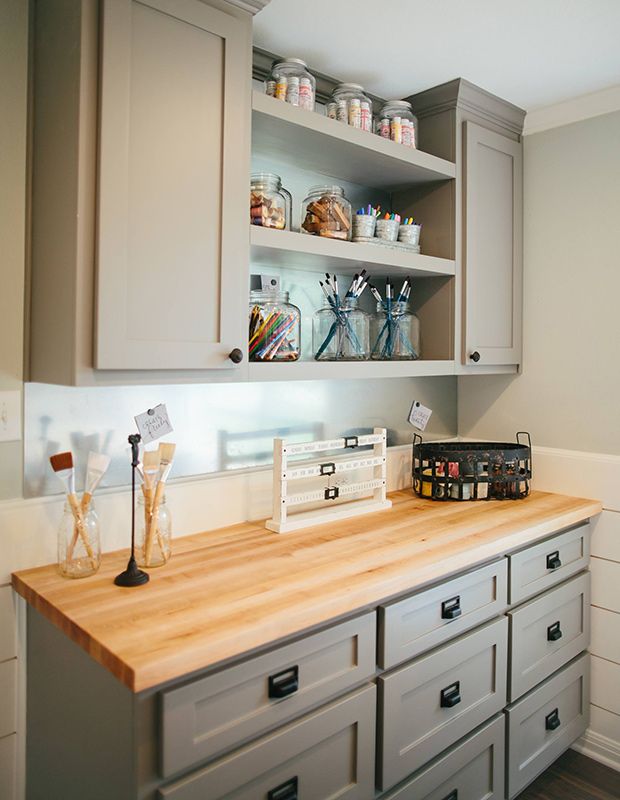 Pour the excess primer back into the can and clean the brush and paint tray while allowing the primer to dry.
STEP 5: Paint the cabinets.
Once the primer dries, it’s time to paint the cabinets. Put a new roller cover on your paint roller and pour some paint into the paint tray. Use the brush and roller to coat the doors, face frames, drawer fronts, and boxes with an enamel paint made specifically for cabinets and trim for the best results. After allowing the first coat to dry, apply a second coat of paint. Once dry, put all the doors, drawer fronts, and hardware back on and enjoy the fresh, new, updated look in your kitchen.
RELATED: The 14 Freshest Kitchen Cabinet Colors
Final ThoughtsPhoto: istockphoto.com
With this primer on how to refurbish kitchen cabinets, you have the knowledge necessary to give those boring or ugly wood boxes and doors a facelift. Whether sanding down to bare wood and restaining kitchen cabinets, using a tinted varnish to darken the color, or painting your cabinets, be sure to wear the proper safety gear while you tackle this big-impact project.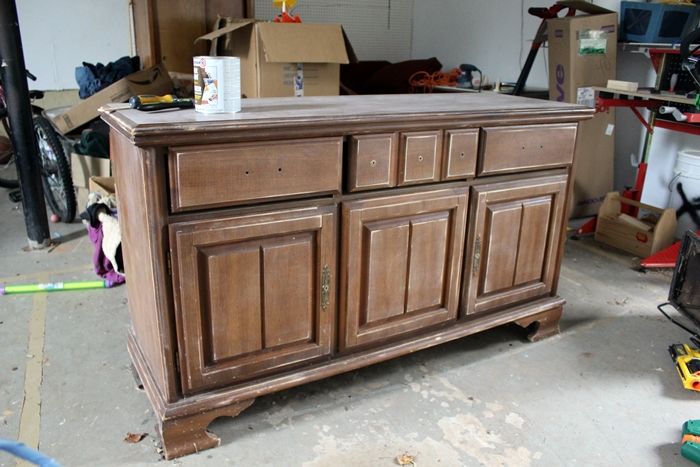
That might feel like a lot of information about the refinishing kitchen cabinets, and it’s hard to cover everything in one coat. If you still have questions about restaining cabinets or simply refurbishing old kitchen cabinets, this section is for you.
Q: What is the average cost to refinish cabinets?Generally speaking, the cost of refinishing kitchen cabinets (with labor) will run between about $1,800 and $4,000, depending on the size of the kitchen. You can save up to 75 percent of that cost if you tackle the project yourself.
Q: Is it worth it to refinish kitchen cabinets?It is absolutely worth refinishing kitchen cabinets. If your boxes and doors are still in good shape, a fresh coat of stain or paint can breathe new life into an old space and save you up to $20,000.
Q: Is it cheaper to reface or refinish cabinets?Generally speaking, refinishing cabinets is less expensive than refacing kitchen cabinets. Cabinet refacing costs, on average, $7,132.
Usually, discoloration is caused by old stain that’s deeply embedded in the wood. Liquid strippers and sanding might not even be an option, so it’s best to go with a darker stain or paint that will hide the blotchiness.
Refinishing your cabinets?
Get free, no-commitment project estimates from pros near you.
Find Pros Now
+Tips for Refinishing Kitchen Cabinets
While it may be tempting to rush through—or even skip—the preparation process, if you truly want your finish to look good and last a long time, prep is the most important step. And the techniques you employ, and the products you use, can make or break your outcome. Follow these steps and you’ll be on your way to a foolproof finish.
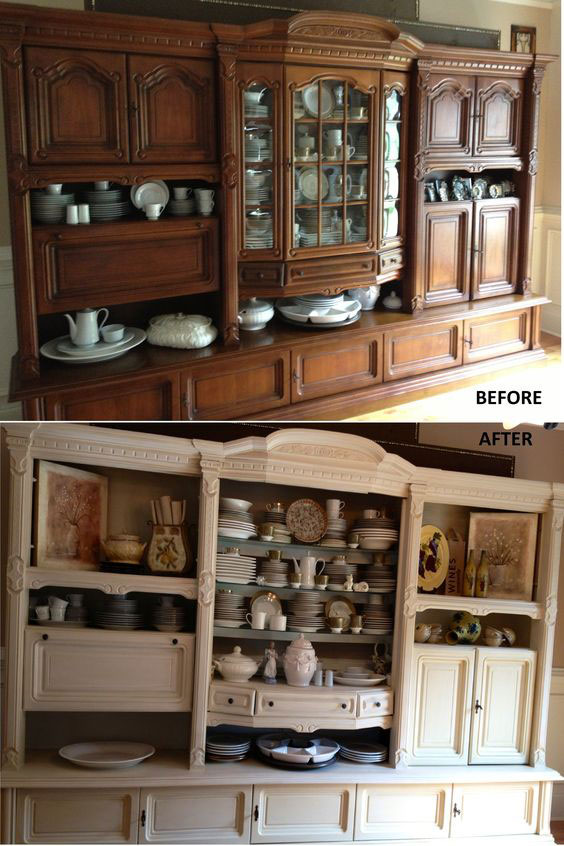
The “Before”
Courtesy Nick SlavikThe wood cabinets were in great shape, but the dark finish was outdated, and made the space feel small and dreary.
Protective Measures
Courtesy Nick SlavikStart by laying down floor protection, and then cover countertops so they can double as a work surface. You can use canvas drop cloths, but personally I prefer builder’s paper, as it protects well, it’s affordable, and it’s easily discarded/recycled.
Preparation Pays Off
Courtesy Nick SlavikYes, some people would say I go a little crazy with prep, but from experience I know that it’s not wasted time. Remove all of the doors and drawers, label/number them carefully (you’ll thank me later), and stage them for cleaning. Plastic and tape off all of the insides of the cabinet boxes to keep dust from getting in, cover all backsplashes with plastic, and seal all appliances to keep them clean.
Degrease
Courtesy Nick SlavikOn to the cleaning process. Scrape off any food residue from the cabinets and then wash/scrub with synthetic steel wool and soap and water. For tough grease, use TSP (trisodium phosphate) and water; the TSP actually emulsifies the grease and removes it much more efficiently than soap alone. Let dry completely before moving on.
Prep, Part One: SVT
Courtesy Nick SlavikThis is the key step to prep: SVT (Sand, Vac, and Tack). Sand the cabinets with medium-grit sanding sponges and/or 180-grit sandpaper on a random orbital sander. It’s not essential to remove all of the finish, but you must scuff it to give it “tooth” and promote adhesion. Once 100% of the surfaces are sanded, use a shop vac with a brush attachment to remove the majority of the dust. The last step is to tack-rag off the residual dust. The best method is to use a microfiber rag with water–but remember to wring out almost all of the water, as residual water will leave spots.
Prime Time!
Courtesy Nick SlavikChoosing the correct primer is so important.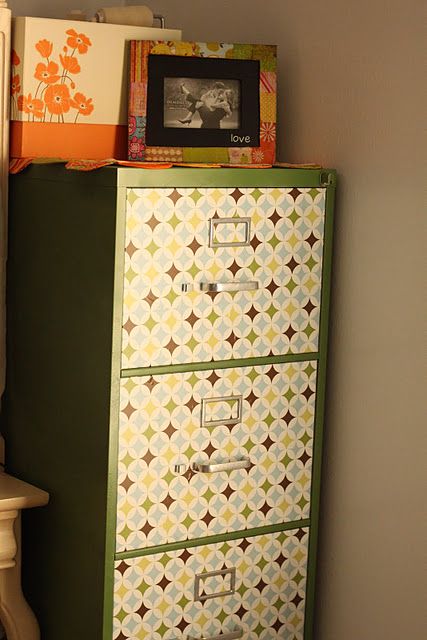 The wrong primer will leave you with chipping cabinets, an uneven finish, and even stain bleeding from the wood. KILZ 3® Premium Primer, in my experience, is easy to apply, adheres wonderfully and blocks stains. A major benefit is that it has low odor, so families can continue to live in the house while work is done. (This is unlike most traditional oil primers which have a very noticeable odor.) And KILZ 3 Premium Primer dries to the touch in 30 minutes and can be top-coated in one hour; this will help with achieving a dust-free finish.
Application
Courtesy Nick SlavikPriming is fairly straightforward: apply as uniformly as possible, and be super thorough. Application can be done with brush, roller, or sprayer. For this project I’ll be demonstrating brush and roller application. The best brush for painting cabinets will have super-fine nylon bristles. This will leave a finish nearly devoid of brush marks.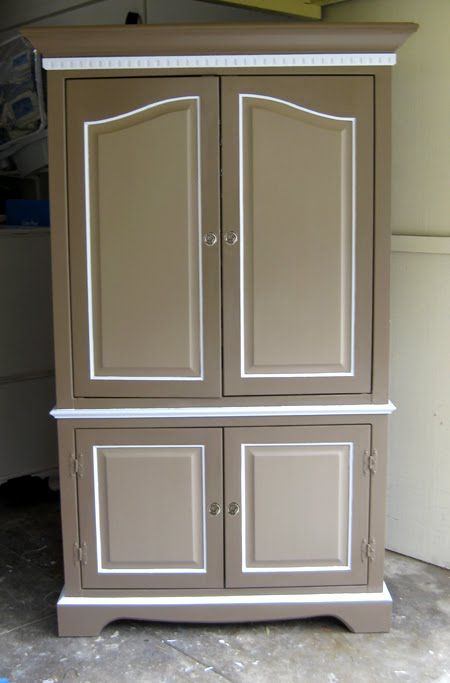 Don’t skimp on this. Expect to pay between $15 and $25 for a good brush. Properly cleaned, it will give you decades of service. When choosing a roller for painting cabinets, I prefer a very high-quality woven cover. This will prevent shedding of fibers and a flawed finish. For the nap, I like ¼” or ⅜”. Anything thicker will leave excessive stipple.
Prep, Part Two: Repeat SVT
Courtesy Nick SlavikOnce the primer is dry I like to repeat the SVT process: lightly scuff-sand to promote adhesion and remove any minor flaws left on the cabinets, and vacuum and tack-rag again before caulking any cracks. I prefer to caulk cracks (where the cabinets meet walls, crown molding, etc.) after priming. Caulk will always stick better to a primed surface than to bare wood. However, never caulk the panels on cabinet doors—they’re actually called “floating panels” and need to move with seasonal temperature and humidity fluctuations. I’ve seen some really bad effects from caulking these panels, such as peeling caulk and even cracked door panels.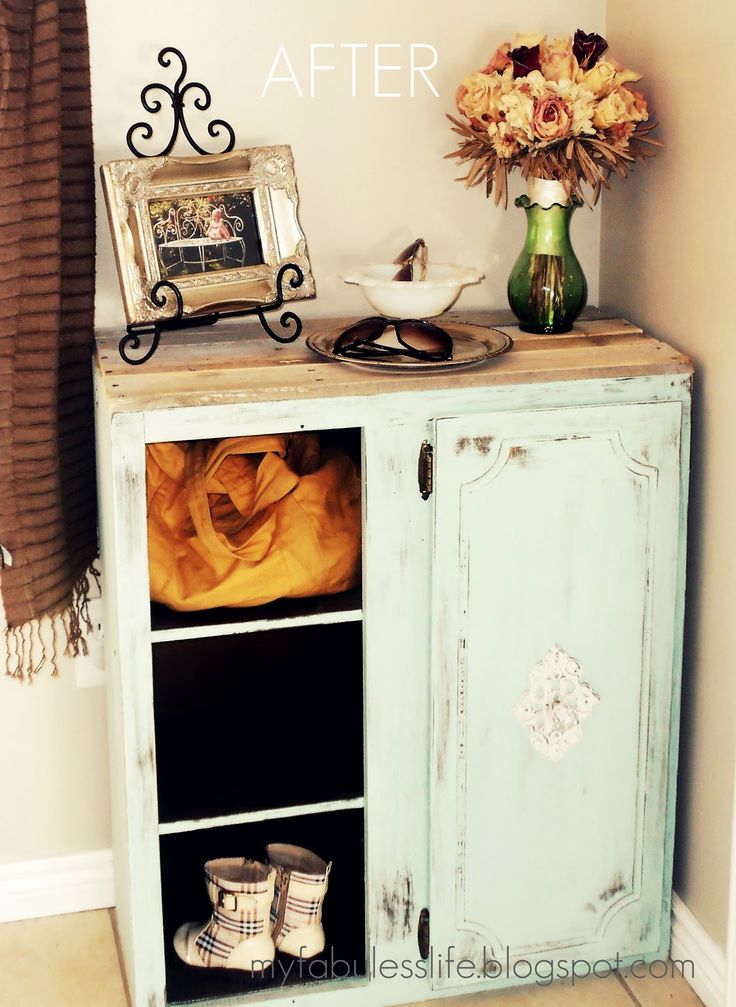 It’s tempting to caulk these, but you’ll have to abstain—trust me on this one. Let any caulk dry completely before moving on.
Top It Off
Courtesy Nick SlavikNow that you have a perfectly primed surface, it’s time for the top coat. The application techniques are the same as priming—use a high-quality nylon-bristle brush and/or roller, and take your time to ensure smooth, even coverage. Start by coating the back sides of the doors and lay them flat. Laying doors flat will help with the leveling of the enamel and give you a smooth finish. Once dry, you can flip the doors over and coat the fronts. For the cabinet boxes, try to keep a wet edge (don’t start and stop, allowing the paint to dry). I recommend applying a second top coat for added protection and an even shine.
De-Prep (Almost There!)
Courtesy Nick SlavikOnce everything has dried to the point where you can handle it, start by removing the tape and plastic from the cabinets.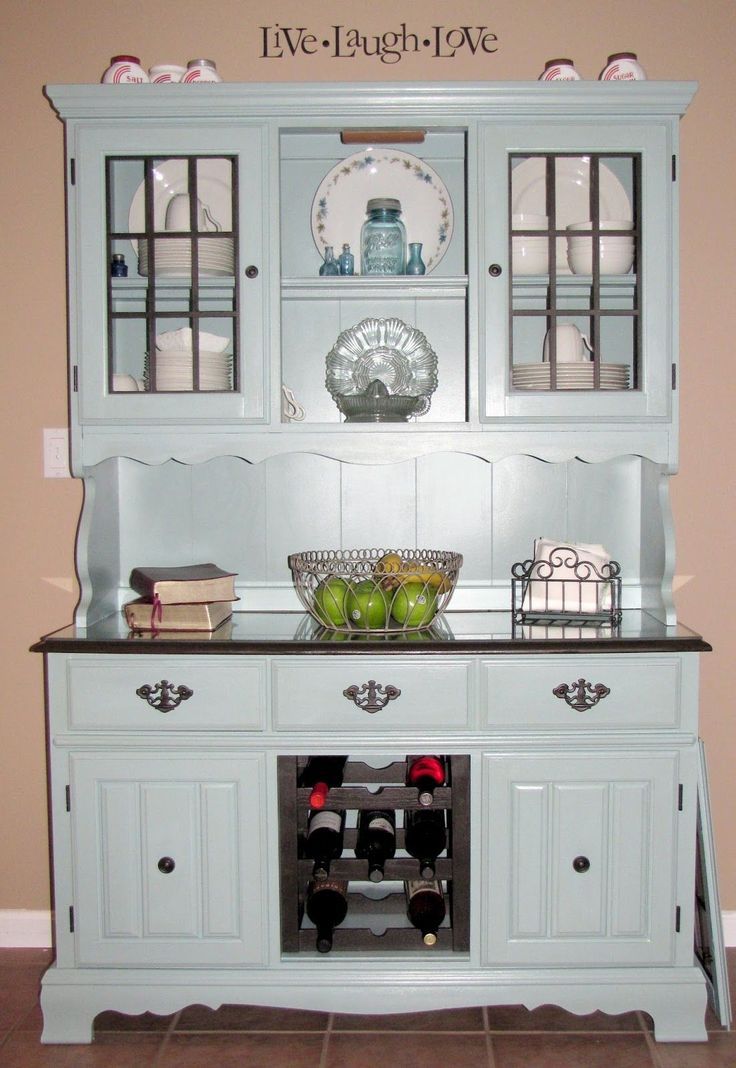 Install the doors one by one. (Now, you get to see if your door labeling system was effective!) Save any adjustments of the doors until the end. I use only hand tools when installing doors and drawers; drills tend to strip out delicate screws. Install any knobs or pulls, and make any necessary adjustments to get them all straight. Pro’s Note: Clients love when you install new clear rubber bumpers on the doors and drawers (they were removed during the prep process). It’s a small detail, but well worth the effort.
Photo Finish
Courtesy Nick SlavikTake one final walk-through to look for touch-ups; if you’re satisfied, then you can go ahead and remove the plastic, paper, and tape from countertops, appliances, and floor, and consider your job well done!
KILZ 3
® Premium Primer is designed for use on interior and exterior surfaces including woodwork, drywall, plaster, paneling, masonry, brick, painted metal, and properly prepared glossy surfaces. To learn more, visit KILZ.com
 How to update an old wardrobe yourself
02/27/2022
0 Comments
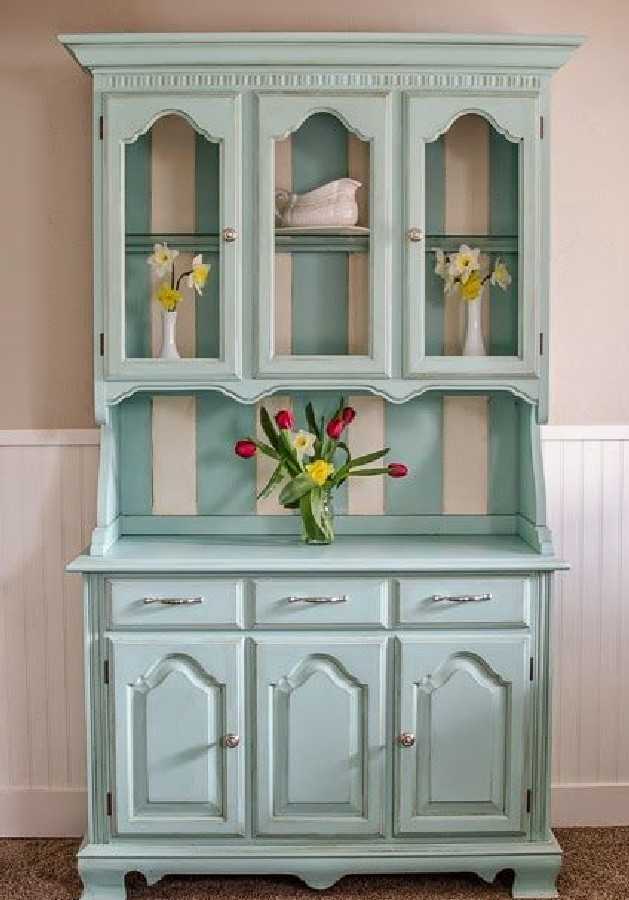
Some things are very pitiful to write off for scrap. This is especially true for still strong, solid interior items, whose design is irrevocably outdated.
Quality cabinet is not cheap furniture that can last for decades. But fashion does not stand still, and repairs carried out in an apartment can significantly change the style of the room, and there is no place for the old furniture in it.
In this case, you can try to transform an old wardrobe, creating something stylistically new out of it. Consider the various possibilities of such a miraculous transformation.
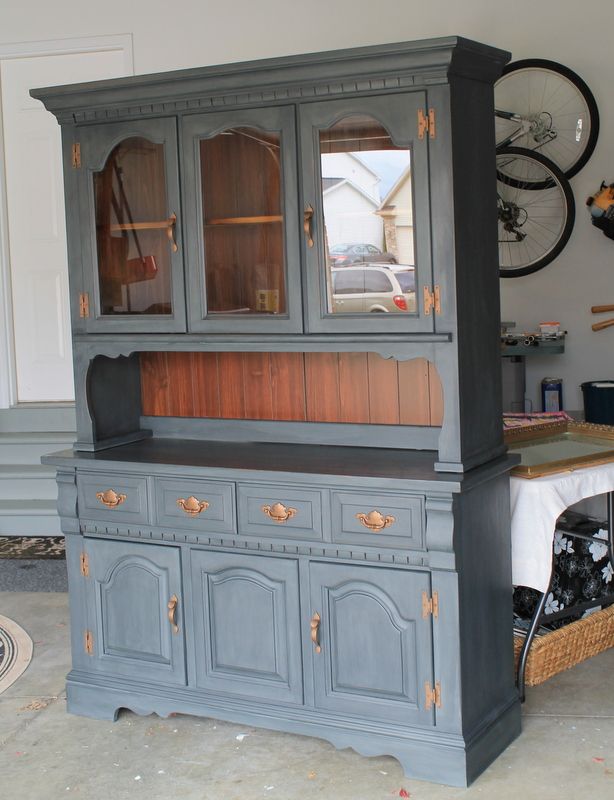
Painting
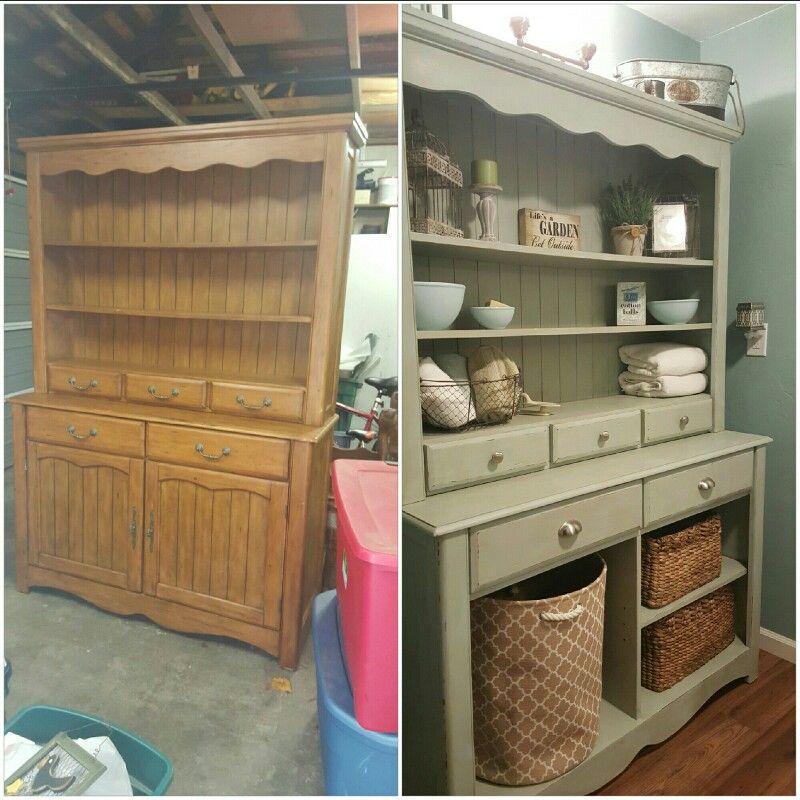
The easiest way to transform an old wardrobe and decorate it to match your interior is to paint. You can paint the product in the color of other furniture , walls, or make it an accent element in bright colors.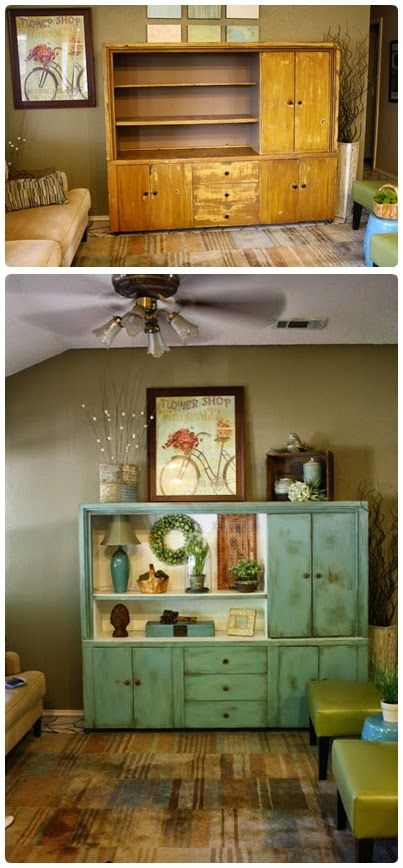
The surface must be prepared before painting:
- remove fittings;
- sanded;
- restore if necessary with putty;
- primed and sanded.
You can paint with a regular brush, sponge or using a sprayer. In the latter case, the coating lays down particularly evenly. After applying several layers of paint and drying them, the surface is varnished, the fittings are returned to their place.
Pasting
Pasting is the easiest, but also the most unreliable way to transform an old wardrobe. On its surface you can stick: fabric, wallpaper, special film.
The main disadvantage of this decor is that it is easily damaged: the fabric will be difficult to clean, the wallpaper will quickly fray, and the self-adhesive will peel off. But there is also an advantage - such a coating is easy to replace.
If you want to apply a durable pattern to wardrobe that will decorate the interior for a long time, it is worth decoupage.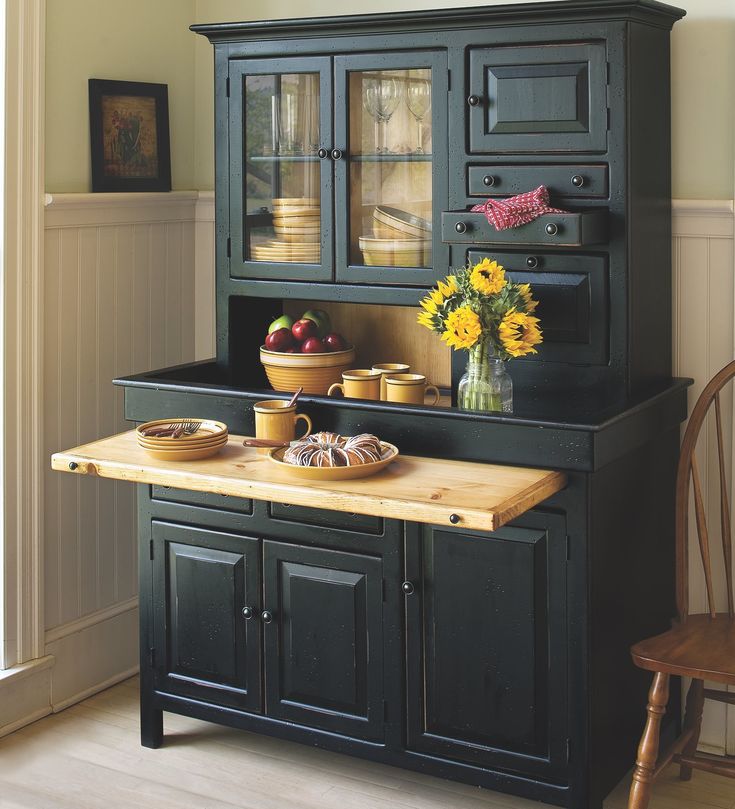 This is a much more durable solution, albeit a very laborious one.
Decoupage
Decoupage is an opportunity not only to change the appearance of an old wardrobe, but also to decorate it, making it one of the central figures of the interior. It is carried out using various materials: old wallpaper, napkins, fabrics.
Another option is to decorate with self-adhesive foil. True, this is not quite decoupage, but even a beginner can handle it.
Prepare the cabinet before drawing:
- remove the handles and pull out the drawers;
- remove the old coating with sandpaper or a brush;
- degrease the cleaned surface;
- , if necessary, remove all irregularities with putty;
- paint the product in the base color.
If necessary, the paint in place of the future drawing is polished with sandpaper so that the image sticks better. After the surface is prepared, proceed directly to decoupage.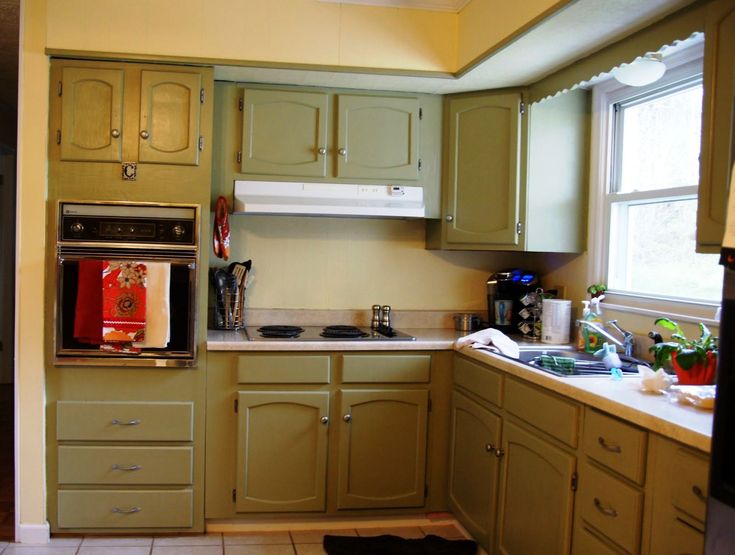
Prepared napkins, cloth or special decoupage films are glued to the surface. You can use special glue or ordinary PVA diluted with water 1: 3. After the image is completely dry, it is covered with a layer of varnish, and the product is ready.
Decoupage looks best on light surfaces. Yes, and it is applied to them much easier. If a dark color is required, it is advisable to pre-paint over the areas on which the drawings will be located with white paint. Or first apply decoupage on a light surface, varnish it, and then paint over the rest of the elements in the desired color.
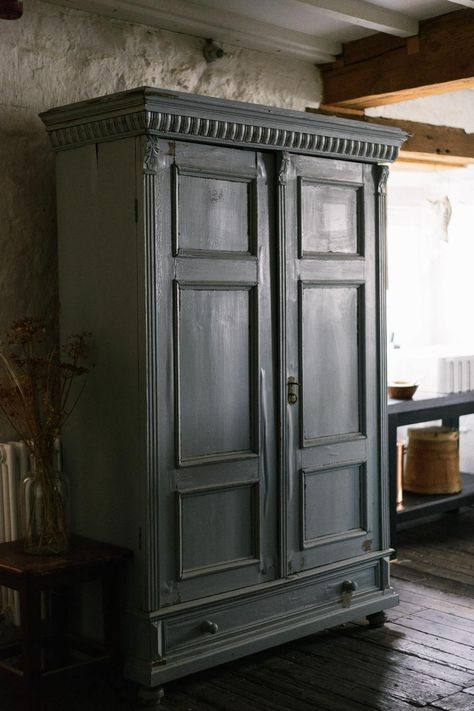
Surface aging
If the design of room involves the use of vintage items, you can artificially age the surface of the cabinet. For these purposes, several methods are used.
- A craquelure varnish that dries to a cracked surface.
- Egg shells can be glued to prepared and painted surfaces. After the unusual application dries, the cabinet is again painted and varnished.
- Dry brush painting - this will leave unpainted areas and make the furniture look older.
- Create artificial abrasions with sandpaper. To do this, the cabinet is painted twice - first in a darker color, then in a light one, and the top layer is partially carefully removed. The result obtained is fixed with varnish.
Upholstered in fabric
A wardrobe can be made soft and cozy. To do this, it is enough to sheathe it with a fabric with a synthetic winterizer backing, foam rubber or batting.
The fabric can be fixed with a furniture stapler, small nails or glue. On the reverse side, fabric sections are decorated with silk braid, ribbon, corners or plastic overlays.
You can use a carriage screed - it will turn out original and add coziness to the atmosphere. And on the soft surface of the cabinet, you can fix badges, bows, photos on pins.
New parts
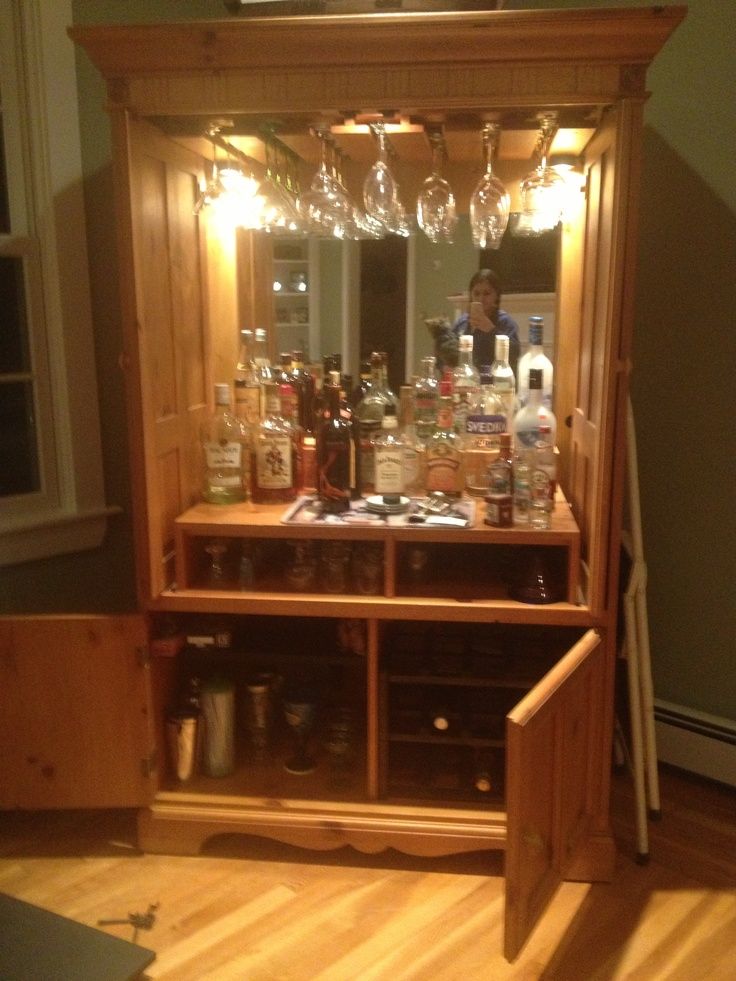
If you like the design of the cabinet as a whole, but would like to supplement it with new details, you can consider the following options.
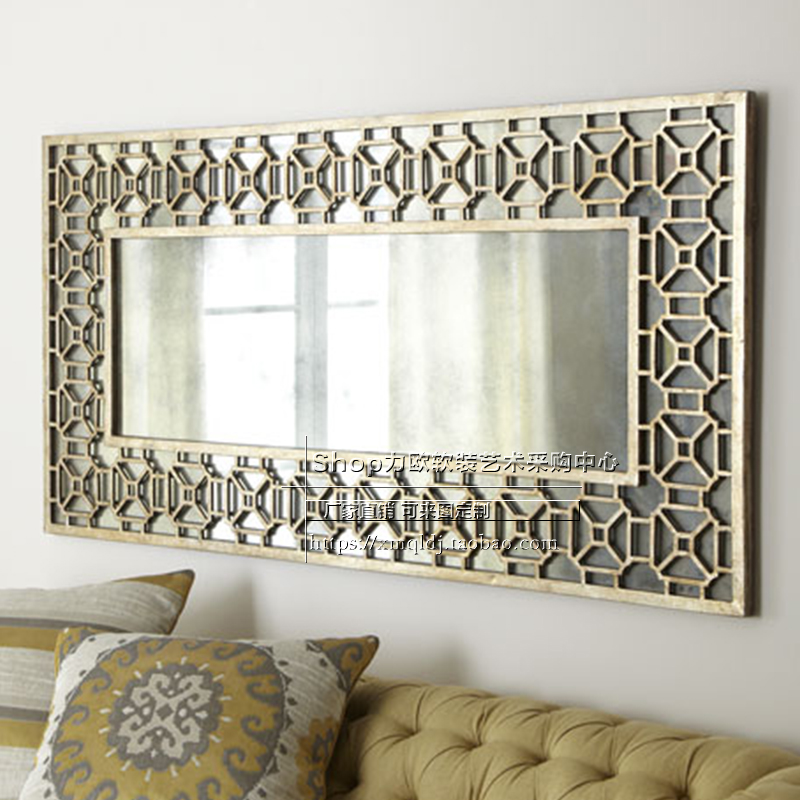
- Decoration with mirrors . Just order the right size mirror along with the mountings and place it on the cabinet. You can fix it on liquid nails or even use glue-based plastic mirrors. Another option is hanging mounts.
- Slate surface. This technique will allow you to design 9 in an original way.0013 wardrobe in the children's room or kitchen. The slate board is simply fixed on the door or side surface with hot glue.
- New fittings. You can choose new handles for the product in accordance with other furniture. New original fittings will help to immediately transform the appearance of the cabinet.
- Mosaic. Help brighten up your closet. The elements can be: pieces of multi-colored glass, beads, shells, pebbles, artificial flowers, ceramic fragments. It is enough to fix the elements on a pre-sanded surface with a rubber-based adhesive. They can fill the sashes or lay out drawings according to a previously prepared sketch.
- Additional decor.
 Currently, stores offer a variety of additional elements for furniture: decorative strips, corners, rivets, nails. With the help of them, you can simply create a new decor or combine it with painting.
Imitation thread
An ordinary wardrobe can be turned into an old one if you imitate carvings on its surface. For these purposes, you can use:
- special plaster;
- plywood elements;
- decorative strips and moldings.
When using special plaster, it will be necessary to sand the surface and apply the material through a stencil. If necessary, details are pressed on the surface: feathers for birds, petals for flowers, leaf veins. After the pattern dries, the stencil is removed, and the three-dimensional pattern is finished with sandpaper.
If prefabricated elements such as plywood trims and decorative strips are used, they are simply glued onto the sanded surface with liquid nails.
In both cases, after the “thread” is applied, the cabinet is painted and the pattern is tinted. You can apply gilding or patina to the surface of the picture. Finish the design by varnishing the cabinet.
Decorating an old wardrobe is a creative activity. It depends only on you what materials and techniques to use, and how laborious the process will be. However, if you approach the matter with a soul, you can get a completely unique product that you will not want to part with for many more years.
Don't know how to update an old wardrobe? Budget methods
Furniture decor is a creative activity that does not like fuss. You have been thinking about how to update an old wardrobe for a long time, but were afraid to spoil an out-of-fashion or familiar piece of furniture. Let's look at different options, ideas and techniques and choose something for ourselves. For simple wardrobes and wardrobes, the decor may be similar, but as for a simple, lost its former gloss, old wardrobe: you can make a unique work out of it.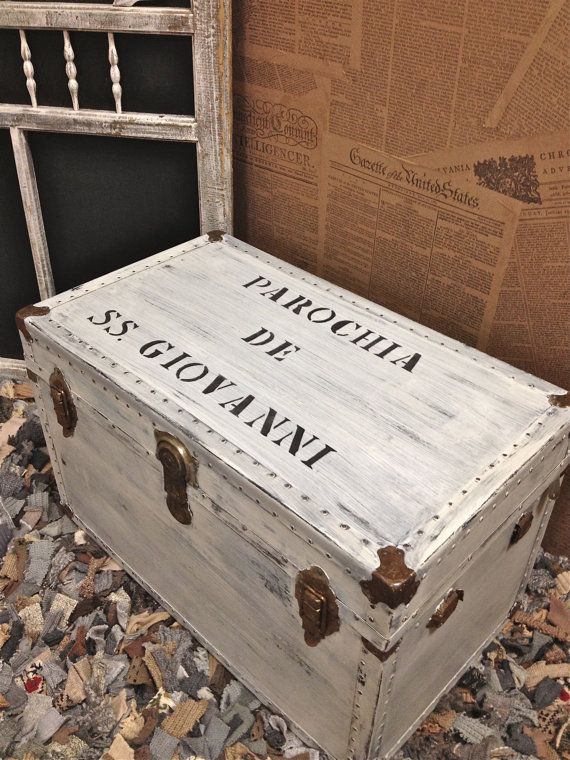
DIY cabinet decor can be done using interesting ideas and all kinds of techniques. Some of them, such as photo printing or color film, do not require special skills. And such as matting or stenciling, not everyone can do it, certain skills are needed. Let's figure out what will help us decorate a wardrobe and wardrobe:
- Photo printing or photo wallpaper.
- Color stained glass film and vinyl stickers.
- Glass or mirror matting.
- Vinyl or plain wallpaper.
- Decorative plaster (stenciling).
- Restoration and painting.
Photo printing or photo wallpaper
This technique is most often used to decorate wardrobe doors. Large-format printing has long been used in interior design. A special printer prints a pattern on paper or any other surface. The inconvenience is that this is an expensive service and you need to look for a special photo printing workshop. Photo printing on glass is called skinal.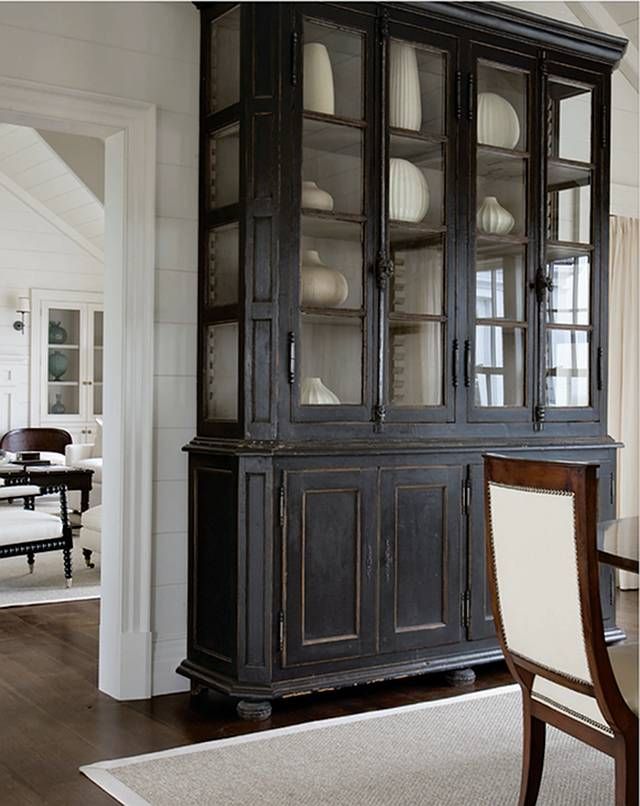
There is a more budget option - this is photo wallpaper. Sold in construction or online stores. The cost is 300 rubles. and above, depending on the size. The theme of photo wallpaper is the most diverse, from landscapes, flowers, animals, to fairy-tale characters for a children's closet. Use starch-based glue when sticking, so you can later remove the old pattern and change it to another one.
The video shows how to properly place photo printing on glass:
Stained glass film and vinyl stickers
This is something that you can quickly, without special skills, stick with your own hands on the surface or glass of a cabinet and wardrobe. Add a touch of class to your closet.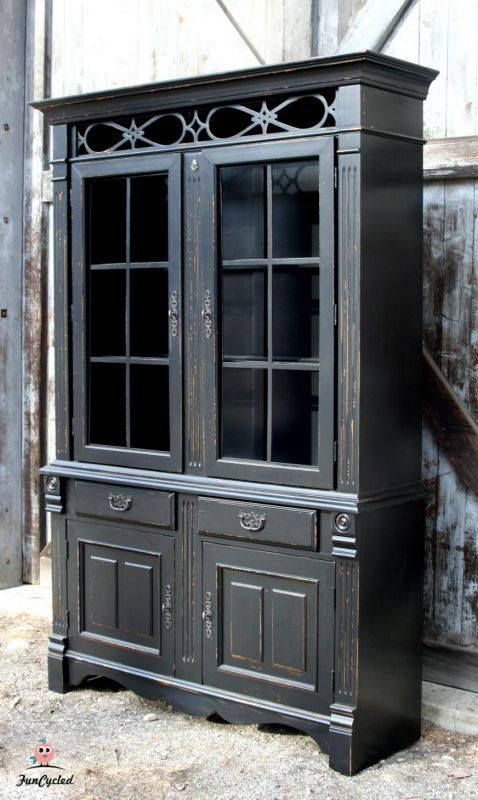 Stained glass films are at the peak of fashion today. They can be bought both in online stores and in specialized repair hypermarkets.
In addition to a beautiful decor, the film protects the wardrobe and closet from damage. Stickers and film are removed very easily.
No one can tell your imitation from the real stained glass.
The cost of stickers depends on the size, this is an inexpensive decoration. The self-adhesive base of stained glass film for glass allows you to often change the surroundings with your own hands.
Glass or mirror frosting
Used for glass and mirror cabinet fronts. More suitable for closet. Industrial matting involves removing the top layer of a mirror or glass. It turns out several levels and a three-dimensional image.
Do-it-yourself glass or mirror matting can be done with a special paste. To work, you will need a stencil and a rubber spatula. We put the stencil on the surface, apply the paste on it with a spatula. Leave for a while, according to the instructions. When using a paste with an abrasive, it is necessary to rub along the lines with glass for about an hour. Wash off the rest of the paste with water.
On the video matting master class:
Vinyl or ordinary wallpaper
You can update your closet with your own hands using wallpaper. This cabinet decor is suitable exclusively for old wooden or "Soviet" furniture. But this is solid, solid furniture, it can still serve and please us. Simple paper wallpapers are more suitable for decoration, as they are easier to coat with glue and stick. And for the price, simple wallpapers are cheaper and lighter than vinyl ones. Simple wallpapers have two drawbacks: they are not durable and the pattern is usually not interesting.
Vinyl wallpapers come in paper or non-woven backing. They are heavier than simple ones, it is better to glue paper-based vinyl with starch-based glue, and with non-woven backing - Methylan Vinyl glue.
Be sure to degrease the surface before wallpapering. This can be done with alcohol, gasoline, or acetone.
Do not forget to press firmly with a dry cloth or sponge and straighten the wallpaper so that the paper does not wave.
Decorative plaster master class
This technique, with which we will decorate the wardrobe, is called stenciling. With the help of decorative plaster and a stencil, we will get three-dimensional decorative elements. They can be subsequently painted in any color, gilded or tinted to your taste.
For work you will need:
- Stencil made of plastic or vinyl, can be made of cardboard.
- Decorative plaster.
- Flat spatula.
- Masking tape.
- Old cabinet.

- Acrylic paint.
- Varnish.
- Sandpaper.
If the item to be decorated is covered with old paint, it is imperative that the entire surface be treated with sandpaper. We process until the wooden base becomes visible. If your old cabinet is not painted, then everything is simpler: remove the top layer with sandpaper, remove dirt and old grease. If you see cracks in the wood, it is advisable to cover them with putty. We take our ready-made or made of cardboard stencil and attach it to the surface of the cabinet door with masking tape.
Next, take a flat spatula and apply the decorative plaster solution to the stencil, filling in all the depressions. Without waiting for the plaster to completely harden, we remove the stencil, and correct all the irregularities with a knife.
Then let the plaster dry, go through the sandpaper and cover the entire cabinet with acrylic paint in several layers. Acrylic will not only decorate the cabinet, but also save it from destruction. Between painting, give the cabinet time to dry. At the end of the work, the surface is varnished on top.
In the video, work with decorative plaster:
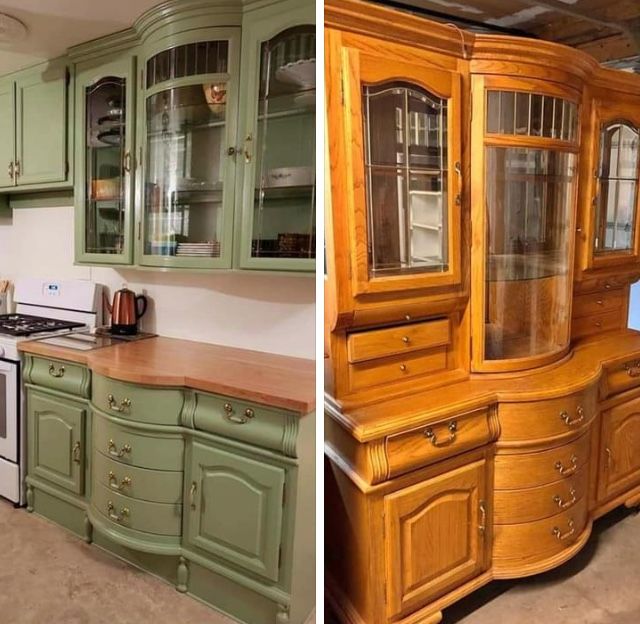
Cabinet decor master class
In our master class, we are updating an old Soviet-era wall. See how the wardrobe will change after such a decor.
For work you will need:
- Old cabinet.
- Acrylic enamel paint.
- Acrylic varnish.
- PVA glue
- Paint brush and roller.
- Sandpaper large and small.
- Paper wallpaper.
- Paint for gold.
- New fittings.
We dismantle the old wardrobe, take out the drawers. We take a grinder or sandpaper and process the surface of the parts. If you process with sandpaper, then do it first with a large emery, and at the end go through with a fine one.
We apply acrylic paint first in the corners with a brush or sponge, and then over the entire surface with a roller. You need to paint 3-4 times until the dark color disappears. Next, decorate the boxes: paint the front sides of the boxes with a brush and white acrylic. We are waiting for it to dry. Next, glue masking tape to finish the decorative element with gold paint.
We paint the decorative element with gold paint. We paint over all the boxes with white acrylic paint, dry it. We take off the tape. Next, we move on to wallpapering. Wallpaper is the most simple, paper. Cut into strips, spread with PVA glue and carefully glue. Make sure that the wallpaper sticks tightly, press them with a sponge.
Next, we work with large doors. It is important to understand how to glue the paper so that it fits well.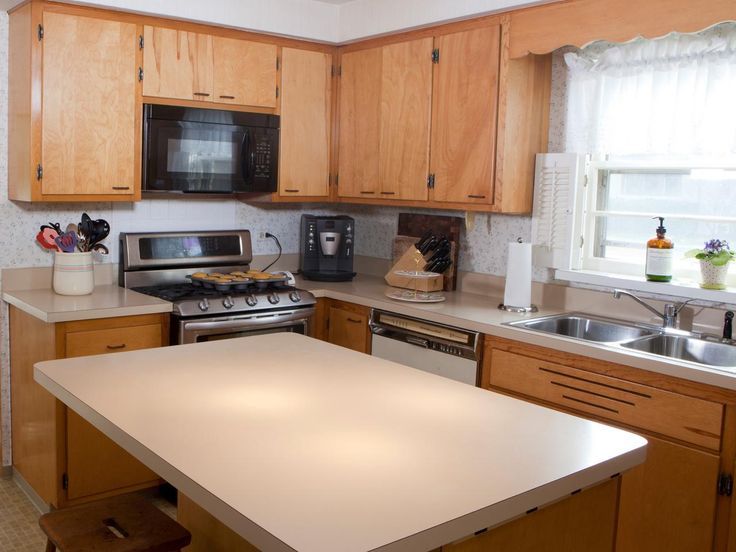 Pay attention to how best to glue the wallpaper: along or across. Painting the cabinet inside.
Glue the wallpaper on the inside of the cabinet. We paint over everything that remains dark, we insert new fittings. The cabinet is ready for further service.
Restoration and painting
There is old furniture that needs a little restoration before decoration. What you need to know about restoration and what we can do with our own hands:
- If the wood has decayed in places, it is necessary to treat the surface with a metal brush. This is how we remove dead tissue. Next, you need to wash off the fine dust with a stream of water.
- Before painting, the cabinet must be air-dried, but not in the sun. This will take 1-2 days.
- If there are nail holes, scratches or other defects, putty the surface with a rubber spatula, preferably in thin layers. Allow the work to dry well between coats.
- If the furniture has parts covered with rust, they must be treated with a special rust solution.