How to tile the bathroom
How To Tile A Bathroom Floor (For Beginners!)
Wondering how to tile a bathroom floor? Follow along with this step by step tutorial and learn how! This is a project that even a beginning DIYer can take on.
Tiling a bathroom floor….it sounds pretty intimidating, right? If you are beginner and you’ve never tiled before it may honestly feel completely out of reach. But just like most things in life, with a little investment of time (with research and learning) along with an investment of your money (with buying the tools for the job) – you can definitely learn how to tile a bathroom floor!
Advice for trying new DIYs (like tiling a bathroom floor) for beginners
My best advice for someone starting out is to take your time the research and learning part.
- Start with reading DIY blog posts (like this one) and watching helpful YouTube videos
- Then take it one step further and read the detailed instructions provided by the manufacturer!
- Many people look over this simple step because the instructions provided by the manufacturer can sometimes be pretty boring to read or use terminology that you’re not familiar with! But you can rest easy knowing that you’re getting expert advice.
- Many people look over this simple step because the instructions provided by the manufacturer can sometimes be pretty boring to read or use terminology that you’re not familiar with! But you can rest easy knowing that you’re getting expert advice.
You can usually find the manufacturer’s instructions easily online by searching for the brand & product name. Once you find the product page, you want to look for something called TDS (or Technical Data Sheet)…see I told you it was boring sounding! Haha!
However, within the Technical Data Sheets you’ll find a wealth of information, including exactly what to do with the product and how to use it.
You may need to look up TDS info for multiple products as well… For example, if I was doing research for how to tile a bathroom floor I would look up the installation instructions for my tile, the concrete backer, the mortar and the grout! A lot of research I know, but just think of how smart you’ll be after you’re done!
After you start doing your research and learning, you need to select your tile! Luckily for you, I’ve rounded up the best modern farmhouse tiles here and my favorite large format tiles here.
Disclaimer: don’t follow this tutorial for shower floors!
Keep in mind that this tutorial is NOT for how to tile a shower floor. Since showers are subjected to a ton of water & there needs to be proper slopes for draining, the process for shower pans (which is what shower floors are called) is very VERY different. This tutorial is for bathroom floors outside of the shower.
Related Reading:
If you’re going to be tiling your shower as well as the bathroom floor, you definitely need read this shower tile installation tutorial and this super detailed DIY shower guide.
This how to tile a bathroom floor tutorial contains affiliate links, but nothing that I wouldn’t wholeheartedly recommend anyway! Read my full disclosure here.
Let’s learn how to tile a bathroom floor!
Supplies for installing bathroom floor tiles:
- 1/4” WonderBoard
- Cement Board Screws
- Bathroom Floor Tiles
- Level
- Thin Set Mortar (be sure it is the right kind for your bathroom floor tile material and size)
- Chalk Line
- Tile Saw
- Spacers
- 5 Gallon Bucket
- Sponge
- Mesh Tape
- Grooved Trowel
- 1/4″ Square Notch Trowel
- Rubber Mallet
- Grout (be sure it is the right kind for your bathroom floor tiles)
- Rag
- Rubber Grout Float
Step 1.
 Ensure level & clean subfloors.
Before you get started on the tile, let’s start with tiling bathroom floor preparation. First, remove any debris and dust from your floors. If you’re going to be removing tile floor, be sure to read this post for some tips and tips.
Next, you need to make sure your subfloor is absolutely level. You are spending a lot of time putting in your bathroom floor tiles and if your space isn’t level you can expect to spend the same amount of time redoing the floor, which would be a major bummer.
We were kind of in luck here because we laid brand new subfloor for this bathroom so it was nice and flat.
Step 2. Lay WonderBoard.
The bottom layer when laying bathroom floor tiles is concrete backer. And if you’re wondering… NO you can’t just install the bathroom tile floors on top of the plywood subfloors. Plywood (just like all wood products) expands and contracts, so it’s not a good surface for tile. You definitely need a first layer of concrete backer board before tile floors.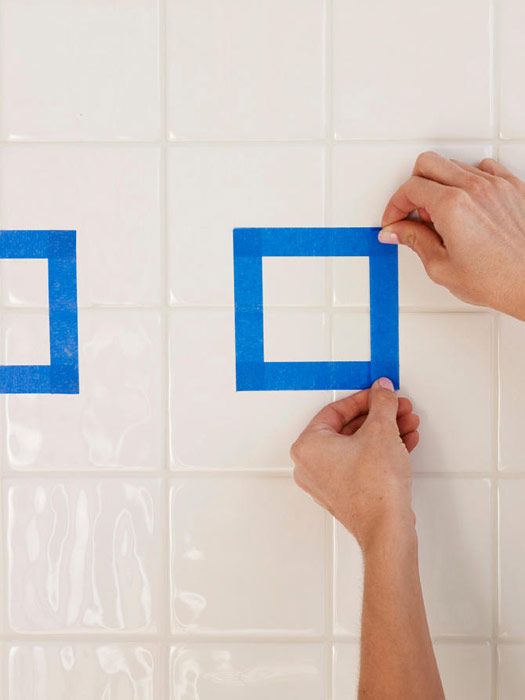
We used 1/4” WonderBoard laid directly onto the subfloors to provide a stable surface for installing tile floor. (Note: there are two sizes of WonderBoard 1/4″ and 7/16″…1/4″ is for floors and countertops and 7/16″ is for walls, including shower walls).
Using a 1/4″ square notched trowel, apply thin set mortar directly on to your subfloors and lay cement backer boards on top. (See Step 6 below for more information on how to mix up your thin set).
Secure the cement backer boards with cement board screws screwed into the floor joists spaced about 6 inches and drive them until they are flush with the cement boards, but not countersunk.
The seams of the backer board also need to be taped with mesh tape, but we did this as we laid the tile later in Step 7.
Step 3. Line up tile placement.
Measure the middle between two walls and make a small mark on the floor. Repeat for the other two walls. This will get you a middle point for the room that you’ll want to start your tiles from.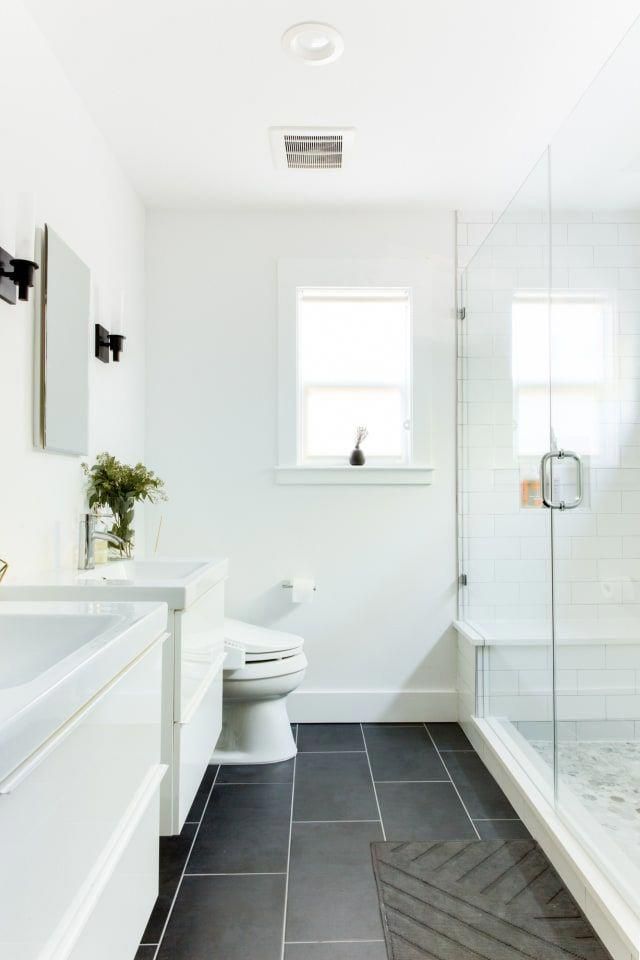
Tile looks best with long and straight runs. So measure the distance from the mid point to the longest wall. Take that measurement and make marks on opposite sides of the longest wall and snap a chalk line.
Repeat with a perpendicular wall so you make a cross on your floor with chalk lines. This will be where you place your first tile to make sure everything else is nice and square.
Step 4. Lay out bathroom floor tiles.
Lay out your bathroom floor tiles along this line starting at the cross you made with the chalk lines. Go from one end of the room to the other.
Make any adjustments based on potential traffic on grout lines and to ensure you don’t have small tiles cuts on either end.
If you are working on this project alone, we would recommend laying out your entire tile project and make all your cuts first. This is called “dry fitting”.
You will not have time to mortar, measure, and cut tiles to fit as you go alone, which can get a little stressful when you’re going back and forth to the tile saw a million times as your mortar starts to set up.
Don’t forget to use spacers when you are dry fitting the bathroom floor tiles.
Step 5. Cut edges pieces with a tile saw.
Cut any edge pieces as necessary with a wet tile saw.
UPDATE: You’ll see here that we are using this tiny little tile saw and we actually ended up not loving it! Read more here about why we don’t think you should use cheap tile saw like this and why we got so frustrated. You’d be better off renting a nice tile saw for your project or investing in something that work better if you’re going to be tiling more than 1 time. When we started our master bathroom renovation, we ended up investing in this larger tile saw and we love it!
Step 6. Mix up thin set mortar.
Go to your pantry and pull out that jar of creamy peanut butter. Open the lid and take a good look. This is the consistency your mortar should be when you go to lay your tile.
Follow the instructions on your mortar to get it mixed properly. Also, be sure to grab a bucket of water and a sponge/rag so you can clean the mortar and bathroom floor tiles as you go.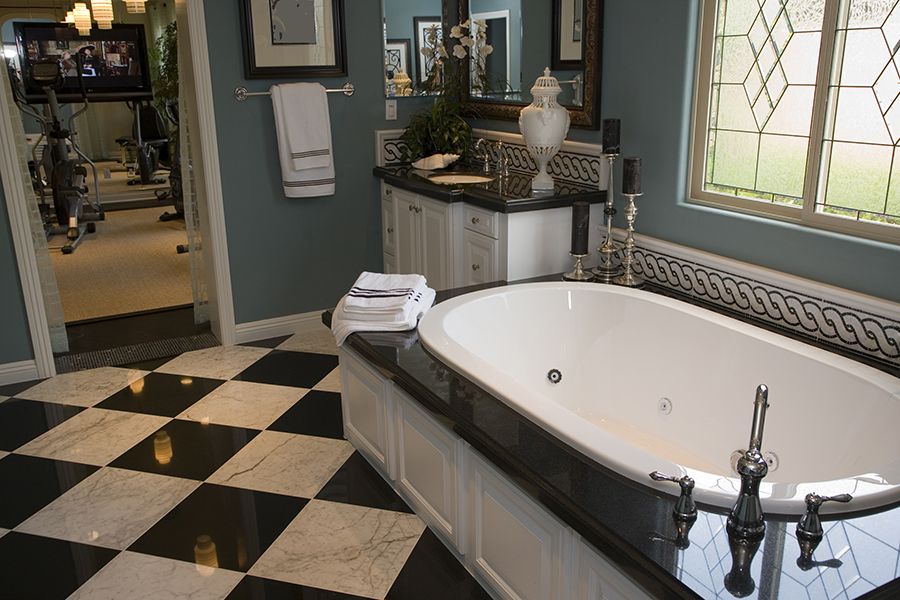
Step 7. Lay bathroom floor tiles.
With mortar mixed and bathroom floor tiles cut and laid out, it’s time to start installing your floor.
Start by removing tile where your chalk cross is, lay down your mortar with a grooved trowel held at 45 degrees.
Make sure your first piece on the floor absolutely square by using your chalk lines. Any flaw here is going to show up in the rest of your design.
Mortar dries pretty quickly so only lay enough for about 2-4 feet of one row at a time.
Gently set the floor tile down on top of the mortar and with even pressure, push down the tile with an ever so slight twist to work out any air bubbles.
When setting your bathroom floor tiles try to get them as close to the other tiles as possible, then add tile spacers and adjust for a tight fit.
You’ll want to be sure you are leveling the edges of the tile to its neighboring tile with a level and a rubber mallet.
UPDATE: On our next bathroom remodel, we tried out these tile spacers and clips and we’re big fans now.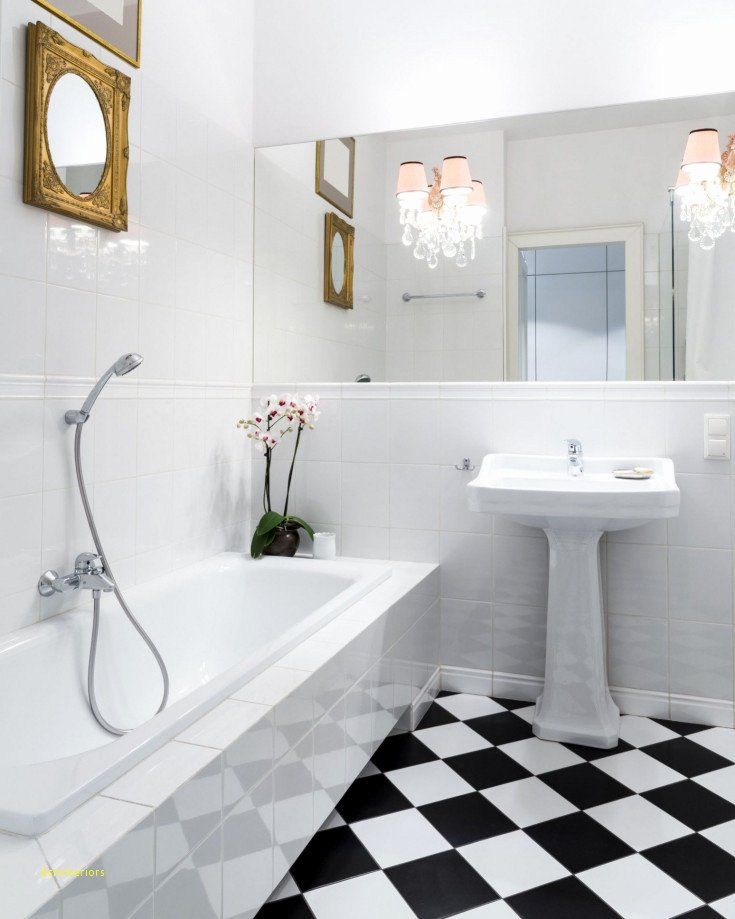 We tried them out for the first time on this renovation and we loved them. They help you space your tile out properly and ensure everything is level and flush.
Step 8. Wait 24 hours before grouting bathroom floor tiles.
Close off the area and wait a full 24 hours before you step back on the floor to grout.
Step 9. Apply grout to bathroom floor tiles
Mix up your grout and start glopping it onto the tiles. Work in small sections and spread grout over tiles with a rubber grout float held at 45 degrees as you skim over and push the grout down into the tile gaps. Work the grout into all of the bathroom floor tile joints.
Step 10. Wash tile surface
Wait about 20-30 minutes and then use a damp sponge to rinse away any “haze” left on the grout. Be sure the sponge is well squeezed so you don’t get too much water on the tile. Repeat until the tile is clean.
Step 11. Celebrate
Once all your tiles are laid, spaced, level, and grouted…. you can celebrate! You did it!
Do you have leftover tile? Check out what to do with leftover tiles here and then see what we did with the leftover marble tiles to make these DIY marble coasters.
Bathroom tile flooring is a project that may seem a little overwhelming, but it’s really fairly simple.
Hopefully this step by step tutorial for how to tile a bathroom floor was helpful for you to learn everything you need to know if you’re going to do it yourself.
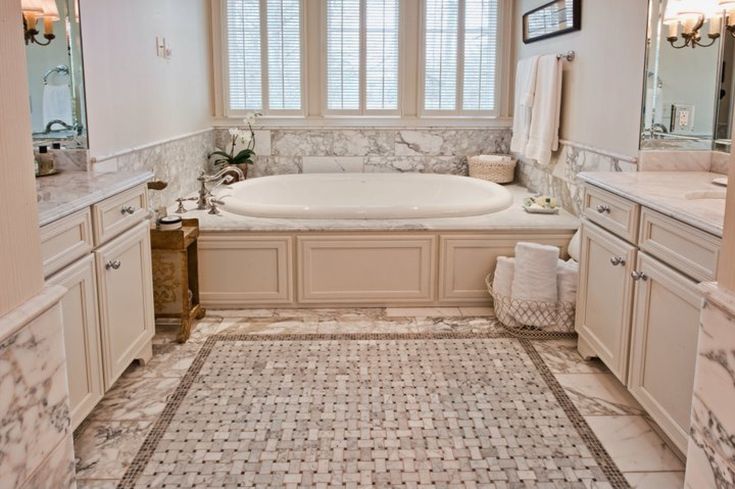
Here’s a quick look at the bathroom all finished and prettied up with decor!
click here to see the finished bathroom reveal and all of the sources!
Materials
- 1/4” WonderBoard
- Cement Board Screws
- Bathroom Floor Tiles
- Thin Set Mortar
- Grout
Tools
- Level
- Tile Saw
- Sponge
- Grooved Trowel
- Rubber Mallet
- Chalk Line
- Spacers
- 5 Gallon Bucket
- Rag
- Rubber Grout Float
Instructions
- Ensure level and clean floors.
- Lay wonderboard.
- Line up tile placement.
- Lay out bathroom tile floors.
- Mix up thin set mortar.
- Start laying bathroom floor tiles.
- Wait 24 hours before grouting bathroom floor tiles.
- Apply grout to bathroom floor tiles.
- Wash tile surface.
Install a Ceramic Tile Floor In the Bathroom (DIY)
Learn how to install tile — specifically, how to lay new ceramic tile over an old vinyl floor.
Time
Multiple Days
Complexity
Intermediate
Cost
$101–250
Introduction
Whether you're replacing an old shabby bathroom flooring tile or installing a new one, you can't beat ceramic or stone tile for durability and appearance. When laid properly, it's virtually a forever floor tiling that requires almost no care and maintenance. And you can select materials from a vast array of colors and textures.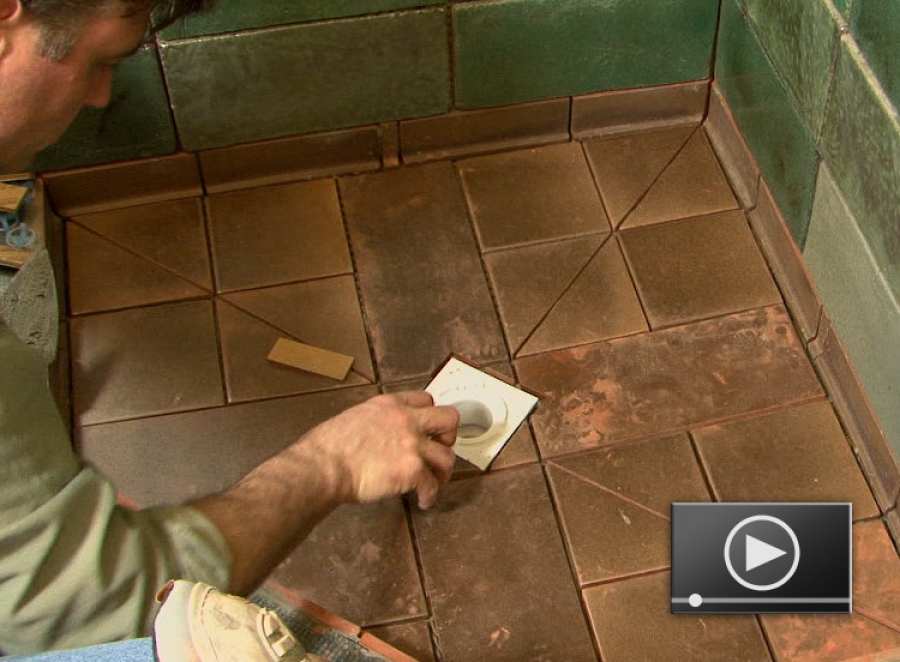
What's equally attractive is that you can lay a first-class tile floor yourself, often in one weekend, and save the $500 to $1,500 cost of hiring a pro. If you're comfortable using basic hand tools and have the patience to align tiles just right, you can handle laying tile.
Tools Required
- 4-in. diamond blade
- Angle grinder
- Bucket
- Caulk gun
- Chalk line
- Cordless drill
- Drill mixer
- Drywall saw
- Dust mask
- Grout float
- Knee pads
- Margin trowel
- Nippers
- Notched trowel
- Offset saw
- Putty knife
- Safety glasses
- Scoring knife
- T-square
- Tape measure
- Tile cutter
- Utility knife
- Wet saw
Materials Required
- #12x2" stainless steel screws
- 1/4-in. tile backer board
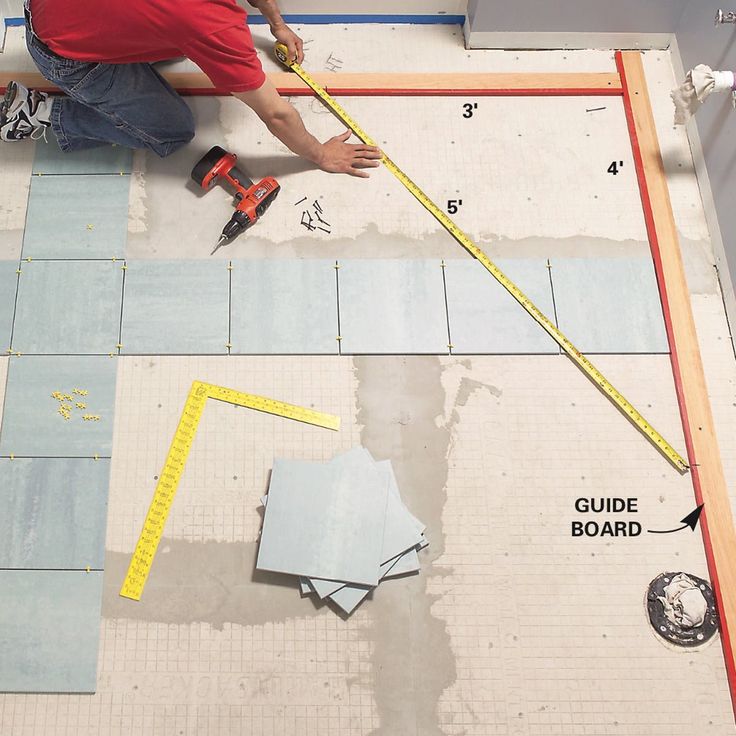
- 1x4 guide boards
- 2-1/2- galvanized screws
- Acrylic additive
- Alkali-resistant mesh tape
- Backer board screws
- Backer rod
- Construction adhesive
- Duct tape
- Sanded caulk
- Sanded grout
- Silicone caulk
- Thin-set mortar
- Toilet extension ring
- Transition threshold
- Wax ring
Estimating the Cost of a Tile Project
The tile itself will be your biggest cost, so start by measuring the square footage of the floor. Then add 10 percent for cutting waste. If you choose a more complex layout than the simple grid pattern we used, your waste will be greater.
Most tile sells for $5 to $15 per square foot, but you can spend as little as $3 or more than $50. If you have to install a backer board, add $2 per square foot to the cost of the tile. Other materials will cost about $90, regardless of bathroom size. The tile tools you’ll need (including a tile cutter) will total $60 to $80.
Assess Your Floor
The success of any tile job depends on a solid base — a floor that flexes very little as you walk across it. If you have a concrete subfloor, this isn’t an issue. You can lay tile directly over the existing vinyl as long as it’s well adhered.
If possible, avoid tearing out vinyl flooring. Leaving it in place saves time, of course, but it also reduces asbestos hazard concerns. Asbestos was used in sheet vinyl and vinyl tile until the mid-1980s. By leaving the vinyl undisturbed, you won’t risk sending asbestos fibers into the air.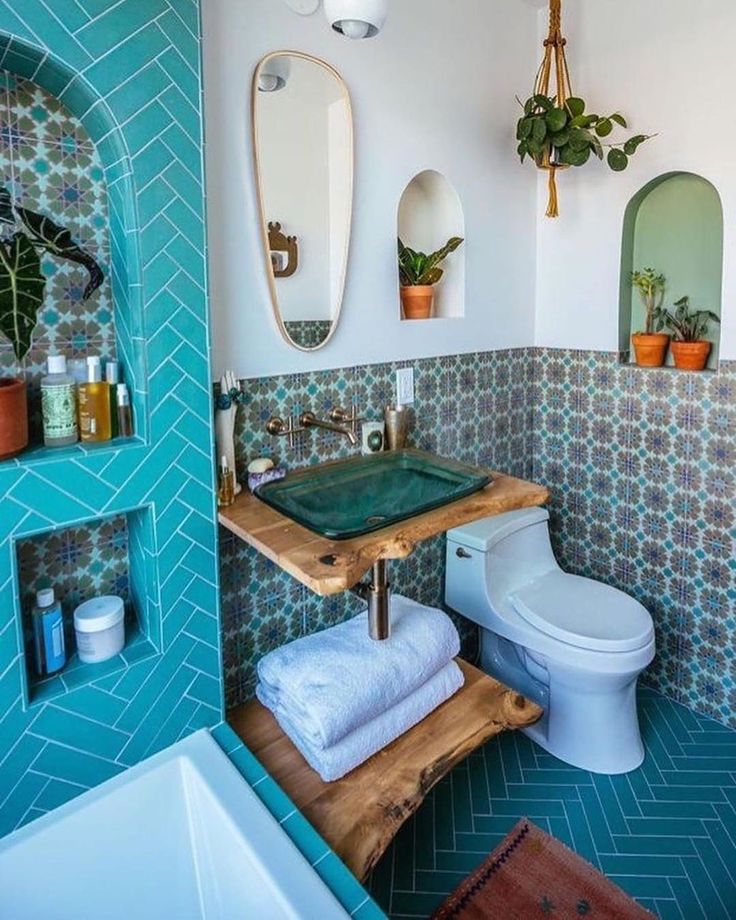
If you have a wood subfloor, there’s a good chance you’ll have to install a backer board over your vinyl to make the floor thicker and stiff enough for tile. The easiest way to see flooring thickness is to pull off a floor register. Otherwise, look for plumbing passageways through the floor. As a last resort, drill through the floor with a one-inch or larger spade bit (your new floor will cover the hole later).
To prevent asbestos dust from becoming airborne, mist the bit with a spray bottle as you drill. In addition to floor thickness, you’ll need to determine joist spacing. If there’s an unfinished basement or crawlspace below the floor, simply measure the spacing. If there’s a ceiling, probe for joists with a drill bit.
If the joists are spaced 16 inches apart, the layers of structural flooring beneath the vinyl should add up to at least 1-1/8-in. With joists every 24 inches, you need 1-1/2-in. If your floor is too thin for tile, add a thicker layer of tile backer board. Our floor required 1/4-in.-thick backer. Yours might need 1/2-in. backer to reach the minimum thickness.
If your floor is already thick enough, you can simply prep the vinyl floor (Photos 1 – 4) and skip the backer installation (Photos 5 – 8). Then tile directly over the vinyl, following the same steps we used over the backer board.
Regardless of the type of subfloor, there are two situations where you can’t leave vinyl in place.
First, if large areas of the vinyl are loose, don’t set tile or backer over it. Small loose spots are acceptable and easy to deal with (Photo 4).
Second, “cushioned” sheet vinyl must be removed before you can set tile. Cushioned vinyl has a foam backing that makes it noticeably thicker and softer than standard vinyl flooring. It’s too spongy to support tile or backer board. Before removing it, call your local health department for instructions on how to check for asbestos and proper procedures if asbestos is present.
Gather Advice While You Shop
Home centers carry everything you need for this project, but begin shopping at a tile store, where you’re more likely to get expert advice on how to lay tile.
Make a quick sketch of your floor plan and jot down all the dimensions. Also, take a photo of the floor at the doorway. This will help the tile store staff recommend a “transition” to neatly join the tile to the hallway flooring. Transitions come in different styles to suit any situation.
When you choose the tile itself, ask if it requires any special installation steps. Some tile should be coated with grout release before grouting. Also, ask about cutting techniques for the tile. You’ll use sanded grout for the floor. Ask if sanded caulk is available in a color that matches your grout for the floor/tub and floor/wall tile joints.
-
- Pro tip: When learning how to install tile, understand that cement products like thin-set and grout draw moisture from the skin and can even cause burns that require medical attention.
 While most pros work bare-handed, wear gloves if you have any special sensitivity. Also, wear eye protection while mixing thin-set and grout.
- Pro tip: When learning how to install tile, understand that cement products like thin-set and grout draw moisture from the skin and can even cause burns that require medical attention.
Project step-by-step (16)
Sign Up For Our Newsletter
Complete DIY projects like a pro! Sign up for our newsletter!
Do It Right, Do It Yourself!
Originally Published: January 07, 2019
Similar Projects
How to lay tiles in the bathroom: step by step instructions - INMYROOM
Tips
A professional decorator, artist and blogger explains how tile joints, knots and seams should look in modern bathrooms and bathrooms
If you want to get the bathroom of your dreams, you will have to find the best tile installer in the world. And so that you can speak the same language with him and know exactly what you want, you must know the secrets of perfect joints and seams the way decorator Oksana Panteleeva knows them.
Oksana Panteleeva
Decorator
A historian by profession, Oksana Panteleeva became a decorator and stylist after graduating from the "Details" school. In his apartment, he remodels and repaints something every day and shares his experience in the blog “On the Wave of Decor”
Where to start?
When you begin to draw your tiling story on the layout of the wall, then:
1. First, draw a plan with the arrangement of all furniture and plumbing fixtures.
2. Decide on the location of decors (tiles with decor), depending on where you will have the most beautiful wall, and where you will just have a wall ... beautiful, but not so important.
3. Find the center of your layout. I advise you to walk from the center in most cases, if you are not a pro and do not do this every day.
4. Calculate how the decors will go along the wall: symmetrically to each other, or just a strip in the center (not centered), or the entire wall along the bath - one big decor.
5. Think carefully about the beginning of the tile laying: where you will start the step and where you will end it.
6. Decide how the joints will look: with a plinth, with a cornice, with a floor without a plinth, with a ceiling without a cornice.
7. think over all the corners, both internal and external: do you need special ceramic corners (many collections have them), or the master will cut the tiles at 45 degrees.
8. Consider the layout of the floor together with the layout of the walls in order to understand how the seams will join, how the carpet (for example, metlakh) will be located in relation to the furniture. Wouldn't it turn out that we draw a beautiful carpet, and then it will not be visible from under the bath?
A few unspoken rules
1. We start laying out the tiles from the edge of the bath, that is, there must be a whole tile above the bath.
2. The whole tile is usually left at the wall-ceiling joint.
3. Cut tiles go to the wall-floor joint.
Trimming tiles
If there are a lot of trimmings, I suggest first looking for a variant of a different format. Maybe you will find the perfect tile with the perfect size, and you will have a minimum of cut joints.
You can beautifully leave with cut tiles in the corners if half or a little more than half of the tile remains.
Or the pieces of the tile are full extensions of each other, which can often be seen when laying out subway tiles.
The most common mistake is to leave small pieces of tiles in the corners.
But when there is very little space left, and trimming the tile will turn it into a "stub" - this is not very beautiful. Here you can search for a suitable decor by size or mosaic ... or change the tiles.
At one site, I ordered a “factory” trimming of the central tile with edge processing, and put it in the center so that I get whole tiles along the edges, and in the center it’s so narrow, but ONE, and not two stubs along the edges.
Knots and joints
What is a knot in the understanding of a professional when it comes to laying tiles? Knots are places of junction, contact. All corners, internal or external, all undercuts, all transitions from decors to decors, we will call knots.
Let's agree - we forget about plastic corners once and for all. For a beautiful bathroom, this is terrible! And no matter how much the builders tell you that other options are impossible, it's expensive, it's impractical ... don't be persuaded. So they don't know how to do it, that's all.
Tip: you should know that there are collections in which there are external and internal corners for folding tiles, corners with decor.
Maybe you won't injure the craftsman, but find such a collection right away (as a rule, from elite manufacturers).
Advice #2: tiles are convex, voluminous, with decor are really very bad for cutting, joining and so on. The master must be a super pro!
And a few more important rules from the pros
Vitaly Likhov
expert
Founder of SM-HOME and VITSET
to frosting. The disc will not cling to it, it will not break off in pieces. If this option is unacceptable, see the next paragraph.
2. Hedgehog method (they cried but pricked). The tile is cut on a machine with a large margin to the required point, and then it is manually sharpened with any grinding tools.
3. It is necessary to have a skill of the corresponding level from the master. Everything is clear here.
4. Availability of a good tool, machine tool. No matter how magical the master may be, but if the circle “beats”, then the result for chips will be appropriate.
5. Availability of time. This is manual labor, requiring significant labor costs. If the task is to do well, it is necessary to allocate time for this.
6. Increased supply of tiles. Cutting under 45 significantly increases the risk of splitting tiles, regardless of skill.
Cover photo: project by Natalya Kupreychuk
How to lay tiles in the bathroom beautifully: layout options
Of course, no one will forbid you to live beautifully; taken bathroom. And we will start by telling you how to lay beautifully ceramic tiles in the bathroom. What’s more, there are plenty of ways to do it. Finishing the bathroom with ceramic tiles is the best option of all. An extensive selection of sizes and shapes, a variety of tile colors, makes it possible to express individuality in the interior of the bathroom.
You can, of course, lay tiles of the same color, and this has its advantages, but if you combine tiles of two or more colors, you can, in addition to the aesthetic side, solve a number of other problems. For example, to correct some of the shortcomings of the room, or to highlight the functional areas of the room.
How to decide on the choice of design
Before laying tiles in the bathroom, you need to study all the possible options for laying tiles applicable to your room and only then stop at the right one. The design should be designed before the repair work, because the choice of material, with what pattern and what size the tile should be, will depend on the decision you make on the interior.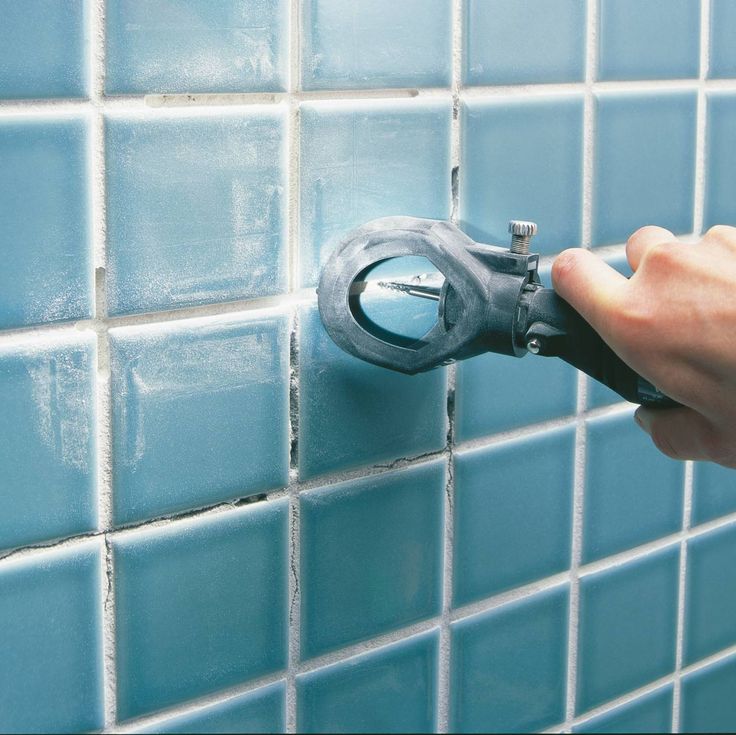 To combine wall and floor tiles, as well as the harmony of the cladding with the interior in the room, you need to take into account the following points:
- Geometric parameters of the room. Using a certain size of the tile, its color scheme and the optimal laying scheme, we can achieve a visual change in the direction we need of the volume of the room.
- Availability and location of plumbing and furniture. Interior items should match the tiling and be combined with the tile pattern.
- Illumination in the room. When planning, it is necessary to exclude the possibility of dark zones and unwanted reflections on the surface.
Possible tile layouts
If you know how to combine different tile laying options, you can get not only a beautiful room, but also an original design of the room.
A wide variety of tiling options are available.
- Standard pattern or straight lay. Tiles with this method are laid out seam in seam without shifting in rows.
As a rule, square-shaped tiles are used, but rectangular tiles also look good.
- Offset tiling. In this case, the lining is carried out like brickwork. Often used for flooring. Allows you to hide minor defects.
- Diagonal installation. The tile is located at an angle of 45 degrees to obtain diagonal rows. The option is one of the most difficult to implement, firstly because of the large amount of cutting, and secondly, in the obligatory precise marking of the axes. The advantages of this method of cladding include the ability to level out surface irregularities, and the area of \u200b\u200bthe room at the same time visually increases. In shortcomings, we write down an excessive amount of waste due to the need to cut tiles adjacent to the walls.
- Herringbone. It is mainly used for flooring, tiles are glued in the form of parquet. There are two kinds.
- Traditional parquet method.
- Attachment method, small inserts of other colors or patterns are inserted into the general background.

Having decided on the laying scheme, let's consider the existing options for laying tiles in the bathroom.
Wall panel
Tile wall panels are an excellent option for the bathroom
Without exaggeration, the most common option for laying tiles in the bathroom. The lower part of the wall along the entire perimeter is tiled with darker tiles, the rest of the area is laid with light tiles. You can also separate the lower and upper parts of the wall with a decorative frieze or border. At the same time, the floors can both match in color, and enter into contrast with the wall.
Horizontal stripes
Horizontal strip encircling the tub to expand the space
Can be narrow, made of decors, or wide, up to several tiles in height. They are located in any plane of the wall and can be of two or more colors. The method allows you to visually increase the width of the room.
Vertical stripes
As in the above version, the stripes are both narrow and wide, but their length and location are different:
Vertical stripes add volume and give the atmosphere a feeling of lightness
- From floor to ceiling.
- From the ceiling, not reaching the floor.
- From floor to ceiling.
- Stripes starting and ending at different sections of the wall.
Floor with curb
One or two lower rows of the wall are made of floor tiles. The method allows you to visually expand the room somewhat, but at the same time underestimate it a little.
A border in small baths is used as a last resort
Accent pieces
The main principle of the method is the use of contrasting tiles or tiles of other colors to highlight functional areas against the general background of the layout. To date, the option is very popular, while the undesirability of its use for small rooms should be taken into account.
Equalization of colors
Today, many people use checkerboard patterns of ceramic tiles
The basis of the method is that different walls, or sections of walls, can be tiled in different colors, highlighting separate functional areas, for example, a bathroom or locker room, washbasin or shower. In this case, the colors should not mix with each other. Applying the method of equality of colors, floors can be laid in two ways:
- Checkerboard.
- Color combination in the middle of the room.
Patchwork or kaleidoscope
The origin of the word "patchwork" comes from the English "patcwork" and means a patchwork quilt. Actually, in fact, we observe a patchwork blanket when using this option. The decoration in the room is bright and cheerful, like pictures in a kaleidoscope. Tiles with different patterns and colors are randomly laid on the surface.
Patchwork is one of the latest trends in tile fashion
Splashes
The entire area of the walls of the room is laid out with a single-colored tile, and only in some places and randomly are inserts made of several tiles of a different color, which in some way resembles drops of water or splashes. This option should be used only in fairly spacious rooms.
Bathroom interior Splashes of summer
Photo print
An option worthy of attention for lovers of individuality, because any picture that you want to see on your wall can be ordered as a photo print on a tile.