How to take care of bell pepper plants
How Do I Grow Peppers At Home
Home › Edible Gardens › Vegetables › Peppers
Peppers
By: Caroline Bloomfield
Image by numxyz
Like most gardeners, when you’re planning your vegetable garden, you’ll probably want to include bell peppers. Peppers are excellent in all sorts of dishes, raw and cooked. They can be frozen at season’s end and enjoyed in dishes throughout the winter.
Brush up on some bell pepper info to learn all about growing these delicious and nutritious vegetables. A little knowledge about pepper plant care will go a long way.
What Growing Peppers Need to Get Started
Growing bell peppers isn’t difficult, but temperature is an important factor. While they’re fairly easy to grow, pepper plant care in these early stages is critical.
Always start pepper plant seedlings indoors. The seeds need the warmth of your house to germinate. Fill a seed tray with seed starting soil or well-draining potting soil, placing one to three seeds in each container. Place the tray in a warm location or use a warming mat to keep them between 70 to 90 degrees F. (21-32 C.) – the warmer the better.
If you find it helpful, you can cover the tray with plastic wrap. Water droplets will form on the underside of the plastic to let you know the baby seeds have enough water. If the drops stop forming, it’s time to give them a drink. You should begin to see signs of plants popping up within a couple weeks.
When your little plants get to be a few inches tall, gently pot them separately in small pots. As the weather begins to warm, you can get the small plants used to the outdoors by hardening the seedlings off – putting them out during the day for a bit. This, along with a little fertilizer now and then, will strengthen them in preparation for the garden.
When the weather has warmed up and your young plants have grown to about 8 inches tall (20 cm.), they can be transferred to the garden. They’ll thrive in soil with a pH of 6.5 or 7.
How Do I Grow Peppers in the Garden?
Since bell peppers thrive in the warm seasons, wait for the nighttime temperatures in your region rise to 50 degrees F. (10 C.) or higher before transplanting them to the garden. Before you plant peppers outdoors, it’s important to be absolutely certain that the chance of frost is long gone. A frost will either kill the plants altogether or inhibit pepper growth, leaving you with bare plants.
Pepper plants should be placed in the soil 18 to 24 inches (46-60 cm.) apart. They’ll enjoy being planted near your tomato plants. The soil should be well drained and amended before you put them into the ground. Healthy pepper plants should produce peppers throughout late summer.
Harvesting Peppers
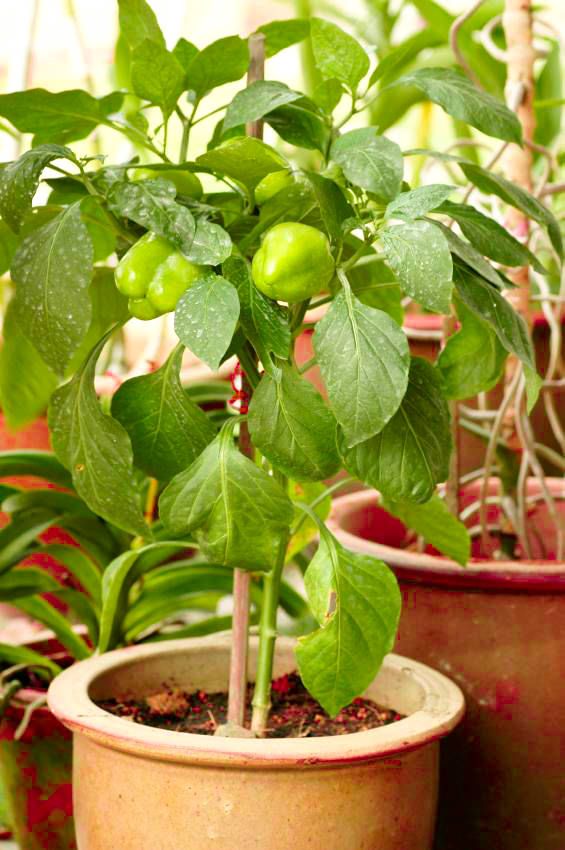
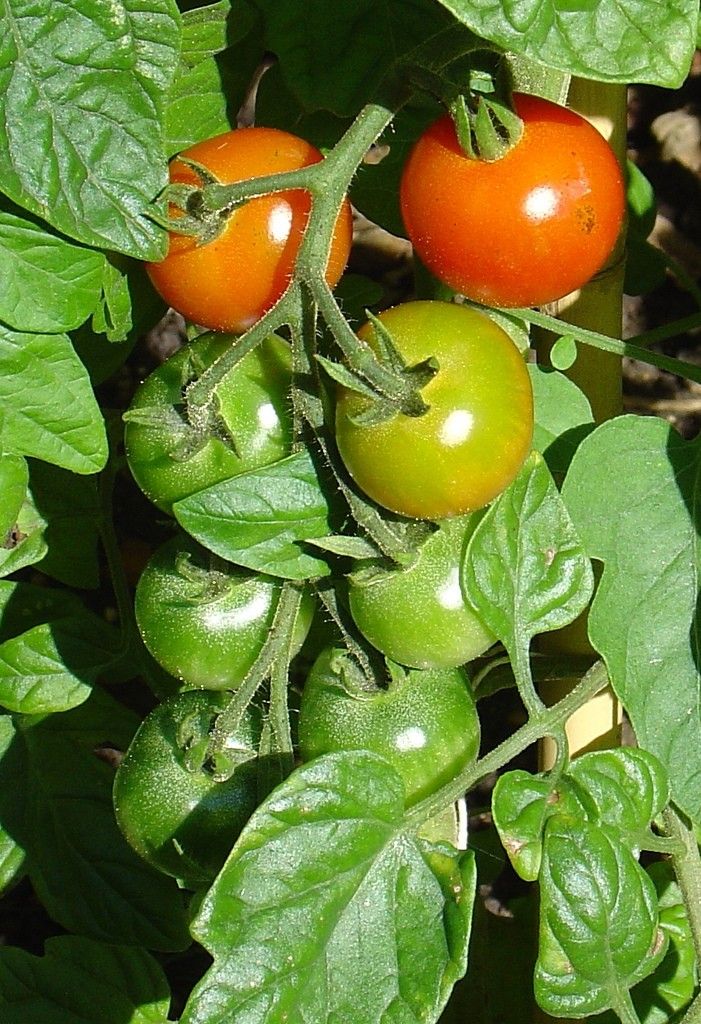
It’s easy to determine when your peppers are ready to harvest. Begin to pick the peppers once they are 3 to 4 inches (7.6 to 10 cm.) long and the fruit is firm and green. If they feel somewhat thin, the peppers aren’t ripe. If they feel soggy, it means they’ve been left on the plant too long. After you harvest the first crop of peppers, feel free to fertilize the plants to give them the energy they need to form another crop.
Some gardeners prefer red, yellow or orange bell peppers. These varieties just need to stay on the vine longer to mature. They’ll start out green, but you’ll notice they have a thinner feel. Once they begin to take on color, the peppers will thicken and become ripe enough to harvest. Enjoy!
This article was last updated on
Read more about Peppers
Did you find this helpful? Share it with your friends!
You might also like…
Beginner’s Guide on How to Grow a Bell Pepper Plant
If you’ve just started planning the perfect layout for your veggie garden, you might be looking for some ideas on what to grow. As temperatures slowly start to rise in the spring, you may be dreaming about vibrant tomato vines, mouth-watering cucumbers, or the perfect bell pepper plant.
While bell peppers might not be the easiest fruit to grow — yes, just like tomatoes, bell peppers are technically a fruit — they are certainly well worth the challenge. These warm-weather species make a great addition to refreshing salads or as a healthy afternoon snack. They’re also great eaten raw or cooked.
With that in mind, it’s time to learn the fundamentals of growing a bountiful bell pepper plant. We’ll show you the different types of peppers to consider and the basic elements needed to cultivate these delicious, versatile, and crisp veggies (er, fruit).
Peppers 101: Pepper VarietiesBefore we get into the technicalities of growing bell peppers, it’s important to understand a few basic things.
The bell pepper plant (Capsicum annum) belongs to the nightshade family, which spans more than 2,300 species, including eggplants, potatoes, and tomatoes. One of the greatest attributes of peppers is that they come in a variety of colors, shapes, and sizes, making them one of the most versatile foods used in many different cuisines worldwide.
Unlike their spicier cousins — like jalapeños and serrano peppers — bell peppers do not contain capsaicin, the compound responsible for pungency and heat in hot peppers.
Ever wondered if green bell peppers and red peppers come from different plants? Well, they’re actually the same pepper that are simply at different maturity stages. They start green, but if you leave them to mature on the plant long enough, they’ll eventually achieve their full color: a bright and deep crimson red.
Fun fact: The longer you allow your bell peppers to mature, the higher their vitamin C content. Red bell peppers that are allowed to mature fully also have a sweeter flavor!
While peppers are quite resilient to garden pests, you may want to opt for resistant varieties to ensure your pepper-growing experience goes smoothly. Some of the best species include:
- Green peppers that turn into red sweet peppers: Sweet red Marconi, Lady bell, Gypsy, Lipstick, Bellboy, Sweet California wonder
- Orange peppers: Orange sun, Milena
- Yellow peppers: Golden California wonder, Honey bell, Marengo
No matter if you decide to grow just one type of bell pepper plant or you want to put your gardening skills to the test with a pepper bundle, you’ll need to learn the basics of how to grow thriving and healthy plants.
The first thing you should know about bell pepper plants is that they’re quite sensitive to cold temperatures, so it’s a good idea to start them indoors before their growing season begins (spring/summer).
Keep in mind that sweet bell peppers have a long growing season — they take between 60 to 90 days from sowing to harvesting — so the sooner you get started, the better. It’s recommended to sow your bell pepper seeds 8 to 10 weeks before your last spring frost date. You can use the Back to the Roots grow calendar to find out when that is.
Germination occurs within 10 days, and once the first set of true leaves appears, you can begin transplanting them outside if that’s your goal. (Bonus: Bell pepper plants can also be grown indoors.)
But before you move your bell pepper plant out into the open, make sure to check that the nighttime temperatures do not go below 70°F, as this may shock your young plants and contribute to their premature demise. The best way to support these plants is to wait for the last frost danger to pass.
As a true warm-weather crop, bell peppers love direct sunlight and full sun, so place them in a location where nothing is blocking the light. If you live in a climate with extreme high heat and intense sunlight, your peppers may be susceptible to sunscald, especially the younger leaves and more tender fruits. While they may look aesthetically unappealing, sunscalded bell peppers are still edible and equally tasty.
Bear in mind that to produce large and healthy fruit, pepper plants need plenty of full sun, at least 6 to 8 hours every day.
Don’t Water Too MuchFinding the right watering balance is the key factor to a thriving bell pepper plant. Since sweet bell peppers cannot tolerate extremely high temperatures, it’s essential to water them appropriately to prevent diseases. If you live in a desert climate or experience a very dry summer season, it may be necessary to hydrate your plants daily — especially in the early morning or evening to prevent water evaporation.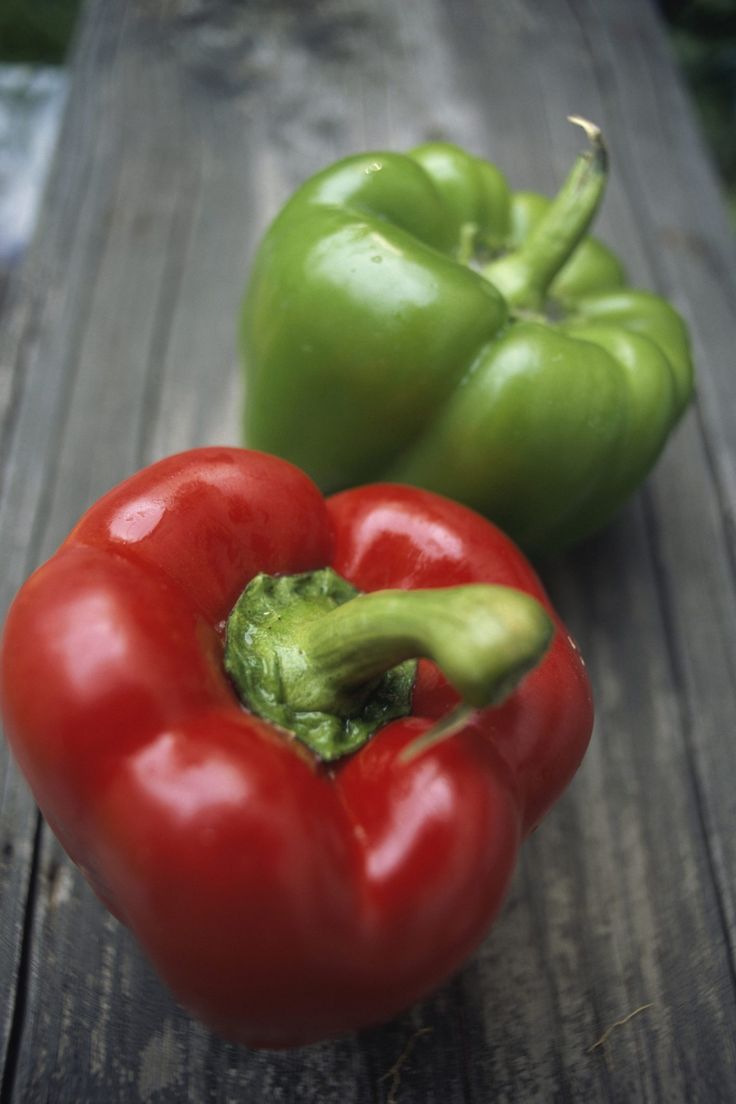
To avoid diseases and pests, such as anthracnose or blossom end rot, avoid overhead watering and make sure you water deeply and evenly at the base of the plant. By doing so, you encourage the development of a strong and healthy root system, which in turn will make your plant more resilient to overcome any bumps in the road.
Select the Perfect SoilBell pepper plants prefer sandy to loamy soil, which is enriched with organic matter. You can either buy a potting mix with these characteristics or purchase all the elements individually and create your own. If you’re not sure what the best option is, don’t be shy — ask one of the staff members at your local Home Depot Garden Center for an opinion.
Note: Fertilizing is an important step in vegetable gardening. But don’t go crazy and over-fertilize as it usually encourages your plant to grow more foliage and produce less fruit, which is obviously not the goal.
Since water is vital for growing bell peppers, choosing the proper soil is undoubtedly the best way to ensure optimal moisture levels. These plants don’t like wet feet, so opting for sandy, loamy soil will ensure good drainage and help the soil temperature rise quicker, a key factor in the cultivation of bell peppers.
Equally important is the soil pH. Veteran gardeners claim that a slightly more acidic soil (between 6.0 and 6.8) is the optimal environment for your bell pepper plant to yield a bountiful harvest. Mixing some coffee grounds into the potting mix is a natural, eco-friendly way to balance the pH levels of the soil and support your plant’s growth.
Pro tip: To prevent blossom end rot — which is primarily a calcium nutrient deficiency — crush some eggshells and add them to the soil. It’s an easy, organic way to provide your plants with an extra nutritional boost.
To speed up the warming of the soil and help retain some moisture during hotter days, consider covering it with a dark mulch.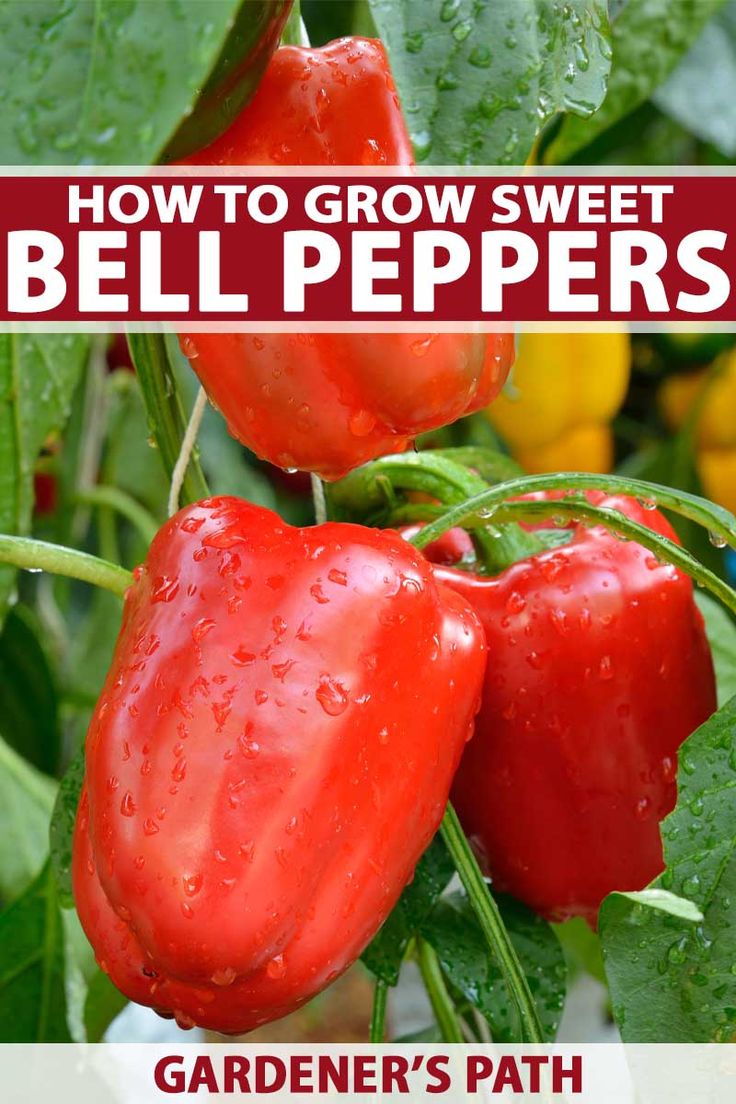
If you live in a small apartment with a tiny balcony and think you don’t have enough space to grow bell pepper plants, think again!
Bell peppers are a perfect match for container gardening and raised beds, so you can easily squeeze them into even the smallest spaces. Since these veggies (OK, fruits) require good drainage, a raised fabric bed — like this one from Back to the Roots — is a fantastic and affordable home for your bell pepper plant.
The Back to the Roots Fabric Raised Beds are made with durable felt and are double stitched, so you can easily move them around without worries. They also come with internal grow walls to prevent root tangling between different plants, which means you can plant all sorts of different veggies, herbs, and houseplants simultaneously.
Keep in mind that, like tomatoes, bell peppers benefit from some type of staking or structural support./flapjack-succulent-plant-profile-5073225-04b-e089566baeae4575a0cc4eaaf44453ab.jpg) Tomato cages are a great alternative, and they’re easy to set up. Just make sure you put them in place when the plants are still young, as it can be tricky to position them around fully mature plants.
Tomato cages are a great alternative, and they’re easy to set up. Just make sure you put them in place when the plants are still young, as it can be tricky to position them around fully mature plants.
The coolest thing about peppers is that they come in all sizes and shapes, and you can find a variety that caters to your taste. From sweet to spicy, they offer a great range of flavors that will take your cooking to the next level.
While growing and maintaining a bell pepper plant does come with its challenges, you’ll feel incredibly proud when that first tiny pepper makes its debut in the world. To learn more tips and tricks for cultivating these crunchy and delicious edibles, check out our comprehensive guide on how to grow peppers from seed to harvest.
How to care for peppers during flowering and fruiting
Pepper ranks third in popularity in garden greenhouses and hotbeds of Russian gardeners. With proper care, it gives excellent harvests of multi-colored healthy fruits, from which the most diverse and delicious home-made canned food is prepared for the winter.
About the origin of pepper, how to grow its seedlings and plant them in a greenhouse or greenhouse, as well as further care for plants, we have already talked about in the article: "How to grow peppers".
Today we will talk about the most important period in the development of this heat-loving crop - the beginning of flowering and the entry into fruiting. We will tell you in detail how to care for peppers at this time.
There are certain subtleties here, ignorance of which can lead to partial or complete loss of the crop.
HOW TO CARE FOR PEPPERS AFTER FLOWERING
Pepper is a rather capricious culture. You can plant beautiful seedlings in a greenhouse, but not get a harvest. It all depends on the knowledge of the biological characteristics of this plant and, accordingly, properly organize its care.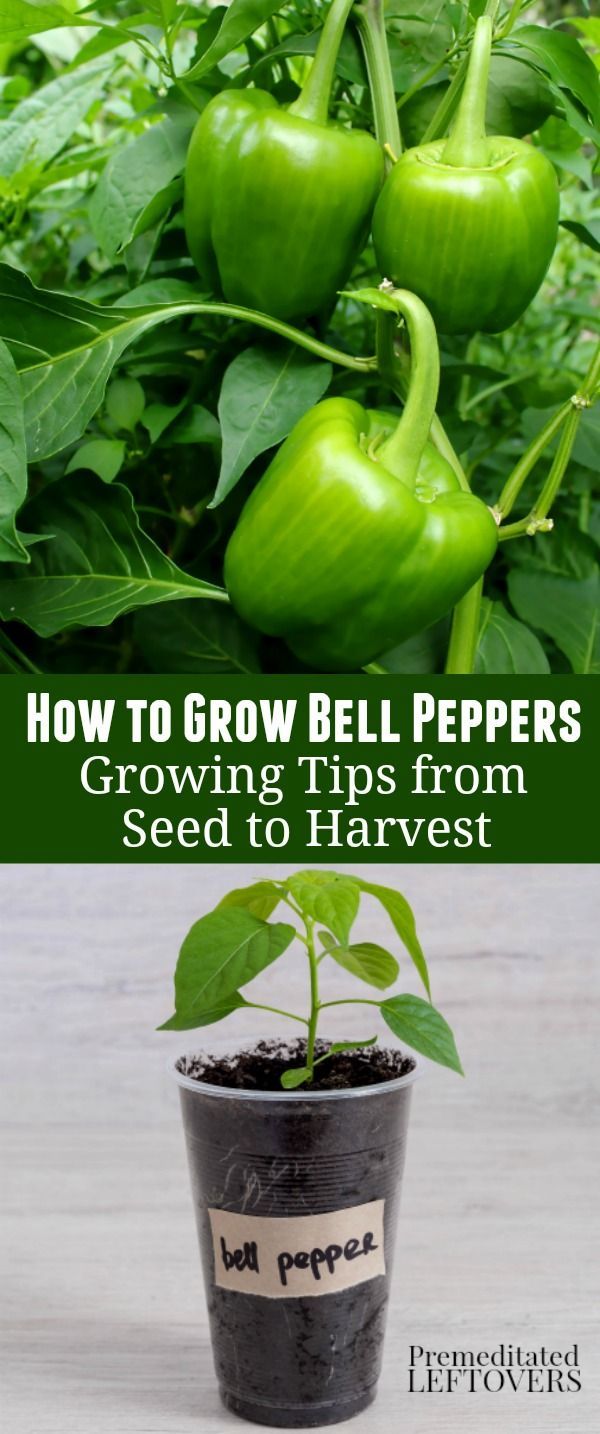 This is especially important during the flowering period.
Pepper is a thermophilic crop that needs a lot of sun to grow and develop. Good lighting is especially needed during the period when the buds appear, otherwise the flowering will be weak, and hence the harvest will be small.
In film greenhouses and open field, it is necessary to monitor the differences in day and night temperatures, as well as uneven exposure to humidity. Under such conditions, peppers must be covered with a film or non-woven material, otherwise the flowering time may be significantly delayed.
Temperature control. The temperature in the greenhouse is very important. The optimum air temperature in it for good growth of peppers is + 25 ... + 26 degrees. When it drops to +17 degrees, plant growth is inhibited.
If the temperature rises above +29 degrees, the pollen becomes dense, pollination stops, and the flowers begin to dry out and fall off.
In polycarbonate greenhouses, when the temperature rises to a critically high level, ventilation is organized.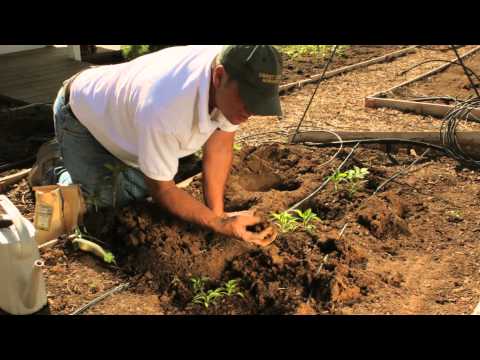 But it should be remembered that pepper does not tolerate drafts! Therefore, doors and windows are opened only on one side.
In very hot weather, cover greenhouses with white sheets or non-woven covering material to protect from direct sunlight.
Irrig. Without good watering, juicy fleshy fruits simply cannot be obtained. For early and friendly flowering of pepper, watering plays a huge role.
Peppers should only be watered with warm water! From the cold, all processes of growth and development in plant tissues slow down, pollination worsens. The fruits grow ugly and are also bitter.
In the greenhouse, peppers are watered 2 - 3 times a week and very plentifully - one watering can for one adult plant. It is very good to water the pepper once a week not with clean water, but with an infusion of fermented grass. This will serve as additional nutrition for the plants.
Low-growing varieties and hybrids are watered very carefully - right under the root, so that water does not get on the flowers.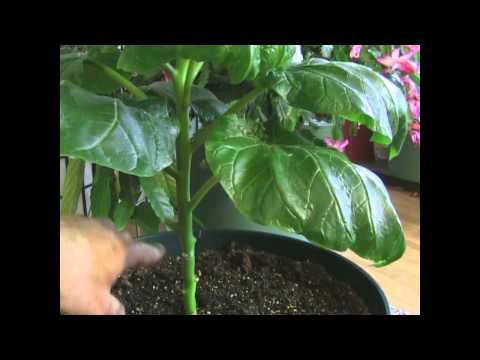 This will prevent pollination.
Should be watered either early in the morning or in the evening, but not in hot weather. Otherwise, leaf burns may occur and a soil crust will actively form.
To prevent this from happening and keep the moisture well around the roots of the plants, mulch the bed in the greenhouse with straw or hay. This technique will still prevent the growth of weeds in greenhouse beds.
Thoroughly loosen all plants before doing this. You need to loosen with a small chopper and very carefully so as not to damage the delicate roots located close to the surface of the earth.
After the beginning of mass ripening of fruits, watering is reduced to once a week.
Fertilizer. For friendly flowering and active formation of ovaries, peppers need good nutrition, and first of all, macronutrients such as potassium, nitrogen, phosphorus and a number of microelements.
Immediately after the start of flowering, experts advise feeding all plants with a solution (per 10 liters of water) of urea (1 teaspoon), potassium sulfate (2 teaspoons) and superphosphate (3 teaspoons). Since superphosphate is poorly soluble in water, it is first poured with boiling water for 2 days.
Three weeks later, one more feeding is carried out with potassium sulfate and superphosphate with the addition of wood ash to the solution, which contains more than thirty useful microelements.
Formation of bushes. To obtain a good harvest of large, juicy peppers, it is necessary to remove excess shoots on the bushes, which will take away the strength of the plant and thicken the bushes.
All shoots that appear below the first fork are carefully broken off. At the same time, the crown is thinned out so that the pepper bush is well ventilated and illuminated by the sun.
This must be done before flowering begins, otherwise it will be weak and the plants will produce very few fruits. In addition, they will be small and thin-walled due to lack of nutrition.
This operation is carried out two to three times a month. The shoots are broken off very carefully, since the stems of the pepper are unusually fragile and can be easily damaged. Places of broken stepsons are powdered with wood ash or point-burned with a solution of potassium permanganate.
Tie to supports. How to care for peppers if their bushes do not have sufficient support? After all, if peppers are not tied up at the beginning of flowering, then under the weight of ripening fruits they will “fall” to the ground or simply break.
Plants of low-growing varieties can be tied to pegs, but tall ones need serious support. Modern hybrids grow up to 1.4 m in height and are able to form up to thirty fruits on one bush.
Such plants must be firmly fixed, otherwise they will definitely break. In a greenhouse, it is best to make a horizontal trellis. To do this, horizontal ropes, wire or thick twine are stretched under the ceiling along the rows of plants.
To it, from each plant, a vertical rope is pulled upwards, which is attached under the third pair of leaves using an air loop. At the top, the rope coming from the bush is loosely fastened, leaving a free end so that as the plant grows, the length of the trellis can be adjusted.
HOW TO CARE FOR PEPPER DURING THE FERTILIZING PERIOD
In most regions of Russia, early and mid-early varieties and hybrids of pepper are usually grown, so that in a rather short summer they have time to fully ripen. From sowing for seedlings to the beginning of fruiting, they usually take from 100 to 115 days.
Top dressing during the fruiting period. Peppers ripen in waves. The first to be harvested are the peppers of the lower tier, then the middle tier, and later the others the upper tier. After collecting peppers from each tier, the plants must be fed.
Feed only with natural fertilizer - either fermented grass or mullein solution. In both cases, wood ash is added to them. Feed at the rate of 1 watering can - for four plants.
Before fertilizing, the plants must be well watered with clean warm water so as not to burn the roots. You can also carry out two separate top dressings with a solution of wood ash (1 cup per bucket of water). Ash is rich in potassium. Fruits need potassium to extend their shelf life.
Growers often argue about the timing of harvesting. Experts recommend harvesting peppers in the phase of technical maturity, that is, when the fruits have fully reached their size, but have not yet turned into a varietal color.
There is also biological maturity, when the fruit has reached the desired size and turned into the appropriate color (yellow, red, green, orange). It comes about a month after the technical one.
If you keep the fruits on the bushes for so long, then the harvest will be at least half as much. And there is no point in this, since peppers plucked at technical maturity, stored in a warm, dry place, will certainly “reach” the desired condition. But the extra fruits will not deprive the plant of the strength it needs to form and ripen new peppers.
THE BEST PEPPER VARIETIES AND HYBRIDS FOR YOUR GARDEN
We told you. How to care for peppers during flowering and fruiting.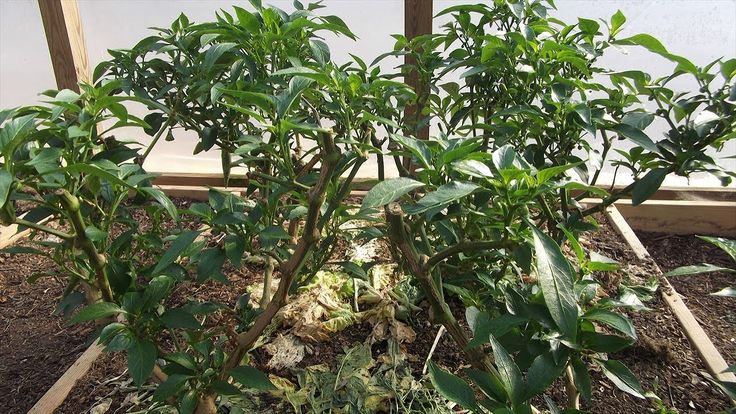 Now you just have to choose the best varieties and hybrids that you can plant next year.
We offer you the best peppers from our collection:
Hot peppers : varieties - Spagnola, Bell, Rokita ; hybrids F1 - Homera, Yanka, Sparkling .
Sweet pepper : varieties - Garden ring, Golden Prague, Sakura ; hybrids F1 - Iceberg, Altair, Tevere, Chizhik, Ombrone, Caliph, Bucket, Barbie, Gemini, Love, Leader, Jupiter, Orange beauty, Frant, Favorite, Orange miracle, Gypsy, Eskimo, Raphael, Cypress, Moth, Rainbow , Pythagoras.
We are sure that any of these varieties and hybrids will delight you with high yields of delicious, juicy peppers!
planting, care, types and varieties, photo.
- Details
- Anatoly Vorontsov
Cultivation of bell pepper
Bulgarian pepper is a source of beneficial vitamins that help restore strength and strengthen the body.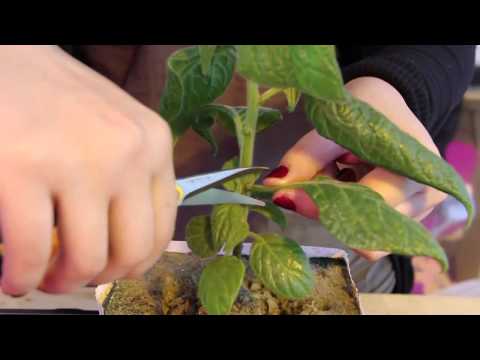
"Bulgarian" pepper got its name from a Bulgarian breeder, and its real homeland is America.
Yellow, red, orange and green, cone-shaped and oval - they are all so different, but there are so many necessary and useful things in these peppers. Sweet pepper among vegetables occupies a leading position in terms of vitamin C content. Bell pepper fruits also contain vitamin P, vitamin A, B, carotene, folic acid, as well as calcium, potassium, iron, phosphorus, copper, iodine, magnesium, sodium and zinc .
Antioxidants, which are part of the bell pepper, rejuvenate cells, thin the blood, and also clear cholesterol. Pepper increases hemoglobin in our blood. The fruits of red pepper contain lycopene, which prevents cancer. Peppers are recommended for beriberi, to increase appetite. Pepper juice is also useful, especially when mixed with carrot juice.
Regular use of pepper improves skin condition, improves visual acuity, enhances hair growth. Scientists strongly recommend fighting depression, insomnia with the help of bell pepper.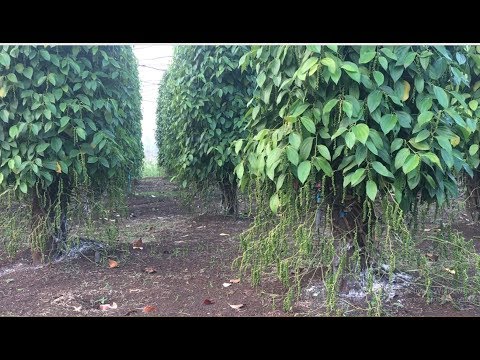 To do this, just eat red bell pepper.
Bell pepper varieties
Thanks to breeders, vegetable growers today have a huge selection of modern pepper varieties. When choosing a variety of sweet pepper, you need to take into account the climate conditions in which the bell pepper will grow. In the south of our country, the choice is very large - there are suitable conditions for growing sweet peppers, even late-ripening varieties. However, in the north of Russia, where a cool and short summer, only early ripening varieties are suitable. As well as pepper hybrids.
Early and medium low-growing varieties are suitable for growing pepper in the middle zone of our country: Tenderness, Kolobok, Winnie the Pooh, Gift of Moldova, Myasisty 7, Postrel, Krepysh, Suite, Funtik.
The list of medium -sized early varieties and hybrids is even more extensive:
AGAPOVSKY , Chrysolite F1 , Rapsody F1 , Buratino F1 9000, 9000, 9000 9000, 9000 9000, 9000, 9000 9000 9000 9000 9000 9000 9000 9000 9000 9000 9000 9000
005
Dobrynya , Rush barrels , Health , Orange miracle F1 , Jubilee .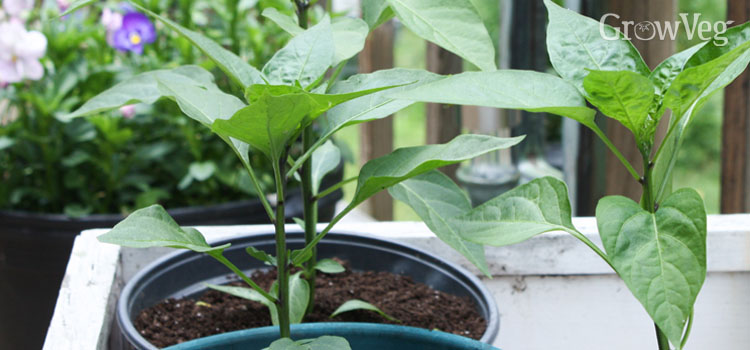
It is best to choose several varieties of bell peppers with different ripening periods. Then the whole season you can provide yourself with a fresh harvest.
Bell pepper seedlings
When growing pepper seedlings, the question immediately arises - when to plant the seeds? You can make a calculation. The age of bell pepper seedlings when planted in open ground should be 75 days. Pepper planting usually begins in May.
Bell pepper seeds
Sweet pepper seeds before planting, you can not warm up, just hold them in potassium permanganate. Take a teaspoon of potassium permanganate in a glass of water, dip the seeds in this solution for 20 minutes, then rinse with water. Pour the prepared seeds with water with a stimulant (Epin) for 10 hours, then drain the water and, without washing, place in a warm place to swell the seeds for 10 hours. When the seeds swell, the nutrient reserves pass into the active phase, and the substances that prevent germination go into the water.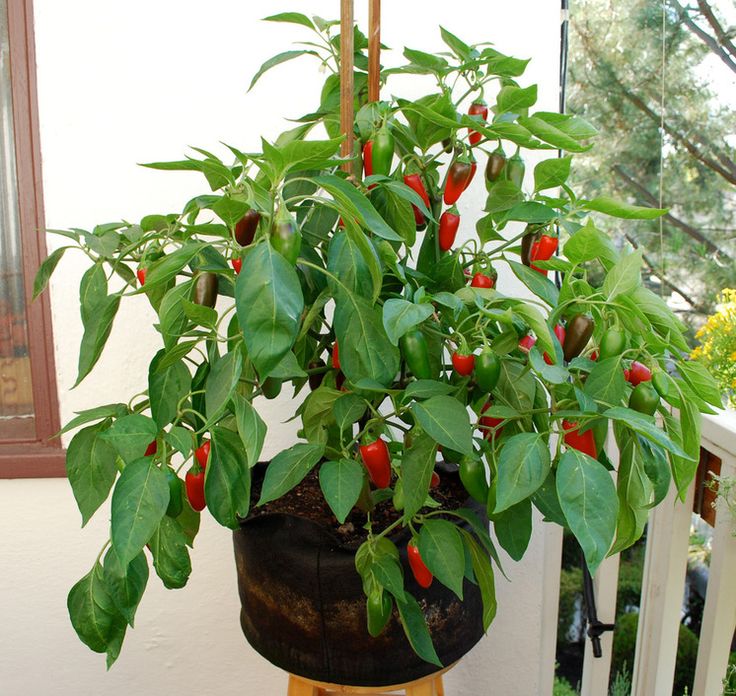
To plant bell pepper seeds, you can use ready-made purchased nutrient soil. The soil should be permeable, loose, porous. The finished mixture must be poured with a solution of potassium permanganate and calcined.
Planting of bell pepper seeds is carried out in already watered grooves to a depth of 1 cm, at a distance of about 2 cm.
Boxes with crops are placed on a warm windowsill. Seedlings will appear within a week. Water as needed, once a week. Mostly spraying with potassium permanganate, water or growth stimulants is used.
Bell pepper seedlings in the two-leaf phase must be dived. You can dive pepper into peat pots or plastic cups, filling them with nutrient soil.
The next care for pepper seedlings is watering, top dressing.
Planting bell peppers
Pepper loves sunny areas protected from strong winds. Best of all, sweet pepper will grow on the soil where the predecessors were beans, peas, carrots, cucumbers.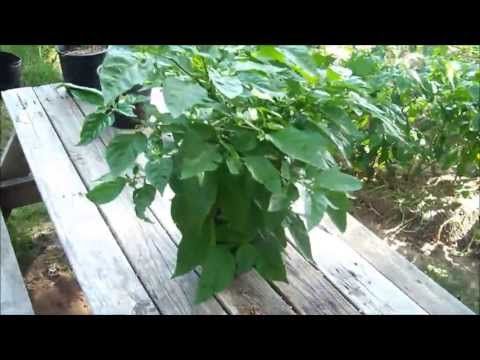 It is not recommended to plant bell peppers where potatoes, eggplants, and tomatoes were previously planted.
Before planting bell pepper, the bed is filled with ash and compost: per 1 sq. m of land half a bucket of compost and a glass of ash.
Bell pepper seedlings are planted in the evening at a distance of 40 cm from each other, between rows 55 cm. The holes are filled with a weak solution of potassium permanganate, then mulched with earth. Pepper seedlings are deepened into the ground to the bottom two true leaves.
For two weeks, the bell pepper takes root, and grows poorly. To help him, it is necessary to loosen and stop watering.
As far as top dressing is concerned, the first dressing can be carried out approximately a few weeks after planting.
And some more recommendations for the successful cultivation of sweet pepper:
- To increase the yield of pepper, the flower that begins to grow from the first branching of the foliage must be removed.
Learn more
- Wood floor kitchen
- Stair railing decorated for christmas
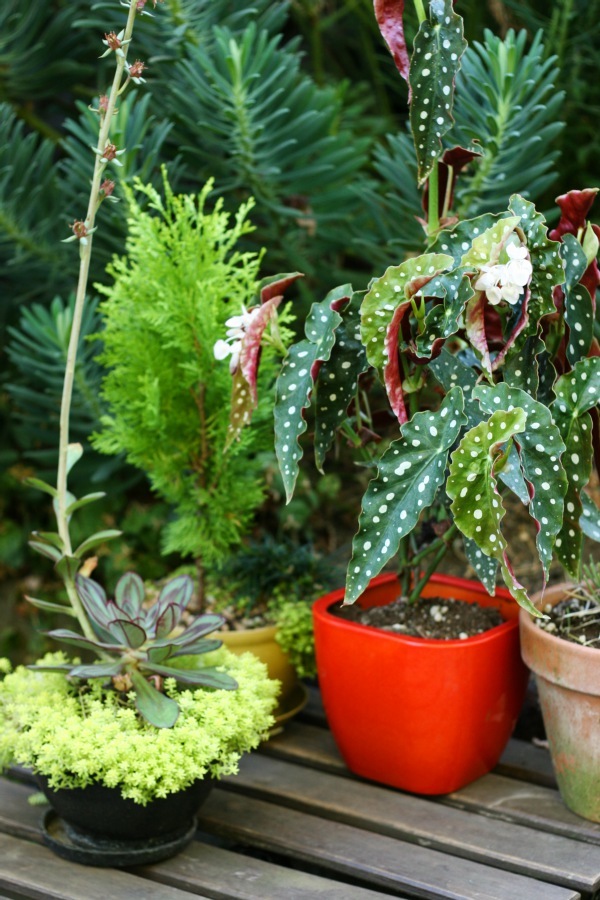
- How to winterize potted begonias
- Home living room color schemes

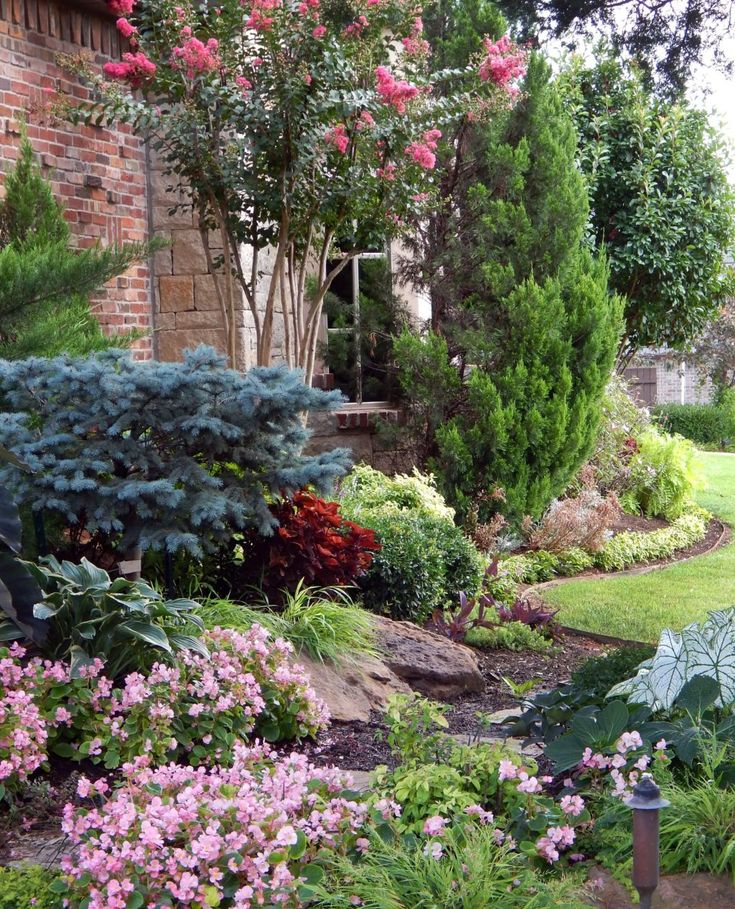
- Planting ideas for front gardens
- Painting ideas for your room

- Michael douglas address

- Installing a wet room
- Wooden dining table decor

- Plant with tomatoes
- Fitting a wet room