Installing a wet room
Wet Room: How to Build a Wet Room
When it comes to bathroom upgrades, options abound. Now more than ever, it seems people are turning to the sort of renovations that make their shower and bath areas feel as spacious and spa-like as possible. And one increasingly popular option for achieving these spa vibes is by transitioning your traditional bathroom space into a wet room.
This May Also Interest You: What’s a Wet Room?
Read on to learn more about this burgeoning trend and to find out if it might be the right fit for you and your next bathroom renovation.
What Is a Wet Room, Anyway?
A wet room is a completely waterproof bathroom space with no separation between the shower area and the rest of the bathroom. Wet rooms are single level in that there are no steps, trays or raised portions at all. Because they utilize space more effectively, adding a wet room can make your bathroom appear larger. If tranquility and spaciousness are what you’re after, transforming an outdated bathroom into a wet room is the perfect way to maximize your space.
Wet Room Bathrooms: The Benefits
Once you start scrolling through images of wet rooms online, it might start to feel like adding one to your home is more fantasy than reality. After all, their super sleek, elegant appearance looks like something out of your favorite magazine.
But what if adding a wet room wasn’t nearly as difficult as you thought? What if installing a wet room was a smart and sensible upgrade that can be as useful as it is luxurious? The fact is that adding a wet room bathroom to your home offers a number of advantages:
Space Maximization
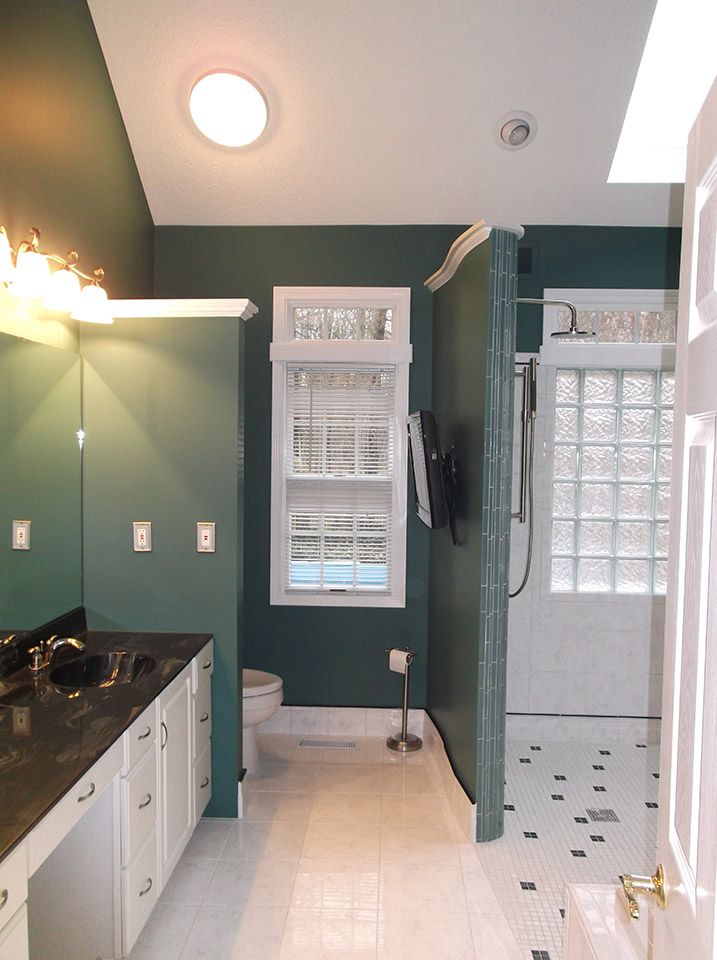
One of the most enticing reasons to install a wet room is its inherent space efficiency. Because everything in a wet room is waterproof, the need for a shower screen or enclosure becomes obsolete. Without the need for a separate shower area, the entire bathroom becomes an open area that appears larger than it actually is. Do you have a small bathroom with an awkward layout that makes mobility difficult? An open-plan wet room might just be your best bet.
As you lay out your new bathroom, be sure to remember that these rooms are designed in such a way that everything can get wet. So you'll want to be sure to site your toilet and sink in such a way that they don't get sprayed by your shower. If there's not enough room to do so, a simple partition between the shower and toilet/sink space can do the job nicely — and using one made from glass will still keep the open feel of the room.
Easier to Clean
As an added bonus, wet rooms are easier to clean than conventional bathrooms. Think about it: There are no shower trays or screens to contend with and, with fully tiled walls and floors, a wet room cleaning routine is super simple. If you opt to install a wall-mounted toilet or sink to further open your floor space, cleaning gets even easier.
What’s more, when installed properly, your wet room floor will protect your subfloor better than standard bathroom flooring. Because the floor of a wet room is as waterproofed, or “tanked,” as a conventional shower pan, wet room floors prevent water from infiltrating your subfloors and are actually more protected against mold and mildew than a normal bathroom would be.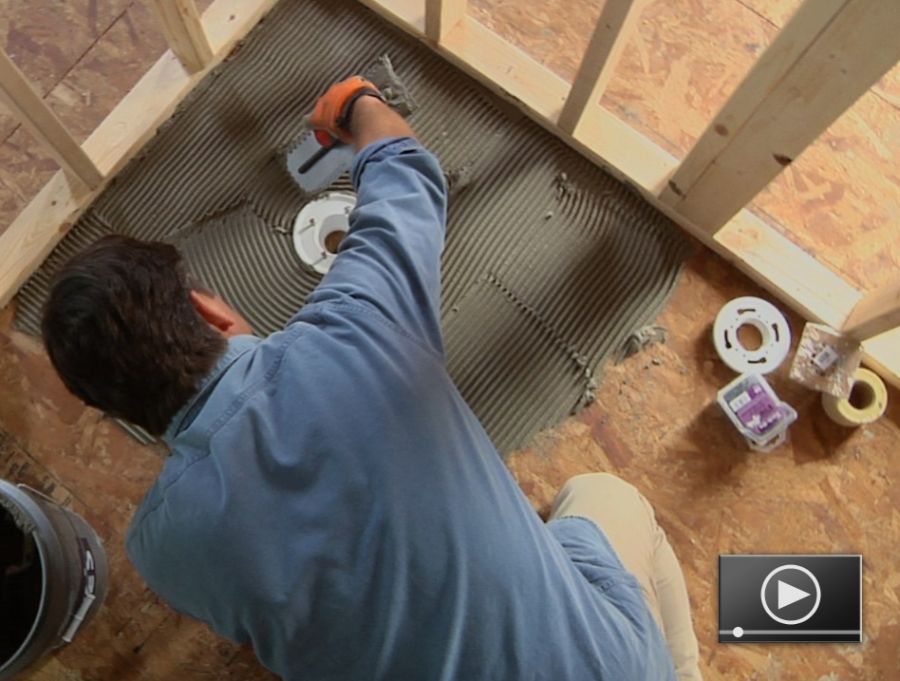
Safer and More Accessible
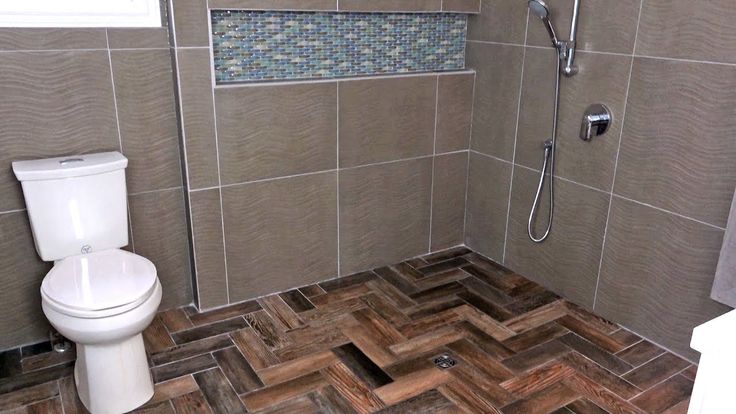
One of the best reasons for installing a wet room bathroom is its functional, accessible design. Whether or not you have any handicapped or elderly members of your family, a doorless, curbless shower area is just safer in general. If you’re concerned that a fully tiled floor might be a slip hazard, you can easily avoid installing polished tile and opt for a non-slip option like natural stone or porcelain.
Speaking of safety, be sure to plan your drain correctly. A popular option in wet room bathrooms is drains that run from one wall to another and funnel water to a central point. Such a drain system can act as something of a gutter that can ensure that water stays on one side while the other side stays dry.
Adds to the Value of Your Home
Open floor plans are in, and they’re here to stay. Sleek design and open spaces are timeless qualities that are both stylish and functional. Secondly, a bathroom without a shower alcove or a bathroom stall feels and looks larger, so increasing the functional space in a room is always a plus when it comes to adding value to your home.
More Related Articles:
- How Much Does a Shower Remodel Cost?
- How to Tile a Shower in 7 Steps
- Making It Rain: How Much Does It Cost to Install a Shower?
- How Do You Install a Shower? Follow This Guide
- How to Remove a Bathtub in 4 Simple Steps
Installing a Wet Room
If you can’t already tell, adding a wet room shower area to your house is a gift that keeps on giving. That said, the idea of ripping apart your bathroom can feel like a pretty daunting and even scary task. And let’s be clear: Unless you’re an advanced DIYer or all-around remodeling expert, installing a wet room is a job that’s best left to the professionals. Ensuring that everything is graded and waterproofed properly is a necessary aspect of a wet room installation, and a pro will be able to make sure there aren’t any water leaks in your new space.
But still, how do you begin designing your new wet room? Whether you’re in the process of a new build or remodeling your existing bathroom, there are crucial aspects to a wet room bathroom design that it pays to stay aware of.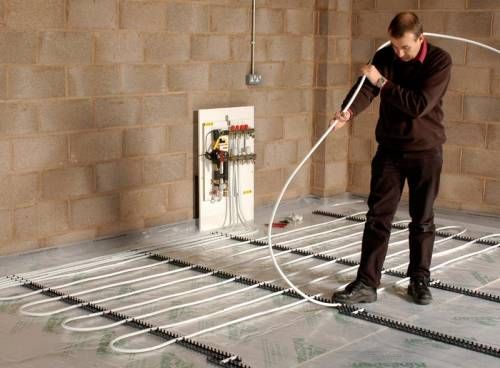 Here are some considerations to keep in mind while you’re in the design phase:
1. Examine Your Bathroom Floor
Before you dive into designing a wet room, you first need to examine your bathroom floor to determine how complex the install will be. In fact, it’s generally accepted that the floor type dictates every aspect of the installation process.
Consider the two most popular floor types: timber and concrete. Timber flooring is perhaps the most popular type of flooring and, if you are planning on installing a wet room upstairs, you are most certainly working with timber flooring. In timber floors, joists run parallel to support plywood subflooring. To install a wet room onto a timber floor, you’ll first need to have a floor former installed onto your subfloor. Floor formers have built-in gradients that work to channel water into the drain. On the other hand, if you are installing a wet room onto a concrete subfloor, you’ll need to first install a drain screed to enable the water to channel away from the shower area and safely exit into a wastewater pipe.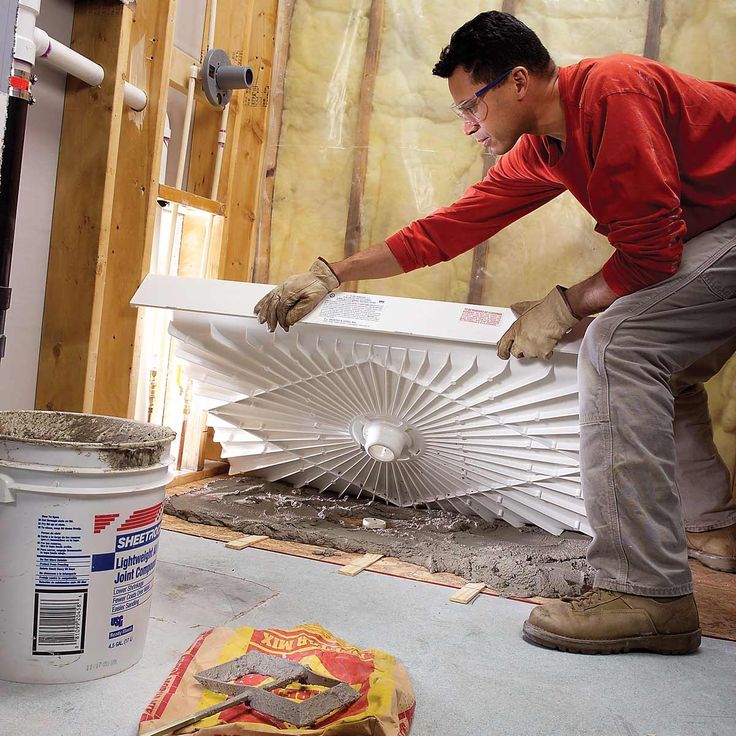
2. ‘Tank’ the Wet Room
One of the key benefits of a wet room bathroom is that the entire floor area, as well as the lower section of each wall, is properly waterproofed — “tanked”— to prevent water from damaging the structural elements of your home. The waterproofing process can be time-consuming and can account for a hefty portion of your project’s budget.
To properly waterproof your wet room area, the entire floor section (including the lower section of the walls) will need to be primed and then have a membrane applied that will need to be set or cured. You can choose to use a liquid membrane like Jackoboard Wet Room Waterproofing Tanking Kit that’s painted on with a roller, or a physical membrane such as Impey TileSafe, which is laid onto the floor before tiling.
3. Choose Flooring and Wall Coverings
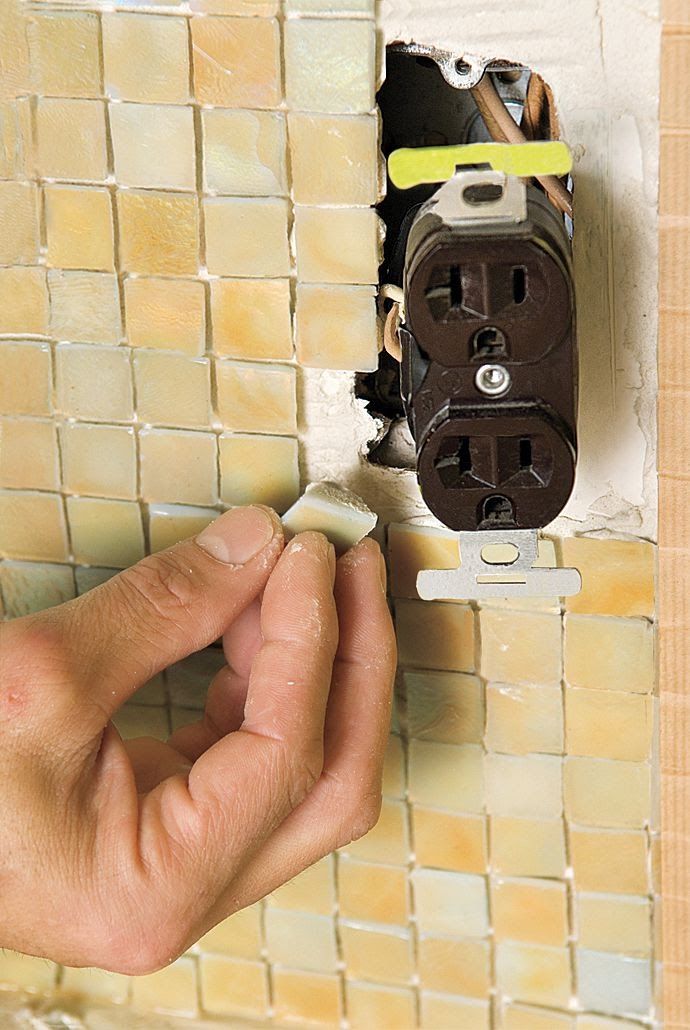
Once the room has been properly waterproofed, the surface areas are ready to be applied. Tile is by far the most popular choice for surface areas in a wet room, and for good reason.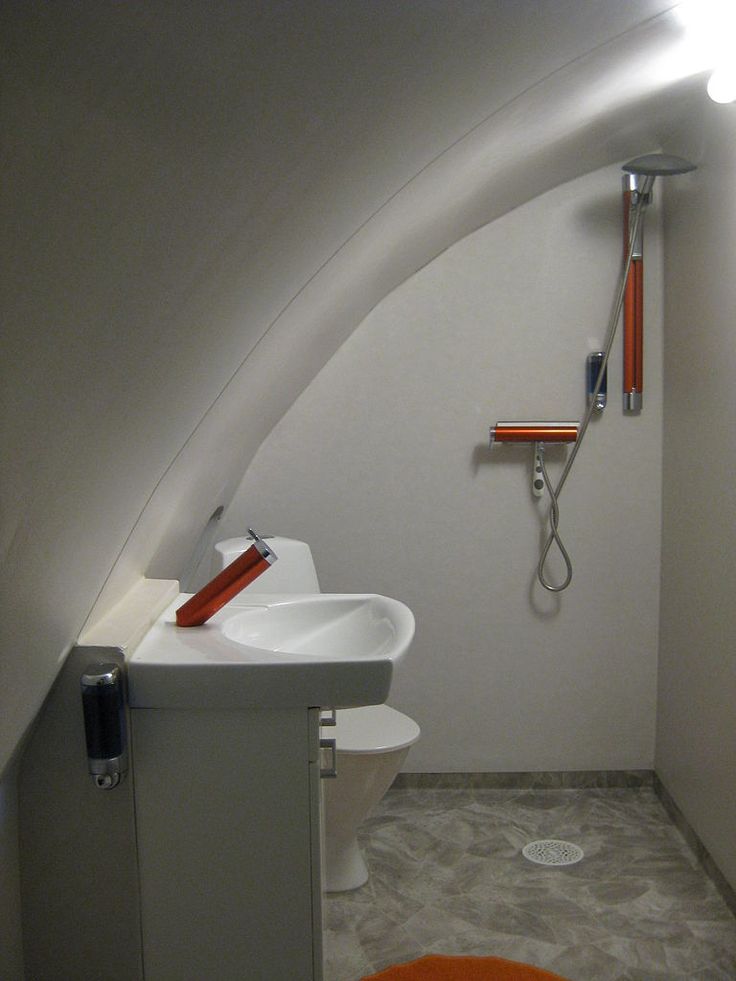 Tile is a sturdy, aesthetically pleasing option that is both easy to maintain and can stand the test of time. However, when choosing tile, it’s important to go for a material that’s not inherently slippery, like ceramic tile. Although they need to be sealed after installation to prevent damage and staining, natural stone tiles are one of the most popular choices for surface areas in a wet room due to their rustic, hard-wearing finish, but also because they’re less slippery than other types of tile.
In addition to tile flooring, vinyl and rubber flooring are other popular choices for a wet room bathroom area. Because of their durability, cost-effectiveness and the wide variety of available patterns, colors and textures, vinyl and rubber flooring remain good waterproof options for your new wet room, particularly if tile is out of your budget.
In terms of wall tile, you can really let creativity be your guide. Keep in mind that porcelain is less porous than ceramic, so it might be a good choice for keeping moisture away from the back of the tiles. Glass tiles are also a popular and waterproof option.
4. Vent It
One other thing to keep in mind when planning your wet room: Be sure to have good ventilation. This can be as simple as a standard vent fan, but it's critical that you include one in your planning because wet rooms tend to get moisture over a larger surface area. If that moisture doesn't have a place to vent, mold and mildew growth can occur.
Wet Rooms: Worth the Work
Whether you want to add value to your home, increase accessibility or simply update your space, adding a wet room may be the way to go. And doing so might be less complicated than you think.
How to install a wet room
How to guides
Posted by Adam Chard in How to guides | 4 years ago 12 min read
One of the best ways to add value to your property is to install a stylish wet room bathroom. In this blog post, we'll discover how it's done.
If you don't already know, a wet room is a fully waterproofed bathroom, offering level access showering and producing a clean, contemporary look.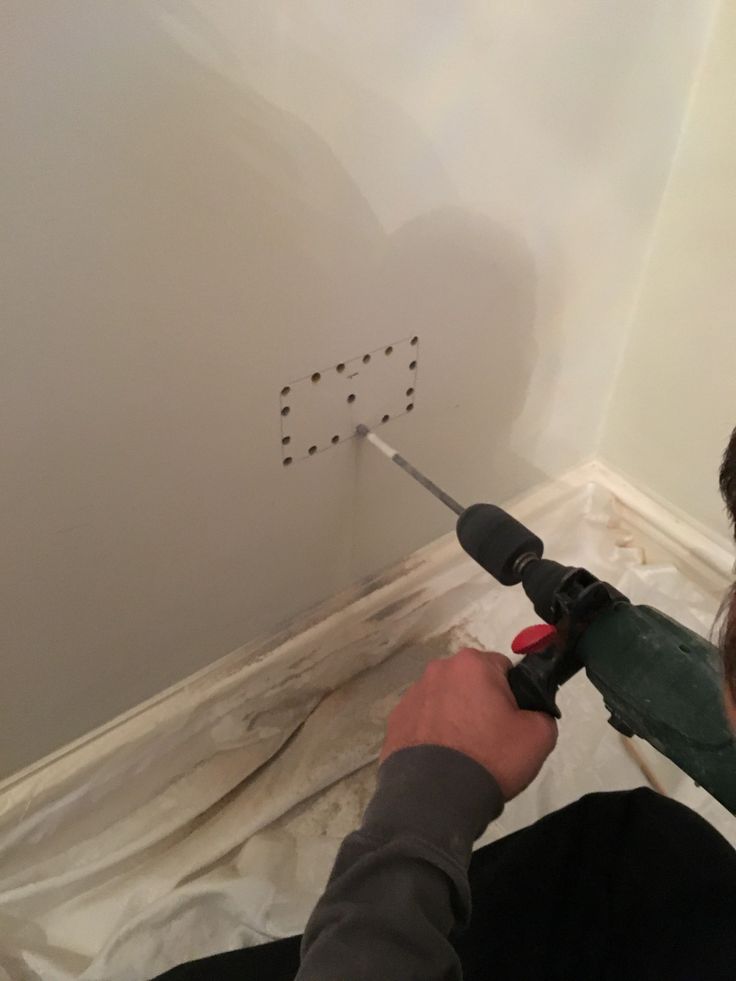 A shower tray with drain is normally incorporated into the floor and tiled over.
You may think a wet room is out of your price range, but we argue not. With our high quality wet room installation kits, made right here in the UK, you can create your very own wet room in just a matter of days, rather than weeks.
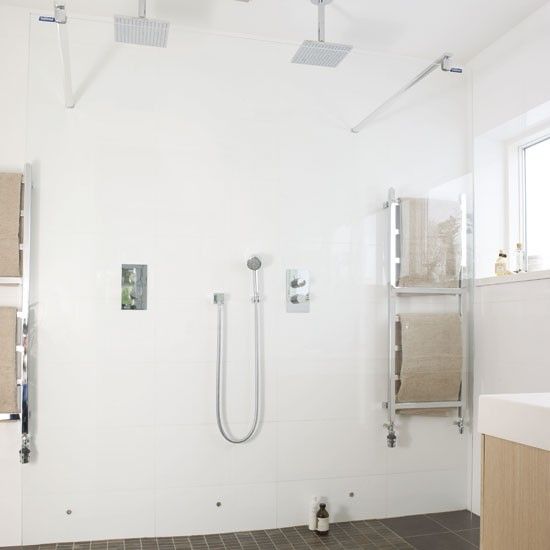
You don't need a huge space to create a stunning wet room like this
Below, you'll find a video and instructions on how to install one of our wet room kits, with shower tray and waterproof flooring, which will get you well on your way to creating a beautiful and fully-functioning wet room.
Before you do anything
Always unpack your wet room pack immediately after delivery. Check for any damage or faults as it’s better to find them now, rather than during installation.
Always turn off your water at the mains before attempting any DIY in the bathroom.
Tools you’ll need:
- Circular saw
- Electric drill
- Hard point saw
- Notched trowel
- Paint brushes
- Pencil
- Silicone sealant gun
- Spirit level
- Standard screwdrivers
- Tape measure
Check you have the following:
Supplied with wet room tray waste & installation kit:
- 2 x internal wall corners
- Fix-KST fixing adhesive
- PRO-Seal pre mix tape sealer
- Waterproof tape
- Wet room shower tray waste and trap
- Wood floor primer
See what's in the box:
Will need to buy separately:
- Silicone sealant
- Tiles
- Tile grout & adhesive
- Waterproof floor kit
- Wet room shower tray
- Wood battens
- Wood screws
- Shower & valve (if required)
- Glass panel(s) (if required)
Time to complete:
- 3–5 days (depending on the size of your room)
How much does it cost to install a wet room?
To find out the latest typical costs that a tradesperson might charge to fit a wet room, check out our guide to bathroom installation costs.
Fitting your wet room shower tray and floor
At Victoria Plum, you’ll find our wet room shower tray kits are made from high quality materials for a 100% waterproof seal and anti-bacterial protection.
Please follow this video, with step-by-step instructions below:
The instructions below are for fitting your wet room shower tray, waste and flooring only.
Here's how to install a wet room
-
Measure the entire floor area and plan the layout of your new wet room on a piece of paper.
-
Decide now if any of the waterproof boards need to be cut and if they do, cut them now using a hard point saw. Lay the entire pack out across the floor area to check the fit.
-
Carefully remove the waterproof boards and store somewhere safe.
-
Mark the shower tray position onto the floor and position of the waste hole in the wet room shower tray.
-
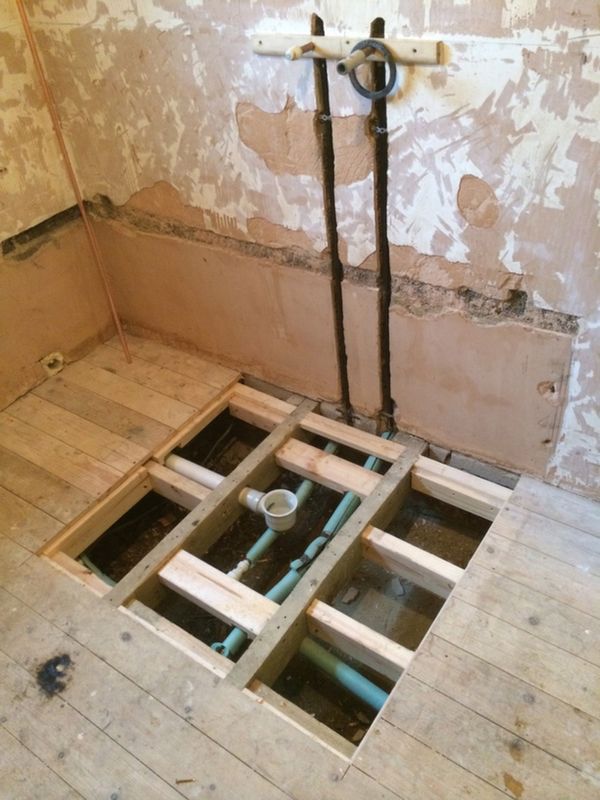
Using the nails or screws holding the existing flooring down as a guide, establish where the joists are.
-
Mark the centre line of the first joist outside the shower area as you will need to remove the floor up to this line.

-
Carefully remove the wet room shower tray and store somewhere safe.
-
Set your circular saw blade to the depth of the floorboards. It may be necessary to increase the depth slightly if it doesn't go right through the floorboards.
-
Using the circular saw, cut along the lines you have marked and remove the flooring and all nails and screws.
-
Make sure that the remaining floorboards or sheets in the rest of the room are fully secured down and as level and flat as possible.
-
Spread solvent weld adhesive around the inside of the drain connector.
-
Push the shower drain base onto the shower drain connector with a twisting action.
-
Spread solvent weld adhesive around the inside of the opposite end of the shower drain connector and then slide onto the waste pipe with a twisting action.
-
Once the solvent weld has set, pour water down the drain to check that the waste isn't blocked and that there aren't any leaks.

Handy hint: Make sure all pipes and drainage parts are clean at all times using solvent waste pipe cleaner.
-
All exposed joists will now need a batten running along the inside of the joist to accommodate the new plywood low level floor.
-
Cut some timber batten (approximately 20mm x 50mm) to length and screw at approximately 150mm intervals to the inside of all joists 18mm below the top of the joists.
-
Cut some 18mm plywood to fit between the joists on top of the battens previously fitted.
-
Measure the shower drain base position on the plywood then mark and cut using a jigsaw, so that the drain base and connector will be exposed through the new floor.
-
If you are left with a gap between the wet room shower tray and the flooring, make use of any of the discarded floor boards to make up the gap.
-
Lay the wet room shower tray into position and check it lines up with the shower base.
 Remove the tray and store aside for the moment.
 -
Paint the entire floor area (including the new plywood) with wood floor primer. Leave to dry for at least 30 minutes.
-
Spread Fix-KST adhesive onto the shower tray floor area and drag your notched adhesive trowel across the surface to leave just the right amount of adhesive on the floor.
-
Place the wet room shower tray into position and bed down into the adhesive. Check that the shower tray is level in both directions.
-
Place the internal bowl into the shower drain base, then lock the internal dome into position.
-
Apply a thin bead of silicone around the drain base top and the outer ring of the shower tray.
-
Screw the drain top securely then allow the silicone to cure.
-
Spread Fix-KST onto the floor area, then use your notched trowel to leave just the right amount of adhesive on the floor.
-
Place the first waterproof board into position and bed down onto the adhesive cement.
Handy hint: If the floor immediately outside of the shower area is likely to get wet, it is a good idea to angle the boards slightly so that the water will run towards the tray and drain.
-
Repeat for the remaining boards, mixing more Fix-KST as required. Leave to set for approximately 3 - 4 hours depending on room temperature.
-
Along all joints fit the fixing plates at approximately 300mm centres. Place the centre hole of the fixing plates directly over the join line and screw to the floor.
-
Place the waterproof internal corners into position then mark around them with a pencil.
-
Using Pro-SEAL pre-mix tape sealer and a paintbrush, apply a thin layer of adhesive slightly overlapping the pencil marks.
-
Place the internal corner firmly into the tape sealer, then apply a further thin layer of tape sealer over the top.
-
Apply a thin layer of Pro-SEAL tape sealer to one edge of the floor and adjoining wall approximately 60mm wide on each.
 Repeat for any remaining walls.
 -
Apply a thin layer of Pro-SEAL tape sealer over all board joints and fixing plates.
-
Place the waterproof tape strips firmly into the tape sealer then apply a further thin layer of tape sealer over the top.
-
Place the shower drain top upside down and mark around it with a pencil.
-
Set aside the drain top then mark a line from each of the 4 corners of the square to each corresponding corner of the wet room shower tray. These lines act as tiling guidance for the tray falls and also the "tile up to point" for the shower drain top.
-
Finish the tray in your choice of tile using an S1 flexible cement-based tile adhesive.
-
If you are using tiles larger than 100mm, it is necessary to cut the tiles along the same lines previously marked, in order to maintain the slope.
-
Measure from the top of the finished tile to the top of the shower drain top.
-
Now mark the same distance as previously measured on the shower drain top.
-
Use a hard point saw to cut the excess from the bottom of the shower drain top.
-
Refit the O ring onto the lowest indent remaining on the shower drain top.
-
Ease the drain top into place, then fill the gap around the edges of the shower drain top and the start of the tile with the same grout you used on your tiles.
-
Place the shower drain finishing grate into position. Leave to dry for at least 24 hours before using your shower.
Congratulations, you've now fitted your new wet room shower tray, waste and flooring.
We would also recommend waterproofing your walls using our waterproof wall kit.
Whilst DIY can be a good way to save time and money, you should always hire a qualified professional to plumb and install your products. The instructions above are simply a guide to fitting a wet room and shouldn’t be used to attempt full plumbing and installation.
Great wet room ideas & advice
Click on any of the links below to discover more wet room inspiration and advice:
- 4 great wet room ideas
- Walk in shower enclosure and wet room ideas
- Planning a wetroom
Posted by Adam Chard in How to guides | 4 years ago
A born & raised West Countryman, now living on the Yorkshire Coast, for over 9 years Adam has been bringing home interior ideas to life at Victoria Plum. Adam’s favourite interior styles have been shaped by both urban and natural influences.
Transfer of the wet zone in the apartment. All aspects.
2. Legalized redevelopment of the bathroom.- 2.1. Redevelopment - expansion of the bathroom.
- 2.2. Remodeling of a bathroom in a panel house.
- 2.3. Redevelopment of a bathroom in Khrushchev.
- 2.4. Relocation of a bathroom.
- 2.5. Remodeling of a bathroom in a new building.
1. Transfer of wet areas in the apartment - all the nuances and features.
1.1. Enlargement of the bathroom due to the corridor.
Transfer of the wet zone in the apartment - permission (clause 1.6).
Such works during the redevelopment of an apartment as an increase in the wet zone due to a corridor or other non-residential premises are not prohibited by existing regulations.
Thus, it is permissible to expand or arrange additional wet zones on the area of non-residential premises (all premises inside the apartment except living rooms and kitchens). It is necessary to carry out such work after obtaining the appropriate permit for repairs.
1.2. Expansion of the bathroom due to the kitchen or room.
Often, apartment owners want to increase the bathroom at the expense of the kitchen or room. Unfortunately, such redevelopment is prohibited by clause 7.20 of SP 54.13330.2022.
According to them, any wet zone inside the apartment (expanded or arranged additionally) should not be located (even partially) above the living quarters of the apartment, which is located on the floor below.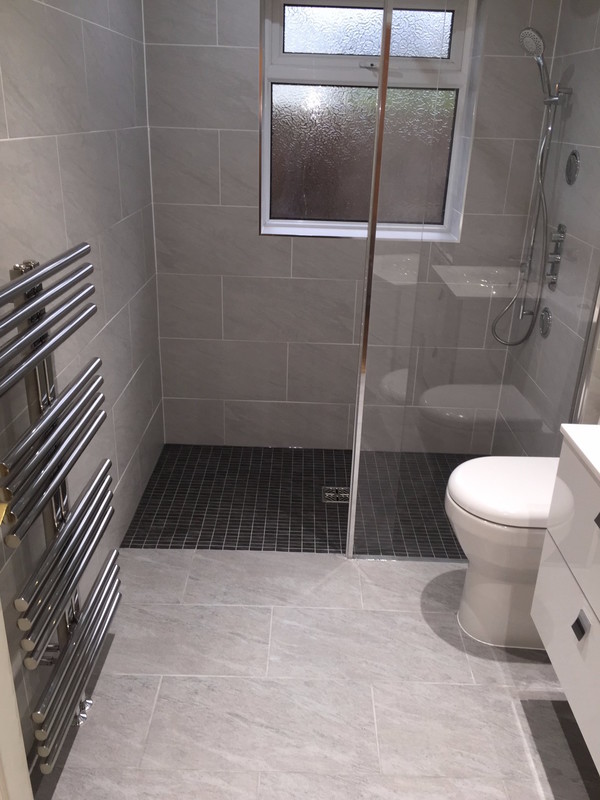 Since the officials automatically consider that the layout of the apartment below completely coincides with the layout of your apartment, you, therefore, cannot climb into the living rooms and kitchens with wet areas when repairing an apartment. Even when performing appropriate waterproofing in the floor of such premises.
Of course, from the point of view of logic, it is not entirely clear why it is possible to transfer wet areas in an apartment to non-residential rooms, but not to residential ones. After all, if you flood the corridor below the neighbor, and not the room, then it will not be easier for him. But, unfortunately, we have such laws, and in order to agree on redevelopment, they must be followed.
Transferring a bathroom or extending it to a living space can only be done if there is no other apartment on the floor below you, but there are offices, shops, basements, and so on.
1.3. Re-planning of a bathroom - coordination under the project.
Redevelopment of a bathroom with an extension due to the corridor - permission (clause 1.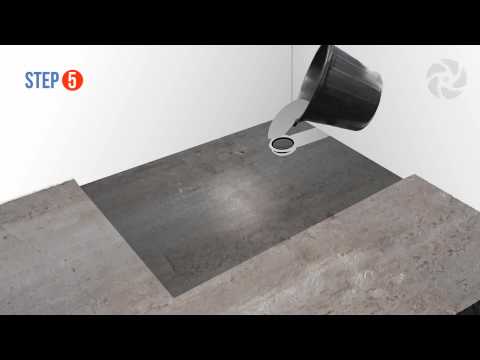 9).
9).
Any change in the location of the bathroom or toilet partitions is considered a redevelopment of wet areas and requires obtaining the appropriate redevelopment project permit. This requirement is given in paragraph 2.2.1 of App. No. 1 to the Post-tion of the Government of Moscow No. 508. The redevelopment project must be ordered from the design bureau, which has the necessary SRO approval (permit) for its implementation.
1.4. Waterproofing of wet areas.
Firstly, according to SNiP "Floors" the floors of all wet rooms must be made with a waterproofing device. The material and the presence of waterproofing must be prescribed in the redevelopment project. Its implementation is confirmed at the acceptance of the redevelopment by an act for hidden work, filled in by the designer and contractor. You can read more about these acts here.
Secondly, the repair of the bathroom with redevelopment must be done in such a way that at the entrance to it there is a door sill that will not allow water to leak out when it leaks into neighboring rooms.
The height of such a threshold should be at least 15-20 mm. Instead of a threshold, it is allowed to make the floor level in wet rooms lower than the floor of neighboring rooms to the same height.
Of course, it is extremely rare for any of the owners to fulfill these requirements so as not to stumble over the threshold or floor step. However, recently the inspectors of the Housing Inspection began to find fault and pay attention to this much more often, and therefore we recommend that you still install the threshold. In practice, we had a case when the owner of the apartment, after dismantling the threshold, had a water leak in the bathroom. She leaked out of it into the next room, so I had to redo my repair and the repair of the neighbors below in much larger volumes than if it had stopped due to the threshold within the bathroom. The owner himself admitted to us that now he regrets that he did not leave this threshold. Another way to prevent the occurrence of such situations is to install a water leakage control system that shuts off its supply in the event of a leak.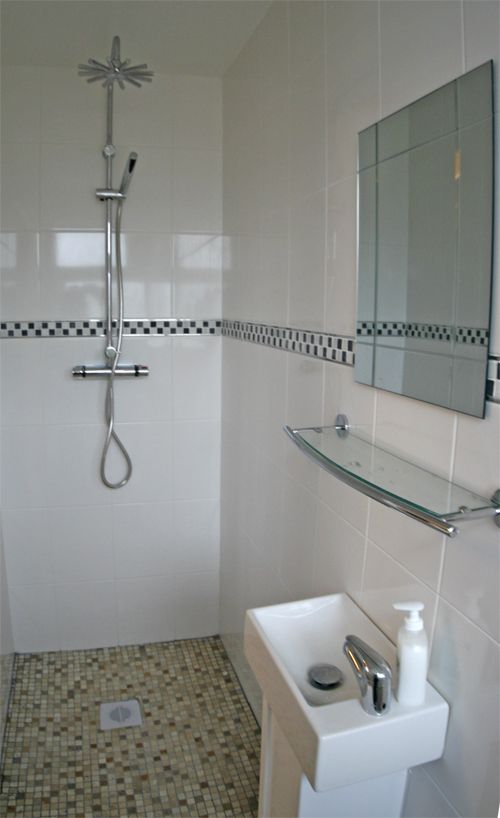 Now they have become quite affordable.
Commentary to the video:
The expansion of wet areas now requires project approval in accordance with a separate paragraph 2.2.1 of Appendix 1 to Moscow Government Decree No. 508, which is also valid in 2022, and not due to a change in floor construction, as it is it was earlier before the introduction of Decrees of the Government of Moscow No. 1104 of December 29, 2017. No. 1572 dated 12/17/2018 and No. 1335 dated 08/19/2020.
The exit device from the wet zone to the room or kitchen is now legal, since SanPiN, which previously prohibited this, was canceled from 03/01/2021.
1.5. Redevelopment of the bathroom in the apartment - the location of the entrance.
A bathroom or a wet area with a toilet bowl used to be designed so that the entrance to it was from a corridor or non-residential premises. Now this requirement has been canceled by Decree of the Government of the Russian Federation No.
1631, and therefore the exit from the room with the toilet can also be done into the kitchen and into the room.
True, it's probably not very pleasant to eat in the kitchen when someone enters it directly from the bathroom. I'm not talking about smells. But it already depends on the wishes of the owners. From a legal point of view, the main thing is that it is allowed.
At the end of the article, we will come up with several coordinated redevelopments of bathrooms and wet areas. We also advise you to read the article on the design of redevelopment.
2. Legalized redevelopment of the bathroom
2.1. Redevelopment - expansion of the bathroom.
Before renovation.
After renovation.
These photos show a fairly typical redevelopment of bathrooms. Both bathrooms were expanded due to the corridor. At the same time, the entrance to the kitchen was provided from the room. Thus, it was possible to obtain quite spacious bathrooms by modern standards due to the less usable area of the corridor.
2.2. Remodeling of a bathroom in a panel house.
Before redevelopment.
After redevelopment.
Above is another redevelopment of an apartment with an impact on the bathroom in a panel house of the KOPE series. Here, too, the wet zones were expanded with a corridor, and the entrance to the kitchen was made from the living quarters. There was enough space in the corridor to complete the bathrooms, although not very spacious, but still separate.
2.3. Redevelopment of a bathroom in Khrushchev.
Before conversion.
After reconstruction.
In Khrushchev, the most common type of impact on wet areas is to increase the bathroom due to the corridor leading to the kitchen. In Khrushchev, unlike panel houses, the wall between the kitchen and the living room is almost always non-bearing, and therefore it can be completely dismantled. True, if the stove is gas, then sliding doors must be installed in place of this partition.
2.4. Relocation of a bathroom.
Before redevelopment.
After redevelopment.
In this case, the bathroom was moved to the corridor. More precisely, we can say that due to the area of the corridor, a second guest bathroom was arranged, while in the dimensions of the former wet areas it was possible to make one large one.
2.5. Remodeling of a bathroom in a new building.
Before renovation.
After renovation.
Despite the fact that in modern new buildings the areas of bathrooms, as a rule, significantly exceed the areas of bathrooms in prefabricated houses and Khrushchevs, they are also quite often expanded. In this example, two bathrooms were combined and expanded due to the corridor area. The result of this redevelopment is a very spacious and comfortable bathroom.
Legally Allowed Bathroom Remodels
When it is not possible to move into a spacious new apartment, we naturally want to improve our current one.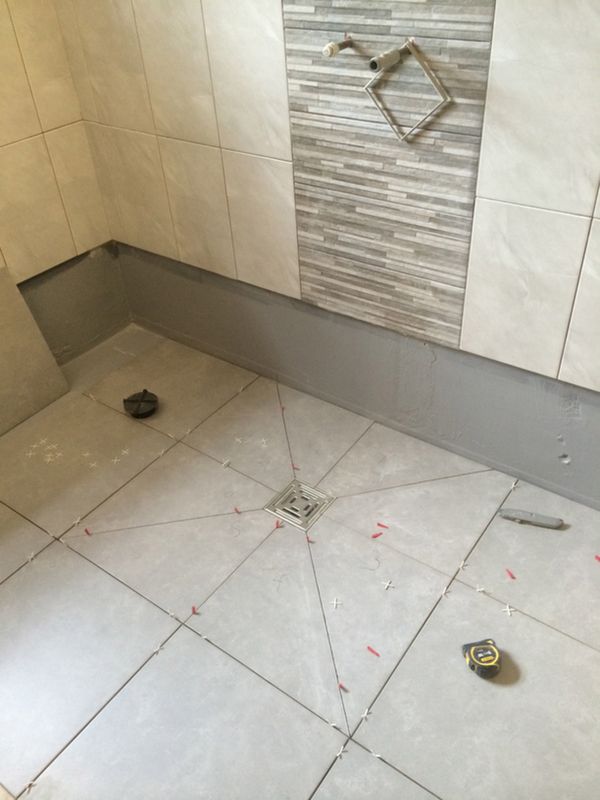 And if the office is theoretically easy to convert into a nursery, then the bathrooms and bathrooms need to be upgraded immediately, at the stage of overhaul. Even a local change in the bathroom is likely to provoke repairs throughout the apartment: first, you break the wall surfaces in the corridor and redesign them, then you want to coordinate the design of the living rooms with the changed corridor, and away we go: the repair will spread smoothly throughout the apartment.
You can start thinking about a possible remodeling of the bathroom right now. To do this, I offer my analysis of common and, importantly, acceptable options for redevelopment and refurbishment of bathrooms.
Anton Petrov | ANTON PETROV Unique Home
1. Increase in size
Bathrooms (as well as kitchens) are the so-called wet areas of the apartment. They are considered non-residential area, which limits the possibility of their expansion. For example, it is unacceptable to expand bathrooms at the expense of the residential part of the apartment, but you can expand them at the expense of the area of the corridor or an adjacent storage room.
Fact: It is illegal to extend a bathroom with a kitchen, and vice versa.
READ ABOUT INTERIOR WITH PHOTO…
Houzz tour: Shelving for teapots and wall made of glass blocks
Anton Petrov | ANTON PETROV Unique Home
In the photo: view of the bathroom from the corridor
Tip: Leave the corridor wide enough. In typical apartments, the entrance to the bathrooms always goes through the corridor, and the corridors are large and wide, and if you decide to increase the area at the expense of the corridor, which is permissible and legal, then you need to carefully calculate the width of the corridor that will remain. The minimum comfortable width is 90 cm, and ideally the length does not exceed 180 cm.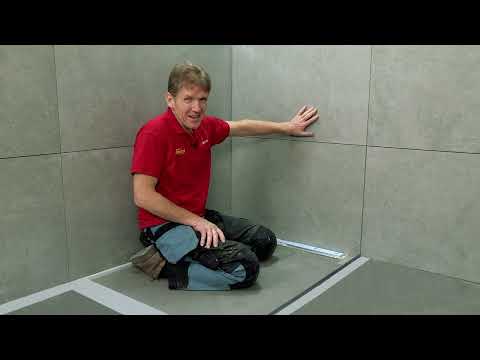 Subject to these conditions, you will get a comfortable corridor in which two people of average build can disperse and not feel discomfort. I strongly do not recommend making corridors already 90 cm.
SEE ALSO…
Counting centimeters: Rules for the ergonomic arrangement of furniture do not infringe on his rights. Reducing the width of the corridor should allow it to move freely without obstructions.
Do not forget that any of us can be limited mobility: jumped on a skateboard in the park, fell, woke up, cast - and this happens.
READ ABOUT THE INTERIOR WITH PHOTO…
Houzz tour: Cozy Provence for three in a panel house:
Lev Lugovskoy
. Feel free to transfer the bathroom to the pantry or organize a second bathroom in a large corridor - this allows housing legislation. But do not forget that such work will require approval and coordination.
Organization of a bathroom in place of a living room will never be agreed upon.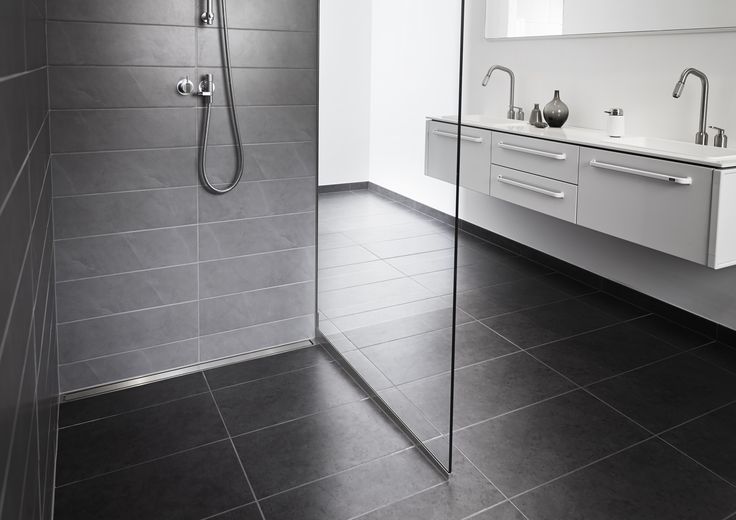 Those images with a bathroom in the middle of the bedroom that you see are most often implemented in private houses or apartments (formally non-residential). They are rarely possible in an urban high-rise building.
However, if you are a happy owner of a property on the ground floor or above non-residential premises (for example, a shop or a neighbor's apartment where redevelopment has already been made and agreed), this prohibition does not apply to you. Although it will be problematic to carry out engineering communications for technical reasons.
Read about the interior with the photo ...
Houzz tour: piano, fireplace and boxing pear in the Moscow loft
Richard Guilbault 2 Council: It is important the number of corners can lower the pressure in the common house main, from which there will be a weak pressure in other apartments and the temperature of hot water is lower. About other restrictions on the redevelopment of the bathroom - in the article below.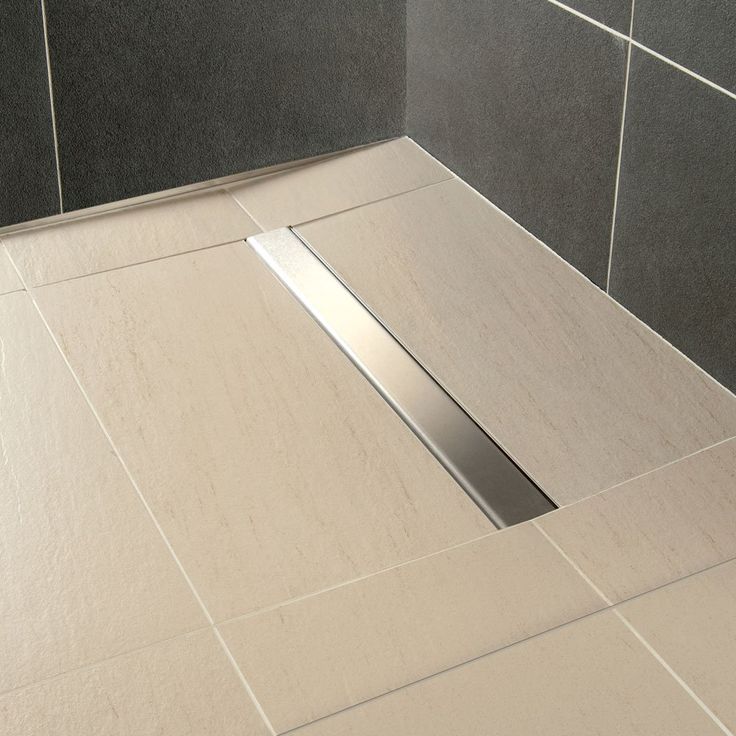
SEE ALSO…
With all conveniences: A small bathroom in a typical house
Marina Govorushko
We wrote a lot about both the necessity and the technology of dismantling; I will not dwell on this issue again.
READ ALSO…
- 0142
- Sanitary cabin: What to do, demolish or leave?
4. Installation of equipment and its transfer
Transfer of a sink, bathtub (in case of expanding the bathroom) will not be engineering difficulties, since for sewerage they require a pipe with a diameter of 50 mm and a slope of the outlet communication of 2-4 degrees - to ensure natural drainage of waste water.
Jeanne Bundakova
If you lay a sewer pipe without a slope, then the drains will stagnate in the pipe, which will cause an unpleasant smell, blockages and dangerous bacteria, for which such an environment is ideal.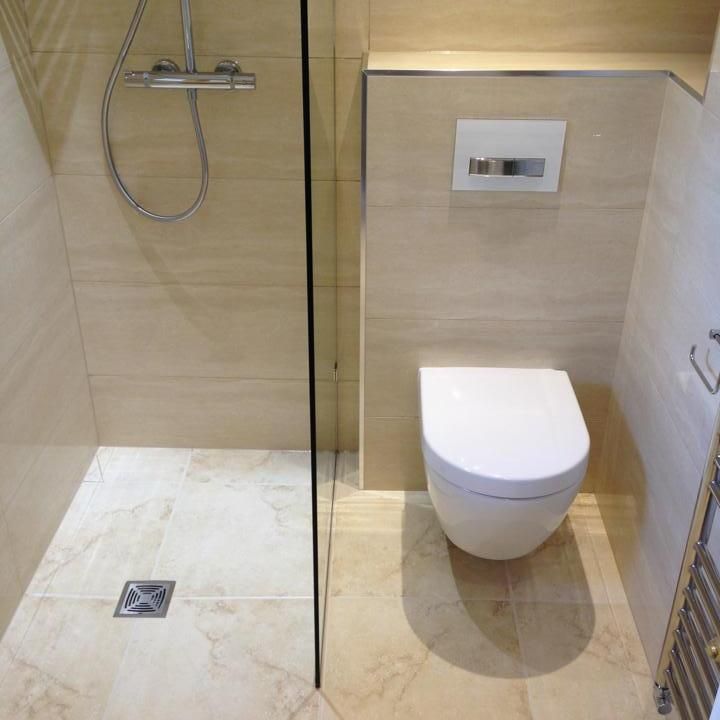 The same applies to the toilet - it is very difficult to move the toilet and organize the proper slope of the sewer pipe, the diameter of which is already 10 cm.
Even turning the toilet is difficult, because the presence of bends (corners) on the sewer pipe causes the sanitary problems described above.
Advice: The main sanitary rule is that the equipment is always paired: a toilet bowl and a sink, a bathtub and a sink. Therefore, be sure to install a washstand near the toilet, especially if the restroom is isolated from the bathroom. This is an important sanitary condition and a good habit.
Olga Litvinova
5. Installation of auxiliary equipment
This is a radiator (towel dryer), washing machine and drying cabinet. It is better not to move a water heated towel rail far from the common line, as this can disrupt the circulation of hot water and lower the temperature in the heated towel rail, from which it will lose its purpose. In a water heated towel rail, water must pass without obstacles, so you should not choose an overly complex model with a large number of tubes.
Advice: For mains capacities in typical houses, the ideal size of a water heated towel rail is 600x800 mm. Electric can be anything you like, but in a small bathroom with a huge model it will be very hot.
Yurieva Galina | Interior Design and Decorating |
The washing machine connection requires a cold water and sewer connection, so the installation location of this equipment must meet the requirements. Coordination of the installation of a washing machine or replacement of a heated towel rail is not required.
SEE ALSO…
Clean work: Unexpected ideas for placing a washing machine
Oksana Korotkina Studio
6. Ventilation
Ventilation in bathrooms not only helps eliminate odors, but also removes moist air outside.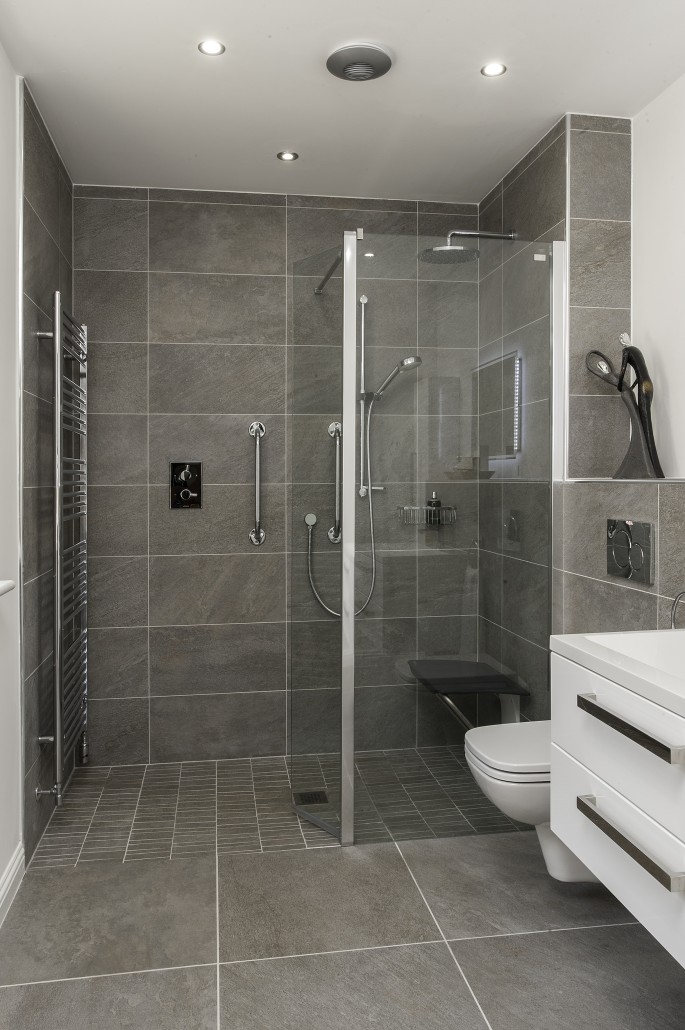 Ventilation shafts must not be demolished or closed, as this will limit the ventilation of the entire house, which in this case will suffer from mold and mildew.
Sullivan, Goulette & Wilson Ltd. Architects
Mold loves residential buildings, especially walls and ceilings, so it will penetrate deep into them if there is no humid air removal system. Exhaust air in a sealed space creates ideal conditions for fungus and mold, and they, in turn, settling in a residential building, are harmful to health. I categorically do not recommend dismantling the ventilation ducts - this is illegal.
Advice: Install a quiet fan in the ventilation duct that will blow in and out the exhaust air - this will keep you healthy.
Read also ...
- Black spots: how to defeat the fungus in the bathroom
- Ventilation in the bathroom: so that it is not painful damp 2 Galina Galbova
7 that an inspection will not come to your house to check whether you have replaced tiles or porcelain stoneware with a natural stone coating (although, of course, the weight on the floor slab will increase and it is important to take this factor into account - you should get carried away with natural stone with an eye to the condition floors).
Learn more