Fitting a wet room
Wet Room: How to Build a Wet Room
When it comes to bathroom upgrades, options abound. Now more than ever, it seems people are turning to the sort of renovations that make their shower and bath areas feel as spacious and spa-like as possible. And one increasingly popular option for achieving these spa vibes is by transitioning your traditional bathroom space into a wet room.
This May Also Interest You: What’s a Wet Room?
Read on to learn more about this burgeoning trend and to find out if it might be the right fit for you and your next bathroom renovation.
What Is a Wet Room, Anyway?
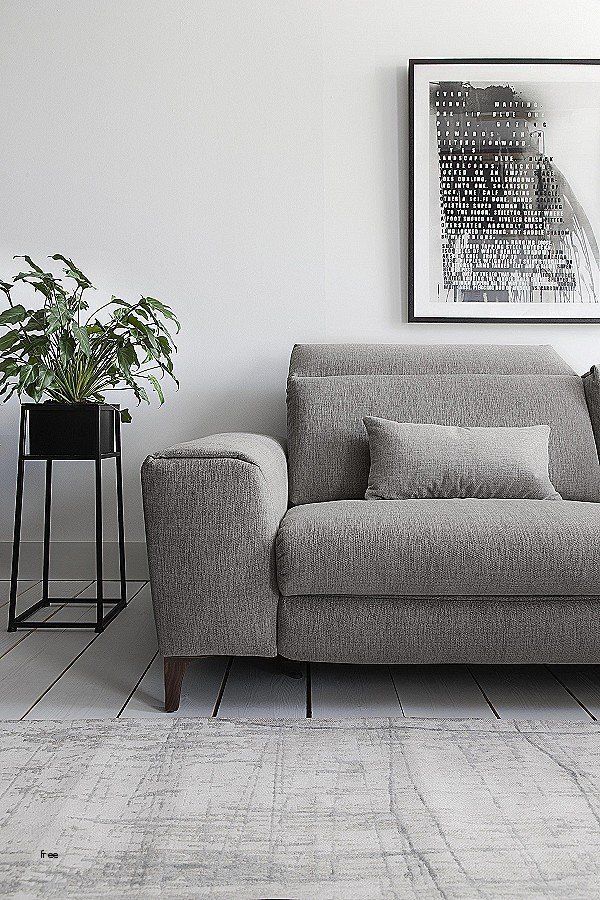
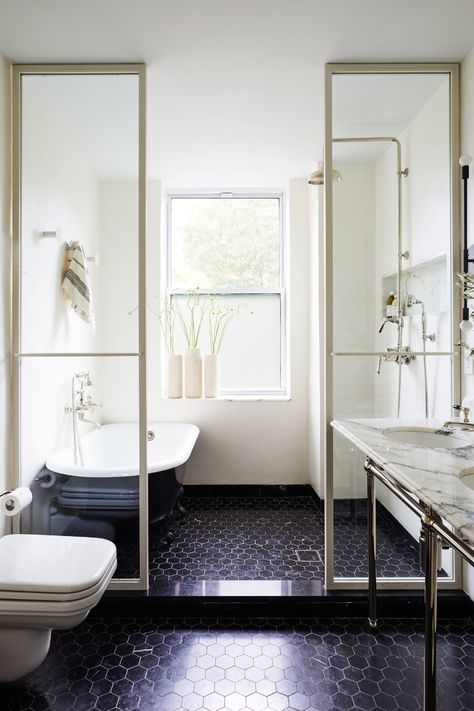
A wet room is a completely waterproof bathroom space with no separation between the shower area and the rest of the bathroom. Wet rooms are single level in that there are no steps, trays or raised portions at all. Because they utilize space more effectively, adding a wet room can make your bathroom appear larger. If tranquility and spaciousness are what you’re after, transforming an outdated bathroom into a wet room is the perfect way to maximize your space.
Wet Room Bathrooms: The Benefits
Once you start scrolling through images of wet rooms online, it might start to feel like adding one to your home is more fantasy than reality. After all, their super sleek, elegant appearance looks like something out of your favorite magazine.
But what if adding a wet room wasn’t nearly as difficult as you thought? What if installing a wet room was a smart and sensible upgrade that can be as useful as it is luxurious? The fact is that adding a wet room bathroom to your home offers a number of advantages:
Space Maximization
One of the most enticing reasons to install a wet room is its inherent space efficiency. Because everything in a wet room is waterproof, the need for a shower screen or enclosure becomes obsolete. Without the need for a separate shower area, the entire bathroom becomes an open area that appears larger than it actually is. Do you have a small bathroom with an awkward layout that makes mobility difficult? An open-plan wet room might just be your best bet.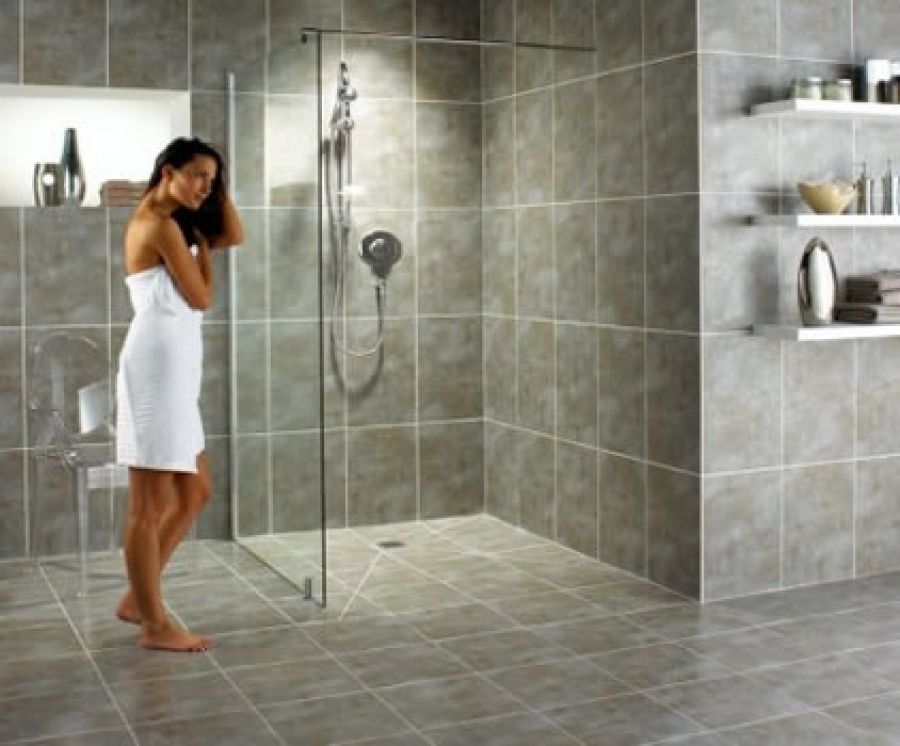
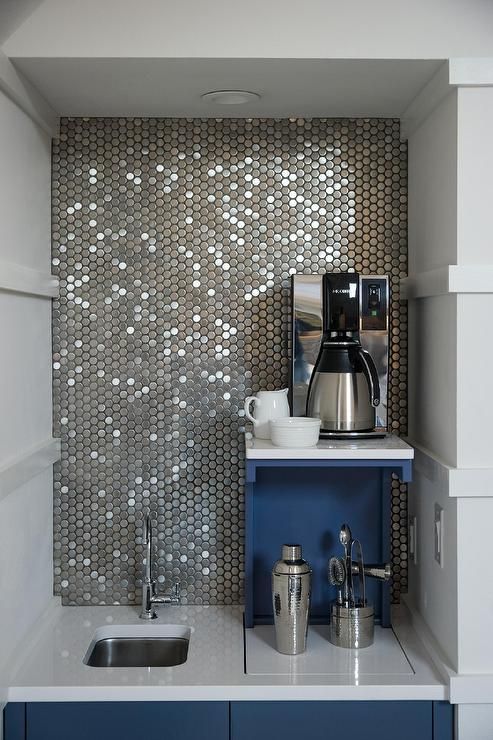
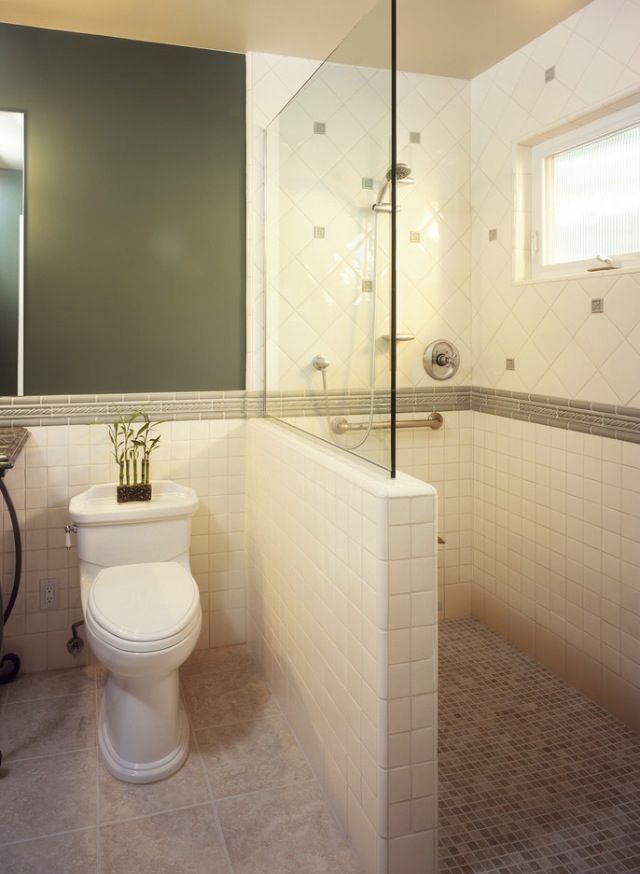
As you lay out your new bathroom, be sure to remember that these rooms are designed in such a way that everything can get wet. So you'll want to be sure to site your toilet and sink in such a way that they don't get sprayed by your shower. If there's not enough room to do so, a simple partition between the shower and toilet/sink space can do the job nicely — and using one made from glass will still keep the open feel of the room.
Easier to Clean
As an added bonus, wet rooms are easier to clean than conventional bathrooms. Think about it: There are no shower trays or screens to contend with and, with fully tiled walls and floors, a wet room cleaning routine is super simple. If you opt to install a wall-mounted toilet or sink to further open your floor space, cleaning gets even easier.
What’s more, when installed properly, your wet room floor will protect your subfloor better than standard bathroom flooring. Because the floor of a wet room is as waterproofed, or “tanked,” as a conventional shower pan, wet room floors prevent water from infiltrating your subfloors and are actually more protected against mold and mildew than a normal bathroom would be.
Safer and More Accessible
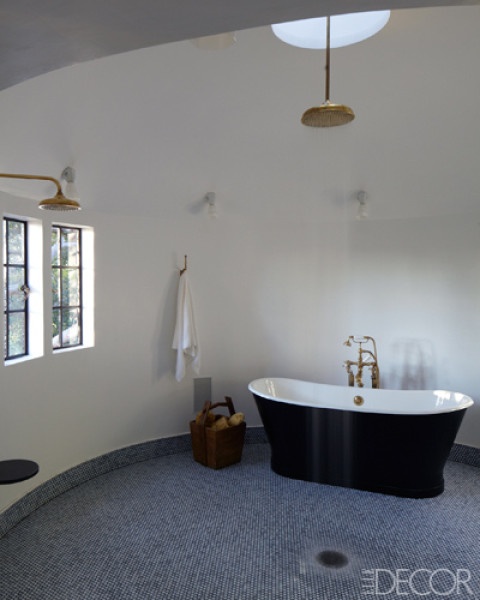
One of the best reasons for installing a wet room bathroom is its functional, accessible design. Whether or not you have any handicapped or elderly members of your family, a doorless, curbless shower area is just safer in general. If you’re concerned that a fully tiled floor might be a slip hazard, you can easily avoid installing polished tile and opt for a non-slip option like natural stone or porcelain.
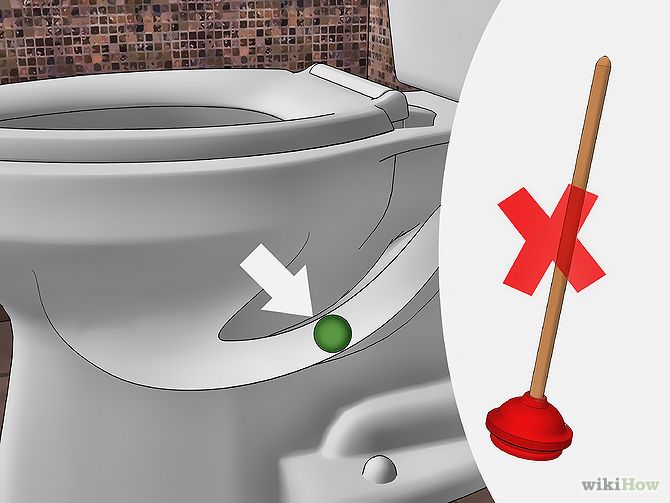
Speaking of safety, be sure to plan your drain correctly. A popular option in wet room bathrooms is drains that run from one wall to another and funnel water to a central point. Such a drain system can act as something of a gutter that can ensure that water stays on one side while the other side stays dry.
Adds to the Value of Your Home
Open floor plans are in, and they’re here to stay. Sleek design and open spaces are timeless qualities that are both stylish and functional. Secondly, a bathroom without a shower alcove or a bathroom stall feels and looks larger, so increasing the functional space in a room is always a plus when it comes to adding value to your home.
More Related Articles:
- How Much Does a Shower Remodel Cost?
- How to Tile a Shower in 7 Steps
- Making It Rain: How Much Does It Cost to Install a Shower?
- How Do You Install a Shower? Follow This Guide
- How to Remove a Bathtub in 4 Simple Steps
Installing a Wet Room
If you can’t already tell, adding a wet room shower area to your house is a gift that keeps on giving. That said, the idea of ripping apart your bathroom can feel like a pretty daunting and even scary task. And let’s be clear: Unless you’re an advanced DIYer or all-around remodeling expert, installing a wet room is a job that’s best left to the professionals. Ensuring that everything is graded and waterproofed properly is a necessary aspect of a wet room installation, and a pro will be able to make sure there aren’t any water leaks in your new space.
But still, how do you begin designing your new wet room? Whether you’re in the process of a new build or remodeling your existing bathroom, there are crucial aspects to a wet room bathroom design that it pays to stay aware of. Here are some considerations to keep in mind while you’re in the design phase:
1. Examine Your Bathroom Floor
Before you dive into designing a wet room, you first need to examine your bathroom floor to determine how complex the install will be. In fact, it’s generally accepted that the floor type dictates every aspect of the installation process.
Consider the two most popular floor types: timber and concrete. Timber flooring is perhaps the most popular type of flooring and, if you are planning on installing a wet room upstairs, you are most certainly working with timber flooring. In timber floors, joists run parallel to support plywood subflooring. To install a wet room onto a timber floor, you’ll first need to have a floor former installed onto your subfloor. Floor formers have built-in gradients that work to channel water into the drain. On the other hand, if you are installing a wet room onto a concrete subfloor, you’ll need to first install a drain screed to enable the water to channel away from the shower area and safely exit into a wastewater pipe.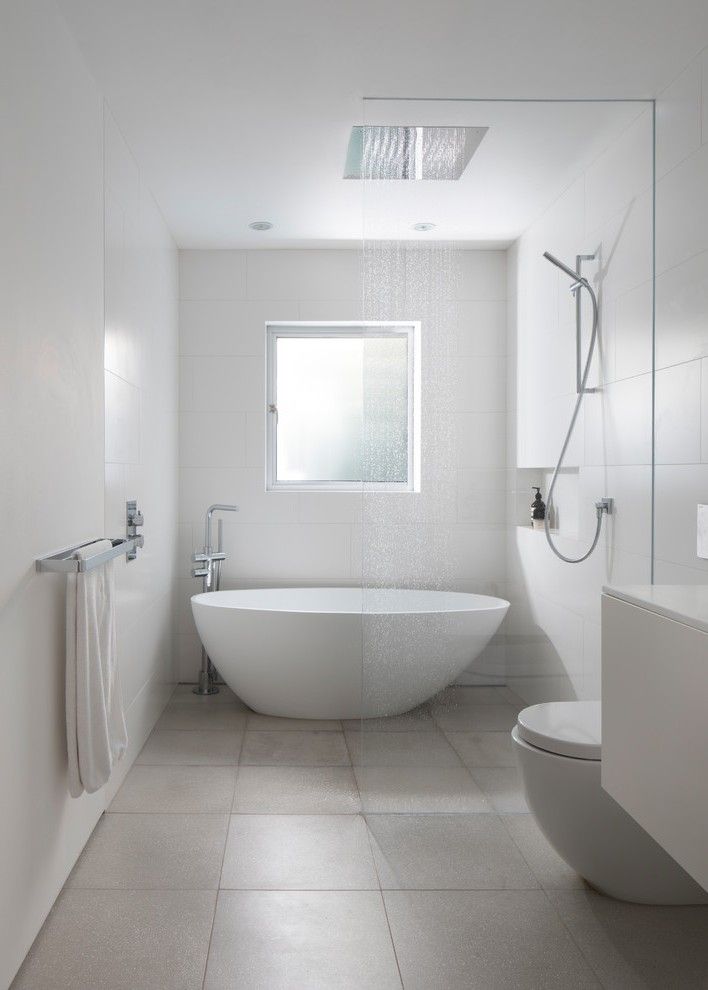
2. ‘Tank’ the Wet Room
One of the key benefits of a wet room bathroom is that the entire floor area, as well as the lower section of each wall, is properly waterproofed — “tanked”— to prevent water from damaging the structural elements of your home. The waterproofing process can be time-consuming and can account for a hefty portion of your project’s budget.
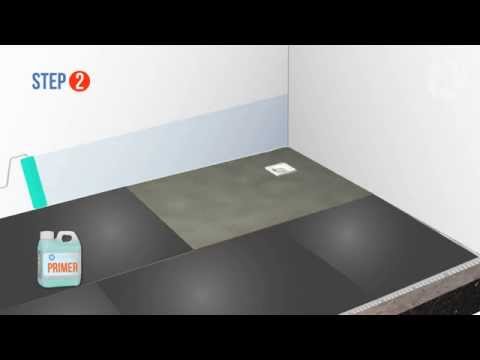
To properly waterproof your wet room area, the entire floor section (including the lower section of the walls) will need to be primed and then have a membrane applied that will need to be set or cured. You can choose to use a liquid membrane like Jackoboard Wet Room Waterproofing Tanking Kit that’s painted on with a roller, or a physical membrane such as Impey TileSafe, which is laid onto the floor before tiling.
3. Choose Flooring and Wall Coverings
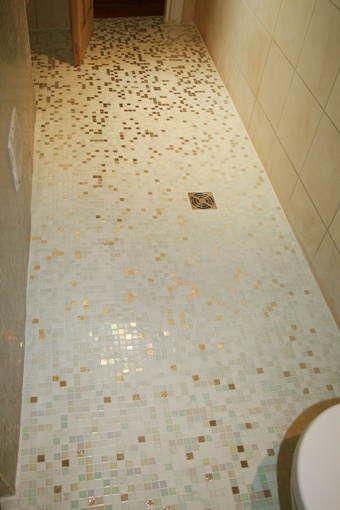
Once the room has been properly waterproofed, the surface areas are ready to be applied. Tile is by far the most popular choice for surface areas in a wet room, and for good reason.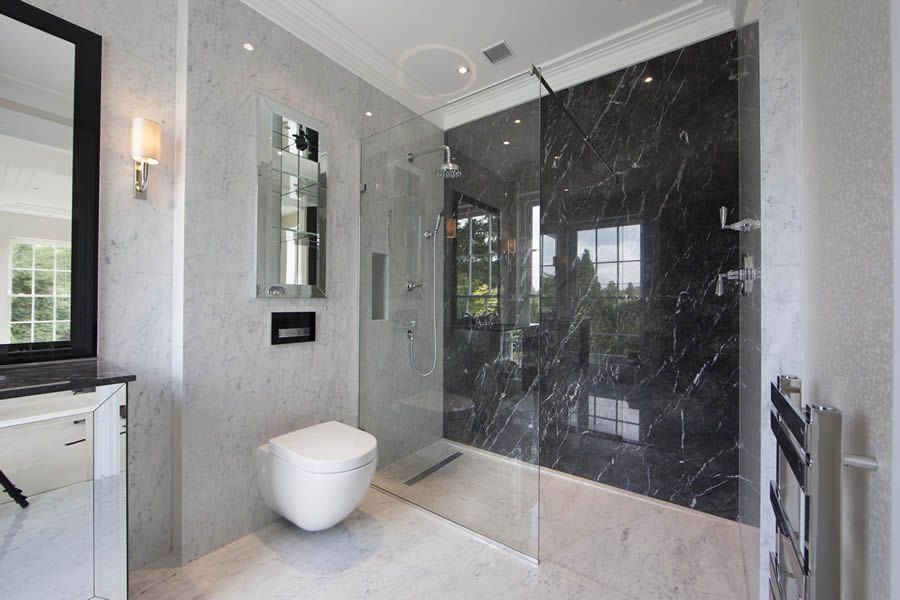 Tile is a sturdy, aesthetically pleasing option that is both easy to maintain and can stand the test of time. However, when choosing tile, it’s important to go for a material that’s not inherently slippery, like ceramic tile. Although they need to be sealed after installation to prevent damage and staining, natural stone tiles are one of the most popular choices for surface areas in a wet room due to their rustic, hard-wearing finish, but also because they’re less slippery than other types of tile.
In addition to tile flooring, vinyl and rubber flooring are other popular choices for a wet room bathroom area. Because of their durability, cost-effectiveness and the wide variety of available patterns, colors and textures, vinyl and rubber flooring remain good waterproof options for your new wet room, particularly if tile is out of your budget.
In terms of wall tile, you can really let creativity be your guide. Keep in mind that porcelain is less porous than ceramic, so it might be a good choice for keeping moisture away from the back of the tiles. Glass tiles are also a popular and waterproof option.
4. Vent It
One other thing to keep in mind when planning your wet room: Be sure to have good ventilation. This can be as simple as a standard vent fan, but it's critical that you include one in your planning because wet rooms tend to get moisture over a larger surface area. If that moisture doesn't have a place to vent, mold and mildew growth can occur.
Wet Rooms: Worth the Work
Whether you want to add value to your home, increase accessibility or simply update your space, adding a wet room may be the way to go. And doing so might be less complicated than you think.
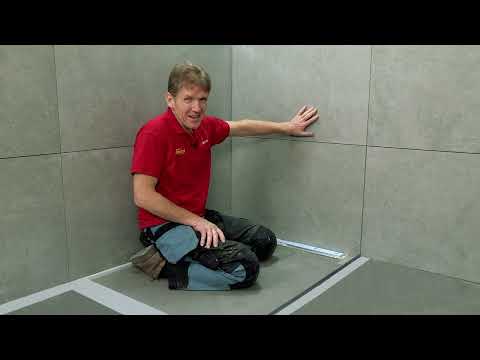
How to install a wet room
How to guides
Posted by Adam Chard in How to guides | 4 years ago 12 min read
One of the best ways to add value to your property is to install a stylish wet room bathroom. In this blog post, we'll discover how it's done.
If you don't already know, a wet room is a fully waterproofed bathroom, offering level access showering and producing a clean, contemporary look.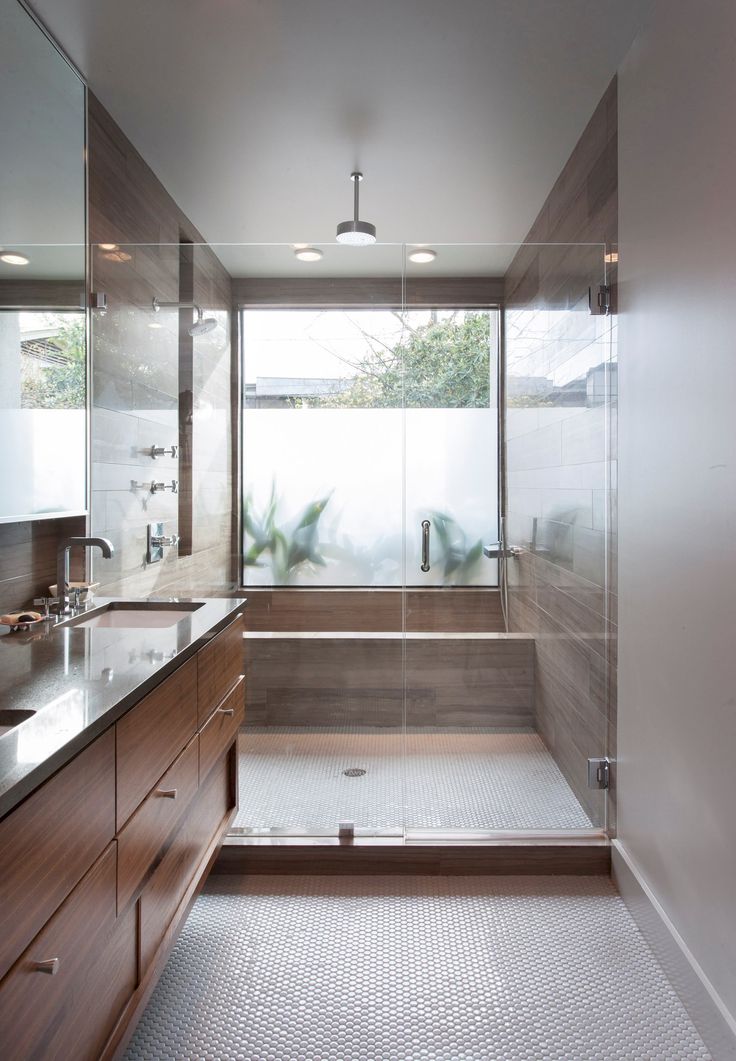 A shower tray with drain is normally incorporated into the floor and tiled over.
You may think a wet room is out of your price range, but we argue not. With our high quality wet room installation kits, made right here in the UK, you can create your very own wet room in just a matter of days, rather than weeks.
You don't need a huge space to create a stunning wet room like this
Below, you'll find a video and instructions on how to install one of our wet room kits, with shower tray and waterproof flooring, which will get you well on your way to creating a beautiful and fully-functioning wet room.
Before you do anything
Always unpack your wet room pack immediately after delivery. Check for any damage or faults as it’s better to find them now, rather than during installation.
Always turn off your water at the mains before attempting any DIY in the bathroom.
Tools you’ll need:
- Circular saw
- Electric drill
- Hard point saw
- Notched trowel
- Paint brushes
- Pencil
- Silicone sealant gun
- Spirit level
- Standard screwdrivers
- Tape measure
Check you have the following:
Supplied with wet room tray waste & installation kit:
- 2 x internal wall corners
- Fix-KST fixing adhesive
- PRO-Seal pre mix tape sealer
- Waterproof tape
- Wet room shower tray waste and trap
- Wood floor primer
See what's in the box:
Will need to buy separately:
- Silicone sealant
- Tiles
- Tile grout & adhesive
- Waterproof floor kit
- Wet room shower tray
- Wood battens
- Wood screws
- Shower & valve (if required)
- Glass panel(s) (if required)
Time to complete:
- 3–5 days (depending on the size of your room)
How much does it cost to install a wet room?
To find out the latest typical costs that a tradesperson might charge to fit a wet room, check out our guide to bathroom installation costs.
Fitting your wet room shower tray and floor
At Victoria Plum, you’ll find our wet room shower tray kits are made from high quality materials for a 100% waterproof seal and anti-bacterial protection.
Please follow this video, with step-by-step instructions below:
The instructions below are for fitting your wet room shower tray, waste and flooring only.
Here's how to install a wet room
-
Measure the entire floor area and plan the layout of your new wet room on a piece of paper.
-
Decide now if any of the waterproof boards need to be cut and if they do, cut them now using a hard point saw. Lay the entire pack out across the floor area to check the fit.
-
Carefully remove the waterproof boards and store somewhere safe.
-
Mark the shower tray position onto the floor and position of the waste hole in the wet room shower tray.
-
Using the nails or screws holding the existing flooring down as a guide, establish where the joists are.
-
Mark the centre line of the first joist outside the shower area as you will need to remove the floor up to this line.

-
Carefully remove the wet room shower tray and store somewhere safe.
-
Set your circular saw blade to the depth of the floorboards. It may be necessary to increase the depth slightly if it doesn't go right through the floorboards.
-
Using the circular saw, cut along the lines you have marked and remove the flooring and all nails and screws.
-
Make sure that the remaining floorboards or sheets in the rest of the room are fully secured down and as level and flat as possible.
-
Spread solvent weld adhesive around the inside of the drain connector.
-
Push the shower drain base onto the shower drain connector with a twisting action.
-
Spread solvent weld adhesive around the inside of the opposite end of the shower drain connector and then slide onto the waste pipe with a twisting action.
-
Once the solvent weld has set, pour water down the drain to check that the waste isn't blocked and that there aren't any leaks.
Handy hint: Make sure all pipes and drainage parts are clean at all times using solvent waste pipe cleaner.
-
All exposed joists will now need a batten running along the inside of the joist to accommodate the new plywood low level floor.
-
Cut some timber batten (approximately 20mm x 50mm) to length and screw at approximately 150mm intervals to the inside of all joists 18mm below the top of the joists.
-
Cut some 18mm plywood to fit between the joists on top of the battens previously fitted.
-
Measure the shower drain base position on the plywood then mark and cut using a jigsaw, so that the drain base and connector will be exposed through the new floor.
-
If you are left with a gap between the wet room shower tray and the flooring, make use of any of the discarded floor boards to make up the gap.
-
Lay the wet room shower tray into position and check it lines up with the shower base.
 Remove the tray and store aside for the moment.
 -
Paint the entire floor area (including the new plywood) with wood floor primer. Leave to dry for at least 30 minutes.
-
Spread Fix-KST adhesive onto the shower tray floor area and drag your notched adhesive trowel across the surface to leave just the right amount of adhesive on the floor.
-
Place the wet room shower tray into position and bed down into the adhesive. Check that the shower tray is level in both directions.
-
Place the internal bowl into the shower drain base, then lock the internal dome into position.
-
Apply a thin bead of silicone around the drain base top and the outer ring of the shower tray.
-
Screw the drain top securely then allow the silicone to cure.
-
Spread Fix-KST onto the floor area, then use your notched trowel to leave just the right amount of adhesive on the floor.
-
Place the first waterproof board into position and bed down onto the adhesive cement.
Handy hint: If the floor immediately outside of the shower area is likely to get wet, it is a good idea to angle the boards slightly so that the water will run towards the tray and drain.
-
Repeat for the remaining boards, mixing more Fix-KST as required. Leave to set for approximately 3 - 4 hours depending on room temperature.
-
Along all joints fit the fixing plates at approximately 300mm centres. Place the centre hole of the fixing plates directly over the join line and screw to the floor.
-
Place the waterproof internal corners into position then mark around them with a pencil.
-
Using Pro-SEAL pre-mix tape sealer and a paintbrush, apply a thin layer of adhesive slightly overlapping the pencil marks.
-
Place the internal corner firmly into the tape sealer, then apply a further thin layer of tape sealer over the top.
-
Apply a thin layer of Pro-SEAL tape sealer to one edge of the floor and adjoining wall approximately 60mm wide on each.
 Repeat for any remaining walls.
 -
Apply a thin layer of Pro-SEAL tape sealer over all board joints and fixing plates.
-
Place the waterproof tape strips firmly into the tape sealer then apply a further thin layer of tape sealer over the top.
-
Place the shower drain top upside down and mark around it with a pencil.
-
Set aside the drain top then mark a line from each of the 4 corners of the square to each corresponding corner of the wet room shower tray. These lines act as tiling guidance for the tray falls and also the "tile up to point" for the shower drain top.
-
Finish the tray in your choice of tile using an S1 flexible cement-based tile adhesive.
-
If you are using tiles larger than 100mm, it is necessary to cut the tiles along the same lines previously marked, in order to maintain the slope.
-
Measure from the top of the finished tile to the top of the shower drain top.
-
Now mark the same distance as previously measured on the shower drain top.
-
Use a hard point saw to cut the excess from the bottom of the shower drain top.
-
Refit the O ring onto the lowest indent remaining on the shower drain top.
-
Ease the drain top into place, then fill the gap around the edges of the shower drain top and the start of the tile with the same grout you used on your tiles.
-
Place the shower drain finishing grate into position. Leave to dry for at least 24 hours before using your shower.
Congratulations, you've now fitted your new wet room shower tray, waste and flooring.
We would also recommend waterproofing your walls using our waterproof wall kit.
Whilst DIY can be a good way to save time and money, you should always hire a qualified professional to plumb and install your products. The instructions above are simply a guide to fitting a wet room and shouldn’t be used to attempt full plumbing and installation.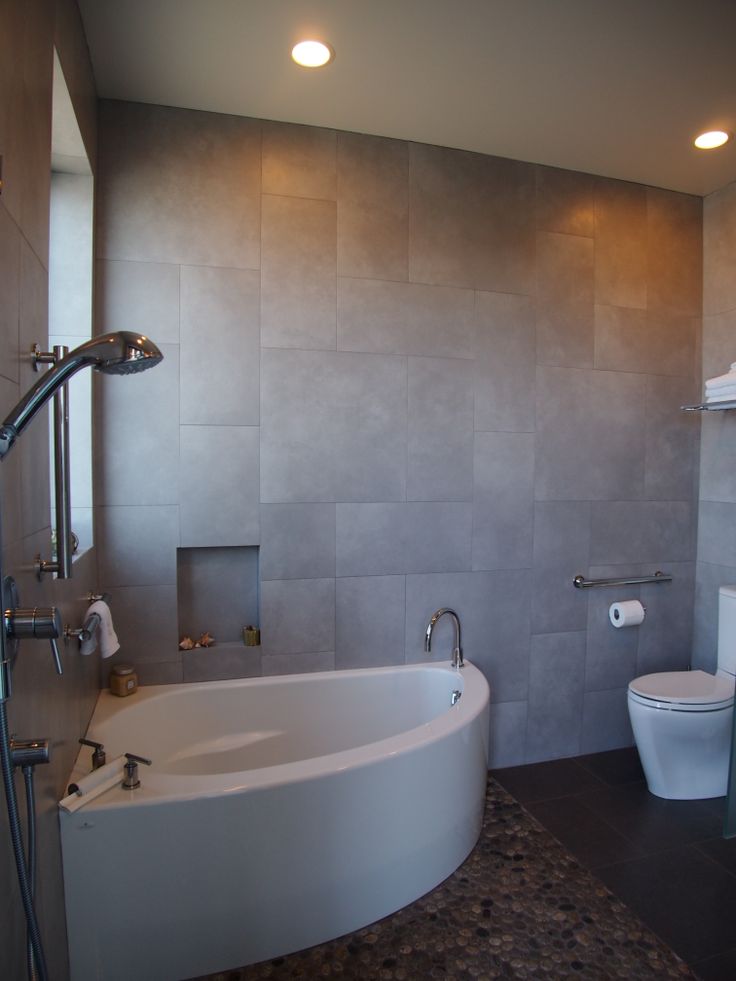
Great wet room ideas & advice
Click on any of the links below to discover more wet room inspiration and advice:
- 4 great wet room ideas
- Walk in shower enclosure and wet room ideas
- Planning a wetroom
Posted by Adam Chard in How to guides | 4 years ago
A born & raised West Countryman, now living on the Yorkshire Coast, for over 9 years Adam has been bringing home interior ideas to life at Victoria Plum. Adam’s favourite interior styles have been shaped by both urban and natural influences.
Common sense when installing outlets in damp rooms
The water that flows from our taps is a good conductor of electricity. This is the reason for the possible problems associated with the use of electrical appliances in wet areas.
Unfortunately, accidents happen year after year and month after month. Previously, it was a hairdryer that fell into a filled bathroom or a working washing machine.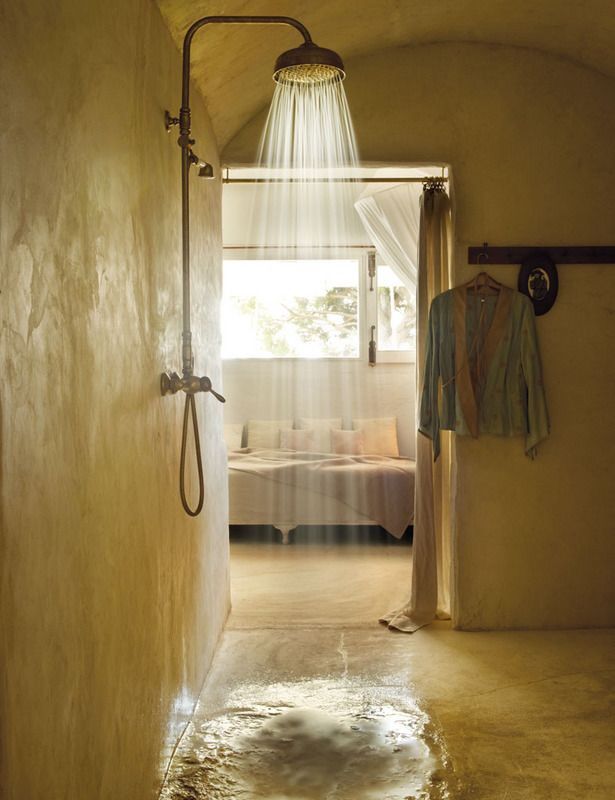 Times are changing, and now the main danger comes from charging gadgets. A charging smartphone that fell into the water has caused more than one death of teenagers and adults. Only in 2018 such cases occurred in Lobnya, Serpukhov, Bratsk and other Russian cities. A typical picture is an unsuccessful attempt to take a selfie or answer a phone call when the phone was on charge.
In the Soviet Union, houses were rented out “with municipal repairs”, they simply did not install sockets in bathrooms and toilets, and this was a cardinal solution to the problem. No electricity - no problem.
Following this logic, you can go back half a century ago, but we are used to living in comfort and are not ready to give up the modern benefits of civilization.
In the bathroom we use a washing machine, hair dryer, curling iron (girls will understand, for men we explain - curling tongs) or a hair straightener, a mirror with light, an electric razor, a smartphone and even a TV where we feel comfortable.
In the bathroom we can install electric underfloor heating, heated towel rails, a shower cabin with music and lights or a hydromassage bath. Yes, and without lamps in the bathroom is definitely not enough.
Let's think together how to protect yourself and your loved ones from electric shock in the bathroom?
What do the standards tell us about installing sockets in bathrooms or other wet areas of apartments and houses?
Consider two documents:
- Rules for the installation of electrical installations (PUE)
- GOST R 50571.11-96 (IEC 364-7-701-84) “Electrical installations of buildings. Part 7. Requirements for special electrical installations. Section 701 Bathrooms and showers.
But before that, let's just think logically.
What does common sense tell us?
Sockets should be placed away from water. Given the accidents described, it is best to place them at least 1.5 meters from the edge of a bathtub, shower or sink.
Why? Because the length of the smartphone cord is approximately 1 meter. If you have children or if you are planning a replenishment in the family, it is better to foresee this, as they say, God saves the safe.
This will not cause any particular inconvenience when connecting electrical appliances, but it will protect your loved ones from trouble, because teenagers so often first think and only then do. And adults can forget and do something spontaneously.
Overview GOST R 50571.11-96 (IEC 364-7-701-84)
“Electrical installations of buildings. Part 7. Requirements for special electrical installations. Section 701. Baths and showers”
This GOST describes the requirements for electrical installations in bathrooms and showers in their surrounding areas. The wet room is divided into four zones.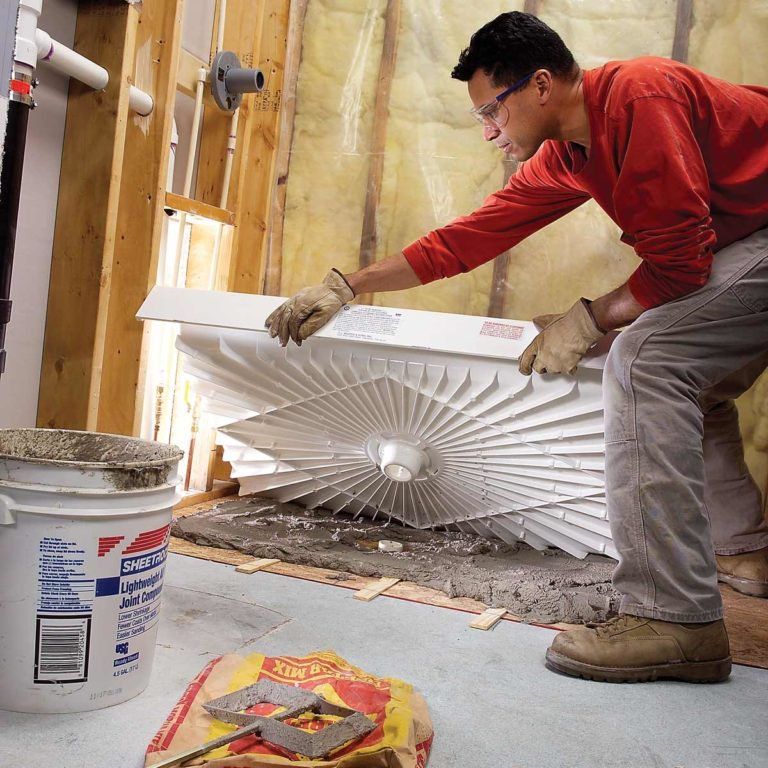
- Zone 0 - where the water will stand, i.e. inside a bathtub or shower tray.
- Zone 1 - horizontally is the outer edge of the bathtub or shower tray (or, if there is no tray, up to 60 cm from the shower head), vertically at a distance of 0 to 2.25 m (i.e. from the floor almost to the ceiling over a bathtub or shower).
- Zone 2 extends another 60 cm horizontally from zone 1.
- Zone 3 retreats another 2.4 m from zone 2.
| Zone 0, 1, 2 and 3 when installing a bathtub
| Zone 0, 1, 2 and 3 when installing shower with tray (or shower enclosure) |
In zones 0, 1, 2 switches must not be installed (701.53)
There must be no outlets in zone 0, 1, 2. There may be socket-outlets in zone 3 if they are protected by an RCD or RCBO with a leakage current not exceeding 30 mA.
Any switches and sockets must be at least 0.60 m from the door to the prefabricated shower enclosure. Junction boxes may only be installed in zone 3.
In zone 0, only electrical appliances intended for use in the bath may be installed.
Only water heaters may be installed in zone 1.
Only water heaters and class II luminaires may be installed in zone 2.
Overview of PUE
Clause 7.1.48. In the bathrooms of apartments and hotel rooms, it is allowed to install socket outlets in zone 3 according to GOST R 50571.11-96, connected to the network through isolating transformers or protected by a residual current device that responds to a differential current not exceeding 30 mA.
All switches and sockets must be at least 0.6 m away from the shower door.
All discussions about the degree of protection IP refer to electrical equipment, not sockets!
Terminals
- Socket outlets must not be located closer than 60 cm from the water source (eg the edge of a filled bathtub).
- It is better to move the sockets from the water source to 1.5 meters so that no one would physically drop a smartphone while it is charging into the water. Yes, we understand that this is unlikely, no one will check where you install sockets in the bathroom, the choice is yours, but there are sad statistics. The decision is yours alone.
- It is logical that sockets are not located near the floor even in zone 3. What if there is a flood? Sockets should not be in the water.
- It is logical not to place outlets opposite valves or flange connections. Even if the valve bursts, the jet of water should not be directed to the outlet, because at this time your loved ones may be in the bathroom.
- Bathroom sockets must be protected by a working RCD with a leakage current of not more than 30 mA , details in our article 9 important facts about RCDs - make your sockets 100% safe.
- There are recommendations to use in bathrooms RCD with a leakage current of 10 mA (see SP 31-110-2003, Appendix A).
- All arguments in the PUE or GOST R 50571.11-96 regarding the degree of protection IP do not apply to sockets, but to electrical appliances. We list them, suddenly they will be useful to you when choosing a lamp for the bathroom.
- In zone 0, electrical appliances with a degree of protection of at least IPX7, voltage up to 12 V, intended for use in the bath, are installed, and the power source must be located outside this zone.
- Only water heaters may be installed in zone 1, degree of protection against IPX5.
- Water heaters and luminaires of protection class 2, degree of protection against IPX4 can be installed in zone 2.
- In zone 3, appliances with degree of protection IPX1 can be installed.
- If you want to install a socket close to the water, don't worry, a high protection socket will keep you safe.
Most manufacturers produce sockets with IP44 protection. What does IP44 mean?
In accordance with GOST 14254-2015, an IP44 socket with a closed cover (aka “dust and moisture-proof socket”) will remain in good condition if it is splashed from any direction.
First of all, if such an outlet is not splashed, but a jet of water, then it can cause electric shock to a person.
Secondly, when opening the cover of the socket, the degree of protection is reduced from IP44 to the IP degree of protection of a conventional socket, do not believe it - check with the manufacturer. Now remember how often you unplug the plug from the outlet to which, for example, a washing machine is connected?
So why risk it?
It is possible to install sockets with the usual degree of protection and, for example, protective covers, away from water sources, this will be sufficient to ensure safety.
This article describes the situation with the installation of sockets in individual residential premises - in apartments, townhouses, cottages, etc.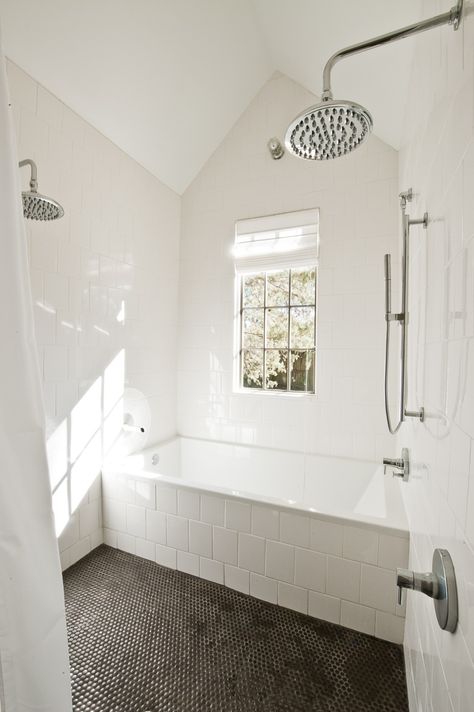
P.S. When it comes to hotels, baths, saunas, laundries and other public buildings, the requirements are even tougher.
PUE, clause 7.1.48. Installation of plug sockets in bathrooms, shower rooms, soap rooms of baths, rooms containing heaters for saunas (hereinafter referred to as "saunas"), as well as in washing rooms of laundries is not allowed, with the exception of bathrooms of apartments and hotel rooms.
In the bathrooms of apartments and hotel rooms, it is allowed to install socket outlets in zone 3 according to GOST R 50571.11-96, connected to the network through isolating transformers or protected by a residual current device that responds to a differential current not exceeding 30 mA.
Instructions (manual) for the operation of psychrometric hygrometers VIT-1 and VIT-2
This article will acquaint you with the instruction (operating manual) for psychrometric hygrometers of the VIT-1 and VIT-2 types, as well as how to dispose of psychrometric hygrometers .
Do not forget that you can buy psychrometric hygrometers VIT-1 and VIT-2 from us at the best price.
Introduction
1. The instruction defines the safety measures when working with the hygrometer, its preparation for operation and the procedure for operation, typical malfunctions and maintenance of the hygrometer.
2. Specifications of the hygrometer, corrections for hygrometer thermometers, manufacturer's guarantees are given in the passport.
Instructions for safety when working with the hygrometer
1. When working with the hygrometer, do not:
- Subject the hygrometer to sharp blows both during installation and during operation;
- Wipe the scale of thermometers and psychrometric table with solvents, acids and similar liquids;
- Overheat the thermometers of the VIT-1 hygrometer over 45°C and the VIT-2 hygrometer over 60°C. Overheating will destroy the thermometer reservoirs.
2. When the thermometers are destroyed, the thermometric liquid toluene is removed from the surrounding objects with hot water. Toluene is toxic, flammable, flash point is about 5°C.
Design and principle of operation of the hygrometer
1. The hygrometer is a device assembled on a base of phenolic or other materials with similar properties. Attached to the base are two thermometers with a scale, a psychrometric table, a glass or plastic feeder filled with distilled water. Thermometer reservoir labeled "Humid." moistened with water from the feeder using a cambric or chiffon wick.
2. The method of measuring relative humidity with a psychrometric hygrometer is based on the relationship between air humidity and the psychrometric difference - the difference between the readings of "dry" and "wet" thermometers that are in thermodynamic equilibrium with the environment. After taking the readings of the thermometers and introducing amendments to their readings, the difference in the readings of the thermometers is determined. Then, according to the indication of the "dry" thermometer and the difference between the readings of the "dry" and "moist" thermometers, the relative humidity of the air is determined according to the psychrometric table.
Preparing the hygrometer for operation
1. Unpack the hygrometer and check that the instrument is complete in accordance with the passport.
2. Remove the feeder from the base. Fill the feeder with distilled water. Filling is carried out by immersing the feeder in a vessel with water with the sealed end down.
3. Install the feeder on the base so that there is at least 20 mm from the edge of the open end of the feeder to the thermometer reservoir, and the wick does not touch the walls of the open end of the feeder.
Attention! Wet the wick by dipping the wet-bulb reservoir into the feeder with water before placing the feeder in working position.
4. Place the hygrometer in a vertical position at eye level.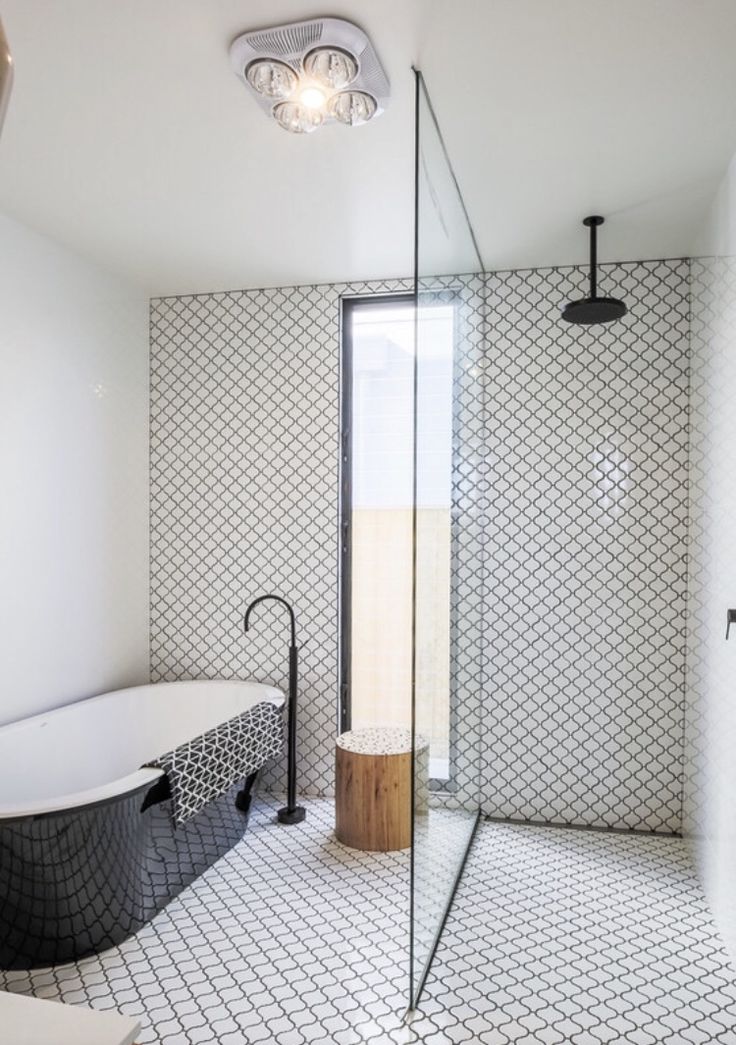 At the installation site of the hygrometer, there should be no vibrations, sources of heat or cold that create a temperature difference between the lower, main tank and the upper spare, more than 2 ° C.
5. The psychrometric table mounted on the base of the hygrometer is valid for a certain velocity of the vertical air currents (aspiration velocity) surrounding the hygrometer. The suction rate is indicated on the table. You can see the complete psychrometric table for the VIT-2 version hygrometer by reference .
6. Before measuring relative humidity, measure the aspiration rate directly below the hygrometer. Measurement of the aspiration rate is carried out using a vane anemometer U5 GOST 6376-74. It is possible to use the previously produced ASO-3 anemometer, type B, GOST 6376-52. The measurement procedure is in accordance with the passport for the anemometer. The aspiration velocity measured by the anemometer is rounded off to tenths of m/s according to the arithmetic rounding rule. You can buy an aspiration device for VIT hygrometers by clicking on link .
7. Measure relative humidity with a hygrometer only after the readings of the hygrometer's thermometers have been established. The minimum holding time of the hygrometer in the measured medium is 30 minutes.
Operation of the psychrometric hygrometer
1. Take readings on the dry and wet thermometers. When taking readings, the eye of the worker should be at the level of the horizontal tangent to the meniscus of the liquid so that the scale mark at the reference point is visible straight.
2. A person working with a hygrometer should be at a distance of normal visibility of the scale marks from it and beware of breathing on thermometers during readings. When reading thermometers, first tenths of a degree are quickly counted, then whole degrees.
3. Determine the temperature using thermometers with an accuracy of 0.1°C by entering the corrections for thermometers given in the passport for the hygrometer to the readings.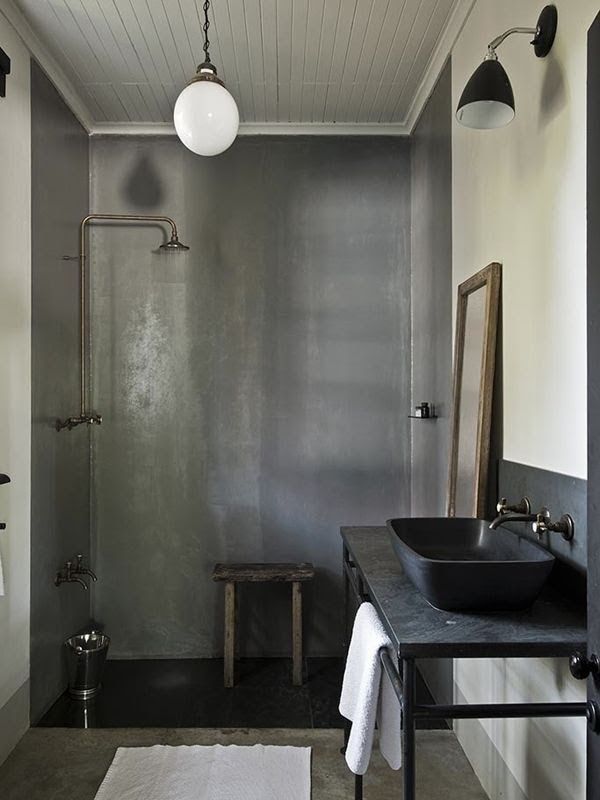 Calculate the temperature difference between dry and wet thermometers. Corrections are introduced by algebraic addition.
4. If there are no corrections in the passport for the readings made by "dry" and "wet" thermometers, calculate the corrections by linear interpolation for two corrections related to temperatures between which the reading by thermometers lies.
5. Determine the relative humidity from the psychrometric chart. The desired relative humidity will be at the intersection of the lines of temperature according to the "dry" thermometer and the temperature difference according to the "dry" and "wet" thermometers.
6. If the table does not contain the obtained temperature difference according to the "dry" and "wet" thermometers, use interpolation to determine the humidity. If there is no dry-bulb temperature in the table, to determine humidity, use interpolation only for those areas of the psychrometric table in which a 1°C change in dry-bulb temperature results in a change in relative humidity of more than 1%.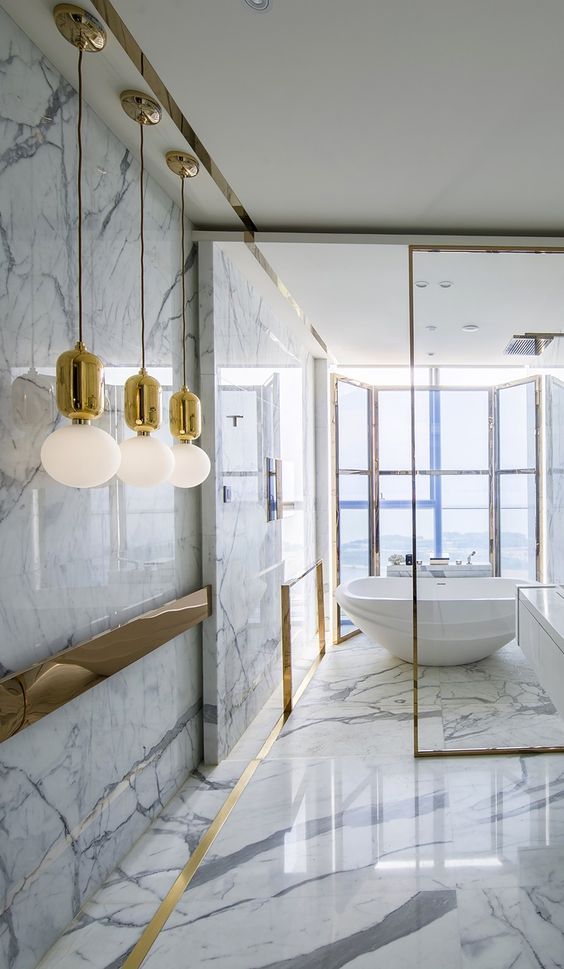
For other areas of the table, the dry bulb temperatures should be rounded to the nearest table value using the arithmetic rounding rule.
Example of determination of relative humidity by interpolation
1. Determine the temperatures using "dry" and "wet" thermometers and the difference between these temperatures.
| Thermometers | Measured temperatures | Amendments to thermometers according to passport | Temperatures as amended |
| Dry | Tc=22.5°C | -0.15°C | 22.35°C |
| Wetted | Tw=16.1°C | +0.20°C | 16.3°C |
We take Тс=22.4°С, temperature difference (Тс-Тв) is equal to: 22.4-16.3= 6.1°С.
2. Determine the relative humidity for Тс=22.4°С and Тс-Тв=6.0°С, for which we interpolate the values of relative humidity according to the table for Тс from 22 to 23°С and Тс-Тв=6.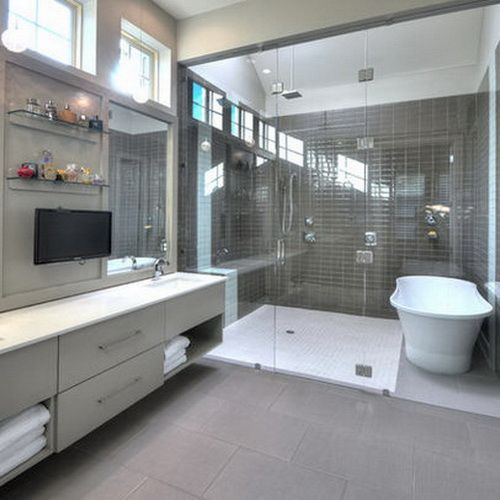 0 °C.
0 °C.
| Tc according to table | Tc-Tv difference according to table | Relative humidity |
| 22°C | 6.0°C | 48% |
| 23°C | 6.0°C | 50% |
With an increase in Tc by 1°C, the relative humidity increases by 2%, therefore, an increase in Tc by 0.4°C will increase the relative humidity by (0.4x2)/1=0.8%.
For Tc=22.4°C and Tc-Tw=6.0°C, the relative humidity is: 48+0.8=48.8%. We accept "Fp" = 4.9%.
3. Determine the relative humidity for Тс-22.4°С and Тс-Тв=6.5°С, for which we interpolate the relative humidity values according to the table for Тс from 22 to 23 and Тс-Тв=6.5°С.
| Tc according to table | Tc-Tv difference according to table | Relative humidity |
| 22°C | 6.5°C | 44% |
| 23°C | 6.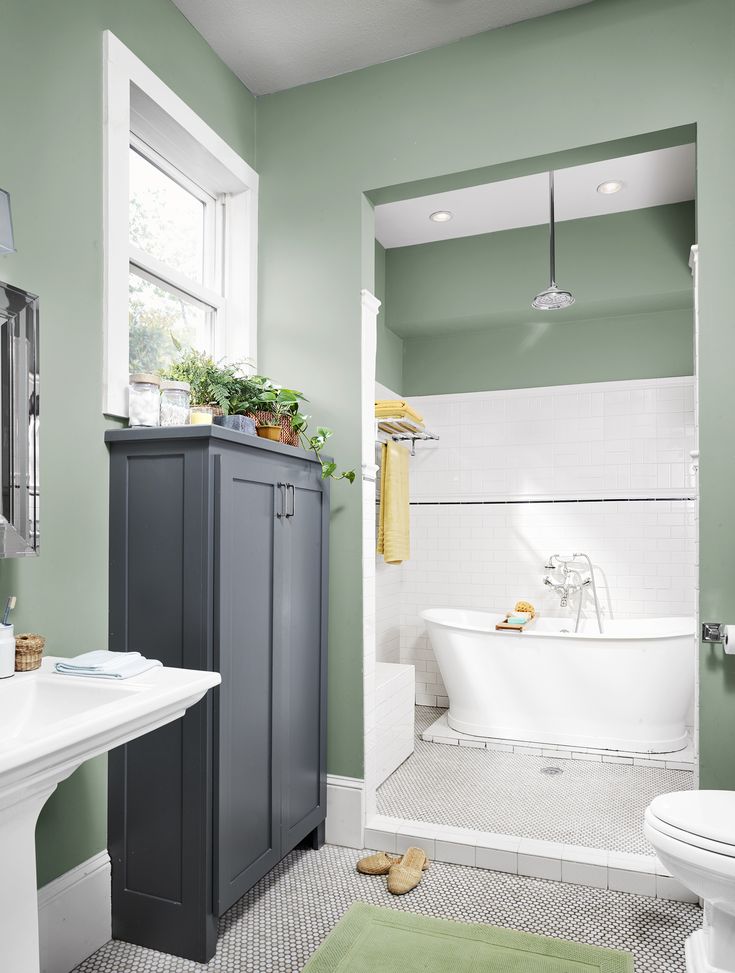 5°C 5°C | 46% |
For Tc=22.4° and Tc-Tw=6.5°C, the relative humidity according to the calculation similar to p. 2 is 44.8%. We accept "Fp" = 45%.
4. Determine the relative humidity for Тс=22.4°С and Тс-Тв=6.1°С, for which we interpolate the found values of relative humidity for Тс-Тв from 6.0°С to 6.5°С at Тс = 22.4°C.
| Tc | Difference Ts-Tv | Relative humidity |
| 22.4°C | 6.0°C | 49% |
| 22.4°C | 6.5°C | 45% |
With an increase in Tc-Tw by 0.5°C, the relative humidity decreases by 4.0%, so an increase in Tc-Tw by 0.1°C will reduce the relative humidity by (0.1 x 4.0)/0.5 = 0.8%. 49.0-0.8=48.2%. We accept "Fp" = 48%.
Typical malfunctions of psychrometric hygrometers and methods for their elimination
1. The hygrometer contains glass parts, so protect the hygrometer from drops and sharp impacts.
2. If the feeder is broken, replace it with another supplied with the hygrometer, to do this, remove the remains of the broken one and insert a new one, fixing the feeder with a spring located on the back of the hygrometer base. Or buy a new feeder for the VIT hygrometer.
3. Thermometric fluid bursts are a repairable problem. If liquid breaks appear in the thermometers, eliminate them by carefully heating the thermometer reservoirs to the appropriate temperatures (VIT-1 not more than 45 ° C and VIT-2 hygrometer not more than 60 ° C. Overheating will destroy the thermometer reservoirs).
Maintenance of psychrometric hygrometers
1. The feeder must always be filled with distilled water in accordance with GOST 6709-72. Top up the water well in advance, preferably immediately after the measurement or at least 30 minutes before the start of the moisture measurement.
2. Allow the use of boiled water, boiling time is at least 15 minutes. Fill the feeder with water pre-cooled to ambient temperature.
3. Keep the wick on the wet bulb reservoir clean, soft and damp at all times. If the air dust content is up to 5 mg/m³, change the wick once every two weeks, with more dust content as the wick gets dirty.
4. Before replacing, remove the dirty wick from the thermometer reservoir. Wipe the reservoir with a cotton swab moistened with warm water.
5. Take a wick from the hygrometer kit, or cut a 60 mm long wick if the wicks in the kit are given as blanks, into 10 pieces. Wet the wick in distilled or boiled water and pull it over the thermometer reservoir so that you can tie it with a thread over the reservoir. The end of the tied wick above the tank must be at least 7 mm.
6. Prepare two loops of thread. With one loop, pull the wick tightly over the thermometer reservoir and tie off the threads. Put the second loop on the wick under the reservoir and gradually tighten it, all the while spreading the wick so that it fits snugly around the reservoir. Tighten the loop not tight, but so that it does not interfere with the capillary wetting of the wick tissue on the thermometer reservoir.
7. For the manufacture of a new wick, use cotton chiffon, bleached, undyed, technical without a ban in accordance with GOST 9310-75 or bleached mercerized cambric, article 1402 ON according to GOST 8474-80. It is allowed to use cotton cord-stocking, art. 494, OST 17-184-75.
8. Other types of chiffon or cambric before making the wick, treat as follows:
- wash in hot water (10 g of soda per 1 liter of water),
- boil in a solution of the same concentration for 1.5-2 hours,
- rinse in hot water, change water until clean,
- to dry and iron.
9. Sew the wick to the diameter of the thermometer reservoir with a simple machine stitch. After trimming, the height of the seam should be no more than 1.5 mm.
10. Install the new wick and feeder on the hygrometer according to the instructions.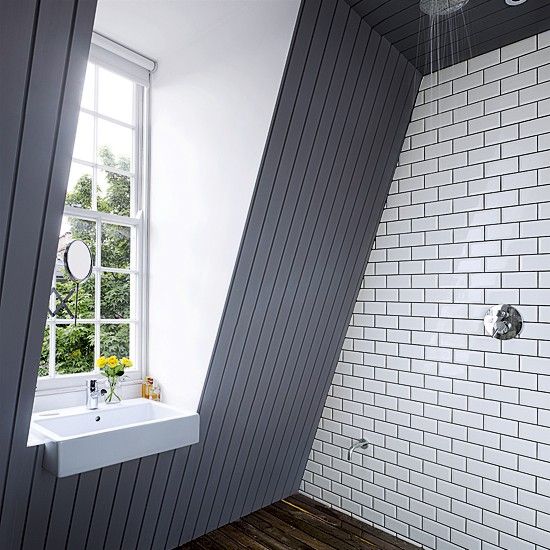
11. The hygrometer is subject to primary and periodic verification. Primary verification is carried out upon release from production, periodic verification - once every two years in accordance with the guidelines MI-737-83 "Psychrometric hygrometer type VIT. Methods and means of verification", approved in the prescribed manner. Information about the calibration of the hygrometer is given in the passport.
Rules for storage and transportation of hygrometers
1. Store hygrometers in closed, dry rooms in a vertical or inclined position, in accordance with the inscription "Top" on the box, at temperatures from -60°C to +45°C. Do not store hygrometers at a distance of less than 1 m from heat sources (heaters, various heaters, etc.).
2. Hygrometers in a transport container are transported by any mode of transport, taking into account the above temperature and subject to the rules for the carriage of goods for the corresponding mode of transport.