How to seal a stone floor
How To Seal Stone Floors
Today we answer the question: How To Seal Stone Floors. But first, let’s give you a bit of background on what sealing a stone floor actually means.
Stone floor sealing is an essential task to enhance your natural and engineered stone surfaces. Sealing your stone floor doesn’t have to be a laborious task and only needs to be done every 2-3 years, more in very high traffic areas or businesses, but it will make a huge difference to both the colour quality and stain resistance of your stone floor investment.
It is very much worth mentioning at this point that old stone floors would have never been sealed and yet maintain their beauty over generations. That said, the all-natural stone is porous to an extent and to stand up to the tests of modern life it’s best to seal your stone surfaces to improve their stain resistance and enhance their natural beauty.
Ultimately you will have a better-looking floor that is sure to last a lifetime.
The stone floor sealers that we offer are largely Italian made and of incredible quality, giving you peace of mind when maintaining your precious stone floors.
The different types of sealers that we offer are known as ‘impregnating’ or ‘penetrating’ sealers. This means that they permeate the surface of the stone through its micro-pores. Other, cheaper, sealers sit on the top of the surface and so are known as ‘topical’.
The benefit of impregnating sealers, aside from offering much better all-around protection is that they last a lot longer – stone sealers that simply sit on the top of the stone and worn away by foot traffic and general everything cleaning.
How to seal Stone Floors – A Guide
- Firstly, before sealing, make sure the stone surface is dry and has been for at least 12 hours.
- Mask off any skirting boards or surfaces you are not applying the sealer too so that they are protected.
- It is of all importance that you ensure your floor is clean before applying your sealant. Whatever you seal in is there to stay, so be diligent with making sure every last piece of debris is vacuumed up.
- Liberally apply your desired sealant. The best way to seal your floor is to spray the sealant onto the surface with a fine, low-pressure spray until the surface it wet. Allow the sealer to penetrate the surface for between 5-15 minutes before spreading evenly with the use of a quality Flat Mop. Paintbrushes are also effective but take a little more time, the benefit of a paintbrush is that you can make sure you have every last inch of the floor is covered.
- It is important to remove any excess sealer from the surface before allowing the floor to dry. The first coat needs to be left to dry for around 6-12 hours; preferably overnight, but do check with the individual sealer you have used as each brand is different.
 Subsequent coats can be re-applied after an hour or so and for the very best results, 2-3 coats are advised.
 - If the sealer wasn’t completely wiped off and you see a residue, wipe the excess with a towel that has been dampened with the sealer. Use a white nylon pad to loosen the residue before following with a clean, dry, white absorbent towel to remove it fully.
- Your sealer will be fully cured between 24-48 hours and the floor can be walked on 4 hours after the last coat has been applied.
- Once dry, the floor can be buffed if you should so wish to give a slight sheen.
For heavy traffic areas and businesses, re-sealing should take place every 2-3 years. !
Stone Sealers From KleanSTONE…
Gleaming floors inspire confidence and style in any setting, whether domestic or commercial. Here at KleanSTONE, we supply advanced floor cleaning solutions to help you achieve a spotlessly clean, perfectly finished floor without the elbow grease.
Our stone floor cleaners tackle spills, stains and everyday grime with ease for a healthier, happier home or work environment.
Our products extend the lifespan of your flooring with powerful, effective cleaning that is gentle enough to use every day and perfect for floors in your home or business, inside and out.
Aside from offering a range of products for stone floor cleaning, we love to share our knowledge and experience from our years helping customers succeed at extending the lifespan of your floors.
Read more on the KleanSTONE Blog, explore our Help & Guides or download our range of Cleaning Guides and learn more about how to care for your natural and engineered stone floors so that they last a lifetime!
Further Reading on the KleanSTONE Blog:
- A KleanSTONE Guide To Stone Flooring
- Which Floor Sealer Is Right For Me?
- Should I Seal My Outside Patio?
- Floor Sealing: The Most Important Thing You Are Not Doing
- Cleaning Quarry Tile Floors
- How To Seal Your Stone Floors
- Is My Mop And Bucket Damaging My Stone Floor?
- How Do I Clean My Natural Stone Floor?
- KleanSTONE, The Pet Safe Floor Cleaner
- What is Travertine?
- Everything You Need To Know About Your Slate Floor…
HOW TO CLEAN AND SEAL A NATURAL STONE FLOOR
I have been cleaning and sealing stone floors for over 40 years and people often ask what the best way is to clean and seal a stone floor, which are the best cleaning products for stone floors and what stone sealers do you recommend.
This method is for cleaning and sealing a small natural stone floor without any special equipment, if you have a small galley kitchen, a small hallway or a bathroom with a natural stone floor this method is best for you. This is also for applying a surface seal (like a mat, satin or gloss finish seal) and not an impregnator as the process for this is a little different to the method outlined in this article.
PLEASE READ THIS FIRST
THIS METHOD IS NOT FOR POLISHED MARBLE, GRANITE OR LIMESTONE FLOORS, ALSO IF YOUR FLOOR HAS ANY GROUT MISSING FROM THE JOINTS OR THE TILES ARE DAMAGED OR CRACKED THIS METHOD IS NOT SUITABLE FOR YOU. THE METHOD OUTLINED IS FOR CLEANING A FLOOR NOT FOR STRIPPING OFF AN OLD SEAL OR POLISH TO DO THIS YOU WILL NEED SPECIALIST EQUIPTMENT AND STRONGER CHEMICALS AND IT IS BETTER TO HAVE A CONTRACTOR DO THIS TYPE OF WORK FOR YOU.
SELECTING A SEAL
If the floor has not been previously sealed or it has been a few years since it was treated, you should test your seal a few days or a week before you start. You can clean one or two tiles and test it on your own floor, or if you have a spare tile it is a good way to try a different finish. If you do not have one, most tile shops will sell you a single sample tile some of them may even give it to you if you are an old customer. I have found the large DIY stores will also sell you a single tile, if you find a damaged one, they will let you buy it at a low cost.
TESTING YOUR SEAL
Testing the seal on your floor or a similar tile will tell how many coats of the seal you will have to apply before you can achieve the look that you want. On some natural stones, the first coat will make little or no difference as most of the product will be absorbed into the stone. It is not until the second coat that you will have an idea of how the stone will look and if it will need a third coat or not. Testing the seal will also give you an idea of drying time, and when testing leave one coat to completely dry before applying a second coat. How the stone will look ten minutes after it has been sealed is completely different from how it will look after a few hours or a day. I suggest testing the seal a few days in advance so that you will see it in different light conditions, that way there is a better chance that you will be happy with the final finish.
YOU WILL NEED THE FOLLOWING ITEMS
Time: – Give yourself plenty of time, do not try to do it in a few hours or in a day, spread it over 2 or 3 days depending on how dirty the floor is, and they type of natural stone you have.
Cloth dust sheets: – 2 dust sheets or old bed sheets, these will have several uses for this project. You will use one to protect any flooring leading to the area to be cleaned and a second dust sheet to be folded in order to make a knee pad for yourself (If you are comfortable you will do a better job)
A flat mop: – These are available in most supermarkets and buy plenty of spare mop heads 4 or 6 (To save money you can also use some old towels or old microfiber cloths)
Cleaning Agent: – I use Lithoifin and HG products for natural stone. The products from these two companies are specially formulated for natural stone and will not harm the stone if used properly. Always read the label first or contact a stone supplier for advice if you are not sure.
Avoid any products that contain acids, bleach or lemon and, never use toilet cleaners or limescale removers and do not use anything containing a caustic or an abrasive in them.
A Soft bristle brush or broom and a small hand brush
Rubber Gloves
Spare microfiber cloths
A small plastic bucket or jug
A litre of Natural Stone sealer of your choice
A paint roller & tray with either a short pile roller or a sponge roller
TIME AND PREPARE YOURSELF
You are going to spend between two thirds or three–quarters of your time cleaning and preparing the floor, preparation is everything. As a minimum spread the job over 2 days, 3 days if it is a larger area or very dirty. You are going to clean the floor in 1 square metre sections, as this advice is for small floors it is not going to take the whole day. If you are not used to doing physical work for a living you may find it tiring, so stop and rest between sections when you want to.
PREPARE THE AREA
Before we start, I will assume you have swept or vacuumed the floor and you will have protected any other floor areas with one of your ground sheets and you have your rubber gloves on.
CLEANING THE FLOOR
Mix a small amount of cleaning agent in your bucket or jug using just the water from your hot water tap only mix enough to clean a 1 or 2 square metre area. Carefully pour some of the solution onto the first area, it should be enough to wet the area but do not flood it. Using your soft broom keep moving your solution around do not allow it to dry add a little more solution if needed.
CLEAN THE GROUT
While the area is still wet using your folded dust sheet kneel and scrub the dirt out of the grout joints before the solution dries. Keep moving your solution around for about another half a minute making sure no sections can dry, once the water cools the solution it is not as effective.
DRY THE FLOOR
While it is still wet dry the area with one of your flat mops or microfibre cloths. Put these away to be cleaned later, never use them more than once for this project.
RINSE WITH CLEAN WATER AND DRY
You have removed the dirty solution from the floor, now wet the floor again with just hot water using a clean mop head or cloth and dry the floor again with a clean cloth or mop. If your cloth is dirty when you have dried the floor repeat the process again with just hot water, using clean mop heads or cloths each time. Once you are satisfied this area is clean move onto the next area.
REPEAT THE PROCESS
Repeat the process with a clean mix of your solution and hot water or add to the original mix if you have any left. Always use clean mop heads or cloths each time. By using this method with a clean solution mix, clean hot water and clean mop head etc at every stage you will not transfer dirt from one section of your floor to the next.
SPECIAL EFFORT
You should make a special effort to clean the grout while cleaning the floor. Clean grout will make a dramatic difference to the finish and in some cases when cleaned properly it will look like a newly laid floor.
STAINS
After you have cleaned the floor you may have some deep stains. These stains may have been there for some time and you have just cleaned off the dirt that was covering them. If you have lived in the property for a few years you may know what they are or what caused them. Removing some of the stains can just be as simple as using a stronger mix of your cleaning solution. If it is a paint stain white spirit and a small stiff brush works well. For oil and rust stains Lithofin and HG have products for removing these types of stains.
Now that your floor is clean all the cloths and mop heads can be washed and dried for later use and you have no wasted materials.
DRYING TIME
You would have used more water to clean your floor than normal, so it will need a few hours to dry. Leave it for as long as you can 12 to 24 hours is good. If your floor is in the kitchen or bathroom you will still to use these rooms so cover the floor with your dust sheet. Use a dust sheet without a plastic backing this will allow the stone to breathe and dry out. If your stone floor is in the hallway use an old towel in front of the door and remove it at night to let the stone dry. Check to make sure that your floor is completely dry before you proceed the best place to look is near the grout joints as this area absorbs more water than other parts of the stone.
THE SEAL
I will assume you have decided on which seal or type of seal you want to apply to your natural stone floor if you have tested it on a spare tile you will know what to expect and how many coats to apply to achieve the look that you want. If you are still unsure contact a local supplier or the company that supplied and fitted the tiles if you know who they are for some advice.
PREPARATION
Read the instructions on the container before you start even if it is a product that was given to you by the contractors that laid the floor for you or even if you have used it before. I read them every time I do a job. Make sure you have everything you need ready and finally sweep or vacuum the floor, you will be amazed how much dust particles and hair etc that will settle on a floor in just a few hours.
VENTILATION
Open a couple of windows in your property for ventilation, opening 2 windows, one at either end of your home will allow the air to flow through your property. This is very important if you going to use a spirit-based seal. Water–based seals do have a very strong smell which can be unpleasant. Venting the property will help get rid of the smell and assist with the drying time.
CHOOSING THE TYPE OF ROLLER
Which type of roller is best? If I am sealing honed marble or limestone floor, I use the short pile roller. If I am sealing a riven slate floor, I use the little sponge roller as this allows me to work the product into the crevices and little undulations in the tile.
APPLYING THE SEAL
We will be working in one square metre areas or smaller as before, make sure you have your dust sheet folded into a knee pad as before. If you are comfortable you will do a better job. We will be applying 2 or 3 thin coats of our chosen seal.
Pour a small amount of the product into the paint tray and wet your roller, do not saturate it and remove any excess. When you apply the seal, you should not see the product spray, splash or run as you apply it.
THE FIRST COAT
Apply an even coat over every inch of the stone, working it back and forth into the stone, until it is fully absorbed into the stone.
Natural stone will absorb the seal quicker in some areas than it does in others, even on the same tile one half may absorb all the seal and next to it the seal will sit on the surface. You will notice when this happens so move your roller over the area where the seal is sitting on the surface and work the seal into the areas that have absorbed all the seal. Only add more seal as you notice the roller is drying out and makes no difference as you work the product into the stone.
THE STONE WILLL ABSORB MOST OF THE FIRST COAT
Do not worry if you do not see a big difference in the look of the stone. Your goal at this point is to just apply a thin even coat to the stone. Once you are sure you have covered the whole area move on to the next area, working in one square metre areas until completed. The first coat dries quite quickly as most of the product is absorbed into the stone.
FIRST COAT, TOUCH DRY
This will just take an hour or two as it is a small area. Once it is touch dry, we can apply the second coat. As before get comfortable, wet your roller with the seal but do not overload it. As you apply the seal to the surface you will notice more of it sits on the surface, if you see tiny little bubbles forming work the roller back and forth spreading it thinner across the stone until they vanish leaving a smooth finish you should notice that you use less seal and it spreads easier.
RIVEN OR TEXTURED FINISH STONES
In the case of riven stones wait for a minute or two before you move onto the next section. If you notice little pools forming as the seal runs through the crevices. When this happens dry your roller in the tray and remove the excess with the roller or spread it thinner. I always keep a spare dry roller for this purpose when sealing a riven tiled floor. Do not leave it too long before removing these little pools as once the seal starts to dry and set the roller will stick to the seal and it will affect the overall finish.
NO MORE THAN TWO COATS
Never apply more than two coats of seal in one day, if you feel it needs a third coat, leave it for another 24 hours before doing so. The other thing to consider is how the stone looks ten to twenty minutes after it has been sealed is different from how it will look after 24 hours.
A LIMESTONE KITCHEN FLOOR CLEANED AND SEALED WITH A SATIN FINISH SEALWALKING ON THE FLOOR
The floor should dry in a few hours to test it just touch it lightly with the palm of your hand if it feels tacky leave it for another hour or so. When you need to use the area at first touch it to see which parts are still wet or tacky and walk on it wearing a clean pair of socks try not to walk on it while wearing shoes for at least 24 hours.
REPLACING FURNITURE
If you have any items to put out on the floor like a dustbin or a toilet brush or an umbrella stand in the hallway leave it off the floor for about 36 to 48 hours. The seal may be dry to the touch, but it will not be fully cured, and these items may stick to the seal or floor.
MARKS AND SPILLAGES
If you have a spillage in the first few hours just blot the area with a dry cloth do not wipe or rub the area, it may not have affected the seal. If it has simply apply a very small amount of the seal with your roller and work it into and around the area to blend in.
You should now have a nice clean and sealed floor to enjoy for many years if you need any advice before you start please feel free to contact me. This article is for cleaning and sealing a small area if you have a larger area just allow more time and do not try to do too much in one go or you can contact me for a quotation to do the work for you.
Facing (finishing) the floor with stone
Abramova Polina
direction manager
8 800 777 03 51
From time immemorial, natural stone has been used for flooring as one of the most durable and at the same time beautiful materials. Design options are diverse - it can be a simple stone tile, a checkerboard pattern, a complex ornament or a unique mosaic. It all depends on the chosen style and the budget of the project.
Thanks to modern technologies, it was possible to cope with the main disadvantage of a stone floor - low thermal conductivity. As a rule, the tile is laid on top of the heated structure. In addition, it is extremely important that experienced builders deal with stone flooring, because. stone is far from the cheapest material, and correcting any errors during installation will be very expensive.
SELECTION OF STONES FOR FLOORING
The choice of stone for floors should be based on the conditions of the room. Marble and granite floors have long been the norm, but there are other interesting options for laying the floor.
- for commercial establishments, galleries and stations (high traffic areas) granite and basalt are perfect. Such rocks are characterized by low abrasion and high resistance to pollution and acids.
 This is very important, because during the winter, due to dirt, sand and salt, significant damage to the surface of the stone can be caused;
 - among the "domestic" rocks, the greatest demand is typical for marble, marble onyx, travertine and limestone. They are not as hard-wearing and impact-resistant, however, when used at home, they will last a very long time. We advise you not to use marble for finishing the hallway and rooms where perfect cleanliness is not always maintained;
- slate stands out for texture. With it, you can create interesting and unusual interiors. But it has a layered structure and it is for this reason that during the first year of use the floors are subject to “peeling”. In addition, this option can noticeably suffer from sharp heels and stilettos;
- quartzite, in fact, has the strength of granite and the beauty of marble, but it has one significant drawback - the cost is 2-3 times higher than most granites and marbles. It is not easy to saw, grind and polish.
 In this regard, non-edged slabs with a slightly uneven surface are often used.
FEATURES OF FINISHES AND FINISHES
Ideally, the beauty of the floor is combined with its safety. Due to the high humidity, stone floors are slippery, and this is fraught with injury. The texture should definitely be remembered when lining a bathroom or pool.
Tiles of the following sizes are commonly used: 305*305, 600*300, 600*600 and others. In addition, you can create a unique tile that resembles honeycombs or diamonds. The premium segment prefers mosaic marble floors or creating an interesting panel. The architect, together with the customer, develops a suitable drawing. We, in turn, embody ideas with the help of professional designers, as well as use precise cutting machines with program control.
Recently, the "butterfly" has been especially popular. In this option, several solid stone slabs (2 or 4) from one stone block are laid out next to each other. It turns out a unique pattern from the reflected veins of the stone.
INSTALLATION OF THE STONE FLOOR
Before the installation of the stone floor, all engineering communications must be installed: heating and water supply pipes, wires, underfloor heating. You should also carry out waterproofing, install a reinforcing mesh and perform a finishing screed. It should be noted that the thickness of the future coating and the adhesive layer affects the screed. Usually it is 5-10 mm, if the thickness of the stone is 20 mm. A number of requirements are imposed on it - the screed must be dry, clean and made in a perfectly even layer.
We work with trusted manufacturers who specialize in stone chemicals.
There are 2 most popular tiling methods:
- Tiling with minimal overlap. It is important that the surface of the tile is even. At the joints should not remain noticeable traces of the solution. Until the repair is completed, the floor should be closed, and the joints sealed with construction tape.
 Then it is necessary to carry out a complex repolishing in order to update the texture and achieve the highest possible smoothness of the floor.
 - In the second case, a chamfer is applied along the entire perimeter of the tile. As a rule, the chamfer is barely noticeable, but there are different options - depending on the planned relief of the floor. With this finish, the mortar filling the space between the tiles is clearly visible. But in this case it looks quite interesting and neat.
STONE FLOOR CARE
A stone floor can serve you for centuries, but its safety depends on three factors:
- the right choice of stone and its texture;
- compliance with floor laying standards;
- further implementation of simple rules for the care of the stone. From time to time, treat it with a water repellent - a substance that creates a barrier against moisture, dirt and dust.
You can learn more about the rules for the operation of the stone floor from the article "Care of the stone floor".
How to glue stone to stone securely and professionally
An urgent problem for stone craftsmen and builders is gluing and sealing natural and artificial stone:
- Restoration of stones
- Sealing of stones
- Combination of stones both indoors and outdoors
We have previously dealt with the topic “Granite bonding”, PURAFLEX 9155 is equally suitable for bonding other types of natural stone, including artificial, for example: porcelain stoneware, fiber cement boards, etc.
Call us and we will select the adhesive composition and bonding technology for you
SDM-CHEMIYA offers several universal solutions that have already been tested and are currently working in production.
Bonding of natural stone worktops
The bonding of stone worktops does not require exceptional properties and special characteristics from the adhesive, however, the composition must be correctly selected taking into account operating factors.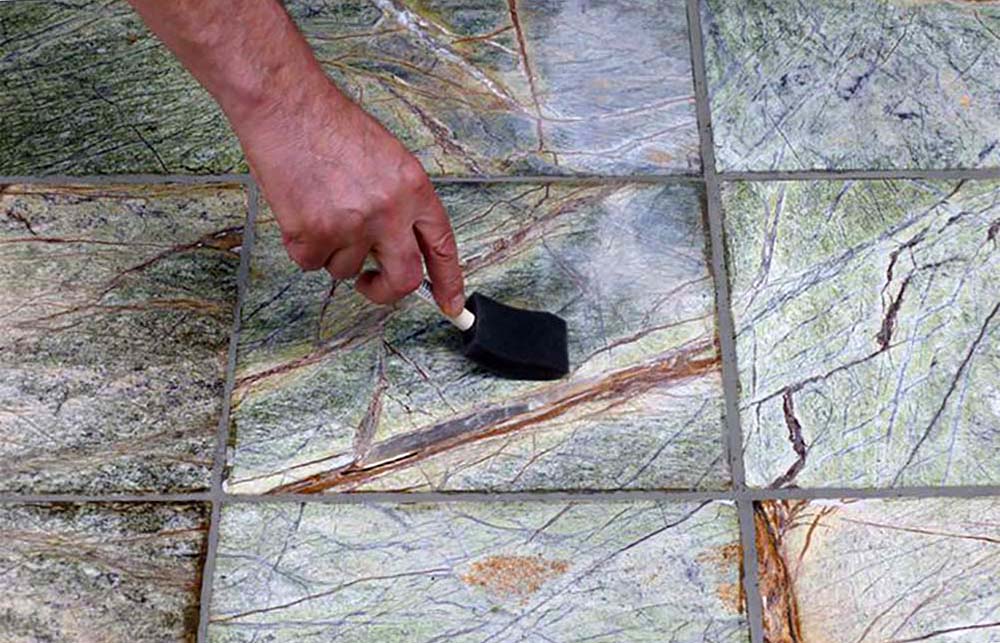 External influences that affect the adhesion, life and viscosity of the adhesive are water from the sink and heat from the hob. Household appliances operating on a stone slab have a slight vibration load on the countertop.
The only and main requirement for glue is that it should stick stone to stone, stone to the base of building materials.
As a rule, when gluing worktops, it is necessary to glue not only natural and artificial stones together, but also glue stone to aluminum, metal to stone, stone to wood, etc.
When gluing worktops, the time of the gluing itself is not very critical, and for this purpose we recommend the PURAFLEX 9140 adhesive.140 gives deformation compensation when the table top vibrates.
When rigid and hard bonding is required, PURAFLEX 9155 is recommended. Due to its high Shore A80 hardness, it quickly and easily bonds stone to stone and stone to metal, also in a vertical position for using stone as an "apron" in the kitchen.
Bonding stone to stone in the manufacture of window sills
In the manufacture of stone window sills, bonding of stone slab with metals in the subsystem, cement or brickwork, installation on other materials is required. The temperature deformation of the window sill is higher than that of the hob, since under the window sill, as a rule, there is a battery, and on the outside there is a window or an open street. We recommend gluing the stone window sill on porous substrates, cement, drywall, etc. with 600 SILIKON KLEBER, on metals or smooth surfaces with PURAFLEX 9140 or PURAFLEX 9220.
If you need to make composite stone window sills - PURAFLEX 9155 and PURAFLEX 9220 are better suited for this task. stone), and the joints can be processed and polished, that is, they will be invisible. PURAFLEX 9155 can also be sanded and painted after it has completely dried.
Stone to stone sculptural bonding - restoration
In this application, a stone bonding adhesive must have some key features.
Stone restoration adhesive should be easy to color, after hardening, its structure should resemble stone as much as possible. Processed according to the texture like a stone. Do not change its color over time and be resistant to UV radiation.
This adhesive should easily withstand both seasonal and daily temperature changes. A prerequisite is its neutrality to aggressive environments and precipitation and harmlessness to humans.
PURAFLEX 9220, an innovative two-component epoxy active base adhesive, has all these advantages and classifications.
Interior bonding stone to stone
For bonding decorative elements made of stone, metal and glass, special requirements are imposed on the adhesive:
- It must be transparent so that the adhesive substrate is not visible on the surface and joints.
- Deformation, to compensate for deformations between materials with different thermal and mechanical elongation, distortion.
- Tear-resistant as metal, stone and glass are not lightweight materials, subjecting the adhesive to sufficient stress.
- Excellent adhesion to smooth and sanded surfaces.
If stone and metal can still be specially treated to make the surface rough and porous for better adhesion, then with glass this procedure is rather complicated. Glass after mechanical processing for the formation of pores and roughness becomes dull. This also applies to thin stones with some transparency.
Taking into account all the above requirements, we recommend using PURAFLEX 9135
Bonding granite, marble, artificial or natural stone to stone is quite an interesting and multifaceted task with peculiarities in each case. We have prepared solutions for each specific approach. If you have any questions about compositions, materials and technologies, our technologists will competently advise you.
