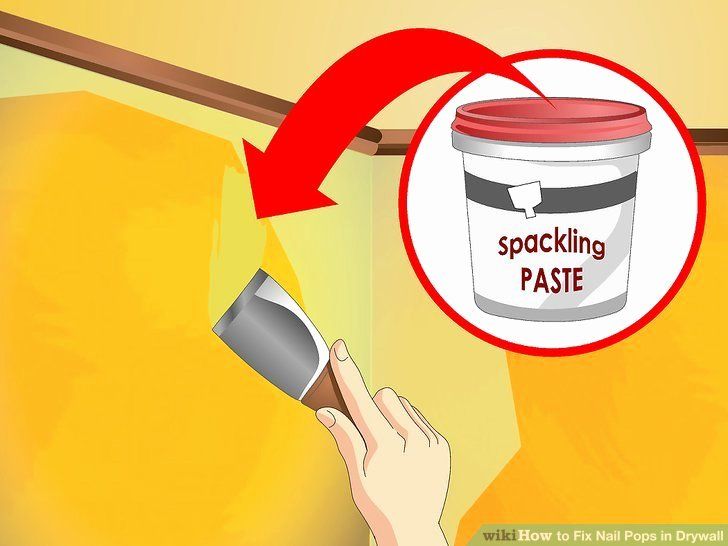
How to remove spackle ceilings
How to Easily Remove Popcorn Ceiling
Very few things date a space like a popcorn ceiling—and not in a charming way. They're difficult to repair, hard to clean, and catch dust easily; but despite all these cons, their popularity exploded beginning in the late 1950s because they made easy work of finishing ceilings and hiding imperfections.
If it's time to redo a popcorn ceiling, there are three popular ways to take on the challenge: scrape, cover with a new layer of drywall, or skim coat with plaster to create a new textured ceiling.
How Much Does it Cost to Remove Popcorn Ceiling?
The national average for popcorn ceiling removal is $1,707, according to Home Advisor.
Removing popcorn ceiling can be a labor-intensive process that is best left to a licensed professional to ensure safe removal. In some cases, there may be asbestos present in the ceiling, so it’s always a good idea to consult with a pro before starting the project.
What is the Best Method for Removing Popcorn Ceilings?
Which is best? Depends on a lot of things, including the age and condition of the substrate (ceiling). We spoke with drywall and stucco expert Mike Poellinger, owner of Poellinger, Inc., in La Crosse, WI, who filled us in on everything a homeowner should know before deciding how to remove their popcorn ceiling. With his help, we break down the three methods to redoing popcorn ceilings below.
How to Scrape a Popcorn Ceiling
When scraping popcorn ceilings, you'll want to use a 4-inch utility knife or a drywall knife to chip away at the texture and create a smooth surface. You'll probably need to skim it with a thin layer of joint compound to smooth out imperfections, then sand it smooth before repainting.
Why do it?
This is by far the most common method of popcorn ceiling removal. Scraping your ceiling is a messy and slow process, but it's the most cost-effective and can be completed by one person. However, popcorn finishes and paint applied before 1979 often contained asbestos and lead, respectively, which could be toxic if sent airborne. If you live in an older home, purchase a home test for lead paint, and consult with an expert about testing for asbestos.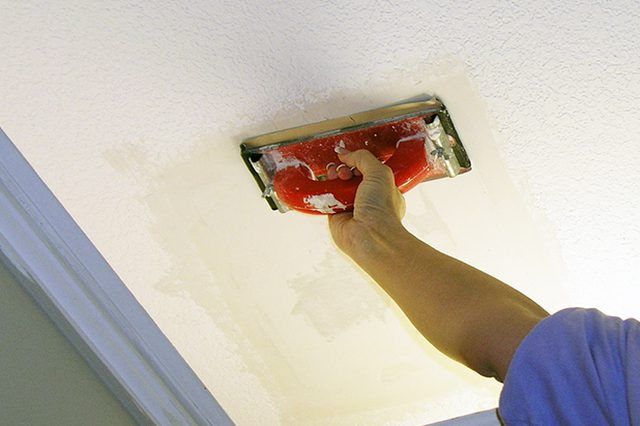 If it tests positive, do not scrape it.
If your ceilings are not at risk for asbestos or lead paint, but they have been painted, it may be near impossible to scrape them, since the porous popcorn material will have soaked it up. Drywalling over them may be a better option.
Pro tip: Don’t spray your ceiling with water before you scrape
A lot of people spray their ceilings with water before scraping to loosen them up, but Poellinger doesn't recommend it. "Not only will it be a sloppy mess, but it will absorb into the ceiling and make it heavy; then it could start to expand and crack. It's more time-consuming, but it's best to scrape it dry."
How to Cover up with Drywall
Affix ceiling-grade gypsum board, which weighs significantly less than standard wall board, right over the existing popcorn ceiling. You'll need to securely screw it into the framing and be proficient at mudding and taping for a seamless job.
Why do it?
This is a better option than scraping if you have lead paint or asbestos, because you can encapsulate the harmful substance instead of sending it airborne.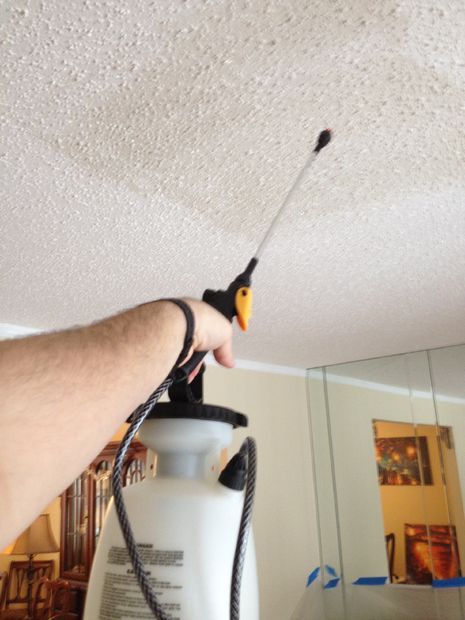 Plus, you'll get the smoothest possible finish, if you mud and tape properly. Alternatively, a team of pros will be able to complete the job in no time. Finally, if the ceiling has damage or if you already need to cut into it to reroute electrical or HVAC, you can make large cuts into the existing substrate without worrying about patching, since they'll soon be covered up anyway.
This method will come at a price—a 4-by-8-foot sheet of ceiling-grade gypsum board costs $9 apiece. It may also be difficult to maneuver the boards single handedly if you're DIYing it. And if you have crown molding, you'll likely have to remove it and replace it.
Pro tip: For a DIY removal project rent a drywall lift
Rent a drywall lift if you're DIY’ing it. It might cost about $40 per day (The Home Depot; location pricing varies), but it's safer and allows you to get a better handle on the material.
Skim Coat on a New Design
Yes, it's still a texture, but according to Poellinger, it's making a comeback—and it's fairly easy for homeowners to do themselves.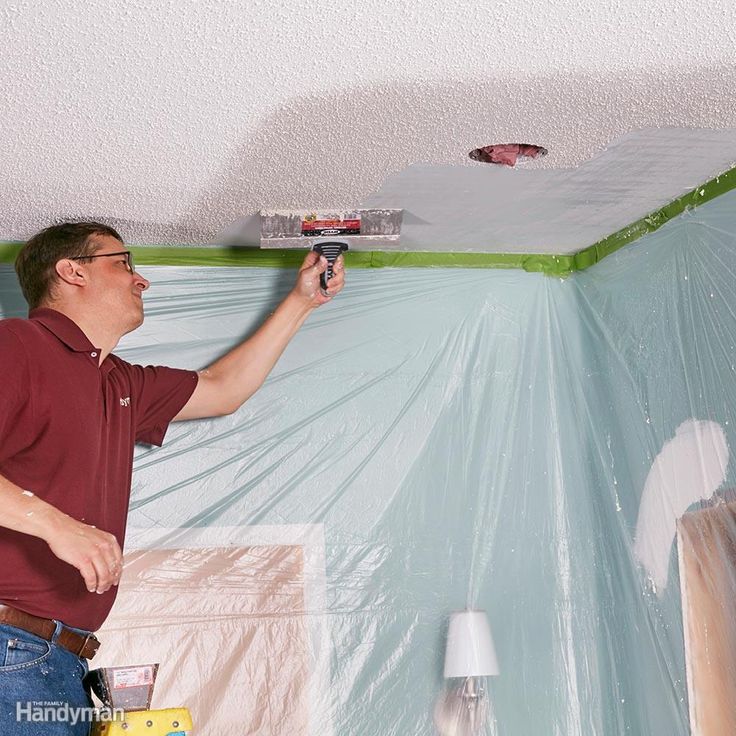 Often found in older homes—pre-popcorn-era—this type of textured ceiling involves cleaning and prepping the existing substrate with quick-set drywall mud, applying a bonding agent like joint compound, and then applying a finish compound with a trowel or knife to create a new texture.
Why do it?
Many old-house owners want to recapture the history of the home, and a smooth ceiling won't fit the bill.
The most important consideration is to make sure the substrate is structurally secure, since adding a wet product could create more weight than the ceiling can handle and cause it to come down. You might need to consult with a contractor before getting started.
Pro tip: Don’t use ready-mixed material as your base
If you opt to skim coat, use a quick-set drywall mud, then touch it up with a ready-mixed joint compound. Don't use a ready-mixed material as your base, as it has a higher moisture content and contains silica, which is prone to causing some shrinkage, affecting your final look.
Do Popcorn Ceilings Have Asbestos?
If your home was built between the 1950s and 1980s, there is a chance that the popcorn ceilings contain asbestos, according to the Mesothelioma Center. The best way to determine if your popcorn ceilings contain asbestos is to hire an abatement professional, or you can purchase a test kit.
If you discover that your popcorn ceilings contain asbestos, don’t panic—and don’t try to remove it yourself. Removing it will cause the particles to escape into the air, making it easy for you and your family to breathe in the carcinogens. Leaving the ceiling intact poses no dangers.
If the ceilings must go, then it’s a good idea to call a professional abatement company to do the job.
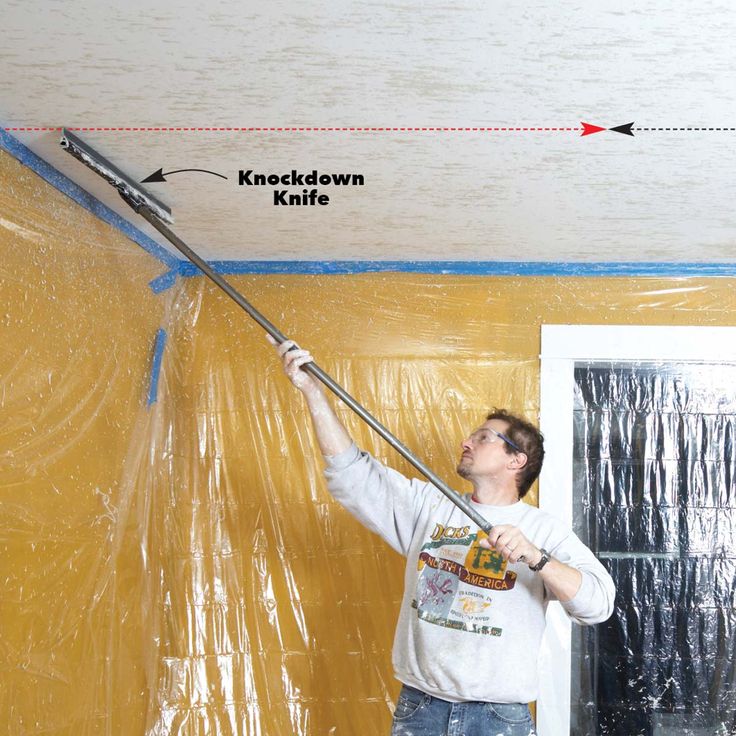
11 Tips on How to Remove Popcorn Ceiling Faster and Easier
Popcorn ceilings were all the rage back in the '60s and '70s. Applying the texture to drywall and plaster ceilings was a quick and easy way to hide imperfections and didn't require any painting afterward.
 But the rough texture catches lots of dust and cobwebs and it can be difficult to know how to remove popcorn ceiling. It can be a real pain to match if you have cracks or holes in need of patching. Figuring out how to remove a popcorn ceiling texture from a ceiling is a messy chore but worth the effort if the substrate underneath is in good shape. Here are some tips to take some of the pain out of popcorn ceiling removal.
Every editorial product is independently selected, though we may be compensated or receive an affiliate commission if you buy something through our links. Ratings and prices are accurate and items are in stock as of time of publication.
1 / 12
Family Handyman
Do a Scrape Test
Before you go to all the trouble of prepping the room, try scraping a small area while learning how to remove popcorn ceiling. Try it dry first, then dampen the texture with water and try again.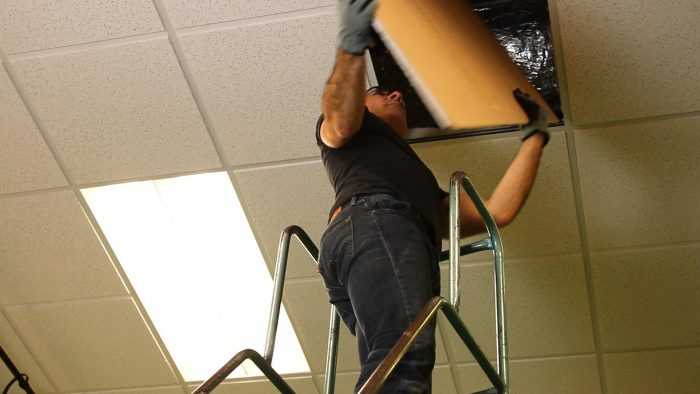 Some texture comes off easily without water, but in most cases wetting is best. If the water doesn’t soak in and soften the texture, the ceiling has probably been painted or paint was added to the texture mix. In that case, wetting the ceiling may not help, and you’ll have to decide whether you want to tackle a really tough scraping job or choose another way to hide your popcorn ceiling.
2 / 12
Family Handyman
Test for Asbestos
Any popcorn ceiling installed before 1980 might contain asbestos—a known cause of lung cancer. Before trying to figure out how to remove any popcorn ceiling texture, contact your local health department and ask about getting a sample tested. So you’re wondering how to remove a popcorn ceiling with asbestos? If the test comes back positive, cover the popcorn with new drywall or tongue-and-groove planks, or hire an asbestos abatement contractor to help in removing popcorn ceiling.
3 / 12
Family Handyman
Prep for a Big Mess
Cover floors and walls with plastic drop cloths as you begin your how to remove popcorn ceiling project. Don’t use canvas drop cloths because water can soak through. Cleanup is easier with plastic too, because you can just ball it all up when you’re done working and throw it in the trash. Leave the plastic in place after popcorn ceiling removal to catch the mess you’ll make repairing and sanding the ceiling later.
4 / 12
Family Handyman
Get the Furniture Out
If possible, remove all furniture from the room you’ll be working in. When learning how to remove popcorn ceiling, it is messy work, and you won’t want furniture in your way every time you move the ladder around. If moving everything out of the room isn’t possible, cluster it and cover it with drop cloths.
5 / 12
Family Handyman
Remove Ceiling Fixtures and Fans
You might think it’s easier to leave light fixtures and ceiling fans in place as you figure out how to remove popcorn ceiling, but they’ll just be in your way and get covered with wet popcorn.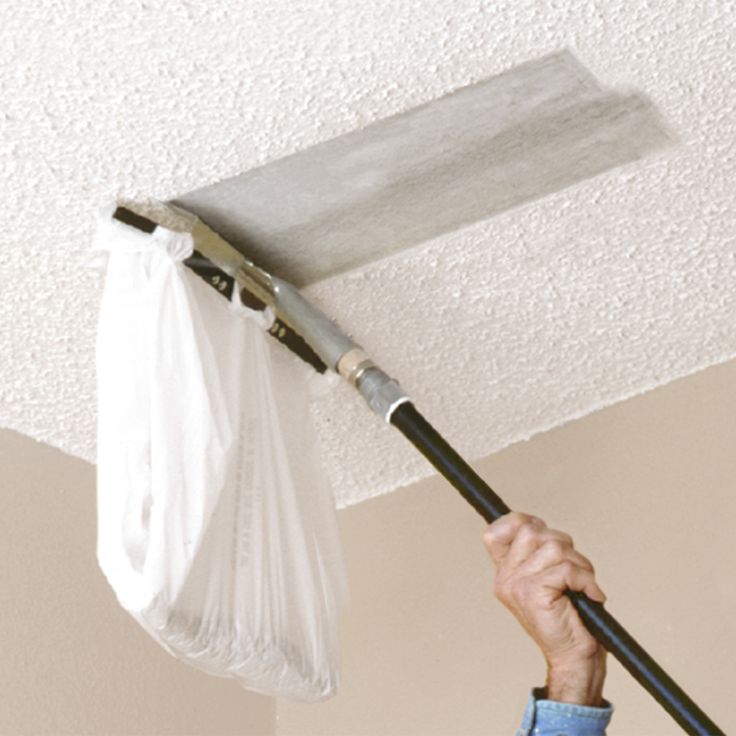 Plus, you don’t want to accidentally spray water into an electrical fixture.
6 / 12
Family Handyman
Protect Can Lights From Water Spray
If you have recessed “can” lights, stuff newspaper or rosin paper inside them to keep them dry when completing a how to remove popcorn ceilings project. Also, make sure the power to those fixtures is turned off at the circuit breaker panel or fuse box.
7 / 12
Family Handyman
Wet it With a Pump Sprayer
For easier scraping and practically no dust during popcorn ceiling removal, use a garden pump sprayer to mist the ceiling and let it soak in for about 15 minutes before scraping. Only give it a light misting—too much water could damage the drywall or loosen the joint tape. If the texture hasn’t softened after 15 minutes or so, spray it again and wait another 10 to 15 minutes.
If the texture still hasn’t softened, it might be painted, or paint might have been mixed into the texture before application. In either case, water won’t easily penetrate. If the texture is painted, you might be able to dry-scrape it first to expose some of the unpainted texture and follow up with wet scraping. If the texture has paint mixed in, you might have to dry-scrape the whole ceiling or cover it up with drywall or T&G boards.
8 / 12
Family Handyman
Cover Electrical Boxes
Shut off the power to any electrical junction boxes in the ceiling and cover them with painter’s tape to keep the wiring dry when spraying water on the popcorn as you complete a how to remove popcorn ceilings project. Overlap the sides of the junction box with the tape, and then trim around the perimeter with a utility knife, being careful not to nick the wires.
9 / 12
Family Handyman
Work in Small Sections
Only spray and scrape a small area at a time—about 4 x 4 ft. If you work too large of an area at once, the popcorn might dry before you have time to scrape it off.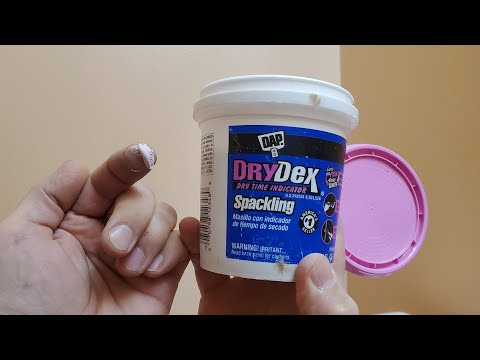 If that happens, respray the area and wait another 10 to 15 minutes before scraping.
10 / 12
Family Handyman
Tame the Mess With a Mud Pan
Use a mud pan—the kind for holding joint compound—to catch the wet popcorn before it hits the floor. That way, you’re not tracking it all over the place when you walk and move the ladder around. Also, use the edge of the pan to clean off your scraper when it gets loaded up with wet popcorn.
11 / 12
Family Handyman
Prevent Gouging
Round off the corners of your popcorn scraper—whether it’s a wide putty knife or drywall taping knife—so it won’t gouge the ceiling and leave you with dozens of ceiling wounds to repair. Use a file, a sander or an electric grinder to do this.
12 / 12
Family Handyman
Smooth After Scraping
Scraping alone won’t leave you with a paint-ready ceiling. You’ll probably have small dings and gouges to fix. At a minimum, you’ll have to sand the ceiling to get it perfectly smooth before painting.
Originally Published: October 17, 2019
How to remove old putty - basic methods
Any repair is a troublesome and dirty business, even if you are just going to re-paste greasy wallpaper in the kitchen or change the style of the hallway. You can’t do without removing the old coating, whether it’s boring wallpaper, plaster or cracked putty.
Contents
- 1 How to remove putty - getting ready in advance
- 2 Tools for removing old putty
- 3 Method one, classic
- 4 Method two, radical
- 5 How to remove old putty from the ceiling
If you do and control everything personally, then be sure to learn how to properly clean the walls, because all materials have their own characteristics, including the obsolete putty.
How to remove putty - getting ready in advance
Getting rid of the old putty coating is a responsible process and always includes several stages.
When all the remnants of wallpaper have been removed from the walls, the first step is to carefully inspect the surface: if the last repair was done in good faith, it is not necessary to remove the putty.
Look for obvious cracks and chips: if there are no more than a dozen such "jambs" on the entire wall, you can try to clean up problem areas, cover them with a primer and putty again. If the repair was made a long time ago, the coating has acquired an unpleasant shade and is swollen in places, doubts aside - everything must be removed.
If the quality of the old coating leaves much to be desired, it must be removed
A word of advice: if the coating is even and fairly tight, but you are not sure that the putty should be left, tap the wall in different areas with a trowel handle: a dull sound will indicate the need for demolition work.
Before removing the putty from the walls, prepare the room: during the repair operation, it will have a hard time.
First, remove all furniture or pack it tightly in polyethylene. Lay out a film around the perimeter of the floor (you can attach it to the baseboards with masking tape) or unnecessary newspapers, also seal the space between the walls and doors with paper tape - you don’t need extra cleaning in the whole apartment. On the door - a wet sheet. Prepare a respirator (for yourself), goggles and tools.
[vimeoyoutubepopup_video displaytype="image" videoplayer="youtube" videoid="Oybwg_kqCYU" text="Removing water putty" autoplay="true"]
Tools for removing old putty
To remove putty from walls, a standard repair kit is required:
- a huge piece of polyethylene or a stack of newspapers;
- softening solution container and large spray bottle;
- rag or large bath sponge;
- hammer, chisel and hard spatula;
- perforator and (or) grinder;
- ladder and stool;
- sandpaper.
Sea container
can be used to remove construction debrisMethod one, classic
Do not immediately try to pound the wall dry with a trowel - even if the coating comes off easily, you will not clean the entire wall like that. Moisten the surface with water from a spray bottle, wait 5 minutes until the composition gets wet, and proceed. If the process still does not go, a starch solution will help to remove the putty.
The destructive mixture is prepared as follows: per liter of water we take 2 tablespoons of starch (corn or potato - to your taste), stir to dissolve everything, and pour into a spray bottle. Then we spray the wall, wait at least 15-20 minutes for the agent to penetrate deeper, and begin to chip off the putty coating with a spatula.
If possible, try to estimate the thickness of the coating: if the putty was smeared in one or two finishing layers of 2-3 mm, then the spray gun will do just fine, but if the repair was done “for centuries” and the thickness is not less than 5-6 mm, it is better to apply starch immediately sponge or cloth.
Starch and water solution helps quickly soak old putty
Method two, radical
When a thick layer of the old coating does not take even starch, real tools will help in the question of how to remove the old putty.
First, you can try a hammer and chisel: apply a chisel at an angle of 45 degrees to places where the coating is clearly swollen and is about to fall off, and begin to chisel section by section.
If the chisel can't handle it, a puncher will come to the rescue. We insert a spatula into the main tool of the builder-destroyer and begin to break the entire putty layer on the wall. In the most advanced cases, the gypsum-cement composition will definitely be cleaned by a grinder with a diamond wheel: we make a small notch on the wall, apply the saw parallel to the surface, and gradually grind off the putty coating.
The last 2 ways are the fastest, but also the dirtiest: be sure to take care of your goggles and respirator and get ready for a grand cleaning.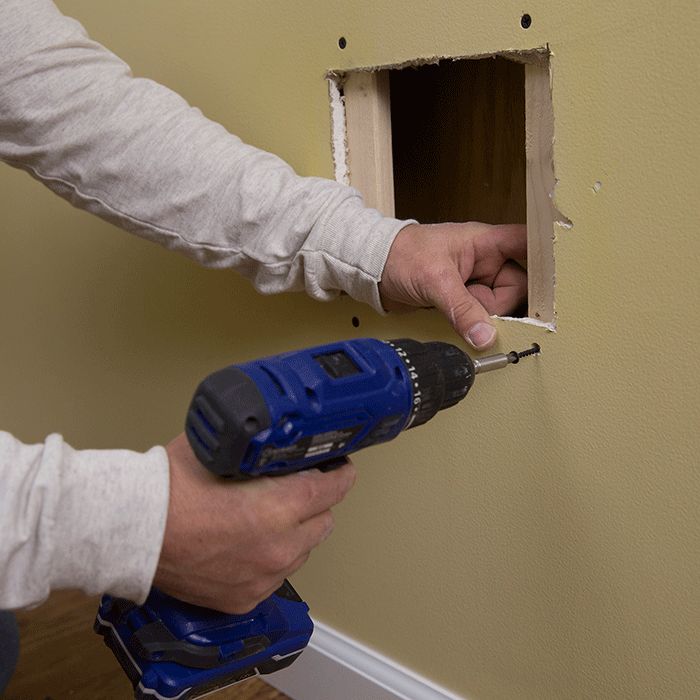
After the old putty is on the floor, it is necessary to clean the wall with sandpaper to finally remove all the irregularities, walk with a wet rag - and you can prime and re-putty the surface.
[vimeoyoutubepopup_video displaytype="image" videoplayer="youtube" videoid="O8t0scfbARM" text="Putty removal with Graco G-Force 2″ autoplay="true"]
How to remove old putty from the ceiling
Quite often it is necessary to remove the cracked old putty from the ceilings, and here the opinions of the builders differ sharply. Someone assures that the ideal way for the ceiling is starch processing and a good old spatula, someone believes that only a grinder will be able to remove the putty layer quickly and efficiently. And yet, how to remove the old putty from the ceiling?
Take a good look at the ceiling to choose the option that suits you. If the putty is based on parole and begins to fall off already when tapped, it is quite possible to get by with a starch method. But if the coating is thick or holds tight, and it is necessary to clean the ceiling, use a grinder: it is both faster and more reliable.
Remove the old putty from the walls completely or not - the choice is yours. However, if you want to get the perfect room with trendy wallpaper or even paint, it's best to clean everything "down to the ground", choosing the method that suits your wall.
How to remove putty from the ceiling: quickly remove (peel off)
Comfort in the apartment determines the condition of the living space. Of great importance is the application of a decorative coating on the surface. But before starting finishing work, you need to learn the rules of how to remove putty from the ceiling.
Content
- 1 view on a certain plane
- 2 Warranty of high -quality work
- 3 nuances of removal of plaster
- 3.1 if you are lucky 9000 3.2 Wonderful case
Looking at a certain plane
The main types of repairs are subdivided:
- for wall treatment;
- for floor decoration;
- for ceiling trim.
Each job requires a set of skills. But if the floor and walls can be draped, then even a slight defect will be visible on the ceiling.
Therefore, it should be understood in advance whether old putty or plaster needs to be removed from above. If the coating is firmly held, then it is possible to do without removing it. But when it is supposed to repair or re-install a stretch ceiling, then it is necessary to perform work on removing the old putty. Outdated paint, putty, gypsum or cement layer will begin to crumble.
Carefully inspect the ceiling before making repairs. If the old coating looks fragile, it needs to be removed. Some people invite a master repairman. But his work will cost the homeowner quite expensive. Therefore, many do it on their own.
But do not think that the process is easy and simple. You should know exactly how to quickly remove the plaster from the ceiling. If the work is done poorly, the result will be depressing. The coating will quickly fall off, and you will have to start all over again.
Even a sharp change in temperature at the opening of the heating season can lead to the formation of defects. Blisters or cracks form on the surface of the plaster, which are the first harbingers of the beginning of the layer separation.
Job Quality Guarantee
In order for the new coating to last longer, all previously applied materials are removed from the ceiling. Both the final layer of plaster and the initial finish are removed.
The exposed surface must be thoroughly rinsed and cleaned. Only in this case, you can be sure that the work will be done efficiently. Any remnant of the old putty will inevitably lead to the fact that the new coating will fall off along with it. Then the ceiling will not save even the deepest primer.
Particular attention should be paid to the presence of fungus, mold or leak stains on surfaces. In these cases, plaster and putty are completely beaten off. The vacated plate is thoroughly dried and an antifungal composition is applied to it.
If there are defects in the roof or walls, they must be closely examined and then completely eliminated.
Details of plaster removal
In order to remove old putty, you need to understand how to remove all previous layers of materials. In some cases, they have already partially crumbled. But sometimes the coating is still quite firmly held on the ceiling. Therefore, it should be cleaned very carefully.
In order to cope with the repair on your own, you should be prepared to devote a lot of time to removing putty. The plaster will come off relatively easily from concrete or brick. And with drywall, caution is required. With rough processing, it is easy to damage it.
It is not enough just to put in a ladder for repairs. As the cleaning of the surface progresses, it will have to be constantly moved from place to place.
If the ceiling is at least 2.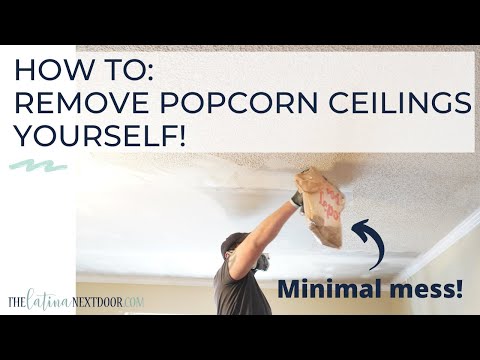 5 m from the floor, it is better to use the kitchen table. You will have to move it less often, and the position of the person conducting the cleaning will be more reliable and safer.
The floor must be protected with newspapers and covered with plastic sheeting. Otherwise, the remnants of the fallen putty will irrevocably spoil it. If the surface is lined with expensive decorative material, then damage to it will lead to irreparable consequences. In this case, you need to select at least 3 layers of the film.
Doors and window panes must also be covered. Then the cleaning after the repair will not take much time.
Great care must be taken when a stretch ceiling is installed. If putty gets on it, then it will be difficult to wash it off. Therefore, it must be protected very carefully.
If lucky
There are 2 types of ceiling slabs.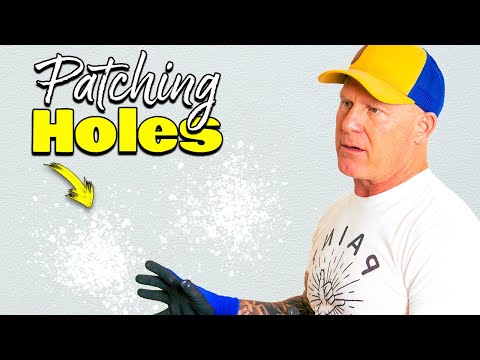
In monolithic and panel houses, they are a continuous surface, often without plastering. Builders put putty on it. Therefore, before eliminating it, it is necessary to establish the quality of the material.
The coating to be removed must first be examined for strength. Choose a small place and try to figure out how to remove the plaster.
The marked part of the ceiling must be cleaned to the ground. If everything worked out, then it is allowed to start more large-scale work.
For dismantling putty, it is advisable to purchase:
- Long pile roller.
- Paint container.
- Rigid stainless steel spatula, at least 10 cm wide.
- Wear-resistant sandpaper.
- Scraper.
- Chisel.
- Grater with coarse diamond mesh.
If the ceiling is whitewashed, apply water with a roller. The material quickly absorbs it, after which it is easy to peel off the surface. If it is still strong, then the operation must be repeated several times with a spatula.
If there is no finish, clean the ceiling with water. If there are sagging concrete or a large mass of mortar on the slab, a chisel is used in the places where the pipes pass through the ceilings.
Particular attention should be paid to the places where plaster compositions are applied to the areas where communications are adjacent to the walls. The work is completed by surface treatment with a diamond mesh.
Difficult case
The most difficult option is when the ceiling is a series of hollow core slabs. In monolithic and panel houses, repairs are not particularly difficult. There are also complex differences in height, and there are seams between the plates. They are smoothed out by applying a mixture of lime, sand and cement in specially adjusted proportions. When an increased proportion of the last component is introduced into the solution, the mixture becomes so strong that its hardness is not inferior to concrete. Removing such a coating will be very difficult.
No less problematic is the situation when putty from alkyd or polymers was chosen for finishing. Then it will be possible to eliminate it only with the use of special tools.
Tool to help you
The choice of tools for removing putty is very important. There are 2 varieties of it: mechanical and manual.
First variant introduced:
- Grinder with cutting disc and removable wire brush for concrete.
- Vibratory grinder with diamond mesh.
- Hammer drill with chisel included.
- Sander with coarse emery belt.
- Random orbital sander with carbide cutter.
For manual work on the removal of putty, it is recommended to choose an iron scraper and a metal brush.
First, they try to remove the reinforcing mixture from the ceiling with a mechanical puncher with a chisel. Then evaluate the strength of the plaster and the thickness of the applied layer.
Putty can be removed more easily by hand using a scraper. They make cuts that reach the plate, then pry the layer with a spatula. If the material does not lend itself, then a brush is used for metal processing.
Mechanical tools are more often used when the plaster coating reaches a thickness of 0.5 cm. Then it is better to choose an eccentric grinder with a cutter.
If the putty is applied even more densely, then you can not do without a grinder with a disc for concrete. She makes mesh incisions. Then they take a puncher with a wide chisel in order to remove everything superfluous with them.
If it becomes necessary to remove too strong alkyd putty, then use a vibratory or belt sander.
Safety
Before starting the repair, you need to think about how to remove the old plaster.
Safety precautions must be observed during repair work, otherwise fragments of plaster can cause injury.
It is necessary to work very carefully, because if the force is applied excessively, the ladder may tip over or the person himself will lose his balance. Therefore, it is worth stocking up with some emphasis.
Used as protection:
- Close-fitting clothing. It is advisable to tie the legs, and raise and fasten the sleeves.
- Helmet or cap with visor. Women are invited to take a thick scarf.
- Eye protection goggles. If diving models are available, it is best to use them so that dust does not get on the mucous membranes. When grinding, the smallest particles of the material scatter in all directions and easily penetrate under any frame.
- Tight shoes. Slippers or slippers are excluded immediately. You don’t need to choose old sneakers either: they will quickly fill up with the remnants of putty. Therefore, work will stop due to the fact that rubbish will have to be shaken out. In addition, stepping on a sharp fragment can hurt or slip. The best option would be tightly laced soldier's boots.
- Respirator. It will protect the face and respiratory organs.
The ceiling of our hopes
The visual "absence" of the ceiling becomes the criterion for a well-done work. It does not catch the eye, because there are no defects on it. Any, the most insignificant, flaw will be visible immediately.
Do not think that when using expensive solutions for applying ceiling paint, putty or plaster, everything will work out effortlessly. If you do not follow exactly all the technologies for performing work, then valuable materials will not give the desired result.
It is necessary to carry out repairs very carefully, sparing no time and effort. Only then will the ceiling become the one that the homeowners have dreamed of all previous years.
Conclusion
In order to completely eliminate the old plaster, you need to spend a sufficient amount of time for repairs. It is better to immediately take a vacation.