How to plant seed onions
Grow Onion - Seed Savers Exchange
How to Grow Onions
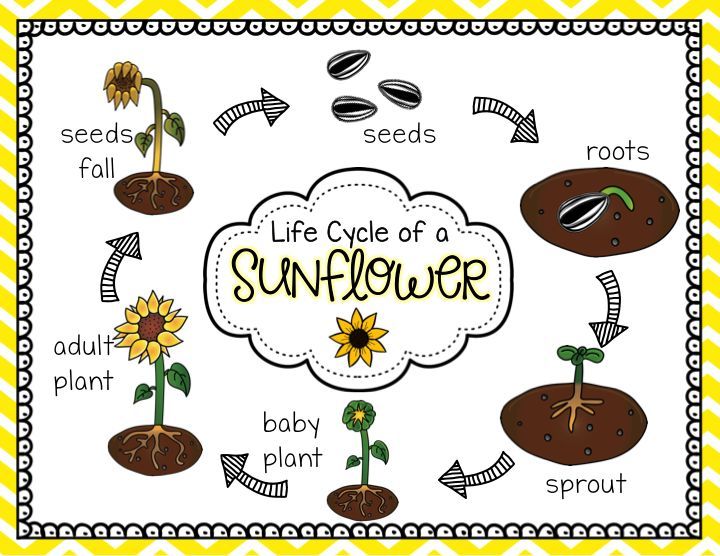
A culinary staple, onions are an essential vegetable in American gardens. Onions, like other members of the Allium family, are biennials, producing seeds in their second year of growth. The bulb (or common) onion has brown, yellow, or red skin and is round, elongated, or flattened. Bunching onions (or scallions) are harvested small.
When and How to Start Indoors
Plant onion seeds indoors 8–10 weeks before transplanting them outside just before the average last frost date in your area. Seeds should be sown ¼ inch deep. Onions require an open and sunny site, fertile soil, and good drainage.
Time to Germination
Seeds will germinate in 4-10 days when started indoors.
When to Transplant
Transplant outdoors just before the last frost.
Spacing Requirements
When transplanting your seedlings, space them at least 6 inches apart. Plant onion seedlings in the least weedy part of your garden; onion seedlings are small and do not compete well with weeds.
Special Considerations
Before the last frost, make a large furrow in your soil, at least 4 inches deep . Water this furrow before planting your seedlings to make transplanting easier.
Common Pests and Diseases
Several bacterial, fungal, and viral diseases can affect onion growth. Insect pests can also be a problem to various degrees in different parts of the United States. Plant your onions in a well-drained space. Diseases and fungi such as Fusarium basal rot, white rot, and Botrytis neck rot can affect crops in storage. Crop rotation can help prevent these diseases.
When and How to Harvest
The tops of bulb onion plants fall over naturally once the bulbs have matured. When half of the tops in a planting have fallen over, lift all of the bulbs and place the pulled plants in a warm, dry place (away from direct sunlight) to cure.
Eating
Onions have limitless potential in the kitchen and are indispensable for flavoring savory dishes. Onions can be roasted, fried, pickled, sautéed, and combined into dishes in dozens of other ways. Bunching onions, especially, are perfect for salads, pastas, and soups. Onion jam or compote is a great way to use a flush of red onions that will not store as well as white or yellow onions.
Storing
Cure onions for two to three weeks after harvesting by storing them in a warm place away from direct sunlight. When the onions feel paper-dry on the outside, clip off the tops and roots, and lightly brush off loose soil before storing the onions in a cool, dry place. Arrange them in a single layer or hang them in mesh bags. Always handle onions very carefully; the slightest bruise will encourage rot. Properly cured onions will store for 6–8 months in a root cellar or cool basement.
How to Save Onion Seeds
Onion seeds are not typically difficult to grow or to collect, but keep in mind that they are a biennial crop, meaning that they seed once every two years.
Life Cycle
Biennial
Recommended Isolation Distance
When saving seeds from onion, separate varieties by at least 800 feet up to ½ mile. To produce seed from onion, select as many perfect onions as you can spare for seed production and store them through winter in a cool, dry, dark place. Replant them in early spring at the same bulb depth and spacing as when they were harvested.
Recommended Population Sizes
To ensure viable seeds, save seeds from at least 5 plants. To maintain a variety over time, save seeds from between 20-50 plants.
Assessing Seed Maturity
Watch first for flowers and then for seed heads to form during the late summer of the second season. Wait for the seed heads to dry. Most of the flowers will be dry, and the seeds will begin to fall out on their own.
Harvesting
After the plants bloom and seed heads begin to dry, gather the heads in a paper bag. Most of the seeds will fall out on their own; shake the bag to free the remainder of the seeds.
Cleaning and Processing
Separate the seeds from the stems and other matter that makes up the seed head. Allow the seeds to air-dry for a few days before storing the seeds in a cool, dry place.
Storage and Viability
When stored in a cool, dark, dry place, onion seeds will remain viable for 2 years.
Download the PDF
from Seed or Sets to Harvest ~ Homestead and Chill
As strange as it may sound, onions are one of our favorite crops to grow! They’re highly underrated. It’s easy to grow onions, once you know how! Few pests bother them, and the plants are forgiving and versatile – since you can harvest and use these alliums at many different stages along the way. Not to mention, onions are the ultimate garden-to-table crop. Just about every killer soup, stew, sauce, or stir fry begins with a familiar foundation: sauteed onions and oil (or butter). Toss in some garlic? Now we’re talkin’.
Read along to learn how to grow onions from seed, seedlings, or sets.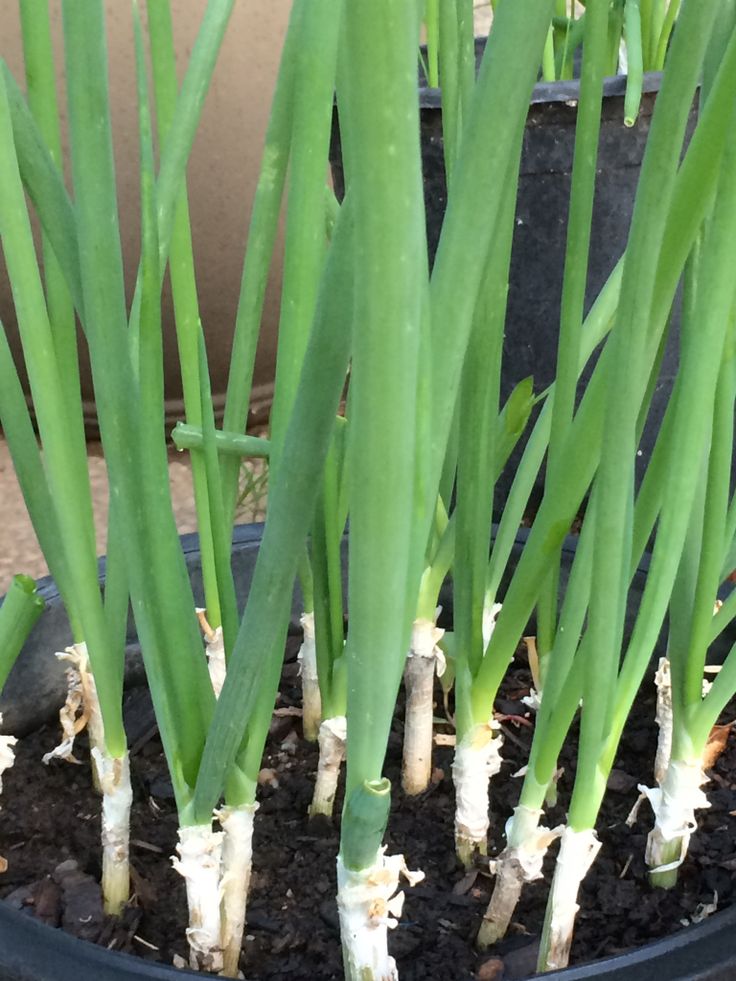 This article will teach you everything you need to know, including how to choose the varieties that will grow best in your garden, when and how to start onion seeds, plus tips for transplanting and ongoing care. Then we’ll talk about how to harvest, cure, store, and preserve your onions too. Spoiler alert: homegrown onion powder is outstanding!
When to Grow Onions
Onions are generally considered a ‘cool season crop’ because onion seedlings like to start their life when conditions are still cool. Then as the weather warms up, they switch to focus their energy on bulb formation. Therefore, spring is the best time to plant onions in most places. If you hope to grow onions from seed, you’ll need to be prepared to get a jump start and plant seeds during winter. After sprouting onions take three to five months to reach a mature size, depending on climate and variety.
Gardeners with mild winters can also grow onions in the fall for a winter harvest.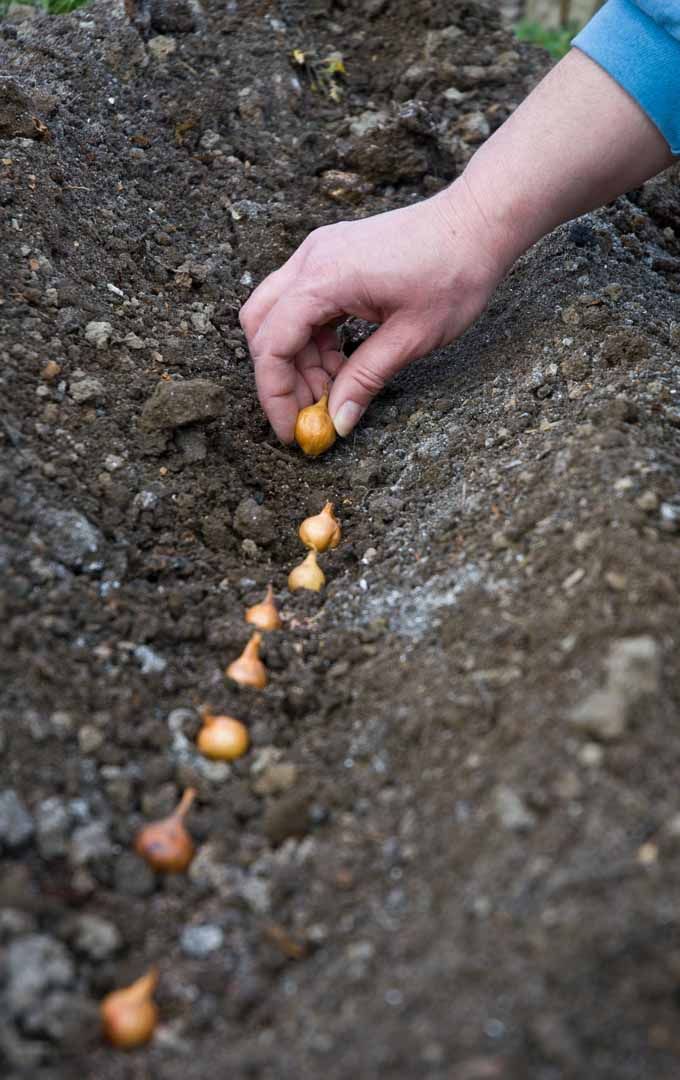 Here on the temperate Central Coast of California, we can grow onions essentially year-round! In colder climates, it is also possible to plant onion sets in fall but allow them to overwinter and harvest mature onions in the spring to early summer. In that case, plant onions when the soil is still warm – at least a month before your first fall frost date. That gives them time to establish healthy roots before they go dormant for the winter.
All in all, it may take a little experimentation to figure out the best time to grow onions in your particular climate and garden. One very important key to this puzzle is to choose the right type of onions to grow for your area!
Take zone 9 for example. According to our planting calendar, zone 9 can start onions in early winter and transplant (or sow outside) in late winter. Then, zone 9 gardeners can sow more onion seeds outside in late summer to early fall. If you need a planting calendar, get one here! We’ve created free printable calendars for every USDA hardiness zone.
TYPES OF ONIONS
The difference between bulbing onions, green onions, scallions or spring onions
Red, yellow, white, sweet… In addition to the various colors and subtle flavor differences, traditional bulbing onions can be enjoyed in a variety of ways – depending on the age they’re harvested! Before forming large bulbs, immature onions may be picked and used as green onions – also known as scallions. If you allow them to mature a little longer and form a modest (but still underdeveloped) bulb, then they’re considered spring onions! Gather up a cluster of young green onions, spring onions, or scallions, and now you have a handful of bunching onions. Note that there are also varieties of slender non-bulbing onions; a true “green onion”.
Short-day, long-day, and day-neutral onions
In addition to size and color, different onion varieties are further classified as either short-day, long-day, or day-neutral onions. They’re grouped by the number of daylight hours required to trigger good bulb formation. It is important to choose and grow onion varieties that are a good fit for your location! Otherwise, the onion bulbs may fail to successfully develop. Non-bulbing green onions aren’t as fussy about exact daylight hours, though all onions like plenty of sun!
- Short-day onion varieties will form bulbs once daylight hours increase to 10 to 12 hours per day. They are ideal for southern gardeners where daylight hours are consistently shorter throughout the growing season compared to the longer days up north. If grown in the north, short-day onions may go to flower too early in the season as the days become increasingly longer – resulting in stunted, small bulbs.
 Short-day onions are rumored to be sweeter than long-day. Some popular varieties of short day onions include Red Burgundy, Grano, White Bermuda, Southern Belle, and ‘Yellow Granex’ (also known as Vidalia).
- Long-day onions will form bulbs once they’re provided 14 hours of daylight or more. Without sufficiently long days, they will not form bulbs. Long-day onions perform best in the northern half of the US and Canada. Yellow Sweet Spanish, Walla Walla, Calibra, Southport White Globe, Rossa di Milano, Red Baron, Red Carpet, Cortland, and Sweet Spanish White are a few awesome long-day onion varieties.
- Day-neutral or “intermediate day” onion varieties form bulbs with 12 to 14 hours of daylight, and are perfect for folks gardening in the middle of the United States. Check out these intermediate day onions: Cabernet, Gladstone, Sierra Blanca, Talon and Red Amposta.
Not sure which to choose?
As a (very) general rule of thumb, short-day onions grow best south of the 35th parallel, and long-day onions do well north of the 35th parallel. Many onion varieties will specifically state which latitudes they’re best suited for. Ironically, our garden is located almost exactly on the 35th parallel – just a squeak north at 35.1216° N. We grow impressively large Walla Walla onions (a long-day variety) during the early spring to summer. Yet they don’t do as well for us as a fall-planted winter crop when the days get shorter. If you’re also close to the boundary, have fun experimenting with a wide variety!
Where each type of onion grows best. However, see the black star? That’s where we’re located, on the California Central Coast, almost right on the 35th parallel. According to this graphic we should be growing short day onions… but we grow stellar long-day onions here too! So, if you’re close to a latitude border or in the central “intermediate” area, don’t be afraid to experiment. Yet if you’re in the far north or far south, stick to long day or short day onions (respectively). Thanks for the great map, Johnnys Seed!
Should I grow onions from seed, seedlings or “sets”?
There are three main ways to grow onions: from seed, seedlings, or by purchasing onion sets.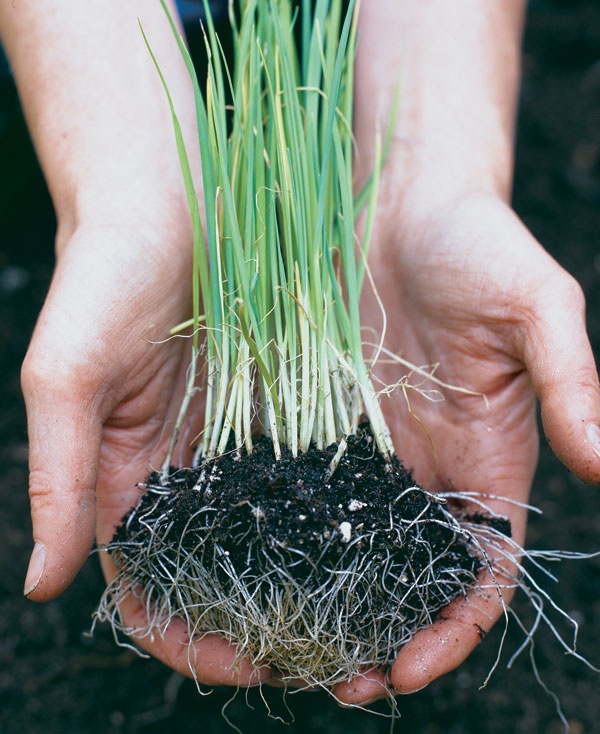 Every gardener has their preference between the three! We like to grow onions from seed, or from seedlings we buy at a local nursery. Growing onions from seed is easy, and allows you to choose the exact varieties you want to grow! Purchasing started seedlings or sets is also a great option, and will give you a quicker start than seed.
Onion seedlings are like small green onions, recently started from seed (within the last couple months). You can grow your own, or purchase seedlings at your local garden center.
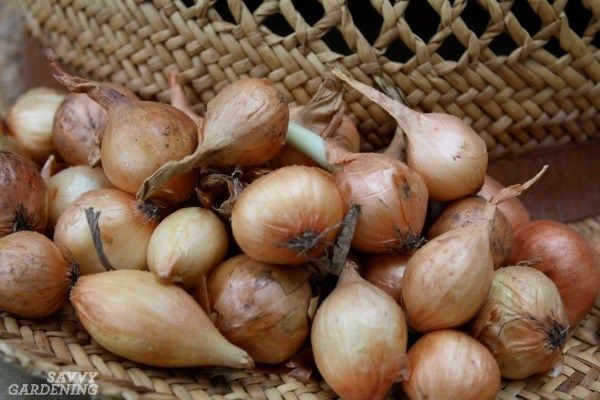
In contrast, onion ‘sets’ are small, dry, immature onion bulbs that were grown from seed the previous year. They were allowed to partially develop, harvested as a tiny bulb, and kept dormant to later sell or plant as “seed” – though they’re not really seed. Because they’re on their second year of life (and onions are biennial), onion sets have the tendency to bolt more readily or result in underdeveloped bulbs. When an onion ‘bolts’, it prematurely sends up a flowering stalk and then forms seed.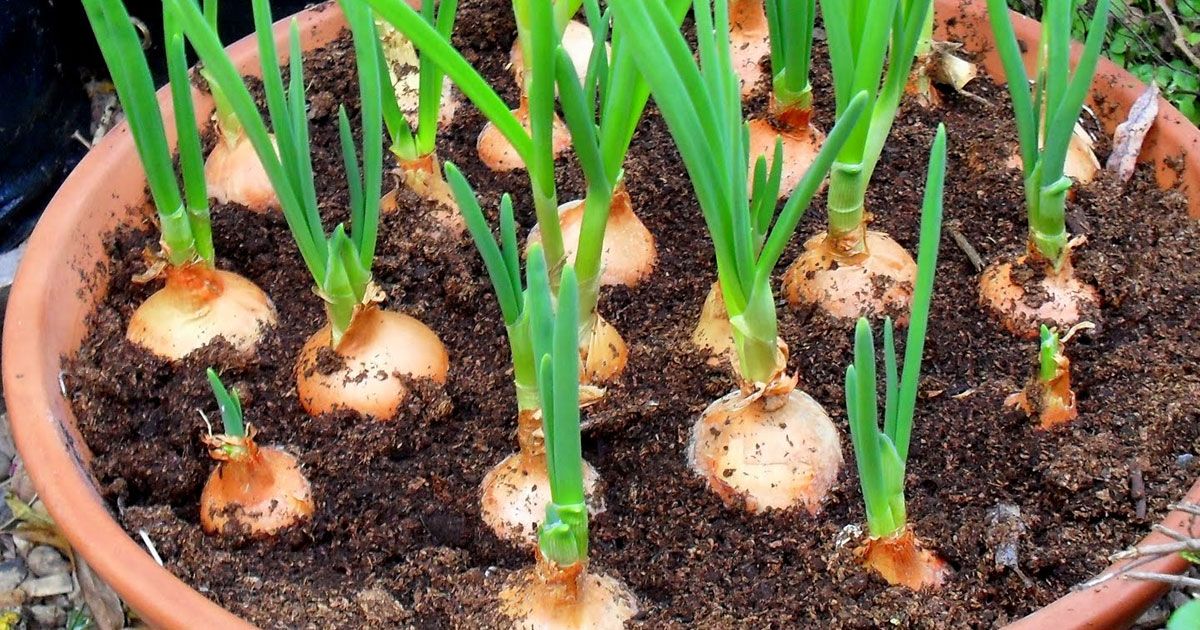 You can still eat around the tough center of the onion bulb, but it will decline in quality and no longer be good for long-term storage.
HOW TO GROW ONIONS FROM SEED
To grow onions from seed, you can either start seeds indoors, sow seeds directly outside, or use the winter sowing method. Planting seeds directly outside is simple. You won’t need to fuss with an indoor seed-starting set-up, or have to transplant seedlings later. However, starting seeds indoors during winter will put you several weeks (to months) ahead of schedule. You’ll have onion seedlings ready to transplant into the garden right away in spring. For northern gardeners with short growing seasons, this is a critical advantage! There, the direct sow method won’t give the onions enough time to mature – so seeds should be started indoors.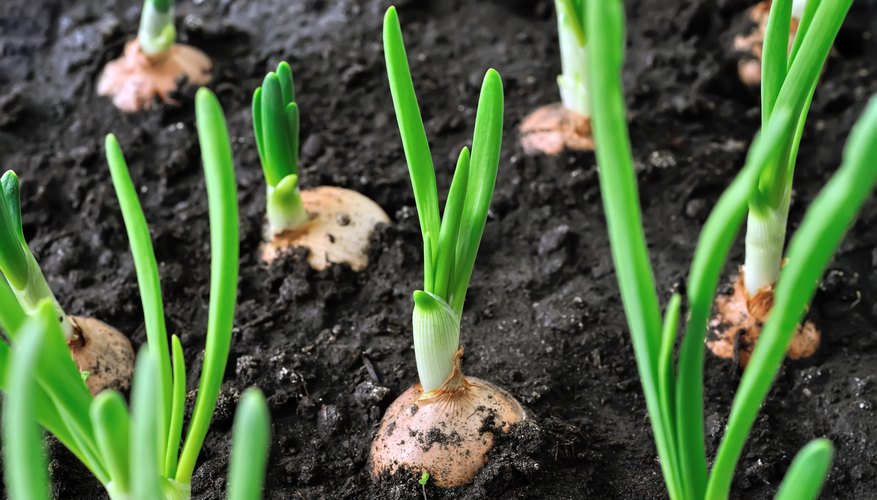
Direct sowing onion seeds outside
Plant onion seeds outside in late winter to early spring, once the ground is no longer frozen and can be worked in your area. Read the soil preparation and site selection tips below before you start. Then, sow onion seeds approximately 1/4 to 1/2″ deep and about 4 inches apart. Cover the seeds lightly with soil, and maintain damp to promote germination. Once they sprout, thin to one onion seedling per 4 inches to avoid crowding. (Note that germination rates will be slower and less consistent with this method, and not recommended for northern climates). Check your zone’s planting calendar to see if you can also direct sow onions in the fall.
Starting onion from seed indoors
Start onion seeds indoors about 8 to 10 weeks before the last spring frost date in your area. Follow the common best practices for indoor seed-starting: use a sterile seedling potting medium, keep the soil damp but not soggy, and provide at least 12 hours of bright light per day after germination.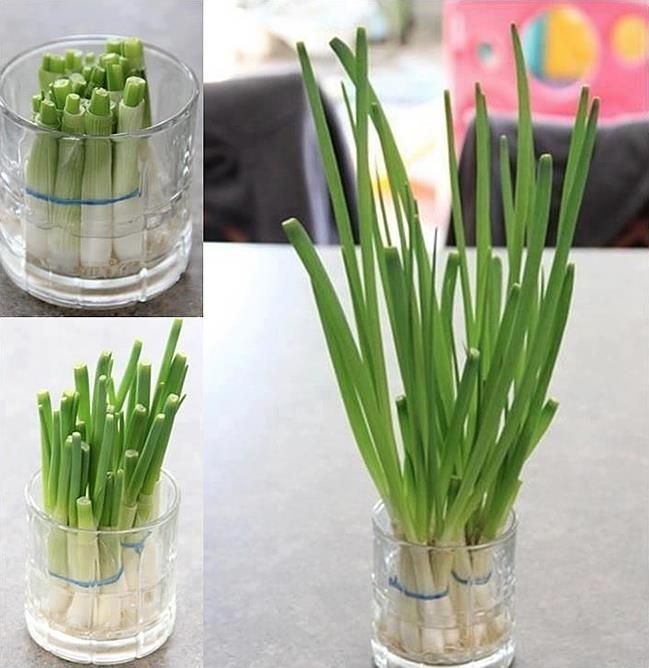 You’ll need a few supplies such as seedling trays, small containers or pots, and a grow light or other supplemental light fixture. Onion seeds will sprout most readily in consistently warm soil (70-75°F, a seedling heat mat will help!) but then can be moved to a cooler spot in the 60s.
The warm, comfy indoor conditions will help onion seeds sprout and grow quickly. Once they reach 5 or 6 inches (or taller), trim the tips of their greens down to 3 or 4 inches. This encourages thickening, stronger root development, and prevents them from flopping over. Eat those trimmed bits as green onions!
I do not thin my onion seedlings until I transplant them outside. I allow a handful of seedlings to grow together in one cell or small pot, and then very gently pull them apart to plant separately come transplant time. Onions do well with this treatment, so don’t be afraid to sow several seeds per container!
Please visit our Seed Starting 101 article for more details about starting seeds indoors, and our favorite supplies.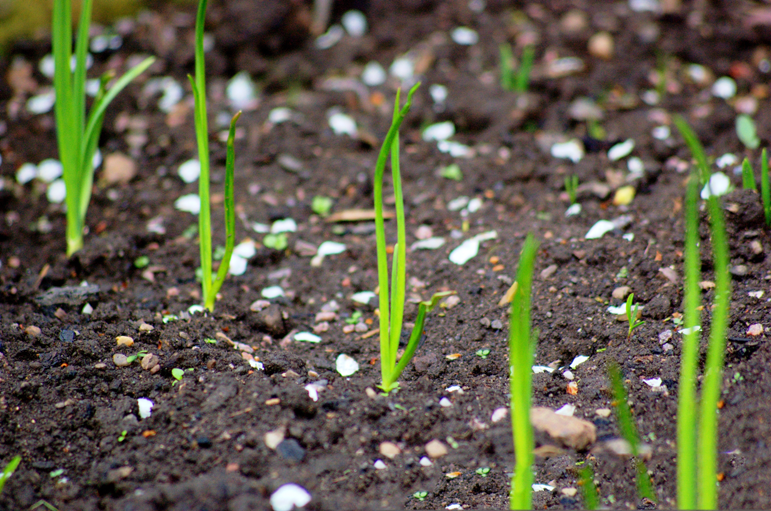
Winter sowing method
A final option to grow onions from seed is with the ‘winter sowing method’. This is when you sow seeds inside a covered container, but do so outside. As the name suggests, start your onion seeds outdoors during the winter – between late December to February in most locations. The seeds will stay dormant in the chilly outdoor conditions, and sprout in spring once the conditions are right. Then you can transplant the already hardened-off seedlings to their final location in the garden. Winter sowing combines the pros and cons of the other options: you won’t get quite the same early advantage as starting indoors, but it’s almost as low-maintenance as directly sowing seeds outside.
To grow onions with the winter sowing method, select a wide shallow container with drainage holes that can be covered with a clear or opaque dome or lid (or, one that already has one).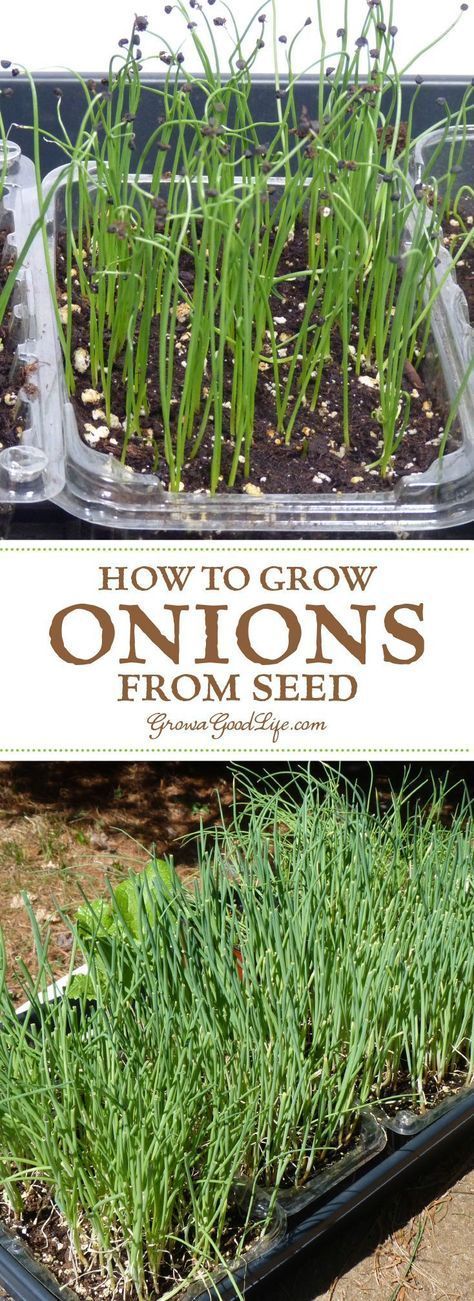 Add at least a couple inches of seed-starting soil to the bottom, evenly sprinkle or sow onion seeds inside, and then lightly cover the seeds with about ¼ to ½ inch of soil. Add at least one or two air holes for ventilation to the cover.
Set the container in a sunny location, water as needed to maintain the soil damp, and wait for the seeds to germinate. Once the seeds sprout, open the container lid on warm days (but close them back up on cold nights). Keep watered as needed. If snow or a hard frost is a threat, move the container to a protected location or cover it with a blanket for insulation.
Old milk jugs, salad green tubs, or similar containers are a popular choice for winter sowing. Image courtesy of Joe Lamp’l.Growing Onions from Sets
Plant onion sets in the garden 2 to 4 weeks before the last frost date in your area. Bury them deep enough that the bulb is mostly under the soil, but with the pointed tip level with the soil surface or just poking out.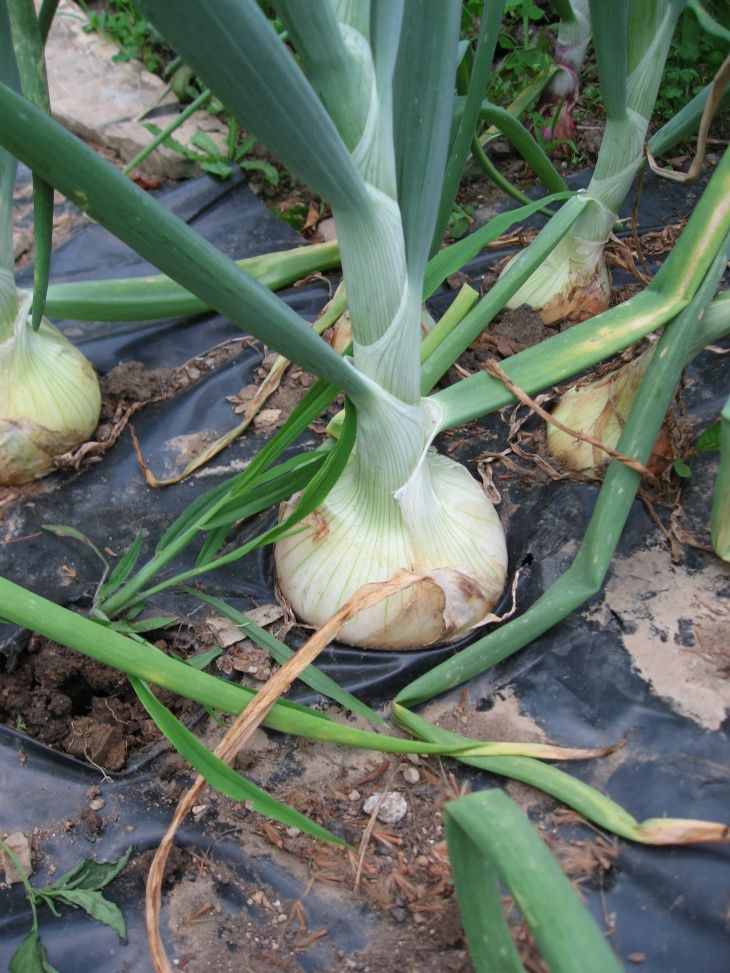 Space onion sets about 4 to 6 inches apart, depending on the expected mature size of the variety you’re planting. Speaking of variety, don’t assume all onion sets you find in local stores will grow well in your area! Big box garden centers are notorious for selling very zone-inappropriate varieties. Small locally-owned nurseries should offer a much better selection.
We haven’t experimented with growing onions from sets, and I’ve heard mixed reviews from fellow gardeners. While this method is certainly easy, it can lead to underdeveloped or flowering bulbs more often than starting from seed or seedlings. If you do opt to grow onions from sets, choose the smallest bulbs you can find. Sets around a half-inch in diameter or smaller are ideal. Contrary to what you may think, bigger isn’t better! Experts say that larger onion sets are more likely to halt bulb development and bolt (go to seed and flower) sooner than more petite bulbs.
Planting onion sets.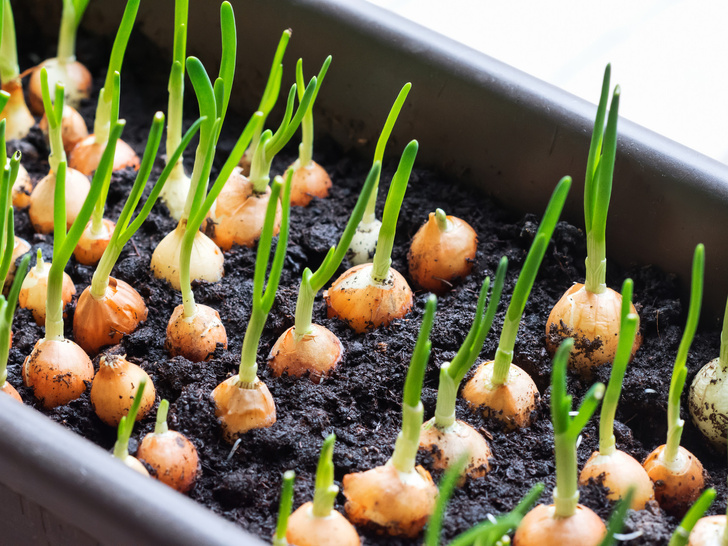
How to Plant Onion Seedlings (transplanting)
Before transplanting, indoor-raised seedlings must be gradually acclimated to outdoor conditions through a process called ‘hardening off’. Even though onion seedlings can tolerate chilly temperatures, hardening them off first will prevent shock or damage from the sudden change in environment. Learn more about hardening off here. (You can skip this step if you are growing onions from seedlings you purchased at a nursery, or if you used the winter sowing method.)
- Transplant homegrown or nursery-bought onion seedlings outdoors about 2 to 3 weeks prior to your areas last spring frost date.
- Gently pull apart or separate any clusters of seedlings, taking care to break as few roots as possible.
- Create a slender hole that is deep enough to accommodate the seedling’s roots, and bury the seedling so the base is about a half-inch to an inch deep.
- Space your onions 4 to 5 inches a part, depending on expected mature size for the given variety.
 Or, plant them closer if you want to harvest them as green onions or small spring onions.
 - If you haven’t already, cut off the tips of the greens with clean scissors, which helps focus energy on growing a large onion bulb. Take the seedlings down to about 5 inches tall. It’s also okay to pull off the outermost seedling leaves; those usually end up looking a bit sad by now.
Onion seedlings that have been hardened off can withstand a light frost, but need to be protected from a hard freeze. If needed, shelter young onion transplants with frost cover, cloches, buckets, or other protective insulation. Learn more about protecting crops from frost here.
Transplanting onion seedlings into the garden. These were seedlings I bought at the local nursery, so they were a tad beat up – and still need to have their tips trimmed. Gently pull apart seedlings, poke their roots down into a hole, and gently pack soil around their base.Planting Location: Sun, Soil, & Amendments
Choose a location in your garden that receives full sun.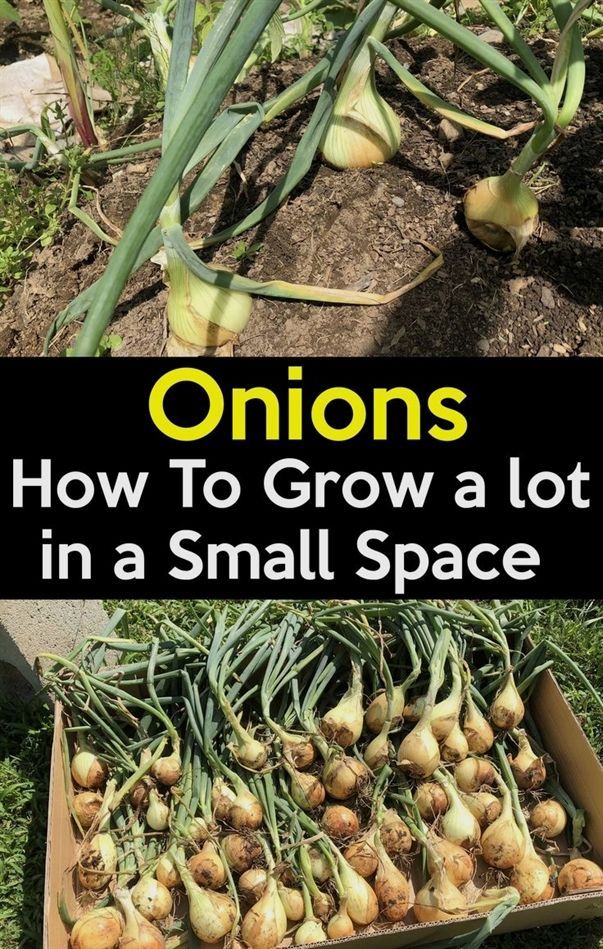 Some varieties of green onions can handle partial shade, but all onions grow best in ample sun. If your garden is on the shady side, choose short day varieties to encourage bulb development. Onions grow most happily in moderately rich, well-draining soil. Amend clay soil with organic matter (e.g. compost) or potting soil to improve drainage.
Before planting, amend the soil with a balanced, mild, slow-release fertilizer such as this organic all-purpose blend. I also recommend lightly working in well-aged compost and/or worm castings to the top couple inches of soil. Avoid high-nitrogen fertilizers. Excess nitrogen will encourage ample green top growth, but at the expense of the bulb. During the growing season, we water our onions at least once with homemade compost tea.
It’s also a great idea to inoculate the soil with mycorrhizae, either by applying some to the soil or watering with a mycorrhizae solution after transplanting. Mycorrhizae are beneficial fungi that promote healthy root development and nutrient uptake for all plants.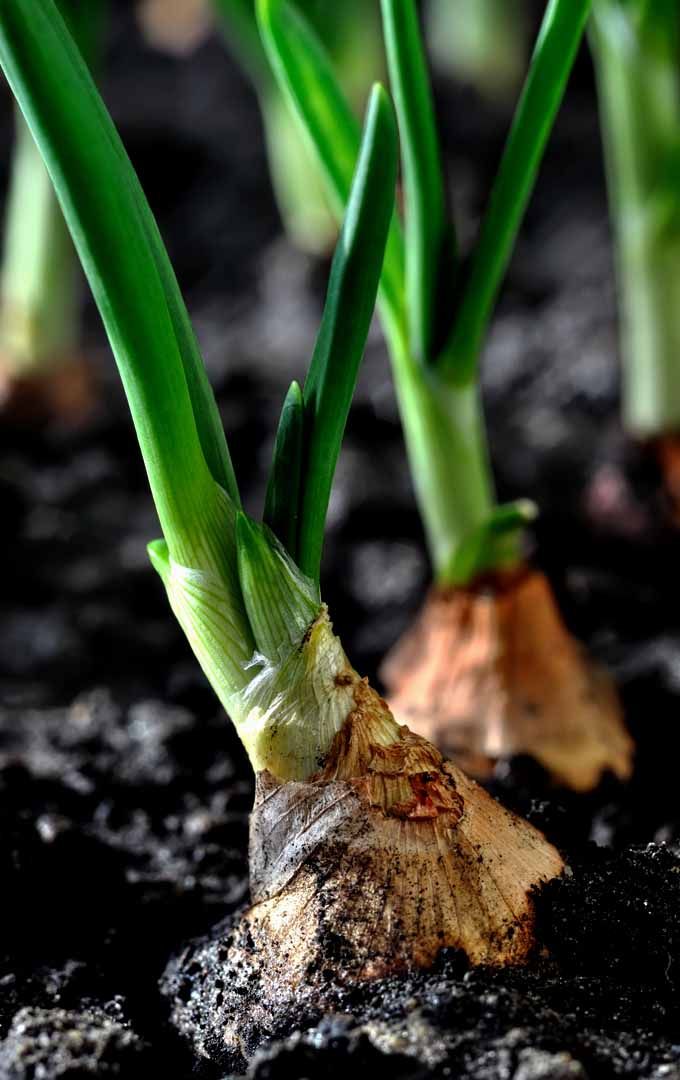 However, onions are especially reliant on root-mycorrhizal partnerships to take up phosphorus that’s essential for their growth!
Water
Onions have shallow root systems, so it is important to keep them well-watered. A lack of consistent water will result in smaller onion bulbs. Adding a layer of mulch around the onions is an excellent way to prevent the soil from easily drying out. We love to use compost as mulch! It is dual purpose since it helps feed the soil as well as retain moisture. Remember, good drainage is crucial too! Soggy soil or standing water increases chances of onions rotting.
Related: The Pros and Cons of 8 Popular Types of Garden Mulch
Here you can see our BPA-free soaker hose irrigation weaving between rows of large onions, and a woody compost mulch on top to help retain moisture.Growing Onions as Companion Plants
Very few pests are attracted to onions.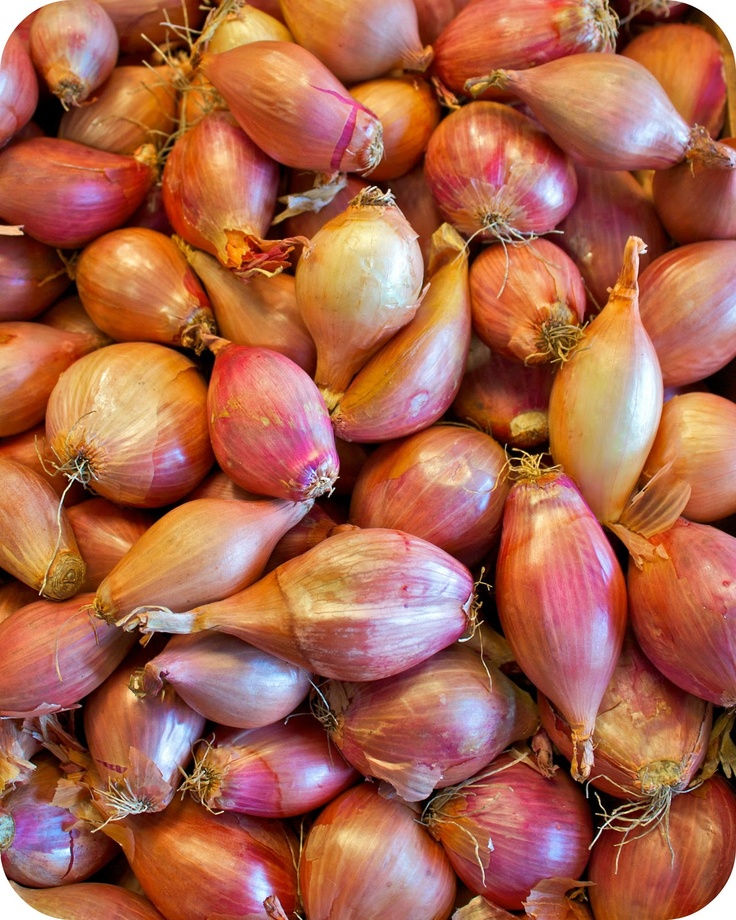 In fact, onions actually repel many pest insects, including aphids, flea beetles, cabbage loopers, ants, carrot rust flies, and more. Therefore, onions make great companion plants in the garden! Onions can be interplanted among other pest-prone crops to help provide natural, organic pest control. Rather than always growing onions in separate designated areas, we’ve had success keeping our Swiss chard plants almost completely aphid-free (usually a big issue) by tucking miscellaneous onions between them. Interested to learn more? Stop by this article, which also includes a handy printable companion planting chart!
Harvesting Onions
To use as green onions or young spring onions, harvest onions any time after they reach the size of a pencil or begin to form bulbs. You can also occasionally cut the tops only to enjoy as green onions, leaving the bulb to continue to grow. To do this, be sure to only harvest a “leaf” or two at time (or just a couple inches from the tips) so there are plenty of greens left behind to photosynthesize and aid in bulb development.
Once the onion bulbs form, you could technically harvest them whenever you’d like to use one. I love popping outside to harvest a fresh onion for dinner as-needed! Yet for maximum storage potential as dry bulbs, you must allow them to grow until they reach full maturity. Onions are mature and ready to harvest once the main stalk gets weak, thin, and starts to flop over. The greens will also start to turn yellow or brown, especially at the tips.
If your onion stalks don’t start to fall over on their own but you want to harvest them soon (e.g. if they’ve reached a mature size, freezing weather is in the forecast, etc) you can also manually bend or push the stalks over a few days prior to harvesting to expedite the process.
When the time is right, pull the plants up but leave them lying on top of the soil to dry for a day or two. Onions are susceptible to bruising, so be gentle when you harvest. Avoid accidentally puncturing the skin or flesh – they won’t hold up in storage if damaged.
How to Cure Onions
Properly curing your onions will enable you to store them at room temperature (in dry storage) for many months after harvest. In very hot, dry climates, those couple days onions spend lying and drying in the field after harvest may be sufficient curing time. Yet most gardeners further cure their onions by relocating them to a dry and well-ventilated area for 7 to 10 days. Cure your onions in a drafty garage, carport, patio, shed or even right outside (as long as it isn’t too humid).
Hang onions from a homemade drying rack, or lay them out flat on a wire rack or screen. Curing onions on a solid tabletop can also suffice as long as there is ample air circulation. Again, take care not to ding them up in the process.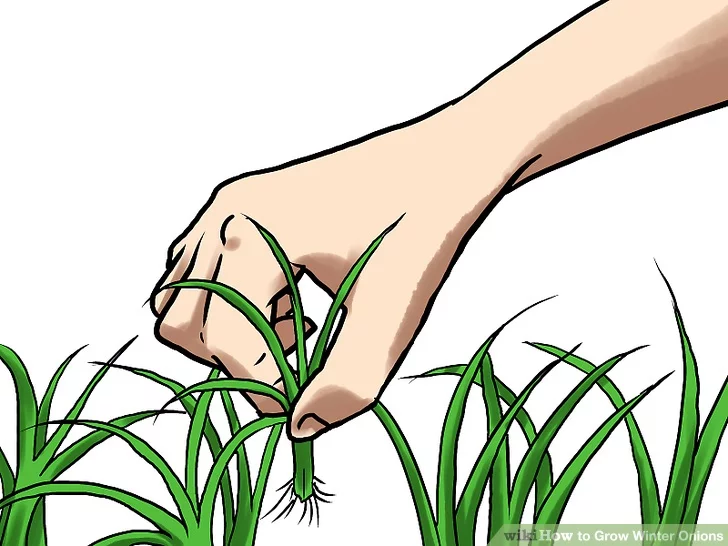 As onions cure the roots will shrivel up, and the greens will dry and form a seal at the top of the onion. When ready, trim off the roots and tops before tucking them away for long-term storage.
Storing and Preserving Onions
Store cured onions in a cool, dark, dry location. For example, in wire baskets or cardboard boxes in a spare closet or cabinet, root cellar, basement, or similar temperate location. Dry onions that were not cured as well (or at all) should keep at room temperature for several weeks, but they’ll last longer in the fridge. Be sure to use up any dinged or bruised ones first. Store immature onions (green, spring, scallions, etc) in an airtight container in the refrigerator for maximum freshness.
In addition to long-term dry storage, there are a number of ways to preserve onions. We love to make homemade dried onion powder, especially with immature onions or those that have started to flower and thus can’t be cured. Learn how to make onion powder here – and be sure to use the greens too! Onion powder brings the perfect pop of flavor to sautéed veggies, dips, dressings, sauces, soup, sourdough bread, and more.
Another great option for preserving onions is to roast and freeze them. We use these super-flavorful, lightly caramelized onions in future soup, stew, vegetarian chili, or quiche. You can also use this recipe to make easy refrigerator pickled onions!
Hot tip: Do onions make you cry? Try holding a slice of citrus (lemon or lime) in your mouth while you cut them!
And that is all you need to know to successfully grow onions!
Well friends, I hope you learned a few new tips that will enable you to grow big, beautiful, flavorful onions of your own! In all, they’re quite low-maintenance and fun to grow, especially once you figure out what varieties grow best in your area. Let me know if you have any questions in the comments below! If you found this information to be valuable, please spread the love by pinning or sharing this article. See ya next time!
Folk way to grow onions
Some amateur gardeners buy black onion seeds and grow onion sets from them. There are few varieties of black onion and, as a rule, they are old and do not differ in all the advantages that are present in the finished bulbs of elite varieties of onion sets of the new generation.
Sowing them with seeds is a waste of time and effort. It is much better to buy ready-made high-grade onion sets and grow tasty, juicy - burgundy, bright red or golden-bronze onions from it, which has all the advantages of modern varieties and hybrids, and is also resistant to diseases of onion crops. nine0003
When growing onions, there are a number of subtleties, without knowing which a good harvest cannot be obtained. In this article, we will tell you how to properly grow onions from onion sets in order to get a full-fledged, healthy harvest from it and talk about the most interesting varieties and hybrids of this crop.
HOW USEFUL ONION
Onion is the most ancient vegetable on earth. The first mention of it dates back to the 5th century BC. It was grown in ancient Egypt and ancient Asia. He came to us during the time of the Mongol-Tatar yoke and "took root" throughout the country. nine0003
In Rus', onions were used not only as a seasoning for food, but also as a powerful medicine that cures many ailments. And until now, the healing properties of onions are highly valued. This is determined by the unique set of vitamins and nutrients contained in the bulbs.
There are: vitamins - A, group B, E, C, PP, H, K; trace elements and nutrients - potassium, calcium, iodine, copper, phosphorus, zinc, sodium, magnesium, iron, zinc, selenium, fluorine, chromium, manganese, fiber, complex organic acids, antioxidants, natural antibiotics, phytoncides, aromatic and essential oils . nine0003
It is simply impossible to imagine any soup, meat, fish or vegetable dish without onions! And how does it help with colds and viral diseases? Just not a vegetable, but a lifesaver!
FEATURES OF GROWING ONIONS
To get large, juicy bulbs, the sets must be planted in a place well lit by sunlight.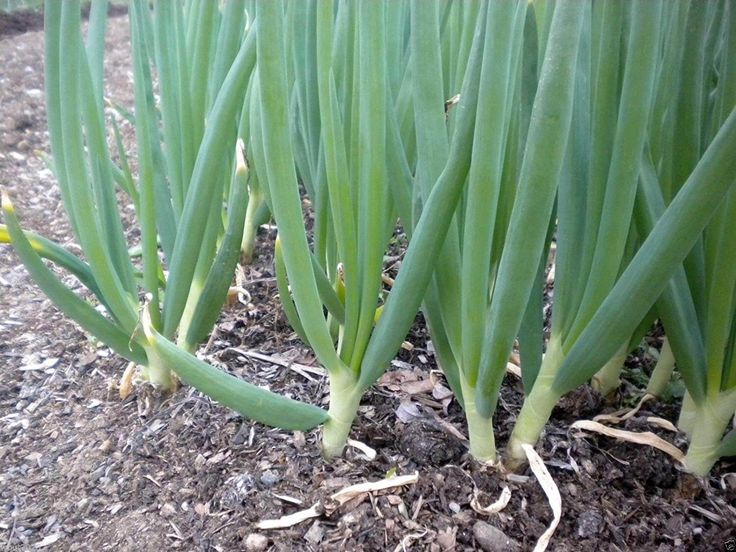 Sowing dates are quite early, since onions are a fairly cold-resistant crop. It is optimal to plant seedlings in late April - early May (according to the weather), when the soil warms up to +13 degrees. nine0003
Precursor crops are important for onions. It is best to plant it after tomatoes, peppers, potatoes, cucumber and pumpkin crops. But after legumes and garlic, it will grow poorly. In one place, onions are grown for no more than four years, otherwise pathogens of bulbous diseases accumulate in the soil. After onions, it is good to sow carrots in this garden bed (we wrote about this in our article “How to grow carrots”).
The day before planting, onion sets are soaked in a weak solution of potassium permanganate or Zircon biogrowth stimulant. Immediately before planting, the upper “tail” is cut off from each onion to speed up its germination. nine0003
Onions need fertile, light, well-permeable soil with a neutral reaction (pH 6.8 - 7.0). Onion sets are planted in rows, making grooves on the beds at a distance of 40 cm from one another.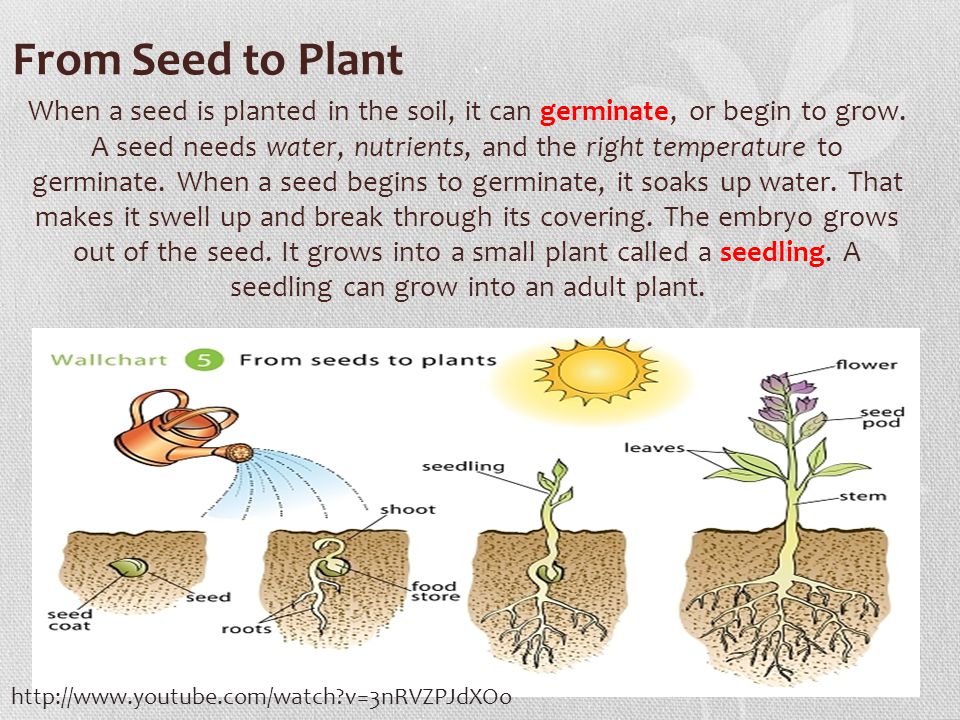 The onions in the groove are placed at a distance of 7 cm from one another, deepening them into the ground so as to leave a “tip” 2 mm high on the surface.
Depending on the variety, bulbs germinate in 10-12 days. They must constantly be in moist soil, so young plantings should be watered (but not overwatered) regularly. After watering, a weak surface loosening is carried out so that a soil crust does not form around the plants. nine0003
Onions need the first nitrogen fertilization to grow quickly. It is best to use natural organics: an infusion of fermented grass or rotted manure. It is absolutely impossible to use fresh manure for feeding onions!
A month after planting, the plants are given potassium-phosphorus nutrition (superphosphate and potassium sulfate). The third time they are fed with phosphorus and potassium (nitrogen is excluded, otherwise the green mass will grow rapidly to the detriment of the bulb) in July - when the bulbs are growing intensively. nine0003
If the bed was well fertilized before planting, then only two top dressings are limited.
When growing onions, you need to decide which plants you will use to get fresh greens (feathers), and which ones - large bulbs. On those that are intended for growing bulbs, it is absolutely impossible to cut off green leaves! Otherwise, the onion will grow small.
When the bulbs begin to form, they must be stripped to 1/3 of their height. This will help the turnip ripen and form well. nine0003
After the growth of the green mass of feathers stops, and they begin to turn yellow, and the bulbs acquire a shade characteristic of this variety, they can be removed.
Wash the turnip, cut off the roots and dry feathers and lay out on thick paper or cardboard in a dry, well-ventilated area. After 3 weeks, new scales form on the bulbs - golden or dark red. This means that the crop can be stored.
BEST ONION SETS FOR ONION GROWING
It is possible to grow high-quality onions only from elite planting onion sets.
We offer you the best hybrids from our collection:
Extra F1 - early, bright golden, very large (up to 800 g), round.
Comet F1 - golden yellow, early, elongated (length 15, diameter 5 cm).
Karminka - early, bright red, elongated oval. nine0003
Premito F1 – mid-season, round, golden bronze.
Surprise F1 - snow white, early, sweet, tender, round.
Krasnaya Gorka F1 - medium early, bright red, round, large (stored up to 10 months).
Lorenzos F1 - early, golden bronze, round.
Falcon F1 - very early, golden brown, round. nine0003
Corundum F1 - early, maroon, round.
Burgos F1 - golden yellow, early, round.
Condor F1 - bright red, early, sweet, round.
Flamingo Pink F1 - hot pink, delicate, round.
Evolution F1 - very early, bright golden, delicate, round.
Each of these hybrids has the best qualities of modern varieties. Choose the ones you like, plant and see for yourself! nine0003
cultivation, planting, care in the open field
Onions appeared in culture about 5 thousand years ago and have not lost their popularity since then. This is not surprising, because care for him is minimal. However, it is important to observe the growing conditions - only in this case, the onion will give the maximum return.
Cultivation of onions
In order to get a good crop of onions, they need to provide two important conditions: nine0144
Onion is a drought-resistant crop, so it is often planted in remote non-irrigated areas. Actually, for him, the drier, the better - excessive moisture leads to the development of fungal diseases.
Planting onions
Onions are traditionally grown in a biennial crop. In the first year, black seeds are sown - over the summer, small onions grow from them, the so-called sevok. It is stored all winter, and planted in the garden in the spring - and only in the second year large bulbs grow. nine0003
Nigella sowing. Onions are not afraid of spring frosts, seedlings easily tolerate cold snaps down to -6 ° C, so seeds can be sown early - at the end of April.
Before sowing, it is useful to soak the seeds for a day in warm water or a slightly pink solution of potassium permanganate - this way they will also be disinfected. Then they are wrapped in a damp cloth and sent to heat. When the seeds have hatched, they can be sown.
You can sow the seeds dry, but in this case they hatch for a very long time - up to 3 weeks, and this is a waste of time. nine0003
Nigella is embedded to a depth of about 2 - 3 cm (1). The distance should be as follows:
- between the grooves - 15 - 20 cm;
- in a row - 2 cm (you should not sow less often, the onion should grow densely so that the set is 1 - 2 cm in size).

Before sowing, the furrows must be watered and the seeds sown in the mud. But you need to fill them with dry soil - this will protect the beds from the formation of a soil crust, which can prevent the onion from rising.
Sets ripen usually around 90 - 100 days - they dig it out in mid-August.
Planting seed. Sevok is planted in the second year (or you can buy it in the garden center and then you don’t have to bother with growing small onions). He is also not afraid of spring frosts, however, if frost catches him, he will quickly go into the arrow, and this will reduce the quality of the onion turnip. Therefore, there is no need to rush into planting the sevka: the optimal time is mid-May, when the soil temperature of the soil will be at least 12 ° C. nine0003
Before planting, the onions need to be warmed up on the battery for 8-10 hours - this will save them from shooting.
After warming up, the seeds must be disinfected. There are 2 options:
- soak in a strong, dark pink solution of potassium permanganate for 30 minutes; Soak
- in an antifungal drug: Fitosporin-M, Gamair or Planriz (any choice) - this is a more reliable way, but more expensive and troublesome.
After soaking, the onion sets must be dried before being planted in the beds. nine0003
The bulbs are planted to a depth of 0.5 cm (2) - counted from the shoulders. The distance should be as follows:
- between the grooves - 20 cm;
- in a row - 10 cm (or a little less if the onions are very small).
They are planted according to the same principle as the black seeds - first they shed the furrows well, then they stick the onions there, and then they cover them with dry earth.
Photo: Jan Woitas, globallookpress. com
com Outdoor onion care
Onion care is simple - it is a rather undemanding plant. He can do without care at all, but if you water and feed him, he will be grateful. nine0003
Watering. It is needed only in the heat and only until mid-July. Onions should be watered rarely - once every 10 days or even 2 weeks is enough. The norm is about 3 liters per 1 sq. m.
Top dressing. Fertilizers for onions are applied only before sowing seeds or planting nigella. The ideal option is 1/3 bucket of humus, in which you need to add 10 g of ammonium nitrate (about 3 teaspoons), 30 g of superphosphate (about 2 tablespoons) and 20 g of potassium salt (1 tablespoon). All this must be mixed well and evenly applied to the soil for digging. nine0003
Harvesting onions
To understand when it is time to harvest onions, you need to be guided by their tops - they should start to turn yellow, but still remain juicy. In this case, the bulbs will be slightly unripe - as it should be, the yellow covering scales should coarsen during the drying process, and not in the garden. This is the key to successful storage.
The bow usually grows above the ground, so it can be pulled by hand. If the bulb does not give in, the soil is too hard, you can dig with a pitchfork. nine0003
After harvesting, the onions should be dried in the sun for a couple of hours (3), and then put in the shade - there they should be ripened and dried for another couple of weeks. Only after that it can be sent to storage.
Rules for storing onions
There are many ways to store onions, but all of them do not give a very good result - the onion rots and sprouts in winter, it has to be constantly sorted out. The only way in which the bow lies until spring is to braid it. This is exactly what our ancestors did, and this is not for the sake of beauty - they just noticed that this is the only way the onion does not deteriorate (4). nine0003
Onion scythes are stored in a room: 20 °C is the best option for them. And it is desirable that it does not rise higher, otherwise the onion will dry out.
You can't store onions in the basement - it's too damp for them there, they will quickly rot.
Popular Questions and Answers
We talked about growing onions with agronomist-breeder Svetlana Mikhailova.
Is it possible to grow onions in one season?
You can, if you grow it with seedlings. In this case, the seeds are sown in the second half of March in cassettes. Seedlings are planted in open ground in mid-May. nine0241
Danilovsky 301, Myachkovsky 300, One-year-old Siberian, Red Baron, Stardust, Strigunovsky local, Schuttgarter Risen, Exhibition are best suited for harvesting in one season.
Why do onions rot in the beds?
This can be due to excessive soil moisture, for example, it often rains in summer or it is watered too often.
The second reason is the onion fly. Its larvae infect the bottom, and the bulb begins to rot.
Which varieties of onions keep well in winter? nine0239
Among the most keeping varieties are: Alpha, Hercules, Globus, Zolotisty, Karatalsky, Skvirsky, Strigunovsky, Sturon, Supra, Centurion, Ellan.