How to plant irises
How to Plant Iris and Do it Right
Do you want to know how to plant Iris bulbs correctly? This is an easy step-by-step on how to plant bearded Irises for the best flowering, healthy plants, and years of enjoyment.
How you plant Iris bulbs (rhizomes) is key to growing healthy plants with loads of flowers. Technically bearded Iris bulbs are called rhizomes but many lump them in with bulbs.
I have shared plenty of the Iris growing in my garden and I thought to share how to plant bearded iris for those that are beginners in gardening or are new to planting bearded Iris.
What you will Learn about Planting Bearded Iris Bulbs
- Best time to plant Iris
- Where to plant Iris bulbs
- How to Prepare your Soil before planting
- How to plant Iris bulbs for best performance
- How far apart to plant the rhizomes
- Replanting Iris after Dividing
- Where to buy Iris bulbs or rhizomes
If you are more of a video person you will find one at the end of this post.
Sometimes I forget that not everyone knows the ins and out of planting and caring for different plants.
I am reminded when I give some to a friend and they end up killing them because they really did not know the right way to plant Iris bulbs and I failed to tell them.
Bearded Iris are winter hardy in zones 3-9, so most everyone can grow them with success!
So here you go, How to plant iris correctly yet easily!
This post contains affiliate links. If you make a purchase after clicking a link I may make a small commission at no cost to you.
When is the Best Time to Plant Irises?
Iris are usually shipped from growers in August and September in the U.S. and that is for a very good reason. The best time to plant iris is in late summer through early fall
This gives most gardeners the chance to get them in the ground so the rhizomes can settle in and start rooting before a hard freeze.
This is also the time that you would dig up and divide the Iris currently growing in your garden.
what you need to know
Dividing Iris
If you plant your Iris correctly then in a few years you will need to divide them. Don’t worry, it’s easy enough and keeps your Iris happy and healthy!
After you have either dug up and divided your Iris rhizomes or you have just received some from an iris farm you need to plant them correctly.
This way you will enjoy strong, healthy growing plants with numerous blooms the following Spring.
Where do Irises Grow Best
The best place for irises is in full sun, with at least 6 to 8 hours of sunlight per day. They can tolerate less than half a day’s worth but it’s not ideal and they won’t bloom well if you don’t give them enough light.
Most recommend planting your Iris bulbs in a dedicated bed or area but I confess to planting them in my flower beds and borders with other plants.
Iris prefers free-draining soil. Iris can withstand drought but not soggy feet.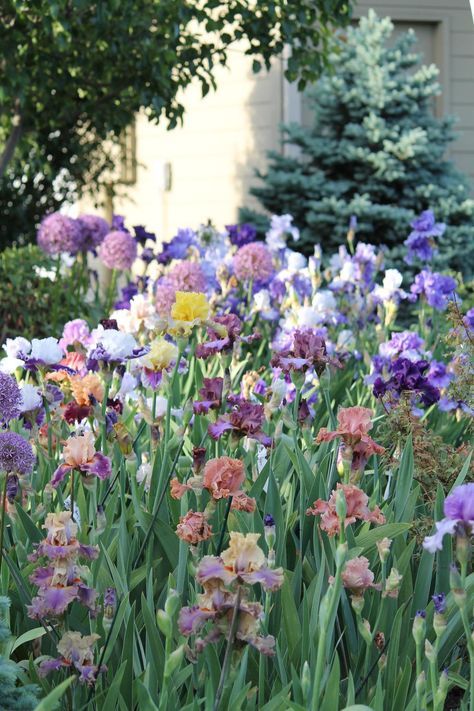
Note: You can plant them with other plants that like more water by planting them on a small hill of soil so they are elevated. They can drain off easily while the other plants get all that water.
This is my favorite tool for digging and planting Iris.
Prepare the Soil
Remove weeds and other debris, then loosen the soil around the area you will be planting the new Iris rhizomes.
I do not typically fertilize when planting my Iris.
The rhizome should have plenty of stored energy so adding fertilizer is not necessary and my soil is well amended each year with compost.
Yet some folks prefer to add fertilizer when they plant. If so then stir the fertilizer into the soil, mixing it in lightly. Don’t just place it in the hole.
Rainfall or watering will deliver the fertilizer where it needs to go if it is stirred into the soil.
If you must use a fertilizer I recommend this one
NOTE: If you struggle with varmints digging up things in your garden then skip adding any fertilizer.
Many times it contains bone meal and that attracts them to dig. Remember, unless your soil is very depleted you most likely do not need to add it at planting time.
The best time to fertilize Iris is after bloom since that is when they are replenishing the rhizome for the next season.
How to Plant Iris Rhizomes
Plant your Iris rhizomes in the soil making sure to keep them close to the surface.
Note: I have been battling voles this year. They have been eating my plants including the Iris rhizomes, to deter them from eating my newly planted Iris I put some of this under and around the rhizome.
This is important enough to repeat….Do not bury deep your Iris rhizomes too deep.
This is the mistake many make. Iris likes to be close to the surface. I leave a bit of the top showing when I plant, that way I know they are not too deep.
Iris loves the sun on their backs, the top part of the rhizome. If you live in a very hot area you can cover the backs of the rhizomes lightly with soil.
In cold, cold climates do mulch a bit before hard cold starts but you need to be sure and rake it back as soon as warmer weather begins.
How Far Apart do you Plant Irises?
A good rule of thumb for planting Iris in groups is 6 to 12 inches apart. Because Iris thrives here I leave at least 12 inches so the new Iris can grow and increase. Increasing means making new rhizomes or bulbs you can divide out later for more Iris.
By spacing them a bit further apart there won’t be a need to divide sooner than in 3 years.
Replanting Iris after dividing
If you want to know how to divide Iris then you can read all about that here.
When replanting a particular Iris that I have divided I like to plant three rhizomes together. That gives me a spectacular mass of blooms in Spring.
Plant them with the pointy nose of the rhizomes facing each other in a circle.
Spacing is not critical but I like to place mine about 6 to 12 inches apart for the reasons stated above.
I firm them in with my foot, you can see my footprints in this photo.
Planting them this close together means you will get a good show of blooms next Spring but you will also need to divide them sooner than if you planted them further apart.
Above the soil is moist but if you are doing this during a drier part of the year water them in and keep them watered through the summer but not soggy.
If you are planting a newly acquired rhizome you will most likely only have one, and that is fine. Plant it the same way just not in a grouping.
In a few years, you will have enough to divide and replant.
Next Spring you will have some lovely Iris to enjoy.
If it is Spring and you didn’t get to divide your Iris in Fall you can still do it, read about how here.
Most reputable Iris farms and gardens send out good-sized, high-quality rhizomes that will bloom the first year.
When dividing your Iris you may have some smaller-sized ones attached to the larger rhizomes.
The smaller ones will many times take another season to grow in size before blooming. So don’t get discouraged if yours don’t bloom the first season.
I hope this helps all those out there that were skittish about growing Iris.
Growing Iris is truly very simple and so rewarding.
Where to buy Iris Bulbs Rhizomes
My favorite Iris Sources are:
Superstition Iris
Schreiners Iris Gardens
Suttons Iris Garden
Happy Iris Planting!
On another note: I also teach painting and have a lesson on how to Paint Iris. Hop on over and learn how you can paint Iris one easy stroke at a time!
Feel Free to Share!
30.8K shares
- Share
- Tweet
How to Plant Iris Rhizomes
By
Sienna Heath
Sienna Heath
Sienna Mae Heath is a gardening expert with over five years of experience in gardening and landscape design.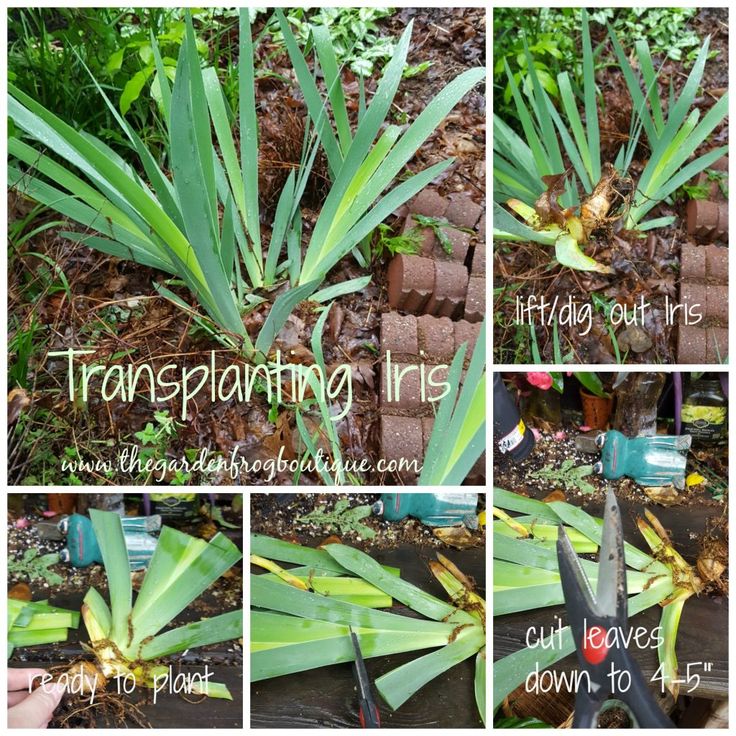 She grows her own food and flowers in her native Zone 6B. Sienna Mae runs The Quarantined Gardener blog and encourages the Lehigh Valley to develop victory gardens for sustainable, garden-based living. Her work has been featured in The Weeder's Digest, Gardening Know How, GrowIt, and more.
Learn more about The Spruce's Editorial Process
Updated on 08/16/22
Reviewed by
Barbara Gillette
Reviewed by Barbara Gillette
Barbara Gillette is a master gardener, herbalist, beekeeper, and journalist. She has 30 years of experience propagating and growing fruits, vegetables, herbs, and ornamentals.
Learn more about The Spruce's Review Board
The Spruce / Jayme Burrows
Project Overview
The Iris genus has more than 300 species that are often classified according to the different root structures they form. Some irises have bulbous roots (such as Japanese iris), while others have fibrous root clumps (including the Siberian iris group).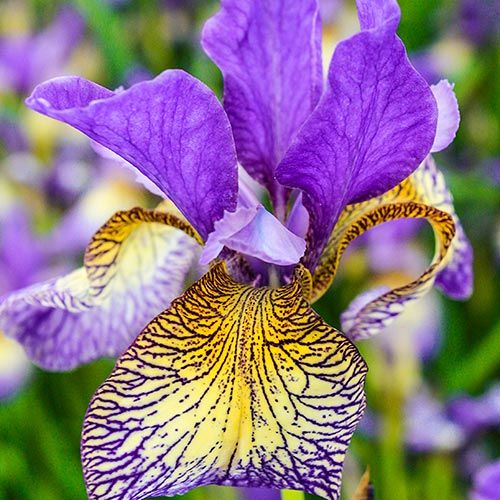 But the largest group, and arguably the most important, is the bearded iris group, all of which grow from rhizomatous roots—fleshy, thickened underground structures. When a gardener purchases a new iris, especially from an online retailer, it is often just a section of rhizome that arrives to be planted, often with a trimmed section of leaves still attached. And when you propagate bearded iris, it's this rhizome that is dug up, divided, and replanted. So learning the correct way to plant an iris rhizome is crucial if you want to grow this magnificent early summer perennial.
What Is a Rhizome?
Technically, a rhizome is a thickened section of plant stem that grows underground, but in practice, a rhizome is considered to be a type of root structure, identified by its fleshy, thickened form and horizontal growth direction. This fleshy root/stem portion serves as a storage vessel for moisture and nutrients, allowing the plant to send forth vigorous leaves and flower stems directly up from the root. The rhizome steadily replenishes and expands itself in preparation for next season's flower display. Examples of rhizomatous garden flowers include bearded iris, bamboo, and lily of the valley.
The Spruce / Meg MacDonald
When to Plant Iris Rhizomes
Most commercial growers ship iris rhizomes in late August or September when nighttime temperatures range between 40 and 50 degrees Fahrenheit. This is an ideal planting time, as the rhizomes have time to settle in the soil and get established before winter. Iris rhizomes can also be planted in spring or early summer, but try to avoid planting them very late in the fall, as they may not overwinter very well.
Equipment / Tools
- Tiller or garden fork
- Shovel
Materials
- Iris rhizomes
- Compost (optional)
The Spruce / Jayme Burrows
-
Choose a Location
Choose a garden spot that receives full sun. While they can tolerate partial sun, bearded irises will not bloom as prolifically without abundant sunlight.
 With shorter types of iris, also give consideration to where they are positioned within the garden bed—avoid locations where they will be shaded by other plants.
The Spruce / Jayme Burrows
-
Prepare the Soil
Iris grows best in well-draining, fertile soil that is neutral to slightly acidic. Take extra care to make sure the soil is well-drained, as irises may rot if they soak in wet soil over the winter.
Loosen the soil using a tiller or garden fork to a depth of about 12 inches. An optional step is to thoroughly mix in 2 to 4 inches of compost with the soil. This can be helpful in improving the drainage of dense soils at the same time it improves soil fertility.
Tip
Be aware that bulb fertilizer, while encouraging healthy root growth, may be based on bone meal, which can attract rodents and other animals to dig up newly planted rhizomes. Compost is a better choice than bone meal when amending soil in preparation for irises.
The Spruce / Jayme Burrows
-
Inspect the Rhizomes
When iris rhizomes are purchased commercially, they will often arrive with a good healthy rhizome section with smaller roots spreading out from the sides, and a section of leaves attached on one end, often cut into a fan shape. (If you have lifted and divided an established patch of irises, your divided pieces should also have this configuration.)
Before planting, inspect the rhizomes and reject any that are notably mushy or dessicated. With rhizomes you have newly dug up and divided, make sure there are no pieces with borer damage; these sections can be clipped away with sharp pruners.
The Spruce / Jayme Burrows
-
Plant the Rhizomes
The rhizome sections are best planted in groups of three or five, arranged so that the leaf fans are oriented the same way, with the rhizomes just barely covered and all pointing the same direction under the soil. Give individual rhizomes at least 3 inches of space between them for smaller varieties, or as much as 2 feet for tall bearded varieties.
 Remember that these plants are fast-growing, and giving them plenty of space will allow them several years before you need to lift and divide them again.
 Dig individual holes about 4 inches deep and 10 inches wide, and create a narrow mound of soil in the bottom of the hole, over which you will spread the roots of the rhizome. The fleshy body of the rhizome should rest on the soil mound.
Carefully backfill the hole with amended fill soil and tamp the soil firmly down against around the rhizome and leaves. The rhizome should be just barely covered, and may even be slightly exposed at the point where the leaves emerge.
Do not mulch over the planted rhizomes, as this can encourage root rot.
The Spruce / Jayme Burrows
-
Water Generously
Newly planted iris rhizomes should be watered every few days until new growth is evident, then water weekly for the remainder of the growing season. Begin to withhold water when it becomes clear the new rhizome is well established, as you don't want the root to soak in wet soil as winter arrives.
The Spruce / Jayme Burrows
Caring for Newly Planted Iris
When iris rhizomes are planted at the typical time—late summer or early fall—it is typical for some new foliage growth to begin, but do not expect the plants to flower until the following spring, at the earliest.
As the newly planted rhizomes put forth leaves in their first spring, treat them as you would when growing any established bearded iris plants, but fertilize them at about half the strength used for established plants. It's entirely possible you will get some blooms in the first season, but usually, this first year is spent developing a robust root structure that will fuel an eruption of flowers in the second full season after planting. Should your irises bloom in their first season, allow the foliage to continue growing until it begins to turn yellow and brown in late summer. The presence of green foliage is what nourishes the rhizome and replenishes it to prepare for good blooms the following year. Even if the foliage is less than attractive, leave it in place until it is no longer green.
Expect to dig up your iris rhizomes for division and replanting every three years or so, as this will keep the patch healthy and productive, at the same time it provides you with new plants. Regular division also allows you to control borer worms, the most common pest that affects this plant.
How to Divide Bearded Iris Plants and Keep Them Growing Every Year
Irises: how to plant and care for them
Irises are one of the easiest flowers to care for and endure even bad weather. In addition, they are very versatile and can be given for almost any occasion. You can order bouquets with irises and other flowers in Odessa at any time of the day or night. Our managers are always happy to provide you with their advice.
Irises, or bettas, are perennial plants of the Iris family. Mature plants need minimal care. Irises are planted from March to September. If you plant a plant in the spring, then in the summer you can see flowers, but you have to wait a whole year for them.
Iris species
There are more than 800 species of irises in the world. This diversity is explained by the fact that bettas easily interbreed and survive even in the most adverse conditions. Very conditionally, all irises are divided into 3 categories: bearded, beardless and bulbous irises. Bearded - the color can be very different, but most often gray-green or purple with flat leaves. The most common group of irises. They are called bearded because they have a strip of villi on the petal, which are a bit like a beard. Beardless - all petals are absolutely smooth (hence the name). In temperate latitudes, only a few beardless species grow, mostly white and blue. Bulbous - has a bulb, blooms in early spring and has a truly huge number of different species. Easy to grow and propagate, usually blooms in early spring. Many do not consider it a separate species of iris.
Planting irises
Planting these plants is not difficult, but it is best to familiarize yourself with some of the features first. Irises, also known as cockerels, cannot live in one place for decades. Given the peculiarities of our climate, it is better to transplant them after flowering and then every 3-4 years. Otherwise, they will occupy all the free space and stop blooming. It is advisable to plant iris on a hill in soil with good drainage and protect the leaves from the wind. You can add chalk if the soil is sour, and treat the root with fertilizer. Irises love rich soil, and if this is not observed nearby, then you need to start preparing the soil.
Add mule, flour or ash if the soil is acidic, or clay soil otherwise. Treat the soil with a fungicide to get rid of weeds. Before planting, the root must be straightened and in no case should the rhizome be completely buried, so as not to provoke the rotting of the flower.
When to plant irises
Bearded irises, the most common in our latitudes, can be planted during the entire flowering period, from early spring to autumn. Beardless irises do not tolerate overdrying of the roots; it is better to plant them in open ground.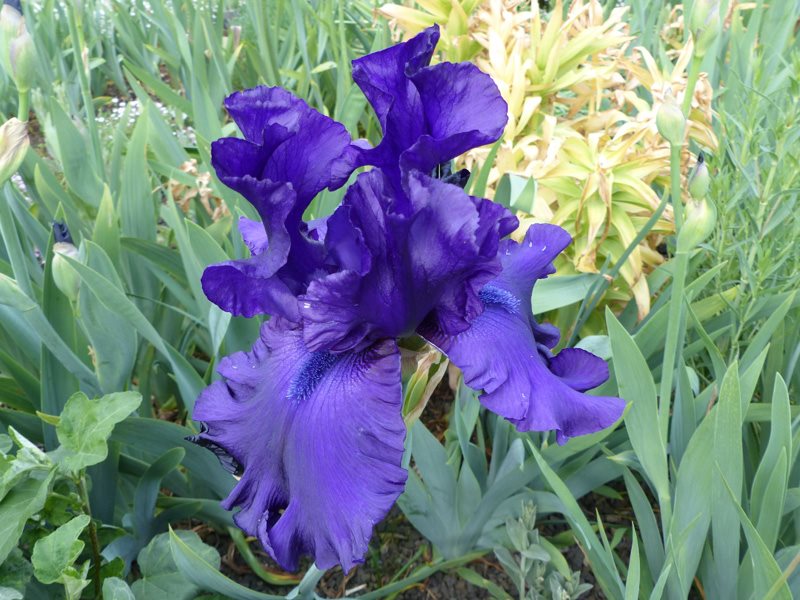 Additionally, mulch the plant to retain moisture. Typically, irises, also known as cockerels, are planted in the fall, after the flower's summer hibernation. The main thing is that the temperature should not be too low, not lower than 10 degrees.
Features of planting in the spring
First of all, pay attention to the soil - you need it to warm up enough. In warmer regions of the country, iris can be planted at the end of March, in a more temperate climate, choose mid or late April for planting. It is desirable that the soil is loose and neutral, and the plant is protected from the winds. When fallen leaves begin to dry around, then it's time to plant irises. The plant during this period is in a calm state and is preparing for flowering next year. If you divide the iris and plant it in several holes, you will quickly see new buds and the rooting process. When planted in autumn, irises bloom beautifully in early spring, these plants are included in the list of primroses of Ukraine.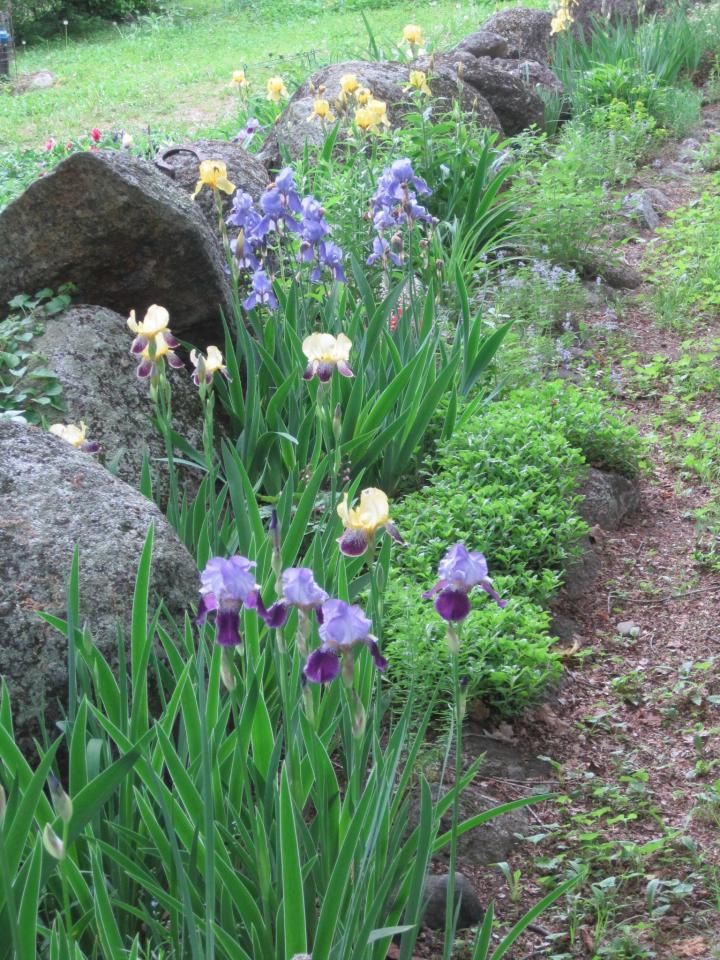
Caring for irises
Caring for bearded and beardless irises is almost identical. Despite the fact that the plant is quite unpretentious, it still needs care. During flowering, irises need watering, however, excess moisture in the soil can kill irises, try to keep a balance. In early spring, loosen the soil by 5-9 cm and try not to use dry dressings, as the rhizome is too close to the soil surface. Weeding the soil must be carried out throughout the entire flowering period.
Watering
Iris is watered in sunny weather, preferably in the evening. In early spring and late summer, reduce watering; in hot and sultry weather, water the plant more abundantly. Pay attention to the air temperature to choose the optimal watering regimen. Irises, or bettas, are drought tolerant, so it is better not to add a little water to them than to provoke rhizome rotting by watering too much. After watering, you can loosen the soil a little, but do not overdo it, only 3-5 centimeters.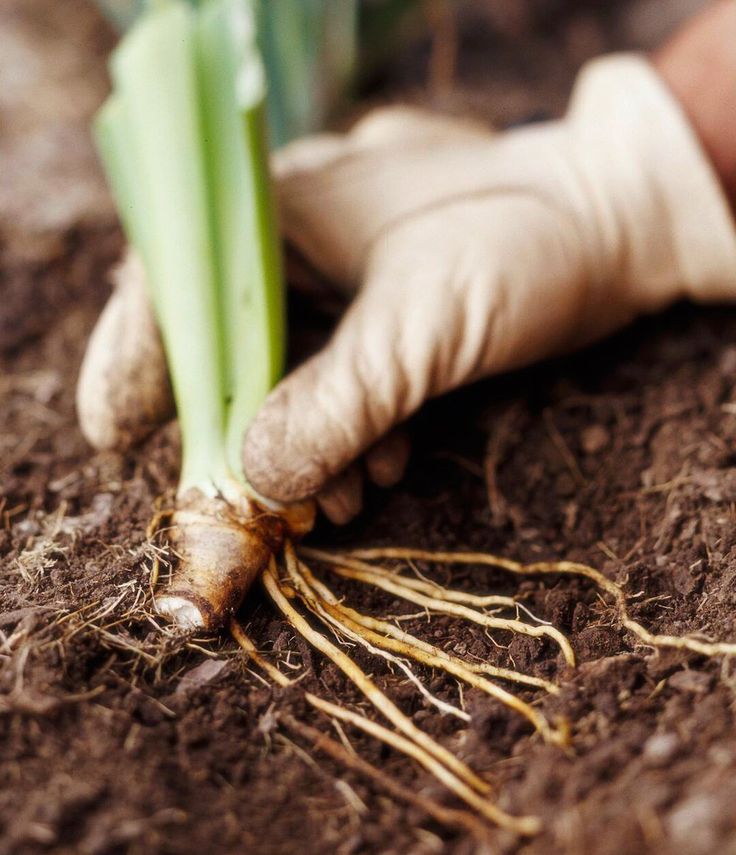
Top dressing
For irises, a potassium-phosphorus top dressing is usually used, for example: 10 g of the mixture, 55 g of superphosphate and potassium salt. This is enough to fertilize 1 m² of soil. Before flowering, irises can be fertilized with NPK complex and put a little nutrient mixture under each bush. During budding, fertilizing is practically not required for healthy flowers, and if the iris began to wither, just try to loosen the soil. In summer, healthy plants do not actually need to be fed. Before wintering, you can pour 1 tablespoon of mineral fertilizer under each flower.
Pest control
Irises are among the most pest resistant plants, but even they can be affected, especially the most beautiful and newer varieties. There are many pests such as Maybug larvae, thrips and aphids. For the prevention of irises, it is necessary to fertilize and dig the soil in a timely manner. If an infection occurs in the spring, spray the leaves with an antibiotic solution (tetracycline, neomycin).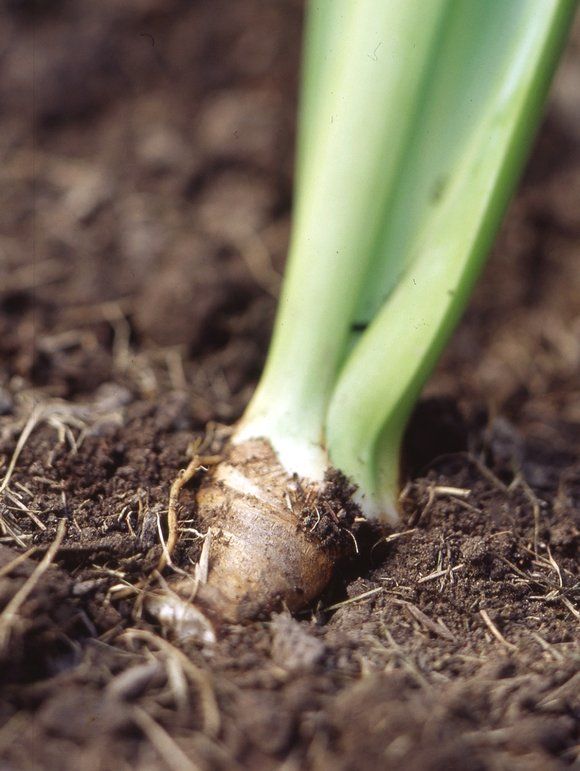 For leaf rust or vermin, use a garden fungicide. Fight insects with insecticides, and ticks with acaricides. In the summer, use preparations containing copper, fungicides and botrytis from the fungus.
How to plant irises: a few simple tips
Irises are a fascinating plant that appeals to people of all tastes. Their popularity is also due to their unpretentiousness, since they do not need special care. Among flower growers, this is one of the most beloved flowers.
Contents:
- General principles for planting irises
- Propagation of irises
- Planting irises
General principles for planting irises
To get a good result, it is important to understand how to plant irises correctly. Only the most general information is needed. Firstly, this plant is classified as a perennial. When planting them outdoors, there is no need to worry about even harsh winters. Irises are very cold hardy.
We are interested in the so-called.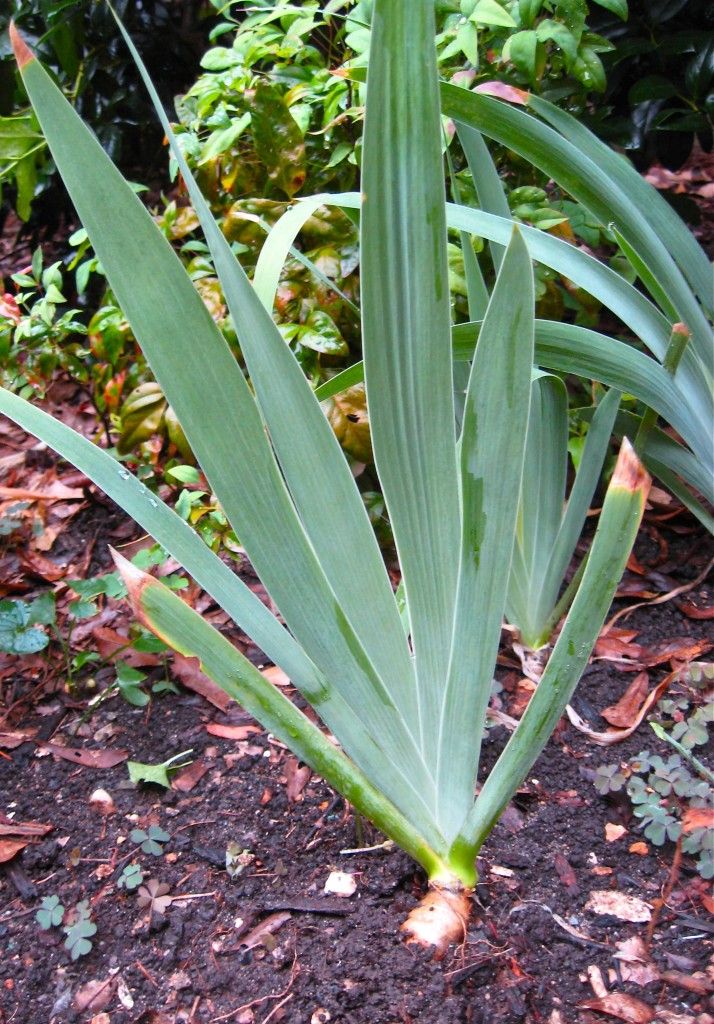 species of irises planted in gardens. According to the shoots, they are usually divided into two categories. We are talking about plants with a vegetative and generative method of reproduction:
- The former tend to have rhizomes underground. They are characterized by annual links. It is from them that later, in the spring, leaves will appear like a fan.
- Generative shoots are characterized by the appearance of peduncles. Each of them will have flowers: eight or (much less often) eleven. It all depends on the particular variety we have chosen. The roots of this plant are characterized by a fibrous type. Moreover, their shape is cord-like or filiform.
Interestingly, thanks to these bushes, the soil structure in your garden will noticeably improve.
Propagation of irises
When learning how to plant irises, it is important to understand the principle of their propagation. There are two of them: the principle of division of rhizomes or vegetative; the second type is the use of seeds. Usually seed propagation is used when it comes to their hybridization. Iris bushes planted from seeds will be able to bloom only after 2-3 years. With vegetative propagation, color should be expected from the first year.
If we are talking about the reproduction and cultivation of both varietal and wild specimens, then the vegetative method is the best fit.
Vegetative propagation method
After dividing the rhizomes of the iris, only well-developed, large bushes are taken. After digging, they should be carefully shaken off the ground. You can divide the rhizome in any way: with a shovel, with a knife, and even break it with your hands.
It is important that each separated part has a leaf tuft. In this case, the rhizome is one (preferably two) annual link. Old links are not needed, and therefore are removed. The roots must be cut by a third. The same applies to the leaves, only they should be cut in half.
It is important to remember that dry and/or diseased leaves must be removed.
Rootstocks should also be checked. There may also be places with damage or rotten. They are best cut with a knife.
A necessary step in the preparation of rhizomes is disinfection. For this purpose, a weak solution of potassium permanganate is prepared, into which the rhizome is lowered for 15 or 20 minutes. After such a procedure, they must be dried under the sun.
You also need to take care of the cuts. They are covered with a special mixture (sulfur and coal in a ratio of 1: 1). Such a treated seedling will take root well and grow intensively.
Propagation of irises by sprouts
After waiting for the flowering to come, using a prepared knife, cut off the sprouts from the plant (we will call it the mother plant), only so that there are no buds. But from the rhizome it is necessary to capture a piece of tissue. Such sprouts are planted under the shade, that is, the greenhouse should be cold. If necessary, you can spray.
Sprouts take root in 2-3 weeks.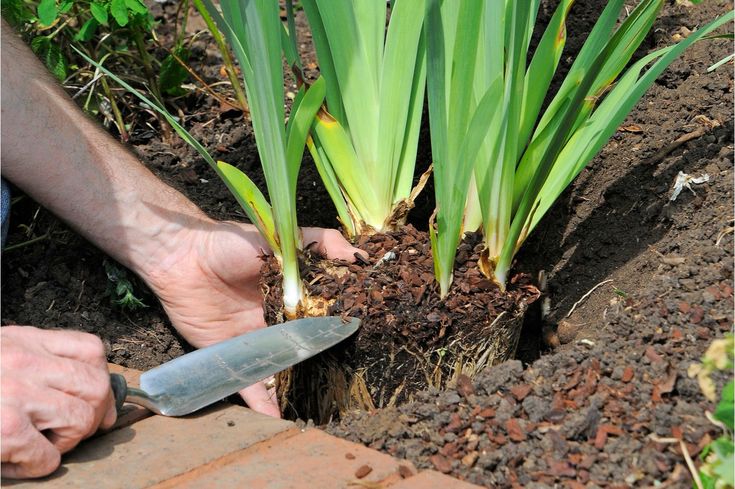 This method is one of the best. First, it determines the variety; secondly, the mother plant does not receive damage; third, take root around 90% cuttings.
Planting irises
The end of the flowering period tells us that the irises can be transplanted. This is the first transplant period. The second is the end of the growing season. After all, this time is characterized by the resumption of growth of both roots and leaves. This moment cannot be missed. After all, if you transplant later, the plants will die due to the fact that they will not be able to take root.
Florists consider the end of August - the beginning of September to be the best time for planting irises. It happens that planting material was obtained after this period.
In such cases it is recommended to plant the rhizomes in pots. The temperature regime should be 7 or 8 degrees. We plant them in open ground in the spring. If the seedlings were planted at the right time, then in the spring you should expect color.