How to paint walls above stairs
How to Paint Above Stairs Safely & Effectively
When you want to revamp your staircase, one of the easiest ways to achieve this is by painting the wall that runs beside it. Compared with undergoing costly renovation work or disruptive installations, painting your staircase wall is a far simpler way to refresh the area. But how exactly do you go about painting above your stairs?
It does present a unique challenge. It can be hard to get the right footing and calculate exactly how to go about painting the area above stairs, especially when the walls and ceiling are high above you.
We’ve compiled this helpful guide on how to paint above your stairs, so you can safely and expertly redecorate this area without having to hire someone. Whether you need to know how to paint the ceiling above your stairs or how to paint tall walls above stairs, we’ve got you covered.
General Pointers: How to Prepare Painting Above Stairs
There are a few things to prepare before you use whichever method you choose to paint above your stairs:
Ensure the Walls and Ceiling Are Dust-Free
Before you begin painting, you need to make sure the walls are completely free of dirt and dust in order to provide a smooth surface for the paint. Doing this means your application will have a seamless finish. To do this, use a cloth attached to a broom or extension pole to remove any dust and cobwebs. Make sure to wear a dust mask.
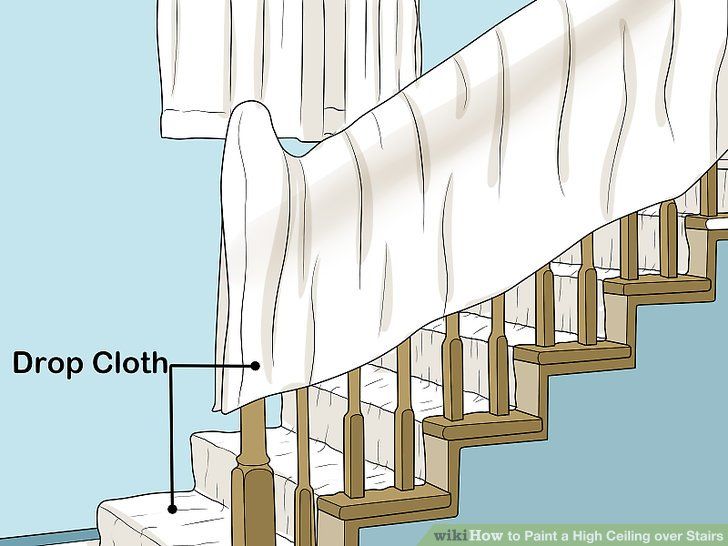
Protect Your Stairs and Balustrade
To stop paint from splashing or dripping onto surfaces it shouldn’t, make sure you get appropriate coverings. Cover stair bannisters and spindles with drop cloths or use plastic sheeting and painter’s tape.
Test the Paint Before You Commit
Often you’ll find that paint can look a little different when it’s actually on your walls than it does on the can. Test the colour on an area of your wall before you commit to a full coat of paint.
Don’t Paint Alone
When you’re using a ladder on your stairs, you need to be very careful. Don’t paint in the house alone in case you fall. The best practice is to have someone there at all times, especially to foot the ladder if you’re painting high walls.
How to Paint High Walls Above Stairs & How to Paint High Ceilings Above Stairs
If you have very tall walls, it can be difficult to execute a proper paint job.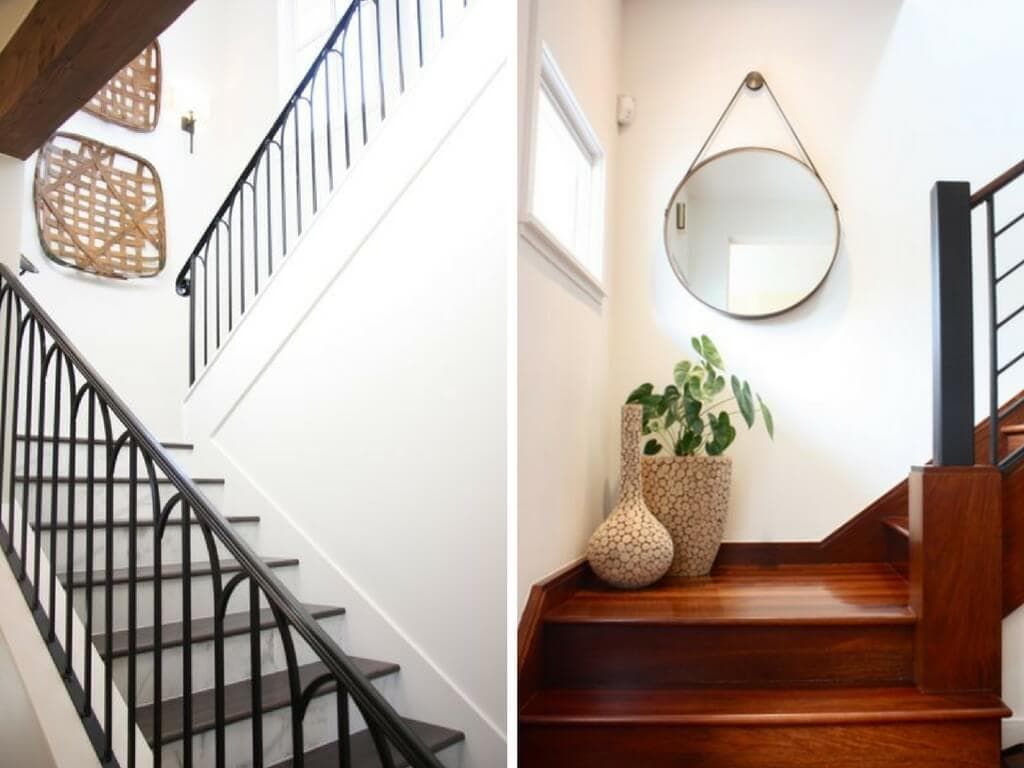 It’s important to do it safely. Here is our recommended method for how to paint a high hallway above stairs:
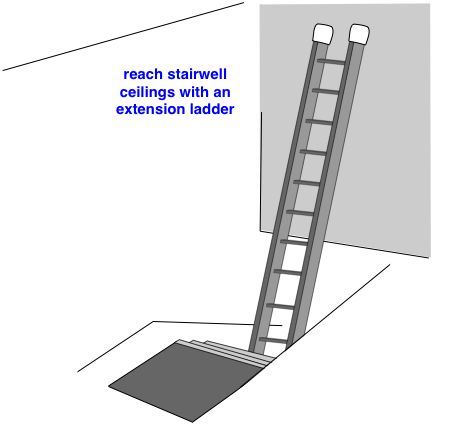
Get an Extension Ladder
A traditional ladder won’t do for this. An extension ladder, also called a combination ladder, is your greatest friend when trying to paint high walls and high ceilings. Parts of it can be folded down or into the ladder to give shorter or longer extensions on certain sides, depending on your needs. You can find an extension ladder at dedicated trade shops or online retailers.
The ladder will help you to paint the ceiling and corners of the staircase wall. You can use it in three ways to achieve this:
- Extend it fully into a traditional ladder with its base at the bottom of the stairs and its top resting against the wall that you see while you’re walking down the stairs, called the headwall. In this position, paint as far as you can reach but be careful not to overreach.
- You can then form a 90-degree angle with the ladder by folding the top part.
 Move the bottom of the ladder a little further up the stairs, making sure it isn’t at too steep an angle, and place the top part of the ladder against the headwall. The effect of this is to allow you to paint further along the ceiling line, away from the headwall.
- Finally, you can fold your ladder so that one side is long and the other is shortened. Place the shorter end at the top of your stairs on the landing with the longer part around halfway up your stairs. Carefully stand on top of the frame you’ve created to carry on painting the ceiling line.
Once you’ve used the ladder for painting the ceiling and wall corners, you can use an extended paint roller for the rest of the staircase wall.
How to Paint Above Stairs Without a Ladder
Investing in the proper equipment for painting the walls and ceiling by your stairs can be costly. If you’re thinking about painting your stairwell but don’t have the budget for the right kind of ladder, there are other ways to paint this part of your house.
We wouldn’t advise using the commonly seen method of placing a board between a step ladder and a longer ladder, as this can be unstable and dangerous. If you don’t want to use a ladder to paint your staircase walls, follow this guide:
Extension Pole Method
This is a truly DIY method that is fantastic for lower budgets. All you need is an extension pole, a paint roller, a paint tray, and some duct tape! You can find all of this in any standard DIY or home store. Securely attach the paint roller to your pole and paint away.
For the edges and corners, you can invest in specialised corner painters and edgers for a low cost and also tape these to the extension pole. Before using the edger, make sure to practice without paint to ascertain how much pressure you need to apply. You can also just use a standard paint brush for this part.
This method provides an easy way to paint the area when you’re painting the walls the same colour as the ceiling.
Be sure to check our other expert guides to painting and decorating this area, including how to paint stairs the right way and staircase wall decoration ideas.
Finish Your Home Improvement Project With Our Beautifully-Made Products
If you’re looking for the perfect finishing touches for your staircase DIY project, look no further than Stair Rods Direct. We can supply a range of excellent products that provide flawless finishes to your staircase and hallway. Whether it’s stair rods, door thresholds, or carpet runners, all of our products are made for easy installation and with gorgeous finishes.
How to Paint a Stairwell Without Hiring Help
*Affiliate links provided for your convenience. For more info, see my full disclosure here.
Note: This is NOT a sponsored post! Also, please excuse the horrible pictures. The upstairs hall has zero natural light and is dark and shadowy. Most of the pictures in this post were taken by my phone or worse…at night with my phone. Ugg! 😉
Guess what? I painted the stairwell all by myself! Without hiring a painter! I’ll admit that I’m ridiculously proud of myself for accomplishing this.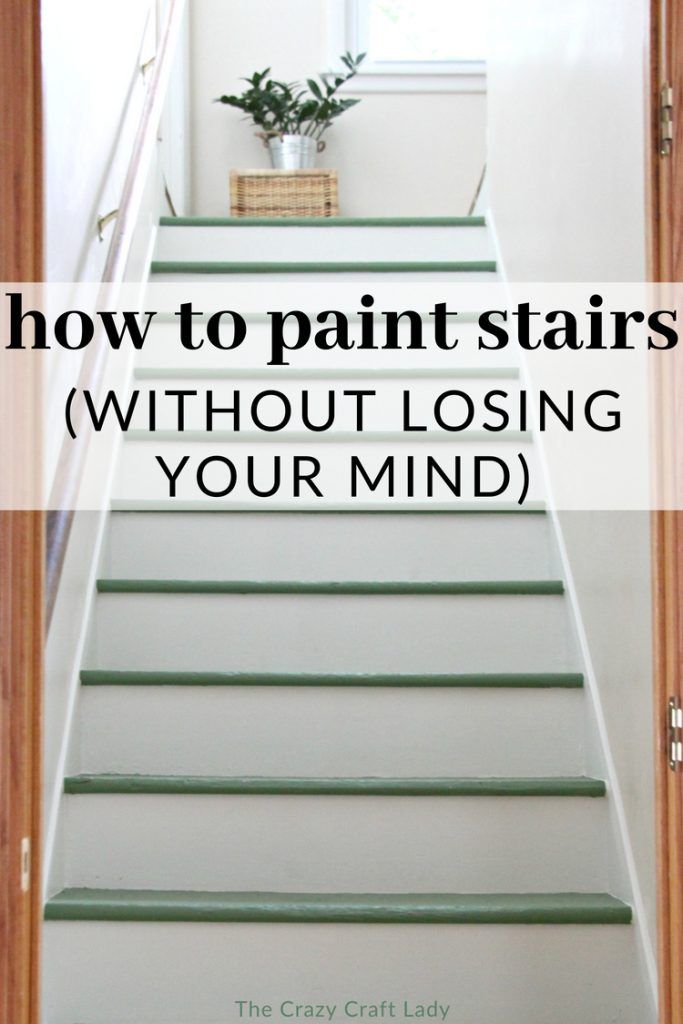 I have droned on and on to my husband about it multiple times. Basically, I geek out about it every time I go up or down the stairs. You’d think I just landed a rocket on the moon. 🙂
In our old house, we took one look at the high stairwell and called our painter. He was reasonably priced and did a fabulous job! No regrets there. However, this time around, I knew that the money to hire a painter would not be in the budget for a long, long time. My options were either wait another year or two or figure out how to paint the stairwell myself.
I’ve been working on a gallery wall for my upstairs hall and didn’t want to hang it on dingy, old paint, so the gears in my brain started turning. I remembered a little edger gadget* I picked up on a whim a few years ago that I enjoyed using. I had recently noticed the new models were improved and could accommodate an extension pole. That was my light bulb moment! Behold… the $5 gadget* that allowed me to paint my stairwell by myself without hiring a pro or needing to buy a special ladder for the stairs!
Image Source: Lowe’s
Not only can the new model attach to an extension pole, it swivels all around and now it has two little guards at the top that keep the paint from smearing on the ceiling, so there is no need for painters tape! My biggest holdup with painting the stairs was that it was too high (we don’t have a stair ladder) and I wouldn’t be able to tape off or cut in. But, with this little gadget, I was able to cut in without needing a ladder or tape!
I taped off the baseboards and door frames then cut in the bottom portion of the walls with my paintbrush. Then, I used the edger to cut in the top edge of the walls, as well as along the sides of each wall. When I did the sides, I turned the edger backward so that the guards were out of the way and I could get paint as close to the corners as possible. Like so…
A couple quick edging tips:
-Practice a few times first to get a feel for the amount of pressure to apply to the edger and how much paint to use. I edged the walls in my hallway first, then edged the stairwell once I was plenty comfortable with the edger. It’s very easy to use, but it was helpful to get really comfortable with it before using it while standing on the stairs with it extended 8 feet above my head. 😉
-The guards flip up so they are out of the way when you dip the edger in the paint. Occasionally, if I got too much paint on my edger, when I’d flip the guards back down, they would get a bit of paint on them that I’d need to wipe off.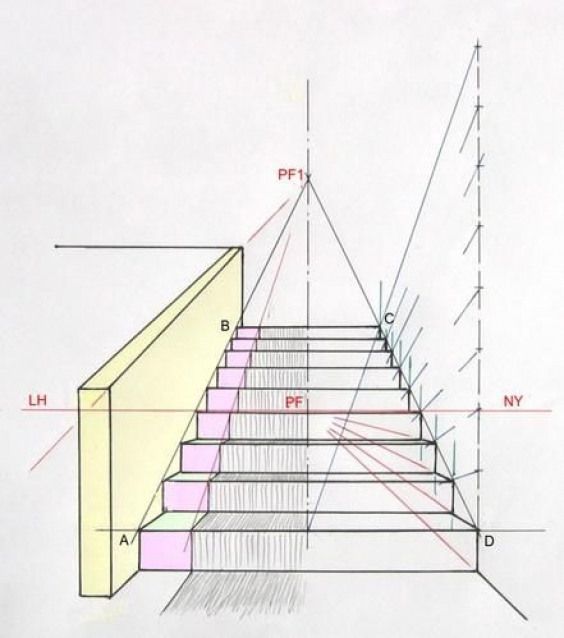 No biggie, but something to be aware of.
-I found that after I dipped my edger, it was helpful if I ever so lightly ran it across the edge of my paint pan to get off any excess paint.
After the cutting in was done, I stood on the stairs or on the landing and rolled using an extension pole. You know you’re insanely jealous of my painting attire. 😉
For the corners, I got really high tech. I duct taped my paintbrush to my extension pole. I told you it was high tech! Haha!
If this method is a little too, um, “rustic” for you, look what I found! It’s a corner painter* made by Shur Line in the same line as the edger! And, it can attach right to your extension pole! It was $5, so I passed and just did my duct taped paintbrush thing. I know, I’m cheap. But, either way will work!
I won’t lie, it was labor intensive and a bit tedious, but it saved me a bunch of money and allowed me to check the stairwell off of my list!
I used the same Benjamin Moore Gray Owl paint color I used in the living room, but I had it lightened by 25% because the hallway is so dark. I didn’t want it to look really dark with all the shadows. Lightening it by 25% was the perfect amount–it appears to be the same color as the living room, even with all the shadows.
Ready for a little before and after action?
Before…
After!
I’m giving that light and those gold doorknobs a major stink eye! They’re on the to-do list!
Next item on the stairwell/hallway agenda? Hang a gallery wall! I already gathered all the frames and have the layout figured out, but I’m still working on gathering photos and artwork. I’m hoping to have it ready to show you next week!
Linking up to Southern Savvy Style and many more awesome blogs!
Decided not to hire painters: she painted the walls and ceiling on the flight of stairs herself, without using scaffolding | Lifestyle
Repair is always associated with a number of difficulties. Painting the walls and ceiling causes the most problems, especially if you live in a two-story house and want to tidy up or just slightly update the space between the stairs. You should start with him, and only then take the stairs. Otherwise, all your efforts will simply go down the drain. And here the most difficult begins. Scaffolding is needed to paint the ceiling. And they, as a rule, do not have the average ordinary citizens. Therefore, they are forced to hire professional painters, whose services are not cheap. Fortunately, this is not necessary at all. There is one good way that will allow you to quickly and without any problems cope with everything without involving specialists. It will be discussed in detail later. nine0003
A few words about the project
The main task is to paint a two-story wall located above the stairs without scaffolding. It seems difficult to implement, but it is far from being the case. With a few secrets in your arsenal, you can quickly deal with painting with minimal financial, physical and time costs. So, let's not waste time, and immediately get down to business.
What will be needed? nine0006
Let's first decide what materials and tools will be needed.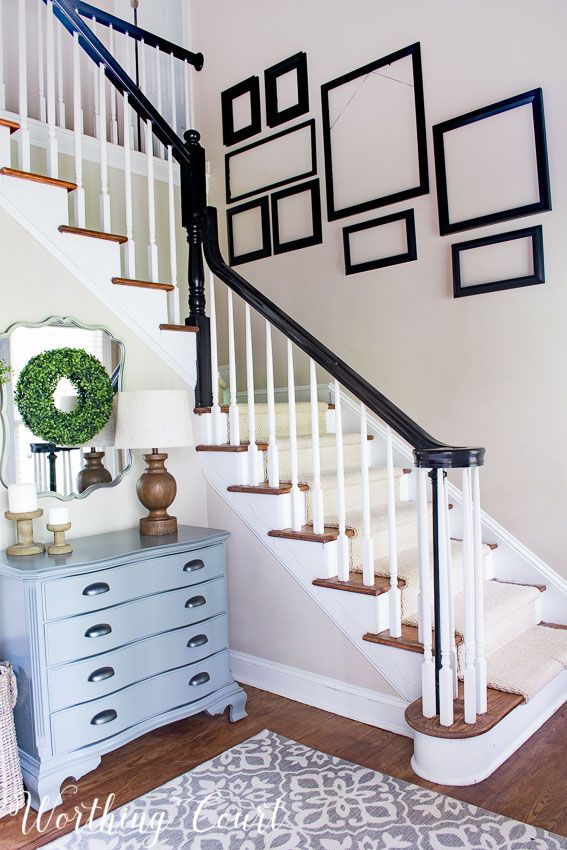 Any repairs involving surface painting require the following:
- paint;
- paint tray;
- brush;
- microfiber cloth;
- masking tape;
- extension;
- angled art brush;
- paint roller with replaceable sponge.
The necessary consumables and supplies can be purchased at any hardware store near your home. You can also save some money and time if you order everything from an online store with home delivery. nine0003
Preparation
To make your work more pleasant and comfortable, it is better to prepare the site beforehand. This will take you no more than 15 minutes, but you will greatly simplify your task. In order not to stain anything, take out the furniture, and cover the stairs, railings and floor with old newspapers or unnecessary rags. Try to keep all places well covered. To do this, do not spare newspapers, but stack them in several layers.
Wall and corner preparation
In order for the painting to be of high quality, it is necessary to wash the work surface from dust before painting. Particular attention should be paid to the corners and the ceiling. These places are the most problematic because they are the source of the accumulation of the web. Removing it is easy if you have a paint extension cord. Just walk around the perimeter along the walls and in the corners.
Painting the ceiling
This is the hardest part when renovating the space between the stairs. And this is not surprising, because it is very problematic to work with the ceiling without having scaffolding or at least a ladder at your disposal. But do not despair and give up ahead of time. There is a solution! nine0003
Don't waste a few dollars and buy a paint saw from the shop. Carefully fill it with paint and make sure not to overload the equipment too much. At the same time, you can significantly simplify your task if you first turn off the wheels located at the top of the edge.
When the machine is primed, start painting the ceiling with it, moving slowly back and forth. It should be noted right away that this is painstaking work that requires a lot of patience and a considerable amount of time. Therefore, immediately tune in to the fact that you have to sweat a lot. nine0003
Painting around the corners
This is an equally complex and time consuming task. But if you are not too limited in funds, then buy Shur Line Corner Painter. This device is not too expensive, but it will greatly simplify the task and make everything better.
When painting, take care not to overload the device too much. Otherwise, you will not only overspend the paint, but you will also have stains that are not so easy to eliminate. Therefore, it is very important to find the perfect balance. The hardest part will be getting into the corner. Paint the center first, then work on the sides. This method of painting is easier, but no less high quality. nine0003
Wall painting
So, here we come to the last and simplest stage of repair in the space between the stairs. Depending on the size of the room, the work may take several hours. For painting, you will need a regular paint roller and a paint tray. It is recommended to start in the direction from the ceiling to the floor. But be very careful not to hit the overlap. Since it has already been painted, if you hit it, you will leave stains, which means that you have to redo everything from the very beginning. nine0003
As for the rolling method, you can use any that you are comfortable with. There is no fundamental value here. The most important thing is to adjust the extension to the desired height in time. And it's not as easy as it might seem at first glance. However, this way you can save a lot of money and time.
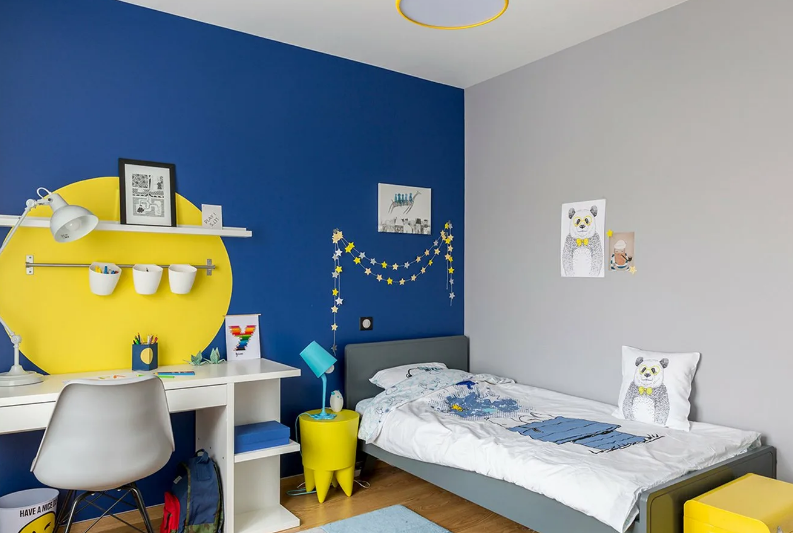
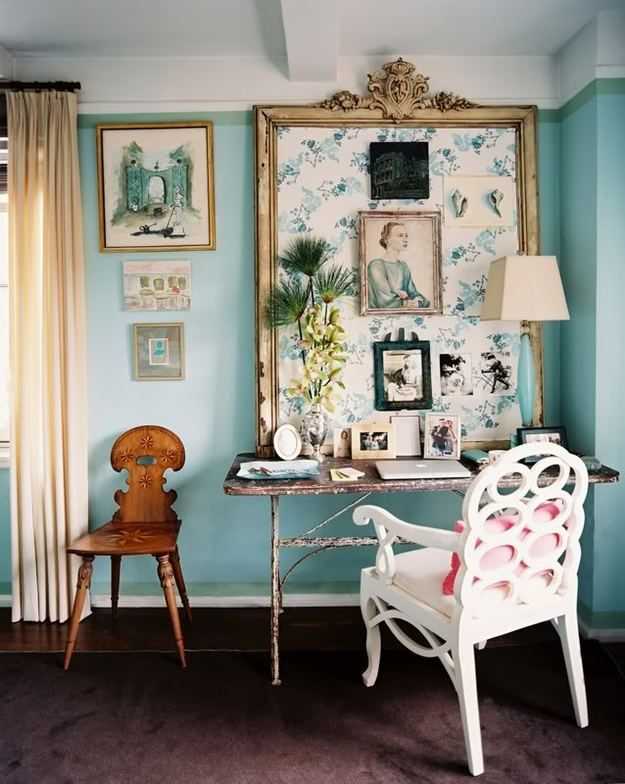
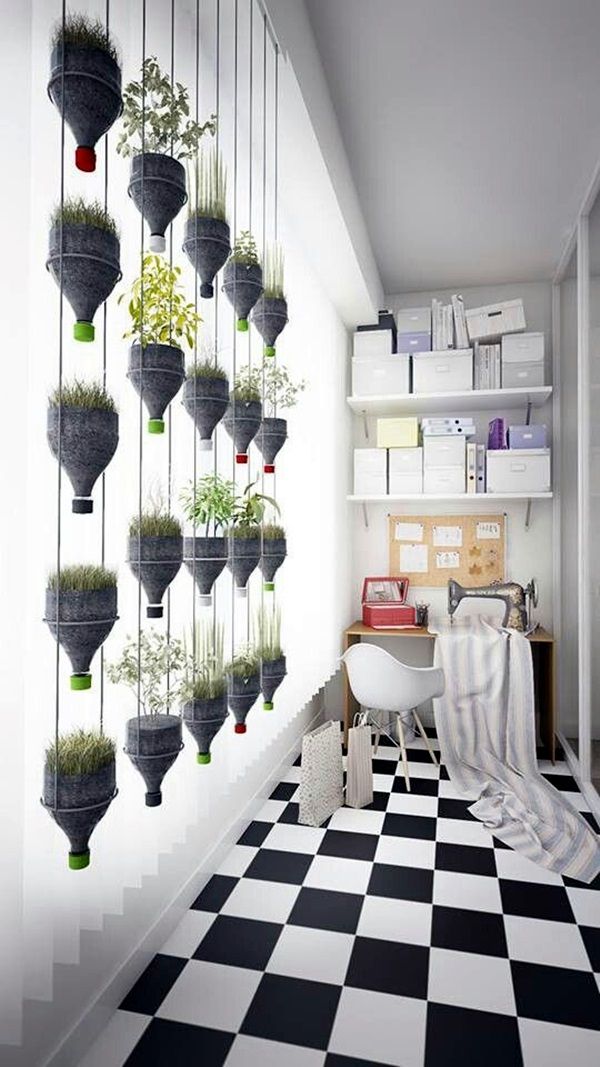
Once the painting is complete, leave the room for a while until the paint is completely dry. After that, you can decorate the landing a little and slightly refresh it. So, for example, you can put a small bookcase on it, and it would also be a good option to hang pictures, ship models or any crafts on the walls. nine0003
General Tips & Tricks
The first coat of paint on ceilings, walls and corners takes about 3 hours and the second coat takes 4-5 hours. You can try experimenting with the corners, but you won't be able to paint them any faster. Other than that, there is no guarantee that the end result will be better. For example, you may see lines, or the color will be far from what you want.
There is also another important aspect. No matter how high-quality the paints and varnishes are, it is imperative to prime the working surfaces in two layers before starting painting. Only in this way can you achieve a good level of adhesion. Moreover, if primed only once, the paint will look a bit mottled. Therefore, no matter which room you are renovating, always prime and paint the walls and ceiling in two coats. nine0003
By following these tips and tricks, you'll be able to do well. It may take twice as long, but the end result will be much better. And don't listen to anyone. Just do it and you won't regret it.
Conclusion
That's really all you need to know about painting the landing in your home. The implementation of the project will take you a whole day. But here, sorry, there is no way to speed it up. Still, the lack of scaffolding significantly complicates the task. Sure, if you have extra money, you can just hire professionals and not worry about anything. But still, extra financial spending is useless. By allocating one day off and adhering to the instructions given in this article, you will be able to do everything just as well. nine0003
Finally, I would like to note that repair is a rather painstaking task that requires not only time, but also patience. If possible, try to make this process bring you pleasure, and then the work will go much faster.
Found a violation? Complain Content
HOW TO COLOR A STAIRWELL - BLOG
February 7, 2022 The staircase is definitely one of the main accents in our home.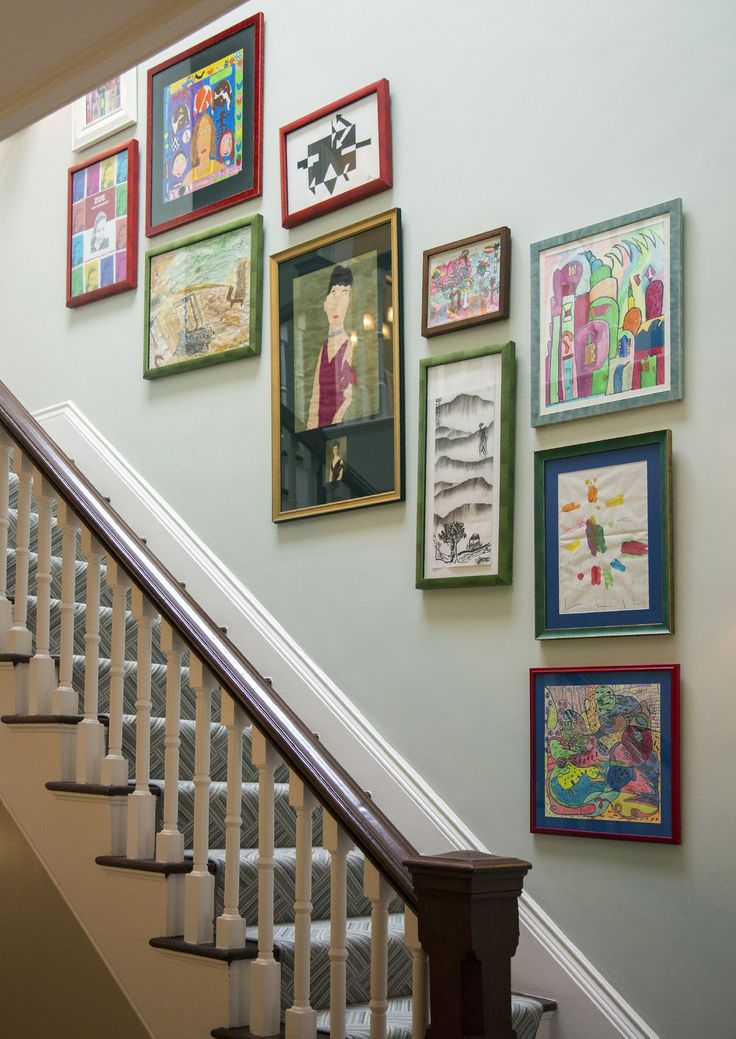 When our stairwell needs attention, we must take care of it properly and safely. Caution and attention should be paid to the preparation, method, materials and how we actually perform the task.
This article discusses the art of stairwell painting: how to do it, as well as the types of materials, tools and equipment needed to do a good job.
Contents Hide 1 Can a ladder be used on a ladder? two How to paint a stairwell without scaffolding 2.1 Tools and supplies for the job 2.2 Here's what you do 3 How to paint a stairwell without stairs 3.1 Tools for the job 3.2 Here's what you do 4 Final thoughts 4.1 Related posts:
Can a ladder be used on a ladder?
In most cases, the painting of staircases is associated with work at height. This means that we will need either a ladder or some kind of scaffolding.
You can use a ladder on a ladder, but it must be the correct ladder and it must be used correctly. Using the wrong ladder (or the wrong ladder) can lead to horrendous injuries.
If you are going to use scaffolding, the same principle applies. Scaffolding made quickly (and looking solid) with what you have can cause damage to your stairs and, in the worst case scenario, injury. nine0003
If you are going to work at height, check what scaffolding and ladders you need. Learn how to use (and create) them safely.
Fortunately, there are several new tools on the market for safely and efficiently drawing elevation from the ground. You can work with them without scaffolding and ladders.
How to paint a staircase without scaffolding
Perhaps you have evaluated your task and decided that you do not need scaffolding. But you don't want to buy painting equipment anymore. That's good, but at the very least you'll need a ladder. nine0102
The best type of ladder for painting a stairwell is a combination ladder. But also consider using equipment from the range of stair assistants or accessories.
The use of a stair assistant provides additional safety.
what does 711 mean in the bible
All of these items are designed to help you complete the task of painting your stairwell safely, conveniently and efficiently. nine0003
which means 1212 in angel numbers
Tools and materials for the job
Here's what you need. To keep your workplace running smoothly, make sure you have enough of out of everything.
- Elevator paper
- Brushes for drawing
- MARAL WANDE, Extension cord, Rollers
- Cardboard Plot
- Napshots
- Massenger tape
- First
- Krask
- Proper ladder equipment
Here's what you do
Follow these steps and resist the temptation to skimp on preparation.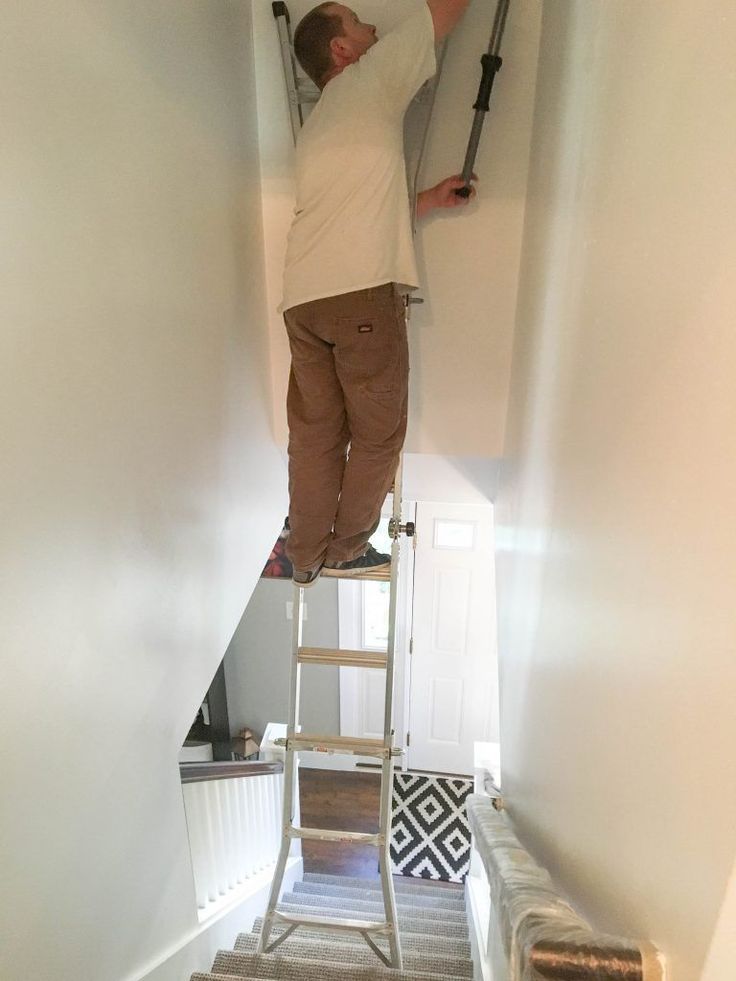 Also, remember that professional painters usually start at the top and work down.
Step 1
Assess the condition of the surfaces to be painted. Stairs are high traffic areas and become worn and dirty. Clean and lightly sand any obvious marks, scratches, dents or abrasions. nine0099 Check the walls for marks, holes and cracks.
Step 2
Protect steps and floor with newspaper/cut paper, masking tape and a rag.
Step 3
To cut through ceilings and wall corners, fully extend the combination ladder so that the bottom of the ladder rests on the ladder. the top should lean against the wall of the head.
When you need to move the base of the ladder further up the ladder, fold the top of the ladder. An angle 9 should form0 degrees. This will keep you clear of the ceiling wall so you can cut along the lines of the ceiling.
Finally, fold the ladder into a short A-frame with one side long and the other short.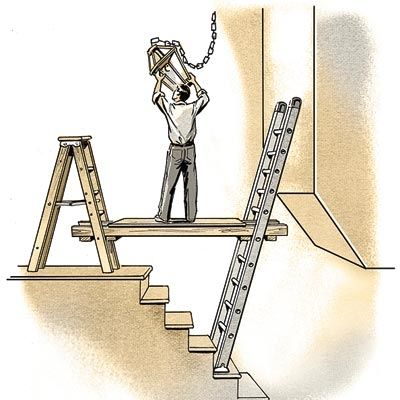 Make sure the rubber feet are securely on the ladder.
Once the mortise is complete, use this system to paint the walls, using a roller to reach the highest areas.
Step 4
To paint the stairs, start at the top of the stairs. Use a 2" decorative brush to paint on the railings. The small brush allows you to reach every crevice and flex evenly. nine0003
Step 5
Paint the balusters. If you use a different color, be sure to mask them where they meet the steps. Use a damp cloth to wipe up drips and spills.
Carved balusters can be difficult to paint. Some repair enthusiasts recommend using paint gloves for balusters and other difficult surfaces.
what does 911 mean in the bible
Step 6
Start painting the steps at the top of the stairs. Paint the bottom of the first ledge, or the raised edge of the stairs, and then the first riser. Finally, paint the tread. nine0003
Continue drawing steps in this order. Some painters make alternative stairs just to be able to use unpainted steps (if necessary).
When the paint is dry, complete the unpainted stairs using a marker to indicate which stairs can still be used by family members.
How to paint a stairwell without a ladder
It is possible to paint a stairwell without a ladder or scaffolding thanks to the invention of new painting tools such as edge banders , paint sticks , paint extensions , and painter corners 9099 .
Tools for the job
Your materials and equipment are almost the same, except for the ladder and platform. And you'll need extension cords and painting assistants. match the height of and the surfaces you will be dealing with.
Here's what you do
Step 1-2
Perform the same paint surface evaluation and protection. You can use the extension cord to remove dust and clean high surfaces.