How to make the lawn green
How to make grass greener in 8 easy steps
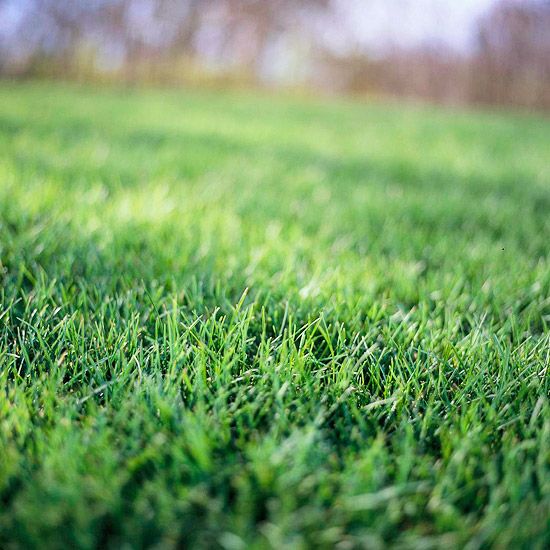
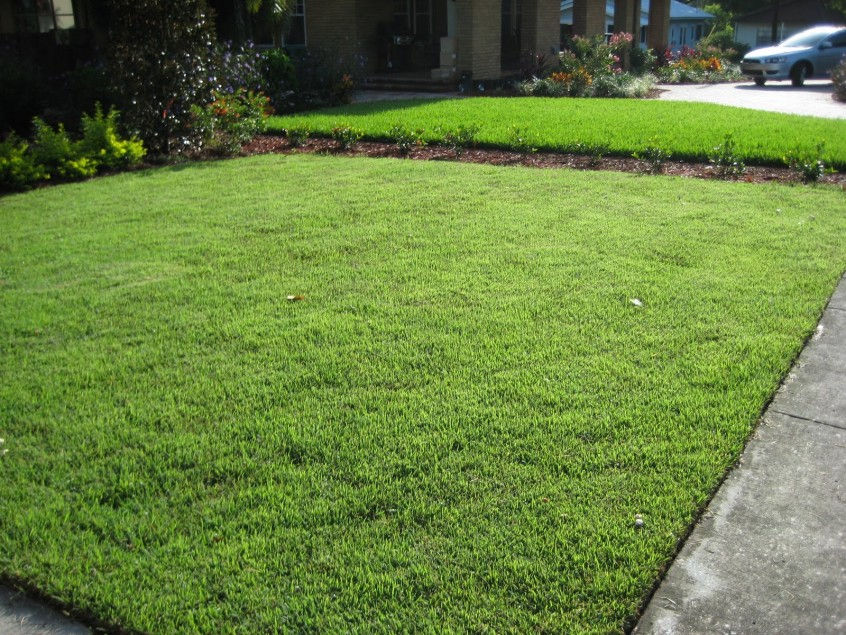
(Image credit: Shutterstock)If you want to spruce up your unsightly lawn this summer, knowing how to make grass greener can make all the difference. Most forget that keeping your lawn well-maintained is as much about the health of the grass as it is about mowing it regularly. While your yard may appear even, the grass can quickly fade in color and ruin the appeal.
You can also learn how to stripe your lawn to make it look bigger. But you need to know more than how to plant grass seed to make your grass greener and how to lay sod to upgrade your lawn, but the good news is small changes can make a big difference to the tone of your yard. Whether you’re a keen gardener or you’re just starting out, everyone can follow these tips. Here, we will take you through what you need to do to get your lawn looking luscious again.
It might also benefit from knowing how to put lime on your lawn for greener results. Before you do though, make sure that you're not making any of these seven common lawn care mistakes. Protecting your lawn mower through colder months is essential, so here's how to store a lawn mower.
What you'll need
Soil test kit
Fertilizer
Water
Spade (optional)
Mower
Grass seed (optional)
Aerator
1. Get to know your grass. First of all, not all grass is the same. Just like plants, there’s all sorts of varieties that can be found in different regions. And each has its own preference in terms of nutrients, exposure to sunlight and even height. Find out what type of grass you have before anything; this will help you understand what it needs to get greener.
Generally speaking, you will find cool-season grasses in the northern states of the U.S. While warm-season grasses can be found in the south. This should help you create a shortlist of potentials. If you’re still unsure, ask your local garden store for guidance.
(Image credit: Shutterstock)2. Test your soil. The next step is to figure out what properties your soil has.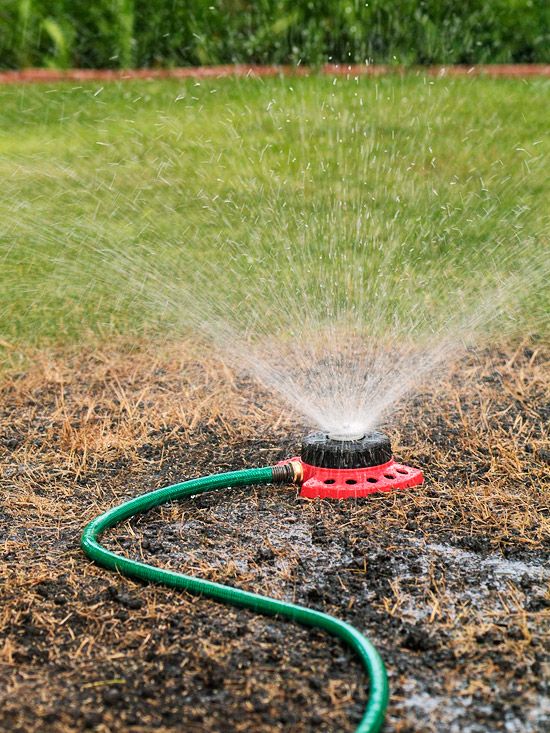 This, combined with your grass type, can help you determine what’s missing for the best growth. Soil test kits are widely available, we recommend Luster Leaf 1602 Soil Test Kit ($15.99 at Amazon ).
The ideal soil will ultimately depend on your grass type, but as a rule of thumb you want a slightly acidic pH level of 6-7, as well as an abundance of nitrogen, phosphorus and potassium. Bear in mind that cool-season grasses prefer the pH to be slightly higher than warm-season grasses. You should aim to test your soil yearly to make sure the minerals are sufficient.
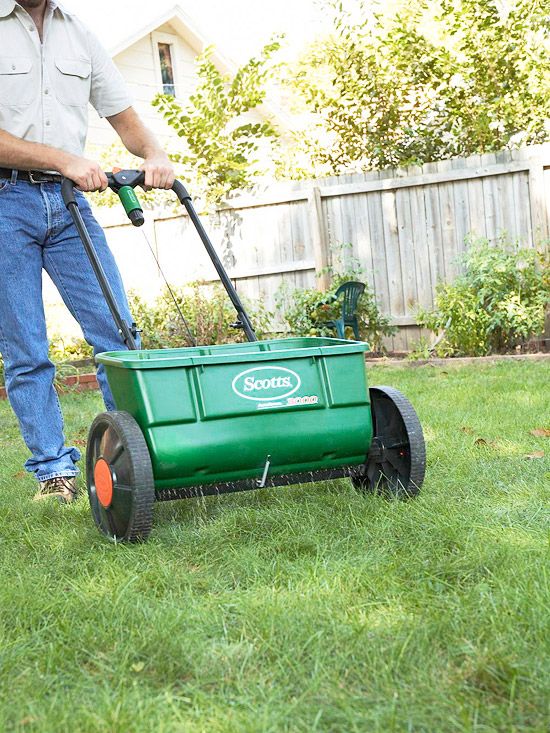
(Image credit: Shutterstock)3. Break out the fertilizer. Now you know what’s missing, you can buy the best fertilizer to suit your yard. Most fertilizers contain nitrogen, potassium, and phosphorus, however, the ingredients and proportions vary to suit different needs. That means when you pick out your fertilizer, look for one which will balance out your mineral levels. Some fertilizers also feature useful additions such as iron supplements to encourage greener growth, while others contain weed killer.
When you should fertilize depends on your grass type. If you’ve got cool-season grass, look to fertilize in the early spring and fall. Whereas, you should apply fertilizer to warm-season grass more often throughout the summer. Be sure to follow the instructions on your specific fertilizer in terms of dosage and application. Too much fertilizer can actually cause damage and leave scorch marks so be careful.
There are natural alternatives available as well if you don’t want to use chemicals in your yard. Spreading a thin layer of compost over the grass in early spring can add valuable nutrition to your soil for instance. You can also purchase organic lawn fertilizers.
Today's best Scotts Green Max Fertilizer deals
$22.98
View Deal
$30. 48
48
View Deal
No price information
Check Amazon
Show More Deals
(Image credit: Shutterstock)4. Water your grass regularly — You must water your lawn regularly, particularly through the heat of summer. Your grass will need about an inch of water per week for guidance and you’ll want to do this first thing in the morning so the sun doesn’t evaporate your efforts. Set your irrigation system on a schedule to accommodate this and take advantage of the rain when you can to save water.
If you’ve planted fresh grass seeds, then those will need more attention when it comes to watering. The ground should be kept moist at first, getting watered 1-2 times per day and then less regularly once the grass reaches 1-2 inches in height.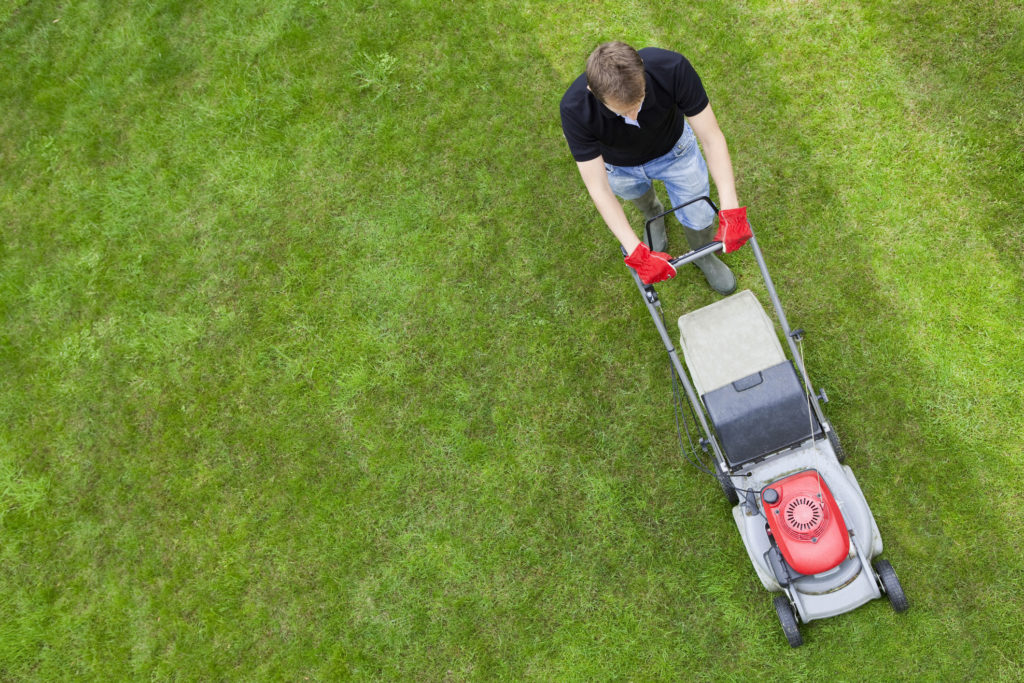
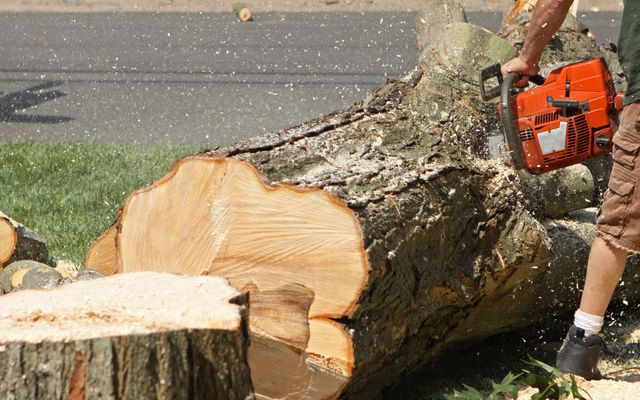
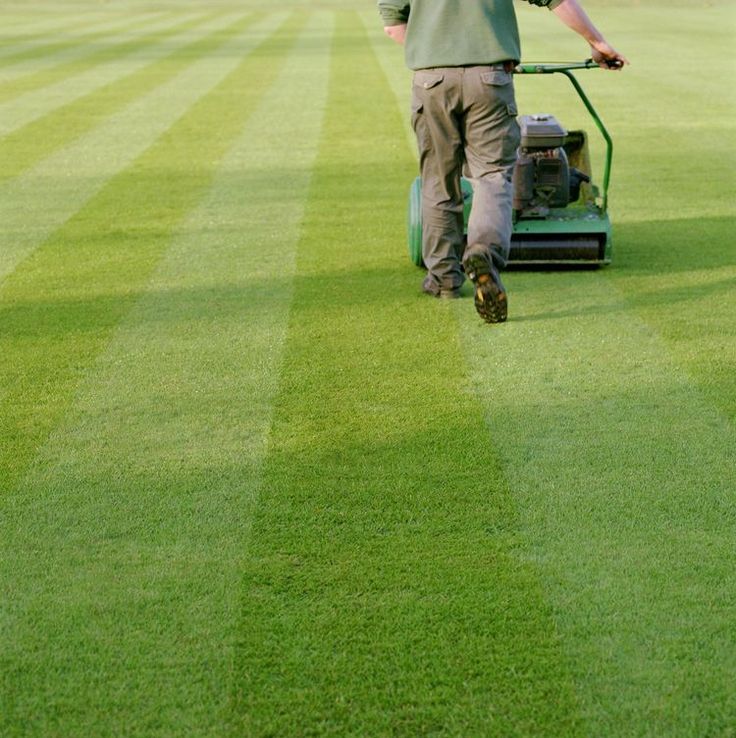
5. Get the most from your mower — Mowing is important to keep your grass looking even and healthy, but be careful not to over-cut. Long grass leaves will actually shield the roots from sun damage and it can encourage root growth too. The height you should cut to depends on the grass type. Cool-season grasses prefer to be short, while warm-season grasses should be tall. Try not to cut more than 1/3 off the grass in total. It sounds crazy, but the optimum height will encourage green growth.
It’s also important to check on the condition of your mower blades. These will naturally dull over time and end up tearing the grass rather than cutting it. The jagged tops of the leaves can then turn brown or white and, combined with the messy finish, will ruin the look of your lawn. Sharpen your blades when necessary or replace for a fresh start. Check out our guide on how to sharpen lawn mower blades for more info.
Thinking about buying a riding lawnmower? My Dad just treated himself to a riding lawn mower — here’s what happened.
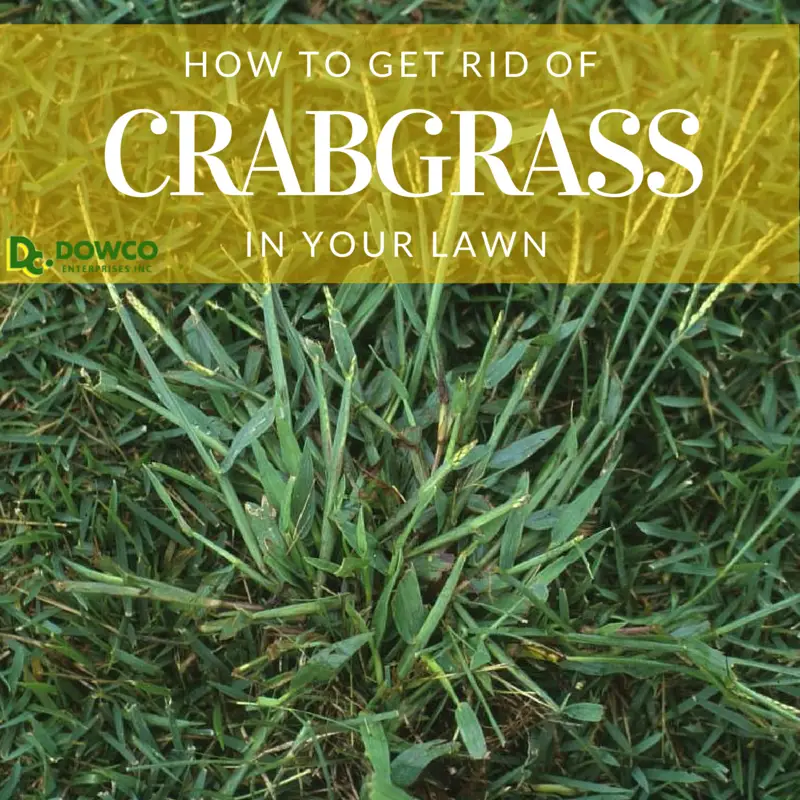
6. Keep on top of weeds — Don’t let weeds get in the way of achieving the greenest yard in the neighborhood. Dig out any weeds as they appear with a spade — just make sure you pull up the roots. If you prefer not to get your hands dirty, you can also treat singular weeds with a dedicated weed killer which can be found in most garden stores. Choose one suited to your weed-type and make sure you wear adequate protection.
If weeds are a real problem and keep coming back, you can also switch to a fertilizer which contains weed-killer to deter them. If you don’t want to use chemicals on your lawn, but still have a weed problem, corn gluten meal is a natural alternative which both kills weeds and fertilizes.
Today's best weed killers deals
$8.48
View Deal
$196.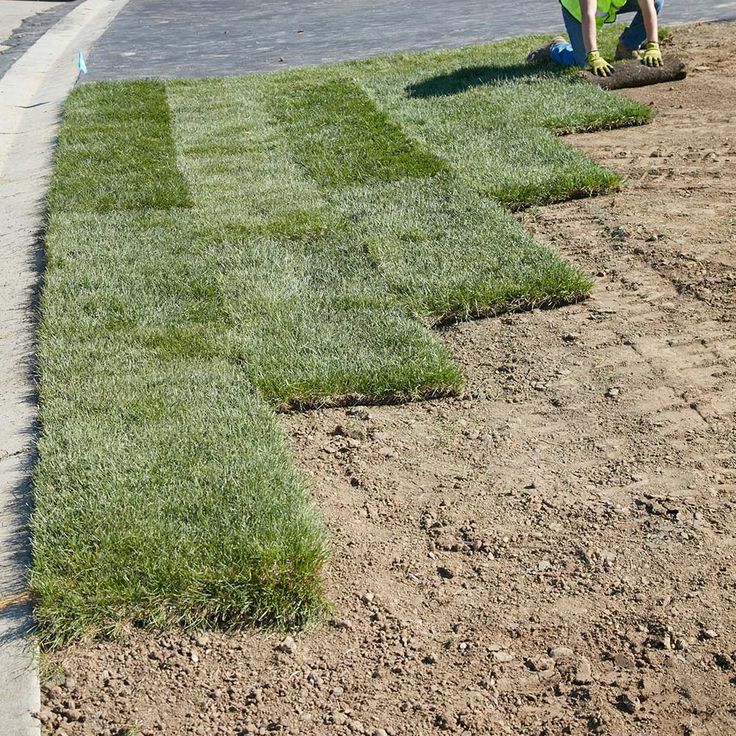 94
94
View Deal
No price information
Check Amazon
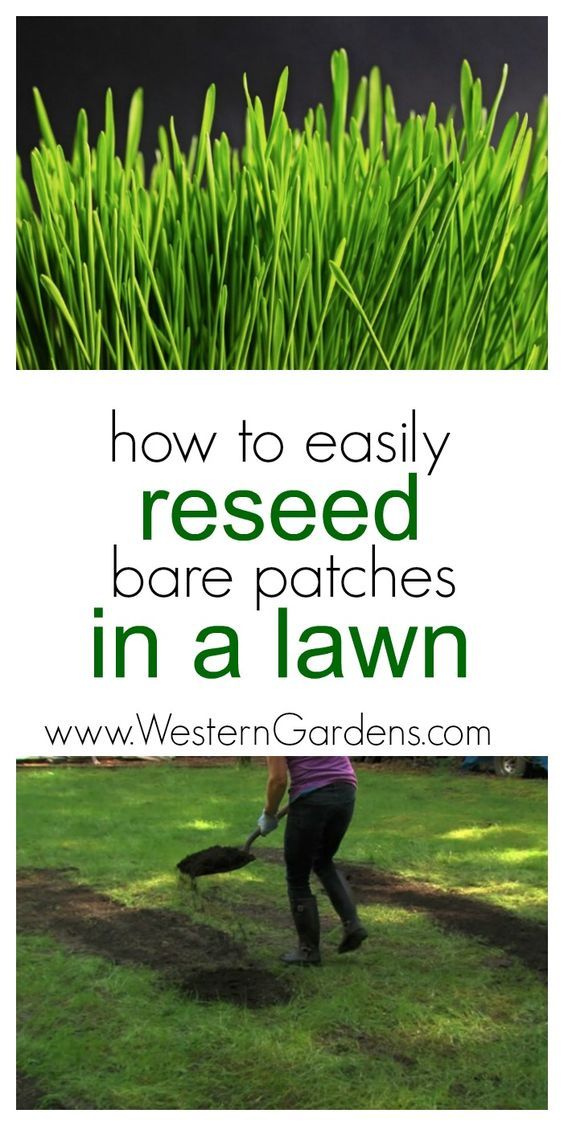
(Image credit: Shutterstock)7. Fill in any gaps — If you’ve been learning how to get rid of moles, or your lawn has a few brown patches, don’t worry. You can easily fill in any gaps with fresh grass seed. First, make sure your seed matches the grass in your lawn. Next, remove any dead grass from the spot you intend to fill and till the top ¼ inch of soil. Now you can distribute your grass seed by hand, cover over with a thin layer of soil and water regularly.
You can alternatively overseed your entire lawn if it’s looking a little tired. After you’ve cut down the existing grass, spread a thin layer (¼ inch) of soil over your lawn with a rake. You’re then ready to sew fresh grass seed with a spreader — make sure you distribute them evenly.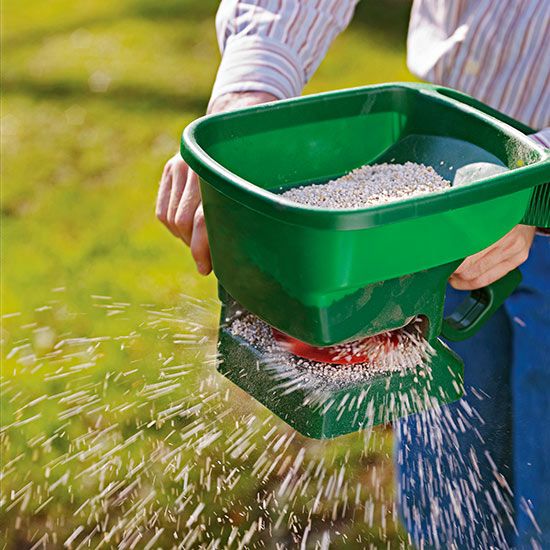 Once the seeds are down, they can be fertilized and watered. You can also cover the seeds with mulch or compost to help protect them from the elements.
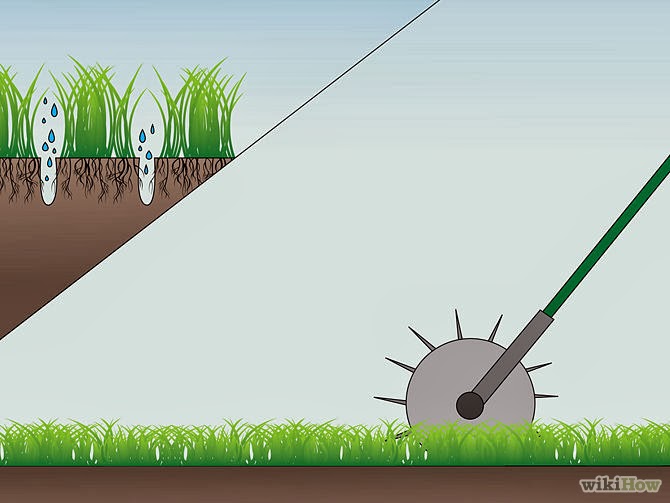
8. Aerate the soil — Lastly, you should aerate your soil every so often if you want green grass. Over time, with heavy footfall, the soil in your yard will compact. This makes it difficult for any roots to receive oxygen and water, causing strain on the grass. By aerating the soil, your lawn will be able to breathe better and will thrive as a result.
You should use an aerator to aerate your lawn, but when and how often depends on your grass seed type. Cool-season grass should be aerated in the early spring or fall, while it’s best to aerate warm-season grass in the late spring or early summer. Aerate once a year if your lawn is struggling or it experiences high footfall. If your lawn is fairly vibrant, once every 2-3 years is enough.
You can purchase or rent aerators, and you push them along much like mowers. You’d be surprised by the difference this can make.
We've also got a separate guide to how to aerate a lawn and when you should do it, for more detail on this step.
Today's best lawn aerator deals
No price information
Check Amazon
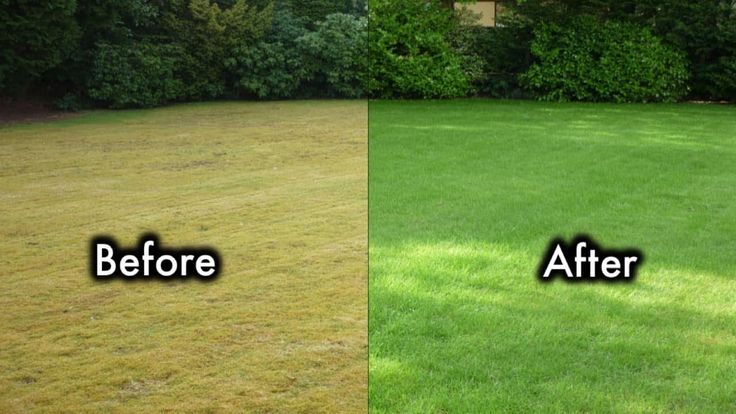
(Image credit: Shutterstock)If you follow these tips, your neighbors will soon reflect your lawn and be green with envy. Just remember that ongoing maintenance is key to keeping a lawn healthy, so repeat the above steps for continuous results. You can read our top tips on how to water your lawn in a heat wave, 7 signs that you are cutting your grass too short that could be damaging your lawn's health and here's how to remove grass stains from your clothes.
For more planting tips, tricks, and how-tos, check out our guides on how to plant sunflower seeds and when to do it, how to plant potatoes and how to grow tomatoes in pots. You'll also want to read how to prune hydrangeas, how to care for an orchid, and how to care for air plants.
Get instant access to breaking news, the hottest reviews, great deals and helpful tips.
Contact me with news and offers from other Future brandsReceive email from us on behalf of our trusted partners or sponsorsKatie looks after everything homes-related, from kitchen appliances to gardening tools. She also covers smart home products too, so is the best point of contact for any household advice! She has tested and reviewed appliances for over 6 years, so she knows what to look for when finding the best. Her favorite thing to test has to be air purifiers, as the information provided and the difference between performances is extensive.
SOLVED: How to Make Your Grass Green | Top 4 Secrets From the Pros
There’s nothing better than a lush, green lawn—especially when you’re equipped with the know-how for how to get it there.
We’re happy to let you in on a few secrets for how to make your grass green. It starts with knowing your grass, but continues with using fertilizer and addressing any damage as it comes.
We spoke to our landscaping pros who have combined over 50 years of keeping grass looking green and healthy and they boiled everything down to 4 essential points that we unpack in this article.
1. Know Your Grass (and How to Support It)
Different kinds of grass
For most of us grass is just, well… grass. But it’s important to realize that there are around a dozen different types of turf grasses [1]—and what you’re looking at in your backyard might actually be a combination of two (or more) types of grass.
Best grasses for different climates
Turf grass generally falls into two distinct categories: grasses that do well in warm climates (like the southern and southeast regions of the U.S.), as well as grasses that are better suited for areas of the country that experience winter and significant seasonal temperature fluctuations (the north, northeast, most of the Midwest, and the Pacific Northwest).
Here are a few types of those grasses [2]:
Warm Season Grasses: These grow best in midsummer temperatures that reach 75-90 degrees Fahrenheit (will generally turn brown when temperatures drop below 55 degrees).-
- Bahiagrass Pensacola
- Bahiagrass Argentine
- Bermuda
- Carpetgrass
- Centipede
- St. Augustine
- Zoysia
-
- Bentgrass
- Bluegrass
- Tall Fescue
- Creeping Red Fescue
- Ryegrass (Annual)
- Ryegrass (Perennial)
Transition Zone: For those of us who live in the middle ground between the north and the south, we may be able to grow either type of grass, but there are some that do better than others [3]:
Winter-Hardy Warm Season Grasses:-
- Zoysia
- Centipede
- Bermuda
Tall Fescue
South Shore Massachusetts Climate Grass
So, where does that leave us in South Shore Massachusetts? Well, if you remember from our blog about hardiness zones, South Shore MA is in hardiness zone 6b. This means that the warm season grasses are generally out, but we still have several of the cool season grasses to work with.
Here are a few that we’d recommend [4]:
- Kentucky Bluegrass (dark green color, fine-to-medium leaf texture)
- Perennial Ryegrass (medium leaf texture, dark green color, germinates and establishes quickly)
- Tall Fescues (fine texture, dark green color, heat and drought tolerant)
- Fine Fescues, like creeping red fescue, chewings fescue, and hard fescue (narrow leaf texture, medium green color, ideal for low-maintenance situations)
Other kinds of grass that grow in Massachusetts
Because we live in a coastal region, there are also several other grasses that grow in our area [5]. In fact, many coastal grasses are absolutely essential for preventing dune erosion and supporting unique ecosystems.
While you likely won’t find these in your lawn, you can expect to see these types of grass in Massachusetts:
- American beachgrass
- American dunegrass
- Big bluestem
- Coastal panic grass
- Indian grass
- Little bluestem
- Poverty dropseed
- Purple lovegrass
- Saltgrass
- Saltmarsh cordgrass
- Saltmeadow cordgrass
- Switchgrass
- Wavy hairgrass
How to select grass?
Beyond selecting a grass that will grow well giving your climatic conditions, there are some other things to consider like pH, fertility, soil moisture, and environmental stresses.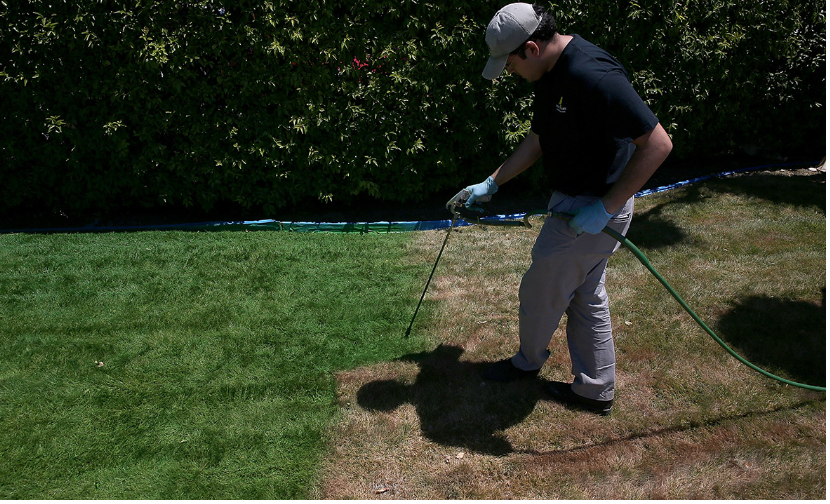
Some grasses will be more shade tolerant than others (like fine and tall fescues), while others are better at forming sod (like Kentucky bluegrass). Additionally, some grasses are better suited for very specific activities—like bentgrass being used for a putting green or a croquet court.
When to plant grass can be found in our gardening guide!
What are some grass growing tips?
- Use a mix or blend of different species of grasses. Using a seed mix (made up of two or more types of grass) will help your lawn better adapt to the conditions of your site (i.e. sun, moisture, etc.).
- Most grasses require around four hours of daily direct sunlight to thrive. If you have an area of lawn that won’t get that, use a species that can handle dappled light (fine and tall fescues).
- Sowing seeds is easier with a spreader (it ensures uniform growth).
- When it comes to reseeding, cool-season grasses will do better in the late summer or fall.
- Be careful to not over-mow or over-water your lawn.

How to deal with grass in summer heat?
The dog days of summer are a constant worry for homeowners, as just a few days without rain can really impact a once-lush lawn. Then there’s the heat to contend with!
We can’t give you any tips for how to stay cool yourself in the summer heat, but we can provide some recommendations to help support your grass:
- Use appropriate mowing techniques. Longer grass will help to shade the roots and prevent any harmful exposure to the sun. This will also help the roots of the grass grow deeper, thus outcompeting weeds and creating a denser turf. That said, use a blade height of about four inches in summer, mow less frequently, and mow earlier in the day.
- Avoid watering in the heat of the day, choose early morning or late evening instead. Keep in mind that your lawn will need about one inch of water a week—but it can tolerate about half an inch every 14-days, depending on water restrictions in your area (always listen to those first!).

How to keep grass green in a drought?
If you’re starting from scratch, you’re in luck. It’s easy to find drought-resistant and fast-growing grass seeds, especially like the fescues we mentioned earlier. These grasses establish themselves quickly, don’t require a lot in the way of maintenance, and are one of our best bets for having a green lawn—even in periods of drought.
If you’re not starting out with a new lawn, however, there are still some things you can do to keep your grass green during drought [6]:
- Prepare for summer early. Consider planning for periods with little rain in the spring and your proactivity and hard work will pay off. Starting with the first cut of the year, consider using a mulching mower to help correct bare patches and keep some grass clippings (mulch) to better hydrate your lawn.
- Avoid damaging it even more. If your lawn is drought-stressed, avoid heavy foot traffic and pet-damage. Don’t add stress to an already-stressed lawn!
- Toss out any thatch.
 Heavy thatch will intensify any damage that your lawn becomes exposed to. It will also suck up all of the water, meaning that your lawn will dry up quicker (even after rain). Contact us to have your thatch professionally removed.
 - Don’t be too scared of a brown lawn. If your lawn is well-maintained (even if it doesn’t look like it!), it should spring back as soon as the rain returns.
How to make grass thicker?
In addition to choosing the right grass in the first place and regularly aerating your lawn, you can do a few additional things to make your grass thicker
- Address diseases. Avoid mowing when the lawn is wet (as this can cause problems) and check for signs of disease or fungal infection. This may appear as powdery residue or colored patches or spots. Also, check for indications of pest damage (and apply an insecticide if necessary).
- Ensure that your soil is healthy. Check for your local extension field office (listed here for Massachusetts residents) and obtain a soil-testing kit.
 It will alert you to nutrient deficiencies that may be responsible for your thinning lawn.
- Water regularly and apply a nitrogen fertilizer. Don’t worry, we’ll discuss more about this below.
How to make grass grow green and healthy?
This brings us to our next consideration: when and how often to water grass for optimal greenery?
The advice that we’re about to give you should be taken as just that, advice. One of the best things that you can do for your lawn is to get to know it.
Take some time observing how it looks each day, in the morning and in the evening. Try to become aware of all of the different elements that affect it (sun, wind, water, people, animals, chemicals) and how these fluctuate throughout the day. The better understanding you have of your lawn and your specific microclimate, the better you’ll be able to take care of it.
Then, you can consider the following [7]:
- Watering in the morning is the best because temperatures are cooler and winds are normally calmer.
 If possible, water before 10 a.m. so that all of the moisture can be absorbed before the heat of the day kicks in and evaporates all the water away.
 - If you have no option but to water in the evening, try to do so before nightfall (between 4 and 6 p.m.).
- When watering, you want the top six to eight inches of soil to be wet—which equates to around one inch of water per week. This can be done as a single watering or two waterings this every week.
How to keep grass green naturally?
Want to support your lush green grass, but do so without chemicals? Here are a few tips for supporting healthy and natural grass growth:
- Apply a thin layer of compost on top of your lawn at the beginning of spring to give it a quick nutrition boost. This can also be done again throughout the spring and summer seasons, just be sure to avoid making too thick a layer.
- Manually remove weeds as you spot them as they’ll compete for any available sunlight, moisture, and nutrients and will ultimately impact the greenery you want.
- If you want something a little easier, but still natural, you can add corn gluten meal to naturally kill weeds and also fertilize your lawn.
- Minimize the amount of pet urine that ends up in your lawn. Over time, it can cause the grass to turn yellow and even die. Make a designated “toilet” spot for your dog.
- Regularly aerate your lawn and remove compacted areas or any build-up of thatch.
2. Use Fertilizer
What is grass fertilizer?
For those of us who aren’t familiar with fertilizers, they are chemical substances that are typically applied to crops and plants to improve productivity, enhance water retention, and support healthy growth.
What’s in grass fertilizer?
While fertilizers vary depending on specific needs, most contain essential nutrients like nitrogen, potassium, and phosphorus.
What are the different kinds of grass fertilizer?
It’s commonly thought that there are six different types of fertilizers [8].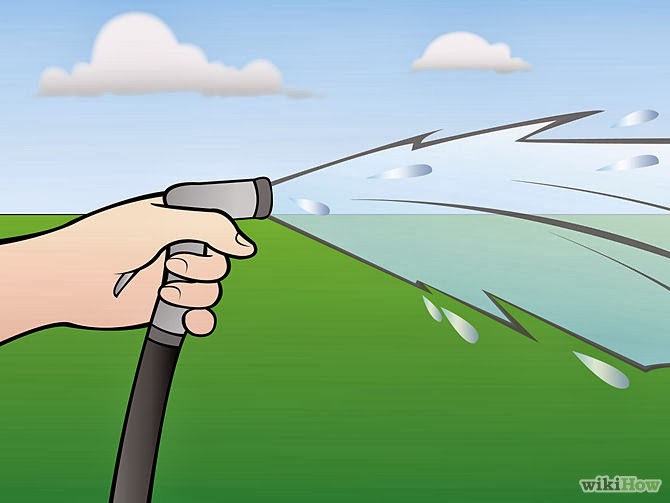 These include:
Inorganic fertilizers:
- Nitrogen fertilizer
- Phosphorus fertilizer
Organic fertilizers:
- Agricultural waste
- Livestock waste
- Industrial waste
- Municipal sludge
How to match fertilizer with grass styles?
When it comes to choosing the right fertilizer for you and your lawn, it’s important to not only consider what type of grass you have, but also your goals. After you’ve done a soil test, you’ll know what sort of nutrients (if any) are lacking, and from that you can choose a fertilizer that’s higher in one or a few of the essential components (nitrogen (N), phosphorus (P), potassium (K)).
Beyond that, there are specific fertilizers for well-established lawns (“weed and feed”), as well as those that have just been seeded (“starter” or “slow-release”). There are also fertilizers that contain additional herbicides to prevent weeds, as well as those that are phosphorus-free (due to issues with phosphorus runoff and pollution).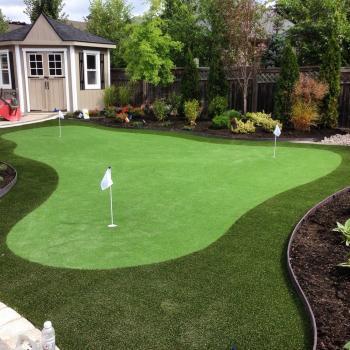
When to fertilize your lawn?
In Massachusetts, it’s recommended that you either fertilize in May, or the fall before [9]. Just be sure that the soil is warm enough for the fertilizer to penetrate and choose a slow-release nitrogen fertilizer if available.
What about seasonal fertilizer in summer?
Feeding your lawn in the early summer can help to better prepare it for the heat and drought conditions that may follow. Slow-release fertilizer is a good idea for most grass types.
However, avoid applying fertilizer in the middle of the summer because it can end up burning a lawn. Additionally, don’t fall in the trap of applying too much fertilizer because that may do more harm than good.
How much is too much?
Adequate nitrogen is crucial for lush, healthy, green grass. However, there can be too much of a good thing. The general rule of thumb is this: you should apply no more than one pound of nitrogen for every thousand square feet of lawn, and you should do so no more than twice per year [10].
So, say you’re using a fertilizer with 5% nitrogen, you should use 20 pounds maximum.
What to do when you’ve applied too much?
Many of us have experienced a phenomenon called fertilizer burn, where we used too much fertilizer and our grass ends up with yellow and brown stripes, or patches of dying or dead grass.
Fortunately, there are things we can do to correct this:
- Leach excess fertilizer. Use a sprinkler head and a garden hose to fully saturate the overfertilized area. The water will drain through the soil, bringing the fertilizer with it. Apply about an inch of water and repeat this every day for a week.
- Remove dead grass. Use a rake to remove the fertilizer-burned areas, add to a compost pile or trash can.
- Plant new grass seed. When spring arrives, plant new grass seeds.
Why is nitrogen important for a green lawn?
Grass can’t grow without nitrogen. In fact, it’s the most important nutrient to support your lawn. Nitrogen works by encouraging new green growth above the soil line. For anyone who remembers middle school biology, this is where the photosynthesis takes place, which helps generate enough energy so that the roots grow healthy and the grass can ward off any pests or diseases.
Perhaps even more important for you and your lawn, nitrogen is also an essential component of chlorophyll, which is what the plants use to feed themselves—and also what gives them their beautiful green pigment. Without nitrogen and all of the things that it supports, you may notice grass blades that are shorter, brittle, dull in color, and more susceptible to stress and disease [11].
3. Consider Using Ironite
This brings us to a very specific fertilizer: Ironite. Unlike the usual NPK combination found in most traditional fertilizers, Ironite contains iron and, as you guessed it, is perfect for an iron-deficient lawn.
Supplementing your lawn with iron is great for another reason too: it makes it greener.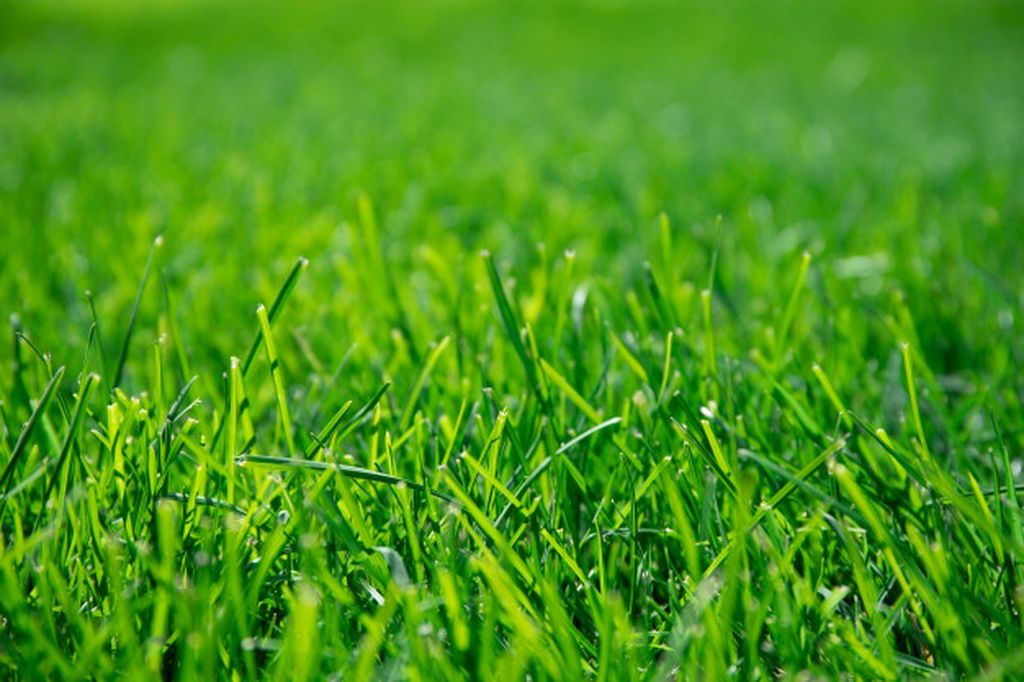 Just like nitrogen, iron (along with some other micronutrients) helps support the process of photosynthesis, giving you long-lasting greenery!
Unfortunately, there are some considerations to make so that you don’t end up with Ironite burn. Like with other fertilizers, the nitrogen in Ironite can be dangerous for those blades of grass. Some of its other ingredients (like muriate of potash) can do the same. So, never use more Ironite than suggested and always water it in immediately.
4. Address Damage
One of the best things you can do to support a lawn full of thick, green grass is to regularly check for damage—and address it quickly. Growing healthy and green grass isn’t difficult, but it does require you to check in on your lawn and provide support when necessary. One of the most common types of damage is bare spots.
How to fix dirt patches in lawn?
Say you’ve overfertilized (oops) or have become the target of some pesky dandelions. Whatever the reason, tending to a dirt patch is easy and will have your lawn looking lush and green in no time.
- Start by breaking up the dirt whatever hand tool you’re comfortable with.
- If you’re working with very clay-y soil, you can add some top soil.
- Add your combination of grass seeds, considering shade and other factors to determine the best mix. Cover the dirt patch completely
- Add a good starter fertilizer and spread so that the fertilizer, soil, and seeds are mixed.
- Water immediately and continue providing light water up to three times a day for 7-10 days. Once the grass starts to emerge, you can cut the watering down to just once a day.
Final Thoughts on How to Make Your Lawn Green
If this seems like a lot—don’t stress it. We’re here to help. Feel free to give us a call at any time to talk about how to make your neighbors green with envy because of a lawn that’s just as green! Also, if you have any other tried and tested tips for supporting healthy grass, let us know in the comments!
Table of Contents
Want to Learn More?
How to get green grass | Briggs & Stratton
If your lawn is turning yellow, you're not the only one.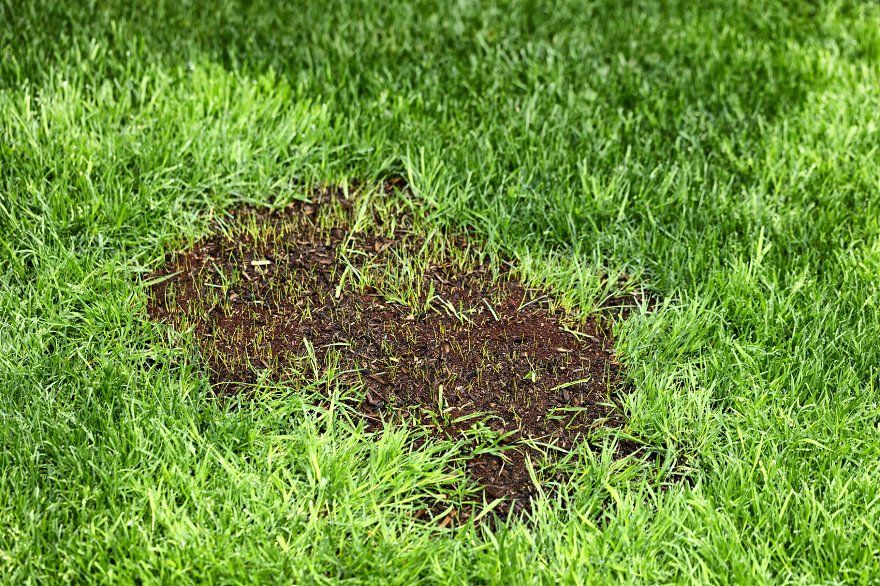 In fact, early summer is the prime time for yellow grass to spread throughout your lawn.
Once you figure out the reasons for this, you can learn how to bring back the healthy green color of the grass. Here are the most common reasons why green grass turns yellow and lawn care solutions.
Poor lawn care increases the load on grass and makes it vulnerable to diseases and pests that thrive on poorly maintained lawns. Timely fertilization, proper watering, and knowing how to mow your lawn properly will help you keep your turf healthy and dense, which in turn will make your lawn greener. Whether you are using a powered mower or a rider, Briggs & Stratton recommends cutting no more than 1/3 of its grass height with sharp blades. Cutting your grass too short will prevent it from becoming a healthy green lawn. nine0003
Is your green lawn infested with fungus?
There are several fungal diseases that damage grass and turn it yellow or straw, including dollar spot, rhizoctonia, and snow mold.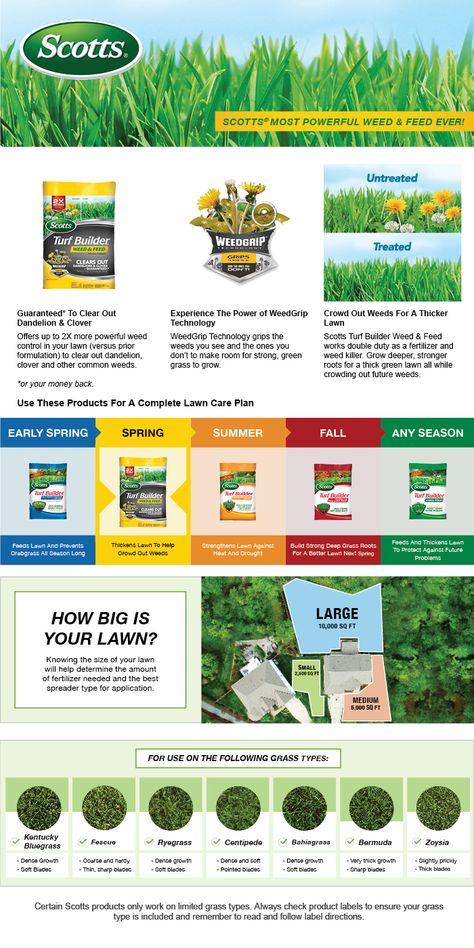 If your area is high in temperature and humidity, which are great conditions for these diseases to develop, your lawn may develop mold. By applying a fungicide to the yellowing, you will soon see green grass again.
Use pest control methods
Got pests? Pests such as grubs feed on the grass, while other pests such as mites and beetles suck the nutrient-rich juices straight from the blades of grass. In any case, this results in damage to the lawn, as well as your green grass turning yellow and weak. If you let pests infest your lawn, you could lose your current lawn and start planting new grass from scratch. For serious lawn pests, apply insecticide to the grass and then water it well to get the chemicals into the soil. Be sure to read the label carefully: to get good green grass, it is important to apply insecticides correctly and limit movement on the lawn. nine0003
Grass Types: Green Lawn After First Planting
If any of these problems have resulted in your lawn being destroyed beyond repair, make sure you have planted the correct grass type. When you plant a lawn, there are many types of grass you can choose from. To prevent yellowing of grass from day one, use this guide to identify grass types.
Read this quick grass selection guide.
Still need help growing thick, green grass? Learn how to fix other common lawn problems with Briggs & Stratton. Briggs wants to help you grow a beautiful, green lawn. You can rely on Briggs & Stratton lawn mower engines to keep your yard in top condition!
6 tips on how to make a lawn in the country with your own hands
Karina_Vailo | 06/28/2018 | Updated | Landscaping | 50 105 views | 11 comments
Contents of the article
Recently it has become very popular to decorate your suburban areas with neat, well-groomed lawns. They are not only pleasing to the eye and make the territory visually a little larger, but also purify the air and serve as an additional source of moisture, which cannot but rejoice on especially hot days. It is a mistake to think that any lawn on which grass grows can be considered a full-fledged lawn. There is a saying in England that only a green area that is at least 200 years old has the right to be called a lawn. Therefore, we can safely say that this is a lot of work and daily care. But do not immediately give up your desires. In this article, we will give 6 tips on how to make a lawn in the country with your own hands in a relatively short period of time and without titanic efforts and costs.
1. Deciding on the type of lawn
Before starting various preparatory work, you need to know exactly what type of lawn you need. To do this, it is worth to decide on its purpose - will it be just a decorative planting, or will your children play on it. Depending on this, you need to choose different types of seeds or ready-made mixtures, prepare the soil for planting in different ways and take care of the site. The following 9 are most in demand0039 types of lawns:
- Garden and park lawn - the most suitable variety for organizing a summer cottage.
 Preparatory work, although it lasts for several weeks, but in terms of the ratio of effort spent to the final result, this is the best solution. And after our detailed recommendations, you will cope with the process of self-arrangement without much difficulty. The composition of the seed mixture includes cereals, which can be called unpretentious. They endure quite hardy the scorching sun and the lack of nutrients in the soil. Garden lawns are often planted around pools, recreation areas, or patios. nine0056
 - Meadow or Mauritanian lawn is the brightest and most “lively” type of lawn, which will appeal to lovers of field forbs. If you want to have your own piece of a real alpine meadow in your country house, then definitely choose a Moorish lawn. You can make a plant composition yourself, or you can purchase a ready-made mixture for sowing. All plants in it are selected in such a way that they do not interfere with each other's growth, develop at about the same time, do not drown out the root system of neighboring plants and form a uniform, colorful and very rich flowering carpet.
 Such plantings require intervention only after some plant species have faded. Then they need to be mowed, dried and yellowed leaves removed. Walking or lying on such a lawn is undesirable. The height of the plants on it is 10-20 cm. Any bruising will be immediately visible. nine0056
 - English or parterre lawn - perhaps the most gentle and delicate look. It is absolutely not intended even for short-term movements on it. And there is no question of sitting on a mat, on soft grass. Parterre lawns are intended only to be admired, and preferably from afar. Seeds for planting are a mixture of very expensive and fragile plants. Such plantings require very nutritious and high-quality soil, regular moisture and care. It is reasonable to use English lawns for complex landscape compositions, where they look luxurious and very original. Arranging such a lawn is a very difficult and troublesome undertaking, so before you start, think about whether you can ensure the proper level of plant maintenance, or waste time and money.
 nine0056
 - Sports turf is ideal for a children's playground or a small sports field. This type of lawn is also suitable for walking and training animals. Perhaps you are breeding purebred dogs. A distinctive feature of such a site will be its resistance to trampling. Seeds for it are selected taking into account the heavy loads that the green cover will experience. Plantings will be tough, hardy and unpretentious in care. Even with active use, your area will not be covered with “bald” spots and will be just as dense and fresh. The only thing that should be foreseen before disembarking is a reinforced substrate, which will help to avoid breaks and violations of the integrity of the coating. nine0056
- Universal roll-up lawn is the fastest way to develop a green area. It is very convenient because already sprouted grass is sold together with turf, twisted into rolls. The presence of a “native” fertile layer serves as a guarantee that the grass will easily take root in a new place, will not wither or disappear.
 Rolled lawns are designed for laying on areas of active use. They can play ball and have a picnic. The herbs in its composition are very hard and dense, therefore they do not differ in special aesthetic properties. Such a lawn is not used as a decorative lawn, and it is much cheaper to sow the site with your own hands. In addition to the high cost, a rolled lawn requires a special way of preparing the soil and the ability to properly line the strips. nine0056
Next, we will take a closer look at technology independent step-by-step arrangement of the most suitable type of lawn for a summer residence - landscape gardening.
2. Where is the best place to organize a lawn?
Strange as it may seem, there are other factors influencing the choice of a lawn location besides your preferences. Let's consider in more detail for each type of plot:
- If you prefer an English lawn, then consider the fact that he prefers a completely open area, without the slightest shade and wind.
 nine0056
 - No lawn will look the way it could if is set up close to buildings that will cast shade.
- The organization of a green zone under fruit or ornamental trees is a beautiful idea, but unlikely. Grass crops simply will not have enough nutrients, which will immediately take away stronger tree root systems and sunlight. And they will not be able to grow in the shade of a tree crown. The grass will not be so rich green and elastic. In order to somehow save the situation, you will have to cut the lower branches of the trees - this will slightly facilitate the access of the sun. But why harm already mature plants, if you can choose a better place? nine0056
- Grass crops are not suitable for excessive moisture . This will lead to rotting of the root system. Therefore, if your site is located in a lowland where a large amount of moisture constantly accumulates, it is necessary to equip good drainage before sowing.
- A perfect lawn requires perfectly level ground . Pits or ledges that have an angle of more than 30° are not allowed. They need to be forced to match. Firstly, in such places water will stagnate or the soil will be subject to erosion, and secondly, when you mow the lawn, this will cause tangible difficulties. Therefore, it is better at the very beginning to make a little more effort and not be too lazy than to regret it every time or redo the already formed area. Appearance from this will suffer significantly. nine0056
Many people really like the idea of garden paths of lawn grass. Indeed, such green paths look very unusual and cheer up. Of course, for such purposes, it is worth choosing seeds intended for sports lawns or rolled lawns. But in places of greatest use, where the feet of guests and family members step with enviable regularity and almost in the same place, even such resistant varieties of grasses will not survive.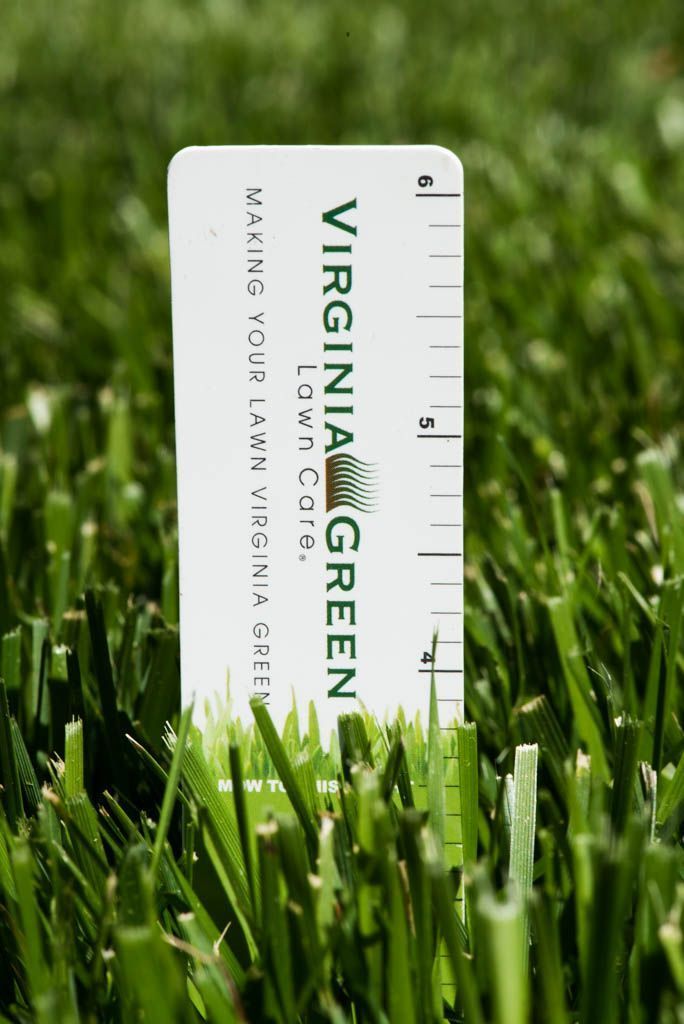 They are designed for intensive movement, but throughout the site, and not along its narrow piece. To preserve pleasant greenery, but not give up on your desire, additionally lay wooden cuts or small logs on the path that you can step on without any fear. nine0003
3. Tips for preparing a planting site
We have decided on the type and purpose of the lawn, we have chosen a place, it's time for more complex preparatory work, namely soil preparation. This process includes three main stages and lasts from 1 to 4 weeks:
- Marking. The easiest way to do this is with small pegs and string. Small pegs are driven in along the perimeter of the future lawn, which are tied with a rope. Knit the rope as low as possible to the ground, then the outlines will be seen more clearly. Marking is necessary in order to estimate the area of the future green zone, if necessary, correct its size or contour and pre-lay flower beds, rabatka and paths not at random, but with high accuracy.
 This will save you from having to transfer or redo anything after the first shoots. Low green areas usually reach a height of no more than 5 cm. They always have smooth edges and clear boundaries. For them, clear geometric shapes are suitable. Meadow or parterre lawns look more elegant if their borders are undulating. nine0056
 - Weed removal. This is a very important step that should be given special attention. The more carefully you work the soil now, the less unwanted seedlings will appear on it after sowing, and you will not need to constantly weed the lawn. To get rid of weeds, you need to treat the area with a general herbicide. Those places that are particularly prone to the appearance of "uninvited guests" should be treated several times with an interval of two weeks until they disappear completely. During this time, shoots of weeds that could not be destroyed will appear. It is best to treat with herbicide in early spring. Closer to autumn, the seeds can go deep into the soil, and you just can’t reach them, but in the spring they will sprout, as if nothing had happened.
 nine0056
 - Alignment. After the plants in the treated area have wilted and dried up, it is necessary to weed it, remove unnecessary rhizomes and other debris and level it with a rake. If you see that the site needs a large amount of fertile layer and is simply unsuitable for planting, the soil needs to be purchased. This is costly and expensive, but at the same time you have the opportunity to permanently get rid of weeds. To do this, a non-woven fabric is laid on the prepared territory, on top of which a fertile layer will be laid in the future. nine0056
4. Preparing the fertile soil
An equally important stage at which favorable conditions are formed for timely and abundant shoots. This will take us about a week.
- In order to correctly select the required type of fertilizer, it is necessary to determine the composition of the soil and its structure. To do this, in any gardening store, special test strips are available for sale, which determine the degree of soil acidity.
 If the test shows that the soil is too acidic, chalk or slaked lime must be added to neutralize the reaction. If the structure of the soil is clayey, heavy, you need to make it more loose and airy. To do this, add humus or humus. nine0056
 - For certain types of seed there is a preferred mineral fertilizer complex . At this stage, they must be added to the soil in the amount specified on the seed package. Depending on the time of the year when you prepare the land for sowing, there are mandatory recommended additives. In early spring, it is advised to add nitrogen fertilizers, which provoke rapid growth, and in the autumn, phosphorus and potassium are recommended, which help the grass to endure wintering more easily. If before that you added biohumus to the soil, then the amount of mineral fertilizers must be reduced. nine0056
- Fertilizers should be distributed evenly over the entire plot. You can use a rake, at the same time and fluff the topsoil. Using a watering can or a hose with a sprayer, the area should be slightly moistened and fluffed up again.
 The earth should be moist and loose, but not stick to garden tools.
 - Now the most important point - the final leveling of the section. To do this, you will need a special roller, the weight of which ranges from 50-100 kg. Such a tool can be rented in specialized stores. It is necessary to roll the soil until your footprints are no longer imprinted on the surface. If on the way you come across a hole or a bump, they need to be cut or covered and re-rolled this place. nine0056
- After rolling, the area must be allowed to rest and settle. This usually takes several days. If time permits, it is better to wait a week. During this time, weeds that could not be killed or seeds that were too deep in the ground may sprout. Some unwanted plants may enter the site along with humus. They also need to be removed. Just weed the area in the right place and level the soil with a rake.
Agree, in order to qualitatively fulfill the above points, it is unnecessary to have any special skills.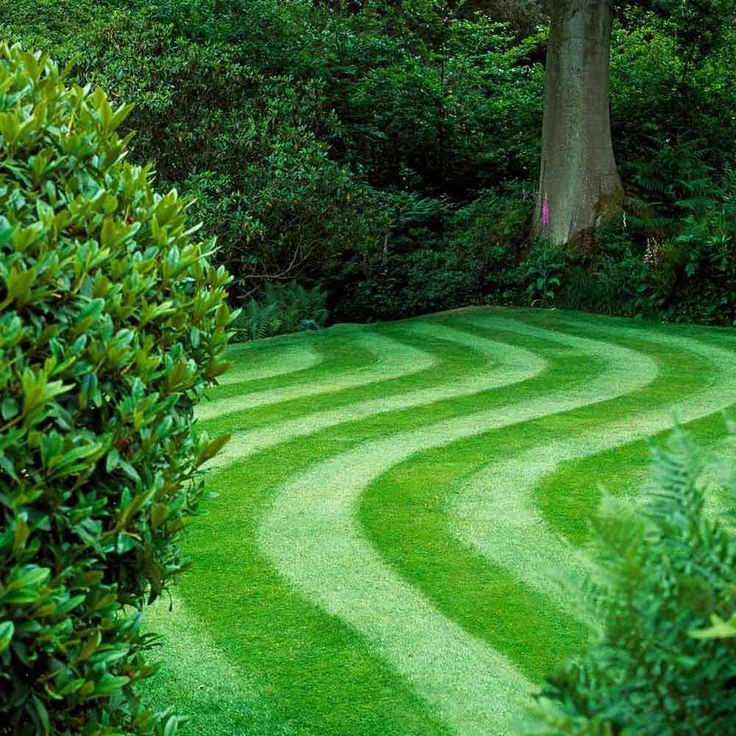 Even a novice summer resident will cope with this. After that, there is little left to do, namely, sow plot with selected seeds.
5. How to sow a plot correctly and, most importantly, when?
In order for the future lawn to be evenly covered with dense grass and successfully overwinter for the first time, it is necessary not only to sow it correctly, but also to choose the right time for this. A small area can be sown in one day.
Getting Started Follow these simple tips:
- Before buying seeds, calculate the area of the plot to determine the number of packages. Usually they indicate the recommended covering area. If in doubt, take a couple more packs. The denser the shoots, the more beautiful the lawn will be. But if you decide to save money, you may end up with bare patches that simply don't have enough seeds. Approximate seed consumption rates - 40-50 g/m2. After the first wintering, the lawn may need replanting or repair, such work will take about half of the amount sown.
- It is very important to spread seed evenly over plot . To do this, mentally divide the lawn into several identical areas. Then distribute the seeds between them so that each section gets the same amount. Now you will know for sure that, for example, for 1 square meter. soil you have two packs of seeds. nine0056
- It is difficult to sow seeds evenly by hand. Experienced summer residents advise sowing half of the seeds along the plot, and the rest across. This works out much better. Some people recommend mixing the seeds in your hand with a little river sand so that they do not stick to your hands and crumble more easily. It would be nice to use a manual seeder, if available. Sow a little more seed near the paths and along the edges of the plot. In these places, the lawn can be trampled more intensively, and more grass will help maintain the same appearance both in the middle and at the edge. nine0056
- For sowing, choose a calm day, otherwise half of your seeds simply will not get to the right place.

- If you see that the soil is too dry, moisten it a little with a watering can or other tool. The main thing is that the watering should be rain and not wash away the newly sown seeds.
- Now with a French rake loosen the top layer of soil a little and hide the seeds so that birds do not peck them.
- Use a roller to finish off the area and moisten again. Don't overfill. Enough moderate watering. nine0056
Place a long piece of cardboard under your feet to avoid leaving noticeable footprints and compacting the lawn during seeding. It will reduce the load on the soil and it will be easier for you to loosen it at the end and hide the seeds.
Now for the best time is for sowing. If you are planning a grandiose project and a large-scale green area that will require a long preparation time, then you can start the preliminary work in the winter. You can clear the area, apply preliminary markings, assess the type and size of the future lawn and lay all the necessary decorative elements, stone beds, etc. Try to guess so that the stage of sowing seeds falls at the beginning of spring or the end of summer, that is, at May or August. In spring, young shoots will germinate especially actively, and at the end of summer the soil will be well saturated with moisture and warm up. This will create very comfortable conditions for young plants.
Another important point, which indicates that this is really the best time, is the state in which the lawn should be before wintering. If you want the young grass to be strong, rich and resilient, you need to have time to mow the lawn at least 1-2 times. Each haircut helps to strengthen the root system, which in turn has a positive effect on the appearance of the green cover. On average, the first shoots appear after two weeks, sometimes after three. nine0003
Mow the lawn only when the height of the grass is 10-11 cm. Together with the grass, a small amount of weeds may appear - do not despair, after a few mowings they will completely disappear.
6. Tips for lawn care in different seasons
If you can already see the first shoots, then you have done a lot of work, which was not in vain. Now it is important to learn how to properly care for a young lawn and not spoil its appearance. The most effective way to keep your lawn looking neat and tidy is to haircut. It's also the most effective way to deal with pesky weeds.
In its first year, the lawn will be very vulnerable and tender. Its root system is not yet deep and strong enough. In this regard, try to walk on it as little as possible, do not give a large load to certain areas and try to protect the young grass from the attacks of domestic animals.
How to mow lawn:
- In fact, mowing is a lot of stress when milking plants. Because of this, it is not recommended to cut more than 1/3 of the stem height in one mowing. In this case, its overall height does not matter. nine0056
- The first mowing is recommended only after the grass has reached at least 10 cm.
 Be sure to make sure that the knives are sharp and do not “chew” the shoots, otherwise you risk tearing them out of the ground along with fragile roots.
 - After several similar haircuts, you can lower your legs a couple of centimeters. Thus, gradually reduce the height until it reaches 5 cm.
- Each cut encourages the plants to start bushing and sprout additional shoots, thereby increasing planting density.
- The strong root system of the plant is the guarantee of grass resistance to trampling. The more often you mow the lawn and walk on it, the worse the shoots take root and the rhizome weakens. And instead of improving the appearance of the lawn and strengthening the grass, you will get the opposite effect. It is very important to give the green cover a break from stress. To get an idea of how long this will take, measure the height of the grass. If it has already reached 12-15 cm, then we can assume that the lawn is ready for mowing again. nine0056
In addition to regular mowing, the lawn needs regular wetting.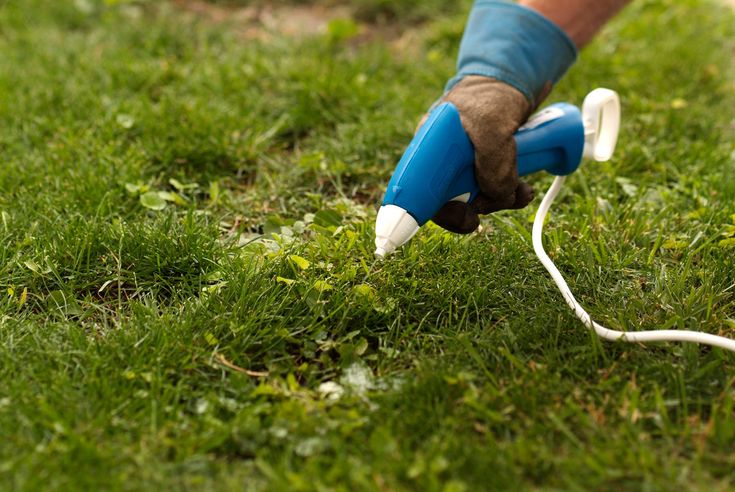 It is recommended to water the lawn only through special spray nozzles so that the strong pressure of water does not wash out young plants. The depth of moisture should be 5-7 cm. A lawn aged 2-3 years with uniform, dense greenery is considered mature and strong.
As for some nuances of lawn care in different seasons :
- The rest period is coming in winter. At this time, there is a danger of grass freezing due to too low temperatures. Plants also become weaker. Because of this, you should refrain from walking around the site and other loads. It is necessary to ensure that there is not too thick a layer of snow on the territory, which will exert considerable pressure. However, a thin snow cover will protect the plants from gusts of frosty wind, so if possible, it should not be removed completely.
- In the spring of there is a risk of root rot due to the accumulation and stagnation of moisture on the lawn.
 This can happen due to untimely snow removal. Be sure to periodically pierce the gray areas with a pitchfork. This will help the water soak into the ground faster. This will not happen if you have provided a drainage cushion. But this only makes sense in large areas. In the spring, after the onset of heat, you can fertilize based on mineral fertilizers with nitrogen in the composition. When the soil is completely dry, the area must be well combed with a non-rigid rake, remove dried blades of grass and other debris. After that, you need to sow the seeds. This will help to block possible gaps that have formed after wintering. The first haircut is carried out when the shoots reach a height of 10 cm. If you did everything on time, it will be around mid-late May. nine0056
 - In the summer of , the main care is regular mowing and timely watering. It is not recommended to mow the grass to a level below 5 cm. Be sure to water after mowing. In especially hot months, watering should be increased.