How to make a bar in your basement
How to build DIY basement bar (with plans)
Skill Level: Intermediate | Estimated time: 1 day
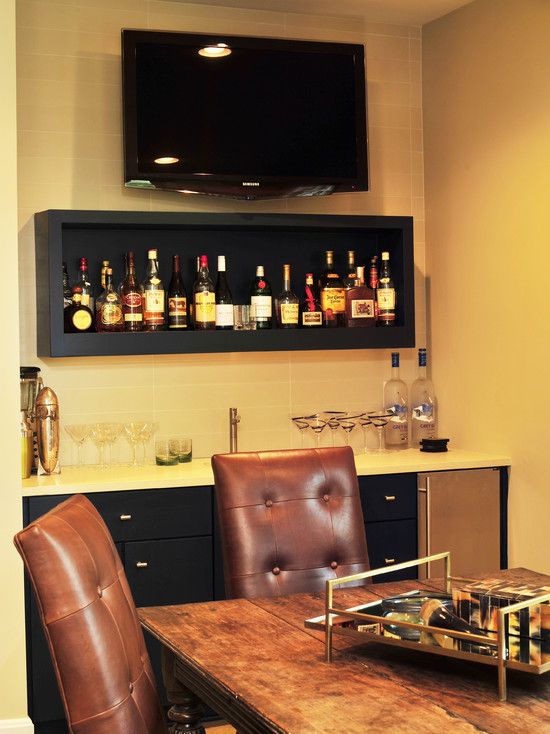
Owning your own in-house bar makes a statement about you. The bar shown here is sleekly styled and smartly laid out for the efficient barkeeper.
A small refrigerator gives you access to cold drinks and ice while convenient cabinets create excellent storage spots for party favors. While this is a “dry bar” (no plumbing), the design could be modified in any number of ways to add running water if you wish. All you need to get the party started is a GFCI electrical outlet and the proper floor space.
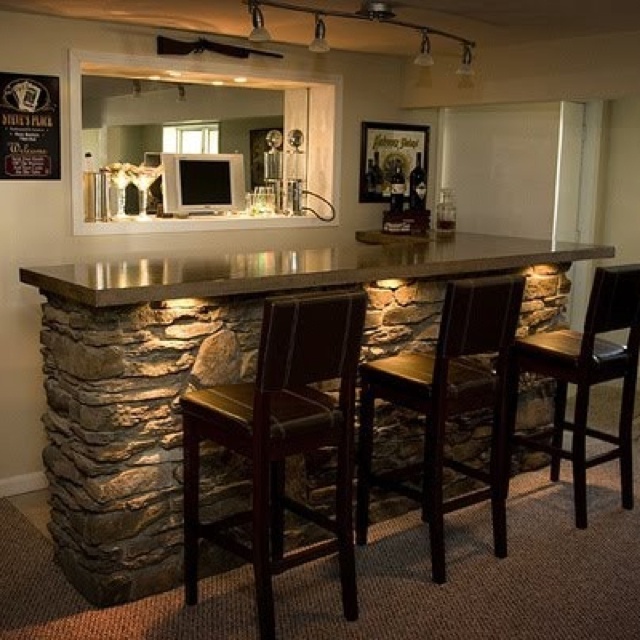
This compact corner bar design features glossy black MDF aprons with decorative cherry appliqués forming a horizontal grid pattern on the aprons. A cherry plywood bartop sits atop a 2 × 6 L-shaped kneewall, harboring some practical amenities on the bartender side. A flip-up lift gate in the bartop on one end provides pass-through access and can even function as a wait station if you want to get really fancy in your hosting. The key components— base cabinets, a laminate countertop, the fridge, and the wood for a sleek Asian inspired style trim-out—set the stage for your next gathering. Let’s party!
Things You'll Need
- Miter Saw
- Table Saw
- Pull Saw
- Flat Bar
- Pneumatic Nailer/Compressor
- Combination Square
- (10) 2 × 6" × 8 ft. SPF
- (1) 3/4 × 4 × 8 Particleboard
- (1) 3/4 × 4 × 8 Cherry Plywood for Bartop
- (2) 6 ft. strips 1/2 × 16" Cementboard
- 20 sq. ft. 4 × 4 wall tile
- Thinset + Grout
- 3/4" Thick Cherry—2 @ 8 × 42" (actual)
- 3/4 × 1 1/2" Cherry Approx 80 Lineal Ft.
- (2) 1/2" × 4 × 8 ft. mdF
- 24" Base Cabinet
- 36" Base Cabinet—Corner (12" wide doors)
- Refrigerator (19w 22d 32-3/4" h)
- Postform Countertop (Mitered, 6 ft. each leg)
- 16d Common Nails
- Panel Adhesive
- 1-1/2" Drywall Screws
- Finish Nails (4d, 6d)
- Finishing Materials
- Glue
- Piano Hinge
Step by Step Instructions
Step 1.
 Cut the 2 x 6 Sill Plates to Length (68")
 Anchor the sill plates for the kneewalls to the floor so they form a right angle at the corner where they meet. Use 16d common nails or screws and panel adhesive for a wood floor; use a powder-actuated nailer on a concrete floor.
Step 2. Attach the End Stud Against the Back Wall
Use panel adhesive and deck screws to attach the end kneewall stud to the back wall, attaching at a stud location. If there’s no stud, open the wall and insert a horizontal nailer between the nearest studs.
Step 3. Make the Stud Wall Corner
Use 16d common nails to toe-nail the corner studs to the sill plates. Use a level to make sure the studs are vertical.
Step 4. Cut Cap Plates the Same Size as the Sill Plates
Complete the framing for the L-shaped kneewall section. For extra strength, drive a few 3" deck screws through the studs where they meet at the corner.
Step 5. Make the Aprons and Trim
Rip two sheets of 1/2" MDF to 40 1/2" wide and trim them to length to make the bar front panels. Sand edges to remove any saw marks. For the smoothest possible finish, spray the front apron panels with an HVLP sprayer. Apply the paint or lacquer over primer, in thin coats.
Step 6. Prepare Hardwood Stock
Prepare at least 80 lineal feet of 3/4 × 11/2" hardwood stock to trim out the aprons and edges of the bartop.
Step 7. Apply a Clear Protective Wood Finish
For efficiency, apply a protective finish to the cherry apron trim stock. Dab some finish on the cut ends after you cut each trim piece to length.
Step 8. Apply Panel Adhesive to the Kneewall Studs
Apply panel adhesive to the kneewall studs to strengthen the bond with the black aprons. Slip a 1/4-thick spacer beneath each apron to create a gap between the panel and the floor.
Step 9. Attach the Aprons
Attach the aprons with a pneumatic nailer and 2 1/2" Finish Nails Nail the apron panels to the wall studs at 8" to 12" intervals.
Step 10.
 Cut 16"-Wide Strips of 1/2"-Thick Cement Boards
 Attach cement board strips to the edges of the kneewall framing members as a backer for the backsplash area.
Step 11. Install the Wall Tile
Install the inside wallcovering before you cap the wall. We used inexpensive 4 x 4" ceramic wall tile set into a layer of thinset adhesive that's troweled onto the cement board.
Step 12. Bond the Particleboard Subbase
Bond the particleboard subbase directly to the top plates of the kneewalls, taking care to achieve even overhangs of 6" in front and 4" on the bartender side of the walls.
Step 13. Secure the Subbase to the Walls
Drive plenty of 2" deck screws to secure the subbase to the walls. The screw heads must be sunk beneath the wood surface.
Step 14. Use a Circular Saw to Cut the Bartop
Make 45-degree miter cuts in the bartop top layer using a circular saw and cutting guide.
Step 15.
 Laminate With Panel Adhesives
 Laminate the top layer of cherry plywood to the subbase with panel adhesives and 1 1/4" screws driven up through the subbase.
Step 16. Cut Parts to Length + Attach them to the Edges of the Bartop
Cut a roundover profile in one edge of the cherry edging stock and then cut the parts to length and attach them to the edges of the bartop with nails and glue.
Step 17. Square-Cut a piece of 1 × 2 Edging
Square-cut a piece of 1 × 2 edging to fit exactly between the ends of the roundover edging, and nail and glue it into place.
Step 18. Nail the End Panel to the Wall
Nail the cherry end panel to the wall end to conceal the stud wall and the edges of the wallcoverings and trim.
Step 19. Attach a 1 x 2 Stop Block to the Wall
Attach a 1 × 2 stop block for the lift gate to the wall directly above the wall-mounted end panel.
Step 20. Attach the Piano Hinge
Attach the piano hinge to the lift gate section of the countertop first, then attach the other leaf to the countertop.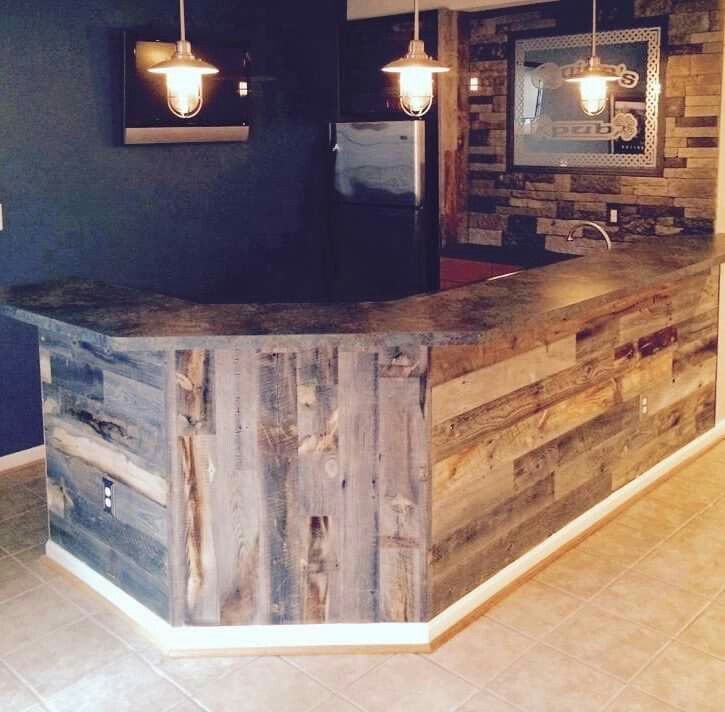
Step 21. Attach the Lift Gate
Attach the lift gate to the countertop and test to make sure it operates smoothly and correctly.
Step 22. Create a Ladder Grid Pattern
Add the decorative cherry strips in a ladder grid pattern, using an air nailer. Start with the vertical strips, then cut the horizontals to fit.
Step 23. Attach a Countertop to the Base Cabinets
Attach a countertop to the base cabinets to create an easy-to-clean work surface for the bartender.
Step 24. Add a Refrigerator or Appliance of Your Choice (OPTIONAL)
Slide in a refrigerator, eg-o-rator or any appliance you choose.
12 Basement Bars We Love
Enjoy Happy Hour at Home
1/14
After a long day, nothing beats relaxing with a glass of wine or a well-mixed cocktail—which is why many homeowners are taking advantage of unused living space to build their own basement barroom. An at-home bar provides a prime spot for entertaining and could potentially add value to your property.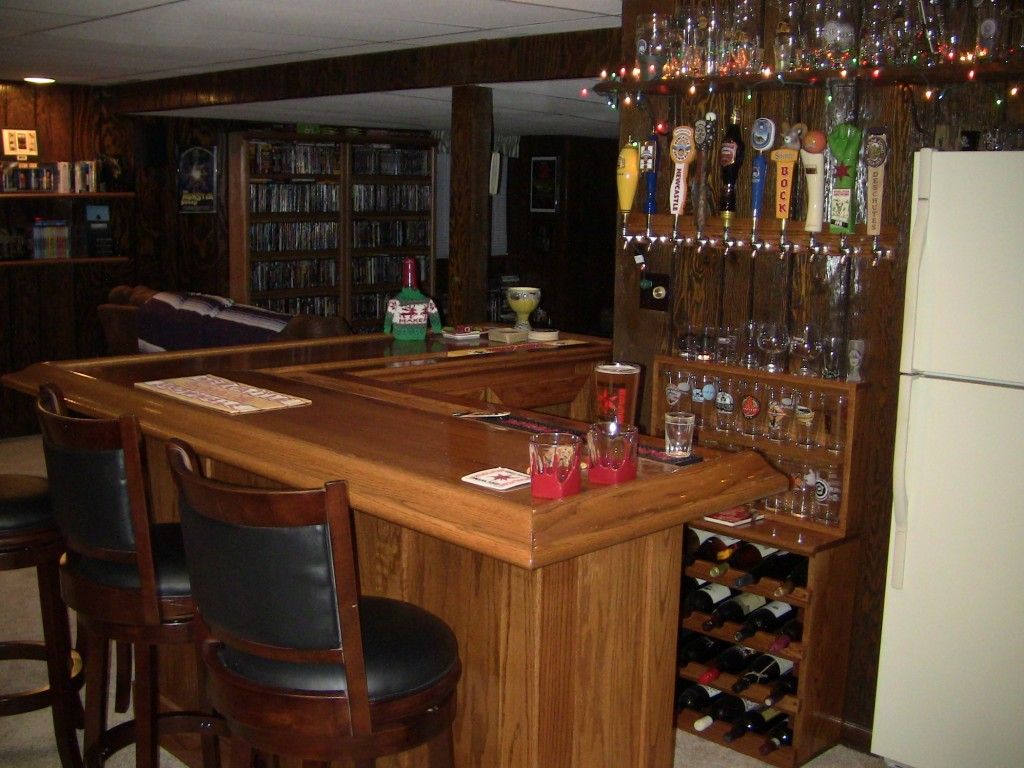 Plus, homeowners with an appealing place for cocktails in the comfort of their own home have less incentive to drive to the local pub the next time they want to wet their whistle. Are you ready to install your own DIY basement bar? Take a look at these 12 ideas for creating a practical and well-designed space for unwinding with good friends—and a good drink.
Related: 12 Finishing Touches for Your Unfinished Basement
istockphoto.com
Cocktail Contemporary
2/14
From the double television sets to the comfortable lounge chairs, every detail of this contemporary bar screams upscale entertaining. The live-edge wood bar seats 6 people, while the glass-backed shelves exude a cool vibe.
Zillow Digs home in Las Vegas, NV
Industrial Meets Rustic
3/14
The combination of industrial and rustic details forges a unique aesthetic in this basement bar. The homeowners relied on corrugated metal siding and reclaimed wood for construction, making this an easy and affordable project to adapt for your own space.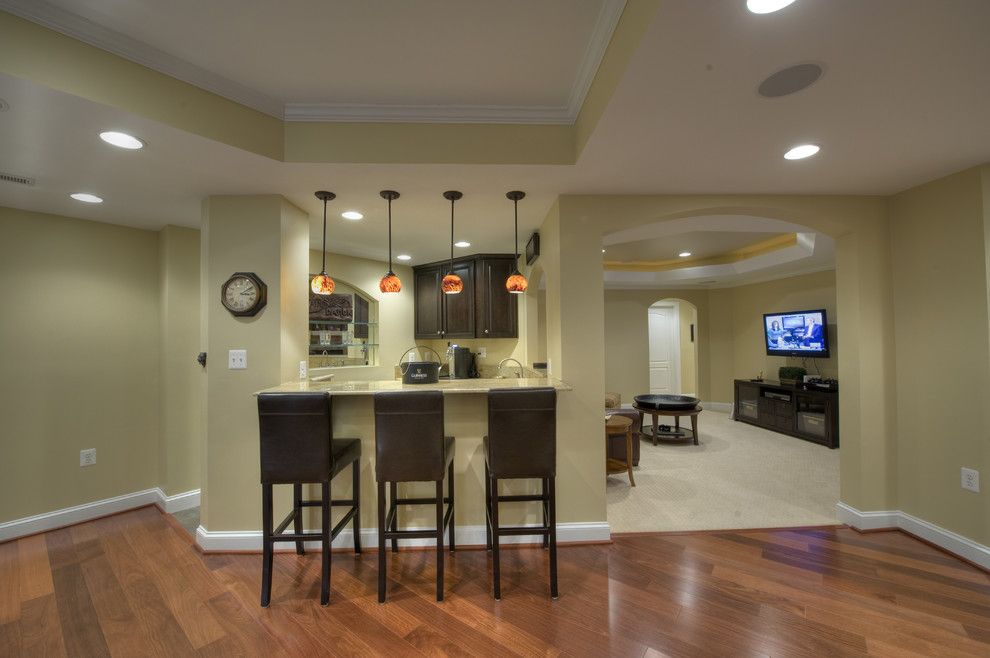
Zillow Digs home in Marshall, MI
Nightclub Vibes
4/14
Why should you have to wait in a line, deal with bouncers, and pay a cover charge when you can re-create a nightclub in your own basement? Sleek design, a pool table, and pitch-perfect mood lighting add to the luxuriously sophisticated atmosphere.
Related: 15 "Under $100" Lighting Solutions for Every Room
Zillow Digs home in Delray Beach, FL
A Statement Ceiling
5/14
This traditional and stately bar is reminiscent of an old English pub. The ornate tin ceiling and light-toned brick backsplash add visual interest, while the leather chairs and dark cabinetry epitomize cozy elegance.
Related: 11 Doable Ways to DIY a Basement Ceiling
Zillow Digs home in Branchburg, NJ
Exposed Brick
6/14
Do you want your basement bar to be the neighborhood gathering place? Then take a cue from this Craftsman-style room, which features exposed brick and warm wood tones.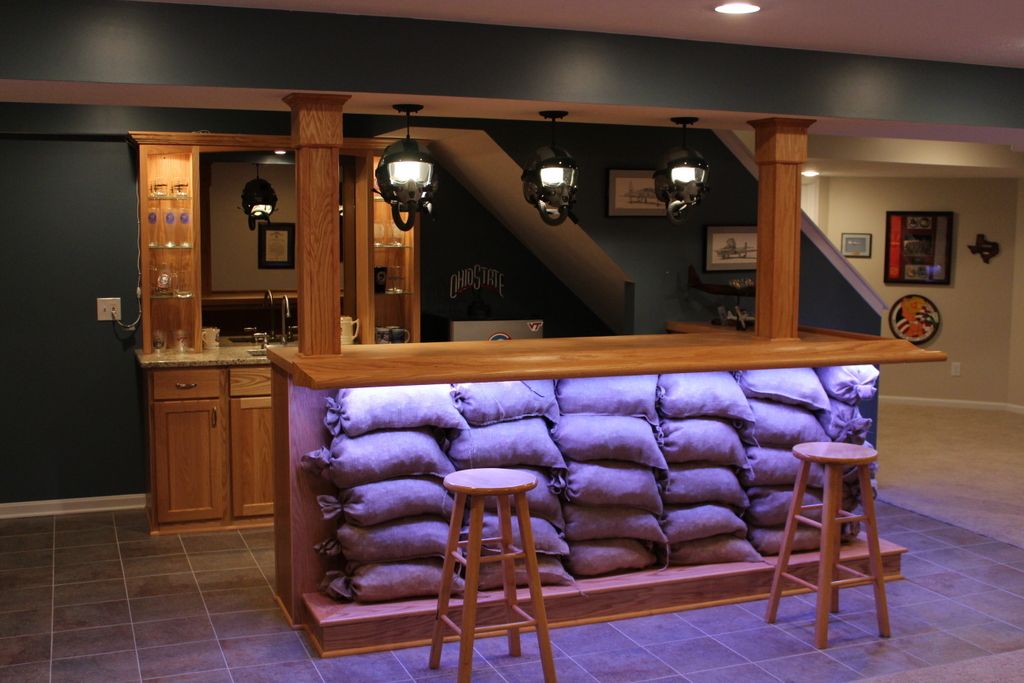 It’s the perfect place to enjoy a cold one with friends.
Related: 14 Reasons to Love Exposed Brick
Zillow Digs home in Bloomfield Hills, MI
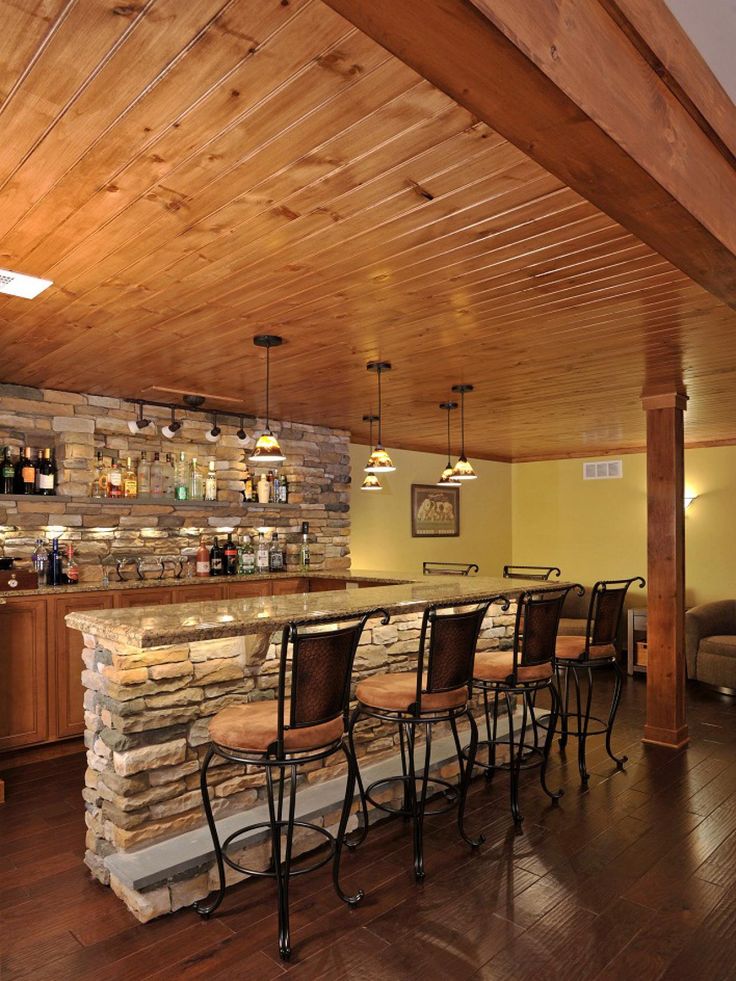
Stone Style
7/14
The rustic finish of the mammoth stone bar strikes an attractive contrast with the formal elegance of the surrounding space. To counter the neutral palette, the homeowners relied on visual variety, opting for unique pendant lights, a multicolored backsplash, and a coffered ceiling crafted from dark wood.
Related: 19 Rooms That Prove Beige Isn’t Boring
Zillow Digs home in Ankeny, IA
A Pop of Color
8/14
A pop of color can instantly liven any space. In this basement bar, a bright orange backsplash and colorful artwork provide an energetic jolt, but homeowners can achieve the same fun-loving effect in their own basement bar with practically any bold color.
Related: 10 Color Mistakes Everyone Makes
Zillow Digs home in Lake Oswego, OR
On the Square
9/14
With classy elegance and tasteful simplicity, this neutral-toned square bar is the perfect setting for afternoon cocktails or morning mimosas.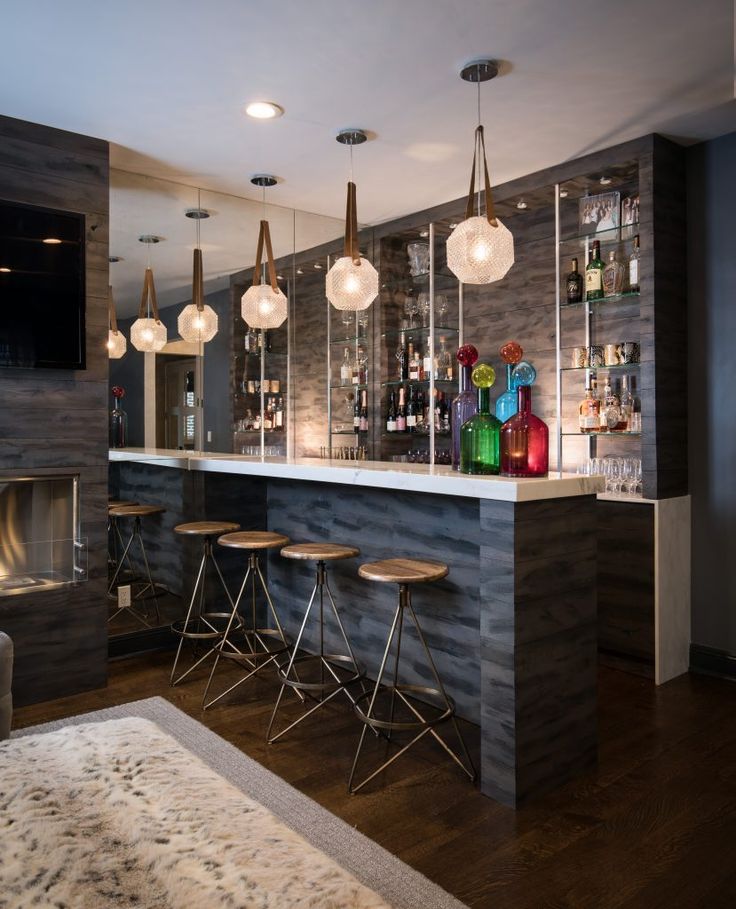 Glints of shiny chrome on the chairs and light fixtures add a touch of bling to the otherwise matte space.
Zillow Digs home in Bloomington, IL
Stunning Soapstone
10/14
If you love both the irregular speckles of granite and the veining of marble, soapstone might be the perfect compromise. Just see what character it brings to this casual basement bar! The stunning countertop material resists stains, cleans easily, and adds distinction to any interior.
Related: The 10 Best Colors for a Brighter Basement
Zillow Digs home in Atherton, CA
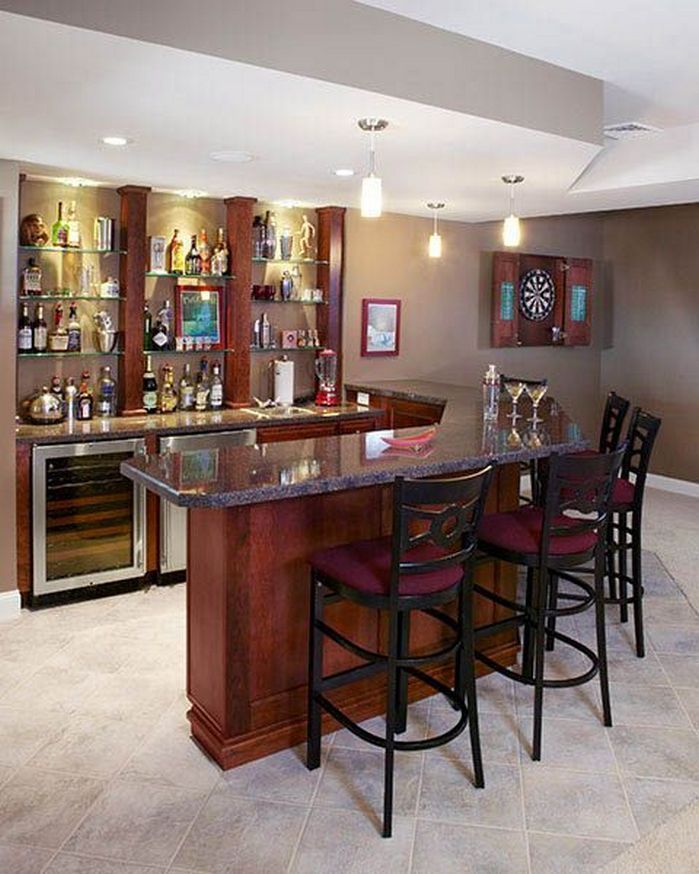
Set in Stone
11/14
Here’s another basement bar that mixes the rustic texture of stone with the traditional look of dark wood. Contemporary pendant lights and fun extras like a dart board and framed jersey create an entertaining hot spot.
Zillow Digs home in Reston, VA
Classy Chrome
12/14
To modernize their basement bar, these homeowners opted for a shiny chrome subway tile backsplash instead of the classic white option.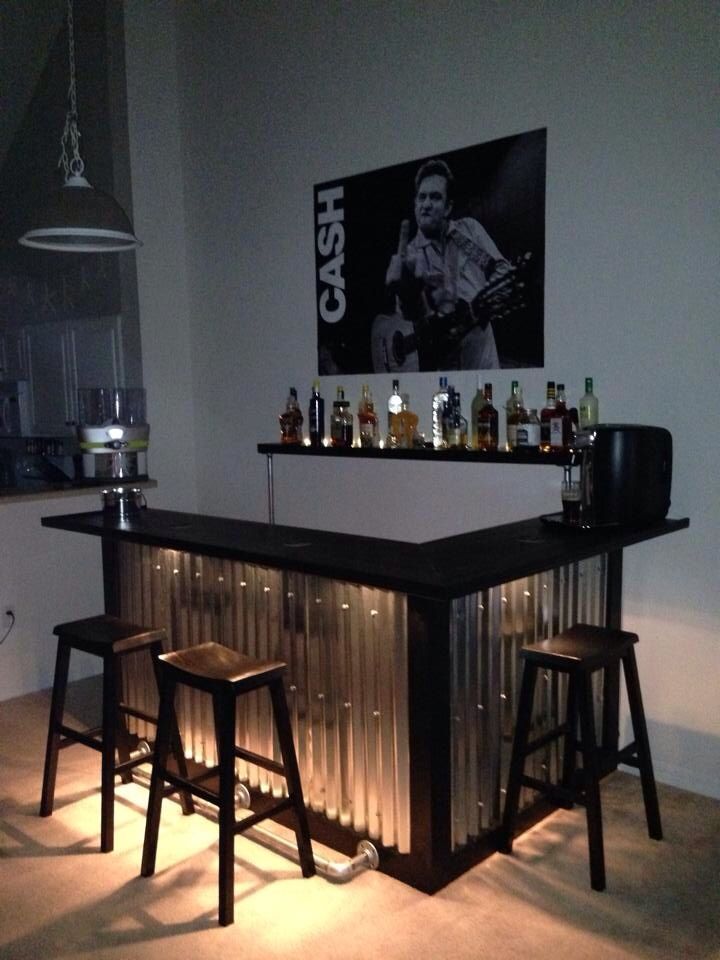 Blue pendant lights, sinuous bar stools, and a glass-door fridge distinguish an otherwise simple space.
Related: 16 New Reasons to Love Subway Tile
Zillow Digs home in Urbandale, IA
Futuristic Finishes
13/14
Purple walls, brushed-metal surfaces, and angular fixtures transform this basement bar into a futuristic getaway. In these space-age surroundings, a gathering of intergalactic travelers would feel as at home as a convivial group of friends.
Zillow Digs home in Las Vegas, NV
Cheers to That!
14/14
These stylish home bars are something worth celebrating—and maybe even emulating in your home.
bobvila.com
Don't Miss!
If you have the money to hire a handyman for every household woe, go ahead. But if you want to hang on to your cash and exercise some self-sufficiency, check out these clever products that solve a million and one little problems around the house.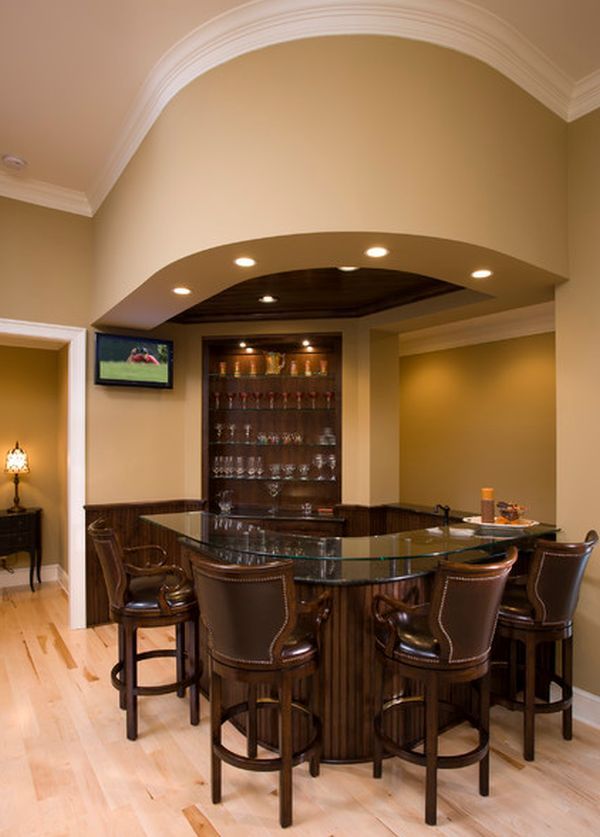 Go now!
Basement Bar - 20 Photos of Design Ideas
What is the best thing to do in your basement? It is a quiet place with good insulation. So if you don't need it for anything else, like a home office or warehouse, then turning your basement into a bar is a worthy choice. Remodeling will be simple and fast.
It is useful to have a lot of shelves that are suitable for storage and display.
First of all, decide where the bar will be.
It should be located somewhere in the center to become the focal point of the room, or against one of the walls. Purchase bar stools and this part is already completed.
But you need more than just a bar and chairs, don't you? You also need to arrange the surrounding space. And there are several options for such a case.
You might want to have a TV here.
Since this will be an entertainment area, a pool table might be a good idea.
Many different designs and shapes can be used here, depending on the type of room.
Traditional country style is a good approach if you are also planning a wine cellar in the area.
Make sure you include a lot of storage space in the overall layout.
Save space with a compact bar with built-in cooler and cabinets.
Since there will be no natural light, use light colors and bright decor.
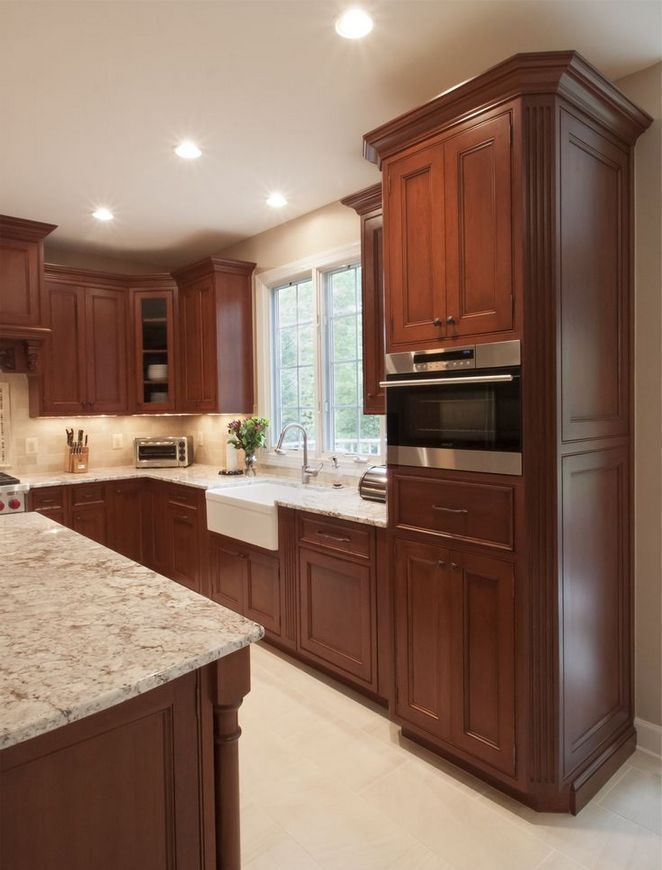
Make it with the kitchen, but keep it a little simpler than the main one.
Soft lines and rounded edges can define the design of a staircase.
Built-in furniture is always practical, especially in our case.
Stone walls and furniture painted in dark color balance each other.
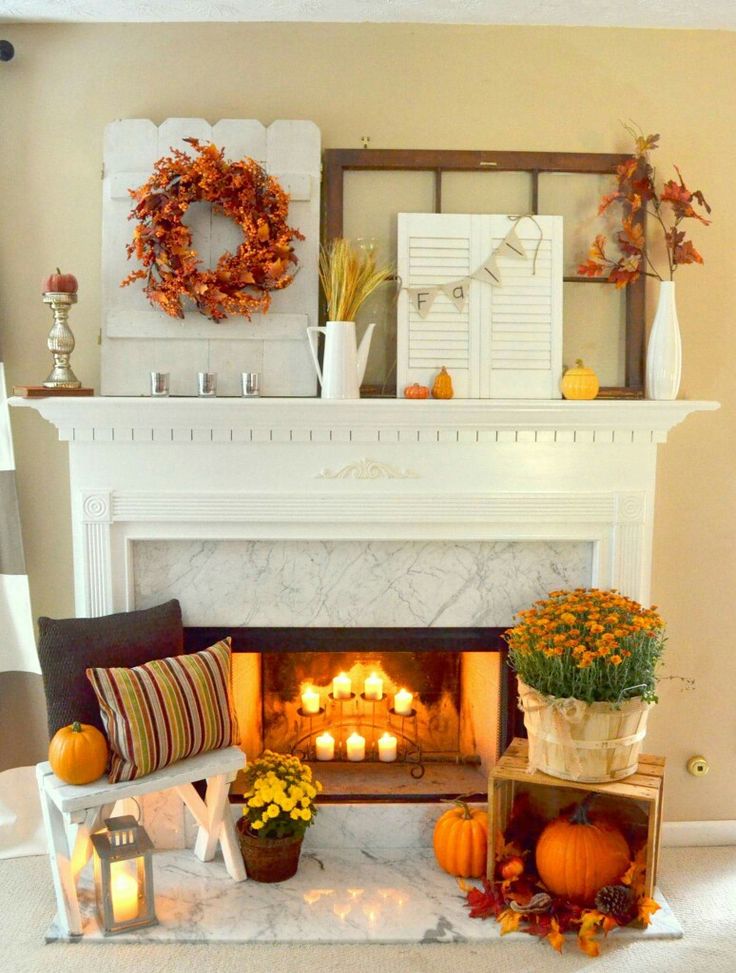
Don't forget to add your personal touch to the decor.
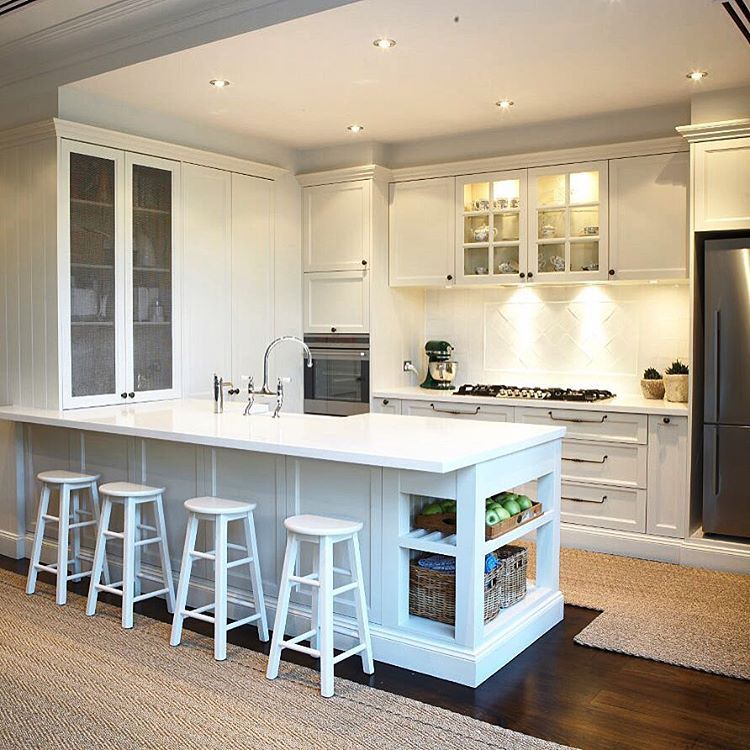
Multifunctional design
For example, you could design the bar as a kitchen island with drawers and storage. To make it look professional, you will also need a sink and shelving for bottles and glasses.
Make the space inviting with lots of wood.
By turning your basement into a bar, you can save a lot of space downstairs.
A sink and refrigerator will certainly come in handy here.
Turn your basement into a cozy and quiet retreat.
Try to make the area attractive and comfortable by using the right colors.
If there is space, you can create a seating area.
It is especially beautiful when the staircase connecting the top and bottom matches the interior.
Of course, you can go one step further and turn the basement into a wine cellar with a bar and seating area. Another interesting idea is to convert this place into a home theater or media center, again with a bar.
Categories: Basement ImprovementPlaces: Bar Counter • Wood • Stone • Brickwork • Staircase • Countertop
You will also like:
6 years ago
6 years ago
6 years ago
7 years ago
7 years ago
7 years ago
How to equip a stylish and cozy bar in the basement of a house
How to equip a stylish and cozy bar in the basement of a house
Equipping your dream home, starting from the attributes of modern luxury, a pool and sunny terraces, is not easy.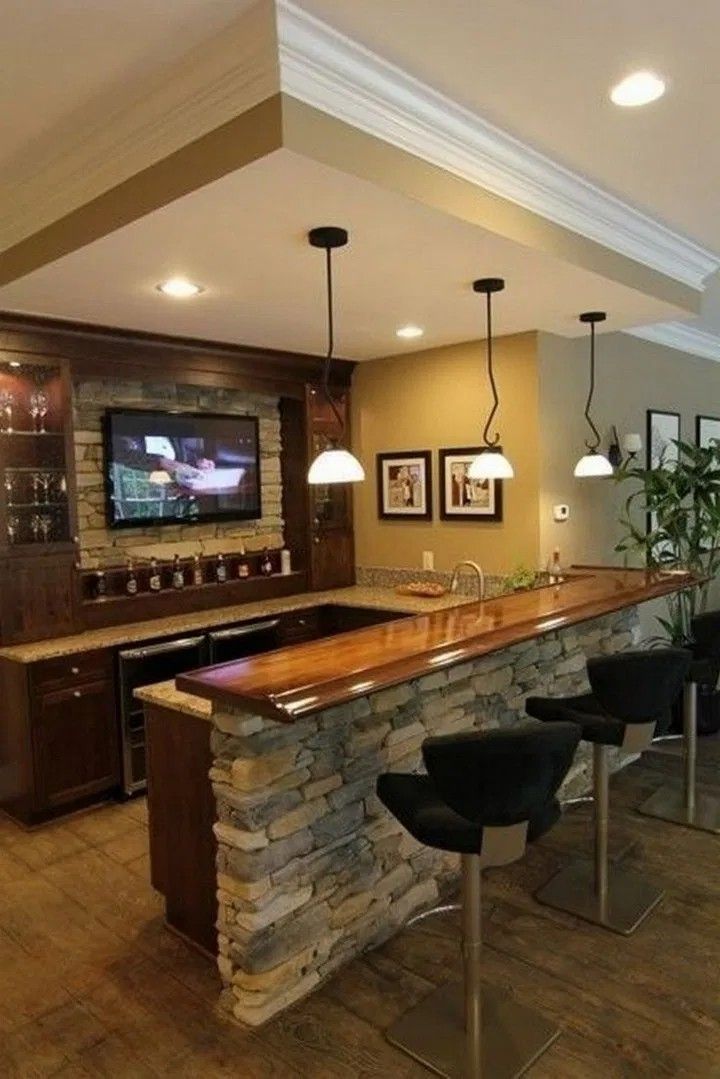 Some people like to relax by the pool in the evening in full view, others prefer to spend a weekend evening inside the house, in which case a stylish home bar in the basement will be a necessary component of such an evening. And most importantly, no one will have to return home after the party.
Home bar interior by Vonn Studio Designs
70s style bar
Basement bar with wine cellar
space. Here is an overview of several interesting ideas when homeowners find free space in the basement of their home. Some of the examples are extravagant and some are ergonomic, but all of them will make you think about the renovation of the basement.
Classic bar setting
Home bar interior by Advance Cabinetry
Home bar by Bellano Tile Company
Stylish home bar by M.J. Whelan Construction
When it comes to dining room and bar design, nostalgia plays a big role. Those with enough room in their basement to let their imagination run wild draw pictures of favorite bars they frequented when they were young. This is not a bad idea, especially if there is no opportunity to visit these places again. Traditionally, a bar is a place where the walls are lined with brick, exposed plaster, or stone, with wrought iron decor and outstanding lighting.
Stone walls in the interior of the home bar
Traditional neon signs in the bar
Rational use of space in the bar
There is not a lot of space to arrange a bar at home. There is no need to set up a pool table or slot machines, just create the right atmosphere with neon lighting and the right furniture. It does not matter what style the interior is planned in, the main thing is the atmosphere.
Time for fun and games
Bar and Lounge by Kyle Hunt & Partners
Bar with billiards by Moss Building and Design meeting with friends.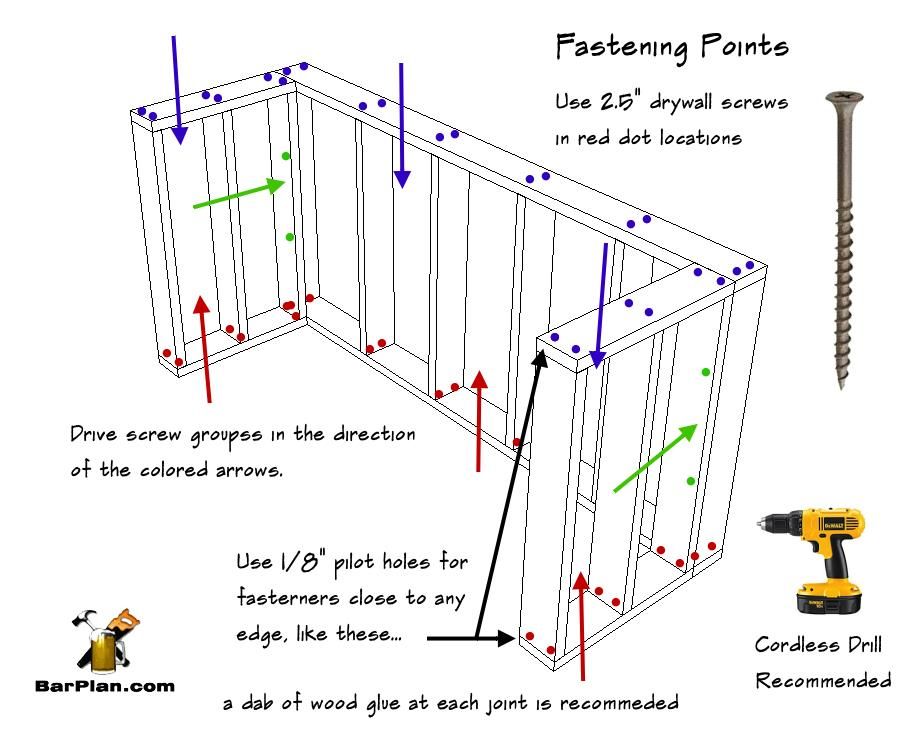 What will be the design depends on interests and opportunities. If someone likes to flip through a magazine with a glass of wine, then a soft corner in the bar is a must. Here you can place an entertainment center or a romantic corner for dinner by candlelight. If noisy parties are planned for friends or relatives, you should put a pool or table football table and some comfortable chairs.
Home bar interior by Jan Gleysteen Architects
Stylish bar with wine cellar by Scott Christopher Homes
When designing a bar decor, don't forget to choose the right color palette for this type of space, which will provide comfort and visually expand the space . You also need to take care of multi-level lighting to create the appropriate atmosphere.
Setting up a bar in a small space
Bar under the stairs
Bar interior by Board and Vellum
Color accent in home bar interior
Even the smallest space can be converted into a bar with the right planning and design solutions.