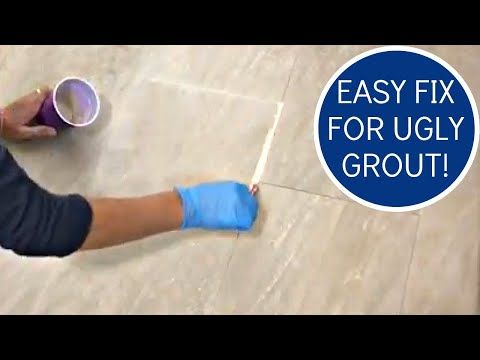
Cleaning floor grout lines
8 Super Effective Methods for Cleaning Grout
Photo: istockphoto.com
Tile is beautiful, durable, and generally easy to clean, but cleaning grout? That’s a different story. Because it’s typically light-colored and has a porous composition, grout is prone to staining. In a tiled entryway or mudroom, dirt and grime are the usual culprits but in the kitchen, spills are more likely to blame. In the bathroom, homeowners must contend with grout that’s marred by mold and mildew.
The good news is that the best way to clean grout doesn’t come with a big price tag. It’s possible to clean and restore your grout using common household products and of course, a bit of elbow grease.
Before you get started on your grout-cleaning endeavors, understand that it is best to begin with the first cleaning option on this list, which is the mildest, least harmful method. If that doesn’t work, you can work your way up to incrementally more intense, odiferous, and potentially time-consuming options on this list. If you’re in doubt about whether a particular grout cleaner is suitable for your surface, test it in a hidden spot first—under an appliance in the kitchen, say, or behind the toilet in the bathroom.
- Stiff-bristled brush
- Vinegar
- Spray bottle
- Baking soda
- Hydrogen peroxide
- Oxygen bleach
- See full list «
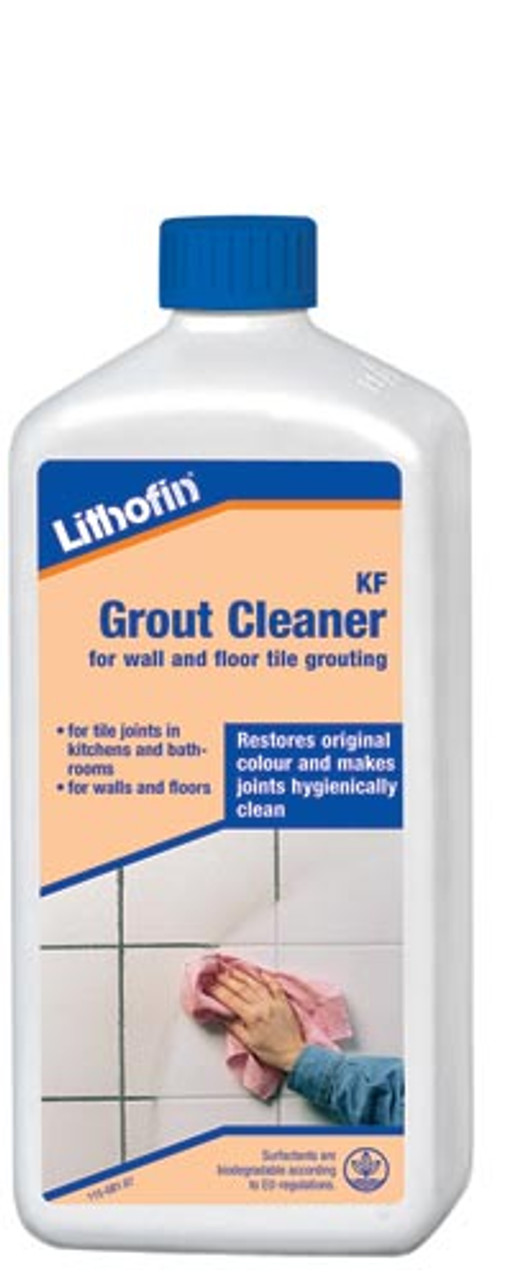
- Grout cleaner
- Chlorine bleach
- Steam mop
There are several types of grout, and most types come in multiple colors. It’s important to take both type and hue into consideration before you start gathering cleaning supplies and making a cleaning plan. The two most common types of grout these days are traditional cement grout and the newer standard, epoxy grout. These grout types can be further broken down as follows:
- Sanded grout.
 Made with cement, sanded grout has grit that you can see and feel when working with it. Tilers use sanded grout in larger joints (more than ⅛ inch wide and up to ⅝ inch or 1 inch, depending on the product). It is a solid choice for heavily trafficked floors, but it’s not the best choice for smooth, polished stone. Why? The grit might scratch these surfaces during grout application.
 - Unsanded grout. Unsanded grout is also made with cement, but it doesn’t contain grit. Tilers use unsanded grout for narrower joints, as small as 1/16 inch wide. This durable material is easier to work with and clean up than sanded grout, and it’s appropriate for both polished stones and vertical surfaces like shower walls. Unsanded grout feels stickier and looks a little smoother than sanded grout.
- Epoxy grout. This type of grout holds up better to water stains and tends to be less vulnerable to shrinking or sagging than cement grouts. Epoxy grout will absorb up to 50 times less water than cement grout, and it’s stronger.
 It works well in harsh environments, such as on kitchen backsplashes and in shower surrounds. It is also easier to clean and more likely to return to its original color than cement grouts, which is a big plus if you’re tiling with white or another light grout color. Epoxy grout is also less prone to cracking. On the downside, however, it’s more expensive than cement grout and takes longer to apply.
Some types of grout are precolored and are as a result better able to resist stains and fading. There are also grout formulations that add polymers to provide helpful features such as moisture and mildew resistance. Finally, as you’re figuring out how best to clean your grout, it’s important to know whether the grout has been sealed, or possibly needs resealing. This might affect both how well the grout holds up and what solutions you can use to clean it.
istockphoto.com
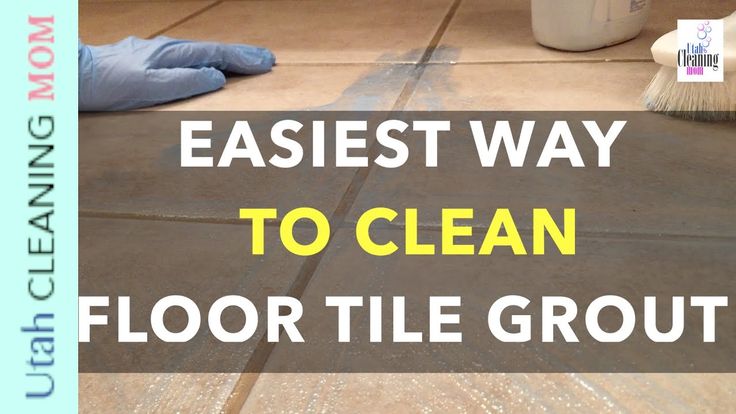
1. Scrub dirty grout using warm water and a medium-bristle brush.If you don’t already have a grout scrubber, most home centers and hardware stores carry a number of products that are specifically designed for the purpose of cleaning tile grout.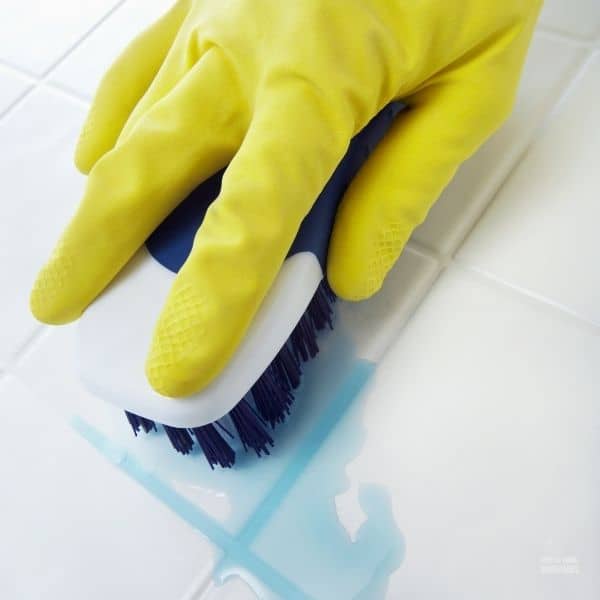 To avoid damaging the grout, opt for a medium-bristle nylon brush, not a hard steel one. Simply spray warm water on the grout lines and scrub in a circular motion, then let it dry. Don’t use too much water or let it sit on the grout for too long. Remember: Porous cement grouts absorb water, which could lead to mildew.
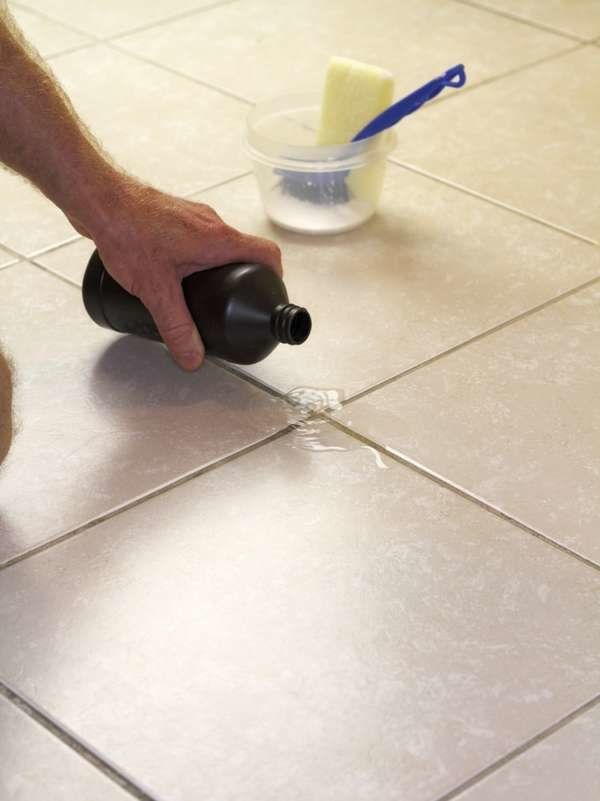
If you know your grout has been sealed but it has accumulated heavy dirt or mild stains, turn to vinegar, that trusty old household staple. Fill a spray bottle with a half-and-half solution of vinegar and warm water. Spray the mixture on the grout, let it stand for 5 minutes, then scrub the surface with a stiff brush. Avoid using vinegar on unsealed grout.
3. Apply a baking soda paste and then spray with vinegar.Cleaning grout with baking soda will bring even more power to the party. Here’s what to do: Cover grout lines with a paste of baking soda and water, then spray on the vinegar solution listed above (remember, only apply vinegar if the grout has been sealed).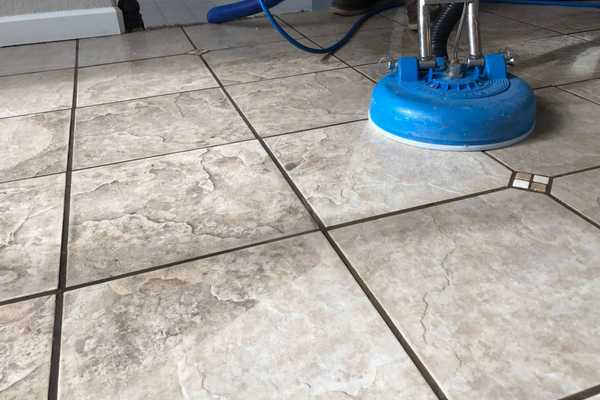 Once the mixture stops foaming, scrub with a brush, rinse with plain water, and wipe dry. If the grout is unsealed or needs resealing, apply just the baking soda solution and scrub carefully.
istockphoto.com
4. Pour on some hydrogen peroxide.Moderate stains may require you to use hydrogen peroxide, which is available in most drug stores. You can use the product straight or as part of a homemade grout-cleaning paste of baking soda and hydrogen peroxide. This mixture is typically safe for both sealed and unsealed grout.
5. Apply oxygen bleach and let it stand for up to 15 minutes.For tougher stains on really grimy white grout, use oxygen bleach as a grout cleaner. You’ll find this cleanser is most often sold in powdered form; bestselling brands include OxiClean and Biokleen Oxygen Bleach Plus.
Before using oxygen bleach to clean grout, make sure the room is well ventilated, and then carefully read and follow the manufacturer’s directions for application. Let the oxygen bleach solution soak in for 10 or 15 minutes before rinsing. Always rinse with clean water and then wipe the area dry so that the dirt doesn’t resettle into the grout lines.
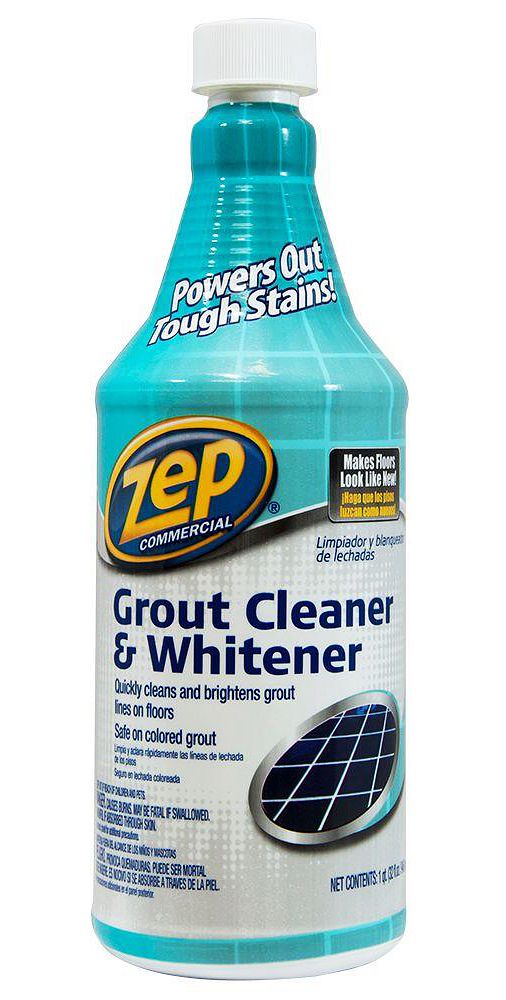
Applying one of the best grout cleaners on the market could make quick work of removing mold and mildew and restoring bright white grout lines. These products work in one of two ways: (1) spray and wipe, or (2) scour with a brush. Spray-on products claim to work without scrubbing. Though they save time and energy, they may contain harsher acids, solvents, or chlorine bleach.
Scouring with a soft brush and cleaner does require a little work, but this method can be especially effective on floors and heavily soiled grout. Before you begin using one of these products, read the active ingredients carefully, and heed the instructions—particularly the safety precautions.
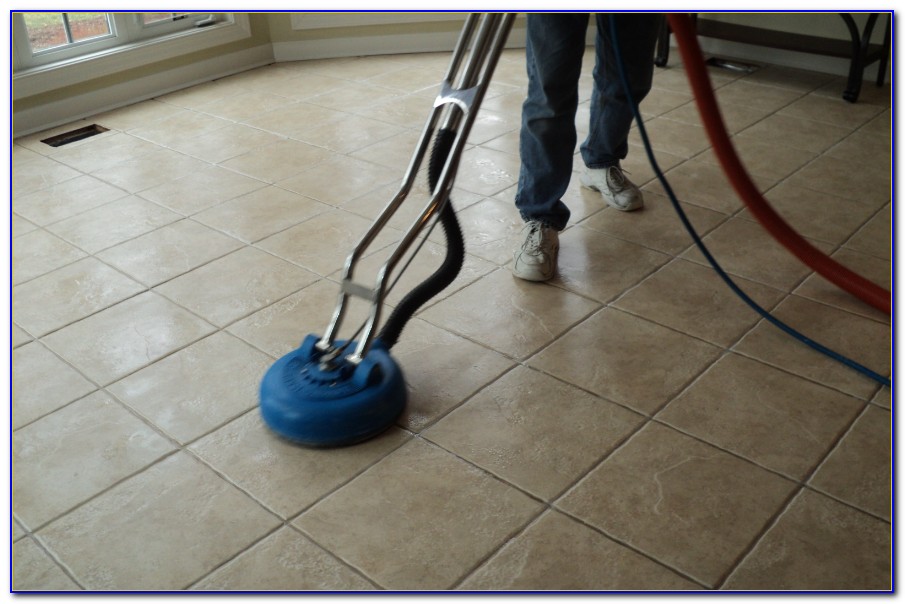
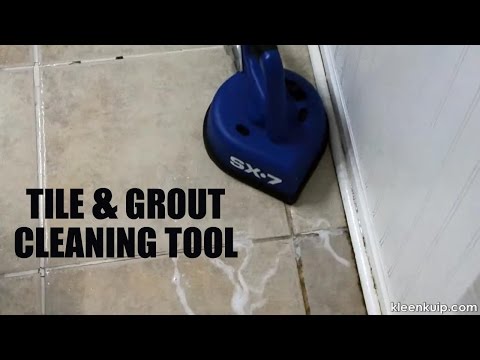
7. Steam-clean the worst of grout stains.The best steam mops are effective and environmentally friendly tools for cleaning grout—or, for that matter, many hard surfaces throughout the house. Bissell, Oreck, and Hoover all make steam cleaners for residential use.
istockphoto.com
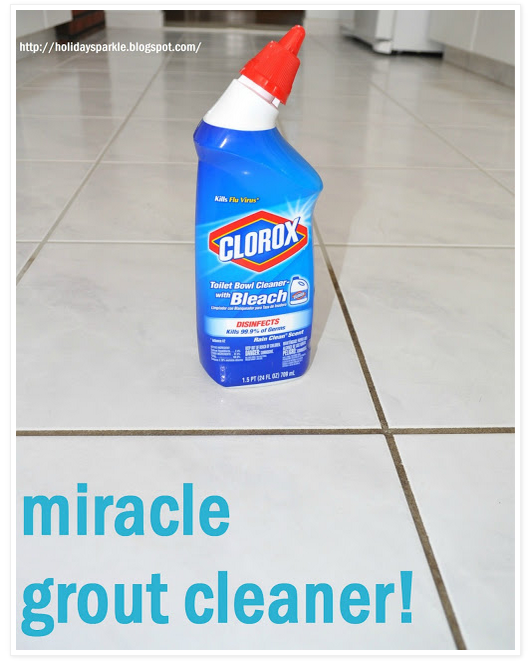
8. Use chlorine bleach sparingly on grout.Chlorine bleach and commercial cleansers containing chlorine bleach can be used sparingly in extreme cases to clean grout. It’s not a great idea to use them as your go-to grout cleaners because long-term use of caustic cleaners will erode grout. When all else fails, however, a bleach product such as Clorox Clean-Up might be effective.
If you’ve tried any or all of the above methods before you apply chlorine bleach, be sure to rinse the surface completely before proceeding with any chlorine bleach products. This is especially true of vinegar, because traces of vinegar mixed with bleach will emit a highly toxic chlorine gas into the air.
Grout MaintenanceOnce you’re finished cleaning your grout, spray it with household vinegar or a mild grout cleaner and wipe it down once a week to keep it stain-free. Wiping grout with rubbing alcohol will also keep mold and mildew at bay. In any case, just a few spritzes and wipes a week can save you a lot of time and effort cleaning and help you preserve the attractive appearance of your tiled surfaces.
Cleaning grout begins with good prevention, including resealing the grout as needed, cleaning up kitchen spills right away, and using a mild homemade or commercial grout cleaner regularly. Once grout begins to look stained or dingy, refer to the steps above. An important reminder about how to clean grout is to start with the mildest approach because this will be the least likely to damage or discolor grout. If the grout stain persists, move on to progressively more intense methods. Always ensure adequate ventilation and wear rubber or nylon gloves when cleaning grout.
Finally, be sure to keep grout sealed and maintained according to your tiling professional’s or manufacturer’s recommendation, and avoid harsh cleansers or scrubbers if the tile and grout are prone to damage.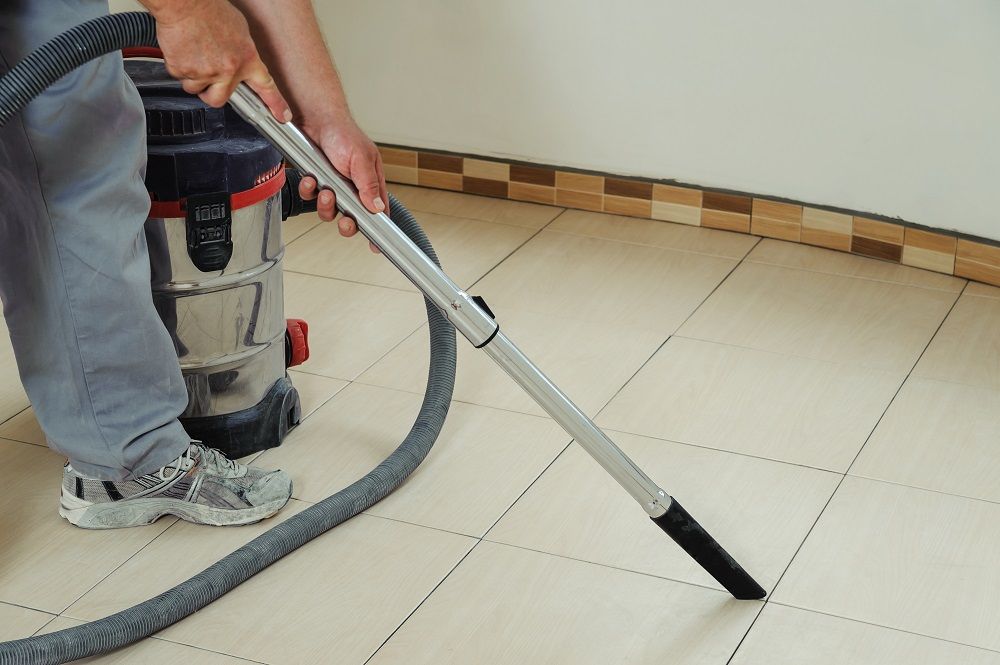 Keeping grout clean and sealed beats having to paint, repair, or regrout it.
The methods outlined above range from the easiest way to clean grout up to more powerful approaches for more stubborn stains. If you still have questions about maintaining and cleaning tile grout, read on for answers to common concerns.
Q: Does Magic Eraser work on grout?A Magic Eraser and a little warm water can remove residue from the surface of tiles and could be a simple addition to your regular grout-cleaning routine. In particular, regular wiping with a dampened Magic Eraser sponge can remove some of the gray surface on white grout. For heavier stains, you may want to choose it as your first scrubbing option instead of a brush or soft cloth, then progress to something tougher if needed.
Q: Can I use OxiClean to clean grout?Although OxiClean is called “oxygen bleach,” it is actually made of a combination of dry hydrogen peroxide and sodium carbonate, which is similar to baking soda. It is less toxic to the environment and more color-safe than bleach.
Powdered OxiClean is safe for use on grout when mixed with water to form a liquid or paste and applied with a cloth, sponge, or grout scrubber. Give the solution from 5 to 30 minutes to sit on the grout before scrubbing away and rinsing.
Q: Can you use steel wool on grout?Do not use steel wool on grout. While the abrasive pad might scrub away the stain, it could also take some of the grout along with it. Plus, steel wool can scratch the tile surrounding the grout joint. Opt instead for a soft sponge or nylon bristle brush, maybe even one mounted on a power scrubber, always starting with the least abrasive material first.
Find trusted local pros for any home project
Find Pros Now
+How To Clean Grout on Floor Tile — Pro Housekeepers
Posted on by admin
Cleaning tile floors with grout can be a tricky topic.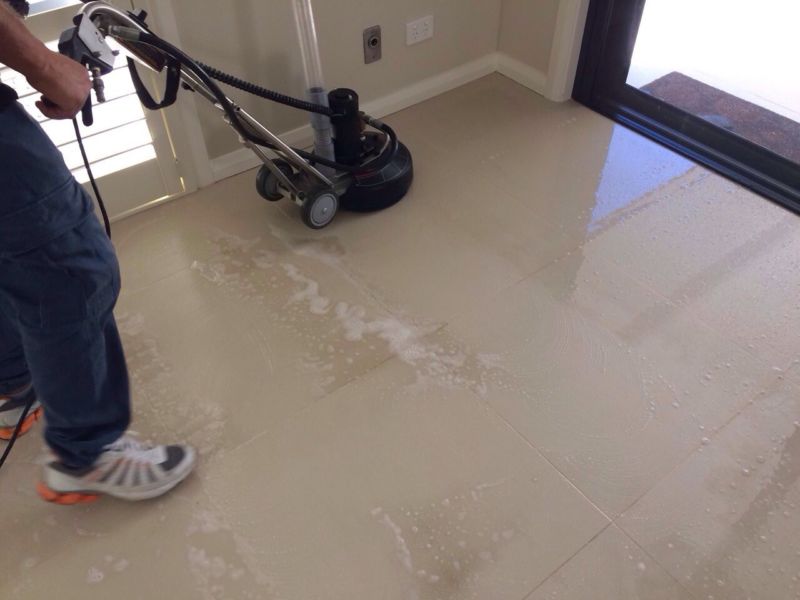 The tiles may seem to wipe clean, but grout on floor tile holds grudges. Dirt and debris cling to this material, making us scrub and scrub while scratching our heads. The trick is knowing how to clean grout off the floor tiles without damaging it or driving yourself crazy.
There is no specific method, so instead, we can talk about many different ways to find solutions that leave us with a sparkling clean tile and its grout.
How to clean grout on floor tile
The first step in understanding how to clean grout off floor tile is to understand the different types of grout. Many types of grout require slightly different methods because they react differently to various chemicals or cleaning products.
- Sanded Grout: this type of grout is gritty and usually used for larger sections like ⅛ to 1-inch fillings. It’s a cement filling that is commonly used for high-trafficked floors.
- Unsanded Grout: is also a cement filling but is usually used for more narrow types of jobs.
 Typically trying to clean this grout is easier than sanded.
 - Epoxy Grout – this grout can be found in areas that may be exposed to water. Potentially mudrooms, bathrooms, or outdoor rooms. Arguably this is the easiest grout to clean.
We can look at how to clean grout with a few different methods based on some of these products.
How to clean floor grout without scrubbing
Because floor grout can sometimes disintegrate when it’s gritty by scrubbing, it’s better to avoid this process at times. This method requires ⅓ cup of baking soda and ¼ cup of hydrogen peroxide. Next, add a teaspoon of liquid dish soap.
The secret is just applying this to grout. Let this sit for five to ten minutes without doing anything to it. Then, using a towel or sponge, wipe off gently and let the grout dry on its own. Most people are inclined to try and scrub the material while it’s on, but this is not necessary.
Baking soda helps remove tough dirt, while hydrogen peroxide is a safer alternative to use than bleach on your floors.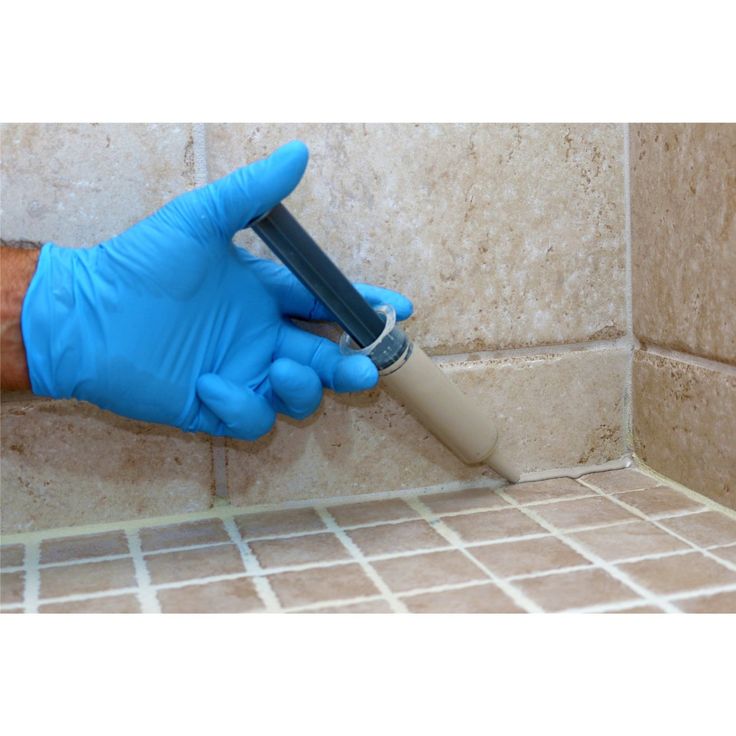
How do professionals clean grout?
Not everyone can hire a professional cleaning service to wipe away the dirt. But that doesn’t mean that we don’t want our homes to look just as clean. So how do professionals clean grout? If they are not using the formula above, you may be surprised to read what they do next.
Materials Used:
- Vinegar
- Water
- Gentle brush (toothbrush)
- Spray bottle
That’s it! Cleaning grout can be simple, and by using a 1:1 ratio of vinegar to the water, professional cleaners often just spray it on and use a gentle toothbrush to loosen the dirt. They may also use a non-shedding lint-free cloth to wipe up some of the solutions but not to scrub away the dirt. It’s important not to use excessive solution, especially with non-water resistant grout.
How to clean grout without damaging it
As mentioned before, there are different types of grouts. Some are more susceptible to damage because the grittier it is, the more friction it will encounter when you scrub it. Ultimately it will wear away and cause the cement to come up.
The best way to avoid damage is to revert to the non-scrubbing method. This is your bleach alternative by using a combination of hydrogen peroxide and baking soda. However, that doesn’t mean we can’t implement a few more tips.
- Do not use high friction brushes, sandpapers, or other materials to try and scrub away the dirt. Especially no scrapers!
- Stick to homemade cleaners, as many store-bought products have harsh chemicals that can break up your grout and damage your tiles.
- Always dab with a sturdy cloth when working with too much liquid on the grout. Even with water-resistant grout, it’s best to clean up excess cleaner.
With these simple tips, you can have clean grout and undamaged surfaces. Ultimately, it’s always better just to proceed with caution. if you did damage your grout, you would have to spend more time replacing it.
Now, we have shared a few different cleaners, but those aren’t the only options. In addition, there are a few different tricks of the trade that you can experiment with to see which secret sauce works best for you!
Whitening Trick
If you want white grout, check out this wild ingredient list that really does the trick.
- Mix one teaspoon of cream of tartar sauce with a squirt of lemon juice.
- This won’t create a lot of mix, but it’s best used as a spot treatment.
- Apply to specific areas of dirt and spread accordingly. Always make sure it’s a runny toothpaste texture.
- Leave on for a few minutes and wipe it up gently with a slightly damp cloth.
If you are not into being a scientist in the kitchen, you can always use Castle Dish Soap. It’s plant-based, so there is nothing to worry about regarding harsh ingredients.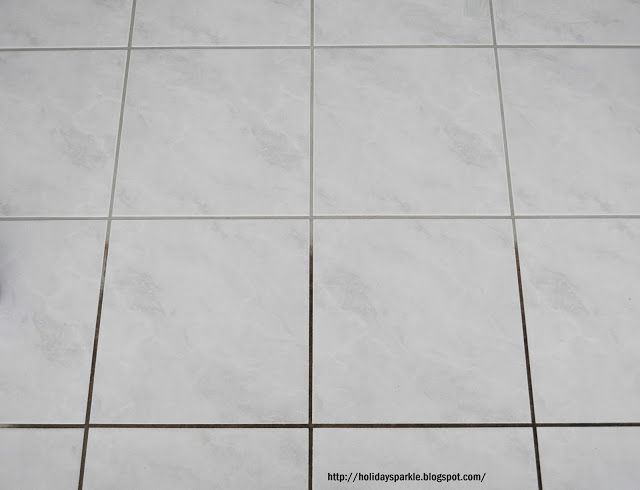
Grout cleaning hacks
Just because we have talked about some of the best ways to clean your grout doesn’t mean we are out of cleaning hacks. Cleaning grout is one of those things that really looks simple, but suddenly you find yourself digging a crater into your kitchen floor. It can be frustrating to try all these different things and feel like your floor is no cleaner. The whitening method above is one of the best hacks, but we have a few more.
- Try our Epsom salt dish soap recipe. It’s ½ cup of baking soda, 1 cup of Epsom salts, and one and ¼ cup of liquid dish soap! Mix together and use it as a solution to lightly scrub the area.
- Using a stiff brush for grouts that don’t disintegrate quickly can be an excellent way to get rid of the collected dirt. Ultimately these are grouts that are not brand new but relatively new in flooring. The older a floor is, the more likely it has wear and tear.
- The best idea is to avoid using paper towels, toilet paper, or any disintegrated cloth when wet.
 Instead, use a sturdy microfiber lint-free cloth and can get into the creases without ease. You can even line a scraper with one to protect the grout from being dug up.
Cleaning grout with bleach
Ok, so we haven’t mentioned any use of bleach yet, and you are likely wondering whether cleaning grout with bleach is off the table. The answer is no, not entirely. One of the ideas behind not using bleach is sometimes the potential impact the harsh chemicals can have or just the fact that some people don’t like using bleach in their household at all.
To do this properly, you want to follow the next steps:
- Take three tablespoons of powdered bleach (Oxiclean works) and mix with warm water in a bucket.
- We always suggest working with gloves to keep your hands well protected and never touch your face or eyes.
- Fill the grout lines with the solution and let it sit for 10 to 15 minutes to really get all the dirt up.

- Rinse your grout lines well with water and a cloth or sponge to get the bleach up. This is especially important for pet owners.
How to clean grout on tile floors with hydrogen peroxide
Hydrogen peroxide and baking soda produce an oxygenated bleach and also provide a safer, homemade option. It’s also one of the most highly effective methods of cleaning grout. This is because it’s a natural neutral cleaner.
You can clean the floors by applying the paste to grout and leaving for 10-15 minutes before wiping it up.
Cleaning grout with baking soda
Baking soda can go in a number of the recipes we listed above to find the right kind of cleaning solution or paste. Baking soda is a little more aggressive in terms of getting dirt up from porous surfaces like grout. This would be one of the solutions that we would recommend not scrubbing if possible because it can possibly cause damage.
A Madness of Methods
It can be tricky when it comes to getting the dirty spots up between the tiles.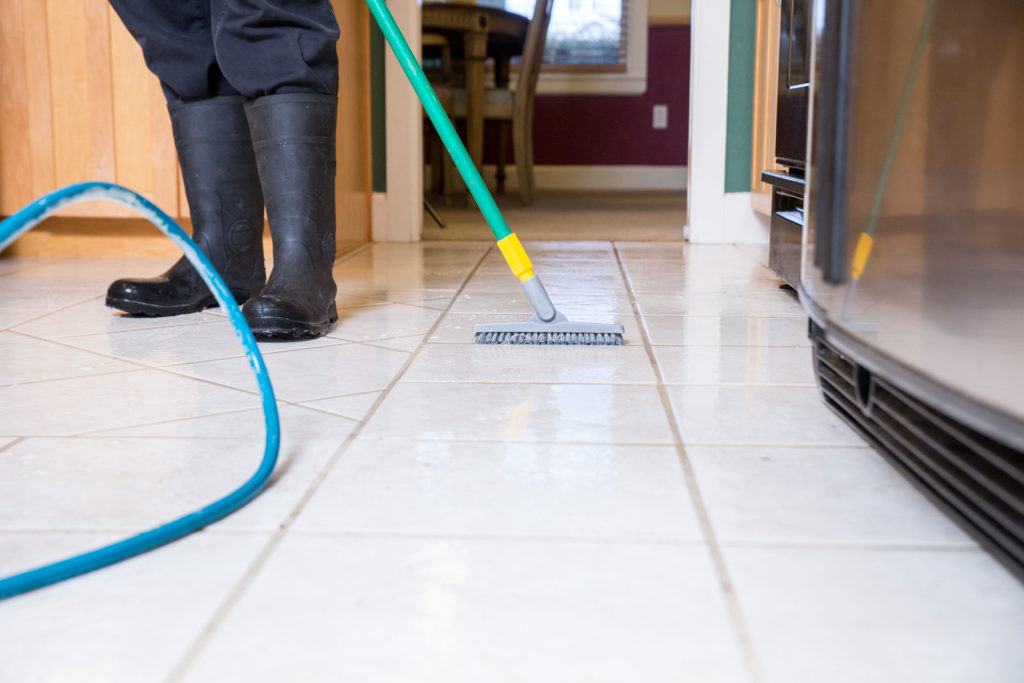 Grout is a gritty kind of material that often makes for a more difficult clean-up. Some cleaning products can also be temperamental, using homemade options is never a bad idea. That’s why we have given many alternatives starting from more to less aggressive.
When it comes to the actual application and cleaning, it’s always better to err on the side of caution and try not to scrub. Scrubbing with the wrong products can cause the grout to loosen and come up.
It can take a few tries to find the best method. We encourage you to try a few of the homemade ingredients listed above.
This entry was posted in Cleaning Tips & More. Bookmark the permalink.How to clean the seams between tiles on the floor in the bathroom and in the kitchen
Tiles are the most common and popular type of cladding. It has excellent performance characteristics, resistance to temperature extremes and high humidity. It is easy to take care of the tile, it is easily cleaned of dirt, but it also has a weak point - the place of joints between the elements.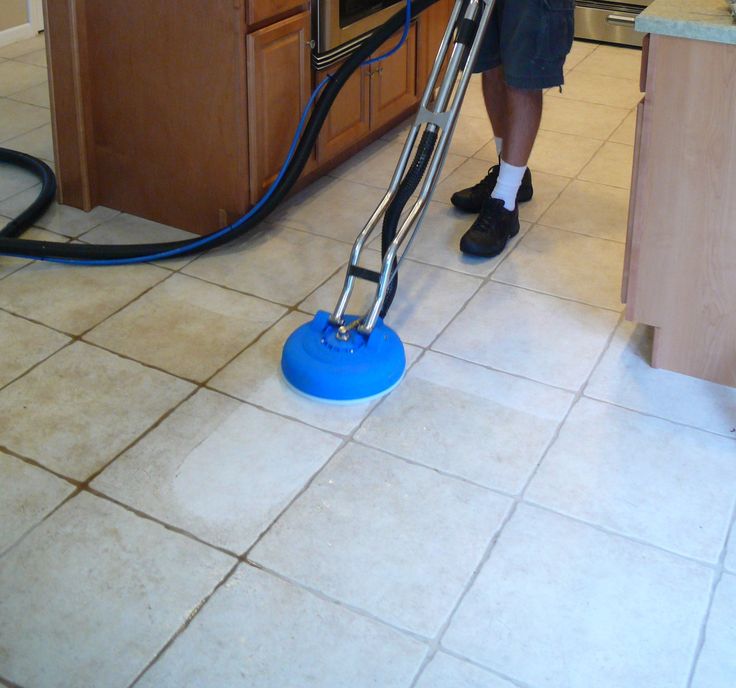 The joints are filled with grout, which has a porous structure and quickly absorbs dirt.
Even by constantly cleaning the tiles, it is impossible to prevent darkening of the joints, especially on the floor. Moisture is absorbed into the pores of the fugue, and over time, fungi and mold may appear and develop. The cladding takes on an untidy appearance. In this article, we will give recommendations for cleaning tile joints, consider the most used methods to combat pollution of various types and complexity.
Why tile joints get dirty
The smooth surface of the tiles does not lose its attractiveness for a long time. But the uniform tone of white or colored seams becomes gray and ugly. To understand how to fix the situation, you need to know the reasons for the color change.
Common factors that cause the grout to darken:
- The technology of the cladding process was not followed exactly. The grout joints were poorly cleaned and finished.
- Poor quality reveal was used.
- The cladding was not maintained regularly. The seams were filled with dust and dirt, in the kitchen - greasy coating, soot from the stove or cigarette smoke. Gradually, pollutants penetrated into the structure of the material.
- Negligence in the use of detergents, the residues of which reacted with the grout components.
- Temperature fluctuations, high humidity, insufficient ventilation causing the destruction of the grout and the appearance of fungus.
- Expiration date of the reveal, darkening from long time use.
Danger of accumulation of dirt
Soap deposits, lime dust, rust, fungus accumulate in the recesses of the filled joints. If you do not follow the destruction of the grout, dirt and moisture will begin to penetrate the structure of the tile. The tile will be saturated with mold pores. The untidiness of the interior is an aesthetic problem.
Cleaning should be carried out as often as possible so as not to trigger the situation. Dust, rust and mold spores not only destroy tiles, but also harm people in the room. They can cause allergic, asthmatic symptoms, headaches, and serious respiratory problems.
What tools and materials will be required
The choice of technology for cleaning joints depends on the degree and nature of contamination, the location of the cladding. If only the surface layer of the fugue is contaminated, you can use household chemicals. With the help of a special marker or paint, it is easy to return the grout to its original color.
A good effect is obtained by rubbing and degreasing the joints, followed by applying a fresh layer of grout on top. With the destruction of the material at the joints, the presence of mold will require radical measures. The grout is completely replaced by treating the seams with antiseptic compounds.
Depending on the chosen cleaning method, you will have to use:
- hard and soft sponges;
- old toothbrush;
- protective gloves;
- rags, cloth napkin;
- floor cloth;
- detergent container;
- spray gun.
Acid or base: what to choose
Before cleaning, the type of contamination must be determined. Grease stains often appear in the kitchen. Soap - in the kitchen sink area, next to the sink and shower in the bathroom. Lime accumulates next to plumbing fixtures. Rust appears in the places of fastening of metal structures, skirting boards. The corners of bathrooms, often at the junction of the wall with the ceiling, are prone to mold.
To remove grease and soap stains, you need alkaline cleansers. Acid preparations will help remove rust, lime, mold. Using professional household chemicals for bleaching grout (Master Good, Unicum, Mellerud), after cleaning, treat the seams with a water-repellent impregnation (water repellent) such as Litolast. The materials are easy to use, safe if you follow the manufacturer's recommendations.
Folk remedies for cleaning joints
Often the only drawback of household chemicals is their high price. Seams need cleaning 2-3 times per season.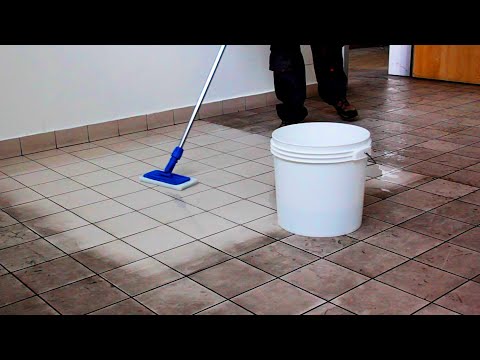 If the case is not started, folk methods help out. For effective cleaning use:
- Citric acid/lemon juice/vinegar (9%). Dissolve 100 g of acid (100 ml of juice/vinegar) in a liter of warm water. The solution is applied with a damp sponge to contaminated areas. After 50-60 minutes, it is washed off with cold water. The seams are wiped with a soft cloth and allowed to dry well.
- Ammonium chloride. For a liter of warm water, you need two tablespoons of ammonia. Using a spray gun, the liquid is applied to the seams, washed off after half an hour. Work is carried out with maximum ventilation.
- Hydrogen peroxide. The antiseptic is diluted in water 1: 2 and applied 3-4 times without rinsing. The drug will return the color of the grout with weak contamination and will become an obstacle to the development of microorganisms.
- Soda, finely ground salt. Moisten the joints with water, wipe with a damp clean toothbrush. Then the brush is lowered into a container with salt or soda, the seams are cleaned.
 Rinse well.
 - Mustard powder. Gradually adding water to the powder, bring it to a state of very thick sour cream. Apply to the seams, leave for 15-20 minutes. Wash away.
- Laundry soap. There are two ways. The first is to lather with a damp brush and wipe the joints. The second is to grate the soap on a fine grater, dissolve in warm water and apply with a sponge on the tiles and seams for 40-45 minutes.
Rinse very thoroughly so that no soap remains on the grout.
Multi-ingredient home remedy recipes
Mixes of improvised ingredients are highly effective. Components for their manufacture will always be found in the home arsenal.
Acid-base solution. Pay off in 3 tbsp. 9% vinegar 150 g baking soda. Add 100 ml of lemon juice and mix well with a liter of warm water. Apply to the seams for 15 minutes, rub with a hard sponge.
Acid solution. 3 tbsp combine citric acid with 50-60 ml of warm water, add a drop of dishwashing detergent.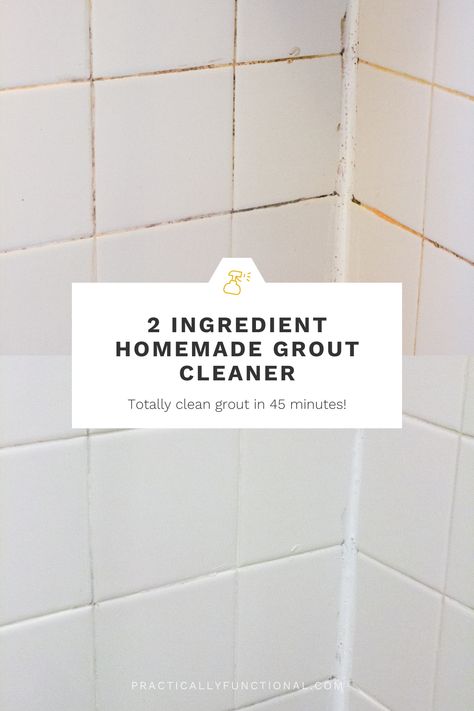 Apply the resulting slurry to areas contaminated with rust, lime, mold. Leave for 20-25 minutes. Rub with a toothbrush, rinse. You can make a liquid spray agent from 1.3 liters of water, 2 tbsp. vinegar, 3 tbsp. citric acid, 100 g of soda. Treat surfaces, leave for 20 minutes, walk with a toothbrush or hard sponge, wash, dry.
Alkaline solution to help remove grease and soap stains. Make a slurry of 150 g of baking soda and 120 ml of boiling water. Lubricate the seams for 10 minutes. Rub until white with a hard sponge. The joints between tiles of classes B, C (low chemical resistance) cannot be cleaned with this product, as the tone of the cladding may change.
Whitening agent. Combine 1 tbsp. baking soda and whitening toothpaste, add 1 tsp. citric acid and 50 ml of heated water. Spread the seams with a paste-like gruel, leave for half an hour, polish with a rag.
Mustard cleaner. Combine 1 tbsp. mustard and 1 tsp. tooth powder, juice of half a lemon, 100 g of soda, 1 liter of water.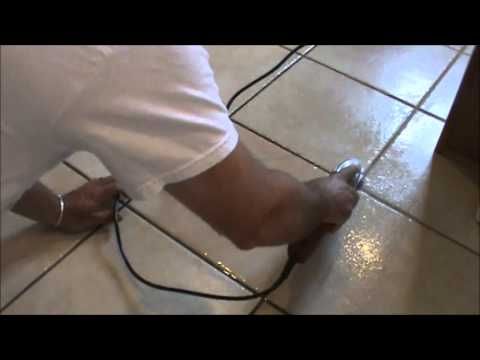 Apply to the seams with a sponge. Wash off after 30-40 minutes.
Cleaning paste that removes mold and restores the whiteness of the fugue. To prepare it, use a tablespoon of citric acid, two each - soda and vinegar, 25 ml of water. To clean the seams on the walls, connect all the components, wait for the reaction to take place. Then applied to contaminated areas, left for 20-30 minutes, washed off.
To clean floor joints, first mix 2 tbsp. soda with 2 tbsp. water, applied to the grout. Top with an acidic solution of vinegar + water in a ratio of 1: 1. After the end of the reaction, the floor is washed.
Mold remover. In two liters of water, 1 tbsp is diluted. ammonia. Using a sprayer, the seams affected by the fungus are treated. Leave on for 30 minutes and rinse well. Work is carried out with open windows and good ventilation or in a respirator.
Ready-to-use cleaners
The household chemicals market offers a variety of products that provide effective grout cleaning.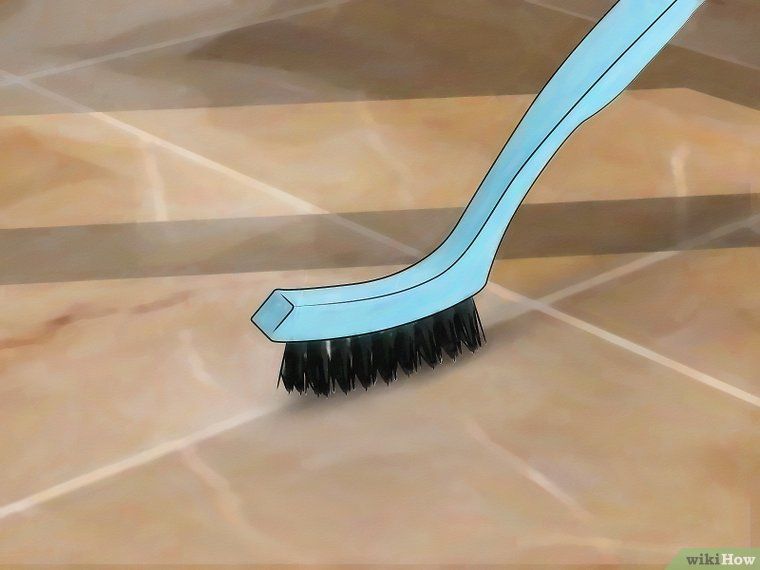 It is not recommended to use powders with abrasive particles and concentrated acid compositions. The first will leave scratches on the surfaces, the second, falling on the tile, will spoil the glossy finish of the cladding.
Before starting to work on the tiled surface, test the selected product on a small, inconspicuous area of the grout. If pollution of different types, it is better not to use a universal remedy. First you need to eliminate fatty deposits, soot, traces of lime. Mold is removed last.
Finished chemicals are divided into several groups according to their functions:
- If the grout has just begun to fade and change color, use compounds containing surfactants - Cillit, Pemolux, Fairy, Cif, Comet.
- With noticeable changes in shade, you can use oxygen bleach, which is diluted according to the instructions and applied to problem areas for half an hour. Residues are removed with a damp cloth, washed surfaces.
- For contamination aggravated by the presence of a fungus, chlorine-containing gel bleaches are used, which must be diluted with water - Domestos, Whiteness.
 Do not use these preparations for cleaning colored grout. They "eat" the color.
 - For heavy soiling, it is worth using special, more concentrated preparations. HG, Rayen, Mellerud, KiiltoClean deep cleaning products are distinguished by their radical action and economical consumption.
When using chemicals, you need to be very careful, observe safety precautions. You need to work with gloves, prevent chemicals from getting on the skin and eyes, carefully wash off the remnants of drugs from surfaces.
Alternative methods
Coated surfaces with unladen dirt can be cleaned without the use of chemicals. To return the seams of purity, you can use the steam generator. The effect is good, lasting for 3-4 months. Hot steam coming out through the steaming nozzle cleans the tile joints from dirt, dust, mold. Remaining dirt and moisture should be wiped off with a cloth.
Foamed melamine sponge removes dust and dirt from grout surfaces. It works like an ordinary eraser, moisturizing well during the cleaning process. Gradually, the sponge will wear out and require replacement.
An excellent result is obtained by coloring the seams with special markers, pencils. They are available in different thicknesses, so you need to choose a model according to the color and size of the seams. Dense grout strips must be cleaned and degreased before painting. Waterproof paint is applied with special thin brushes. This is a time-consuming operation that requires accuracy, but the result is stored for a long time.
There are various reasons for discoloration. Contaminants affect the way the grout returns to its original attractive appearance. With low and medium intensity pollution, it is appropriate to use folk methods, budgetary and effective. If there is no desire to prepare the mixtures yourself, ready-made compositions with surfactants or chlorine in the composition will come to the rescue.
Strongly neglected seams, with the presence of mold, completely darkened, are treated with radical methods, using powerful deep-cleaning preparations.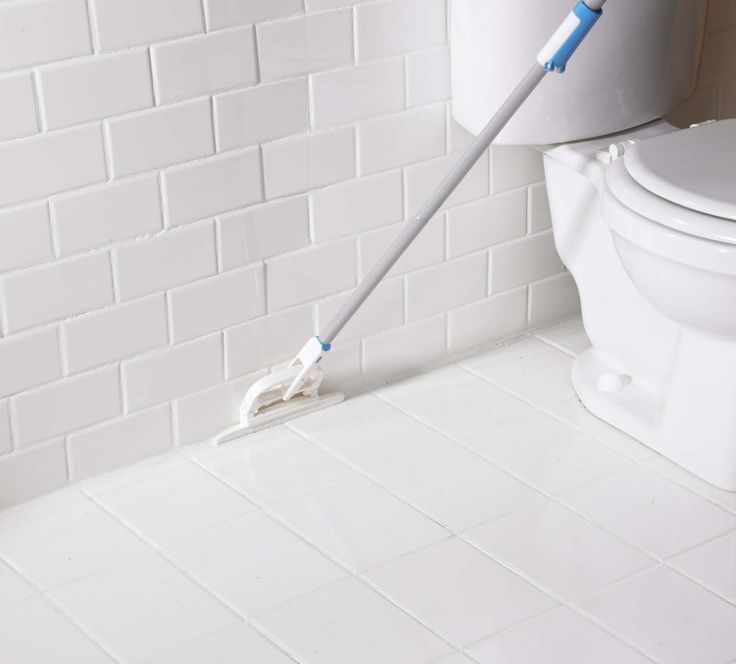 Alternative methods include cleaning with a steam generator, melamine sponge, painting with a marker or paints.
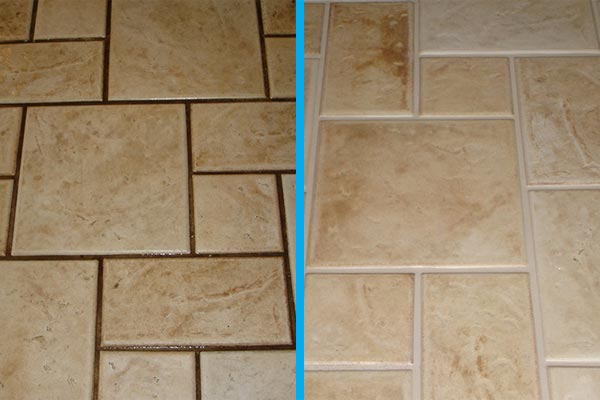
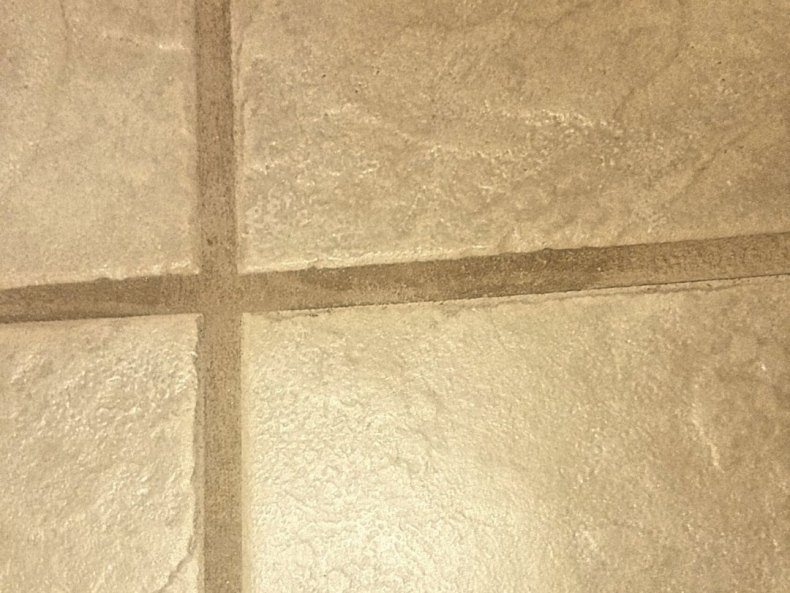
Examples of cleaning joints - before and after
How to clean the joints between tiles on the floor and what to wash off dirt with
Ceramic tiles have been used as a facing material for rooms since the time of the Persian Empire. Attractive appearance, durability, ease of maintenance of cleanliness of ceramic surfaces - this is not a complete list of the advantages of the material. However, time is inexorable and gradually dark stains of pollution appear in the sparkling beauty of the coating of walls, floors, and sometimes ceilings. Sometimes cleaning the seams between the tiles on the floor is not only difficult, but almost impossible. But only until a suitable remedy is found that allows you to scrub and wash even old dirt and grease, making the tile shine. It can be either a universal homemade recipe from the time of "our grandmothers" or a modern, innovative cleaning agent.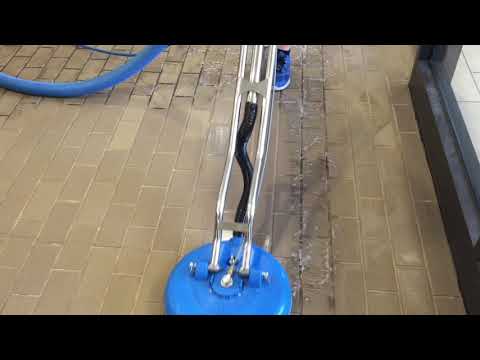
- 1 Causes of pollution and changes in the color of tile joints
- 2 How to clean the seams between the tiles on the floor
- 3 Methods of cleaning
- 3.1 Hand mechanical cleaning
- 3.2 Household chemicals
- 3.3 Steam) 9005
9 , methods, recipes - 4.1 Mixture #1 (lemon juice, soda, vinegar)
- 4.2 Mixture #2 (bleach, soda)
- 4.3 Mixture #3 (baking soda, mustard, lemon, soda, tooth powder)
- 4.4 Ammonia solution (ammonia)
- 5 Radical methods
- 6 Useful information
- 7 Protecting joints from contamination
Causes of soiling and discolouration of tile joints
The only known way to keep ceramic tiles and grouts perfectly clean is not to use rooms where they are used as a finish. In all other cases, the operation of coatings and exposure to aggressive environments cause their natural aging and contamination.
Tiles in the hallway are affected by all types of dirt and soil: clay, sand, black soil, brought into the room with shoes. Not a single seam will last!
In showers and bathrooms, an atmosphere saturated with water vapor and lack of ventilation contribute to the accelerated development of fungal, mold and other microorganisms, which, having settled in tile joints, lead to their blackening, and the use of modern cosmetic and hygiene products no less successfully contributes to the accumulation of dirt .
Tiles on floors and walls in the working area of the kitchen are contaminated with fats, oils, food waste. In the kitchen, the most difficult thing is to wash the seams between the tiles on the floor.
The beginning of the accumulation of mud deposits in the seams can be laid even when laying tiles, when the technology of tiling was not observed, namely:
- no fungus and mildew proof primer;
- the grout was not coated with a protective compound;
- grouting without pre-cleaning of glue;
- violation of the laying process;
- residual adhesive mixture in the seams.
No less important are some operational aspects, or rather the absence of a number of factors:
- ventilation;
- heating;
- timely care.
All three indicators must be present without fail. In the case of the last point regarding timely care, one should take into account the fact that the initial pollution is an excellent environment for the development of fungi and mold.
Important! The effort spent on cleaning tile joints after they are dirty always exceeds the cost of maintaining cleanliness. Good ventilation of the premises, a sufficient level of heat (heating), regular maintenance of ceramic surfaces using special “cosmetics” for tiles and joints will preserve their original freshness and beauty.
How to clean the joints between tiles on the floor
If, with all efforts, it was not possible to save the grout between the tiles, and its original color has changed beyond recognition, you will have to renew the tile using different means.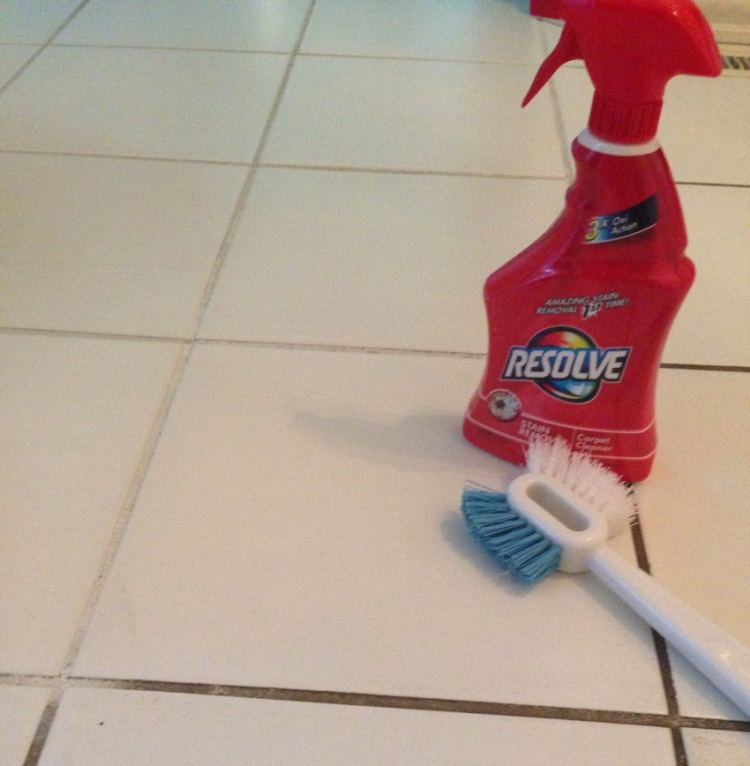
Slight grease stains, smudges from the use of detergents, light limescale, darkening of the grout color are easily removed with degreasers - CIF, Silit, Fairy. The presence of signs of mold, the appearance of fungus will require the use of liquids, which include chlorine. A good result will provide Domestos or Whiteness. The method of their application is simple: apply to the surface of the seam and rinse with water after 5 minutes. The best results for all types of dirt are given by products specially designed for cleaning tile joints. Available ones include BOZO, Ultra-Stripper, Sif and their analogues.
Small stain removed with waterproof dye marker. The agent is powerless against mold. Another way to get rid of simple dirt is a melamine sponge. Despite the high cost, its use justifies itself. In addition, it allows you to clean any light surfaces, including household appliances, easily removing stains. The main thing is to wash off its remnants well, as it crumbles. It also does not hurt to rub the surface well to a shine, since not a single divorce will decorate it, and after the sponge there are many stains.
Rather than washing the tiles on the floor with ordinary water, and then suffering because of their unsightly appearance, it is better to immediately take care of their beauty using professional cosmetics.
Cleaning methods
Tiles and tile joints can be cleaned not only with different means, but also in different ways, depending on the degree and type of contamination. It is important to know not only how to wash the tiles on the floor so that there are no stains, but also how to get rid of grease, dirt and tile adhesive.
Manual mechanical cleaning
Simple, effective, but time-consuming method. Allows to remove pollution of tile seams by mechanical processing. Depending on the degree and depth of damage to the seam with dirt, it is used in the following cases:
- For light soiling, various abrasive pastes and powders.
- For more difficult cases, fine grit sandpaper.
- Another option is a kitchen scraper.
- A semi-circular chisel of small diameter has proven itself.
Manual mechanical cleaning should be used carefully. The main thing is not to overdo it and not erase the grout completely, because then it will have to be completely changed. Otherwise, this is better than cleaning the tiles on the floor from stubborn dirt, you can quickly and efficiently.
Household chemicals
The achievements of modern chemistry are enormous, and if the use of the means listed above did not give results, this does not mean that the situation has reached a dead end. Household chemical stores offer a wide range of tile cleaners.
The choice is up to the user, who can make it based on the degree and nature of the contamination.
Selection guide:
- We recommend the use of bleach and chlorine products in the bathroom.
 They remove fungus and mold to the middle stage of neglect.
 - The kitchen will need alkali preparations. Available in spray and liquid form. For seams, you can use oxygen bleach, which is recommended to be diluted 1 to 2. Special markers also work well with this task.
Steam cleaner (steam generator)
Modern technologies make their own adjustments in the technology of cleaning ceramic surfaces. The use of a device that generates high-pressure steam for processing joints between ceramic tiles will allow you to easily cope with all types of pollution, get rid of bacteria, kill fungus and destroy mold.
A pleasant feature of its use is the absence of dried mud smudges and stains, maintaining the integrity and structure of the grout. With a steam cleaner, you don't have to worry about how to remove old adhesive from ceramic tiles.
Folk methods, ways, recipes
The experience of grandmothers, friends and neighbors, accumulated over decades of persistent struggle with dirt in tile joints, often helps out in difficult times.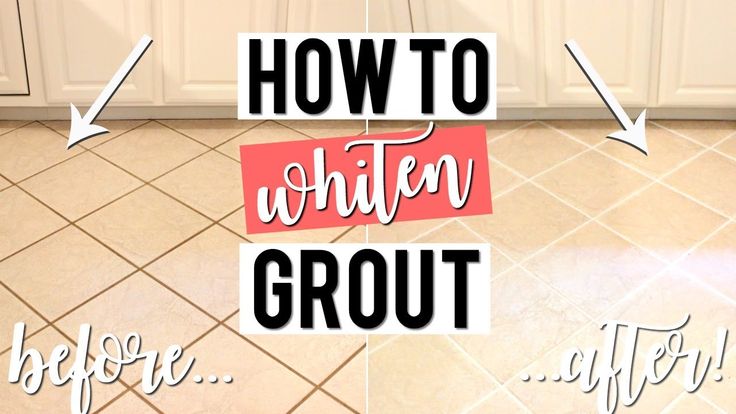 We offer a list of the most popular and effective recipes with which the question of how to clean ceramic tiles from tile adhesive, grease, dirt, stains will be removed along with dirt.
Blend #1 (lemon juice, baking soda, vinegar)
Cooking sequence:
- Pour 1.5 liters of boiled water (20°C) into the container.
- Add the juice of half a small lemon, half a glass of baking soda, a quarter glass of vinegar (9%).
- Stir with caution, since as a result of the combination of the components, a violent reaction is observed, accompanied by the release of foam.
- The agent is applied to the contaminated surface of the seams by rubbing.
- Work with a hard-sided dish sponge or an old toothbrush.
- After 20-25 minutes, the solution is washed off with water and wiped with a rag.
- Evaluation of the result, which in this case will depend on the degree of contamination.
Recommendation: Lemon juice can be replaced with citric acid (crystals).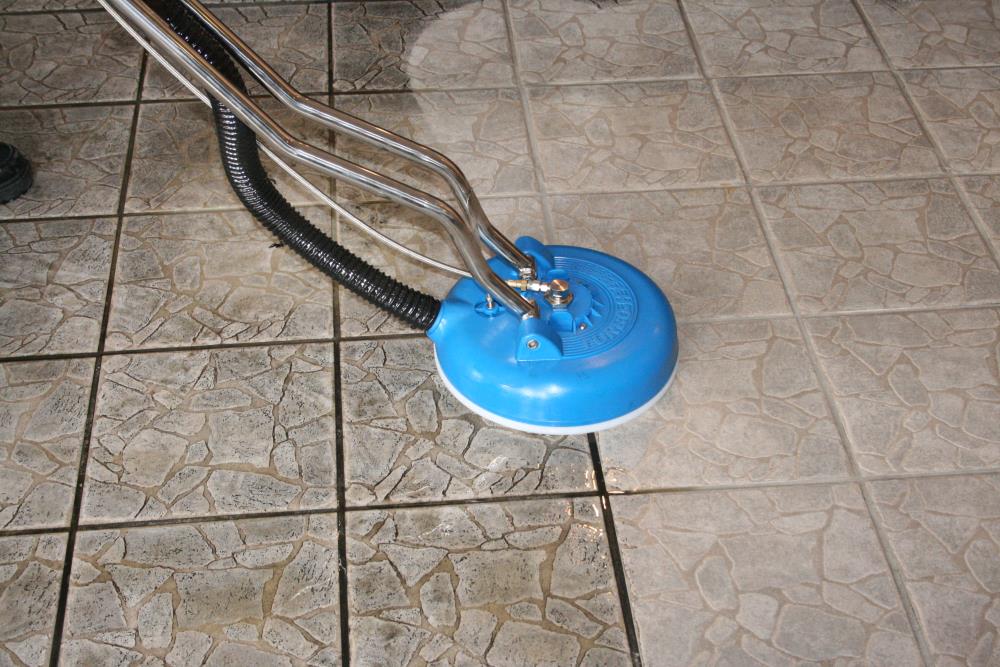
Important! You can only work with rubber gloves!
Blend #2 (bleach, soda)
Only suitable for cleaning joints with white grout! Contains chlorine, so it is only allowed to work with rubber gloves and a respirator (gauze bandage).
To prepare the solution, it is recommended to use whiteness household bleach and ordinary baking soda.
Cooking method:
- Focusing on the total area of the seams to be cleaned, pour bleach into the container for preparing the mixture and, gradually stirring, add soda until the mixture acquires the density of sour cream.
- Apply the finished mixture to the seams with a spatula and leave to dry completely.
- Use a kitchen sponge or brush to wash off the residue of the mixture and clean the seams.
- The agent perfectly copes with mold and clarification of seams.
Mix #3 (Baking Soda, Mustard, Lemon, Baking Soda, Tooth Powder)
For 1 liter of water you will need the following ingredients:
- Mustard (powder) - 1 tbsp.
- Lemon juice - from 1/3 of the fruit.
- Baking soda - 0.5 cup.
- Tooth powder (paste) - 1 tsp.
Combine all components in a container and mix thoroughly. The resulting mixture rubs the contaminated seams (a sponge is used). Leave for half an hour, then wash off with warm water.
Ammonia solution (ammonia)
The simplest and most effective fresh mould. It is also a good antimicrobial agent. We prepare a solution of 2 liters of water and a tablespoon of ammonia. It is sprayed with a sprayer over the entire surface of the tiles and joints. After 20-25 minutes, the tile is wiped from the remnants of the mixture and dirt.
Radical methods
In particularly difficult cases, when the damage to tile joints by mold or fungus has gone so far that neither professional nor folk remedies help, there are only two options left:
- Completely remove old tiles, treat surfaces with antifungal agents and lay new tiles in compliance with all technologies;
- Remove all grout from infected joints, treat with antifungal agent, wipe the joints with fresh grout, cover with a protective layer to prevent re-infection.
Both in the first and in the second case, it makes sense to use the services of professional tilers. Pleasure is not cheap, but the result is guaranteed. The main thing is to control the removal of the adhesive, so that later you do not suffer how to remove the old tile adhesive from the tile.
If this is not possible, and only the second option is available for independent execution, we recommend that you consider the following tips:
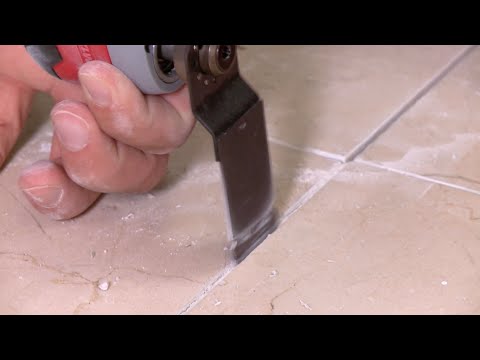
- Use a scraper, paint knife, chisel or power tool - drill, screwdriver, electric chisel, grinder.
- Safety first! Work with power tools should only be in protective goggles and a mask.
- A mild vinegar solution is suitable for softening grout.
Useful information
Performing tile grouting work and choosing the right products to achieve the best results requires knowledge and understanding of the characteristics of each type of tile.
- Do not use products containing acids on glazed tiles.
 The icing will fade and lose its luster.
 - Do not use strong acids or alkalis to clean glass mosaics and tiles.
- Unglazed matt tiles need to be rinsed after grout cleaning and a layer of protective mastic applied.
- Epoxy-based grouts have increased strength and resistance to mold and mildew, which justifies their use for grouting tile joints on floors.
In order not to wonder how to clean the joints quickly or how to remove the adhesive from the tiles, it is better to do it right away. Not a single remedy will give an instant desired result.
Seam protection against soiling
Having determined the degree of pollution, having chosen a cleaning agent suitable for solving the problem, having successfully applied it, you should perform some more actions aimed at maintaining the achieved result.