How to landscape with rock
How to Landscape With River Rock
River rock, featuring 50 shades of grays, beiges, and browns, can transform your home landscape into a natural beauty. But where do you start? Let us help by showing you how to landscape with river rock using these 15 ideas.
Here are just some of the ways: Spread river rock as mulch in your gardens, fill in the crevices between your flagstones or create a charming walking path for attractive curb appeal. Just like river rocks’ colors, shapes, and sizes, the landscape possibilities feel endless.
Landscaping with river rock:
What is River Rock?
Photo Credit: Scott Webb / PexelsRiver rock is a type of rock that has been smoothed, rounded, and semi-polished by moving water. River rocks can be found on beaches, in stream beds, and riverbeds, and appear in a wide range of shapes and colors. They’re typically 1 to 2 inches in diameter but can vary in size.
We’re sharing with you 15 river rock landscape design ideas for a little inspiration and creative guidance for your garden landscaping. From controlling erosion to adding texture to a walking path, to serving as mulch for your xeriscape, water-polished stones will do wonders for your landscape. Not to mention the low-maintenance care that accompanies them.
15 River Rock Landscaping Ideas
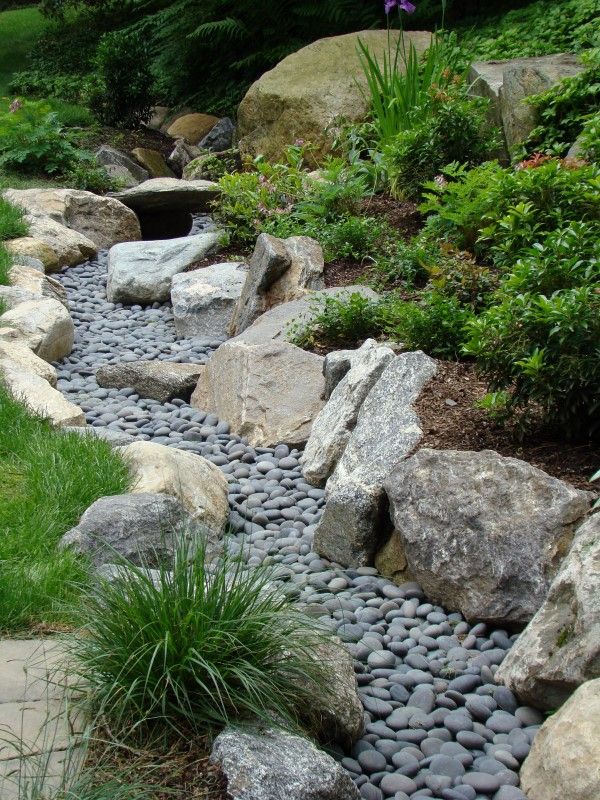
1. Make a Rock Garden of River Rocks 2. Build a Walking Path 3. Spruce Up Your Moon Garden 4. Encourage Good Drainage With a Dry Creek Bed 5. Control Erosion 6. Design a Mosaic 7. Mulch Your Flower Beds 8. Landscape Edging 9. Neaten Up Your Flagstones 10. Place at the Bottom of Your Water Features 11. Accentuate Your Fire Pit 12. Give Your Poolscape a Makeover 13. Design Retaining Walls 14. Get Xeriscaping 15. Turn River Stones Into Stepping Stones1. Make a Rock Garden of River Rocks
Photo Credit: E. R. Scigliano / Wikimedia Commons / CC BY-SA 4.0A rock garden needs pebbles and/or boulders, but how about river rocks as a base?
The result: Your succulents will pop right out of the garden (visually) with contrasting river rocks as a ground cover.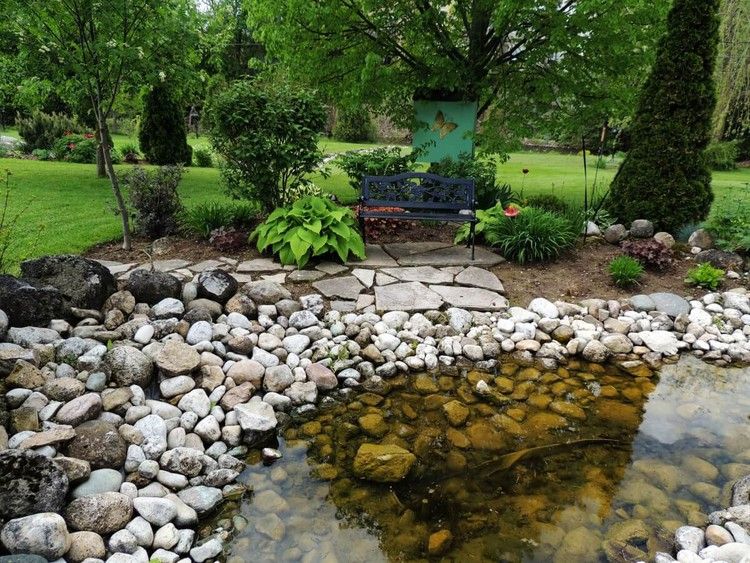 This creative garden design provides a variety of different sizes and different colors of river rock. Not to mention it’s a good option for drought-tolerant plants like succulents.
Don’t have a rock garden? Here’s how to build a rock garden.
2. Build a Walking Path
Photo Credit: PlantDo Home & Garden / YoutubeRiver rocks can be used to create an elegant walking path of these small, round stones.
The result: The crunchy, clacking sounds as you walk on the rocks will delight your ears, and the path’s texture will please the eyes. This also helps to provide a more natural look in your yard compared to other stonework.
3. Spruce Up Your Moon Garden
Photo Credit: Pxhere / CC0 1.0Your moon garden shimmers and thrives under the moonlight with its white flowers and intoxicating blooms. To add extra glow, lay down garden paths or edges with white river rocks.
The result: The moonlight will reflect off the white surface and give your moon garden that extra shine.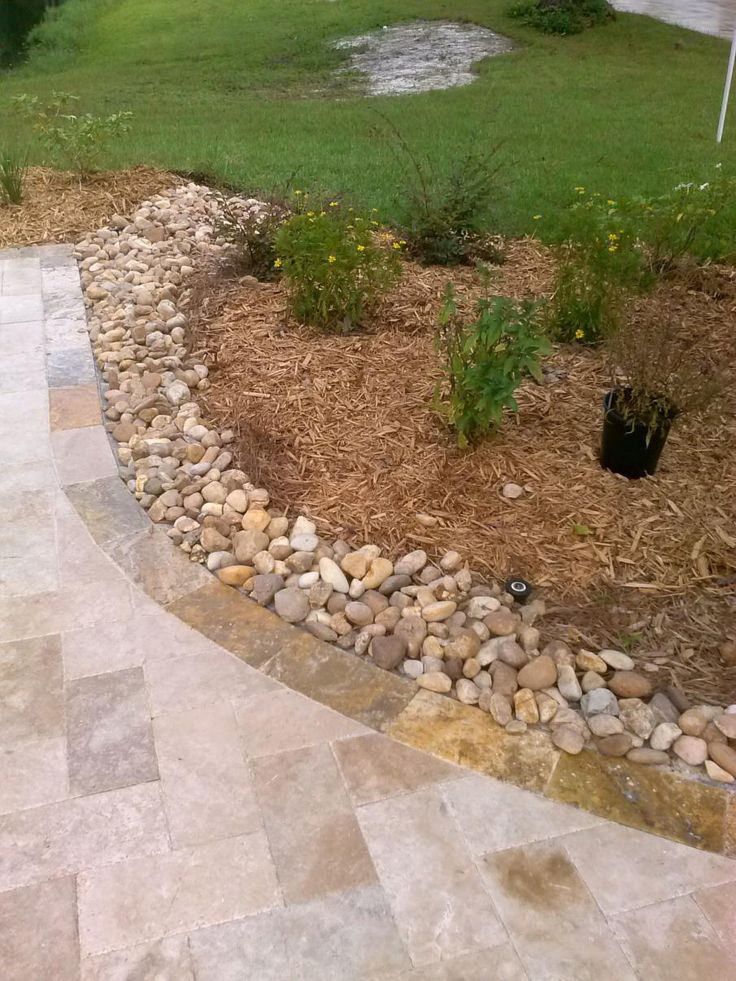
4. Encourage Good Drainage With a Dry Creek Bed
Photo Credit: Pxhere / CC0 1.0Because rounded river rock does not fit snugly together to create a compact surface (like machine crushed gravel), water can easily pass through these small stones and into the ground.
So what?
Poor drainage can lead to contaminated runoff polluting water habitats, such as rivers and streams. Runoff can also damage your home’s foundation or basement.
The result: A river rock surface has better drainage. Surfaces made of pavers, concrete, or asphalt are impervious, meaning they don’t allow water to drain into the ground underneath.
5. Control Erosion
Photo Credit: Joe Haupt / Flickr / CC BY-SA 2.0If erosion has been a struggle in your landscape, river rocks are an excellent tool to keep your soil and plants in place in areas with heavy runoff or on a steep hill.
If your landscape has naturally flowing water, such as a small creek, install river rock around the creek’s edges to prevent erosion during heavy rain.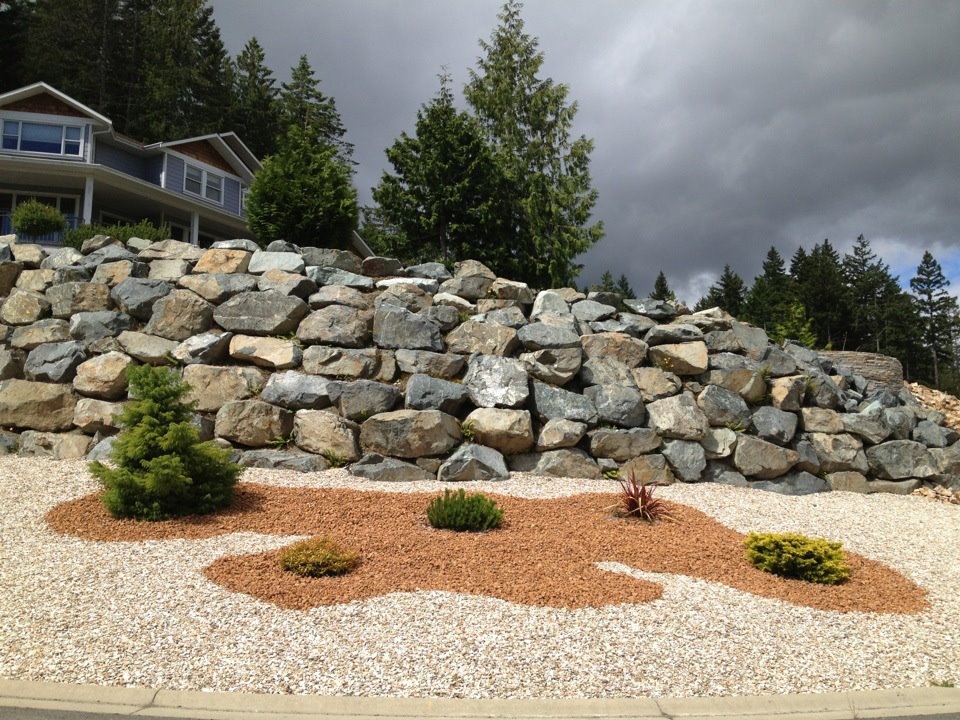
The result: A small pile of river rocks beneath the drain can put a stop to the water from your downspouts creating eroded areas.
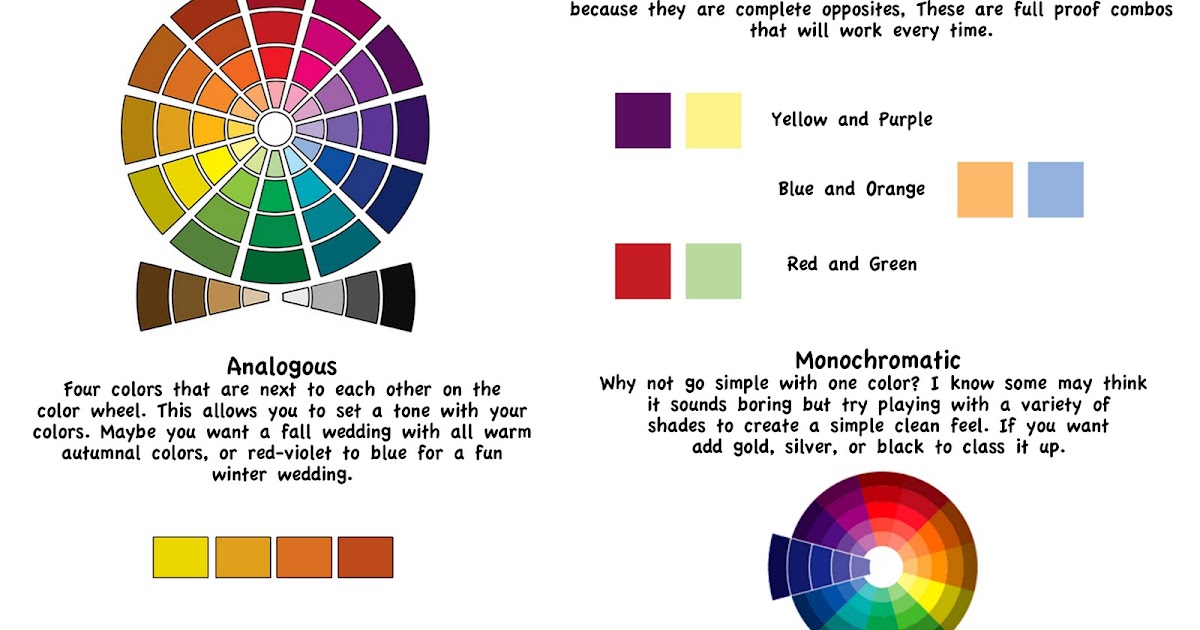
6. Design a Mosaic
Photo Credit: Muriel Ligerot / YoutubeCreate a river rock mosaic that can be embedded in concrete to create a one-of-a-kind walking path in your front yard.
The result: A river rock mosaic in the front yard will have your friends and family gushing over your put-together lawn.
7. Mulch Your Flower Beds
Mulching with River RocksPhoto Credit: Garden Of Eden Landscaping Services / Youtube
Mulch your garden beds with river rock for an added dose of texture. River rock mulch helps prevent erosion and offers various colors and sizes to make those plants stand out in the landscape. It also helps to prevent weed growth in gardens.
Better yet? Rock mulch offers a permanence that most organic mulches cannot. Organic mulches, like wood chips or shredded bark, need routine replacement.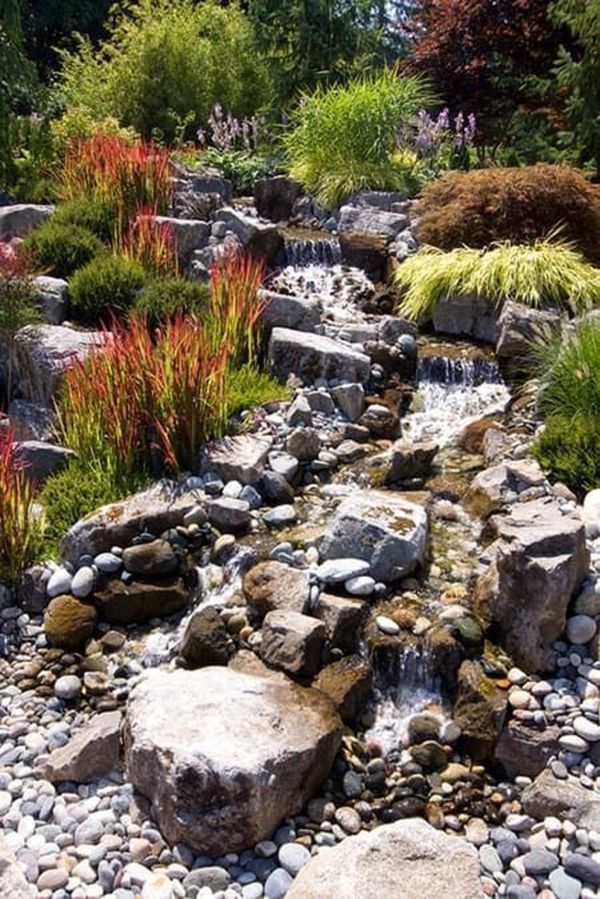 If you’re mulching on a budget, a more permanent option may be what you need.
Quick tips for drawing your sprinkler system plan:
Pro Tip: When using river rock as mulch, lay down landscape fabric underneath. If you ever need to remove the stones, the landscape fabric will make removal much more manageable. Otherwise, the rocks may sink into the soil.
8. Landscape Edging
Photo Credit: Garden Of Eden Landscaping Services / YoutubePlace a layer of river rocks around your garden beds as edging. Edging accentuates your flower beds and gardens by creating a definitive border, and it helps to prevent erosion.
The result: Edging with river rocks can keep mulch from spilling out of garden beds after heavy rain or wind.
9. Neaten Up Your Flagstones
Photo Credit: Decorative Concrete Kingdom/ Flickr / CC BY 2.0If your flagstone path is looking a little shabby with sprouting weeds and loose dirt, fill the gaps and crevices with small river rock.
The result: The river rocks will highlight your flagstones and give them a cleaner, striking look.
10. Place at the Bottom of Your Water Features
Photo Credit: Pxhere / CC0 1.0If your landscape boasts a shallow pond or graceful water fountain, add river rock at the bottom for a calming, natural effect.
The result: The clear water will ripple over the beautiful stones.
11. Accentuate Your Fire Pit
Photo Credit: Ruth Hartnup / Flickr / CC BY 2.0For a rustic outdoor space, install river rock as a ground cover around your fire pit, or use large river rocks to build a fire pit.
The result: The river rock and firepit will make your backyard feel like a campground getaway, and you’ll love how the small stones accent your fire pit’s hardscape features.
12. Give Your Poolscape a Makeover
Photo Credit: Pxhere / CC0 1.0Add river rock around your above-ground or in-ground pool.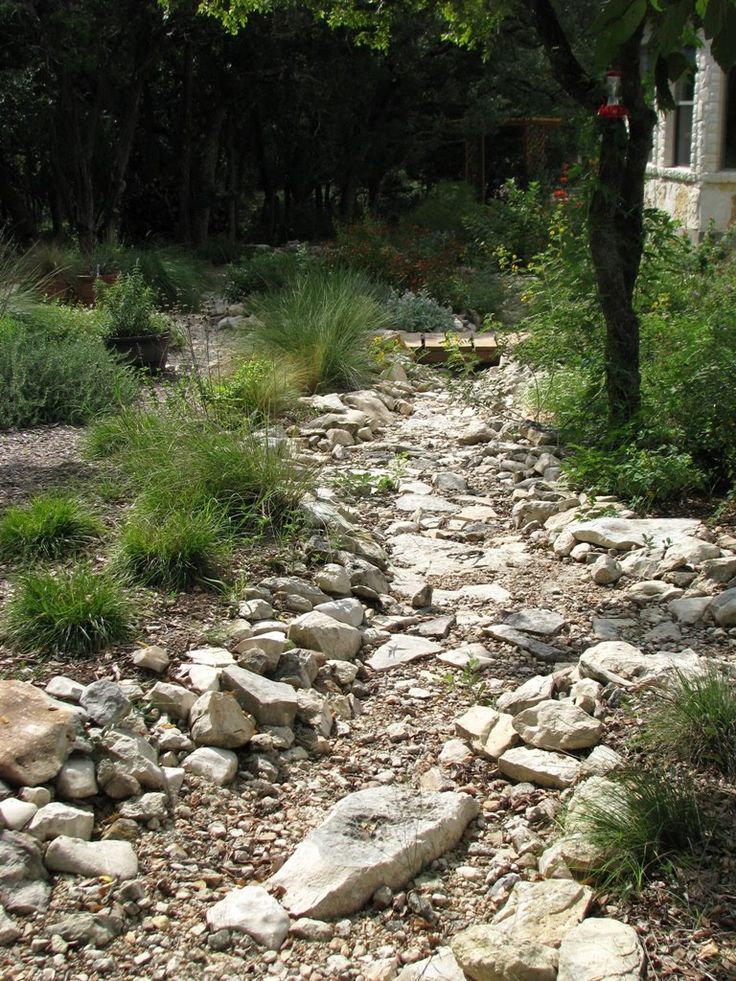 Your poolscape makes just as strong an impression as your landscape — spruce up the aging patio and surrounding greenery with various river rock ground covers.
The result: River rocks will look stylish as a mulch ground cover for your pool’s succulent garden. Lay down a river rock walking path to lead the way, or place your pool’s patio furniture on a river rock bed.
13. Design Retaining Walls
Photo Credit: Field Outdoor Spaces / Flickr / CC BY 2.0Medium- to large-sized river rocks can make useful material for retaining walls.
The result: Retaining walls help prevent erosion, makes landscaping on hilly terrain more manageable and supports raised garden beds.
14. Get Xeriscaping
Photo Credit: Downtowngal / Wikimedia Commons / CC BY-SA 3.0River rock will fit seamlessly into your xeriscape and encourage good drainage in your dry garden.
Xeriscaping is a landscaping style intended to conserve water and require as little irrigation as possible.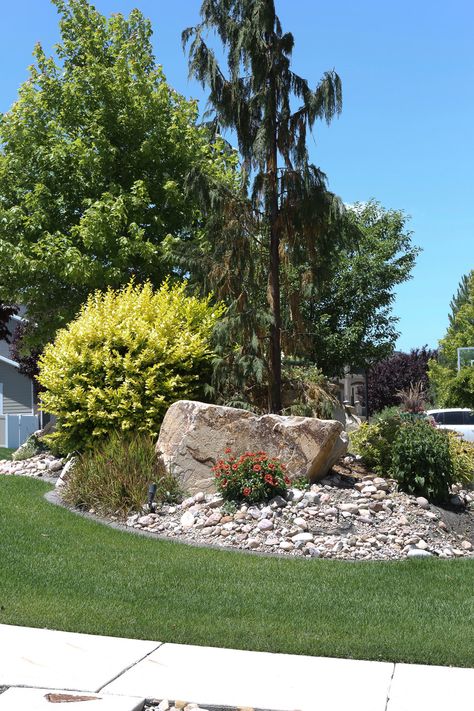
The result: If you xeriscape just right, your garden should require water only from the local climate.
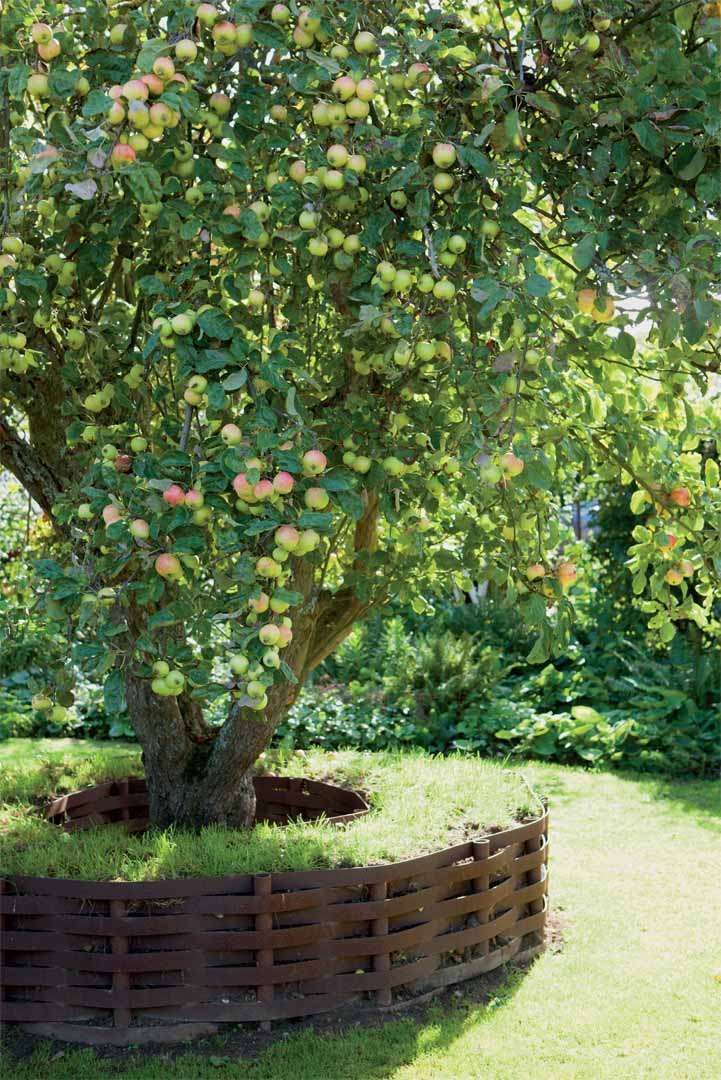
15. Turn River Stones Into Stepping Stones
Photo Credit: PxfuelCarefully placed river rocks can make cute stepping stones leading to the butterfly garden, the front door, or the she shed.
The result: River rocks serve as stepping stones and placing them can be a fun, simple project for backyard landscaping.
FAQ About River Rock Landscaping
How Much Does River Rock Cost?
River rock prices will vary depending on the rocks’ size, color, shape, and whether they are polished.
Buying by the ton? Cost may range between $100 and $300 per ton, sometimes costing as high as $800 per ton.
Cost per pound? Prices typically range between 5 cents and $1 per pound.
How is River Rock Installed?
Not all river rock installations are the same.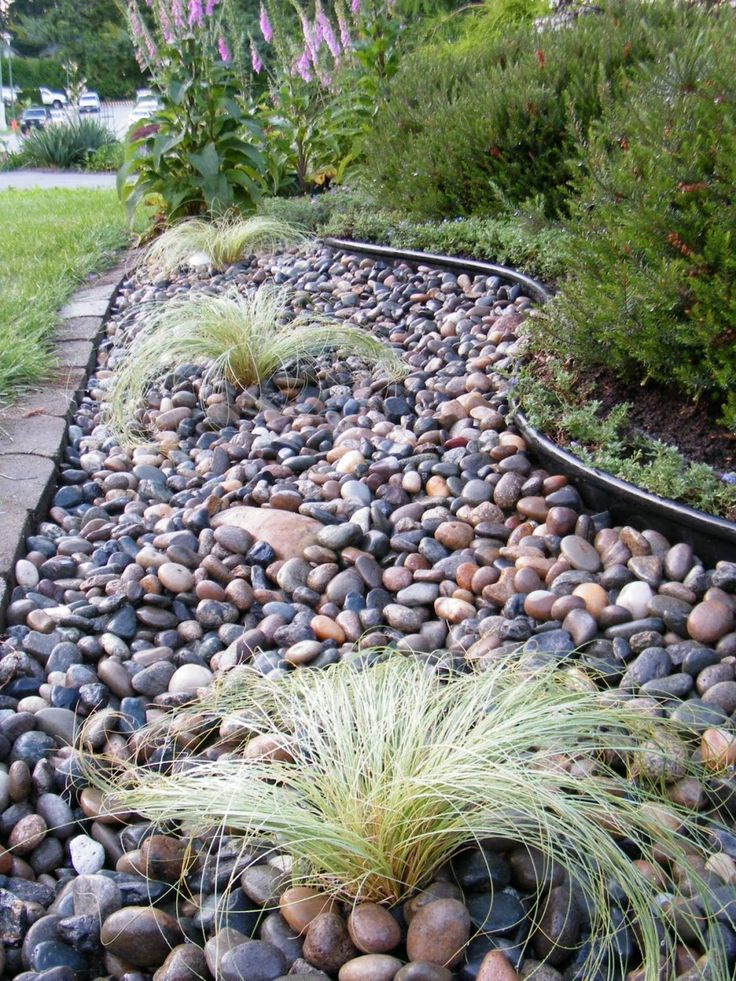 Whether you’re spreading river rock as a mulch, pathway, or drainage system, follow the guidelines for your specific landscape project.
Many river rock landscape ideas are easy DIY projects, while others may require a professional for installation.
In some cases, you may want to use landscape fabric beneath the rocks to control weeds and prevent the stones from embedding in the soil. If you place a few medium-sized river rocks beneath a downspout to control drainage, you may not need landscape fabric.
If you are spreading river rock around plants, you’ll want to work slowly. Lay down your river rock by the handful, and carefully spread it out around your plants.
Keep in mind: The depth of your river rock layer will vary depending on the rock sizes you’re installing.
Are There Disadvantages to Using River Rock?
Some homeowners may prefer to work with other landscape materials besides river rock.
Here are a few of river rock’s disadvantages:
• Removal from the landscape can be tricky
• May require a barrier between river rock and the soil, such as landscape fabric
• It’s an inorganic mulch, meaning it won’t return nutrients into the soil for your plants.
• River rock absorbs heat and may become too hot to touch. The excess heat also may harm some plants.
• Adding new plants to a river rock ground cover can be difficult.
• River rock can be expensive.
• Debris, such as seeds and dirt, may build up between river rocks.
• Mowing too close to river rocks may damage your mower. How? The lawn mower may also expel the stones and cause injury to a person nearby.
When to Call a Professional Landscaper
Landscaping with river rock isn’t always easy. When you have a range of landscaping designs and different river rock types to choose from, sometimes you need a professional’s advice.
Call a professional landscaper near you if you need assistance with river rock landscape design, installation, river rock removal, or moving large stones.
Main image credit: Jeremy Levine / Flickr / CC BY 2.0
Jane Purnell
Jane Purnell is a freelance writer and actor in New York City.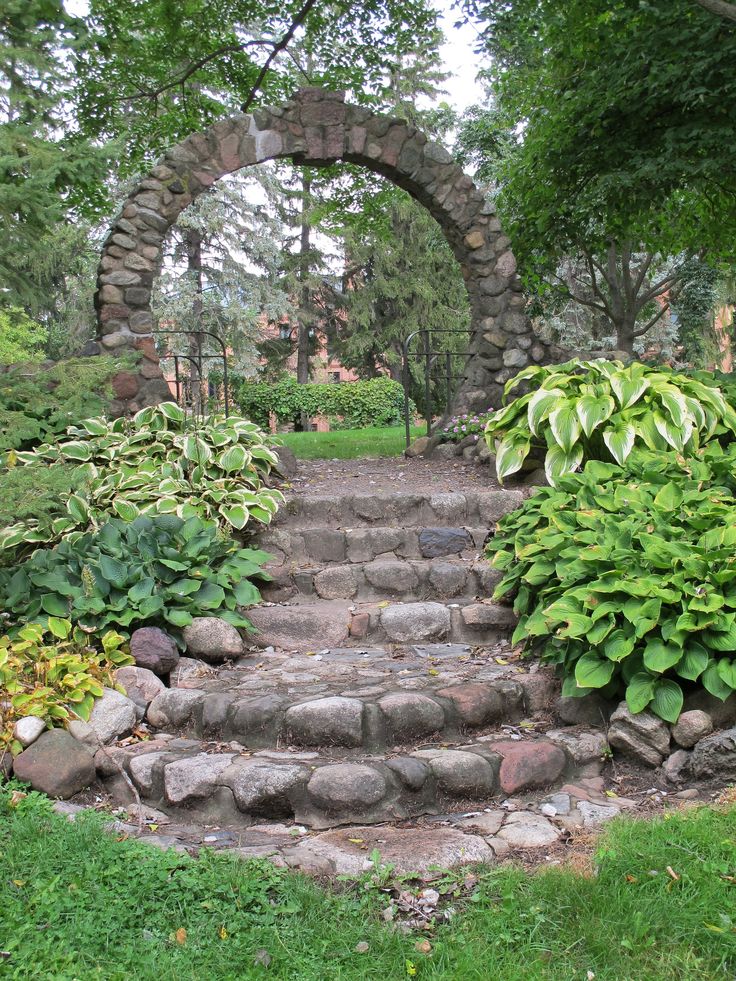 She earned her B.A. from the University of Virginia and enjoys a warm cup of French press coffee.
Posts by Jane Purnell
Easy Ideas for Landscaping with Rocks
Rocks provide a natural, textural element to landscape designs as well as a durable, low-maintenance, organic option that’s often quite eye-catching. Stones also can help hide or disguise problem areas, like ungraceful hills or grades, utility equipment, or unattractive foundation walls, or stand in for mulch in beds. Today, let’s look at some creative ways to add beauty and tips for landscaping with rocks, boulders, river rock, flagstone pavers, and more.
Rocks, boulders, and plants turn an awkward slope into an area that’s pretty and inviting.
via Princeton Scapes
Landscaping an area with rocks and mulch yields an eye-catching and low-maintenance design.
via Stonewood Design Group
Various size boulders, flowering plants, and vining ground cover create a natural-looking retaining wall.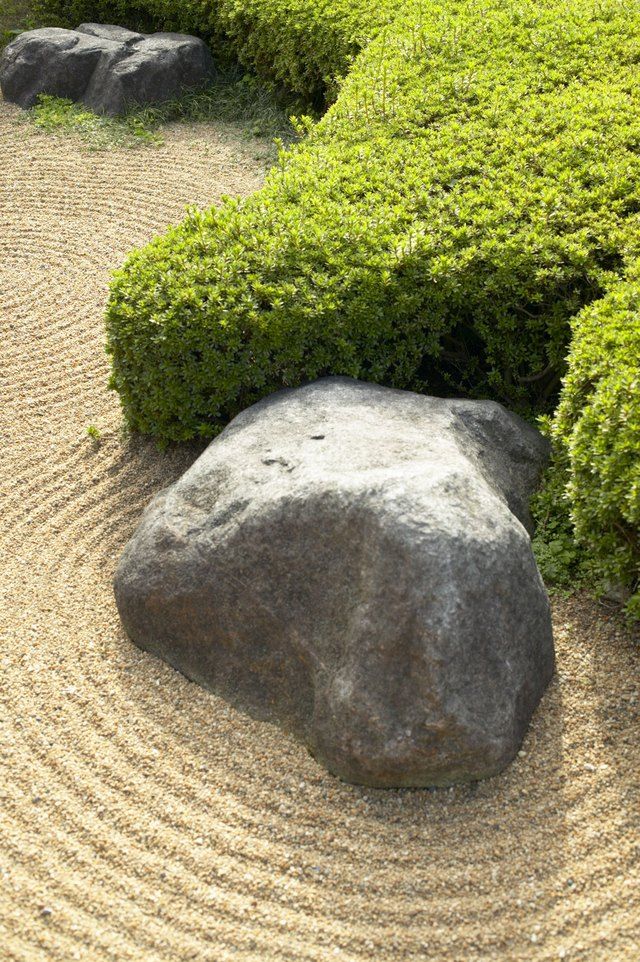
via Wallace Trucking
If you already have stones or boulders on your property, you can group them into beds, add a river rock base, and tuck in some plants around them.
via Creative Country Mom
Flowers mixed in with larger rocks is a beautiful (and easy) combination.
via Garden.Org
Mixing in large rocks into beds is a great way to mix up texture and sizes and rocks help retain moisture.
Smaller rocks added to garden beds are a fantastic way to hold in moisture and add texture.
via Gardenaholic
Just as you can use different sizes and types of plants in your landscape design, you can incorporate a range of rocks and boulders for texture, contrast, and interest.
via Lushome
Constructed from large, flat pavers, this gorgeous stone staircase feels very organic and natural.
via Lithic Construction
This stepped stone walkway cuts a pretty, winding path down this gentle slope.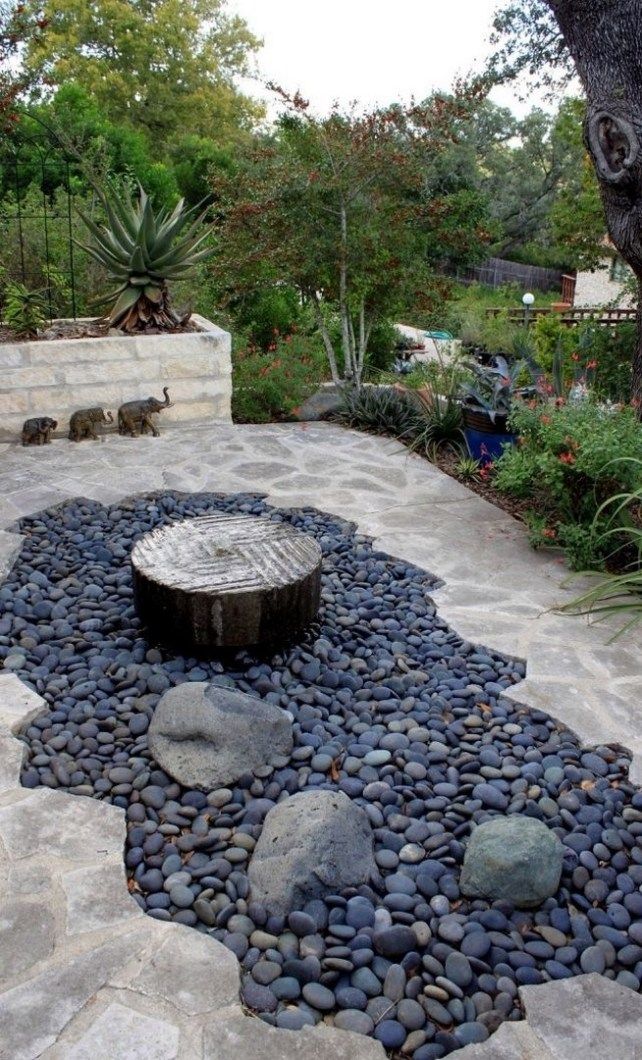
via Westover Landscape Design
Flagstone and river rock were used to create this walkway. Landscape edging contains the river rock at the sides for cleaner edges.
via Pinterest
Instead of using rocks for the walkway, in this design, the stones outline the grass path and mingle with flowers and other plants in the beds.
via Worthminer
Smooth, tumbled river rock can be used to border a flowerbed or to fill it in areas where you want low-maintenance landscaping.
via Life in the Mediocre Lane
Rocks are the ideal material for creating drain beds. Here, small stones were used to construct a dry river bed for redirecting and slowing stormwater runoff—and boost the home’s curb appeal in the process.
via Chesapeake Stormwater Network
Large, flat rocks artfully arranged under a downspout provide stormwater runoff and also create a beautiful dry waterfall.
via Kitchen Fun with My Three Sons
For a more modern look, this splash block combines fabricated stones with natural versions in an eye-catching design.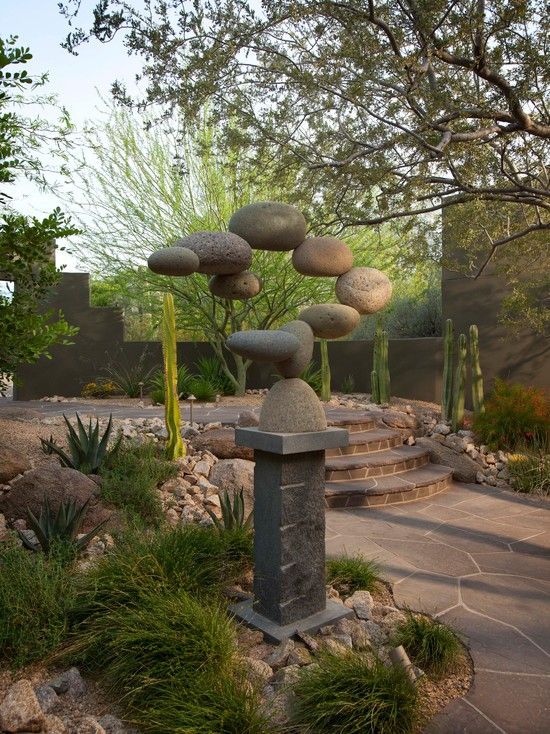
via Phillips Scott Landscaping
If you want to create your own rock walkway, this tutorial shows you how to combine large, flat flagstones with small decorative landscape rock.
via Better Homes and Gardens
In this design, beds edged with brick and filled with decorative landscape rock are illuminated by rope lighting that highlights the curve of the bed.
via Lifehack
Rocks large and small can be used in so many unique ways in your landscaping. What creative uses can you find for them in your yard?
For more creative landscape and design ideas, you can find more inspiration here.
Thanks for stopping by!
Christy
Rocky Landscape Oil Painting Tutorial
This wild rocky landscape needs to be painted with energetic, pointed brush strokes that will help convey the hard, angular surface of the rocks and boulders.
Painting brushes are made from natural raw materials or from synthetic fibres.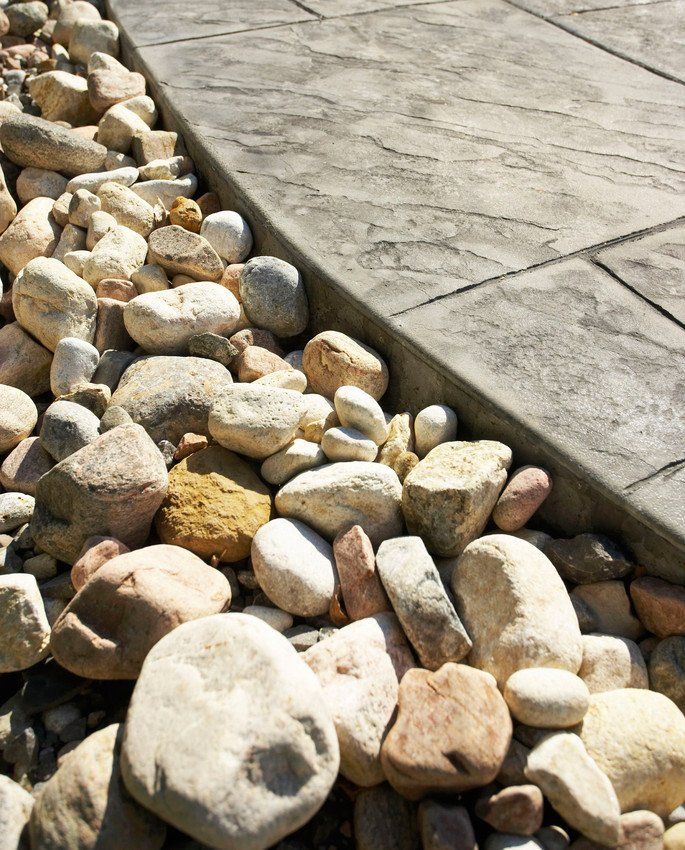 They differ in a huge variety of shapes and sizes, depending on the purposes for which they are intended. In order to create a bright, expressive picture, the artist must choose the right brush and skillfully use it.
The most important technical elements of this landscape can be considered the texture of oil paints, the shape and direction of brush strokes, as well as the bold use of the play of chiaroscuro.
For the oil painting lesson you will need:
Oil paint brushes: round #4, flat #2,6 and 8
Palette
7 oil paints: phthalocyanine green, carmine, titanium white, French ultramarine, grass green Neapolitan yellow, raw sienna
White spirit
Turpentine
Rigid Flat Paint Tool No. 10
2 Spatula for Painting: Leaf and Flat
It is very important for an artist to have at his disposal a set of different brushes with which he can create a variety of visual effects. Oil paint brushes come in a wide variety of shapes, sizes, and the material they are made from.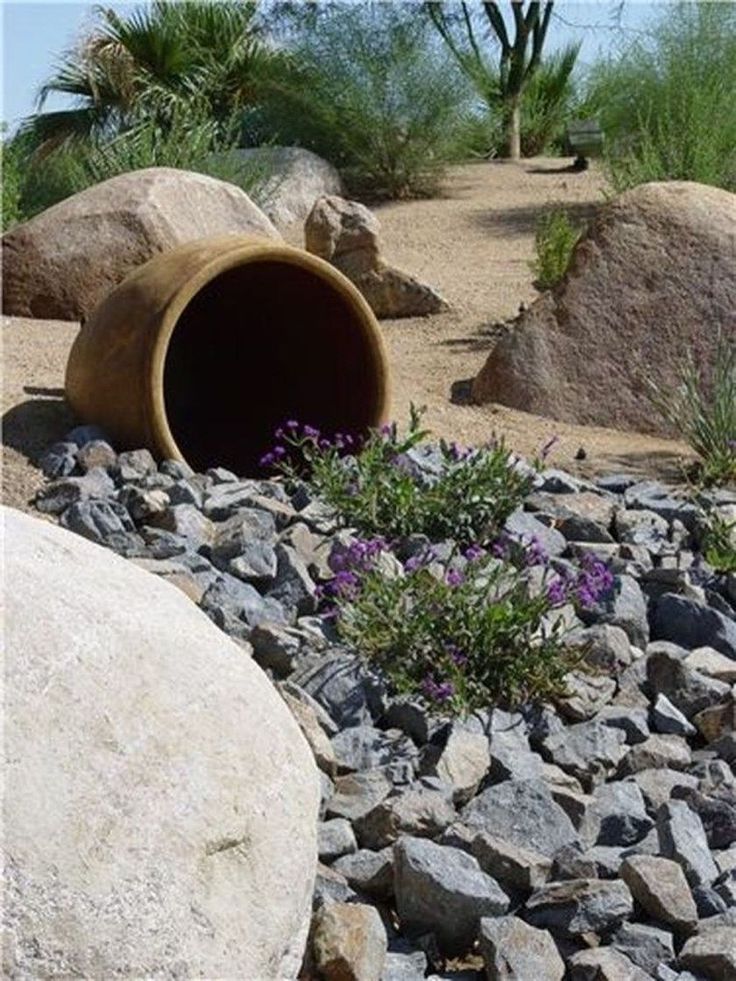 Accordingly, in this case, the strokes of paint left by these brushes on the canvas will also be different.
Painting with Flat Brushes The rocky landscape we have chosen as the subject of this lesson provides you with an ideal opportunity to improve your brush skills. In this story there are three elements that are completely different in texture - the sky, stones and grass. This painting is painted mainly with flat brushes, which are most suitable for depicting hard, uneven surfaces.
Flat brush strokes can be modified by the angle you hold the brush and the force you apply to it. You can also write thin lines with the side of the flat brush and looser strokes with the wide side.
When painting rocks and grass, aim to do it with just a few bold and broad strokes.
Such fast, sharp, unsmoothed strokes will give the picture extra energy and a sense of movement. This is also facilitated by the absence of small details in the composition.
Starting with large patches of color
Since oil paints remain wet on the canvas for a long time, you may be tempted to paint the picture gradually, in small fragments.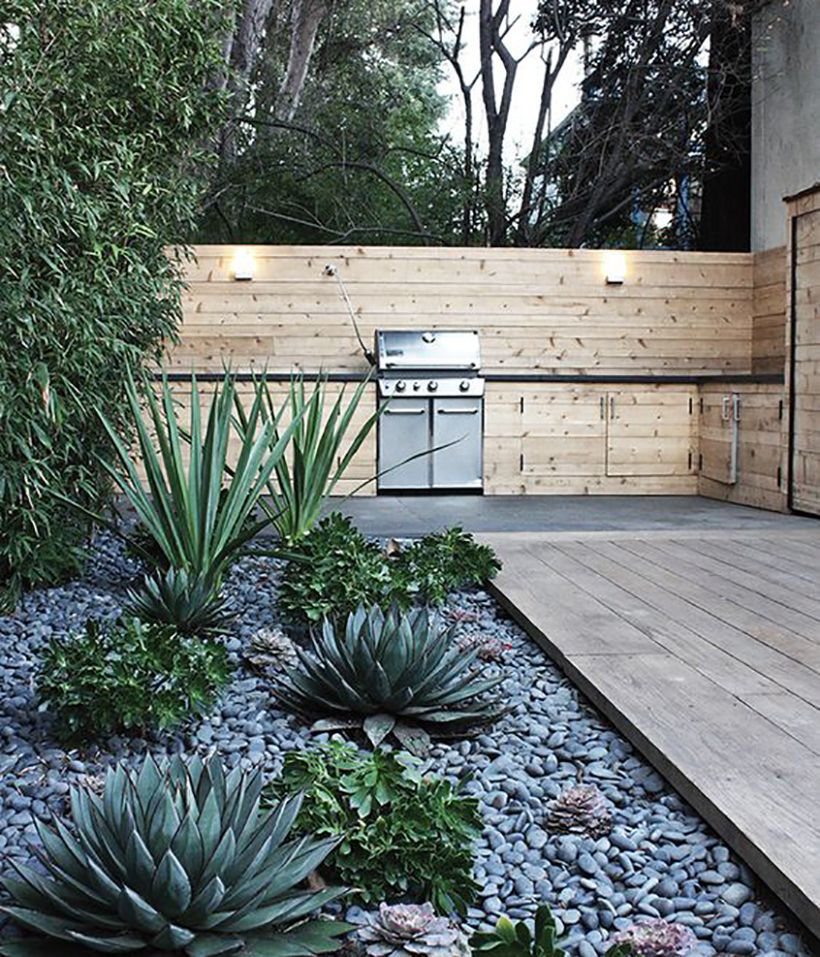 Needless to say, this is the wrong move. A picture painted in this way, almost a sure thing, will turn out to be unnecessarily overloaded with small details.
Work on this landscape should begin with the application of large color spots, painted with liquid diluted paint. Only when all the primary colors take their places on the canvas, you can move on to smaller details. This technique will prevent the surface of the canvas from filling up too early with particles of multi-colored paint and at the same time soften the harsh white color of the primer. finally, large color spots will become a reliable base for you, on top of which you can immediately apply paint in thick, dense layers.
Using paint molding tools
Today we will be using a molding tool for the first time. This is a tool for applying oil paint to canvas. The molding tool resembles an ordinary brush, but instead of bristles it has a piece of corrugated rubber.
Such a tool can be considered ideal for depicting sharp-angled objects, including wild boulders and stones, as in our landscape. It is also convenient to use a forming tool to remove or, on the contrary, smear the paint on the canvas.
Use duct tape to attach the stand to the board
Sometimes it can be very difficult to bring home a painting that has been painted en plein air but hasn't dried yet, especially if it's painted on a board. In this case, you are forced to carry the picture, taking it by the edges. In this case, part of the paint will certainly be on your palms. This problem is very easy to solve by pre-attaching the board with canvas to the drawing board with duct tape. At the same time, you can quite easily “drop in” while working on the tape when the picture is finished, you just remove the tape, and under it there will be a smooth, clean edge.
1 Outlining the main areas of the composition
Rocky landscape oil painting tutorial - step 1 Set the horizon line, granite peak and boulders lying on the ground. Add some carmine to the phthalocyanine green paint to make a warm gray, and thin the paint with turpentine to the consistency of water.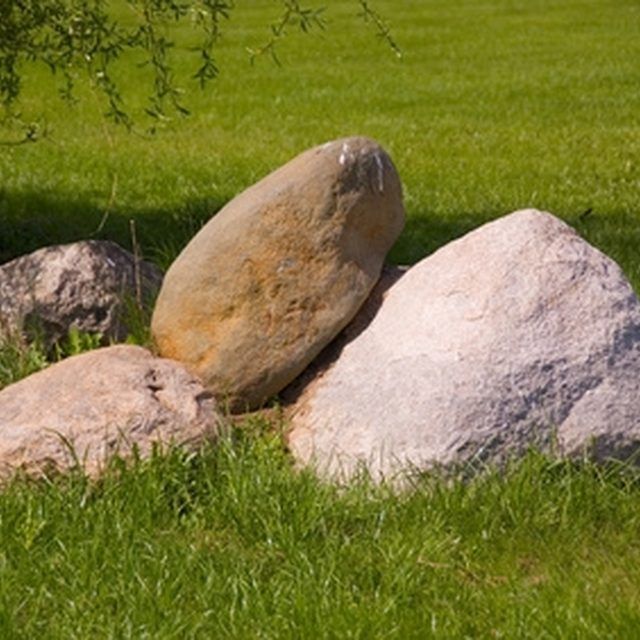 Take a round brush number 4 and with smooth strokes outline the main contours of the composition.
2 Painting the Sky
Rocky Landscape Oil Painting Lesson - Step 2Mix some French ultramarine into the titanium white. Dilute the paint with turpentine to the consistency of concentrated milk. Paint the sky with wide strokes of the #8 flat brush. Add a small amount of the mixed paint that you used in the previous step to the titanium white. Outline the clouds with small, curved strokes.
3 Sketching the distant hills
Rocky Landscape Oil Painting Lesson - Step 3 Mix French ultramarine with titanium white and a little carmine. Mark the distant hills with a few free strokes of this paint. Add grass green and Neapolitan yellow to the blue mixture to give it a green tint. This paint will help you paint a cooler tone on the far side of the hills. To do this, apply a thin layer of green paint over the blue paint that you used to paint the hills.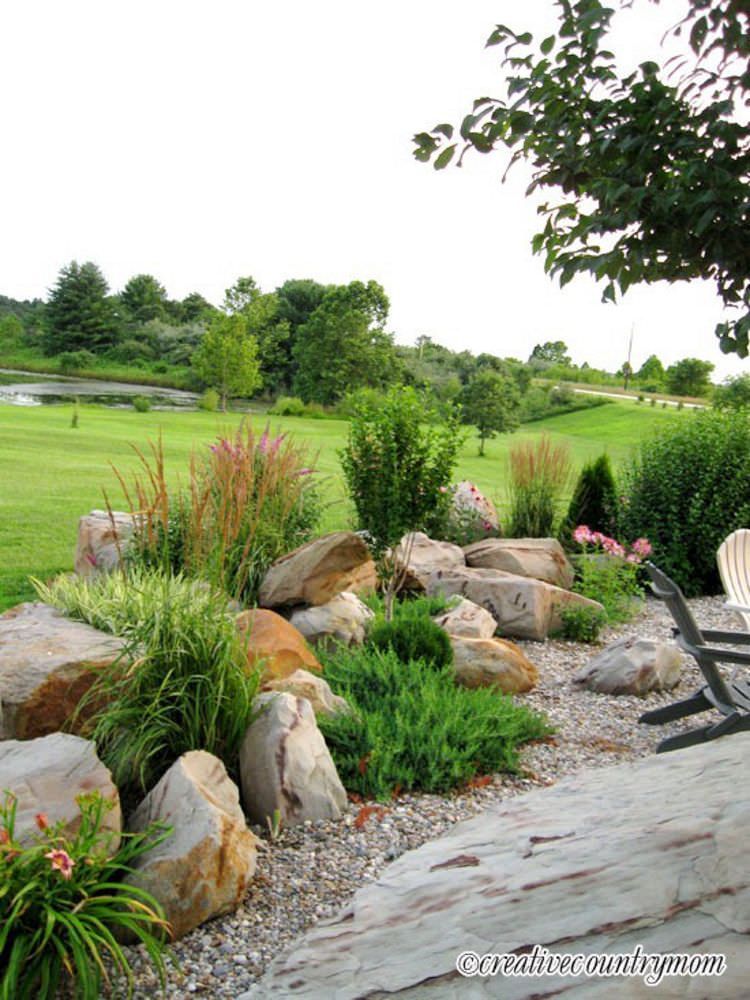
4 Marking the main color of the stones
Rocky Landscape Oil Painting Lesson - step 4Mix some phthalocyanine green paint, titanium white and Neapolitan yellow paint into the carmine. With the resulting purple-gray tone, paint over the granite hill. Apply horizontal strokes with the broad side of the brush, depicting the outlines of separately lying stones. In this case, the paint should be a little thicker so that brush marks remain on it.
5 Adding new stones
Rocky Landscape Oil Painting Tutorial - Step 5Lighten the purplish-gray mixture with some titanium white and paint on the exposed rock under the large granite mound. Use the side of the brush to apply short strokes following the jagged outlines of large stones.
6 Starting to Paint the Foreground
Rocky Landscape Oil Painting Tutorial - Step 6 Add some more carmine to the paint you just worked on to get a dark shade of purplish gray.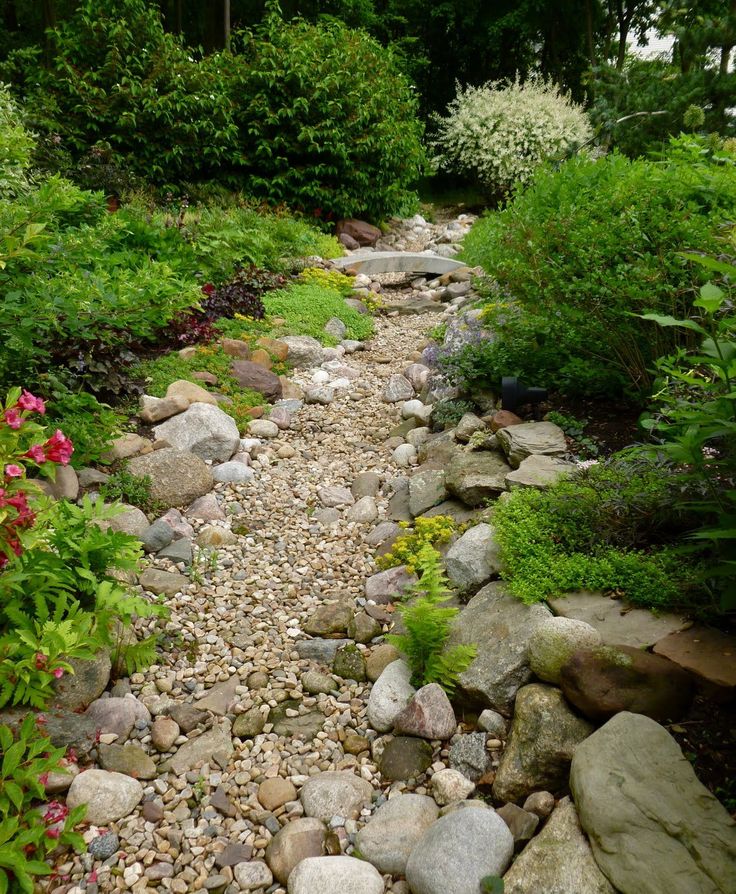 Use this paint to paint shadows on nearby stones.
Mix Neapolitan yellow, grass green and white. You should get a green color with a yellowish tint. Use this paint to paint the grass in the foreground. Apply paint in loose strokes using the wide side of the brush.
7 Finishing the Foreground
Rocky Landscape Oil Lesson Step 7Continue painting the grass with quick free strokes and resist the temptation to smooth them out. In order for the shades of green to vary from light and warm to cold and dark, use blue and yellow paints mixed in various proportions. Different shades of green will help you write bumps and pits on grassy ground.
GOING ON
Now that all the main elements of the composition are outlined, you can start adding details and texture. At this point, we have already managed to achieve a sense of the depth of the landscape. This is achieved due to the fact that the foreground of the picture is written in warm tones, which gradually, as they move towards the horizon, become cold.
8 Painting Individual Rocks
Rocky Landscape Oil Painting Lesson - step 8Mix Neapolitan yellow and white. Add to it a little different mixture, made up of phthalocyanine green paint with carmine. Use this paint to paint individual stones lying on a granite hill. Each stone is written in one stroke, then turn the brush over and write the next stone with its opposite side. If you do not do this, you can brush off some of the bottom layer of paint.
9 Continue Painting the Hill
Rocky Landscape Oil Painting Lesson - step 9Darken the rocks on the right side of the hill a little by adding a little more Neapolitan yellow to the mixture. As before, paint each stone in one stroke. For larger stones use a #8 flat brush and for smaller stones use a #6 flat brush. Leave gaps between the strokes: the dark bottom layer of paint peeping between them will depict the shadows lying between the stones.
10 Add Far Highlights
Rocky Landscape Oil Painting Tutorial - Step 10 Lighten the mixture with yellow paint and white and paint the highlights on the boulders in the foreground.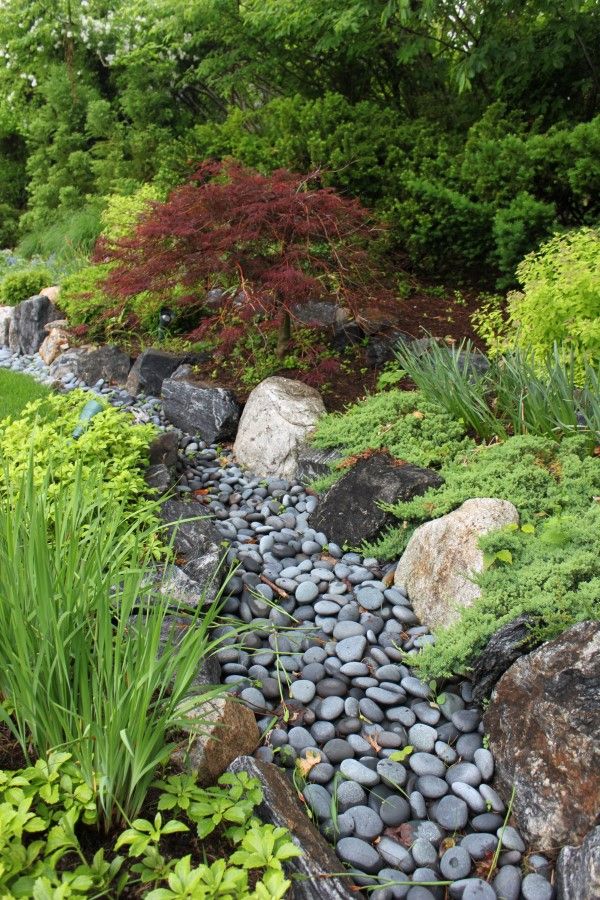 Then add a little more white and French ultramarine to the paint, which will immediately make the tone colder. Take a flat brush number 2 and write highlights on the far stones.
11 Working with a molding tool
Rocky landscape oil painting lesson - step 11Now use a thicker paint and apply it with a #10 paint shaping tool. Take whitewash, add some Neapolitan yellow paint to it and write smoother stones with a shaping tool. To give the stones an uneven shape, write each stone in one smooth stroke, turning the shaping tool as you do so to leave vertical or horizontal impressions on the surface of the paint.
12 Working on the foreground
Rocky Landscape Oil Painting Tutorial - Step 12 Take a #6 flat brush and lighten the shadows lying on the boulders with a light gray paint mixed with ultramarine, carmine and white. Mix raw sienna, Neapolitan yellow and white and paint in small, uneven strokes on the dried grass in the foreground.
FURTHER STEPS
This picture can be considered finished. All elements are written; The composition is based on simple, strong and harmonious color contrasts. Restrained coloring and strict outlines of stones convey the atmosphere of a wild hollow lost between the mountains. It remains to work out some characteristic details to give the picture even more expressiveness,
13 Add Highlights to the Grass
Rocky Landscape Oil Painting Tutorial - Step 13Mix Neapolitan yellow with some grass green and add this mixture to the white. Take a #6 brush and use this pale greenish-yellow paint to lighten the lighted patches of grass in the middle ground. So you will pass the sunlight falling on them. At the same time, move the brush so that it barely touches the surface of the canvas and through the light paint the lower layer of the darker paint can be seen in places.
14 Deepening the Shadows
Rocky Landscape Oil Painting Tutorial - step 14 Take a #2 flat brush and deepen the tone of the shadows lying between the rocks on the shaded side of the hill.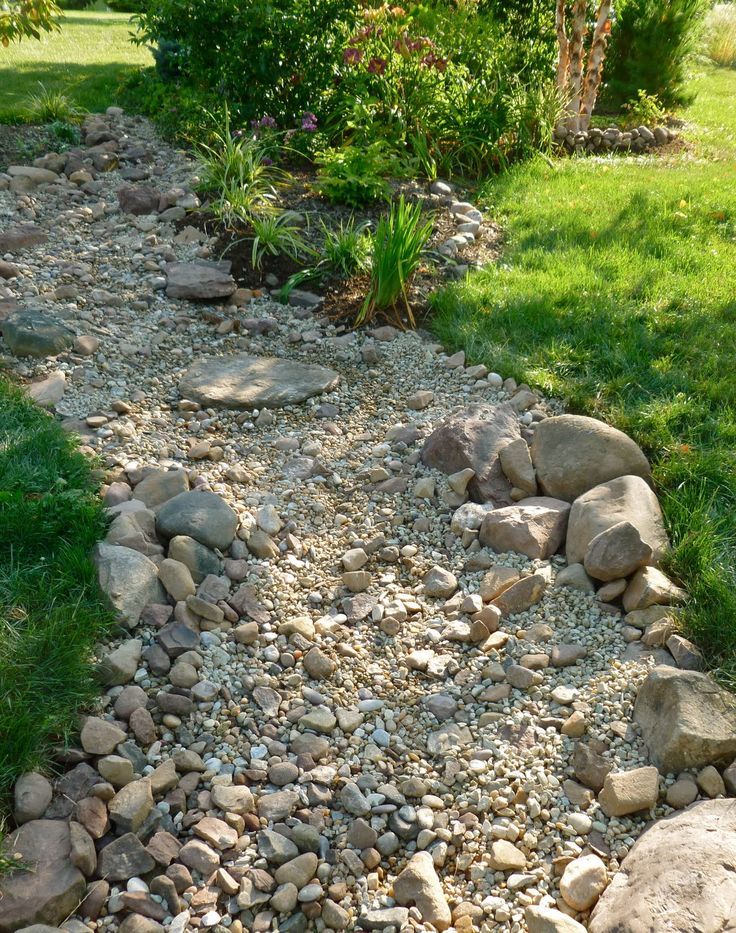 To do this, add a little carmine and white to the French ultramarine.
15 Painting Cast Shadows
Rocky Landscape Oil Painting Tutorial - Step 15The light from the left causes the boulders in the foreground to cast shadows, which should naturally fall to the right. Paint these shadows with a #2 flat brush and dark green paint mixed with grass green paint and raw sienna.
16 Reproducing texture with a spatula
Rocky Landscape Oil Painting Tutorial - step 16Mix dark blue French ultramarine with carmine to paint cracks in the surface of the hill. Pick up some paint on the edge of the leaf-shaped trowel, and then quickly and easily run the trowel over the slope of the hill, which will then leave prints in the form of fine sharp lines.
17 Print grass in front
Rocky Landscape Oil Painting Lesson - step 17 Mix some raw sienna with the white. Take a flat spatula and dip its edge into this mixture.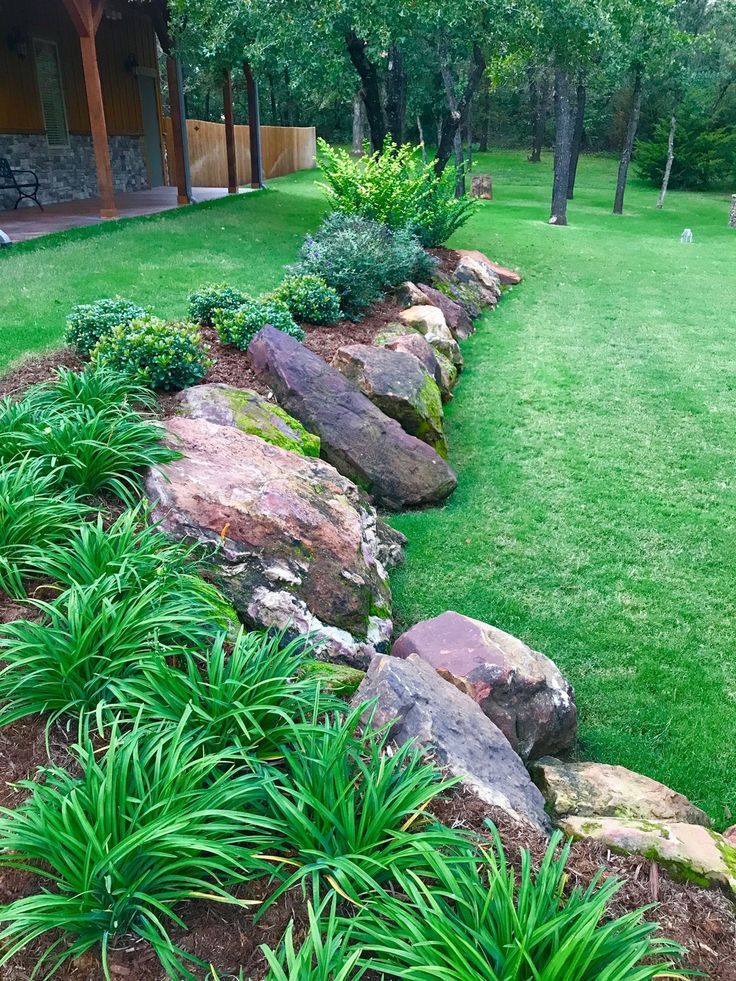 Write individual dried blades of grass in the foreground, for this, pressing the edge of the spatula against the canvas and immediately tearing it off. In this case, individual short lines of a blade of grass will appear on the surface of the picture.
18 Finishing the sky
Rocky landscape oil painting tutorial - step 18Add some warm tones to the clouds. To obtain the paint of the desired color, mix Neapolitan yellow paint with white paint. Pick up this mixture at the very tip of a #4 flat brush and apply a very thin, almost transparent layer of paint to the edges of the clouds.
Step by step oil painting lesson - result
Rocky landscape oil painting lesson - result of lesson A Expressive brush strokes
The granite hill is painted very simply, with a minimum number of strokes, but with their help it is possible to convey the texture and volume of the hill. The expressive use of brushes, molding tools and spatulas makes it possible to depict the surface of an uneven, weathered stone in a very vital way.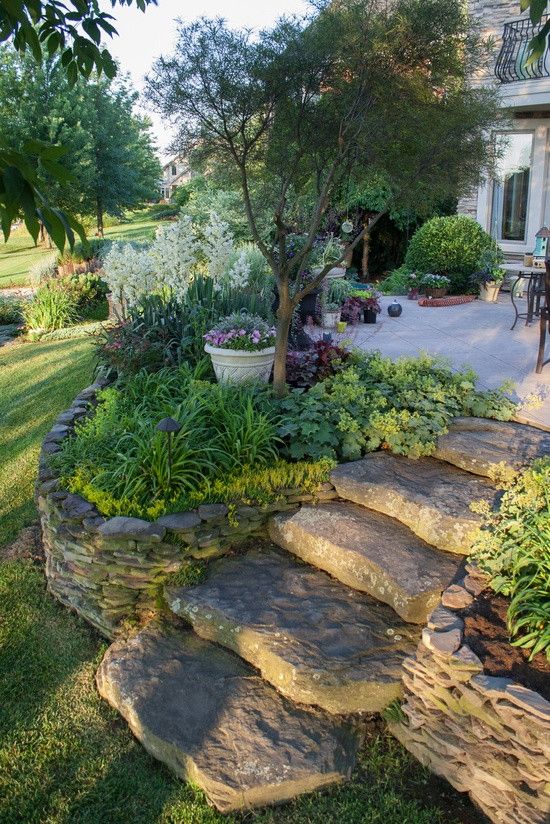
B High horizon line
A very high or, conversely, very low horizon line can have an amazing effect on the entire composition. Here the horizon line is lowered by about one third from the top edge of the painting, which allows the artist to create a spacious foreground and emphasize the vast expanse of this wild corner of nature.
B Selective use of details
A large number of details can be too tiring for both the audience and the artist himself. When painting foliage or grass, draw a few clear leaves or blades of grass in the foreground, and reduce the image of foliage or grass in the rest of the picture to a simple color spot.
HOW TO DRAW A SEA LANDSCAPE - Drawing Lessons from Dasha
- Women's magazine
- Men's magazine
- Garden and vegetable garden
- Medical Encyclopedia
- Design
- Cooking
- Holidays
- Psychology
- Retro
- Lessons
- Clothing Encyclopedia
- Jewelry stones
- Orthodoxy
- Eureka and Physics
- All about cats
- Housekeeping
- Spain
- Post
Home - Lessons - Drawing lessons from Dasha
We have already painted water with watercolors.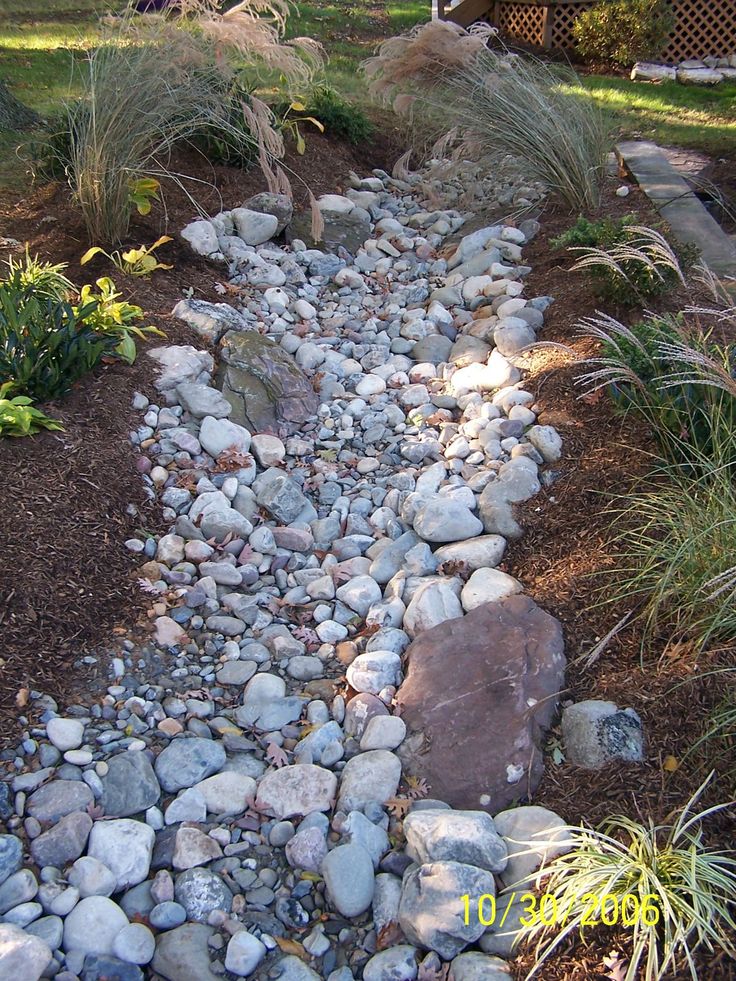 It was a river that mirrored the sky. Now let's write the sea. What's the Difference? The sea is covered with waves, and the salt water itself has a turquoise hue, so it does not always copy the sky. A lot depends on the weather though.
Gamma is somewhat restrained, but not gray. We use blue, ultramarine, ocher, yellow, kraplak red, sepia. You can include other shades of blue.
As a basis, I took a photo of the famous Diva rock in the Crimea. The composition converges with all lines to a point on the right. The forms are simplified, but I myself was surprised how easily avid lovers of the Crimea recognized a famous place.
We start from the sky. First, apply a pale warm shade. Then we add wet “shreds” from a mixture of blue, ocher and sepia in different proportions. For the range of blue tones, we also use ultramarine, but very carefully, since it blows very strong, it can score everything.
It's okay if the sky goes beyond the contour, it is light and the darker rock will not cause harm.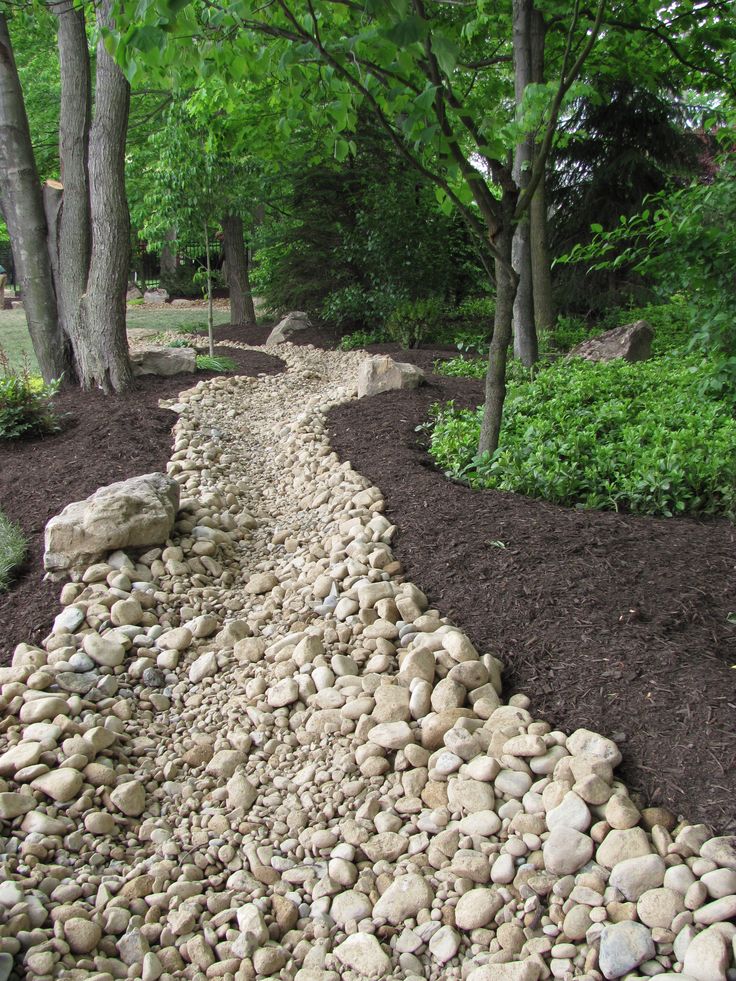 We paint over it with a pale liquid paint of a warm tone: ocher, speckled red and yellow in variations. It is even better to take tinted water, and not a color from the palette. We add the relief of the rock again in the wet. It makes no sense to describe all the colors, since you can make the rock look completely different. The main thing is that the strokes spread. Tilt the sheet to allow the paint to flow vertically.
We draw stones on the right.
We wet part of the sheet for the sea. There is more blue ultramarine here, less sepia. Between the strokes we leave white gaps of white foam. As we approach the shore, the white gaps become larger, and instead of waves we would see ocher-yellow sand. Apply this gaps of sand in small specks. All this work must be done before the sheet dries.
For stones, we use, in fact, all the same colors, but with a predominance of sepia. There is more ultramarine in the shadows.