How to hang glass plates on wall
How To Hang Plates on the Wall (The Best Plate Hangers & More!)
Updated: by Kris Jarrett
Want to know how to hang plates on the wall? I’m sharing my tips & tricks and the plate hangers that I used to get the job done right!
For months I kept my beautiful new plates sitting in a cabinet where they weren’t used or seen. And the big bare wall in my dining room? It stayed bare. Because honestly the whole idea of designing and hanging a decorative plate wall intimidated me. But last month I finally did it – I hauled my plates out of the cabinet and hung them up on our dining room wall:
The trickiest part was figuring out the how-tos of hanging the plates so I thought I’d share what worked best for me, what’s worked for others, and why you may want to choose one method of hanging plates over the other (post includes affiliate links – see my full disclosure statement {here}):
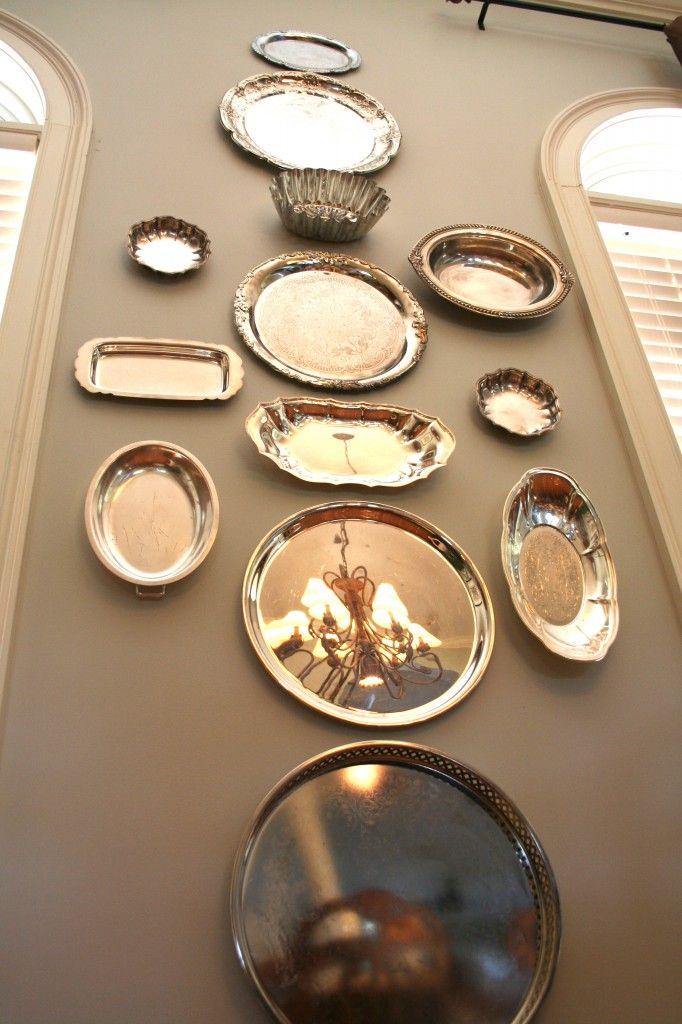
Step 1: Figure Out How You Want to Arrange Your Plates
Take all the plates that you’re thinking about using in your plate wall and lay them out on the floor. If you space constraints for the wall that they’ll be hanging on, it helps to put some painter’s tape on the floor to mark the max width and height that you have to work with. Arrange and rearrange until you figure out a design that you love!
All of my plates are from Juliska – the ones with the printed scenes are from their Country Estate collection in Flint color that you can find {here}. I also have two of {these dinner plates} from their Berry & Thread collection, and multiple different sized plates from their Jardins du Monde collection {here}. The center platter is the Jardins du Monde grande charger that is no longer available but can sometimes be found on eBay {here}.
Step 2: Trace Each Plate on Paper
I wanted to see the arrangement up on the wall before nailing in 20+ hangers and realizing that I should have shifted it up or down or changed some plates around so I traced the plates on kraft paper and cut each of them out. Once each plate was cut out, I drew both a horizontal and vertical line through the center of each paper plate, which helped me line them up evenly on the wall using a level (I wish I was a girl who could just wing it and not worry if things don’t line up quite right but I know myself enough to know that it would bug me if the arrangement was visibly “off”…).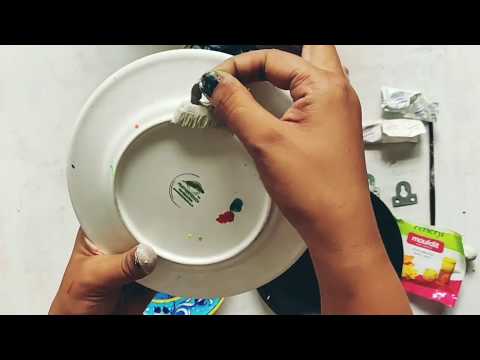
Step 3: Tape Your Templates to the Wall
Once I had my plate templates arranged and level on the wall, I taped them to the wall with LOTS of tape to make sure they wouldn’t fall down overnight (I was doing my hanging the next day). And then when I was getting my girls their breakfast the next morning, I heard a rustling in the dining room and found them in a heap on the floor. Nooo! I had used Delicate Surfaces painter’s tape and it didn’t hold. Ugh. Lesson learned. I redid the arrangement but this time used regular painter’s tape and put a tiny nail through the center of each plate just to be extra sure we didn’t have a repeat incident.
Step 4: Figure Out the Best Plate Hangers for You and Hang Them Up!
My original plan was to hang my plates using {these} Disc Hangers, which are adhesive discs that you adhere to the back of your plates. The advantages of the Disc Hangers are that they allow your plates to hang flat against the wall and they are invisible once you hang them.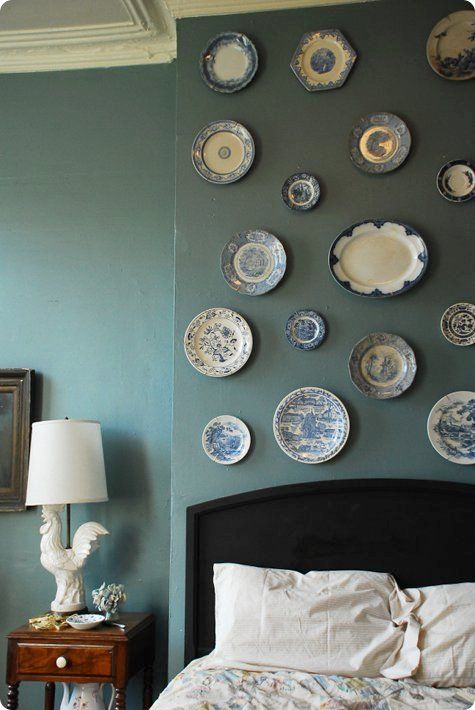 Unfortunately, I realized that most of my plates have a raised pattern on the back – definitely not a good surface for adhering a flat Disc Hanger.
The other disadvantages of the Disc Hangers are that you can’t easily remove them to use the plates – I wanted to be able to take some of the platters off of my wall if needed to use them for serving food at parties every now and then and the Disc Hangers wouldn’t allow me to do them. Also, according to the reviews some people have had issues with their plates fall off the wall when using them. But there are others who have used them with beautiful results (and no broken plates!) such as Emily of Timeless Paper who used them to hang this gorgeous plate wall over her bed (don’t you love it?!):
Since the Disc Hangers weren’t going to work for me, I ended up hanging my plates using Tripar’s white vinyl coated plate hangers found {here}. Beware that they do “run small” – my 9″ plates did not fit the 7″-9″ hanger size – I had to use the 10″-14″ size.
Since they are vinyl coated, they won’t scratch the plates like plain wire hangers can and I love that when you use this type of plate hanger, you can easily remove the plates from the wall and use them. The key to working with these hangers is to bend the top of the hanger so that your plate will lay flat on the wall once hung. The best way to do this is to first attach the plate hanger to the plate and lie the plate on a flat surface. The top of the hanger should (barely) touch the flat surface that your plate is lying on. If it doesn’t, take the hanger off the plate, bend it, and place it back on to see if it’s where you need it to be.
Once all of your plates have hangers, it’s time to get them up on the wall! I used {these OOK picture hooks} – hook your OOK hook onto the wire hanger that is attached to your plate and measure the distance from the top of the plate down to where the nail will go into the OOK hook. Transfer this measurement to your plate template and gently tap the OOK hook nail in just a bit.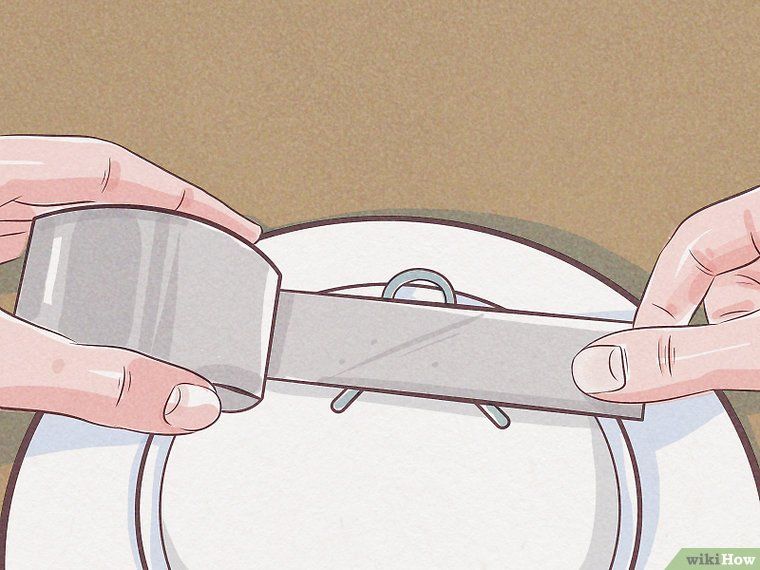
Then remove the template from the wall, put the nail through the OOK hook, and hammer it in at the same spot that you tapped it into moments ago. Now hang your plate!
Repeat.
It’s definitely my favorite thing about our dining room – you can take a tour to check the entire space out including a bunch of fun “before” and “after” pics (it wasn’t too pretty when we moved in!) {here}!
- Pin
- Share
Categories: Decorating Tips Tags: wall art
✉️FREE EMAIL SERIES ✉️
5 Secrets to Reinventing Your Home on a Budget
Simple tips to instantly transform five rooms in your home!
Reader Interactions
How to hang plates on a wall – an expert guide
(Image credit: Emma Sims-Hilditch)
Hanging plates on a wall is a little trickier than hanging pictures. First, there's their fragility, their varying shapes and sizes, and, of course, weights. However, a plate wall can be extraordinarily beautiful, individual and can make for a wonderful accent feature in a room.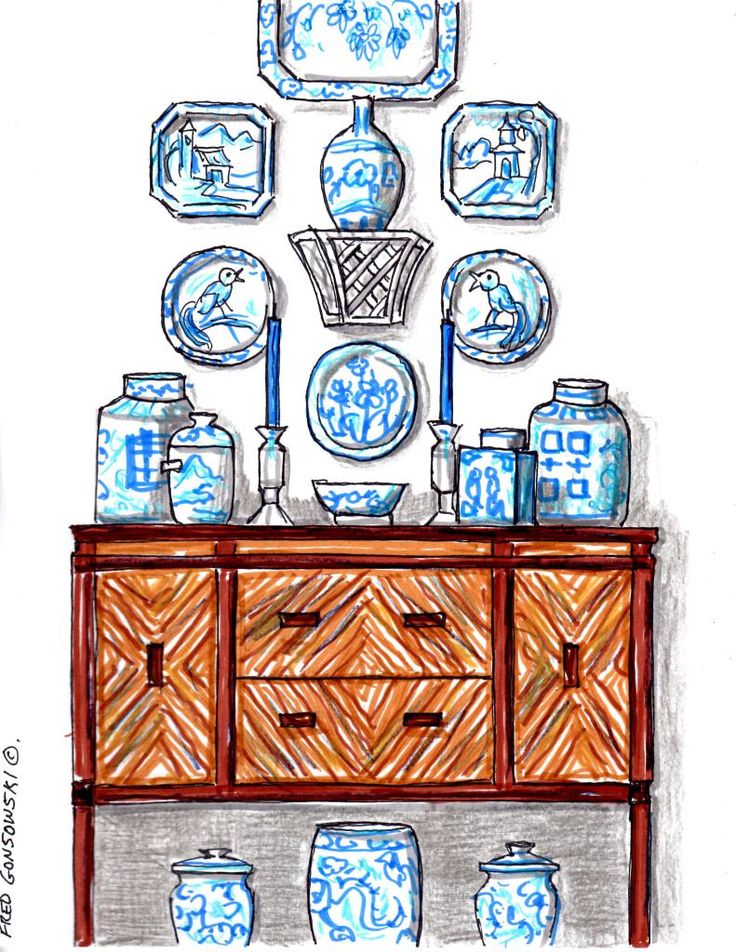
See: Home makeover ideas – simple ways to transform your home
'The selection of art is an intensely personal and often costly process,' says Emma Sims Hilditch, founder and creative director of Sims Hilditch, who is something of a plate wall expert. 'For those looking for a more economical and slightly different way to fill a blank space in a room, then a plate wall is a great solution and is easier to do than you might think.'
Below, Emma demonstrates the simple process in easy steps – including her tips for getting the process just right.
How to hang plates on a wall
(Image credit: Emma Sims-Hilditch)
'When choosing the plates, try to select a range of sizes and a variety of origins,' says Emma. 'Plates which carry meaning or a message are great additions to the design as they help it to become a meaningful part of the home.'
Follow her instructions below – and see Emma's video on hanging plates for more tips.
See: 5 tips for displaying china – plate wall inspiration, plus more ways to create a beautiful arrangement
1. Measure the wall
'Use a tape measure to work out the dimensions of the plate wall first and arrange the plates accordingly on the floor,' says Emma.
It's useful to mark with pencil or tape the central point of the plate wall. This is where you will hang your first plate. It can also be helpful to use low-tack masking tape to mark out the boundaries of the plate display on the wall – and to repeat the exercise on a table or the floor to ensure the plate display you are planning will fit comfortably into it.
2. Measure your plate arrangement
'Draw a rough sketch of where the plates will be positioned and record the measurements on paper,' says Emma.
Use this as a guide to arrange the plates on the table or floor within your taped boundaries – and adjust it until you are happy with it.
'Once the plates are arranged, measure the distance to the top of each plate starting from the highest point down, with the topmost plate being ‘0’. Then mark these measurements on the wall,' says Emma.
3. Create templates of the plates
Draw around each plate on to separate pieces of paper and cut them out to create templates. Stick each template to the wall in the arrangement you have planned on the floor. Now stand back and adjust the arrangement until you are happy with it.
'Try to stick to the measurements as a guide at this stage, but remember that this is an artistic process which may be deviated from slightly to add creative flair!' says Emma.
See: Cottage decorating ideas – charming ways to get a characterful look
4. Clean the plates
'Before hanging, clean the back of each plate where an adhesive disk with a hook will be applied.'
Ensure you clean the front of the plates, too, so that your display isn't marred by fingerprints.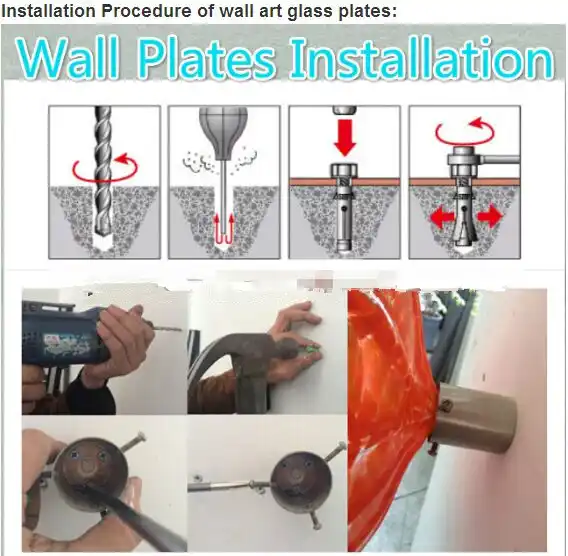
5. Prepare the plates for hanging
'Prepare the disk (‘The Original Invisible Plate Hanger ’) by applying water to the back and rubbing it with your finger for five to 10 minutes. Stick it on the underside of the plate and leave it for 24 hours to bond.
'Once the plates are ready, find the center point on the wall and use the measurements/templates previously recorded to place a hook point where each plate will be positioned, before finally hanging them according to the design.'
6. Hang plates with Command Strips
Hanging plates with Command Strips means that you don't need nails or screws and you can remove or rearrange the plate display without damaging the wall. However, it does mean that the bottom of the plates needs to be flat to the wall – and plates with a lip underneath won't be able to be displayed with Command Strips – although Command Hooks should work if the plate has a hole for you to be able to attach to the hook with string threaded through it.
Assuming you can use them, clean the back of the plates thoroughly, stick the adhesive strip to the wall and another to the plate then press together until you are happy they are attached.
7. How to hang plates with plate hangers
Plate hangers grip the rim of the plates in three or four places and have a clasp at the back of the plate that you can hook over a nail. The important part of this process – other than getting the nail firmly into the wall – is to ensure the plate hangers you choose are the right size: too small and the plates are in danger of falling.
See: Interior design tips – decorating secrets for the world's top experts
The downside to plate hangers? You can see the grips from the front of the plate, so be ready to touch them up with paint – or even nail varnish – that matches the color of your plates so that they blend away.
Founded in 2009, the Sims Hilditch design practice has become one of the most trusted and respected in the industry. Its couture approach combines interior architecture, interior design and procurement management within one concept-to-completion, fully bespoke service. Creative Founder, Emma Sims-Hilditch is passionate about her belief that good design can transform not only how people live but also how they feel.
how to beautifully hang a decorative plate on the wall on the mount
Wall plates in the interior are one of the favorite tricks of decorators. They look stylish, original, fit into any design and are a great alternative to traditional decor like paintings and posters. We tell you how to hang the plates beautifully and fix them well on the wall.
Choosing plates
First of all, you should think about which plates you are going to use as decoration. There are three options:
- Ordinary crockery, such as dinnerware. If it is of high quality and attractive, then it may well serve as an interior decoration.
- Special decorative plates.
 They are distinguished by an unusual design, often drawings or photographs are printed on them. They can be purchased at specialized decor stores or brought from travel.
 - Handmade plates. Any plate with a neutral background can be painted with acrylics or decorated with decoupage - this is a great way to express yourself. nine0014
To make the plates on the wall fit well into the interior, choose the theme of drawings or decor for the room.
- Plates on the wall in the kitchen - a classic for Provence, Scandinavian, ethnic, modern styles. This is where they will look best, as dishes are primarily associated with cooking. To enhance this effect, you can pick up plates with images of fruits, pastries, various drinks, in general, with any topic related to food. nine0014
- For the bedroom, it is better to choose plates with calm patterns in pastel colors, such as images of rabbits, lavender or birds.
- In the living room, you can not hold back and hang the most unusual and bright plates - with abstract drawings, portraits or unusual shapes.
 Recently, plates in the form of fish, leaves or shells have been very popular.
- For hallways and corridors, choose any plates that will emphasize the individuality of your home. nine0014
Where to place the plates
Their location also depends on the room.
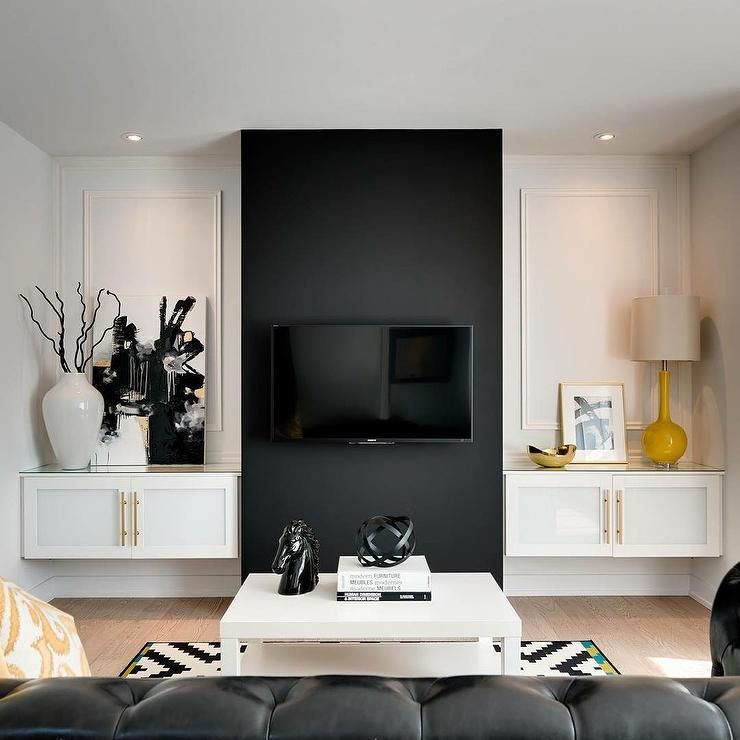
In the living room, the best place is above the head of the sofa, where decor begs to be. But if you want to see your plates more often, then it is better to place them above the TV, mantelpiece or other central points of the living room.
In the interior of the bedroom and children's room, wall plates are placed above the head of the bed or on the opposite wall. nine0003
There is usually little free space on the walls in the kitchen, but you can still find a corner for plates. If you have a dining table here, then the decor will look good above it. No less appropriate, it will look over a sideboard or a low cabinet with kitchen utensils.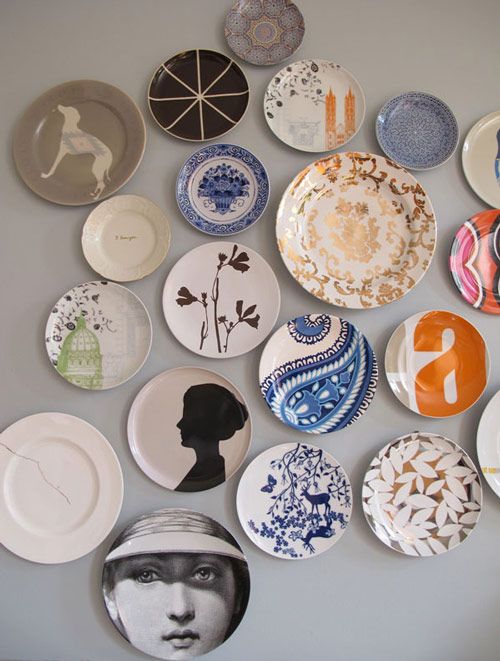 The main thing is not to place the plates in the area of \u200b\u200bthe kitchen apron, where they will regularly get dirty.
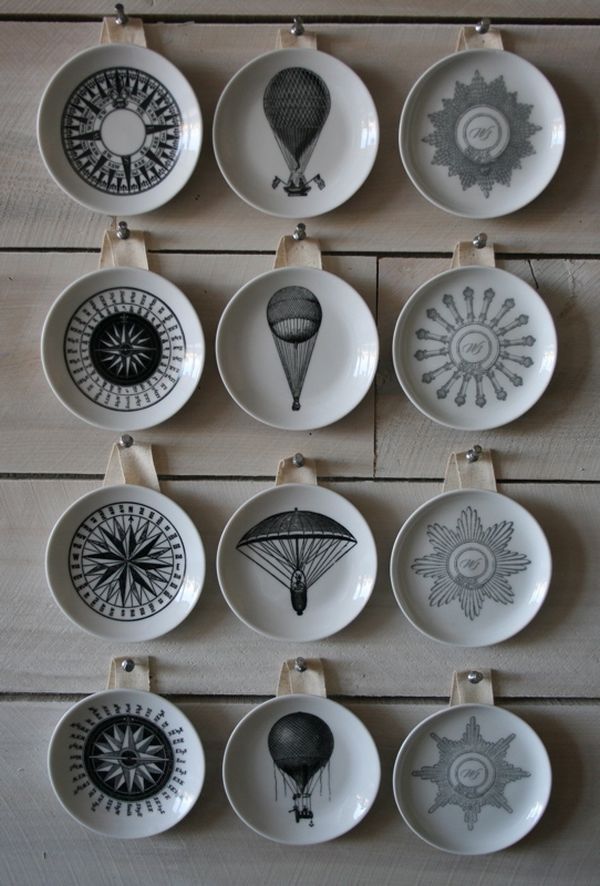
How to hang decorative plates on the wall?
There are 4 main ways to fix a plate on a wall.
- Adhesive discs or Velcro. This is the easiest way to hang a plate on the wall without fasteners. But it is not suitable for all plates, but only for the smallest and lightest. In addition, not all of them have a perfectly flat back surface in order to place Velcro on it.
- You can also hang the plate on the wall using liquid nails or cold welding . This method does not require the use of nails, and it is suitable for unusually shaped cymbals that are difficult to attach to an adhesive disc. To place the decor, glue a small wooden block on the back of the plate, wait for the glue to dry, and then glue the resulting base immediately onto the wall.
- Special holders .
 In this case, you can’t do without holes in the wall, but this method can be called the most reliable. Mounts for plates can be selected at hardware stores or made independently, for example, using “liquid nails”, glue a ribbon or a wire loop onto a plate. nine0014
- If you are looking for a way to hang a plate beautifully on the wall, but don't want to ruin the wallpaper or plaster, shelving and hanging shelves are a good alternative. The advantage of this method is that this way the plates look more orderly and it will not be necessary to drill the wall for each of them.
Secrets of matching with other interior details
Now that we figured out how to hang the plates on the wall, it's time to think about what they will look good with. Armament following recommendations of designers:
- Consider the color scheme of the room. Plates can either echo the colors in the interior or serve as a contrasting spot, it all depends on the tasks.
 If the design of the room is made in monochrome and lacks bright colors, then let the decor of the plates on the wall become a color accent that enlivens the room. But if 3-4 colors are already used in it, then select plates to match the main range.
- It is also worth considering the finish of the wall on which you will place decor . Against the background of wallpaper with patterns, you should hang plain plates, otherwise the combination of colorful walls and decor will ripple in your eyes. And on a neutral background, for example, on a white wall, you can afford to place plates with any patterns.
- The design of the room is also very important. In the interior in the style of Provence, country and shabby chic, cute plates with pastoral landscapes, floral patterns or images of animals will look great. Scandi and minimalism are well complemented by sets of plates of different colors or with abstract patterns.
 In more industrial and modern styles like loft or hi-tech, you can give preference to plates of unusual shapes or made of metal. nine0014
- It is not necessary to hang the plates in a line . If there are a lot of them, then hang them in the shape of a triangle, diamond, circle, or just randomly.
- Make sure your plates match in color, size and theme.
Our dishes can be both wall decor and serve their intended purpose. Stylish plates will give your home a personality and fill it with an inimitable Provencal atmosphere. Order decor from us and get bonus points that can be used to pay up to 50% of your next purchase! nine0003
Go to the section WARE
fastening methods, necessary tools, tips
Are you looking for an original way to decorate your home? Take a closer look at the interiors in your favorite foreign films. In large houses, the walls of the living room are usually decorated with plates with unusual ornaments. This design technique has long migrated to us. Now it has become fashionable to decorate the walls of your office, bedroom, nursery or living room in this way. In this article, you will read useful tips on how to hang a plate on the wall. You will be surprised how many ways there are for this. We will also talk about the rules for decor placement and saucer placement patterns. nine0003
So, let's figure out how to hang a plate on the wall. Mounting is the first thing to consider.
Method #1: no nails
If you are looking for a way to hang a plate on the wall without drilling, then this tip is for you.
Take a plate and glue a small block of wood to it. Wait until everything is dry. Now using this piece of wood and liquid nails or cold welding, glue the plate to the wall.
This base is needed to increase grip. The fact is that the smooth surface of the plate will not be fixed on the wall. Porous wood is a great helper in solving the problem. In addition, it is rare that a plate has a flat surface at the back. Now you know how to hang a plate on the wall without nails. nine0003
Pro tips: how to hang a picture on the wall
Placing pictures and photographs on the wall is one of the most expressive ways to express your...
Making your own holder
Use any ribbon or leather cord. Using the same glue as mentioned above, glue it to the plate in two places to form a hanging loop. Close the edges with pieces of felt, paper or any fabric. This will make the rear view more aesthetic, and the mount more secure. Drive a nail or screw a screw into the wall, and hang the plate by the tape. nine0003
Tape or plaster
Light decor can be fixed with things that are in almost every home. We will need white tape and a band-aid. Stick a long piece of plaster on a plate vertically. Now, with horizontal stripes, fix it again on a plate. Insert the holder into the end of the electrical tape and seal it. Cover the end again with a few horizontal strips of electrical tape. This is a fairly reliable method of attachment.
Self-installation of a satellite dish: step by step...
When a person decides to install satellite television, they are most often invited...
Paperclip, wire and hairpin
It is very convenient to use an eyelet from tin cans for fasteners. If there was none in the house, then a wire, hairpin or paper clip will do.
You can use a hot glue gun (silicone sticks) for work. The back surface must be degreased. For better adhesion of surfaces, you can walk a little along the back wall of the plate with sandpaper. But this is optional. The fact is that if you scratch the surface a little, then the materials stick together better and there is less chance that your plate will fall and break. nine0003
Ready-made wall holder
If you do not like to mess around on your own and hand-made is not your thing, then look for special plate holders in decor stores.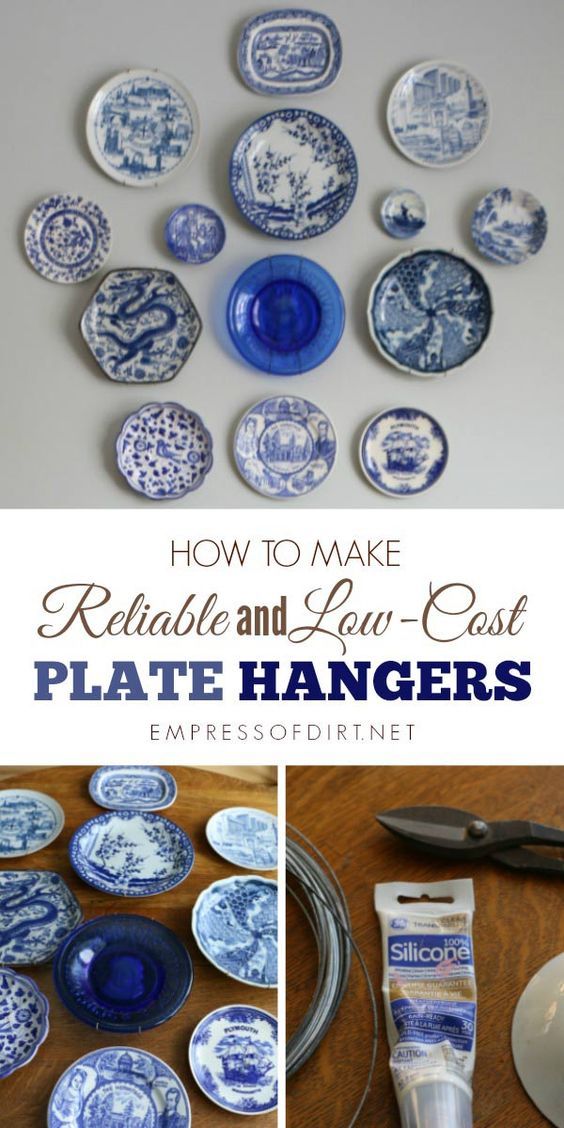 There you will definitely be prompted how to hang a decorative plate on the wall. As an option, a mount-stand is suitable for you. Just fix it to the wall, and put a decorative element into it.
Do-it-yourself TV wall mount
An important task is not just to mount the TV on the wall, but to do it as much as possible...
Factory holders are divided into two types:
- steel with spring;
- round sticker with eyelet.
How do you determine which type of commercial fastener you need? Focus on the weight of the plate. If it is heavy and large, then you need a metal mount. If it is small, then you can get by with a neat sticker.
Mounting the plates on the wall
If you are going to attach a group of decorative items, then first you need to draw a layout - how you see the arrangement of the plates. Now put each product on paper and circle. Cut out each "pattern". Take a sheet of drawing paper and tape the paper plates to it.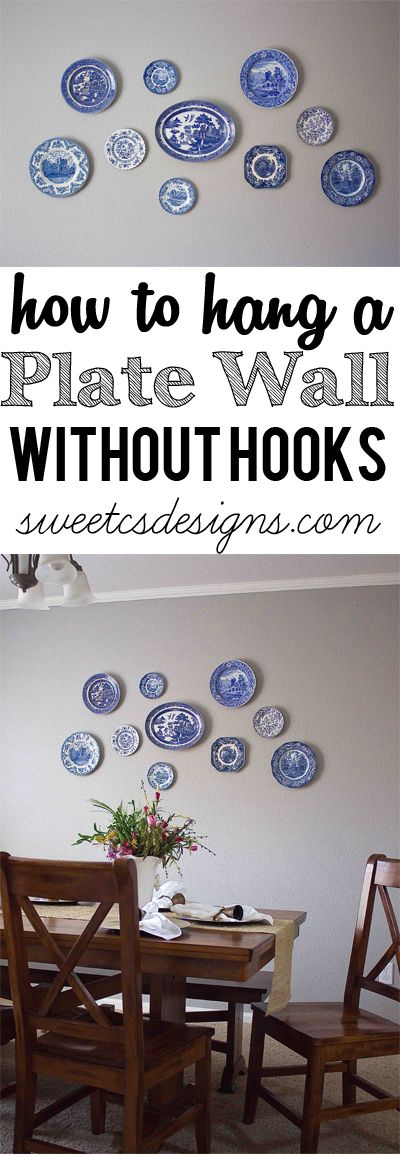 nine0003
Let your imagination run wild and you will surely find your own original drawing. It can look like a waterfall or a rainbow. Or maybe you gravitate towards strict geometry? You can draw a sheet into even squares or rhombuses. Now you have a good idea of how your plates should look on the wall. Never rush to fix the decor without thinking through the composition. After all, any method can leave a mark on the surface that will be difficult to disguise.
Now remove the paper plate models from the wall and, peeking into the “cheat sheet” on the Whatman paper, fix the sketches on the wall surface. It is best to attach to the wall with masking tape. It is made of paper and will not leave marks on the wallpaper. nine0003
Now trace around the blanks with chalk or a disappearing marker. Below you can see some ready-made layouts. Perhaps they will help you create your own version and you will immediately understand how to hang the plates in the best way.
You can also play with some beautiful and massive object, for example, a mirror in a beautiful frame that hangs on the wall.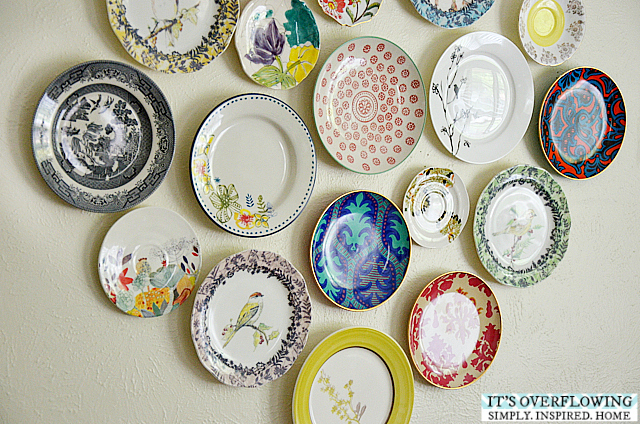 Plates located above the fireplace or an old chest of drawers look great. The plates look beautiful above the bed. In the corridor, they can decorate the space around the doorway. nine0003
How to hang plates on the wall beautifully
Most romantic people love "creative mess". Don't like strictness? Try to arrange the assorted decor in a chaotic manner.
Plates can be combined in the same theme or be in the same color scheme. It is not necessary that all objects be round or square. The combination of different geometric shapes looks more interesting. Next, consider several schemes.
Instead of travel magnets
Do you travel a lot and bring magnets back from your trips? Try to replace them with plates with the sights of the cities you have visited. Magnets are nice, but it's better to admire the plates in the living room than to be constantly tempted to steal something from the refrigerator during bouts of nostalgia.
Plate puzzles
There is a kind of decor. One ornament is drawn on a group of plates. You can understand what exactly is shown if you place the products side by side in a certain order. Very interesting game and a great idea for interior design. nine0003
Strict geometry
If you are a pedant and like everything to be regulated, then the question of how to hang a plate on the wall will not arise. Naturally - along a flat line, or a circle, or a rhombus. In general, along a given coordinate axis.
For dreamers
But if creativity is in full swing, then something unusual can be formed from decorative elements. For example, sun, waves, sunflower, car. This arrangement is especially relevant in the children's room. Get your child involved. Perhaps he will tell you the most unusual solution. nine0003
How to hang plates on the kitchen wall
It all depends on the style of your kitchen and the available space on the walls. You can arrange the plates however you like. There are no fixed rules here.
But which plates to hang will depend on how this room is designed in what style.
- If the kitchen is decorated in ethnic style, then copper trays and dishes painted in folk style (Gzhel, Khokhloma, Indian motifs) will look very organic on the walls. nine0014
- A country-style dining room will sparkle with new colors if you decorate the walls with wicker dishes. Also bright plates with floral ornaments are suitable here. The more saturated colors on them, the better.
- In a large kitchen, which is decorated in a classic style, white, grayish, milky plates on the walls will be appropriate. It is desirable that they be of different sizes and shapes. Make sure that the group of saucers has something in common. Plates look beautiful, the edges of which resemble knitted napkins. nine0014
Nursery decor
There is no limit to fantasy. There are a great many products with a children's theme, and let the owner of the room tell you how to arrange them correctly.