How long do brussels sprouts take to grow
How to Grow Brussels Sprouts
'Brigitte F1' has to be the best and most reliable brussels sprout variety with fantastic results every time. We recommend using an F1 hybrid sprout like Brigitte because the sprouts stay closed longer giving you a broader harvesting period.
Brussels Sprouts, so called because they were very popular in Belgium, are best known today as the least popular part of the Christmas lunch. Yet they are delicious if cooked properly and are an excellent source of vitamin C, vitamin D, folic acid and dietary fibre.
Brussels sprouts contain health-promoting compounds called glucosinolates which may help to prevent cancer, so we can call them a 'super food'.
Brussels Sprouts are a slow growing vegetable, taking 26 to 31 weeks to reach maturity and produce a crop of sprouts. However, there are few other vegetables that can be enjoyed fresh from September right through February.
Where to Grow
Sprouts are hardy plants and will grow in most sites but will need to be staked in Autumn in exposed areas to prevent blowing over in high winds. Soil should be very fertile with plenty of garden compost and well rotted manure added. Ground is better prepared the previous Autumn and allowed to settle as sprouts need a firm soil to produce good sprouts.
When to Grow
If you choose staggered planting dates sprouts can be harvested for a long period from September to February. Sow in modular trays in mid March, early April and early May and plant out 4 weeks later.
Crop Rotation
Sprouts belong in the Brassica section of your rotation plan.
Sowing
Brussels sprouts are best sown in a modular seedling tray and planted out 4 weeks later. Sow 1 seed per module at 2cm deep in an 84 cell plant tray. They will germinate in 7-12 days and be ready to plant out about 4 weeks later. If the plants are on a heat bench or in a propogator and they are looking spindly, turn the heat down and try to give them as much light as possible. If 2 sprouts have been germinated in any of your modules you need to remove the weaker one.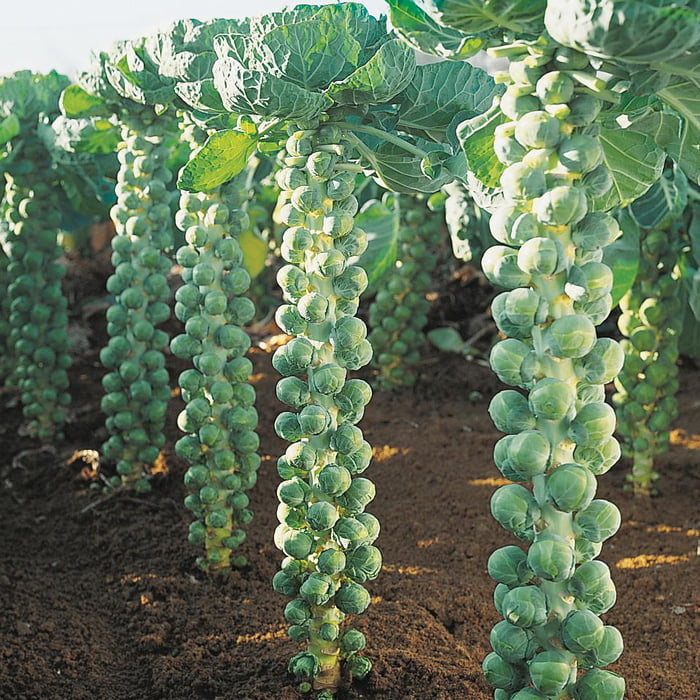 Don't pull the seedling out as you'll damage the roots of the one you want to keep. Nip the unlucky one with your finger nail or cut with a scissors. Watering. It's important to keep you seedlings properly watered before you plant them out in the gartden. You are actually far better to under rather than overwater your plants. This may sound odd but making the roots serch for water helps to develop a better root system. It's a bit like keeping fit. You do need to be careful, however, not to let the compost plug completely dry out or it will form a crust on top and won't absorb the moisture the next time you water. It will all depend on the weather of course but on a hot day you will need to water twice a day, if it's it's dull every 2 days will be fine.
Hardening Off
Plants that have been raised indoors will need to get used to the outdoor temperature and conditions before they can be planted outside, this will take about a week to 10 days depending on the weather. The best way is to use a cloche or mini greenhouse. You can leave the cloche off the plants on dry frost free days and replace at night. Gradually increase the time with the cloche removed until the end of the week when can you leave it off day and night. If the weather is mild you may not need the cloche, just move the plants outside for longer periods each day. If you have started your seeds on a windowsill you will need to leave them in an unheated room for a day or two before moving outside to the cloche.
Transplanting
Brussels Sprouts plants are large and need a much larger planting space than you would think. Tall varieties of sprouts need 90cm between plants and 90cm between rows, smaller varieties need a spacing of 70cm between plants and 70cm between rows.
Make a hole in the soil with a trowel or dibber slightly deeper than the seedling root ball. Plant the seedling up to the level of the first true leaves and push the soil in around the plant with your fingers (The true leaves are the second set of leaves produced after the initial rounded seed leaves). The idea is to get a firm connection between the root ball and surrounding soil, the movement is pushing soil in around the plant horizontally rather than pushing down from the top.
Sprouts need a very firm bed so firm down well around the plant with the sole of your boot.
Seedling plants can be planted up the the base of the first set of true leaves if the stem has got a little leggy from lack of light at the seedling stage. The true leaves are the second set of leaves produced after the initial rounded seed leaves. A light sprinkle of seaweed/poultry manure around the planting hole will help your broccoli get off to a good start. Water it in well if rain is not likely in 24 hours.
Crop Care
Keep your sprouts well watered in dry weather, all brassicas prefer a moist soil. Sprouts are also a hungry crop so apply a feed every 4 weeks or so. Our 'Seamungus' seaweed-chicken manure pellets are an excellent source of nitrogen which will be perfect for leafy crops like cauliflower. If you want to give the plant a quick boost a liquid seaweed feed is ideal. Hoe regularily to control weeds and to stimulate the growth of the plant. One of the best gardening tools you'll ever buy is the oscillating stirrup hoe. It's a very effective old fashioned tool that really works properly. Hoeing not only removes the weeds but it also breaks up the surface of the soil and creates a fine texture or 'tilth'. A good tilth lets air and moisture in to the roots of your plants thus increasing their vigour.
Stake plants in Autumn and earth up around the roots to prevent them rocking or getting blown over. Drive a 2 inch post in beside the plant and tie with a soft tie or garden twine.
Pests and Diseases
See below for the most common symptoms of broccoli pest and disease:
Cabbage Root Fly
Look out for blue tinged leaves which wilt in sunny weather. Recent transplants are most vulnerable and will die, when plants are lifted you will find small white maggots around the roots. Use cabbage collars fixed around the plant stems or cover the crop with protective mesh or fleece.
Cabbage Caterpillars
Cabbage caterpillars are active between may and October and lay clusters of yellow eggs under the leaves. When the eggs hatch the caterpillars will start tucking into your plants so it's easier to check the underside of the leaves periodically (or if you see white butterflies hovering around plants) and brush of eggs. To prevent butterflies laying eggs protect the plants a fine insect mesh.
Leather Jackets & Cutworms
Stems are severed at ground level resulting in the death of seedling plants. Leather jackets and Cutworms are a similar grey/brown colour and live below the surface of the soil where the emerge from at night. If you find one severed stem search the soil in the vicinity and you are likely to find the culprit. To control use a nematode based natural insecticide.
Clubroot
Stunted growth especially if infected as seedlings. Discoloured leaves which wilt. Roots are a thick distorted mass. Clubroot likes acid soil so adding ground limestone or calcifies seaweed will help prevent it's spread. If discovered avoid planting any member of the brassica family for 7-9 years. Isolated gardens rarely have clubroot, it can only enter through infected transplants or walking in infected soil.
Aphids
These are greenfly and blackfly which will be clearly visible on the leaves and especially tender young shoots. These seriously weaken the plant. Control with an organic fatty acid based pest control spray.
Blown Sprouts
Blown sprouts are open leafy sprouts rather than nice tight buttons. The causes are not enough well rotted organic matter in the soil, unsettled ground before planting and not firming down the seedlings enough when planting out. The condition is far less likely to occur with an F1 hybrid variety like brigitte F1.
Harvesting Sprouts
Spouts ripen from the base of the stalk, start picking from the bottom and work your way up. Remove any yellowing leaves as you go as they can harbour disease and restrict airflow around the ripening sprouts.
If you're heading up to the in-laws for Christmas and have told them you're bringing your homegrown sprouts harvest cut the whole stalk, they'll keep longer. Dig up the root and preferably burn rather than compost to avoid encouraging club root.
How to Grow and Care for Brussels Sprouts
Although Brussels sprouts (Brassica oleracea var. gemmifera) date back to ancient Rome, they're named for the city of Brussels, Belgium, where they have been enjoyed for centuries. Part of the cabbage family, Brussels sprouts look like mini cabbage heads. They form on thick stems, along with broad leaves. These leaves are also edible and can be prepared like other hardy greens.
Brussels sprouts are slow-growing biennials (though commonly grown as annuals) that require a long growing season. They are typically planted in the summer for a fall to winter harvest.
Click Play to Learn How to Grow and Care for Heart-Leaf Philodendron
| Common Name | Brussels sprouts |
| Botanical Name | Brassica oleracea var. gemmifera |
| Family | Brassicaceae |
| Plant Type | Biennial, annual, vegetable |
| Size | 2–3 ft. tall, 1 ft. wide |
| Sun Exposure | Full sun |
| Soil Type | Loamy, well-drained |
| Soil pH | Neutral |
| Bloom Time | Summer |
| Hardiness Zones | 2–10 (USDA) |
| Native Area | Mediterranean |
How to Plant Brussels Sprouts
When to Plant
Brussels sprouts require a growing season of 80 days or more, and they improve in flavor after being subjected to a light frost.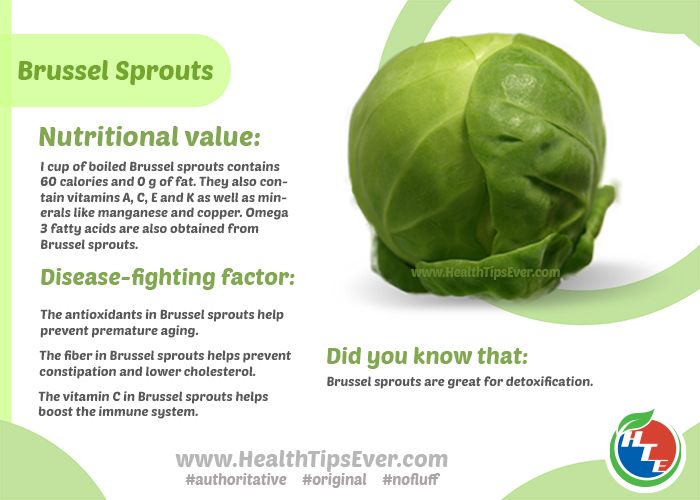 In general, plant seeds approximately four months prior to your area's projected first fall frost date. That likely will mean in the early to mid-summer for areas with cold winters, giving you a fall to early winter harvest. Or in areas with mild winters, you'll typically plant in the mid to late summer for a mid to late winter harvest.
Selecting a Planting Site
Pick a spot that gets plenty of sun and has sharp soil drainage. A raised garden bed is ideal because it can better withstand temperature fluctuations. Container growth is also an option.
Keep Brussels sprouts away from strawberry plants, as strawberries can inhibit their growth. Likewise, don't place Brussels sprouts by members of the nightshade family, such as tomatoes, as sprouts can affect their growth.
Spacing, Depth, and Support
Plant seeds around a half inch deep and 3 inches apart. Then, seedlings should be thinned to around 18 to 24 inches apart once they reach roughly 6 inches tall. Support stakes are sometimes required to prevent the plants from toppling over as the sprouts develop, and it’s best to add those at the time of planting.
Brussels Sprouts Plant Care
Light
Brussels sprouts perform best in full sun, meaning at least six hours of direct sunlight on most days. Too much shade will slow the sprouts' maturity.
Soil
Brussels sprouts like a loamy, well-drained soil that's rich in organic matter. It's ideal to mix a thick layer of compost into the soil prior to planting. The soil pH should hover around neutral.
Water
Keep the sprouts' soil moist but not soggy. Around 1 to 1.5 inches of water per week should be sufficient. Inconsistent watering can result in poor sprout development. A layer of mulch can help to retain soil moisture and keep the roots cool.
Temperature and Humidity
Brussels sprouts prefer temperatures between 45 and 80 degrees Fahrenheit, though they can tolerate short spells below freezing. Humidity typically isn't an issue as long as their soil moisture needs are met and there's good air flow around the plants.
Fertilizer
Use an organic vegetable fertilizer that’s high in nitrogen starting once the seedlings reach around 6 inches tall. Reapply throughout the growing season, following label instructions.
Pollination
Brussels sprouts flower and go to seed in their second growing season. And because most people grow them as annuals, they don't get to this flowering stage. Insects and the wind assist in their pollination.
The Spruce / K. Dave The Spruce / K. Dave The Spruce / K. Dave The Spruce / K. Dave The Spruce / K. Dave The Spruce / K. Dave The Spruce / K. DaveTypes of Brussels Sprouts
There are several Brussels sprouts varieties that vary in appearance, production, and more:
- 'Jade Cross' is a compact, high-yield plant that's good for windy locations and can withstand some hot weather.
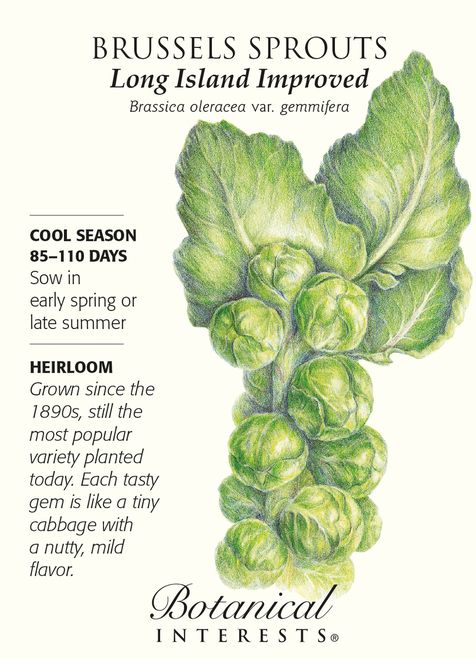
- 'Long Island Improved' is another small but high-yield plant that stands up to wind and tolerates freezing.
- 'Oliver' takes around 80 to 90 days to mature, and it's known for its disease resistance.
- 'Falstaff' features sprouts with a reddish purple color.
Brussels Sprouts vs. Cabbage
Brussels sprouts may look like mini cabbages, and they’re both cool-weather crops. They even have a somewhat similar taste, though cabbage tends to be milder. However, the main difference is Brussels sprouts grow on the plant’s thick stems whereas cabbage heads grow from the ground.
Harvesting Brussels Sprouts
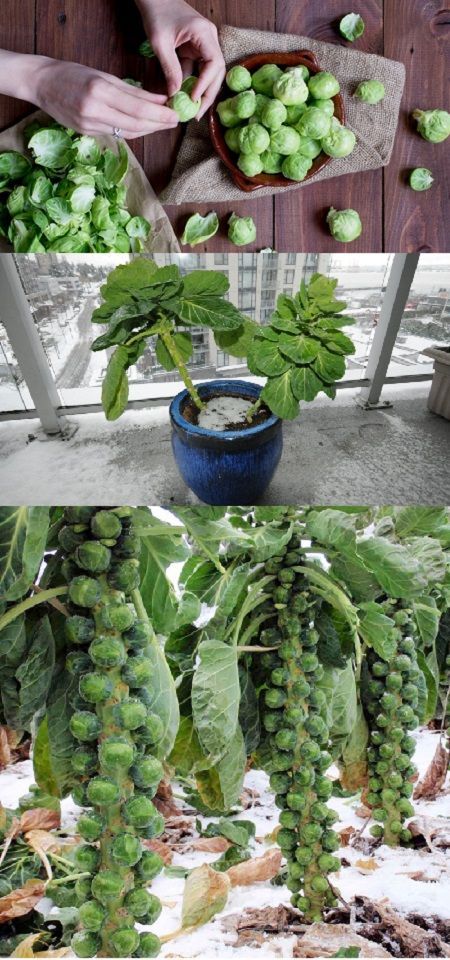
Brussels sprouts grow tall first and don't start producing sprouts until they reach almost full height. Each sprout grows in the leaf axil, or joint. Sprouts begin maturing from the bottom of the plant upward. Start harvesting when the lower sprouts reach about an inch in diameter. Pick them before they get too large and start cracking and turning bitter.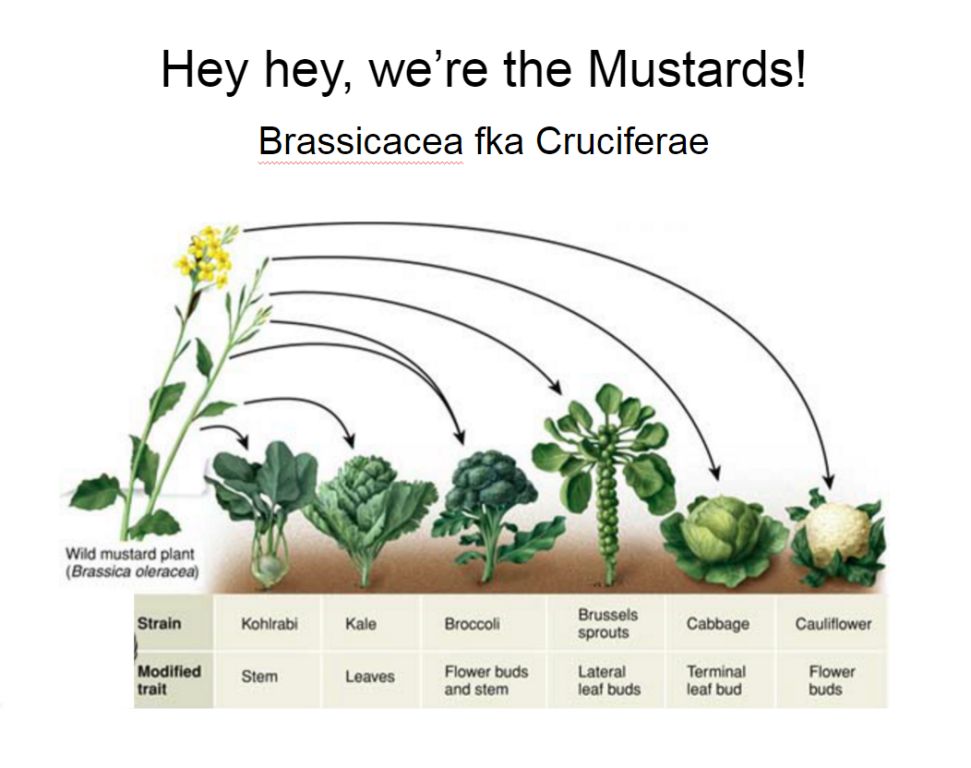 Each plant yields approximately a quart of sprouts.
Pulling off the sprouts is easier if you remove the leaf below each sprout first. Then, twist and pull the sprout. Some people prefer to use pruners instead. After harvesting, a second crop of sprouts might begin to grow at the base of the stem. These won't be as tight as the first crop, but they are still edible.
You can store sprouts in the refrigerator for around five days. Don’t wash them until right before you plan to use them.
How to Grow Brussels Sprouts in Pots
If you don’t have a suitable garden site for a Brussels sprouts plant, container growth can be a good option. It will allow you to control the sunlight, water, and soil for your plant. Opt for a container that’s at least a foot wide and deep. It should have ample drainage holes. Unglazed clay is an ideal material because it will allow excess soil moisture to evaporate through its walls as well.
Pruning
Brussels sprouts generally don’t require pruning. However, you should promptly remove any damaged or diseased portions before they weaken the entire plant. You also can remove yellowed leaves to allow the plant to put its effort into sprout production.
Propagating Brussels Sprouts
Because most people grow Brussels sprouts as annuals, they won’t be able to collect seeds in the plant’s second year for propagation. However, it is possible to regrow Brussels sprouts from scraps. This is an easy way to get more from your harvest, especially if you can’t eat all the sprouts. The best time to start this process is in the early summer for planting outdoors. Here’s how:
- Wash the sprout, and remove any dead leaves.
- Cut the bottom off the sprout.
- Position the cut piece with the stem side down so that it’s just submerged in a shallow dish of water. Do not fully submerge the sprout. Place the dish in a warm spot with bright, indirect light.
- Refresh the water daily. Also, remove any dead leaves.
- Look for roots forming from the stem in around two weeks. Leaves also will begin to grow from the top. Once there is a substantial root system, the sprout should be ready for transplanting.
How to Grow Brussels Sprouts From Seed
Brussels sprouts seeds germinate best at temperatures between 45 and 85 degrees Fahrenheit. To start plants in containers, gently press the seeds into a moist seed-starting mix. Keep the soil moist but not soggy, and put the container in a warm spot with bright, indirect light. Expect germination within about three weeks.
Potting and Repotting Brussels Sprouts
For container growth, use a loose organic vegetable potting mix. If you want, you can mix some compost into the soil to improve its drainage and nutrient content. Repotting shouldn't be necessary, as it's best to select a container that will accommodate the plant's mature size at the time of planting.
Overwintering
Because Brussels sprouts generally are grown as an annual, no overwintering will be necessary. Just make sure to plant early enough for your area to be able to harvest before frigid temperatures set in.
Common Pests and Plant Diseases
Brussels sprouts are prone to the same problems as other plants in the cabbage family. The most common pests are the cabbage looper, cabbageworm, cabbage root maggot, and aphid. Consider using row covers to protect your plants.
Several fungal diseases also can affect Brussels sprouts, including black rot, clubroot, downy mildew, and white mold. Adequate air circulation around the plants can help to prevent fungal issues. If plants become diseased, it’s usually best to destroy them.
How to grow Brussels sprouts: sowing, picking, fertilizing
Brussels sprouts contain proteins, minerals, and the supply of vitamin C in this vegetable simply rolls over. But there is one “but” - the culture has a very long ripening period - it takes up to 6 months from sowing seeds to ripening. To get a vitamin harvest in the summer, it is worth considering the duration of cultivation of the crop and the climatic conditions of the region.
Brussels sprouts: varieties
There are three groups of cabbage varieties:
- Early maturing - the crop is ready for harvest in 4 or 4.5 months.
- Medium - the ripening of cabbage heads takes about 5-6 months.
- Late - these varieties of cabbage will take 6 to 7.5 months to ripen.
Based on the timing of the ripening of the crop, it is necessary to properly plan the planting of Brussels sprout seeds for seedlings. Seedlings are planted in the ground at about 2 months of age. Weather conditions suitable for planting work in different regions fall on different months, in the south - in May, in the middle lane and in the northern regions - in June.
Planting early brussels sprouts outdoors in May at 2 months of age can expect crops to ripen in early August. And late varieties with this planting can be harvested in September. In some regions, a persistent cooling is already observed in September, late cabbage may not ripen, so the choice of varieties should be approached responsibly or grown in a greenhouse.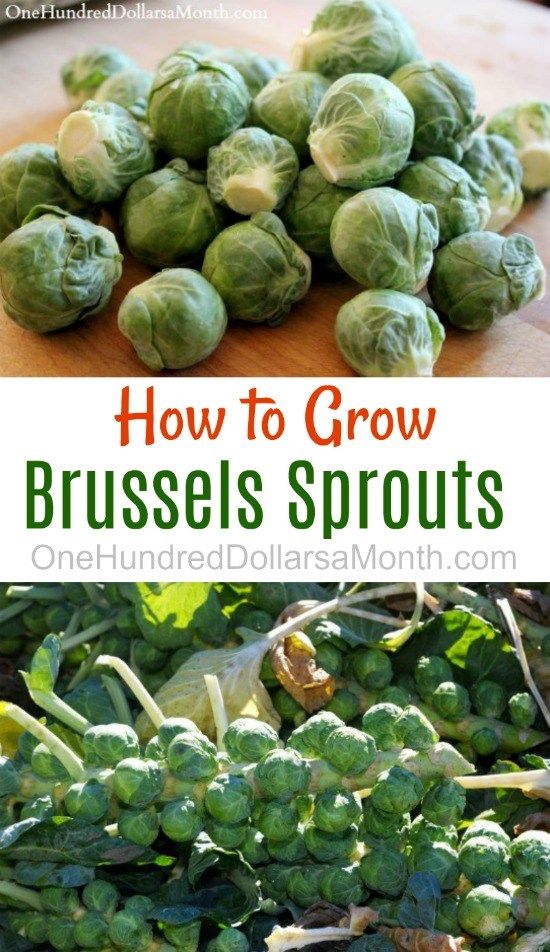
Brussels sprouts: seed preparation for planting
Brussels sprout seeds must be treated before planting - this operation will take almost 2 days.
| Brussels sprout seed preparation operations for sowing | Description of actions |
| Seed treatment in hot water | For 20-30 minutes, the seeds are dipped in a bowl of hot water (temperature about +50C) |
| Cooling | Heated seeds are cooled in cool water for about 1-2 minutes |
| Soak in growth promoters | The seed material is soaked in a solution of Epin, Succinic acid, Zircon for 12 hours. It is better to do this in a closed container, and spread the seeds on cotton pads |
After soaking in biostimulants, the seeds are placed for a day in a household refrigerator, where they are kept at a temperature of +3 + 5C. It turns out like a short stratification.
After finishing the preparatory procedures, the seeds are slightly dried, after which they start sowing.
Sowing seeds of Brussels sprouts
Cabbage seeds can be planted for seedlings in separate cups and boxes filled with nutrient soil. In any case, the container for planting must be durable, because seedlings are grown for 2 months before transplanting into open ground.
Prepare the soil yourself by mixing 1 part leaf humus; 1 part sand, 1 part peat. Leaf humus can be replaced with fertile soddy soil. It is useful to add to the bucket of the mixture:
- Superphosphate - 1 tsp.
- Wood ash - 3 to 4 tbsp. l.
Seeds are planted in individual cups, one at a time, in a common box, the distance between plants is kept at least 4 cm. The depth of placement is no more than 1.5 cm. After sowing, the soil in the boxes is carefully moistened.
Germination of seedlings is carried out in a room with good lighting, daytime temperature is about 16 degrees, at night it is reduced to + 5 + 6C.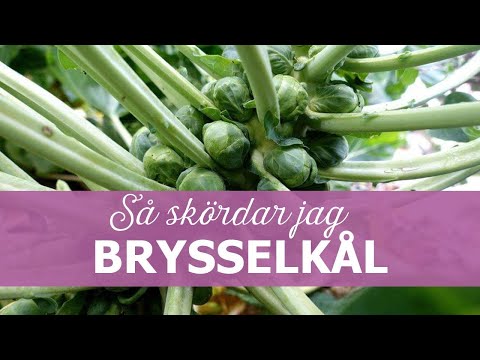
Watering is carried out in doses, it is not recommended to flood seedlings too much and turn the soil into marsh slurry.
Top dressing of seedlings
During the growth of seedlings, fertilizer is applied under the root twice:
- At stage 2 of the leaf, watering is carried out with a nutrient solution (40 g of superphosphate, 20 g of ammonium nitrate and 10 g of potassium sulfate are dissolved in 10 liters of water).
- 2 weeks after the first feeding - a solution is used for irrigation (superphosphate - 60 g is added to 10 liters of water; ammonium nitrate - 30 g; potassium sulfate - 20 g).
Outdoor planting
Brussels sprouts are planted in the ground at the 4-5 leaf stage. Approximately 2 weeks before this event, seedlings begin to harden. Boxes with seedlings are taken out into the open air. Do it in the middle of the day when it gets warmer. The first procedure lasts about 30 minutes, with each day the hardening time is increased. Seedlings that have stood for 2-3 days on the street are ready for transplanting to a permanent place in the garden.
Tip! Approximately 4-5 days before the scheduled transplantation of Brussels sprouts seedlings into the open ground, watering of the plants is stopped, and one hour before the start of work, the seedlings are watered abundantly.
For planting cabbage, choose a site that is as open as possible to the sun's rays, with fertile soil. It is very important to determine the acidity of the soil - cabbage gives excellent yields at a pH of 6.7-7.4.
Attention! Brussels sprouts must not be planted in areas where tomatoes, beets and all members of the Cruciferous family (radish, radish, all types of cabbage) have previously grown.
Work carried out in the evening or cloudy weather.
Seedlings are planted according to the scheme 60x60 cm. After completion of work, the plants are watered abundantly.
Caring for Brussels sprouts
Growing Brussels sprouts is no different from caring for white cabbage. The only difference is that this type of cabbage does not need to be spudded.
Otherwise: gentle loosening; watering about once a week; weed removal; inspection of plants for pests.
Adult plants are fed 2 times: 7 days after transplantation, the bushes are watered with a solution of nitrophoska - 5 liters per plant. The second top dressing is carried out at the stage of the appearance of heads of cabbage.
Author of the article: Oksana Artemenko
Published: December 18, 2020
Views: 17057
(Voting: 5, Rating: 1.4)
Share with friends:
Planting, Growing and Care in open ground
Content: Content: Content:
- Crop description
- Growing Brussels sprouts from seeds
- When to sow Brussels sprouts for seedlings
- Growing seedlings
- Picking
- Planting Brussels cabbage in open ground
- When to plant
- in what soil
- how to plant
- How to grow Brussels cabbage
- Care
9000 9000 9000 9000 9000 9000 9000 9000 9000 9000 9000 9000 9000 9000 9000 9000 9000 9000 9000 9000 9000 9000 9000 9000 9000 9000 9000 - Species and cultivars
Brussels sprouts are interesting not only for their small delicacy sprouts, but also for their attractive appearance: tall stalk and spreading wide leaves.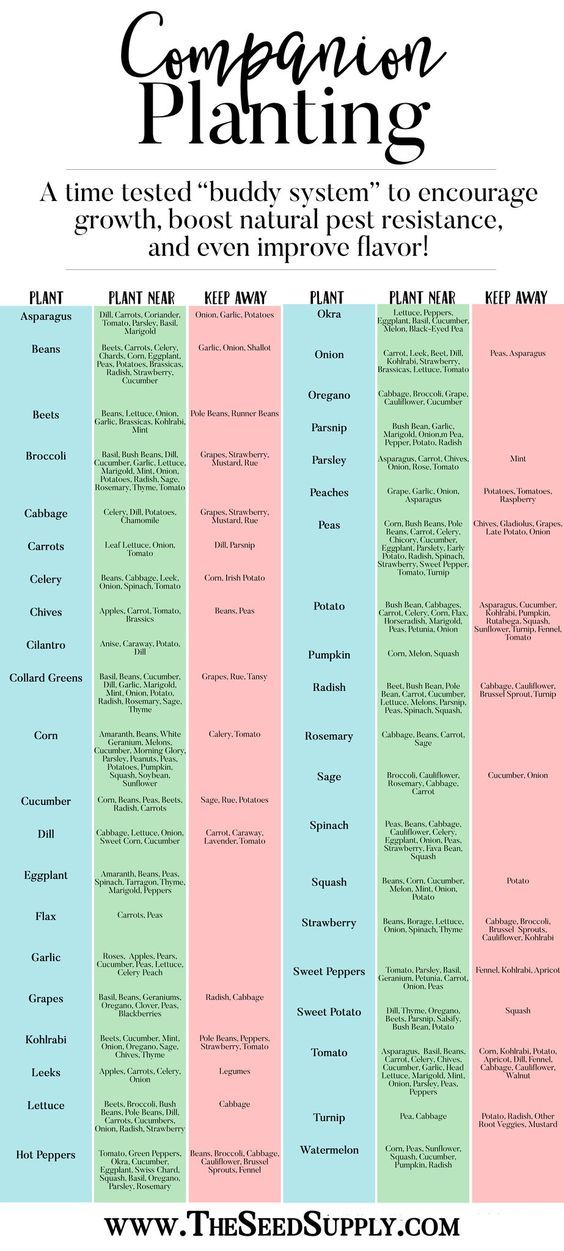 The plant is suitable for cultivation throughout Russia. In this article, we will look at the main nuances of growing Brussels sprouts from sowing and caring for seedlings to harvest.
Crop description
Brussels sprouts are tolerant of short frosts and adverse weather conditions. This resistance is associated with a long growing season: from germination to harvest, depending on the variety, it takes up to 2.5 months. Each plant brings from 20 to 70 small heads of cabbage, with a total weight of 0.5 to 1 kg. Heads of cabbage develop in places of attachment to the stem of spreading fleshy leaves.
Growing Brussels sprouts from seeds
Growing Brussels sprouts from seeds can only be afforded by residents of the warmest regions of our country - Crimea, Kuban and Sochi. In the Middle lane, in the Moscow region and in the north of the country, Brussels sprouts are always grown through seedlings.
When to sow Brussels sprouts for seedlings
Understanding the question of how to plant Brussels sprouts, you need to start by determining the sowing period. The best time is from mid-March to early April. Seedlings are grown either in a heated greenhouse or on a covered balcony. In the hot conditions of the apartment, the sprouts will be uncomfortable. Suitable temperature for seedlings: at night - from 0 to +5 degrees, during the day - about +15.
Growing seedlings
In containers with prepared soil, two seeds are placed, previously soaked overnight in a nutrient solution, and covered with a thin layer of earth. After that, they are left in a cold, bright place. If necessary, the plants are illuminated with phytolamps. Before the appearance of 2-3 true leaves on the seedlings, young Brussels sprouts are shaded from direct sunlight. Be sure to withstand the temperature regime: it is better cold than hot.
Seedlings are watered frequently, but little by little, avoiding extreme soil conditions - drought and overflow.
Picking
As soon as the first true leaves appear on the sprouts, they are picked in separate containers. At this stage, experienced gardeners recommend paying attention to the length of the roots. If the central root is long, then pinch it to the level of the rest. As a result of this event, it is possible to obtain a well-branched root system and, as a result, a stronger plant that is resistant to any external influences.
Planting Brussels sprouts outdoors
In this section you will learn all about planting Brussels sprouts and how to grow them outdoors.
When to plant
Brussels sprouts are planted in the country during the last weeks of April and on May holidays. It is risky to plant earlier: the plant, although cold-loving, can still freeze. If planted later, you can not wait until the fall for the harvest, as the sprouts form and ripen slowly.
In what soil
How to grow Brussels sprouts in the garden to be the envy of all neighbors? Start by preparing the soil. Any plant grows well on fertile land, and the heroine of our article is no exception. Since autumn, it is important to fertilize the earth abundantly with manure and dig it up. In the spring, five to seven days before planting seedlings, dig the site again, feed with complex mineral fertilizers, and also spill it with a solution of potassium permanganate.
How to plant
Moving seedlings outdoors is a very important step in growing and caring for Brussels sprouts. In order not to make mistakes, use our instructions:
- Water the seedlings abundantly the day before planting on the beds.
- Dig holes slightly larger in diameter and depth than the cabbage pot, 60 x 60 cm apart.
- Add chalk, humus or other fertilizer to the wells.
- Place the plants in the holes up to the leaves, lay the soil firmly on the roots. Water.
- Surround the plants with polyethylene to protect them from the cabbage fly.
- The day after planting, sprinkle the cabbage beds with a mixture of lime, ash and tobacco dust to repel insects.
How to grow Brussels sprouts
The cultivation of Brussels sprouts is not much different from the care of other types of cabbage. However, there is one important feature, the knowledge of which will give you a hundred points ahead in the question of how to properly grow Brussels sprouts.
It consists in the fact that a month before the harvest, the stem of the plant is shortened, and all the leaves are cut off so that moisture and useful substances go to the heads of cabbage. Thus, in a month you will achieve a significant increase in their size and yield.
Care
Brussels sprouts love comfortable conditions: regular watering, weeding and loosening of the soil, protection from diseases and insects. She does not need hilling, on the contrary, it can even harm her, because it causes rotting of the lower heads. Otherwise, caring for Brussels sprouts is no different from caring for any other plant. Therefore, even a beginner can grow it.
Watering
Looking at the photo of Brussels sprouts, you can understand that this plant loves water very much. Fleshy wide leaves, elastic heads, a powerful stem - all this requires significant volumes of liquid, especially during the ripening period. The consumption for watering one bush normally reaches 4 liters of warm water per m2 during the period of growth and flowering, as well as up to 5 liters per m2 during the ripening period.
Top dressing
How to grow Brussels sprouts in the open field, if the soil on your site is far from black soil? Take care to prepare the soil even before planting cabbage, as well as regular feeding of plants with nutrient solutions. For good results, experienced gardeners advise using nitrophoska and nitroammophoska during the growth and flowering of cabbage.
Pests and diseases
Leaves and stems should be regularly inspected to protect the crop from pests. When eggs are found, the masonry is destroyed, and the plants are sprayed with a solution of Bitoxibacillin.