How do you plant garlic cloves
The Complete Guide to Growing Garlic | Easy Instructions
Garlic is an easy-to-grow crop that requires little to no care, and if you set aside a head or two from each harvest for planting the next season, you’ll never have to buy garlic again.
Garlic is in the Allium genus, which also includes onions, shallots, leeks, scallions, chives and ornamental Alliums.
Because garlic grows throughout the winter, it is a great crop for keeping your garden in production year-round. Also, heads of garlic can last for a long time when properly cured and stored, so they can be used in the kitchen and enjoyed for months longer than many other vegetables from the garden.
Garlic is planted in the fall and overwinters until harvest time in early summer. (photo: Amy Prentice)
Squirrels and other mammals hate the taste and smell of garlic and will leave your garlic plantings alone — and may even avoid nearby vegetables as well.
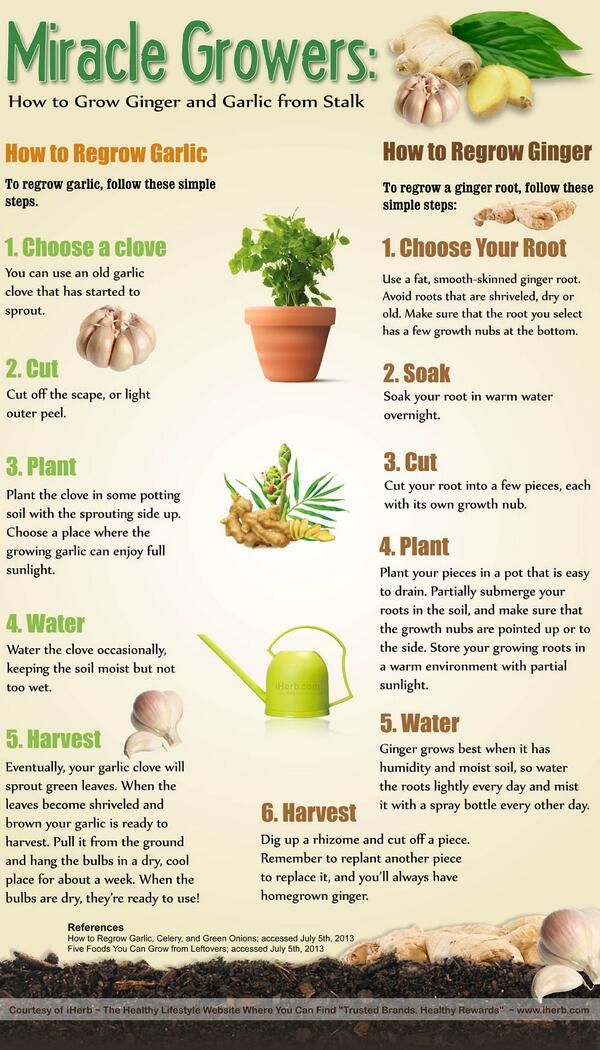
Rather than trying to grow garlic from garlic seeds (or, more accurately, garlic bulbils) it is much easier and much more practical to grow garlic from cloves, a process that I will explain below.
But before getting into how to grow, harvest and cure garlic, it’s important to know how to select the garlic varieties that will perform best in your garden.
Garlic is one crop that the squirrels and other four-legged mammals won’t touch since they hate the taste and smell. (photo: Amy Prentice)
Choosing Between Softneck and Hardneck Garlic
Softneck and hardneck varieties of garlic are so named because of their stalks. While softneck garlic has pliable stalks that can be braided for storage and an attractive display, hardneck garlic stalks are woody, stiff and not suitable for braiding. But the differences don’t end there.
Softneck garlic is better suited to southern climates while cold-hardy hardneck garlic fares better in northern climates.
And even though a softneck variety may be rated for USDA hardiness zones 7-10, that doesn’t mean that it will perform well in the northernmost reaches of zone 7. This is because day-length is another consideration when growing alliums.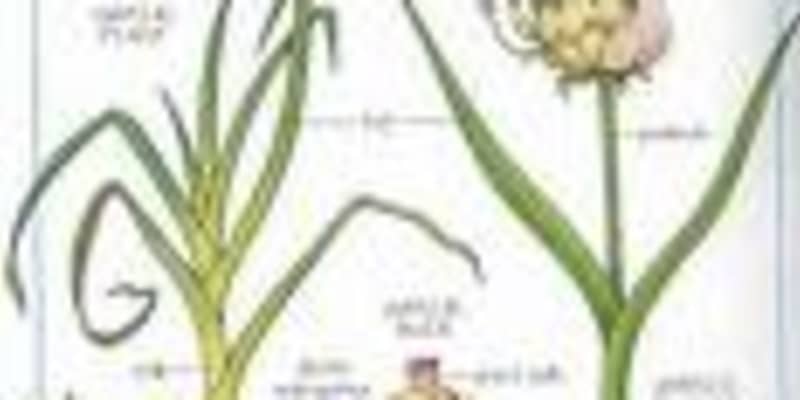
While softneck garlic (Allium sativum sativum) usually has all-white bulbs, hardneck garlic (Allium sativum ophioscorodon) is more likely to have hues of pink and purple. Hardneck garlic is also known to have more intense flavor than softneck varieties.
Softneck garlic varieties like the one shown here usually have all-white bulbs and cloves, and the stalk is absent from the center of the bulb. (photo: Amy Prentice)
After the stalks have been cut off, it is a bit harder to tell softneck and hardneck garlic heads apart. But once you break apart a head, you’ll notice that a hardneck variety has the base of the stalk running through it while the stalk is absent from a softneck garlic head.
Hardneck garlic varieties are easy to identify once you start to remove cloves. The base of the stalk runs through the bulb. (photo: Amy Prentice)
Hardneck garlic cloves have the benefit of being easier to peel, and hardneck heads are typically bigger than softneck heads.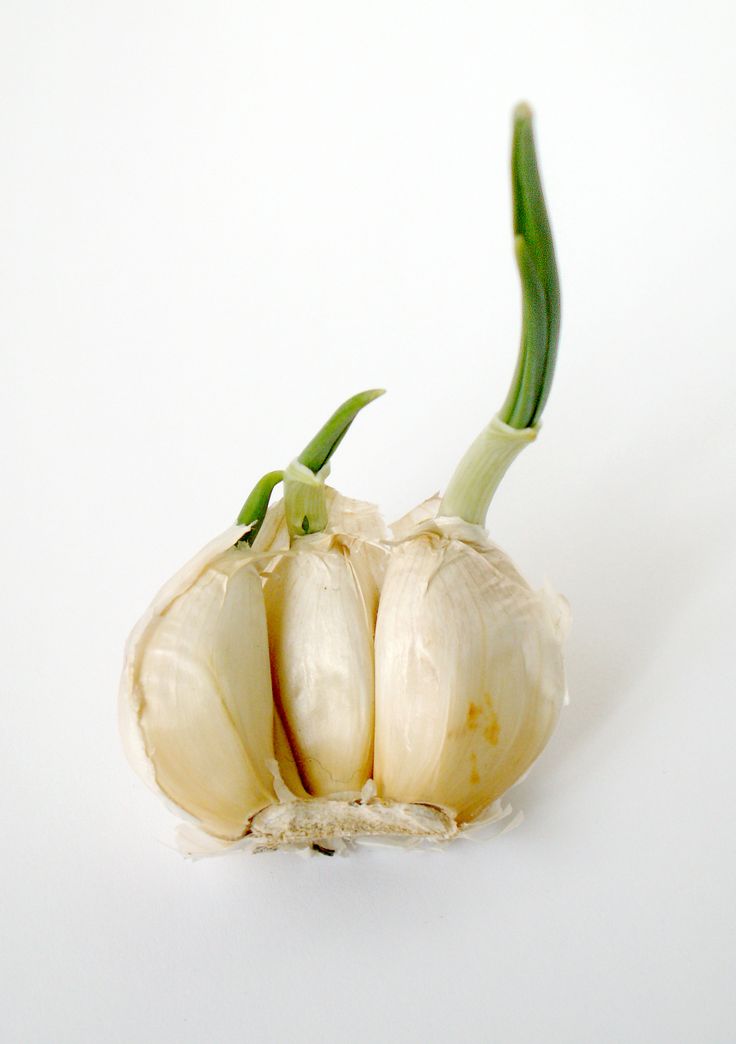 Even though softneck garlic tends to have more cloves per head than hardneck garlic, softneck garlic cloves are smaller.
Softneck garlic lasts longer in storage than hardneck. Including the curing period (more on curing later) softneck can last for six months or even longer, while hardneck typically lasts from three to four months.
Hardneck garlic also grows a flower stem called a scape — and garlic scapes are like a bonus crop. In spring, the curly garlic stem will bloom into a flower if left to grow, but this is not what’s best for your garlic.
Instead of the plant putting that energy into flowering and setting seed (or bulbils, in the case of garlic) it’s better to cut the scape off so that energy goes into producing a larger head.
And that fresh scape is a delicious treat that you can enjoy many weeks before the garlic head is ready to cook with.
You can mince garlic scapes to make pesto, grill them, saute them, mix them in with stir-fry — or even use them in soup. And garlic scapes can be a substitute for green onions in almost any recipe that calls for them. The texture is like asparagus, and the flavor is mild yet unmistakably garlic.
Scapes are a delicious bonus crop that you get when you grow hard neck garlic. Scapes can be used in a variety of recipes or preserved. (photo: Amy Prentice)
Most varieties of hardneck garlic fall into one of three categories: Rocambole, porcelain and purple stripe, but there is even more diversity than that, including Creole and Asiatic.
Most softneck garlic varieties fall under the artichoke or silverskin categories.
Meanwhile, elephant garlic, which is particularly large, is a different species altogether and can be grown successfully in the North or South. Rather than Allium sativum, elephant garlic is Allium ampeloprasum, the same species as leeks and pearl onions.
How to Source Garlic
Garlic heads intended to be separated into individual cloves for planting are referred to as “seed garlic. ”
”
The garlic that you find at your local grocery store is almost always from China or California and, though it depends on where you live, there is a good chance it is not suited to grow in your region. While you can experiment with growing grocery store garlic, there are surer paths to successfully growing garlic.
To find garlic suited to your region, first look to your local farmers and growers. A farmers market or farm stand that carries locally grown garlic is a great source for seed garlic that will produce well where you live.
You can also try to find fellow gardeners willing to share a head of garlic with you from a variety that they have been saving and regrowing with great results year after year.
You can also order seed garlic from a seed catalog or an online seed vendor. Just be conscious of whether the garlic variety you are ordering is softneck or hardneck.
Seed garlic from reputable vendors should be free of pests and pathogens, but wherever you source garlic from, always check before planting for signs of damage or disease.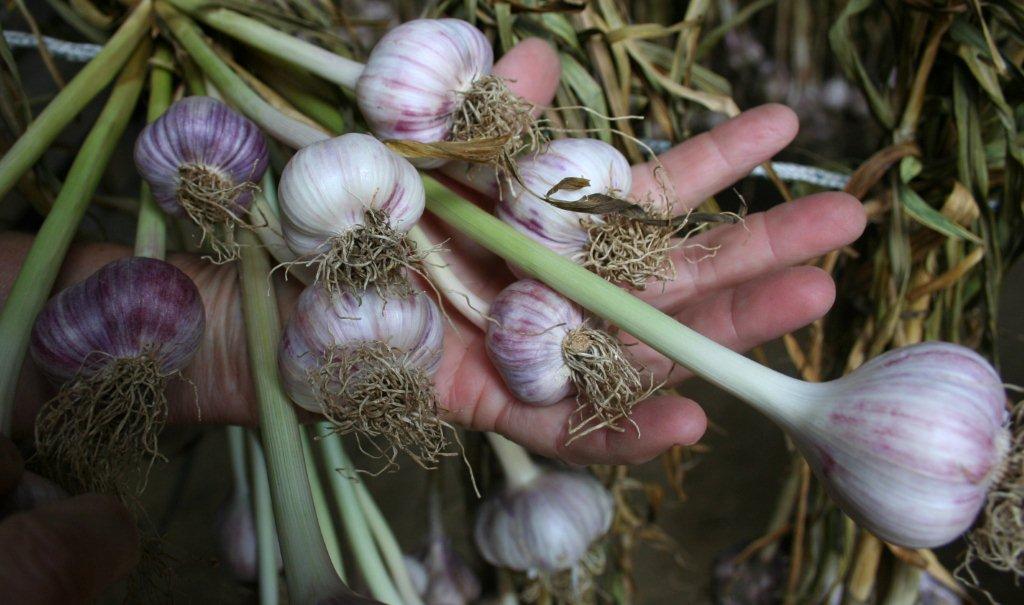 A damaged garlic clove will not thrive and may rot before it produces a bulb. Diseased garlic will not only die, it will introduce pathogens to the garden bed and the viable garlic you have planted.
Seed garlic can be purchased from a seed vendor or your local farmer’s market. (photo: Amy Prentice)
When and How to Plant Garlic
October is the most popular month to plant garlic, but depending on where you live, you could plant sooner or later.
In the North, late September or October are the best times to plant garlic cloves. It should be done at least two weeks before the first frost of the season, and must be done before the ground freezes.
In the South, October is an ideal time but you could wait until November, December or even January. However, it’s best to err on the side of planting early than late.
Garlic can be grown either in-ground or in a raised garden bed. Either way, garlic will grow best and produce the biggest heads when planted in soil that drains readily and is rich in organic matter.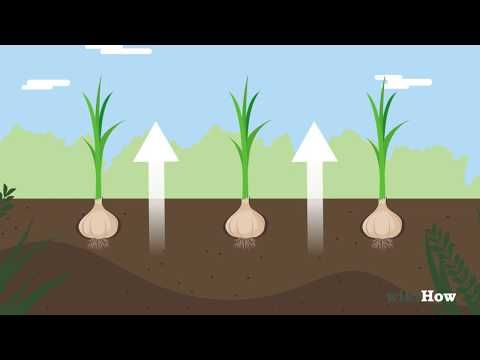
But do not add fertilizer at planting time, as it may stimulate vigorous growth early on that will be damaged when winter weather sets in.
If you wish to fertilize, knowing the nutrient makeup of your soil first is always a good place to start. A soil test will provide that information.
While the natural inclination may be to add nutrients that are best suited for bulb growth and development (phosphorus), this nutrient is often already present in the soil at sufficient levels. In such cases, adding more doesn’t help.
Nitrogen, on the other hand, is a nutrient that is utilized quickly and does not persist in the soil as phosphorus does. Nitrogen is an important nutrient for garlic, especially in spring for foliage health, which is the main lifeline to bulb development below ground.
In spring, side-dress with a nitrogen-based fertilizer, such as blood meal, soybean meal or cottonseed meal, composted chicken manure, or another slow-release nitrogen source. Lightly work the fertilizer just into the surface so the soil microbes can get to work making the nutrients available to the garlic.
Alternatively, you could try a blended organic fertilizer mix specifically developed for garlic. Fruition Seeds Company offers such a product that they claim to have perfected over the years to emphasize bulb development in the fall and foliage growth in spring. It consists of alfalfa meal, kelp meal, feather meal and compost crumbles.
Wait until planting time to break up a head of garlic and separate the cloves. This is best done by pulling the head apart with your fingers, taking care not to damage individual cloves. Leave the “paper” on the cloves, and reject any cloves that have holes in them or other signs of damage. Choose the biggest cloves to plant, as they will produce the biggest heads.
Set aside the largest and healthiest garlic cloves each year to grow and repeat the cycle season after season. (photo: Amy Prentice)
Cloves should always be planted with the pointed side up and the root-end down, just like when planting flower bulbs.
When planting cloves, make sure to place the flat end down and the pointy end up. (photo: Amy Prentice)
Take a trowel and dig parallel furrows 2 inches deep and 1 foot apart. Space garlic cloves in the furrows 4 inches apart and cover them with soil so the surface is level once again, and then water in.
If you are working in an irregularly shaped space, don’t worry about creating neat furrows. Instead, while being conscious of the spacing requirements between cloves, make 2-inch-deep holes with your fingers in any pattern you choose.
Leave the “paper” on the cloves and plant in furrows, like this, or plant in any pattern as long as the cloves are spaced property. (photo: Amy Prentice)
Either immediately upon planting or soon before frost is expected, protect the garlic with a generous application of mulch.
Loose straw makes for a great, fluffy, insulating mulch, should be applied in a 6-inch layer. Alternatively, 4 inches of shredded leaves are just as effective. In warmer climates where the ground doesn’t freeze, all that’s needed is 2 inches of organic mulch to block weeds and retain moisture.
A layer of loose straw is a great mulch option for garlic. (photo: Amy Prentice)
Do not plant garlic in a spot where garlic, onions or another member of the allium family has been grown in recent years. Changing up where garlic is grown (an example of crop rotation) is important for avoiding allium pests and diseases.
When planting, take note of the days-to-maturity of the variety, if known. Days-to-maturity is not exact, but it will give you an idea of when to look for signs that the garlic is ready to be pulled up.
When to Water Garlic
To achieve optimal bulb formation and reduce plant stress, avoid overwatering or underwatering garlic plants. Too little water can stress plants, and too much water can cause bulb rot.
In soil with ideal drainage, garlic requires between a half-inch and one inch of water per week.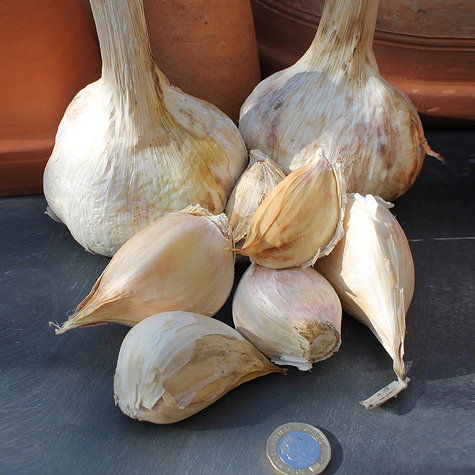 If it rains less than a half-inch in a week, make up the difference with supplemental watering.
It is best to water deep, but infrequently. Rather than watering a little every day, water once a week when rainfall hasn’t already done the job for you.
In the winter, when the ground is frozen or when the outdoor temperature is below freezing, cease supplemental watering until the ground thaws and temperatures rise again.
If growing hardneck garlic, you can stop watering after you have cut the scapes. For softneck garlic, stop watering a week before you expect to harvest.
When and How to Harvest Garlic
In Southern climates, fall-planted garlic may be ready to be pulled up as soon as May or June. In the North, harvest time will likely be around the middle of July or as last as mid-August.
When garlic is approaching maturity, the leaves running up the stalk turn yellow then brown, starting at the bottom of the plant and moving up. The leaves begin to lose their vigor and start to flop over.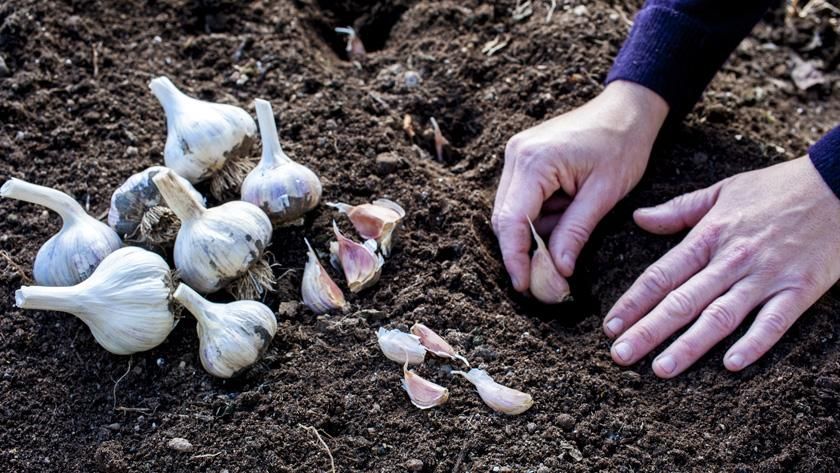 This is a good sign that your garlic is approaching maturity.
The leaves of garlic stalks turn yellow and then brown starting at the bottom of the plant when it’s approaching maturity.
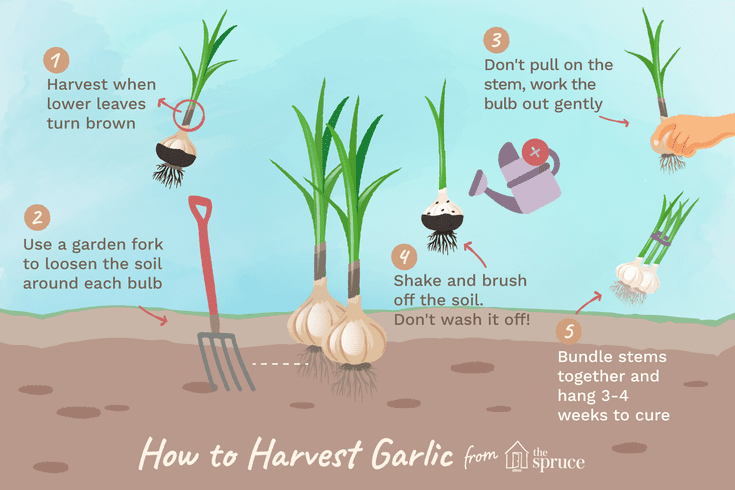
Popular advice is that the garlic is ready when the first four leaves, counting from the bottom, have browned. This is about a third of the stalk’s height. When at least half of your garlic plants reach this stage, cease watering for a week, then perform a test by pulling up one bulb.
Yanking the bulbs out of the soil forcefully may damage the plant. Before trying to pull up garlic, carefully loosen the soil around it with a trowel of a garden fork. Then the bulb should come out of the ground with ease.
If the first bulb appears much smaller than the variety was expected to grow to, water the remaining garlic and give the bulbs another week to grow, and then repeat the test. Be mindful that the smallest cloves planted will not catch up to the size of the bulbs produced by the biggest cloves.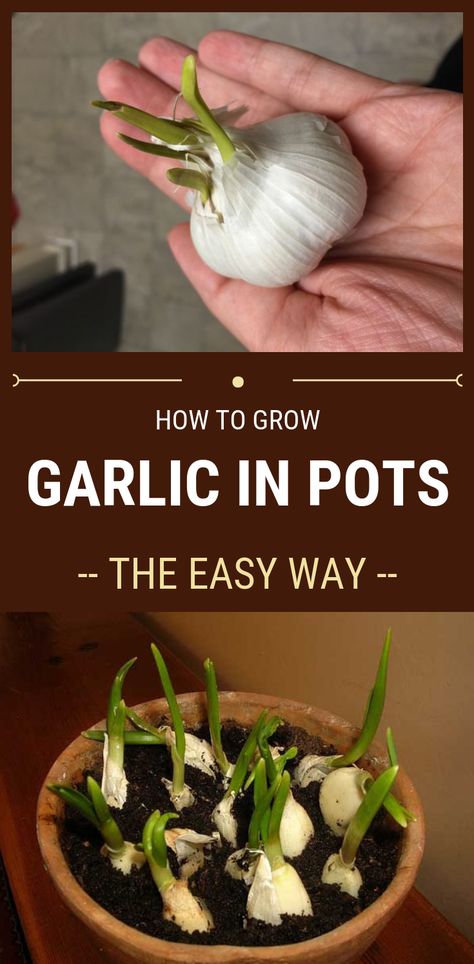
The cloves of garlic bulbs left in the ground for too long will begin to separate and the protective skin may crack.
When garlic comes out of the ground, do not remove the stalk or roots. Garlic needs to be cured for storage first, or it will have a very short shelf-life.
After harvesting garlic, do not remove the stalk or the roots until after curing. Shake off loose dirt but don’t clean the bulbs with water. (photo: Amy Prentice)
Curing and Storing Garlic
After the garlic has been pulled up, shake off the loose dirt, but do not rinse or scrub the garlic. Keep the entire plant intact at this stage and don’t let it get wet. If it is a warm, dry day, the garlic will benefit from a few hours outdoors to dry out, but it’s best to avoid high temperatures over 90 F, bright sunlight, and if it’s wet out, it’s best to get the garlic indoors straightaway.
Curing is a process that will toughen up the bulb and ready it for storage, and it improves the flavor.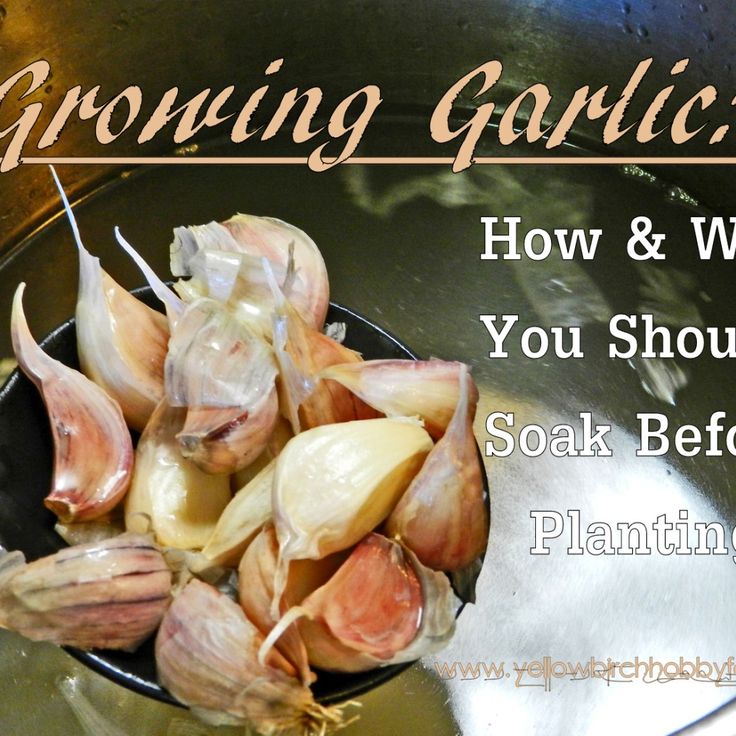
In a house or well-ventilated garage and out of direct sunlight, garlic plants can be placed on wire racks or hung, roots up. They should be spaced out to allow airflow so it dries quickly and does not get moldy. (Run a fan if you can.)
Garlic can be cured by laying it flat and spacing it out in a well-ventilated area. This process prepares the bulbs for storage and improves the taste. Leave the entire plant intact for curing.
After 10-14 days, the outer skin of each head of garlic should be dry and papery. At this point, the stalks can be cut off and composted. In the case of softneck garlic, the stalks may be left on for braiding.
Garlic deteriorates faster once a clove has been broken off from the head, so it’s best to keep heads whole until cloves are needed.
Garlic should be kept in a dry, dark place to discourage sprouting. A garlic keeper jar, with holes for ventilation, or a paper bag works well. Never put garlic in a plastic bag or an air-tight container, as trapped moisture will cause mold.
At room temperature — assuming the room is relatively dry — garlic will last one or two months, if not longer. At cooler temperatures, down to 40° Fahrenheit, garlic will last its longest. Storing at a relative humidity of 60 to 70% with good airflow is ideal to prevent the accumulation of moisture.
If you set aside your largest bulbs each year and plant the largest cloves, you can repeat the cycle indefinitely and your garlic will continue to improve.
If you set aside your largest garlic bulbs and then plant the largest cloves, you will improve your garlic crop every year. (photo: Amy Prentice)
What varieties of garlic are your favorite to grow? Share with us in the comments below.
Ready to have more of your gardening questions answered? Sign up to receive gardening resources, eBooks and email updates on the joegardener podcast and more.
Links & Resources
Some product links in this guide are affiliate links. See full disclosure below.
joegardenerTV Youtube: Easy Edibles for Every Fall Vegetable Garden
joegardener Online Gardening Academy™: Three popular courses on gardening fundamentals; managing pests, diseases & weeds; and seed starting!
joegardener Online Gardening Academy Essential Gardening Fundamentals: The basics on healthy soil, planting, watering techniques, composting, raised bed and other gardening methods, fertilizer, the many benefits of mulch, and more.
joegardenerTV YouTube
joegardener Newsletter
joegardener Facebook
joegardener Facebook Group
joegardener Instagram
joegardener Pinterest
joegardener Twitter
Growing a Greener World®
GGWTV YouTube
Park Seed seed garlic – Use code Joe20 for 20% off at checkout
Fruition Seeds garlic fertilizer
*Disclosure: Some product links in this guide are affiliate links, which means we would get a commission if you purchase. However, none of the prices of these resources have been increased to compensate us.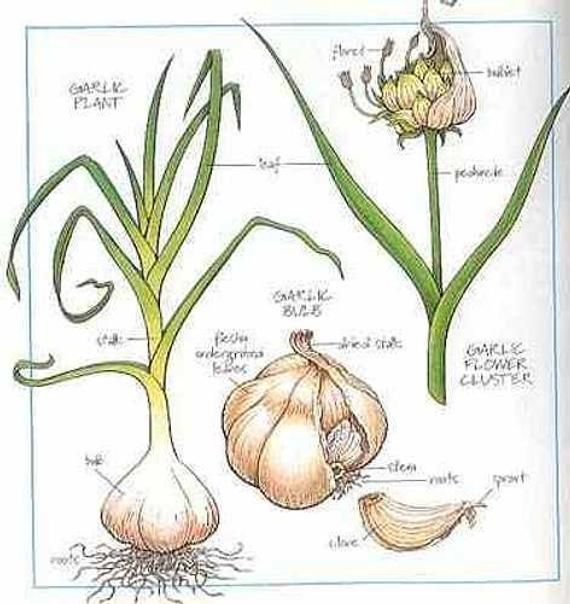 None of the items included in this list have any bearing on any compensation being an influencing factor on their inclusion here. The selection of all items featured in this post and podcast were based solely on merit and in no way influenced by any affiliate or financial incentive, or contractual relationship. At the time of this writing, Joe Lamp’l has professional relationships with the following companies who may have products included in this post and podcast: Rain Bird, Corona Tools, Milorganite, Soil3, Park Seed, and Exmark. These companies are either Brand Partners of joegardener.com and/or advertise on our website. However, we receive no additional compensation from the sales or promotion of their product through this guide. The inclusion of any products mentioned within this post is entirely independent and exclusive of any relationship.
How To Plant Garlic This Fall
When it comes to planting garlic in the fall, a few simple tips will go a long way towards growing an incredible crop that is ready to harvest early next summer.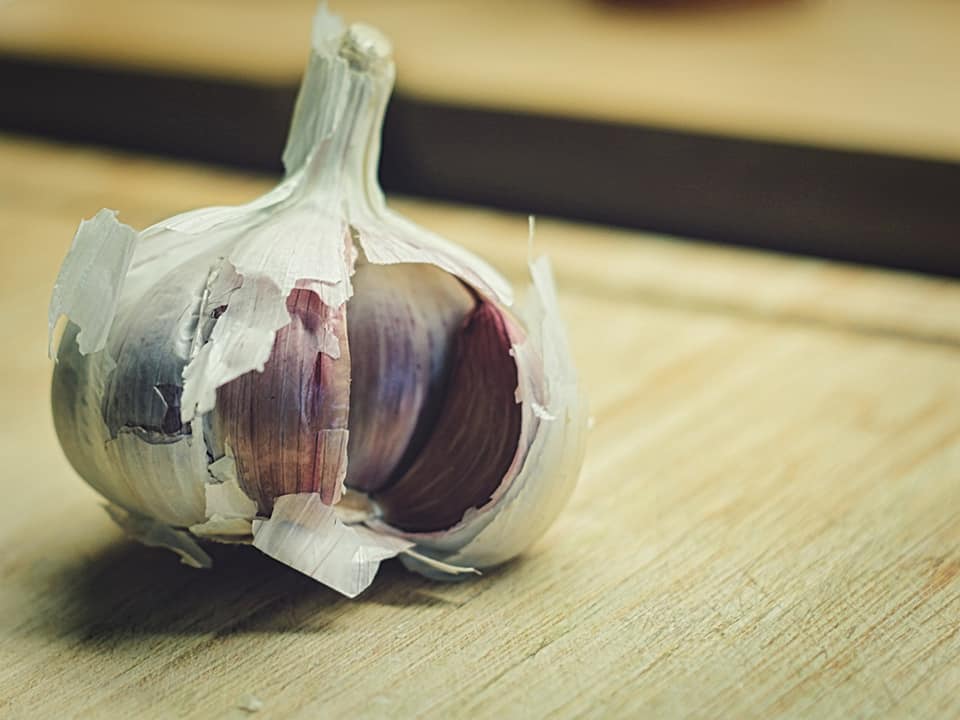
Garlic is one of our favorite crops of all to grow. In fact, we planted it in the fall in our very first garden some 11 years ago – and have never missed a year planting it since!
But even better, we continue to re-plant the same line of seed from those very first bulbs we pushed into the earth back in 2010. Not only is garlic easy to grow, but it gets better with each passing year as you select the best bulbs to replant from your harvest.
There is nothing like the aroma of garlic drying out after a harvest. Garlic stores well and can easily be kept the entire year around.And it is certainly good that it grows so well, because we use it in just about everything! From salsa and pasta sauce, to homemade garlic bread and countless other dishes, we use our homegrown garlic in something nearly every day.
In fact, we even use it to help battle pests naturally outside as well, including a few cloves in our homemade hot pepper spray.
The Ease of Growing Garlic
So what does it take to grow a great crop of garlic? Actually, that may be the best part of all. Garlic is one of the easiest crops to plant and grow in the garden. It naturally repels most pests, and requires little maintenance. It also rarely needs watering or fertilizing.
With that in mind, here is a look at how to plant your own incredible crop this fall, including a short video tutorial near the end as well.
The best time to plant hardneck garlic in the Midwest and Northern states is in the early fall. Here in Ohio, we always plant our crop within the first few weeks of September.
One of our favorite things to plant each and every fall – our garlic crop!That allows a month or two of cool weather growth for it to become established. It then goes dormant for the winter, and comes back to life in the spring. It is then usually ready for harvesting by late June or the first week of July.
Preparing The Garlic Seed For Planting – Soaking The Seed.
Each single clove of a garlic bulb is an individual seed. Once planted, it will then grow into a full bulb.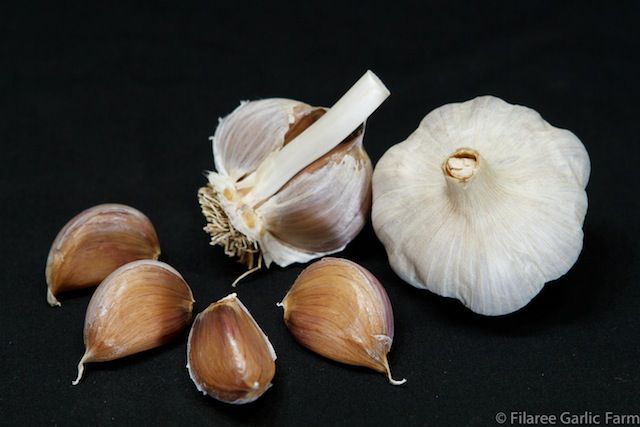
We select the largest of our bulbs that we harvest in June to become our “seed” in the fall. Quite simply, the larger the clove, the bigger the mature bulbs will be when you harvest. We grow a variety of garlic called Siberian hardneck. Not only does it grow well, it is excellent for overwinter storage. Product Link : Siberian Hardneck Garlic Cloves
Each clove of a garlic head is a seed. Select large bulbs for planting – the larger the seed, the larger the bulb will be that grows.To prepare the cloves for planting, separate each clove carefully. Always be sure to keep as much of the papery skin in tact as possible. The skin serves as a protective layer for the garlic, and keeps it from rotting until it sprouts.
A Little Secret – Pre-Soaking The Bulbs
To help promote sprouting and health, soak your bulbs overnight before planting. Fill a quart jar with water and add in a teaspoon of baking soda. Stir and then drop in the cloves to let them soak.
This soaking not only helps the garlic sprout, but also helps prevent ground rot.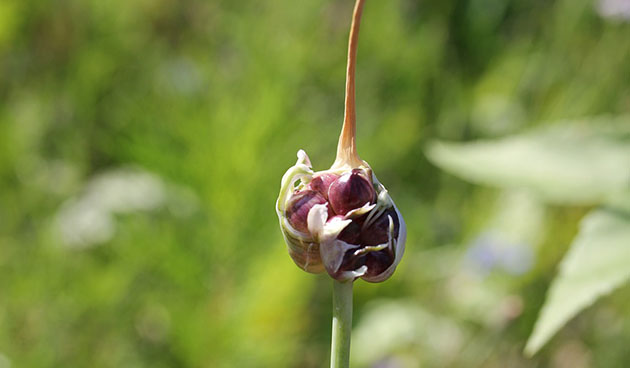 Fall can be a wet time in many areas of the country, and a little extra protection against overly wet soils can go a long way for garlic.
Preparing The Soil
Like most vegetables, garlic grows best in fertile, loose soil. Prior to planting, work in generous amounts of compost to help amend the soil.
Compost is the perfect partner for growing garlic. Not only will it help energize the soil with nutrients, it also helps to loosen the dirt to allow for good bulb growth. And just like with all root crops, loose soil can make a big difference between full sized produce, or stunted vegetables.
How To Plant Garlic
Garlic can be planted in traditional rows, raised beds or raised rows. The key is spacing. Bulbs should be spaced 4″ apart within rows and 4″ between rows.
Begin by digging a trench 3 to 4 inches deep. Fill the bottom of the trench with about an inch of compost. As you plant, push each bulb gently down into the compost layer.
We then add in a teaspoon of worm castings around every bulb as we plant.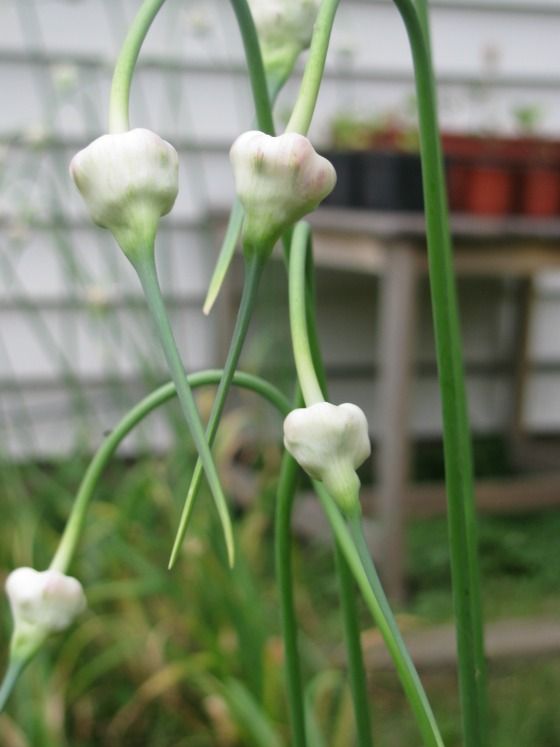 It provide a great source of ready-to-use nutrients for the bulb. Ever since doing this a few years back, our bulbs have been simply amazing! It really is a great little secret to better bulb production.
Plant Up
When planting garlic, make sure to keep the pointy end of each garlic clove up, and the flat end down. The point tip is the sprouting end, and will allow for quick sprouting through the soil.
Finish by covering up with the cloves with remaining soil. Do not press the soil firm, simply cover by spreading the soil to fill the entire trench level with the surrounding soil.
Always plant your garlic bulbs with the pointy end facing up. This allows the bulb to sprout and grow quickly to the soil surface.We place a light 1″ covering of straw over our crop right after it is planted. This protects the ground from weeds seeds blowing in, but still allows the garlic to sprout. Once you have put on your light coat of mulch, water the crop in to help the bulbs and mulch settle in.
Mulching For Weed Control & Winter Protection –
The Secrets To Planting GarlicOnce the crop has sprouted in the fall, we add a few more inches of additional straw mulch to help protect the crop through winter. You can also use shredded leaves as well, but whatever you do, mulch the crop!
One of the biggest secrets to growing mulch is to keep it from competing with weeds. Weeds compete for nutrients, and a weedy patch will keep yields of your garlic lower, and the bulbs you harvest smaller.
Mulch your crop lightly as soon as you plant to help keep weed seeds out. As the crop sprouts, add a few more inches of mulch to help suppress weeds.Garlic is a fairly drought resistant crop. Normal rainfall will usually keep it growing well. If you do experience extremely dry conditions for more than 10 to 14 days in the fall, water the crop to help it along.
Spring Maintenance –
The Secrets To Planting GarlicAs spring arrives, the garlic crop will come out of dormancy and continue to grow.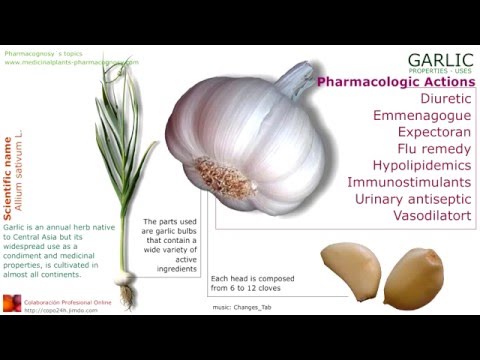 We usually add a bit more mulch to suppress weeds in the early spring. But other than that, the only maintenance required before harvesting is to keep the weeds out.
So how do you know when garlic is ready for harvesting? Depending on where you live, the harvest times can vary a bit. You will begin to see the tops of the crop begin to brown off in early summer. As soon as two-thirds of the garlic tops have browned off, the crop is ready to harvest and cure.
We hang our garlic harvest in the barn a few weeks, tying up the top stems and then hanging them from the rafters. Never wash off your garlic with water. Instead, allow it to dry and then brush off any remaining dirt before storing.For us here in east-central Ohio, that is usually the first few weeks of July. It can certainly vary from late June to late July depending on your climate.
Once the garlic is harvested, it needs to cure for a few weeks to dry out and be ready for storage. One thing you do not want to do is wash your crop off! Allow the dirt around the cloves to dry off naturally – water can prematurely rot the crop as it dries.
We hang our crop up in the barn and let it air out. Usually within a few weeks, we can cut the heads off with a bit of the stem and they are ready to store.
Here is to planting and growing your own amazing crop of garlic this fall. Happy Gardening! Jim and Mary.
How to plant garlic before winter. Winter garlic
Autumn has come, the gardening season is coming to an end, but the trouble is not getting any smaller. One of them is the planting of winter garlic, which has its own characteristics.
In order to get a rich harvest, it is necessary to carefully select the varieties of garlic that can be grown in the conditions of the region.
The most common and suitable for our conditions are varieties:
- Bogatyr. It has a large bulb (weight up to 85 g) with 5-7 cloves. The shape is rounded flat. nine0003
- Komsomolets. The shape of the fruit is round-flat, weight - up to 30 grams. The head of garlic Komsomolets can have from 6 to 13 teeth.
The fundamental difference between winter garlic and spring garlic is that winter garlic is planted in autumn, and spring garlic is planted in spring.
Winter garlic produces large heads with large cloves, but is less stored, although there are many techniques to help preserve it. Spring garlic forms small heads that are perfectly stored until the new harvest. In addition, winter garlic shoots, i.e. forms air bulbs, with which, along with teeth, this culture can be propagated, but does not form spring bulbs. nine0003
Over time, even the best variety degenerates, so in the summer it is necessary to leave a few air bulbs on the garlic arrow (which we break out) to improve the variety. Next year they will form large single teeth - this will be the planting material. Before planting, they can be soaked for 2-3 hours in one of the preparations: Immunocytofit, Rizoplan, or in a warm solution of potassium permanganate. In addition to improving the variety, this is a good way to save seeds. Bulbs and single-tooths are planted simultaneously with the main planting material. nine0003
Divide the garlic into cloves before planting so that the lower part where the roots form does not dry out. The teeth are sorted by size, paying attention to the bottom: there should not be a dead part of the old bottom. It, like a cork, prevents germination and the formation of roots, so it is removed. Large heads grow only from the largest teeth, so only the outer teeth should be taken for planting.
It is better to plant garlic before winter after certain crops. These include annual vegetables with a short growing season and no common pests and diseases: pumpkin, legumes. It is undesirable to plant garlic before winter after root crops, which greatly deplete the soil. In the place where onions and garlic grow, re-sowing is possible only after three to four years. Likes to grow next to strawberries. Before planting garlic in the fall, the site must rest. A place is selected that has been empty for at least a month. If this is not possible, green manure plants can be used, which will quickly help restore the composition of the soil
The place should be sunny, there should be no fences, shady trees nearby. You should not choose a site in a hollow, water will drain there, and garlic does not like stagnant moisture. The bed must be made high.
Garlic prefers to grow in a non-acidic soil rich in useful elements. Before planting, it is necessary to dig up the soil on a shovel bayonet, this will enrich the soil well with oxygen, dig out weeds with roots. Under digging, it is desirable to add humus, potash and phosphorus fertilizers. Very good to add ash. nine0003
The main question that every gardener decides on his own: "when it is possible and necessary to plant garlic before winter." The fact is that there is no exact date, it is necessary to focus on weather conditions. Planting garlic too early in the fall will cause the plant to take root and sprout green shoots that will freeze out with the onset of cold weather.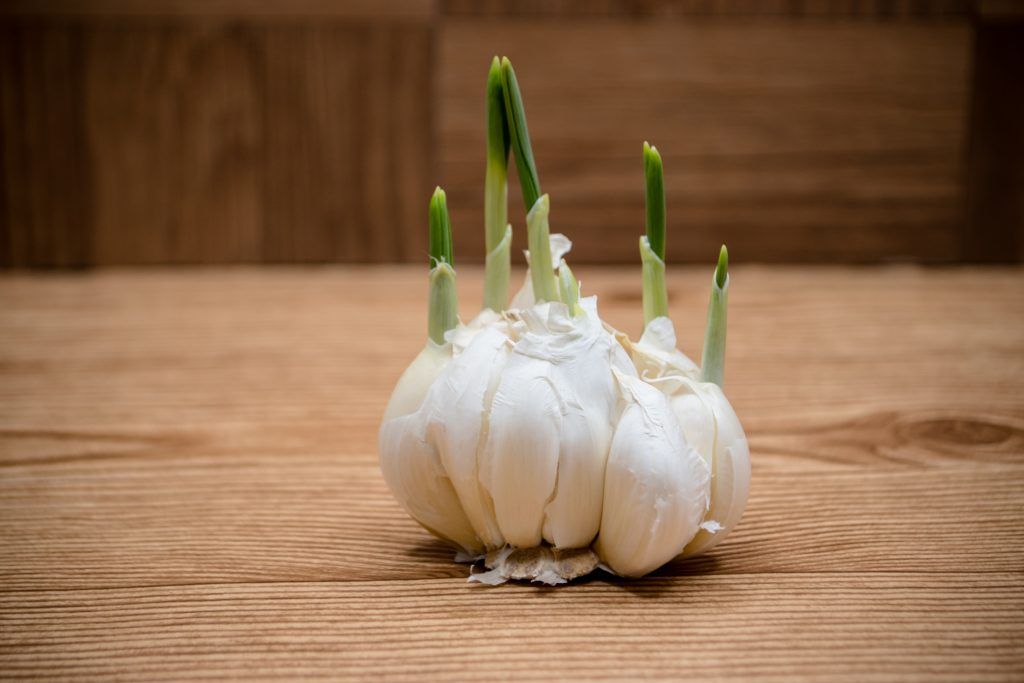 From the moment of planting, at least two to three weeks must pass before the first frost, so that the cloves have time to take root and strengthen. Usually this is the period in ours from late September to mid-October. nine0003
What kind of teeth to take for planting?
Cloves should only be taken from healthy bulbs, otherwise they may not sprout at all, and if they sprout, they will produce a crop infected with diseases, which is likely to die during storage.
Cloves should only be taken from large heads - a cloves taken from a large head is potentially ready to form another large head. In addition, only external teeth should be taken, because. internal teeth will give a smaller yield.
Charts for planting garlic with cloves
We all know from childhood how to plant garlic - row by row and at a fixed distance from each other. Since ancient times, there was only one way to plant it - the usual single-tier planting, which is recommended in a variety of gardening books. However, there are other recommendations as well. For example, specialists from the Volgograd State Agricultural Academy recommend switching from a classic single-tier to a two-tier landing.
Option one - classic single-tier planting of garlic in rows. nine0003
The cloves are planted in rows in grooves at a distance of about 14 cm between large cloves, 8 cm between small cloves and 25 cm between rows. Planting depth is calculated in such a way that about three to four centimeters of soil remain from the top. The larger the teeth, the deeper they are planted. Don't force them into the ground. The distance between the bulbs during sowing is 1-2 cm, the embedment depth is 2-3 cm. The bed is mulched with humus or compost. From above, you can put cut perennials or raspberry branches for snow retention, and remove them in the spring. nine0003
Option two - two-tier planting of garlic in rows.
With this planting, two cloves of garlic are planted in one nest: the first - to a depth of 13-14 cm, and the second - to a depth of 6-7 cm. The distance between rows and between cloves in a row is 15 cm. . Odd rows of garlic are planted to a depth of 6 cm with a distance between cloves in a row of 15 cm. The distance between odd rows is also 15 cm. so that in relation to the teeth of odd rows they are staggered. The distance between the teeth in even rows is also 15 cm.
Both new methods (the second and the third) allow more rational use of the area and obtain almost twice as much yield per unit area compared to traditional planting. In addition, when planting in two tiers, it is more likely to save part of the crop during a harsh and little snowy winter, if we are talking about winter garlic. This technology of planting garlic is patented by the developers, so enthusiastic gardeners can completely try it out on one of the garlic ridges.
Experiments were carried out by specialists of the Volgograd State Agricultural Academy on light-chestnut soil of the Volgograd region. Before planting, the soil was dug up to a depth of 20 cm and organic fertilizers were applied at the rate of 10 kg/m². nine0003
A special device has been developed for the mechanization of planting garlic with strict observance of all distances and depths of planting cloves. It is made of wood in the form of a square with a side of 1.05 m and with many pins. By installing the necessary pins of different lengths and the appropriate displacement of the structure, garlic can be planted in different patterns. Thanks to the device, it was not necessary to manually make a hole for planting each clove: one click on the soil with the structure - and a whole series of holes is ready, and it is already possible to plant. You can do it easier and get by with a pair of ordinary rails: install pins 13 cm long on the first, and 6 cm on the second.
Garlic germination in all spring planting schemes was almost 100%. In April, seedlings were fed with azofoska at the rate of 7 g/m² per horizon. During the growing season of garlic, six irrigations were given in addition to natural precipitation, after each irrigation the soil was loosened.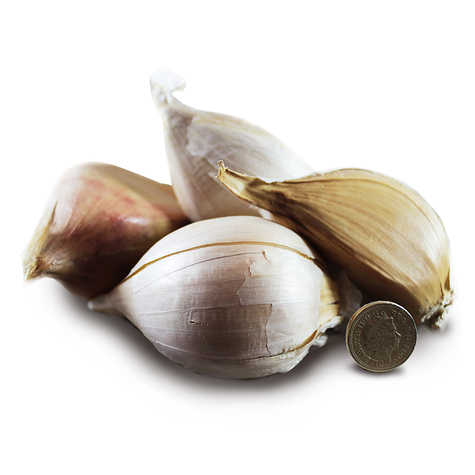 The largest yield (4.4 kg/m²) of acceptable bulb size (40 g) with a relatively low consumption of planting material (0.54 kg/m²) was obtained when planting according to scheme 3. The increase in yield compared to control plantings was 62.7% . When planting according to scheme 2, we got less productivity - 3.7 kg of garlic per 1 m², i.e. compared with the control beds, the yield increase was only 38.2%. This is due to the fact that the plants in the same nest oppressed each other. nine0003
cultivation, planting, care in the open field
There are 2 varieties of garlic: winter and spring (1). You can tell them apart by the bulbs.
Winter garlic. It has an even number of cloves in the head - from 4 to 10. They are large and arranged in a circle. And in the center there is always a stem - the rest of the stem. The problem with winter garlic is that it does not store well.
Spring garlic. Its teeth are arranged in a spiral, and they are of different sizes - larger on the outside, smaller closer to the center.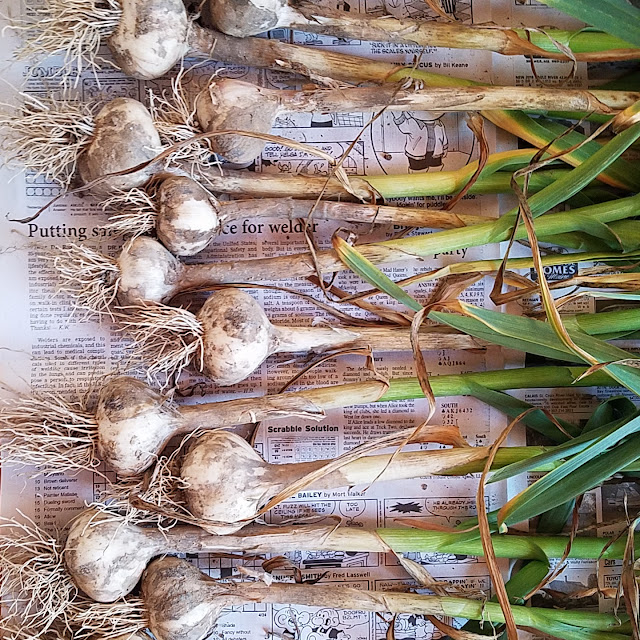 And there are many more - up to 30 pieces. And there is no stem in the center. This variety of garlic is perfectly stored - it can easily lie for a whole year until the next harvest. nine0003
Winter garlic is planted before winter, spring - in the spring, respectively, their care has differences.
Cultivation of garlic
Garlic is a rather unpretentious crop; in many gardeners it grows almost without care and gives good yields. But still, he has one requirement - the soil must be pedigree. Therefore, before planting on the site, fertilizers must be applied (calculation per 1 sq. M):
- humus - 1/2 bucket;
- rotted sawdust of deciduous trees - 1/2 bucket; nine0084
- ash - 5 glasses;
- fluffy lime - 5 cups.
Fertilizers should be mixed, spread evenly over the area and dug up by 10 cm. And he does not like urea and potassium chloride.
Place for garlic should be sunny - this is a light-loving crop.
Planting garlic
The timing of planting garlic depends on its variety. nine0003
Winter garlic. It is traditionally planted 2 to 3 weeks before the onset of hard frosts, in late September - early October (2), when the soil temperature drops below 15 °C.
Planting pattern is as follows:
- row spacing - 25 cm;
- in a row - 10 - 15 cm;
- planting depth - 8 - 10 cm.
Spring garlic. It is planted in the spring, no later than the end of April (3). He is not afraid of frosts, therefore, the earlier you plant, the more likely it is that the crop will have time to ripen - this is especially true in regions with a short summer. The optimum soil temperature is 5-6 °C. nine0003
Planting pattern:
- row spacing - 25 - 30 cm;
- in a row - 8 - 10 cm;
- planting depth - 2 cm.
The cloves are planted at a depth of 3 - 4 cm, and when they begin to take root, they themselves go deep into the soil by 6 - 8 cm (4).
Outdoor garlic care
Watering. It should be regular, but up to a certain point:
- in April-May - once a week: 10 liters per 1 sq. m
- in June-July - 1 time in 2 weeks: 10 liters per 1 sq. m; nine0084
- No watering since August.
In rainy summers, garlic does not need to be watered.
Top dressing. As a rule, in fertile areas of this crop, it is enough that they are applied to the soil before planting. On poor soils, it is useful to additionally feed it with phosphorus and potassium - fertilizers must be applied between the rows 2 weeks after planting the cloves:
- double superphosphate - 30 g (2 tablespoons) per 1 sq. m;
- potassium sulfate - 20 g (1 tablespoon) per 1 sq. m.
- Winter garlic is important to cover in the winter - mulch with humus, compost or peat in a layer of about 5 cm, - advises agronomist-breeder Svetlana Mikhailova. - This should be done in late autumn, at the end of November. The mulch will help keep the bulbs from freezing if the winter turns out to be snowless and the frosts are severe. In the spring, as soon as the snow melts, the mulch must be removed so that the cloves in the soil do not get wet.
“Caring for spring garlic also has its tricks,” continues Svetlana Mikhailova. - It happens that in the cold summer, the ripening of the bulbs slows down, and they may not have time to ripen before the autumn frosts. In this case, in mid-August, you can collect the leaves in a bunch and tie them in a knot - then they will stop growing, the plants will direct all their forces to the ripening of the bulb. nine0003
Garlic harvesting
Garlic harvesting time also depends on the variety.
Winter garlic. It is usually harvested at the end of July. There are three signs that it is already ripe:
- the covering skin begins to crack on the inflorescences, and the bulbs are exposed, but this only applies to arrow varieties - yes, garlic arrows usually break out (5), but you can always leave a couple of plants with inflorescences to use as beacons;
- lower leaves turn yellow; nine0084
- The outer, covering scales of the bulb become dry - this can be seen if you dig up one plant.
Spring garlic. It is removed later - around the end of August. Most varieties of this group do not form arrows, so yellowing of the leaves and lodging of the tops can serve as a visual signal for harvesting.
Photo: pixabay.com– It is better to dig up garlic with a pitchfork – this way there is less chance of damaging the bulb, recommends agronomist Svetlana Mikhailova. - You need to dig in dry weather. After harvesting, the garlic, together with the tops, is removed to dry - for about a week it should lie under a canopy. nine0003
After drying, cut off the roots and stems of the bulbs, leaving a stump of about 10 cm (if the garlic is to be stored in braids, the stems are not cut).
Garlic storage rules
There are many ways to store garlic, but practice shows that almost all of them are unreliable. The best way is to braid the plants in the same way as you do with onions.
But there are nuances:
- garlic stalks are hard and brittle, it is difficult to braid them, so you need to weave straw or twine there; nine0084
- Spit should be stored at a temperature of 1 - 2 °C - onions are stored at room temperature, and garlic dries quickly in heat.
Large heads are stored longer, so the small heads should be eaten first.
Popular questions and answers
agronomist Svetlana Mikhailova answered our questions about growing garlic.
Should garlic cloves be peeled before planting?
No way! Covering scales - reliable protection of teeth from mechanical damage, diseases and pests. Peeled cloves will rot rather than germinate. nine0003
Should winter garlic be watered after planting?
No. It will be enough for him to take root in the autumn rains. Over watering can cause tooth decay.
Can winter garlic be planted in spring?
It makes no sense. For winter varieties, it is important that there are low temperatures after planting. And the spring is too warm. If planted in April, the bulbs will grow inferior and will not be stored. And besides, underdeveloped teeth cannot be used for planting - they form roots very slowly and freeze out in winter. nine0003
Is it possible to plant spring garlic before winter?
It is possible, but spring varieties, when planted in autumn, take root worse and often freeze, therefore they will yield much less than winter varieties.
Why does winter garlic turn yellow in spring?
There may be 4 reasons:
- cold spring - in such a situation, the leaves begin to grow, and the roots cannot yet extract nutrients from the soil;
- lack or excess of moisture in the soil;
- acidic soil;
- Fusarium disease. nine0003
Sources
- Fisenko A.N., Serpukhovitina K.A., Stolyarov A.I. Garden. Handbook // Rostov-on-Don, Rostov University Press, 1994 - 416 p.
- Pantielev Ya.Kh. ABC vegetable grower // M .: Kolos, 1992 - 383 p.
- Group of authors ed. Polyanskoy A.M. and Chulkova E.I. Tips for gardeners // Minsk, Harvest, 1970 - 208 p.
- Shuin K.A., Zakraevskaya N.K., Ippolitova N.
Learn more